Examples
ASB MessageSender Example
What you'll build
Build a WSO2 Integrator automation that sends a message to an Azure Service Bus topic or queue using the ballerinax/asb connector. The integration connects to your Azure Service Bus namespace and delivers a structured message with content type and label metadata.
Operations used:
- Send : Sends an
asb:Messagerecord to the configured Azure Service Bus topic or queue
Architecture
Prerequisites
- An active Azure Service Bus namespace with a topic or queue
- Your connection string and topic or queue name ready
Setting up the ASB integration
New to WSO2 Integrator? Follow the Create a New Integration guide to set up your integration first, then return here to add the connector.
Adding the ASB connector
Step 1: Search for the ASB connector in the palette
Select Add Connection in the WSO2 Integrator panel to open the connector search palette, then search for Azure Service Bus.

Configuring the ASB connection
Step 2: Fill in the connection parameters
Select the Azure Service Bus connector card to open the configuration form. Bind each field to a configurable variable:
- config : The
ASBServiceSenderConfigrecord expression containingentityType,topicOrQueueName, andconnectionString, each bound to a configurable variable - connectionName : The name used to identify this connection on the canvas
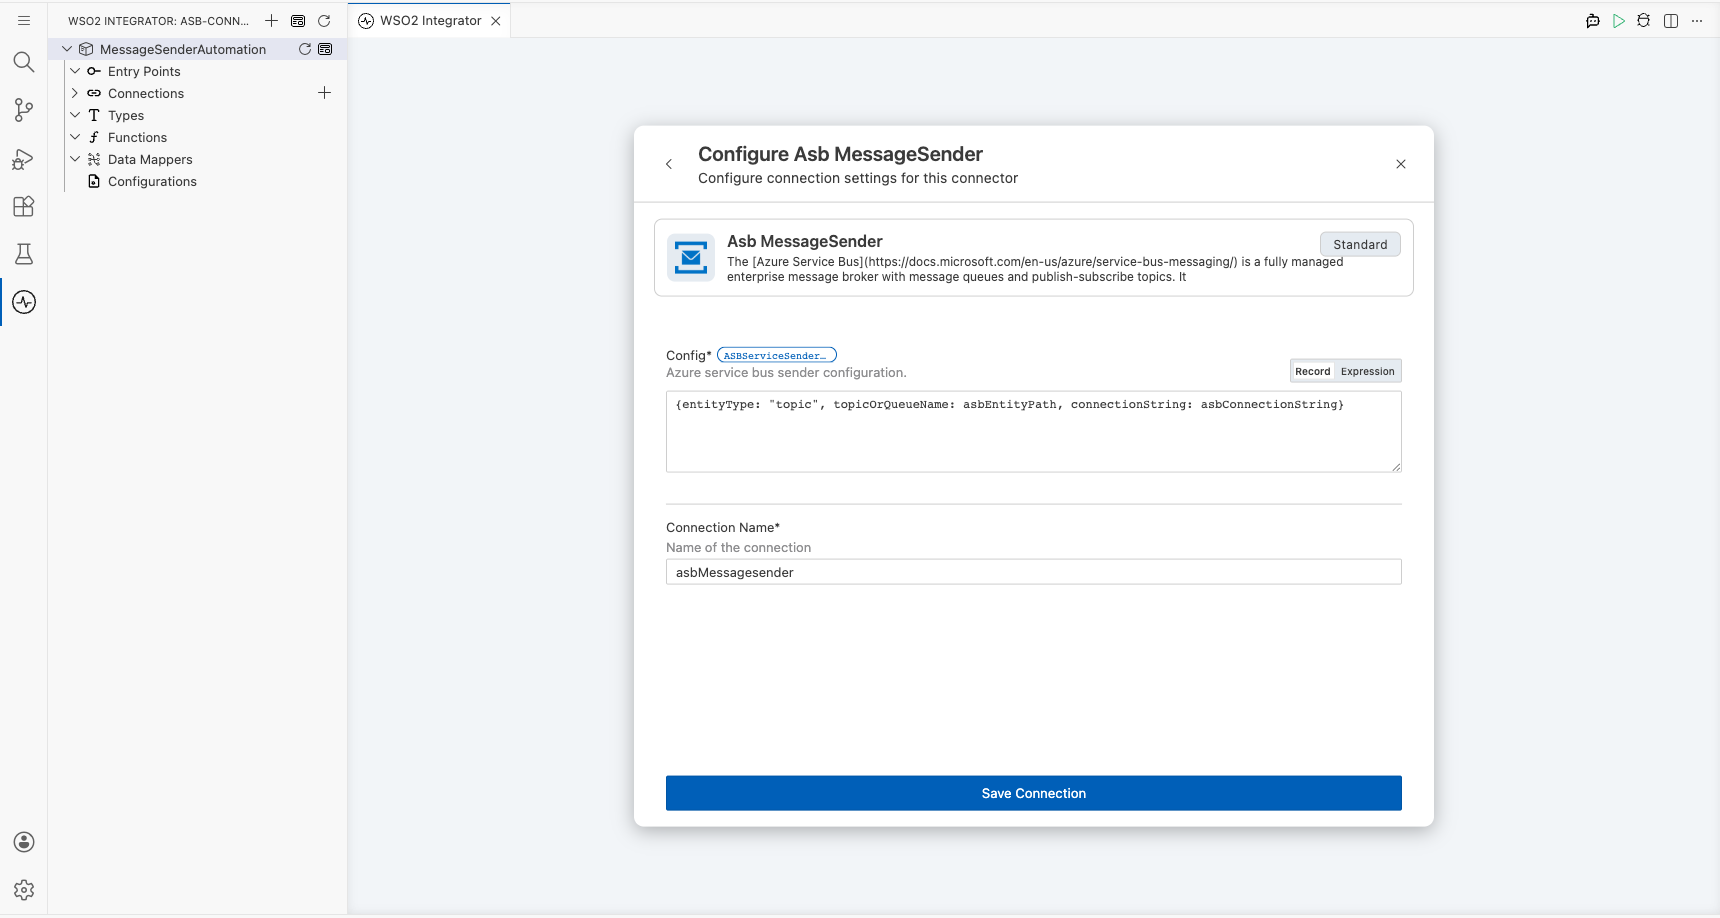
Step 3: Save the connection
Select Save Connection to persist the connection. The asbMessagesender entry now appears under Connections in the project tree.
Step 4: Set actual values for your configurables
In the left panel, select Configurations. Set a value for each configurable listed below:
- asbConnectionString (string) : The full Azure Service Bus connection string for your namespace
- asbEntityPath (string) : The name of the topic or queue to send messages to
Configuring the ASB Send operation
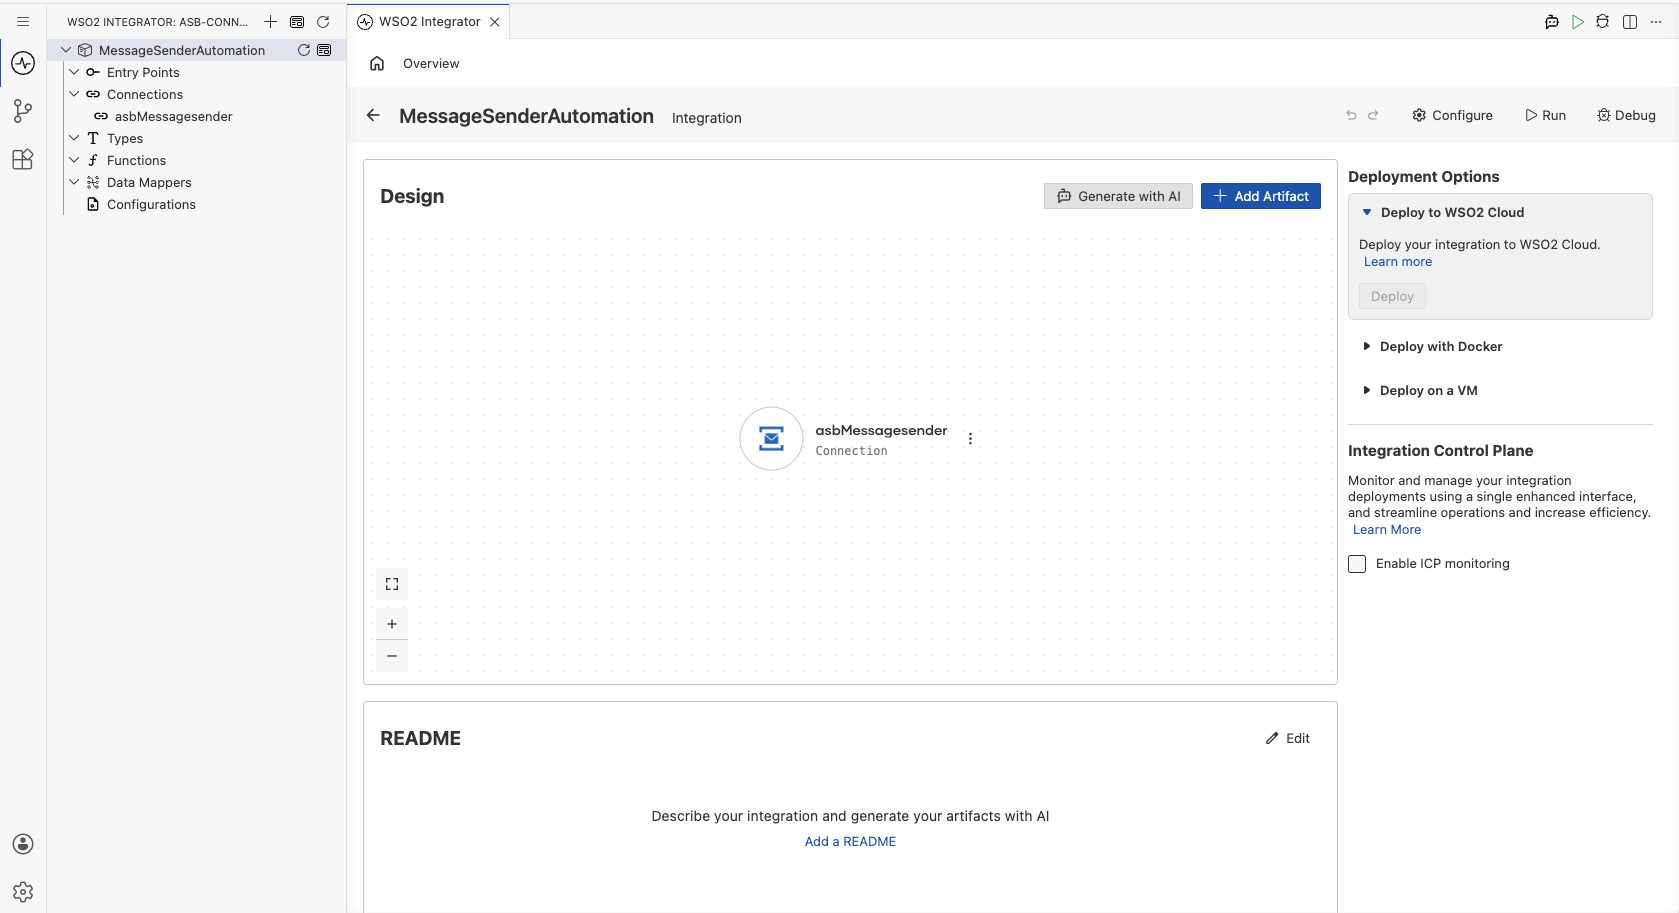
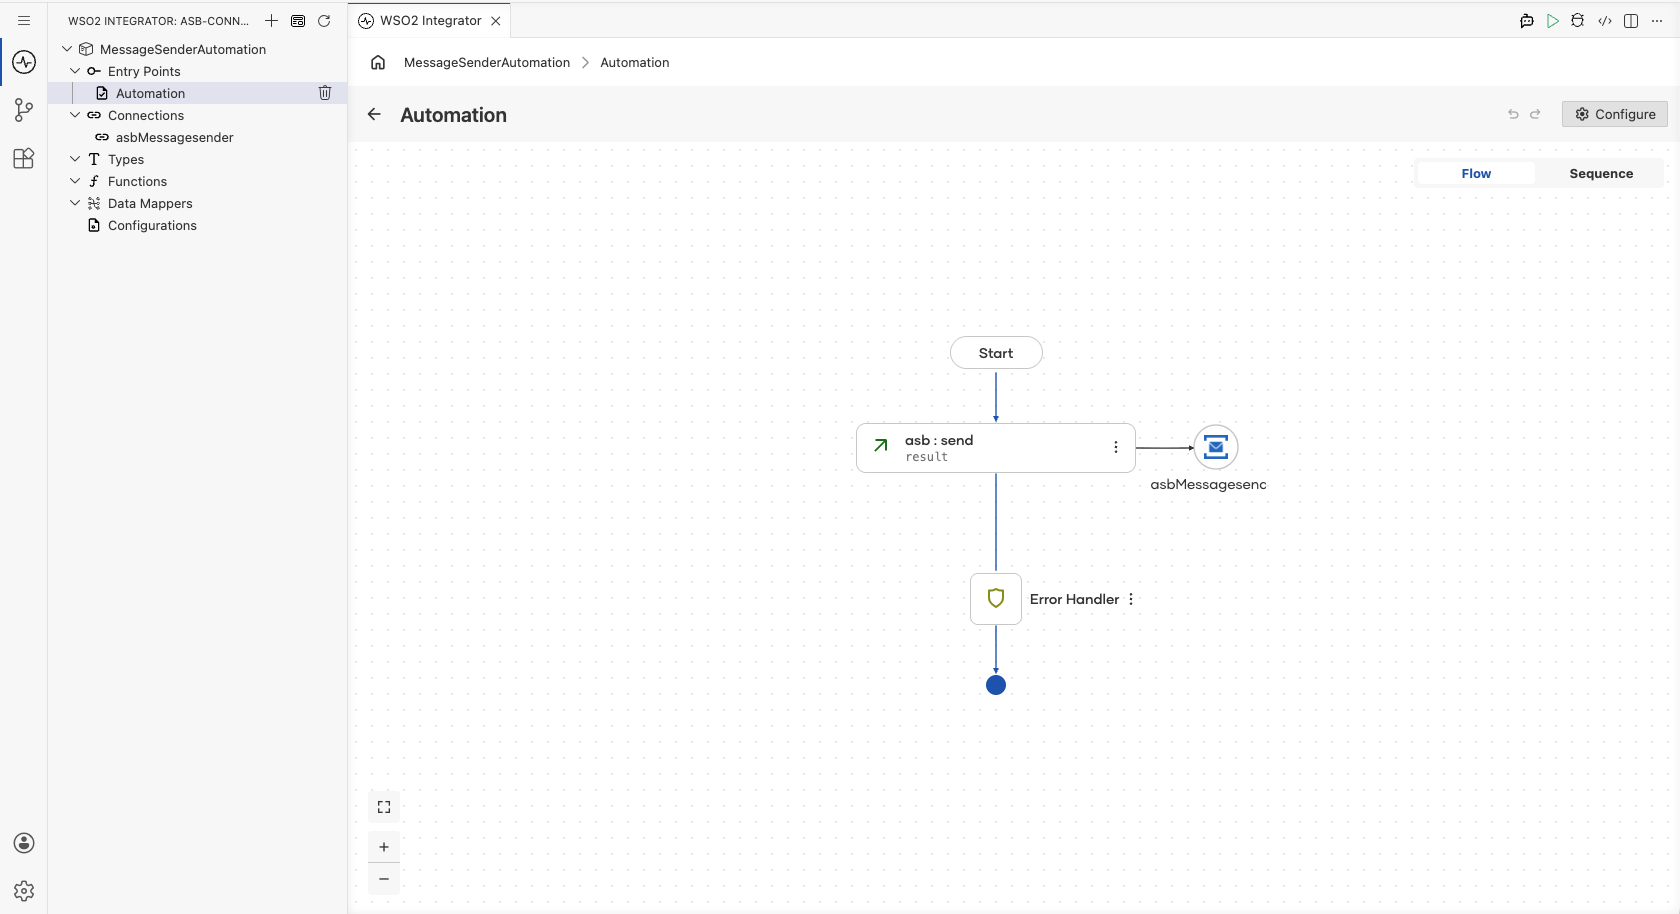
Step 5: Add an Automation entry point
- Navigate to the MessageSenderAutomation integration overview.
- Select Add Artifact.
- Under Automation, select the Automation tile.
- Select Create to confirm with default settings.
The design canvas opens showing a bare flow: Start → Error Handler.
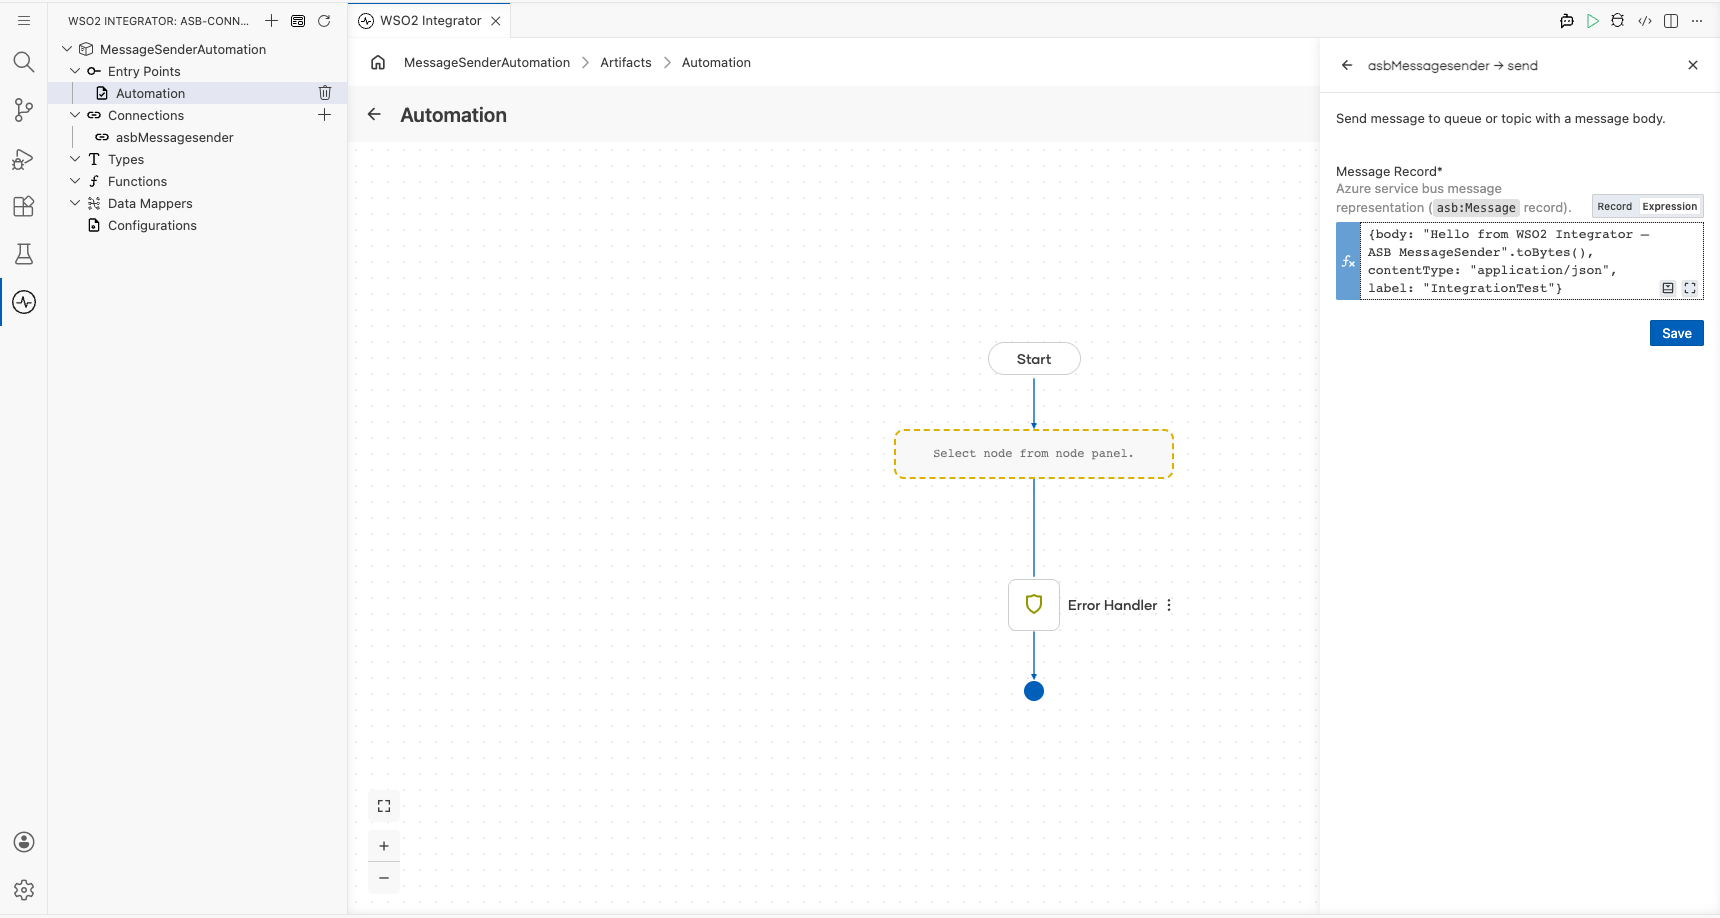
Step 6: Select and configure the Send operation
- On the canvas, select the ⊕ node between Start and Error Handler.
- Under Connections, expand asbMessagesender to see available operations.
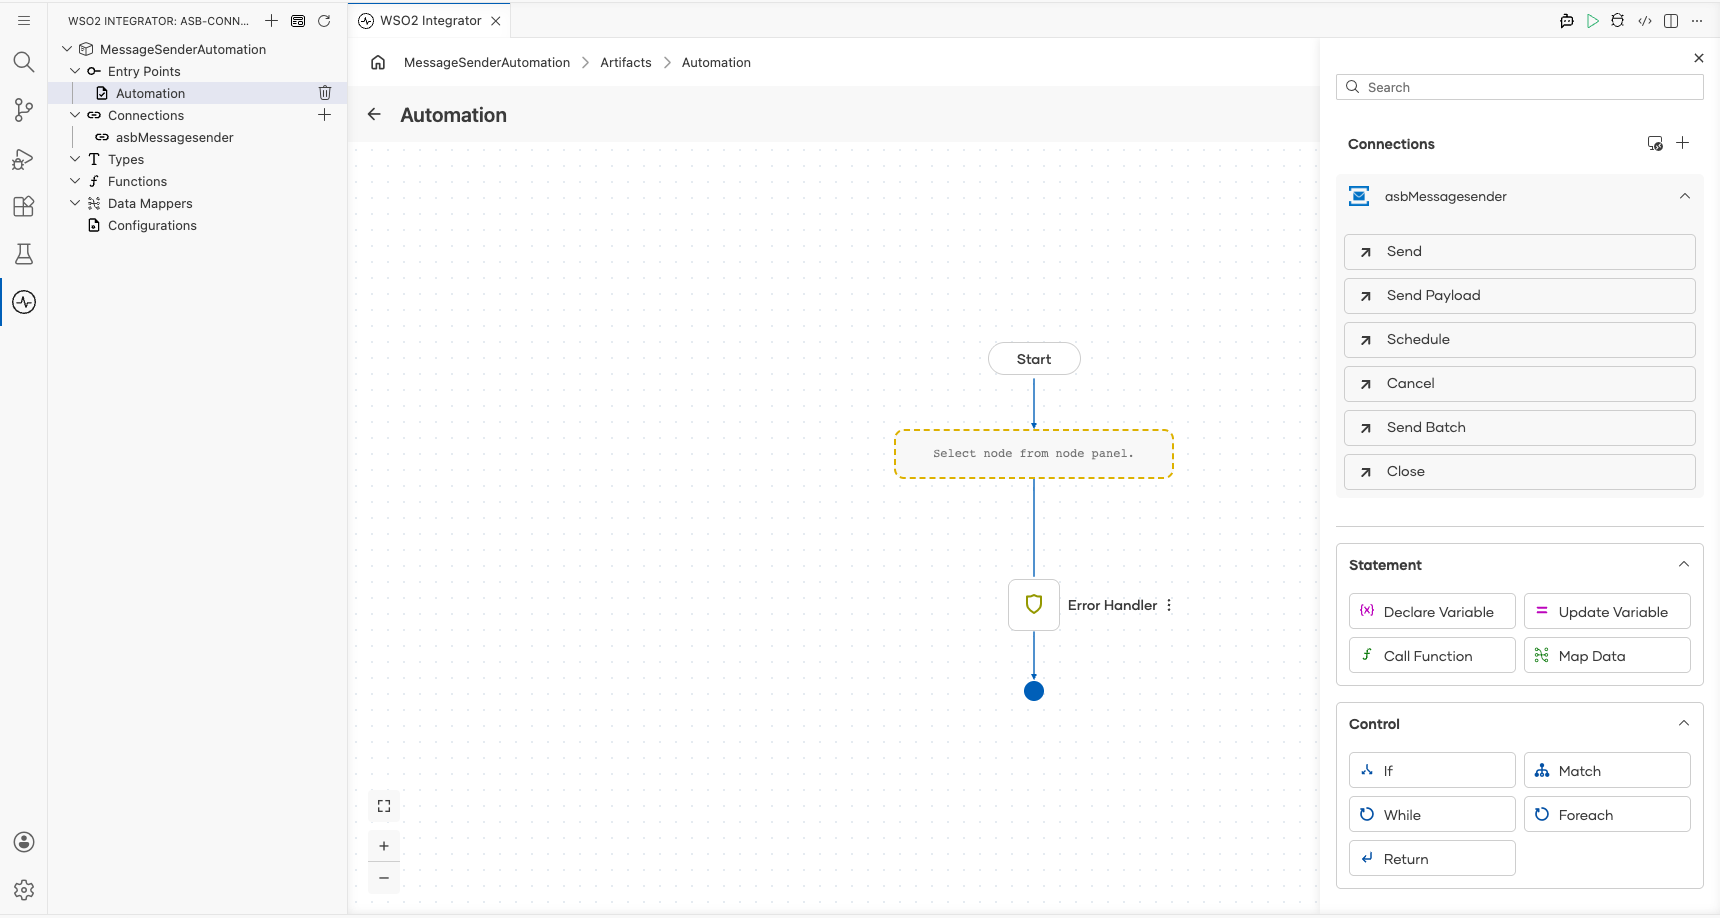
- Select Send to open the configuration form.
- In the Expression tab, enter an
asb:Messagerecord withbody,contentType, andlabelvalues. - Select Save.
Try it yourself
Try this sample in WSO2 Integration Platform.

More code examples
There are two sets of examples demonstrating the use of the Ballerina Azure Service Bus (ASB) Connector.
-
Management Related Examples: These examples cover operations related to managing the Service Bus, such as managing queues, topics, subscriptions, and rules.
-
Message Sending and Receiving Related Examples: This set includes examples for sending to and receiving messages from queues, topics, and subscriptions in the Service Bus.
ASB MessageReceiver Example
What you'll build
Build an Azure Service Bus (ASB) message receiver integration that polls a queue, receives an asb:Message, and logs it as JSON. The integration uses the ballerinax/asb connector inside WSO2 Integrator to connect to an Azure Service Bus namespace and process messages from a specified queue.
Operations used:
- Receive : Polls the Azure Service Bus queue and receives a full
asb:Messageobject
Architecture
Prerequisites
- An active Azure Service Bus namespace with at least one queue
- A primary or secondary connection string from the Azure portal
- The name of the queue to receive messages from
Setting up the ASB MessageReceiver integration
New to WSO2 Integrator? Follow the Create a New Integration guide to set up your integration first, then return here to add the connector.
Adding the ASB MessageReceiver connector
Add the ASB MessageReceiver connector to your integration from the Connections panel.
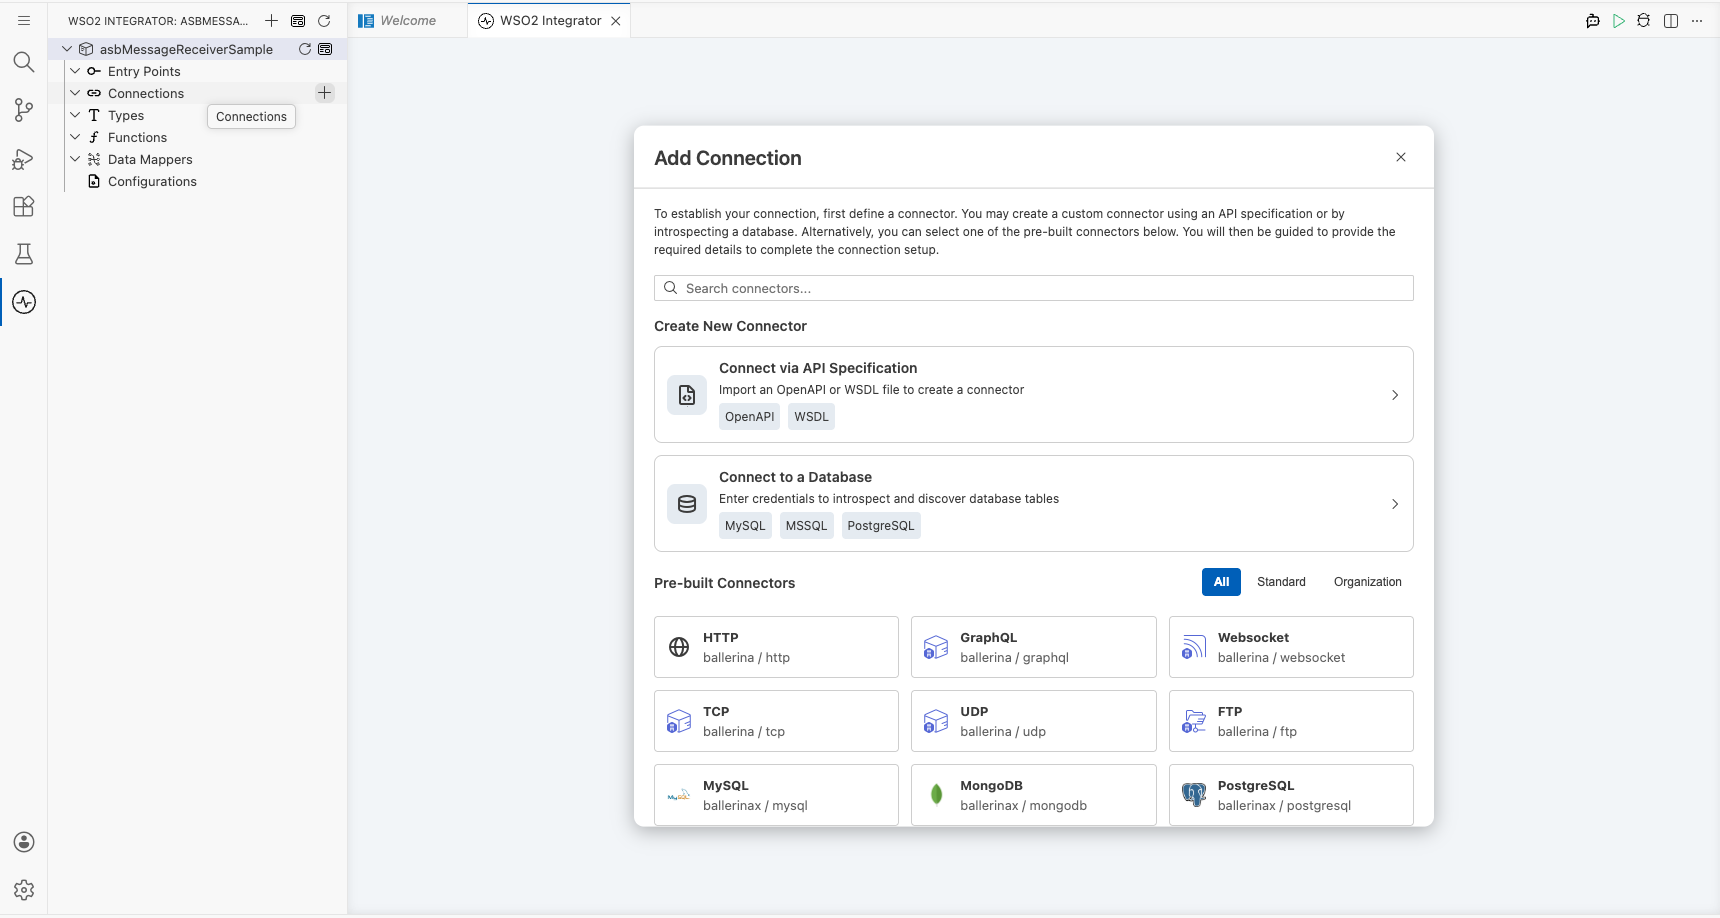
Step 1: Open the Add connection panel
- In the WSO2 Integrator side panel, hover over Connections and select the + button.
- In the search field, enter
asbto filter connectors. - Select ASB MessageReceiver from the results.
Configuring the ASB MessageReceiver connection
Configure the connection form by binding each field to a configurable variable.
Step 2: Fill in the connection parameters
Bind each connection parameter to a configurable variable so sensitive values are supplied at runtime.
- connectionString : The Azure Service Bus primary or secondary connection string
- entityConfig : A
QueueConfigrecord specifying the target queue name (asbQueueName) - Connection Name : A unique name for this connection; enter
asbMessagereceiver
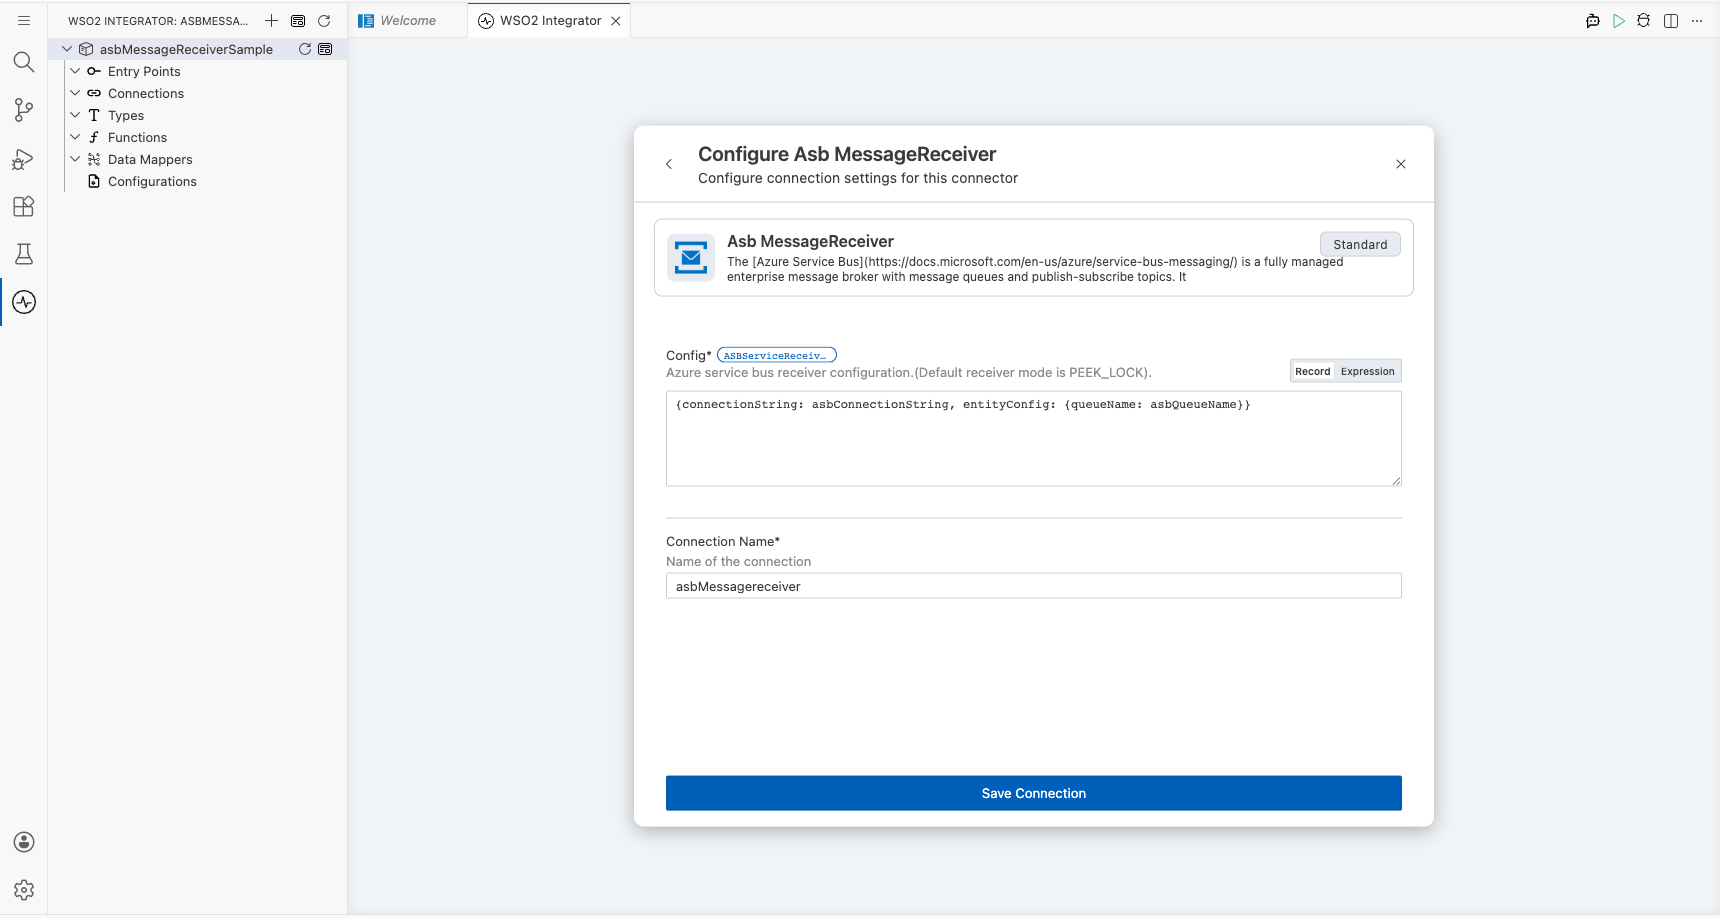
Step 3: Save the connection
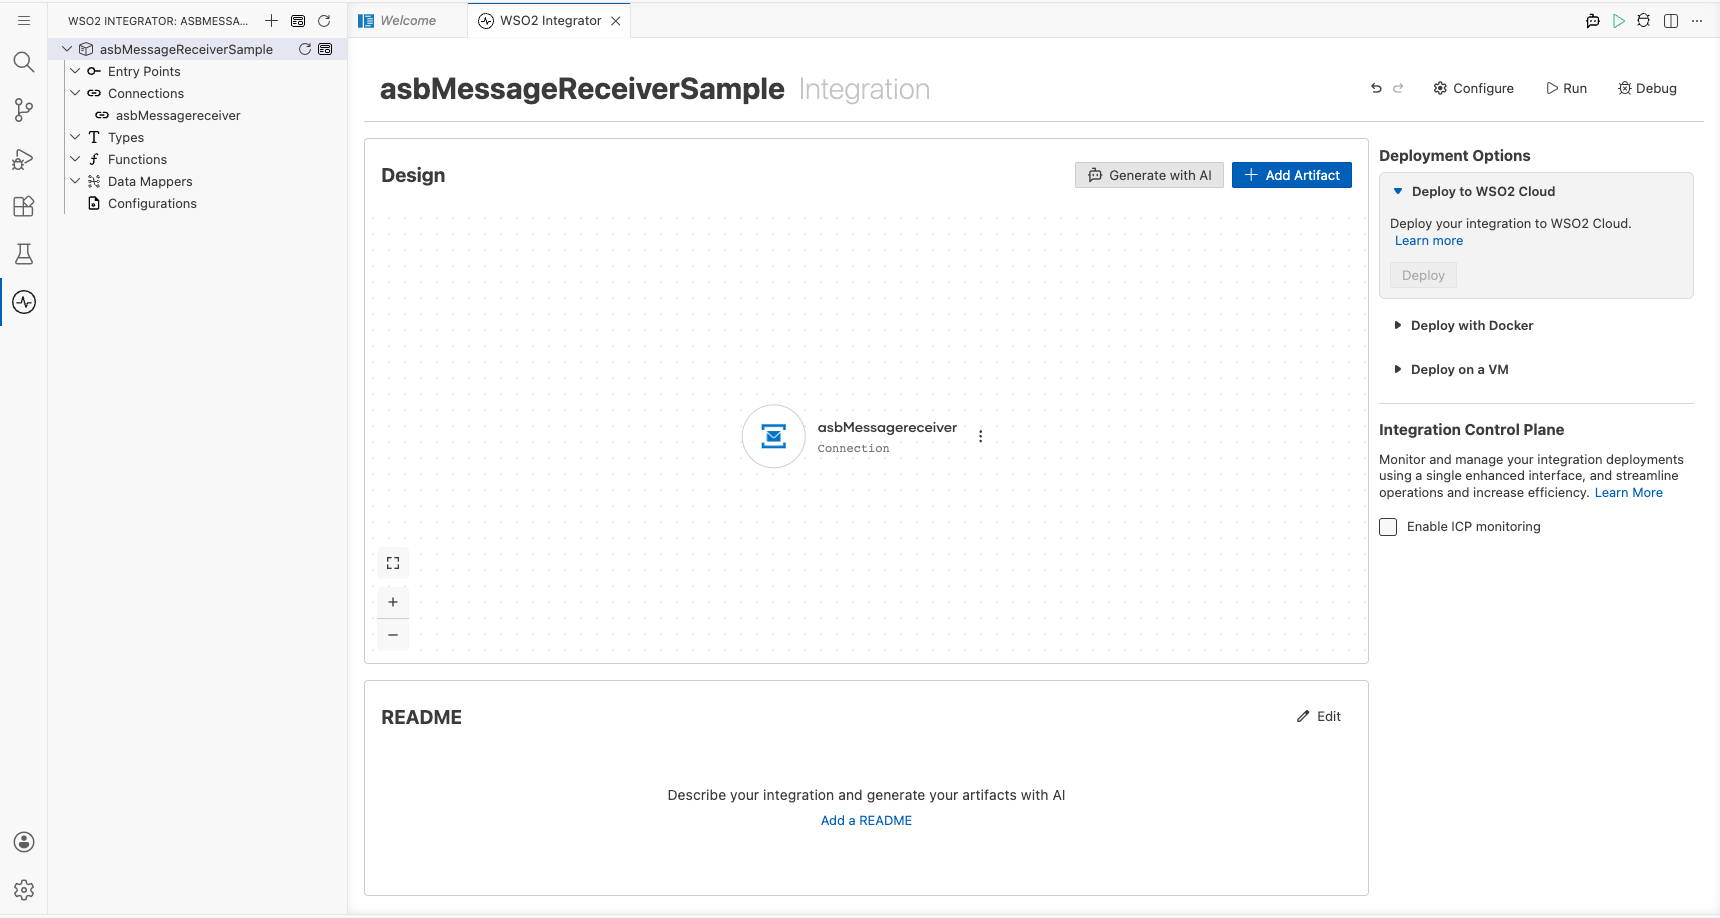
Select Save to persist the connection. The canvas refreshes and shows the asbMessagereceiver connection node.
Step 4: Set actual values for your configurables
- In the left panel, select Configurations.
- Set a value for each configurable listed below.
- asbConnectionString (string) : The Azure Service Bus connection string copied from the Azure portal under Shared Access Policies
- asbQueueName (string) : The name of the queue to receive messages from
Configuring the ASB MessageReceiver receive operation
Step 5: Add an Automation entry point
- In the WSO2 Integrator side panel, hover over Entry Points and select the + button.
- Select Automation from the artifacts panel.
- Leave the default name (
main) and select Create.
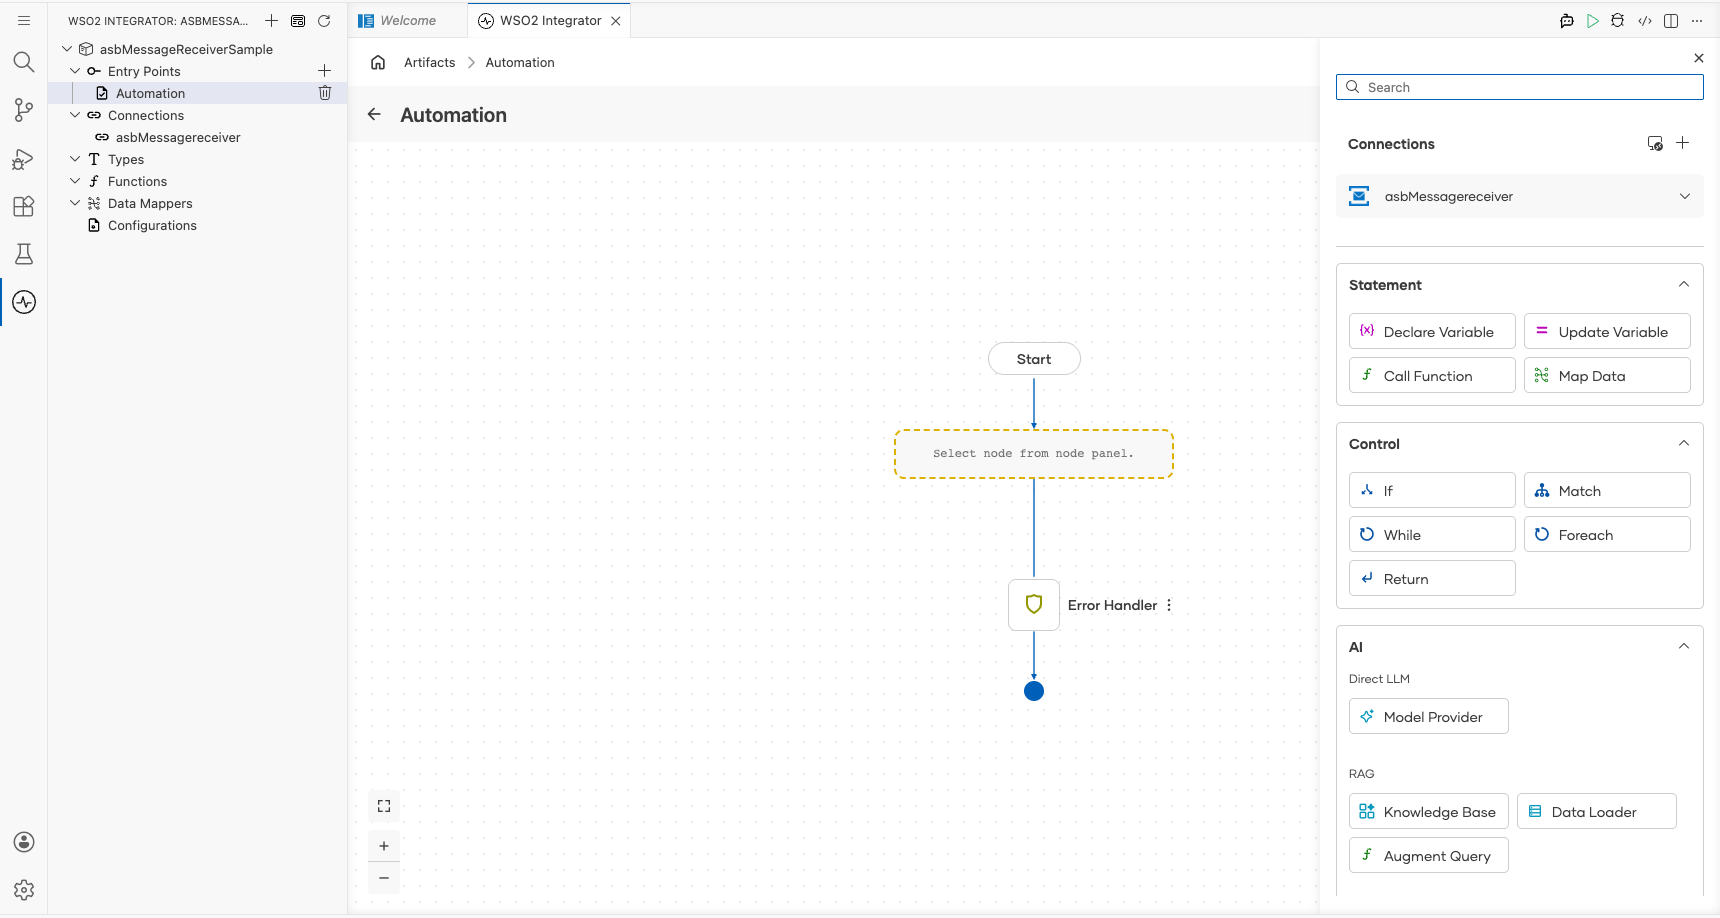
The canvas switches to the Automation flowchart view showing a Start node and an Error Handler node.
Step 6: Select and configure the Receive operation
- Select the + button on the placeholder between Start and Error Handler to open the step panel.
- Under Connections, expand asbMessagereceiver to reveal available operations.
- Select Receive to open the operation configuration panel.
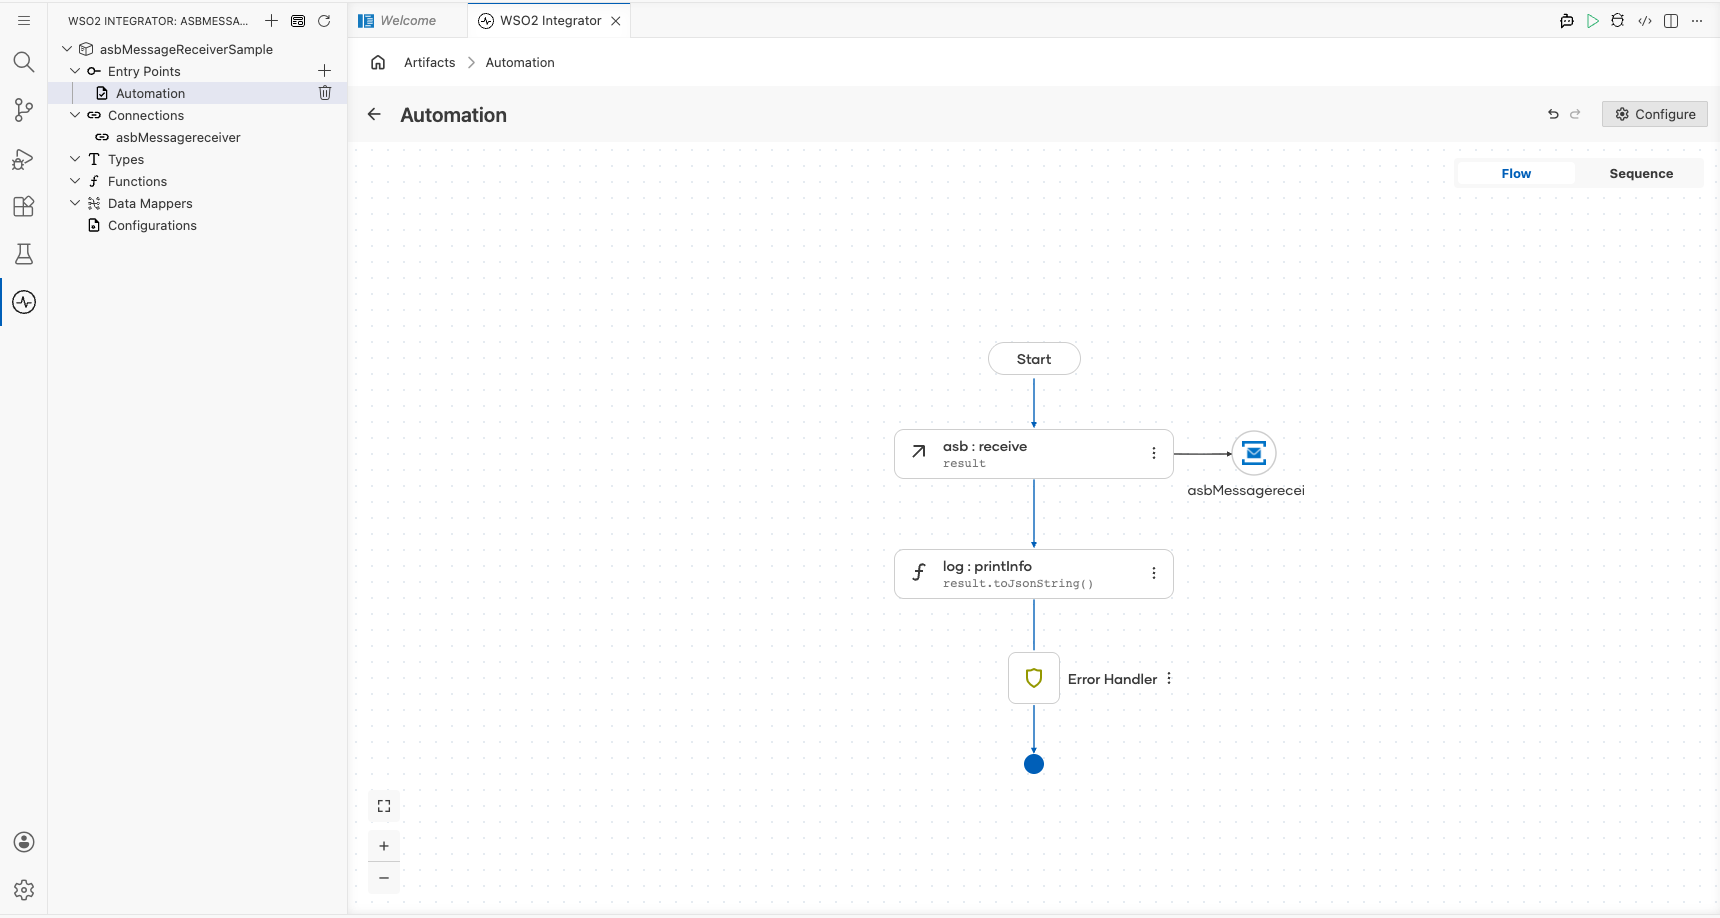
Configure the output fields:
- Result : Enter
resultas the output variable name - Expected Type : Select
asb:Message

Select Save to add the node to the canvas.
Try it yourself
Try this sample in WSO2 Integration Platform.
More code examples
There are two sets of examples demonstrating the use of the Ballerina Azure Service Bus (ASB) Connector.
-
Management Related Examples: These examples cover operations related to managing the Service Bus, such as managing queues, topics, subscriptions, and rules.
-
Message Sending and Receiving Related Examples: This set includes examples for sending to and receiving messages from queues, topics, and subscriptions in the Service Bus.
ASB Trigger Example
What you'll build
This integration listens to an Azure Service Bus (ASB) queue and processes each incoming message automatically. When a message arrives on the configured queue, the onMessage handler receives an asb:Message payload and logs its JSON representation. The overall flow runs from the ASB listener through the handler to a log:printInfo statement.
Architecture
Prerequisites
- An Azure Service Bus namespace with a queue provisioned
- The namespace connection string (
Endpoint=sb://…) and the queue name
Setting up the Azure Service Bus integration
New to WSO2 Integrator? Follow the Create a New Integration guide to set up your integration first, then return here to add the trigger.
Adding the Azure Service Bus trigger
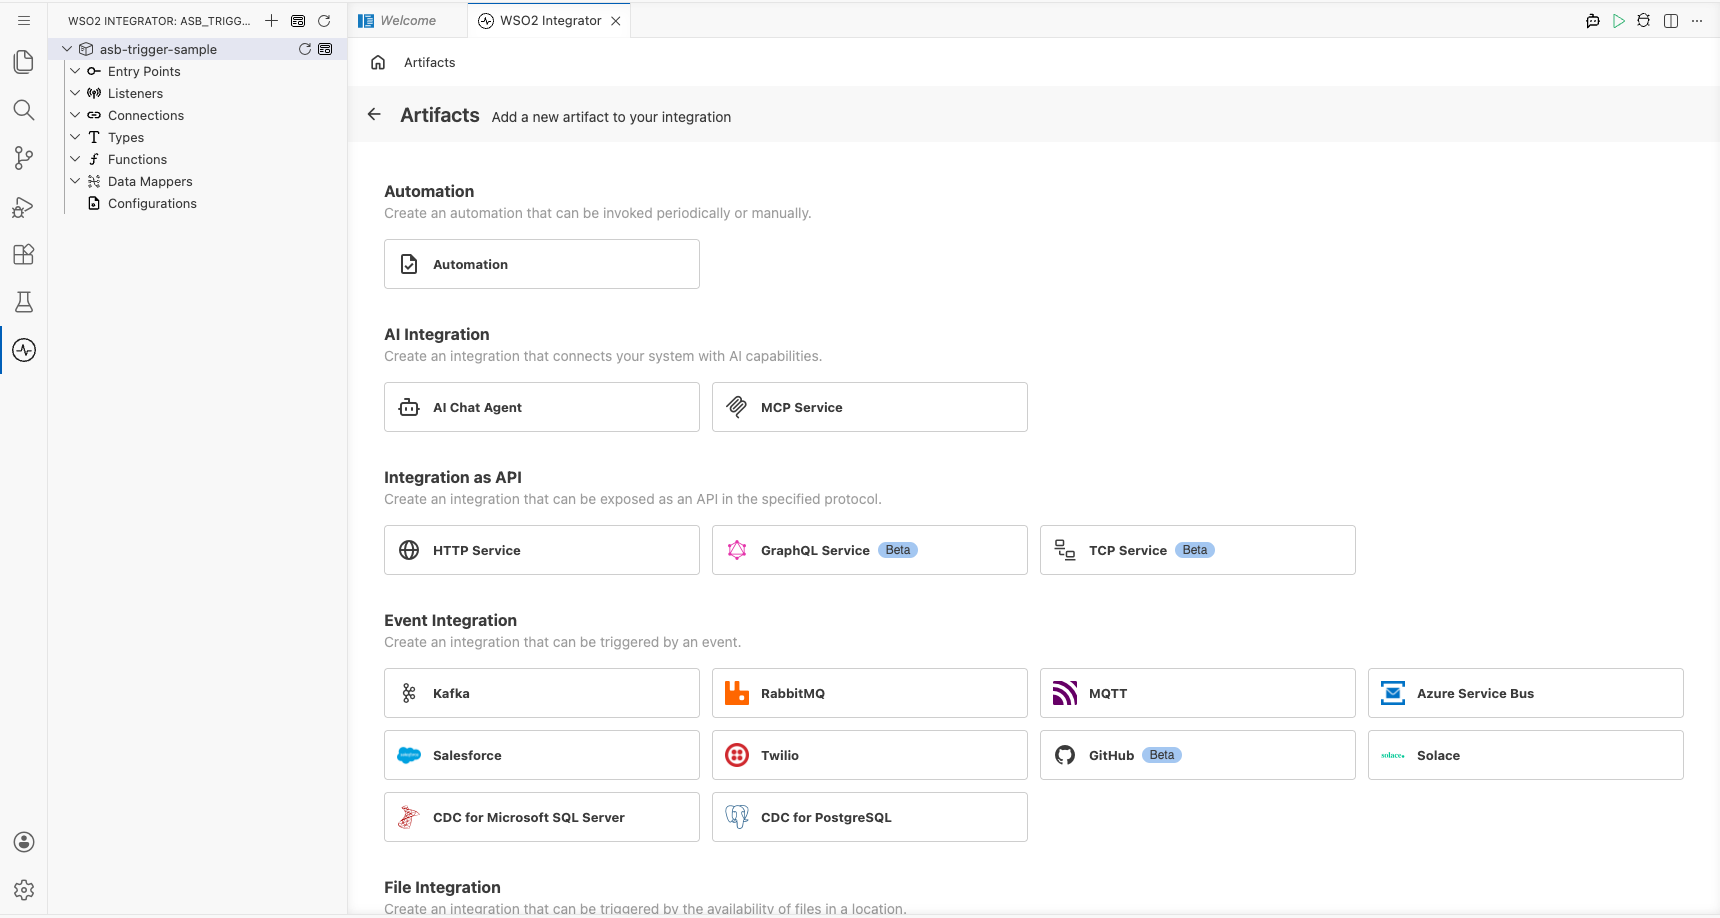
Step 1: Open the Artifacts palette
Select + Add Artifact in the WSO2 Integrator canvas to open the Artifacts palette, then expand the Event Integration category to see the available trigger cards.
Configuring the Azure Service Bus listener
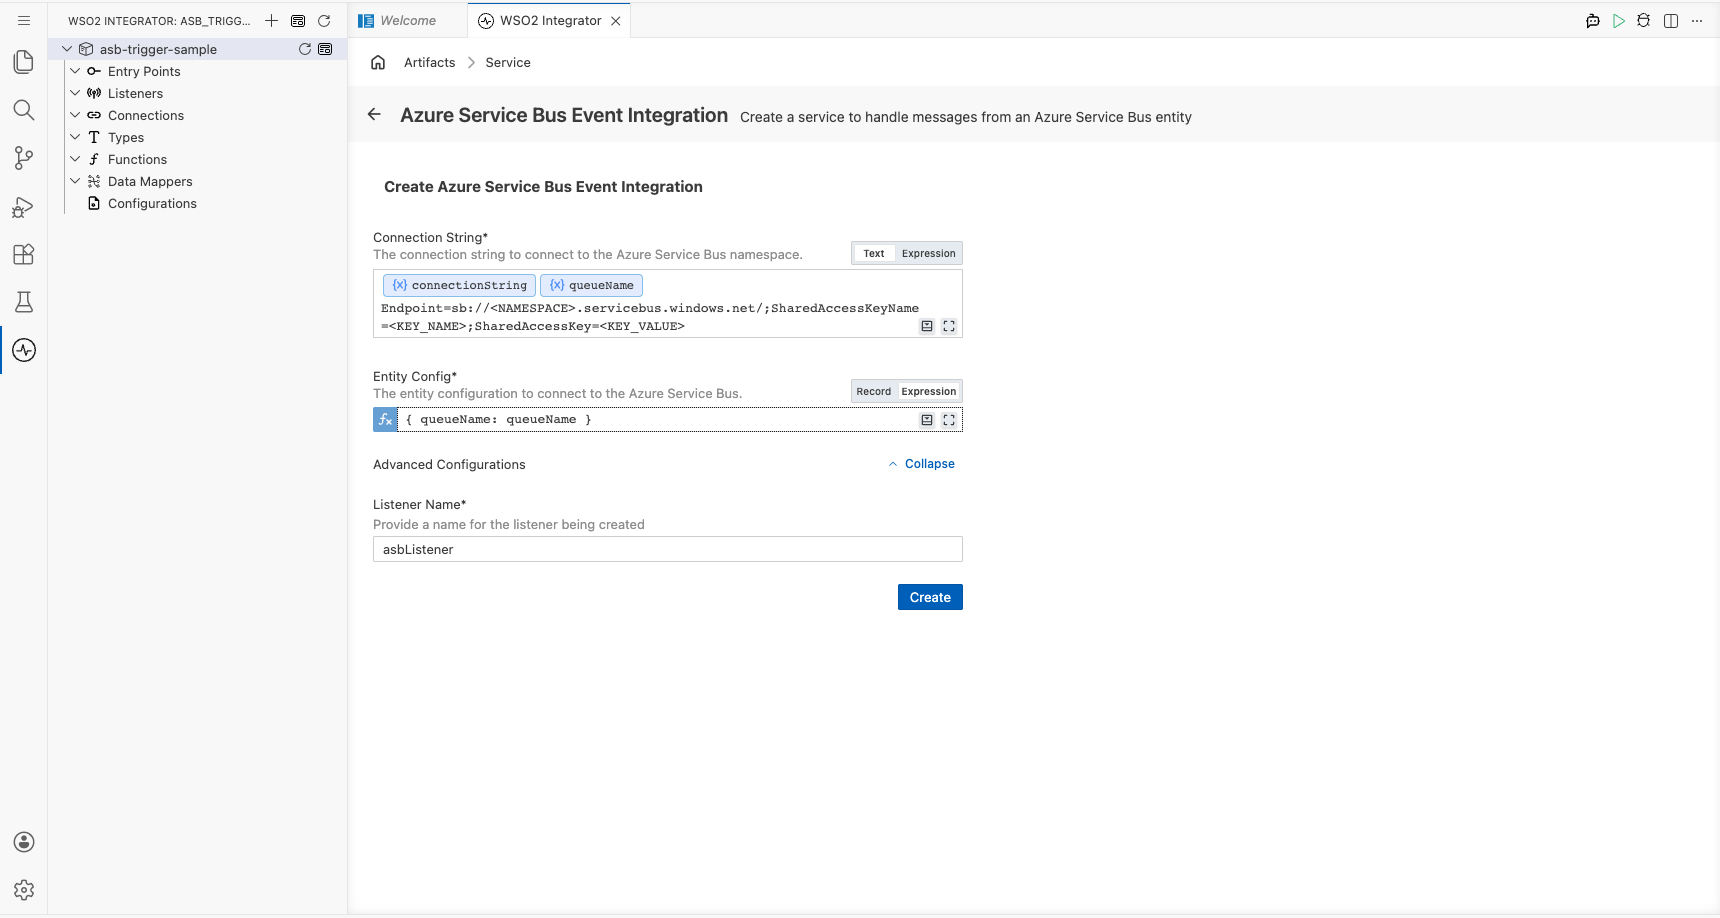
Step 2: Bind listener parameters to configurable variables
In the Create Azure Service Bus Event Integration form, bind each field to a configurable variable:
- Select inside the Connection String field, then select the Open Helper Panel icon to open the helper panel.
- Go to the Configurables tab and select + New Configurable.
- Set Variable Name to
connectionStringand Variable Type tostring, then select Save. TheconnectionStringtag appears in the field. - Select + New Configurable again, set Variable Name to
queueNameand Variable Type tostring, then select Save. - In the Entity Config field, select the Expression toggle and enter
{ queueName: queueName }. - Confirm that Listener Name is set to
asbListener.
- connectionString : The Azure Service Bus namespace connection string used to authenticate the listener
- queueName : The name of the Azure Service Bus queue to listen on
- entityConfig : Expression referencing the
queueNameconfigurable variable to identify the target queue - listenerName : The identifier for the listener instance within the integration
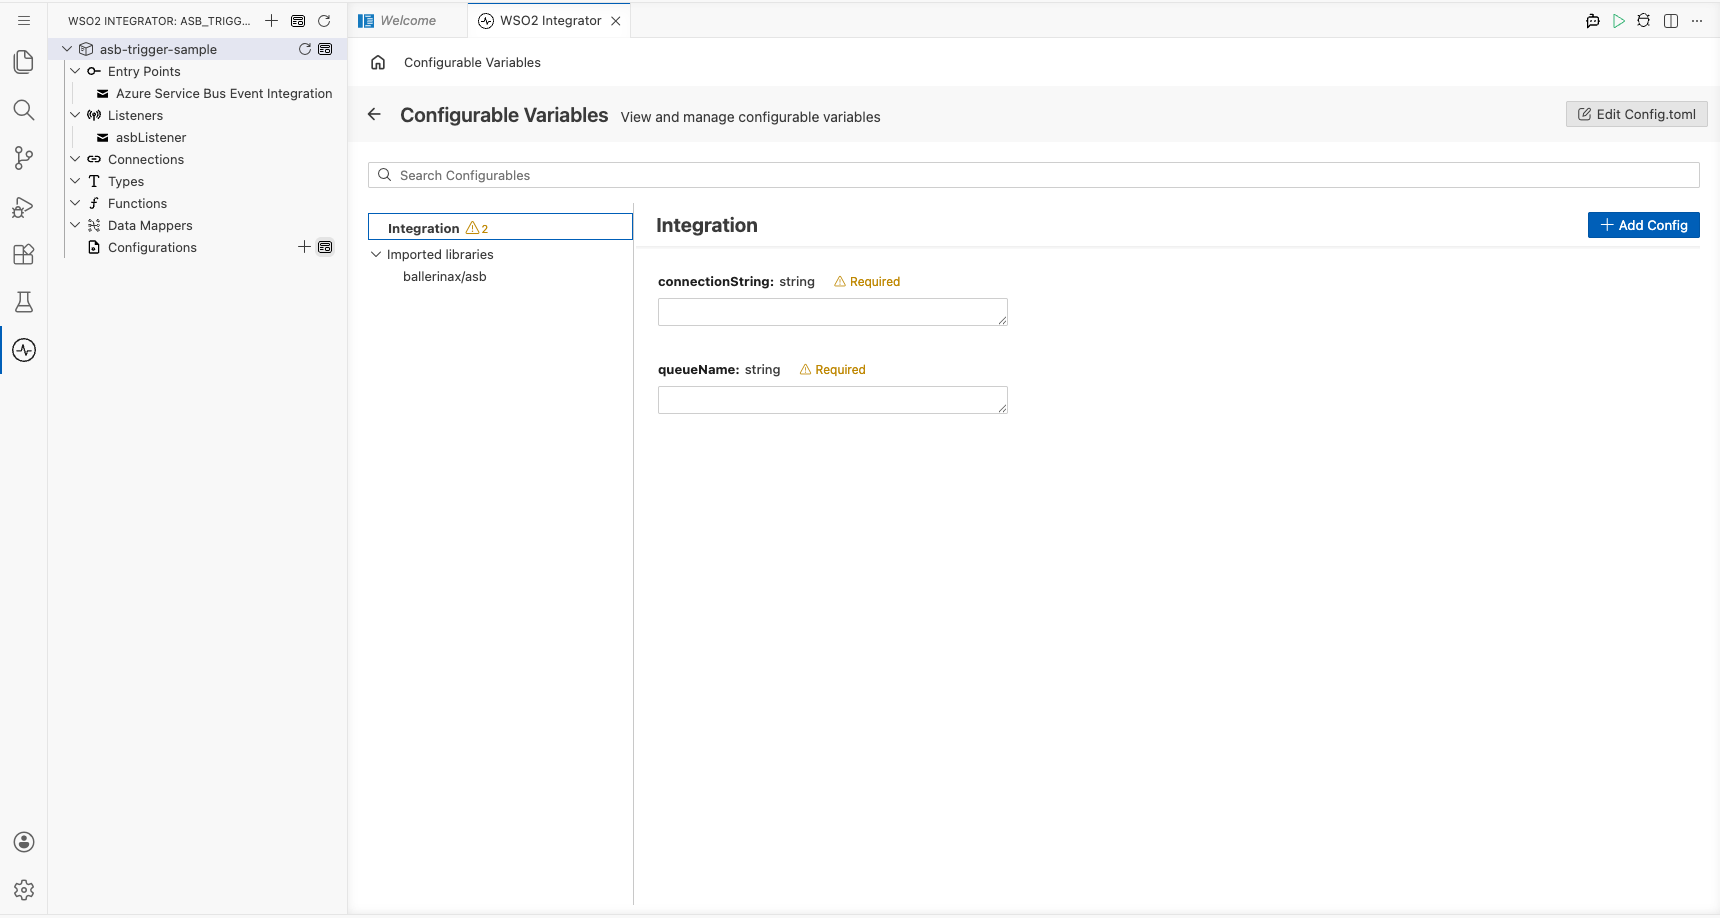
Step 3: Set actual values for your configurations
Select Configurations in the left panel of WSO2 Integrator to open the Configurations panel, then set a value for each configuration listed below:
- connectionString (string) : The full Azure Service Bus namespace connection string, for example
Endpoint=sb://<NAMESPACE>.servicebus.windows.net/;SharedAccessKeyName=<KEY_NAME>;SharedAccessKey=<KEY_VALUE> - queueName (string) : The name of the queue to consume messages from, for example
my-queue
Step 4: Create the trigger
Select Create to submit the form and generate the service scaffold.
Handling Azure Service Bus events
Step 5: Add the onMessage handler
In the service view, select + Add Handler. The Select Handler to Add side panel opens on the right, listing the available handler options.
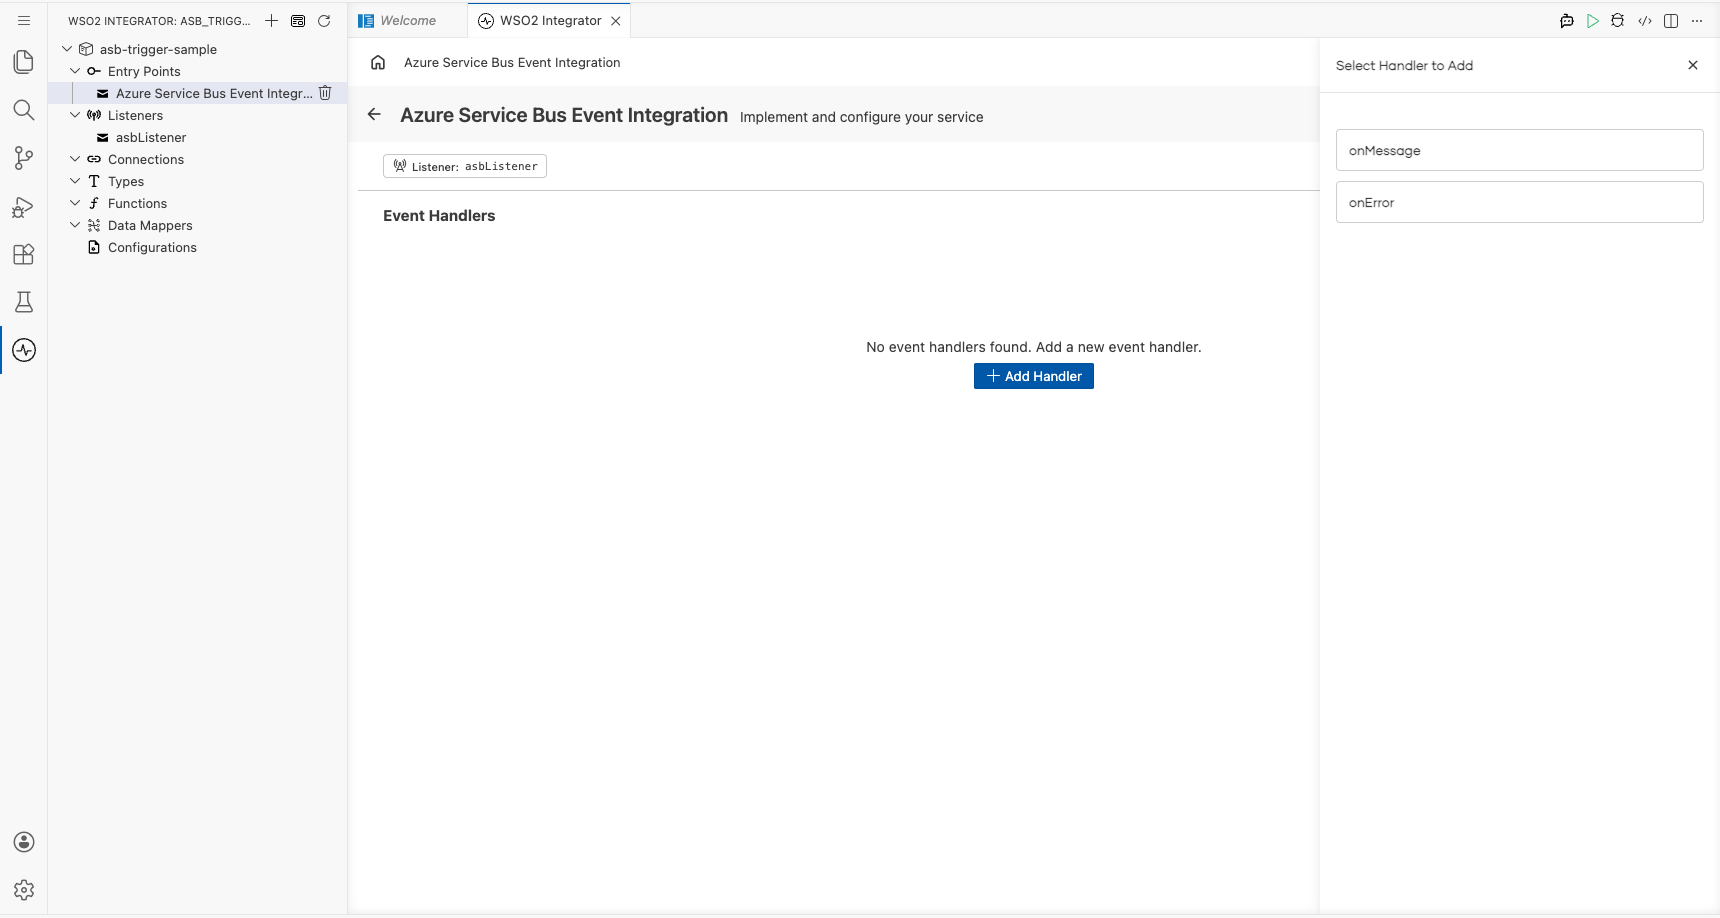
Step 6: Inspect the initial handler flow canvas
Select onMessage from the side panel to register the handler.
Note: Azure Service Bus uses the library-defined
asb:Messagetype; there's no Define Value / Create Type Schema modal for this trigger. The message schema is fixed by theballerinax/asbpackage.
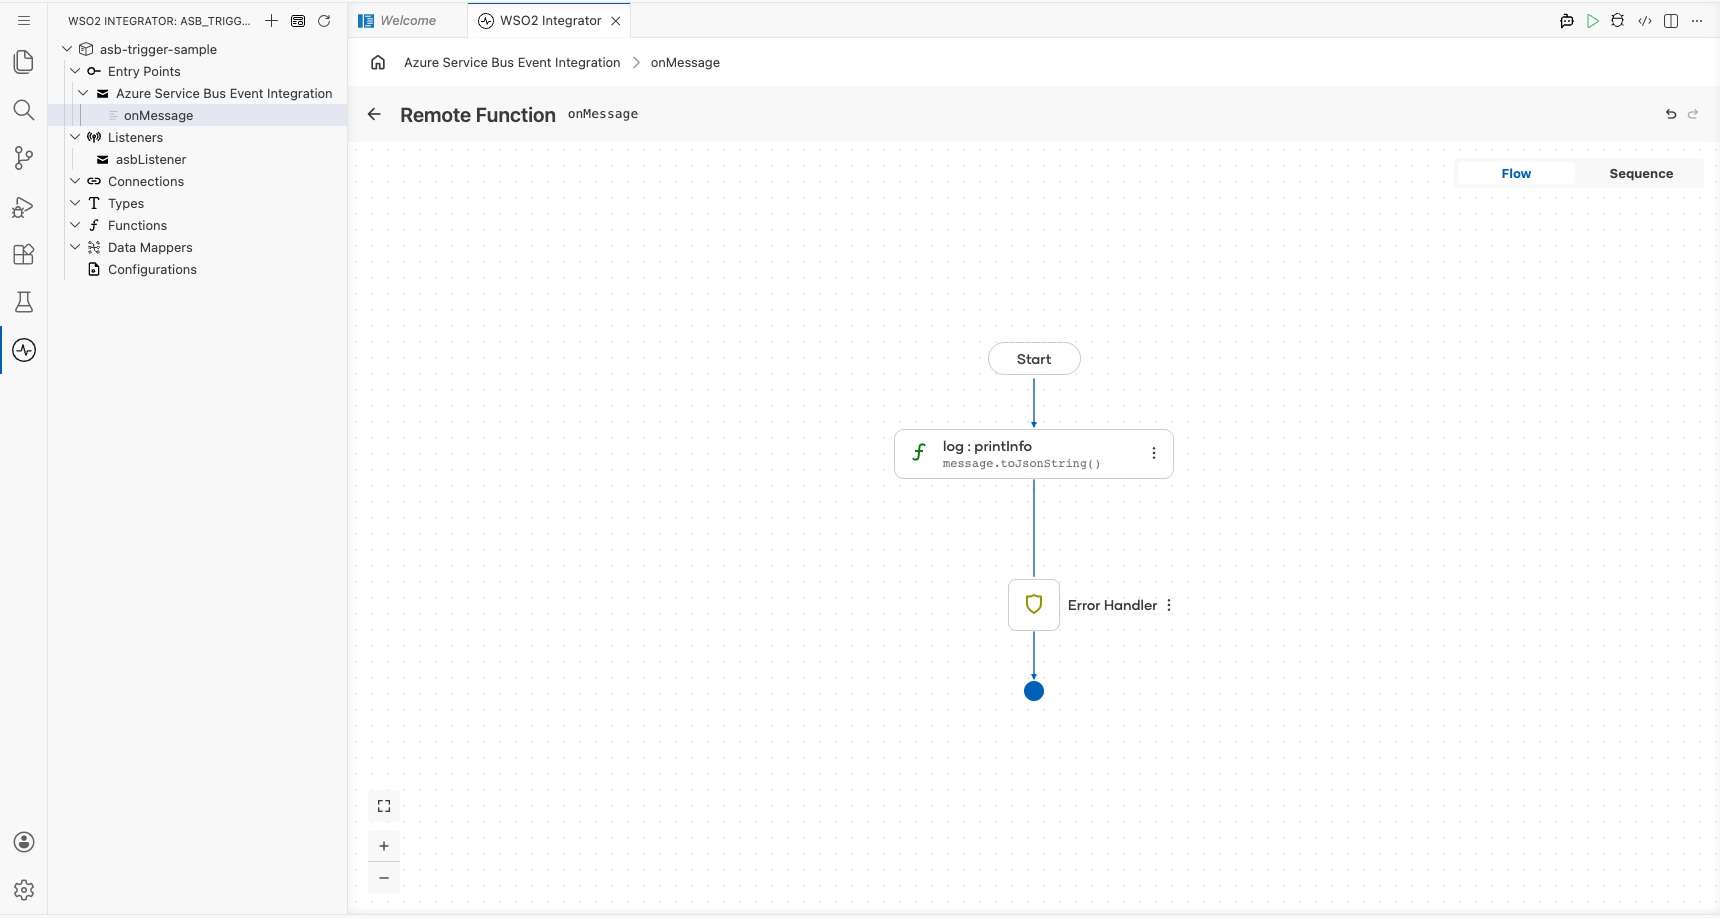
Select the onMessage row in the service view to open the flow canvas.
Step 7: Add the log:printInfo step
Select the + icon in the flow chart, and in the side panel that opens, choose Log Info from the Logging section, then enter message.toJsonString() as the message.
Step 8: Return to the service view
Select the back arrow or select Azure Service Bus Event Integration in the breadcrumb to return to the service view and confirm the onMessage handler row is registered under Event Handlers.

Running the integration
Select Run Integration (▶) in the WSO2 Integrator toolbar to start the listener.
To fire a test event, use one of the following approaches:
- Azure Portal: navigate to your Service Bus namespace, open the queue, select Service Bus Explorer, and use Send messages to publish a test message directly from the browser.
- Azure CLI; use
az restto call the Service Bus REST API:az rest --method POST --uri https://<namespace>.servicebus.windows.net/<queue-name>/messages --auth-type key-auth --resource https://servicebus.azure.net --body '{"hello":"world"}'to send a message from the command line. - Azure SDK client; use the Azure Service Bus SDK for your preferred language (JavaScript, Python, Java, or .NET) to send a message programmatically.
After a message is sent, the console prints output similar to:
time = 2024-01-15T10:30:00.000Z level = INFO message = {"body":"Hello, ASB!","messageId":"abc123",...}
Try it yourself
Try this sample in WSO2 Integration Platform.
What's next
- Action Reference: full reference for all client operations
- Trigger Reference: detailed listener and service configuration
- Setup Guide: Azure Service Bus namespace and connection string setup