Manage an LLM provider
After deploying your LLM provider, manage its configuration through the provider details page. This guide covers all management operations organized by tab.
Access provider details
-
Navigate to AI Workspace > LLM Providers.
-
Click a provider name to open its details page.
The provider details page shows:
- The provider name, version, and template type
- The creation and last-updated timestamps
- Six management tabs: Connection, Access Control, Security, Rate Limiting, Guardrails, and Models
- The Deploy to Gateway button in the top right
Connection
Manage upstream endpoint configuration and authentication credentials for the LLM provider.
Provider endpoint
The Upstream URL field sets where the gateway forwards API requests:
| Provider type | URL configuration |
|---|---|
| OpenAI, Anthropic, Gemini, Mistral AI | Pre-configured (read-only) |
| Azure OpenAI, Azure AI Foundry, AWS Bedrock | Custom URL (editable) |
To update:
- Modify the Provider Endpoint field
- Click Save
Authentication
Configure how the gateway authenticates with the upstream provider:
| Authentication type | Behavior |
|---|---|
| api-key | The gateway attaches an Authentication Header and Credentials value to every upstream request. For built-in providers, the template sets both. |
| other | The workspace stores no credentials for this provider. Use a policy to configure upstream authentication instead. |
| none | The gateway sends no upstream authentication. |
To configure api-key:
- Authentication Header: The header name the gateway sends upstream
- Credentials: Your provider API key
- Click the show icon to reveal or hide the value
- Update and click Save to change credentials
Switching to other or none clears the stored authentication header and credentials for this provider.
OpenAPI specification
The Spec URL field holds the OpenAPI specification the resource list is imported from:
- Supply either a URL or a file upload
- The specification populates the Access Control resources list
- Re-import it to refresh the available endpoints
Access control
Control which API endpoints are accessible through this provider.
Mode
Select the access control mode at the top of the tab:
| Mode | Behavior |
|---|---|
| Allow all | All resources are accessible by default. Move specific resources to Denied Resources to block them. |
| Deny all | All resources are blocked by default. Move specific resources to Allowed Resources to permit them. |
Use the arrow buttons between the two panels to move resources:
>>— Move all resources to the other panel>— Move the selected resources to the other panel<— Move the selected resources back<<— Move all resources back
Import resources
Click Import resources from specification to load or refresh the resource list from the provider's OpenAPI specification.
Security
Configure how applications authenticate when accessing this provider through the gateway.
API key authentication
Set the API key that client applications must provide:
| Field | Description | Example |
|---|---|---|
| Authentication Type | Authentication method | apiKey (default) |
| API Key | The name of the request header that must carry the API key | x-api-key, apikey, Authorization |
| Key Location | Where clients send the key. header is the only supported option. |
header |
| API Key Value Prefix | An optional prefix prepended to the value clients must send, so that clients send Bearer <key> |
Bearer |
To configure:
- Select Authentication Type:
apiKey - Enter the API Key header name your applications use.
- Optionally set an API Key Value Prefix, for example
Bearer, if clients send the key with a scheme prefix. - Click Save.
Rate limiting
Control request and token consumption to prevent cost overruns and keep usage fair across all consumers.
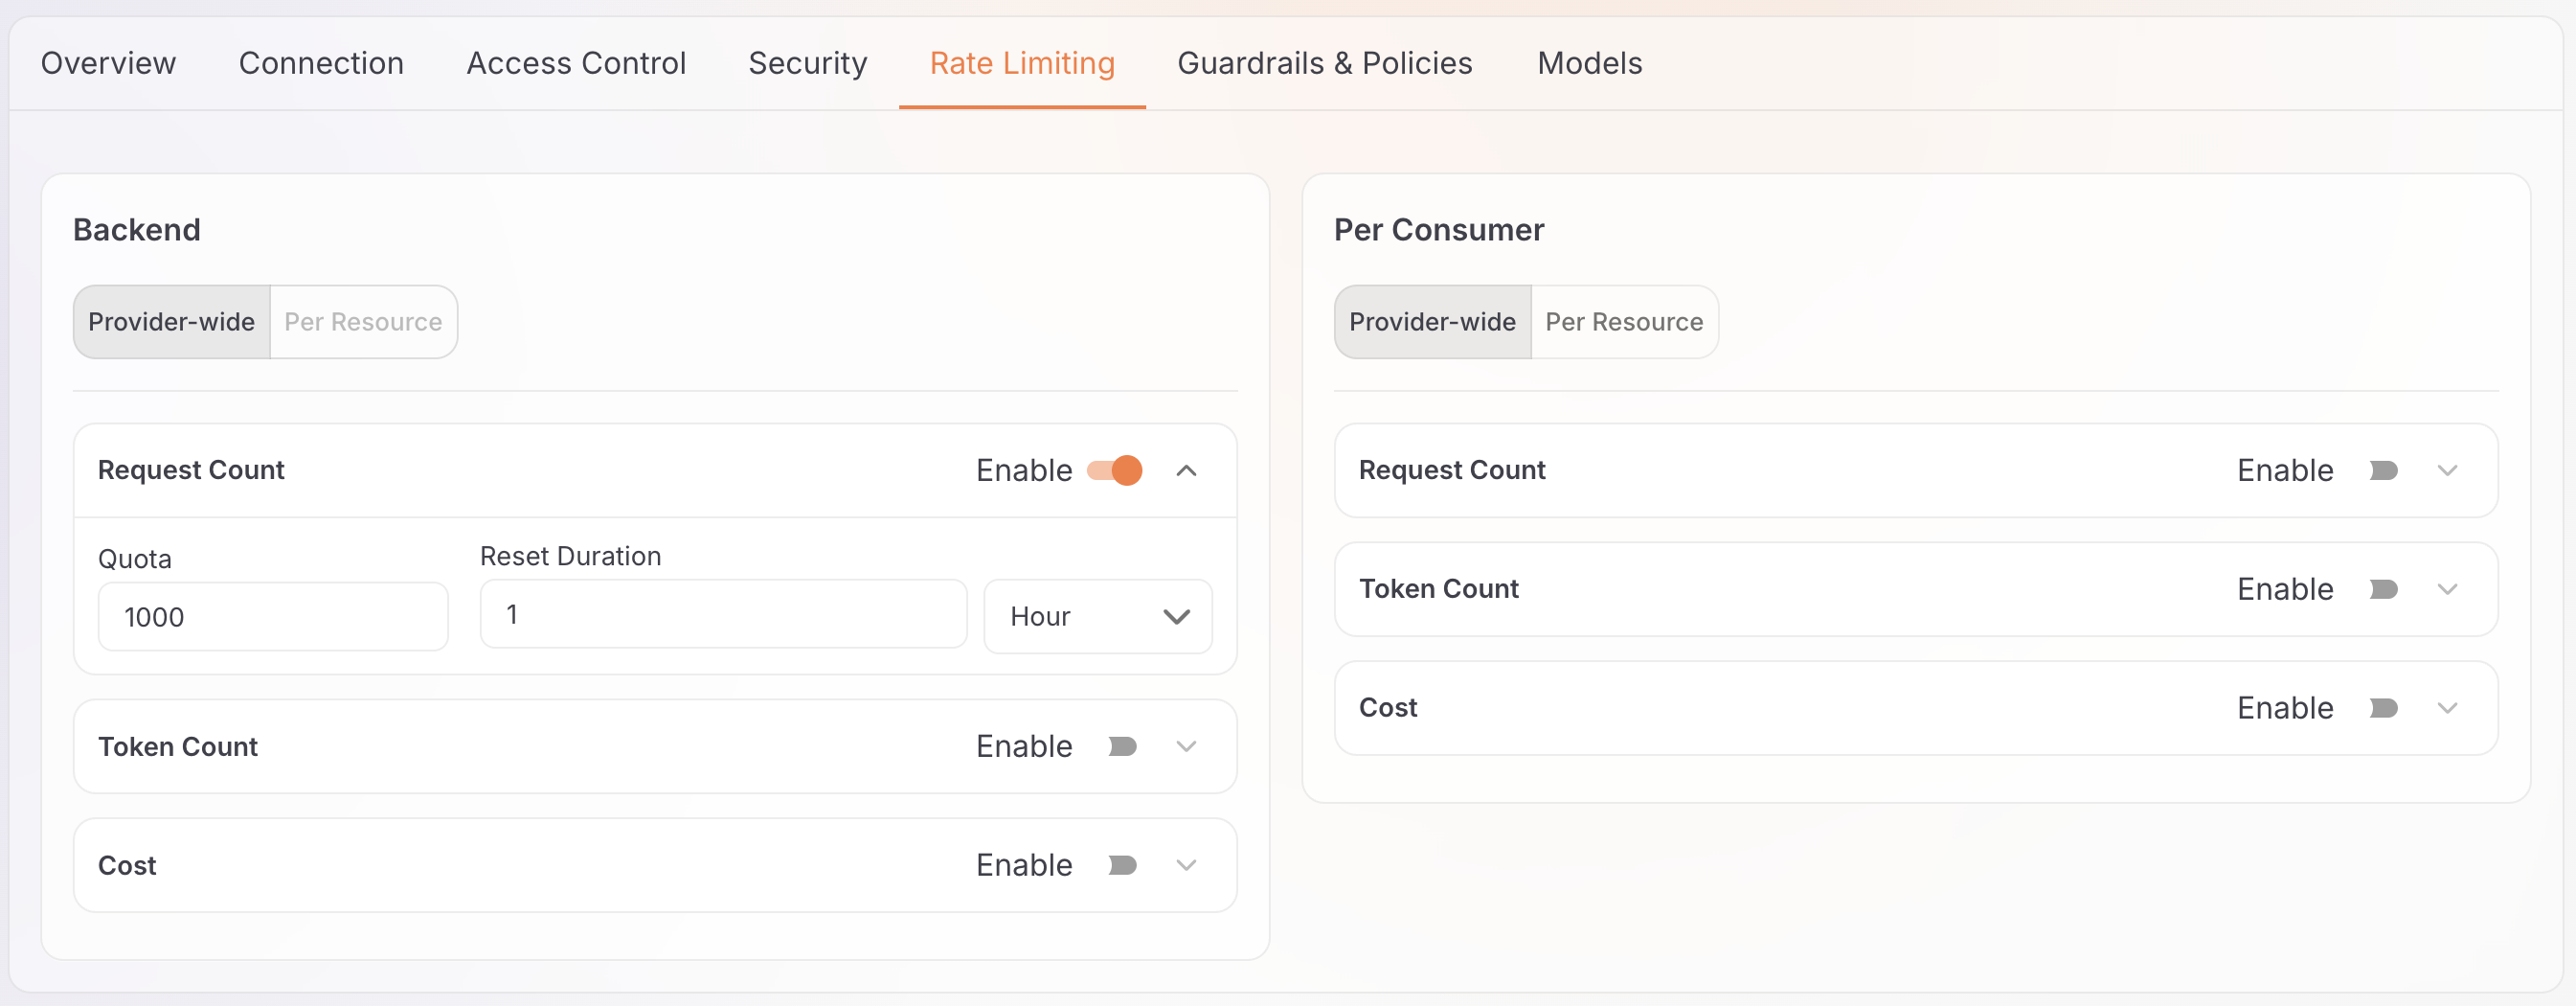
Configure rate limits in the Backend section, which controls requests from the gateway to the upstream LLM provider. Limiting that traffic protects your provider API credentials and caps total spend.
The Backend section supports two configuration modes:
- Provider-wide — A single limit applied across all API endpoints. The limit maintains one shared counter: traffic on any endpoint draws down the same allowance, so exhausting the limit via one endpoint rejects requests on all endpoints.
- Per Resource — Individual limits per API endpoint (for example, chat completions vs. embeddings). Each endpoint maintains its own independent counter.
The Backend section of the Rate Limiting tab presents both the Provider-wide and Per Resource modes:
Note
Provider-wide and Per Resource modes are mutually exclusive. Clear existing limits before switching modes.
Provider-wide limits are a hard ceiling
A provider-wide limit is evaluated before any per-resource policy and counts every request attempt — including requests that a stricter per-resource policy later rejects. When the shared allowance is exhausted, requests to every endpoint receive HTTP 429. See Policy scope: global or per resource for details.
Limit criteria
Configure either of these criteria, or both:
| Criterion | Description |
|---|---|
| Request Count | Maximum number of requests within the reset duration |
| Token Count | Maximum number of tokens (prompt plus completion) within the reset duration |
For each enabled criterion, set the Quota and Reset Duration (second, minute, or hour).
Provider-wide configuration
- Select Provider-wide in the Backend section.
- Enable Request Count, Token Count, or both.
- Enter the Quota and select the Reset Duration for each criterion.
- Click Save.
Per-resource configuration
- Select Per Resource in the Backend section.
- Expand Limit per Resource to set default limits for all endpoints:
- Enable the criteria and configure Quota and Reset Duration.
- To override limits for a specific endpoint, expand that resource row and configure it separately.
- Click Save.
Cost control best practices
Set conservative backend limits first to protect your provider credentials. Monitor actual usage via the Insights dashboard before increasing limits. Use Per Resource mode only when endpoints have significantly different usage patterns.
Learn more: Token-based rate limiting
Guardrails
Attach guardrails to enforce content safety, compliance, and quality standards. Attach a guardrail on a provider globally to all endpoints or at the resource level to specific endpoints. Either way, the guardrail affects every proxy that uses this provider.
View attached guardrails
The tab displays the guardrails attached to the provider:
- Guardrail name and type
- Configuration status and parameters
- Enable/disable toggles to activate or deactivate a guardrail
Add a guardrail
Attach a guardrail globally to all endpoints or at the resource level to one endpoint. A global guardrail runs on every request, whichever endpoint the request calls. A resource-level guardrail runs only on the endpoint you attach it to. If you configure both, the gateway evaluates the global guardrails first, then the resource-level ones. See Policy scope: global or per resource.
To add a global guardrail:
- In the Global Guardrails section, click + Add Guardrail.
- A sidebar opens showing available guardrail types.
- Select a guardrail and configure its settings:
- Fill in required parameters
- Expand Advanced Settings for additional options
- Click Add to attach it to the provider.
To add a resource-level guardrail:
- Find the resource you want to protect and expand its card.
- Click + Add Guardrail within that resource.
- Select and configure the guardrail (same process as global guardrails).
- Click Add to attach it to the resource.
Configure guardrails
You can't edit guardrail parameters in place. To change a guardrail's configuration, delete it and add it again with the updated settings.
To update a guardrail:
- Delete the existing guardrail.
- Click + Add Guardrail and re-add it with the updated configuration.
- Redeploy the provider to apply the changes.
Advanced settings
Each guardrail includes advanced configuration options such as custom thresholds, severity levels, and execution phases. Click Advanced Settings when adding a guardrail.
Production impact
Guardrail changes require a manual redeploy to take effect on deployed gateways. Test thoroughly in a non-production environment before enabling strict guardrails.
Learn more: Policies overview. For the full policy catalog, visit the Policy Hub.
Models
Configure which AI models are accessible through this provider.
Add and remove models
The Models tab displays a chip list of the models available through this provider. Each chip represents one model ID.
To add a model:
- Click Add model provider, select a provider from the list, and click Add to import its model catalog.
- Type or paste individual model IDs into the input field and press Enter to add them as chips.
- Click Save, then Deploy to Gateway to apply the change.
To remove a model:
- Click the remove icon on the model chip you want to remove.
- Click Save, then Deploy to Gateway to apply the change.
The gateway blocks any model that isn't in the chip list. An application that requests a removed model receives an error.
Lifecycle operations
Redeploy provider
Push configuration changes to deployed gateways.
When to redeploy:
- After updating connection settings
- After modifying rate limits or guardrails
- After adding or removing models
To redeploy:
- Click Deploy to Gateway (top right corner)
- Select the gateways to deploy to
- Review the changes summary
- Click Deploy
Deployment status
Monitor deployment progress in the notification panel. Changes take effect within seconds of successful deployment.
Delete provider
Permanently remove the provider and all its configurations.
Prerequisite
You can't delete a provider while an App LLM proxy uses it. Delete or reassign all dependent proxies before proceeding.
To delete:
- Navigate to AI Workspace > LLM Providers
- Find the provider in the list
- Click the Delete icon
- Review the warning and confirm deletion
Irreversible action
Deleting a provider:
- Removes it from all deployed gateways immediately
- Breaks applications consuming this provider
- Deletes all configuration, including guardrails, rate limits, and models
- Cannot be undone
Next steps
- Configure an App LLM proxy: configure and deploy specialized proxy endpoints for GenAI applications or agents using your provider
- Policies overview: explore all available guardrails and policies