Private key JWT client authentication
Private Key JWT Client Authentication is a client authentication method for confidential clients when requesting access tokens from the authorization server. With this method, a client registers its public key with the authorization server and proves its identity by signing a JWT using the corresponding private key. Only clients that can present a valid signed JWT are successfully authenticated.
To use this authentication method, the token request must include the client_assertion_type parameter set to urn:ietf:params:oauth:client-assertion-type:jwt-bearer, along with the signed JWT provided as the client_assertion parameter.
Note
See the list of client authentication methods in the OIDC specification.
Follow the steps given below to implement private key JWT client authentication.
Register the client app in WSO2 Identity Platform
-
Sign into the WSO2 Identity Platform Console
-
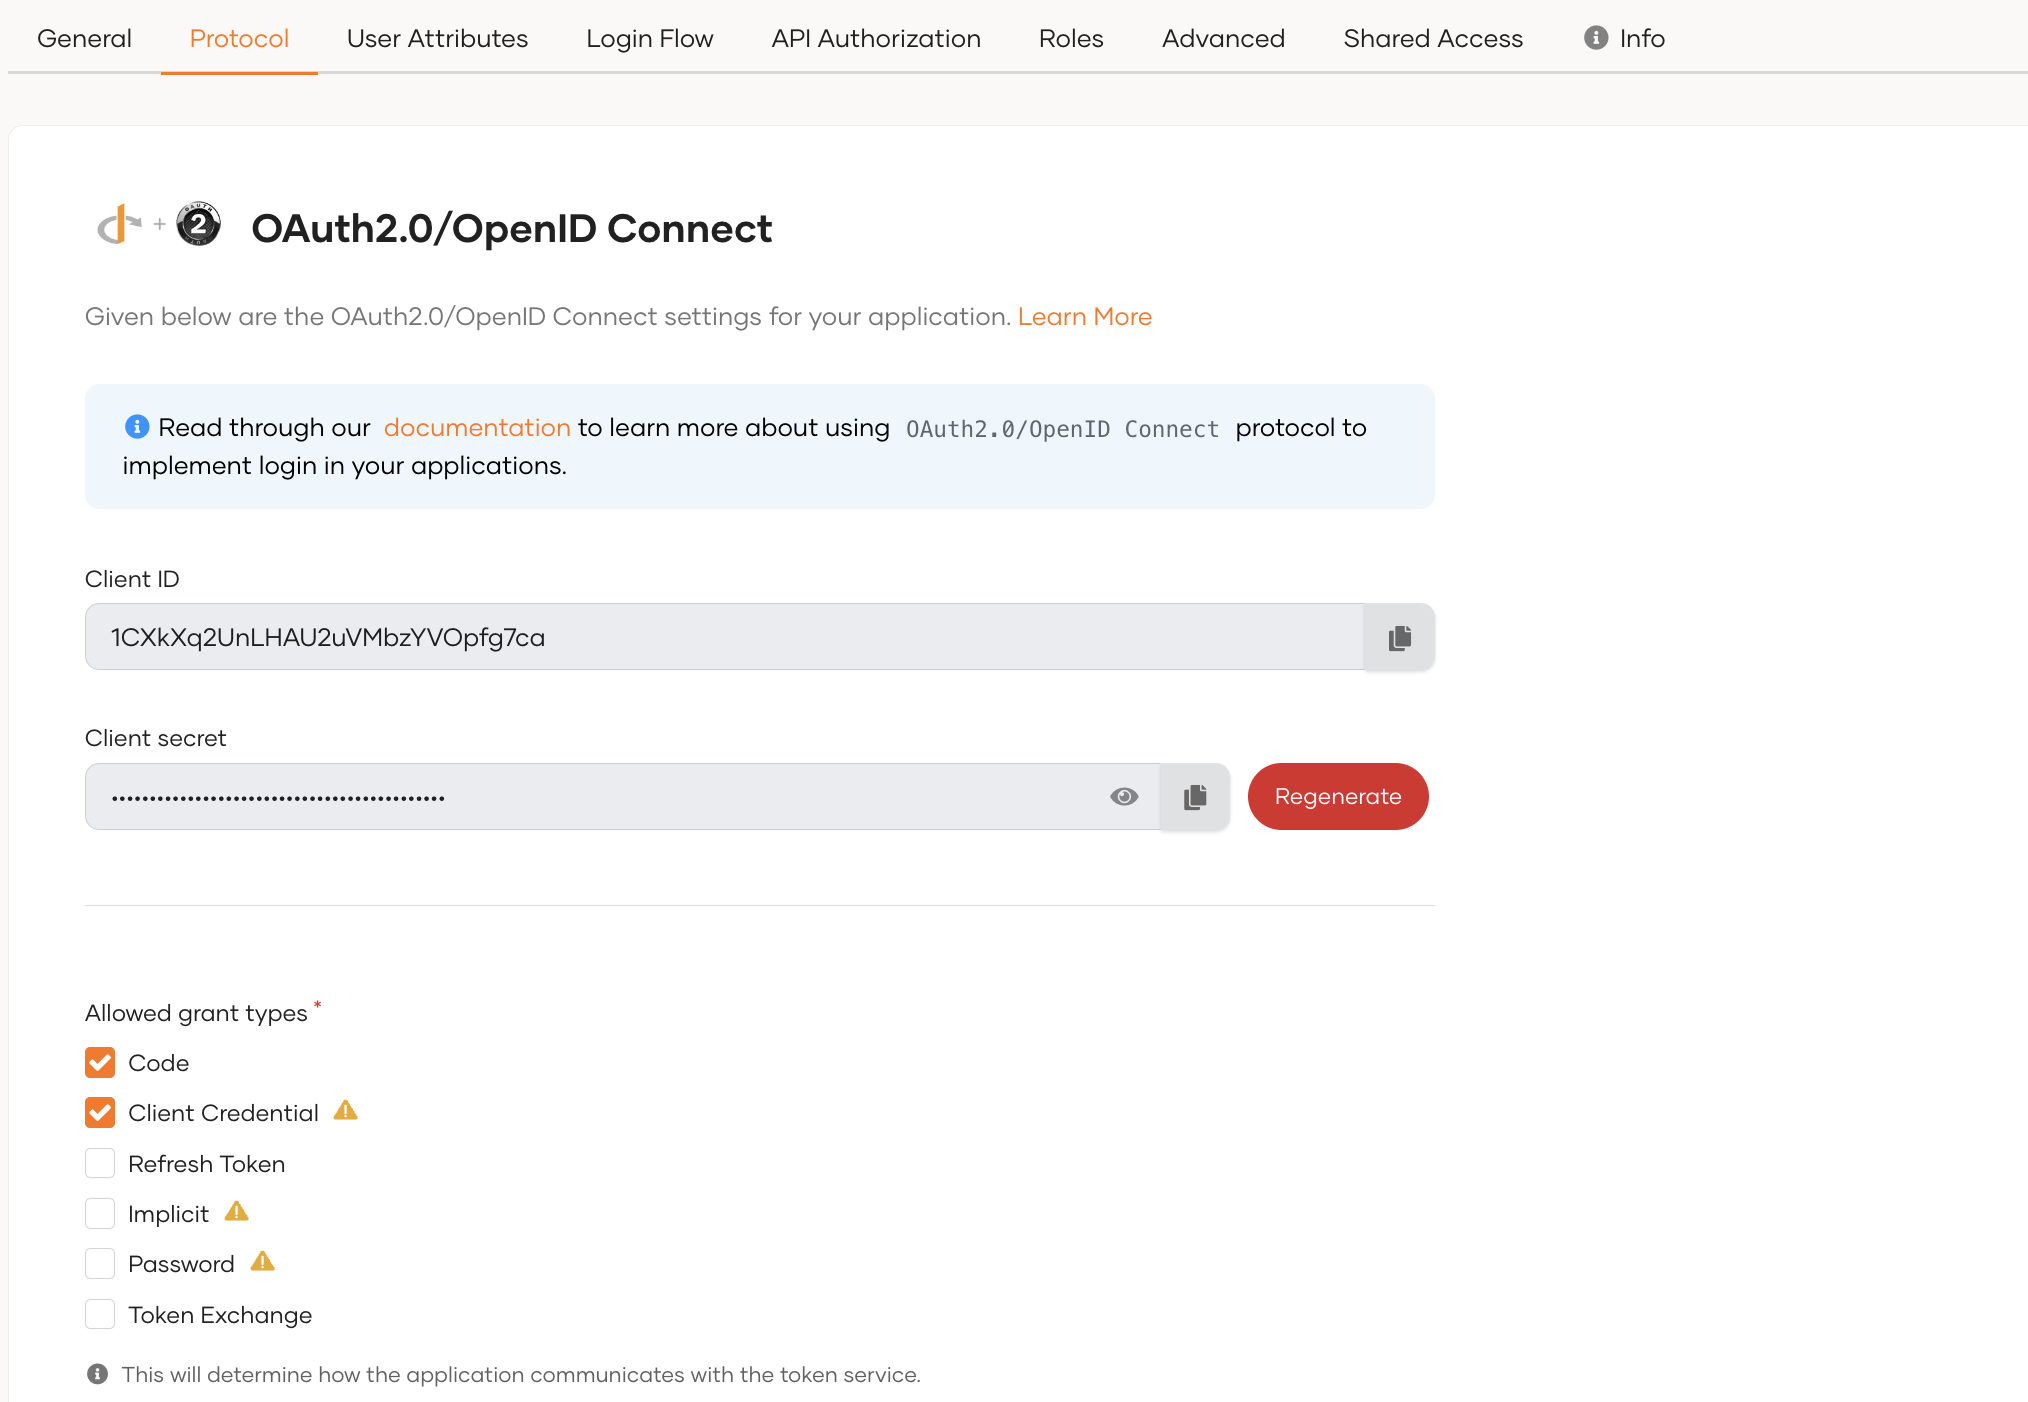
Create an OIDC application:
-
Go to the Protocol tab of the new application and configure the required grant type.
-
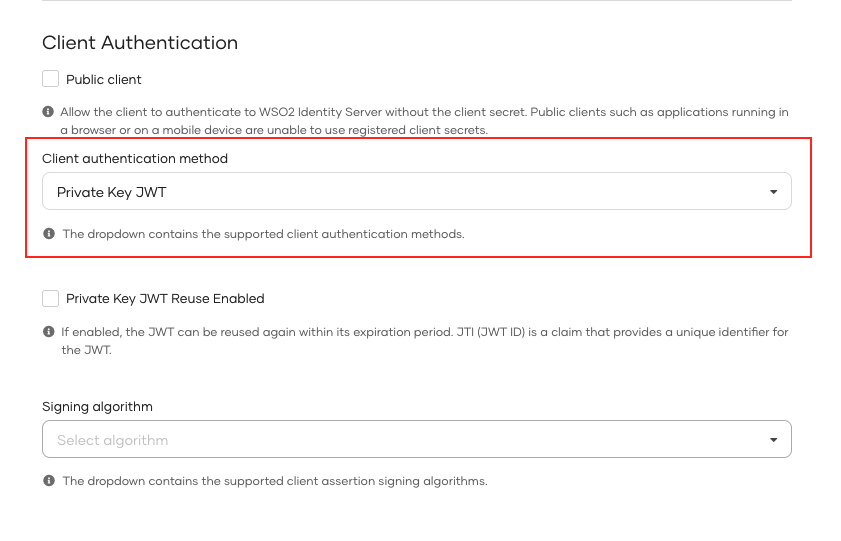
In the Protocol tab, go to the Client Authentication section and under Client authentication method, select Private Key JWT from the dropdown.
Prepare the private key and public key
Generate a public key and private key for the client application. Follow the steps given below.
-
Open a terminal and run the following
keytoolcommand to create a client keystore. Replace<Client_ID>with the client ID of the application created in the previous step, and replace<keystore_name>with a name of your choice for the keystore. -
Convert the
.jkskeystore toPKCS#12format. -
Export the public key from the
.p12keystore. -
Export the private key from the
.p12keystore.
Upload the public key to WSO2 Identity Platform
Go to the Certificate section in the Protocol tab of your application registered in WSO2 Identity Platform and add the public key certificate of your client application.
Note
See the instructions on adding certificates to applications.
Prepare the JWT payload
Prepare the JSON payload required by the authorization server for client authentication. Given below is a sample payload with only the required data. The complete list of required and optional claims that can be used is defined in the OpenID Connect specification.
Note
Note that the audience (aud) is the token endpoint URL of the authorization server, and the issuer (iss) and the subject (sub) is the client ID generated for your application by the authorization server in the previous step.
{
"iss": "<Client_ID>",
"sub": "<Client_ID>",
"exp": 1643650350,
"iat": 1643650346,
"jti": "10003",
"aud": "https://api.asgardeo.io/t/{organization_name}/oauth2/token"
}
Once you have created the payload, generate a signature for it using the client application's private key created in an above step. The resulting JWT is known as the client_assertion.
IAT=$(date +%s)
EXP=$((IAT + 300))
JTI=$(uuidgen)

HEADER=$(echo -n '{"alg":"RS256","typ":"JWT"}' \
  | openssl base64 -e -A | tr '+/' '-_' | tr -d '=')

PAYLOAD=$(cat <<EOF | openssl base64 -e -A | tr '+/' '-_' | tr -d '='
{
  "iss": "<client_id>",
  "sub": "<client_id>",
  "exp": $EXP,
  "iat": $IAT,
  "jti": "$JTI",
  "aud": "https://api.asgardeo.io/t/{organization_name}/oauth2/token"
}
EOF
)

SIGNATURE=$(echo -n "$HEADER.$PAYLOAD" \
  | openssl dgst -sha256 -sign client.key \
  | openssl base64 -e -A | tr '+/' '-_' | tr -d '=')

CLIENT_ASSERTION="$HEADER.$PAYLOAD.$SIGNATURE"

echo "$CLIENT_ASSERTION"
Get the access token
-
Send the JWT and the signature in the token request to the authorization server.
Warning
Send the
client_assertion(and the client secret, if you use theclient_secret_basicorclient_secret_postmethod) as form parameters in the body of thePOSTrequest to the token endpoint. Never send these credentials in custom HTTP headers or as URL query parameters, where they can leak through server logs, browser history, and theRefererheader. -
The authorization server verifies the JWT using the public key.
- Authorization server extracts the signature using the public key and authenticates the client.
- The access token is granted if the client is successfully authenticated.
Let's look at how this works for different grant types.
Authorization code flow
If you are implementing the authorization code flow, you have enabled code as the grant type when registering your application. You can now send the following requests to get the access token.
-
First, invoke the authorization endpoint in WSO2 Identity Platform and get an authorization code.
-
Invoke the token endpoint and get the access token.
curl --location --request POST 'https://api.asgardeo.io/t/{organization_name}/oauth2/token' \
--header 'Content-Type: application/x-www-form-urlencoded' \
--data-urlencode 'code={authorization_code}' \
--data-urlencode 'grant_type=authorization_code' \
--data-urlencode 'client_assertion_type=urn:ietf:params:oauth:client-assertion-type:jwt-bearer'\
--data-urlencode 'client_assertion={jwt_assertion}' \
--data-urlencode 'redirect_uri={redirect_uri}'
Be sure to replace the following values in the request:
{{ organization_name }}Name of the organization that you are accessing. {authorization_code}The authorization code that was received by invoking the authorization endpoint. {jwt_assertion}The JWT assertion that was created for your client application. {redirect_uri}The callback URL of your client application.
Client credential flow
If you are implementing the client credentials flow, you have enabled client credentials as the grant type when registering your application. You can now send the following requests to get the access token.
curl --location --request POST 'https://api.asgardeo.io/t/{organization_name}/oauth2/token' \
--header 'Content-Type: application/x-www-form-urlencoded' \
--data-urlencode 'grant_type=client_credentials' \
--data-urlencode 'client_assertion_type=urn:ietf:params:oauth:client-assertion-type:jwt-bearer' \
--data-urlencode 'client_assertion={jwt_assertion}’
Be sure to replace the following values in the request:
{{ organization_name }}
|
Name of the organization that you are accessing. |
|---|---|
{jwt_assertion}
|
The JWT assertion that was created for your client application. |
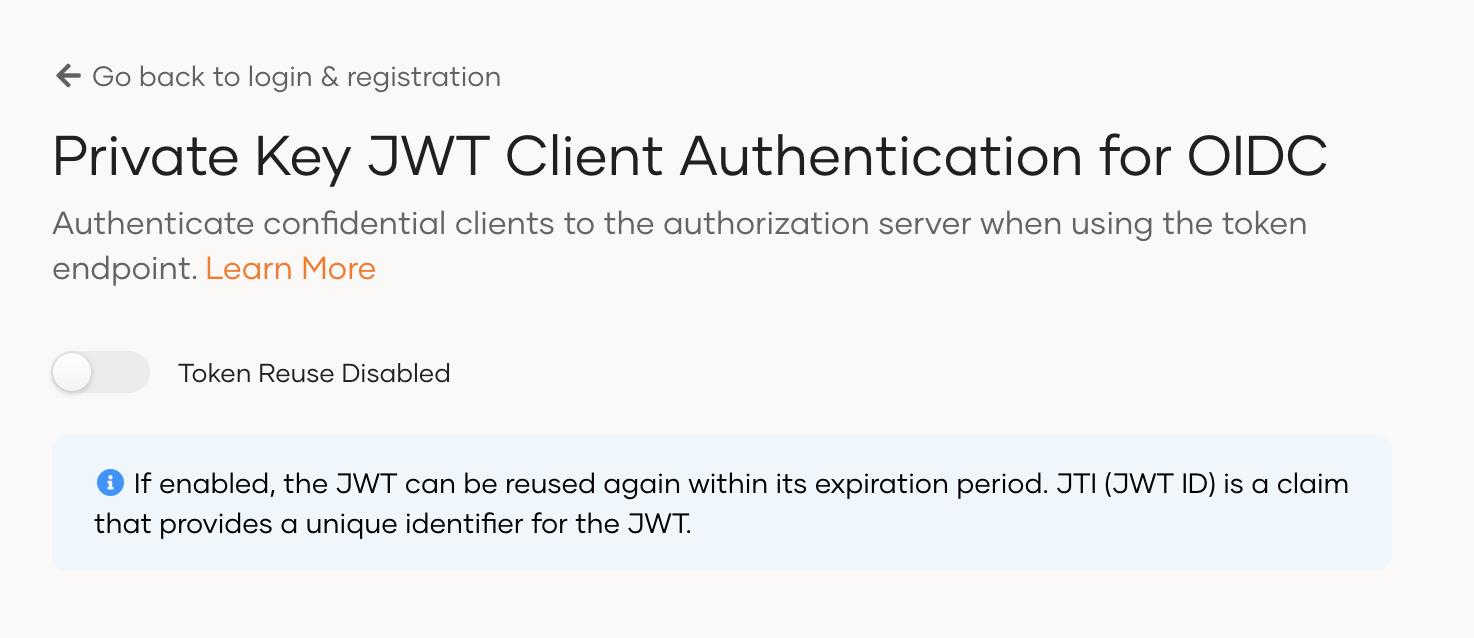
Reusing the access tokens obtained through private key JWT authentication (optional)
The jti (JWT ID) claim is a unique identifier included in the JWT token, which controls the reuse of the access token.
By default, Private key JWT reuse is disabled for an application which uses Private Key JWT as the Client authentication method. If you enable token reuse, the jti can be reused within its expiration period.
To enable Private key JWT reuse for an application in WSO2 Identity Platform,
- Go to the Protocol tab of the selected application.
-
Click on the Private Key JWT Reuse Enabled checkbox under the Client authentication method.