Build a Customer Care Agent with MCP
What you'll build
A customer care agent that connects to a ShopEasy MCP server and answers product availability, order status, and return questions over a chat API.
This tutorial shows how to build an agent that consumes an external MCP server using ai:McpToolKit. You do not build the MCP server here. It is provided as a running service. Your job is to wire the agent to it, write the system prompt, and expose a chat endpoint.
The agent receives customer messages over HTTP, reasons about which tool to call, invokes the MCP server, and returns a natural language answer.
- Model Providers for LLMs
- The ShopEasy MCP server running locally. Clone the repo and follow its README to start it: github.com/wso2/integration-samples.
- Visual Designer
- Ballerina Code
Step 1: Create the agent
- Open WSO2 Integrator and create or select your project.
- Select Add Artifact.
- Under AI Integration, select AI Chat Agent.
- Set the Name to
Customer Care Agentand select Create.
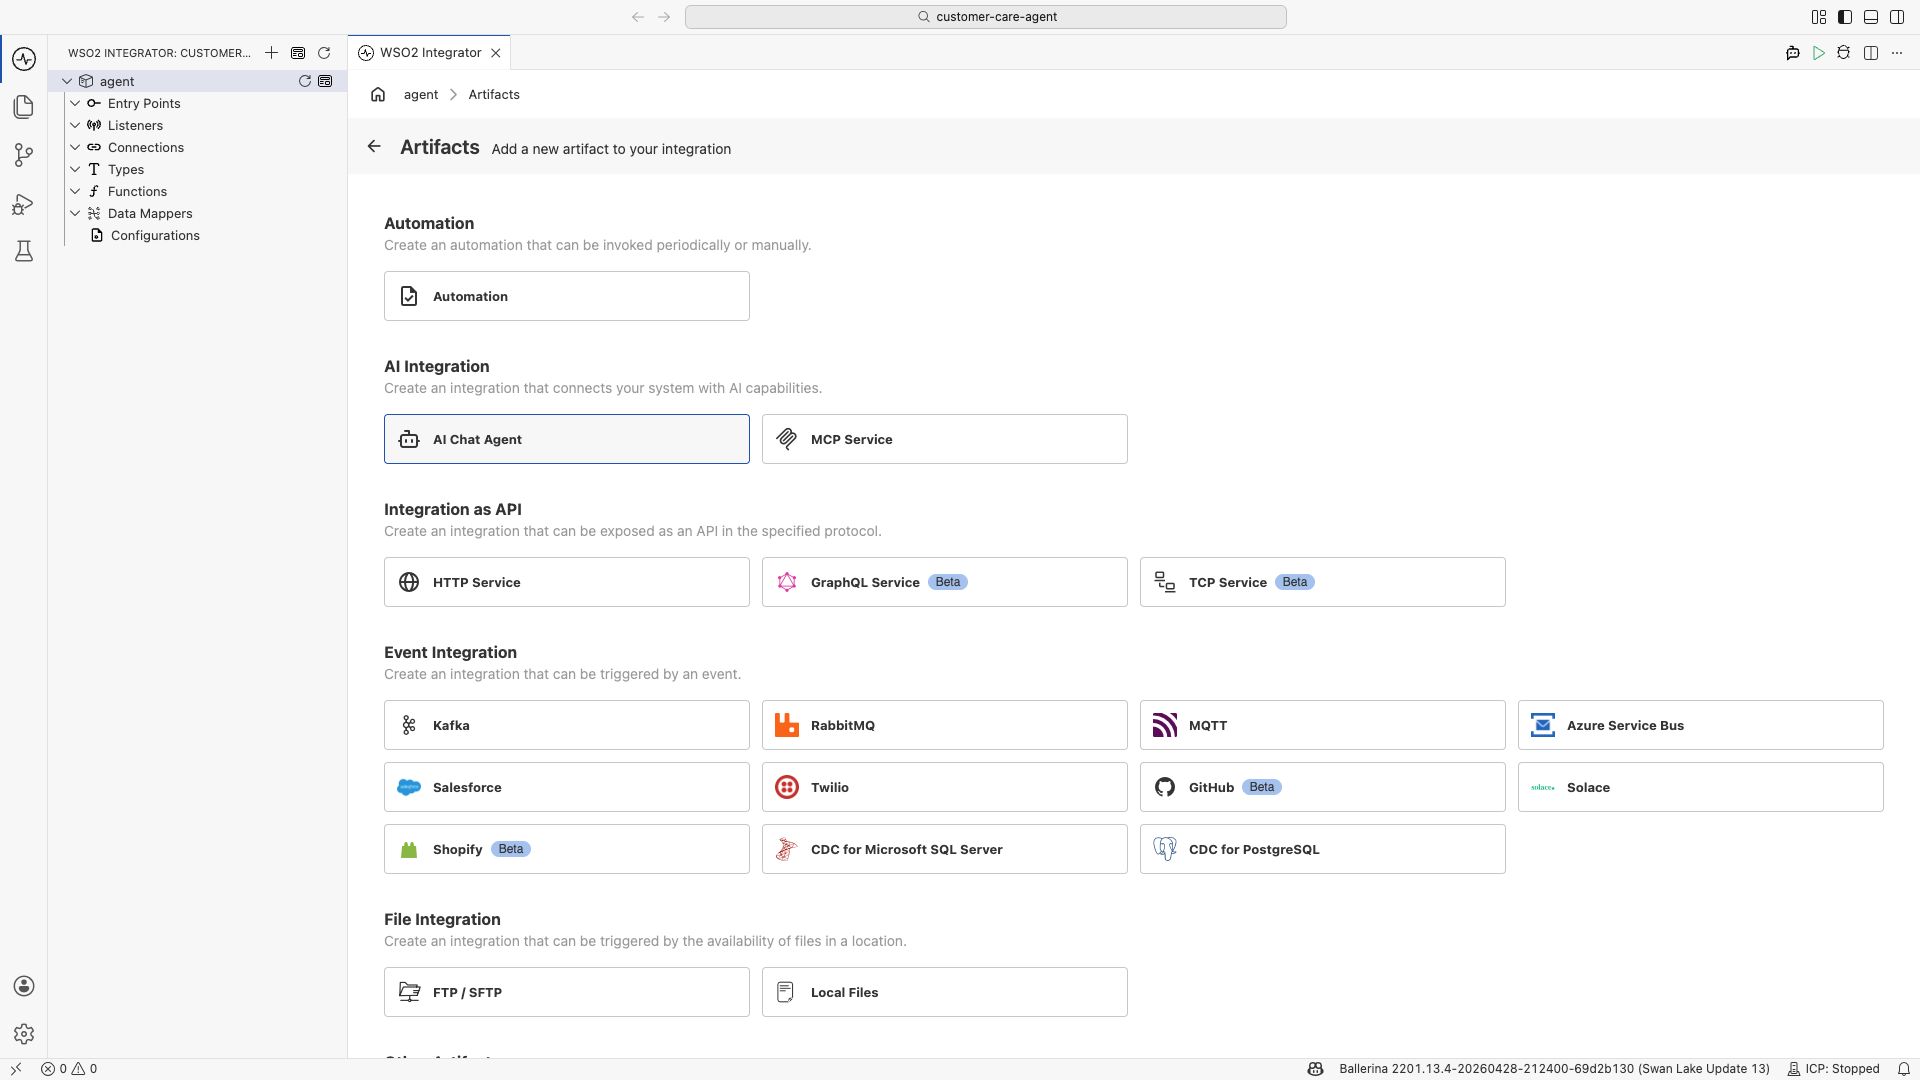
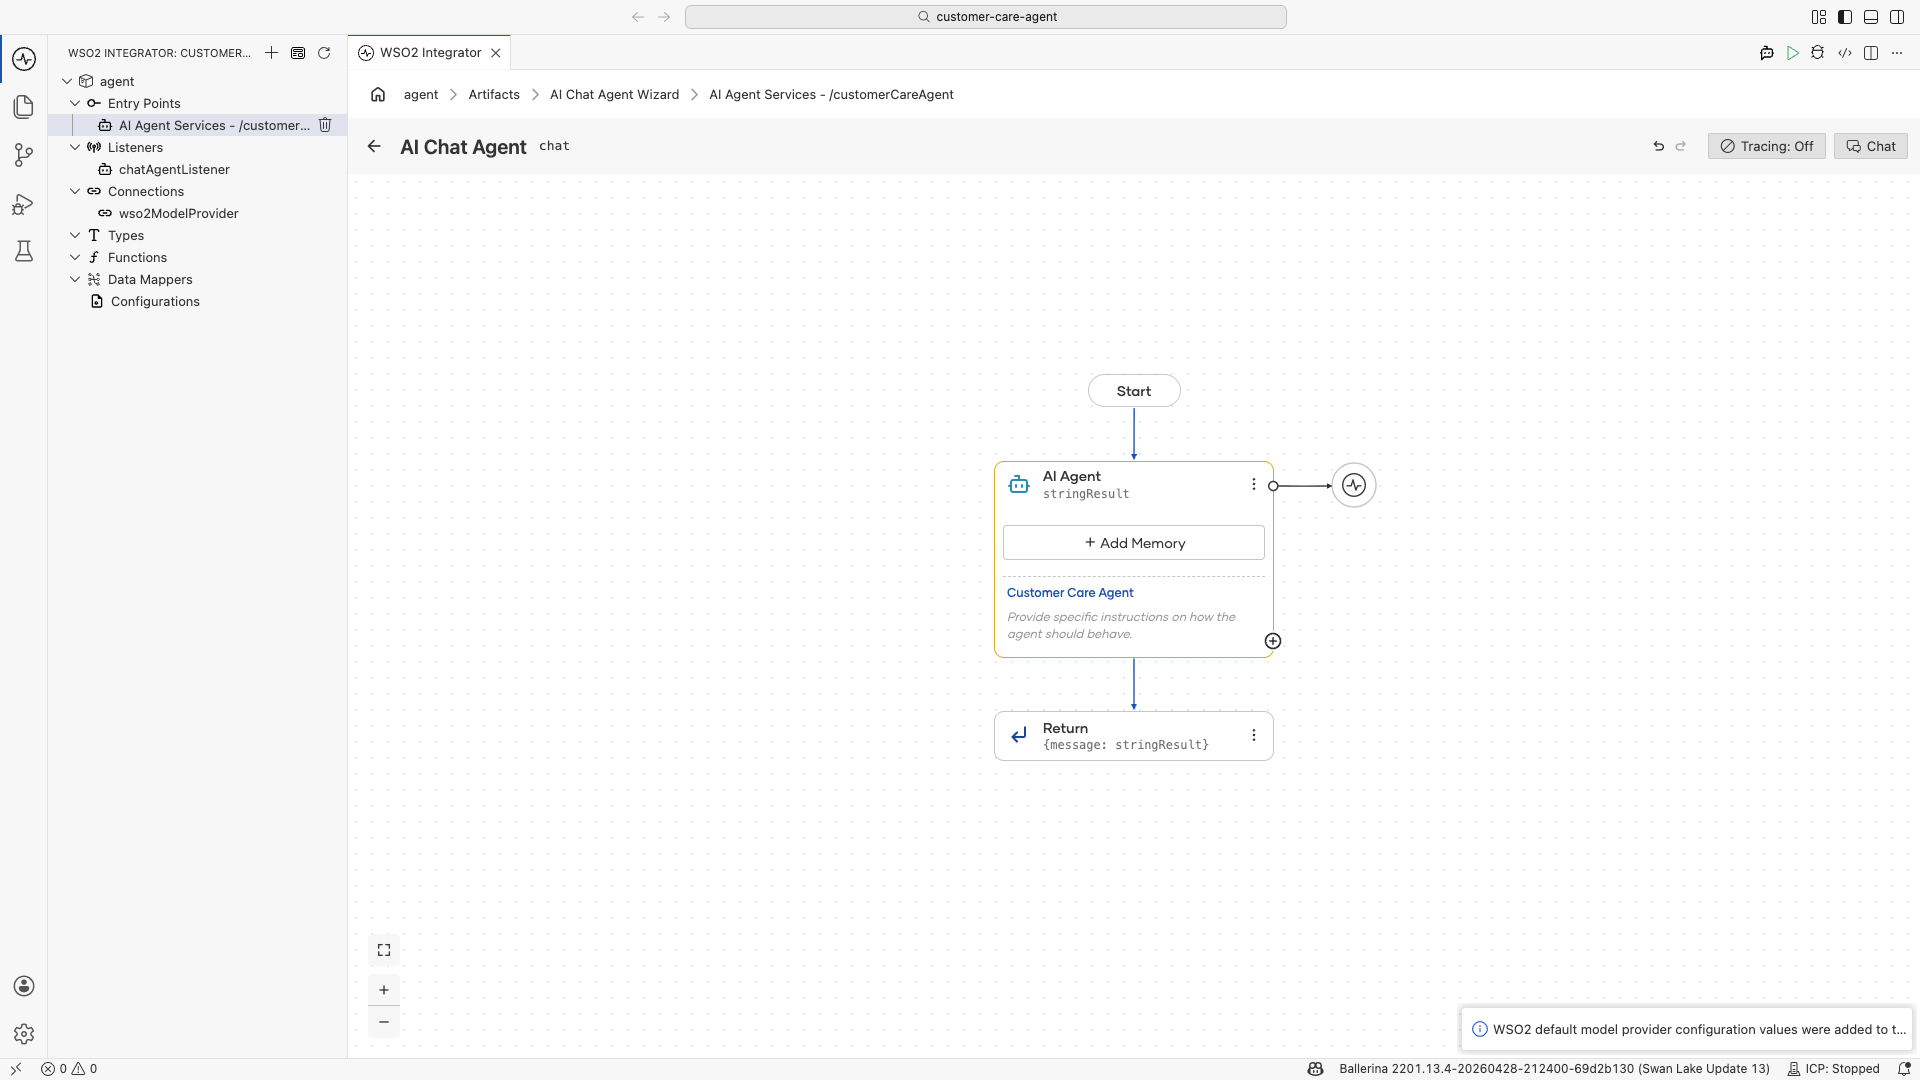
The visual designer opens with the agent flow: a Start node, an AI Agent node, and a Return node.
Step 2: Configure the agent
2.1 Open the agent configuration
Select the AI Agent node to open the configuration panel on the right.
2.2 Write the system prompt
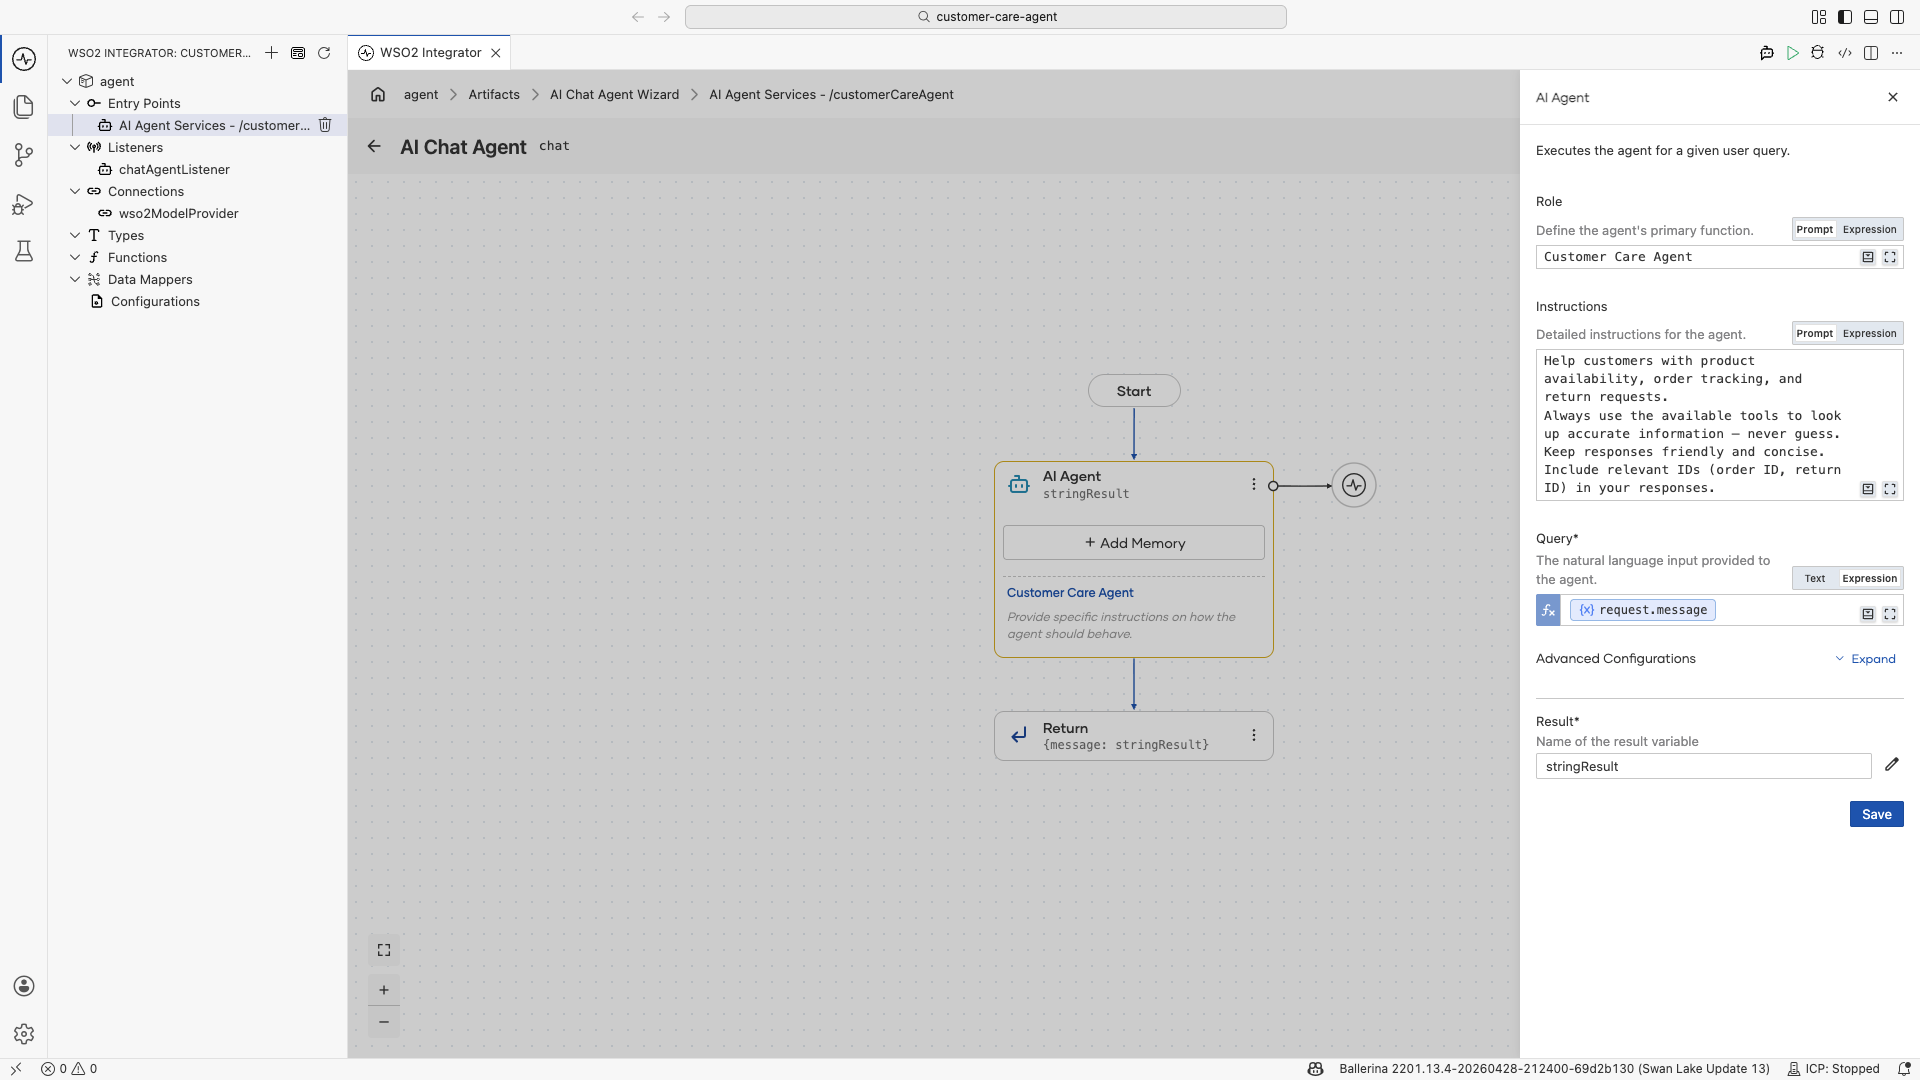
- Set the Role to
Customer Support Agent. - Paste the following into Instructions:
You are a helpful customer support agent for ShopEasy, an online retailer.
Help customers with product availability, order tracking, and return requests.
Always use the available tools to look up accurate information — never guess.
Keep responses friendly and concise. Include relevant IDs (order ID, return ID) in your responses.
2.3 Set advanced configurations
- Expand Advanced Configurations.
- Set Maximum Iterations to
10. - Select Save.
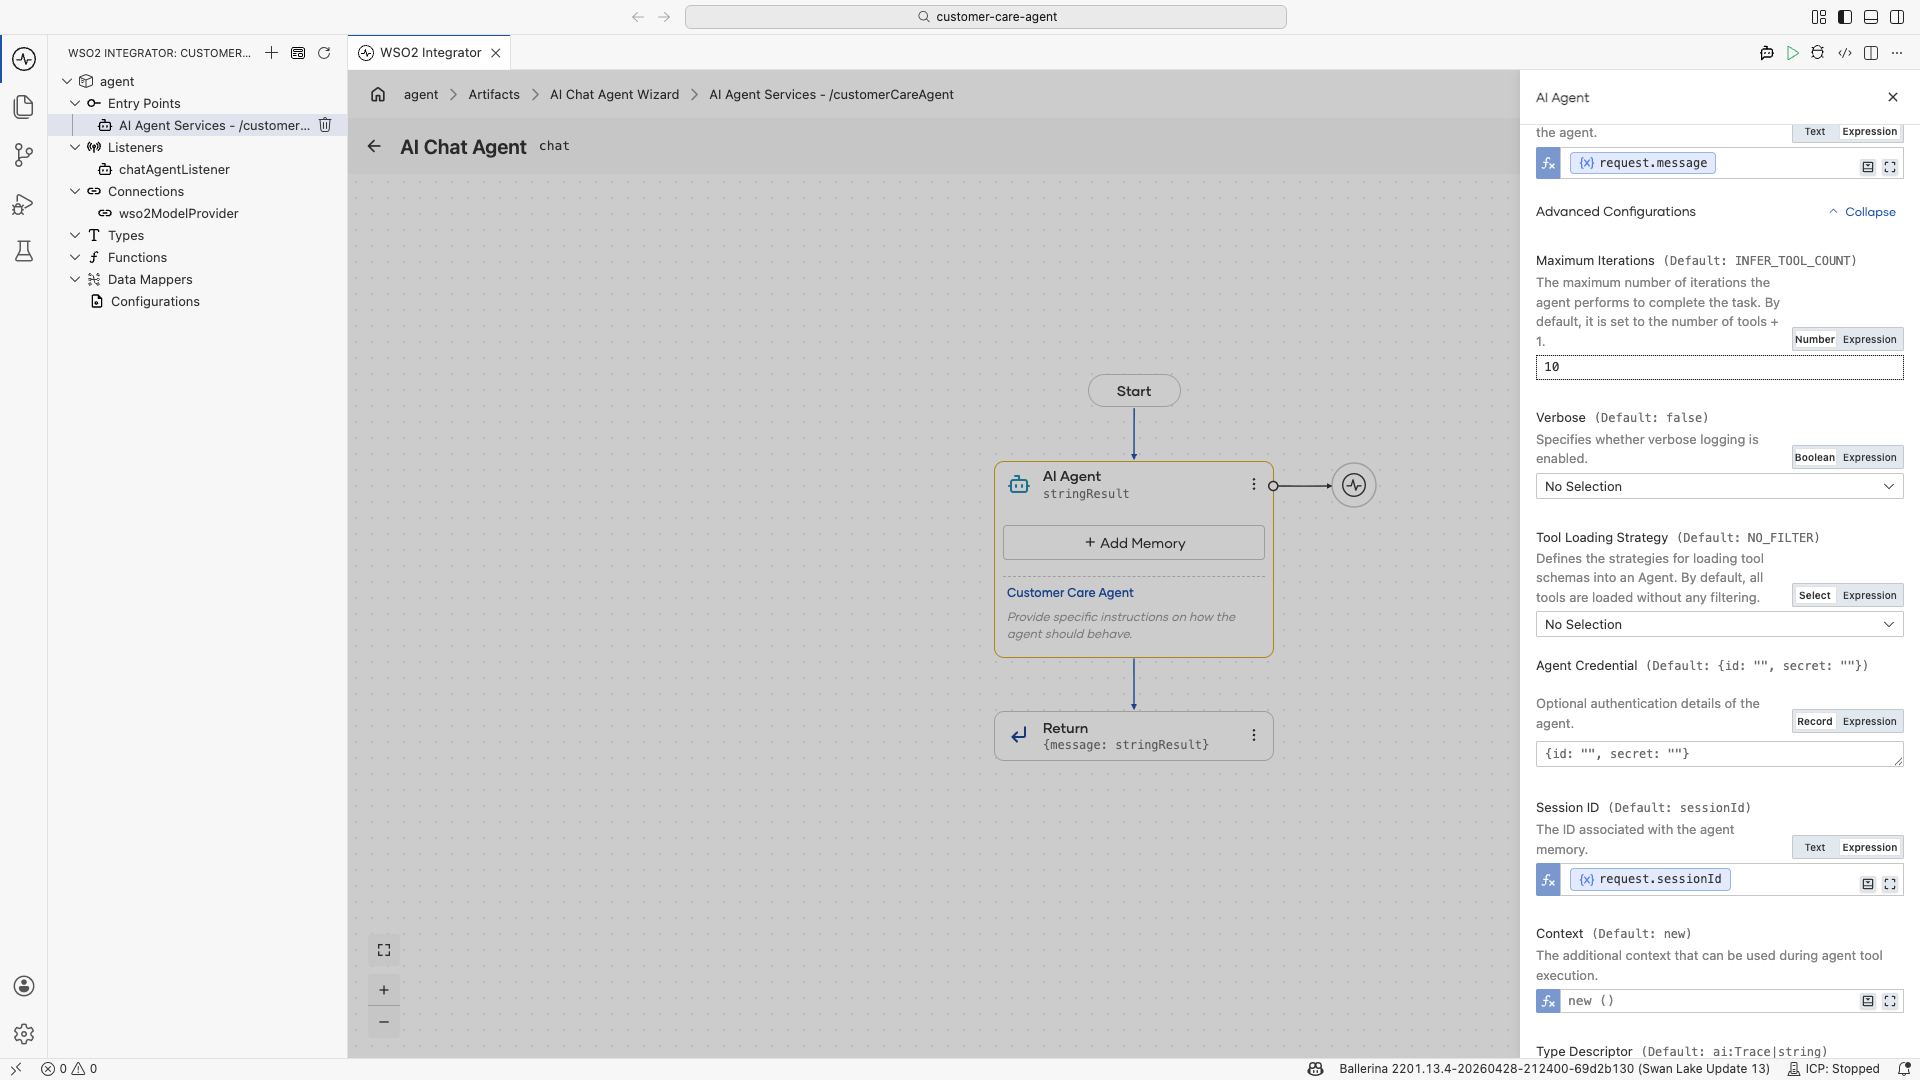
The default is based on the number of toolkit objects, not individual tools. With one MCP toolkit wrapping three tools, the default is 2, which is too low for multi-step queries. Setting it to 10 gives the agent enough room to reason, call a tool, and respond.
Step 3: Add the MCP server as a tool
3.1 Select the tool type
- Select + on the AI Agent node.
- Select Use MCP Server.
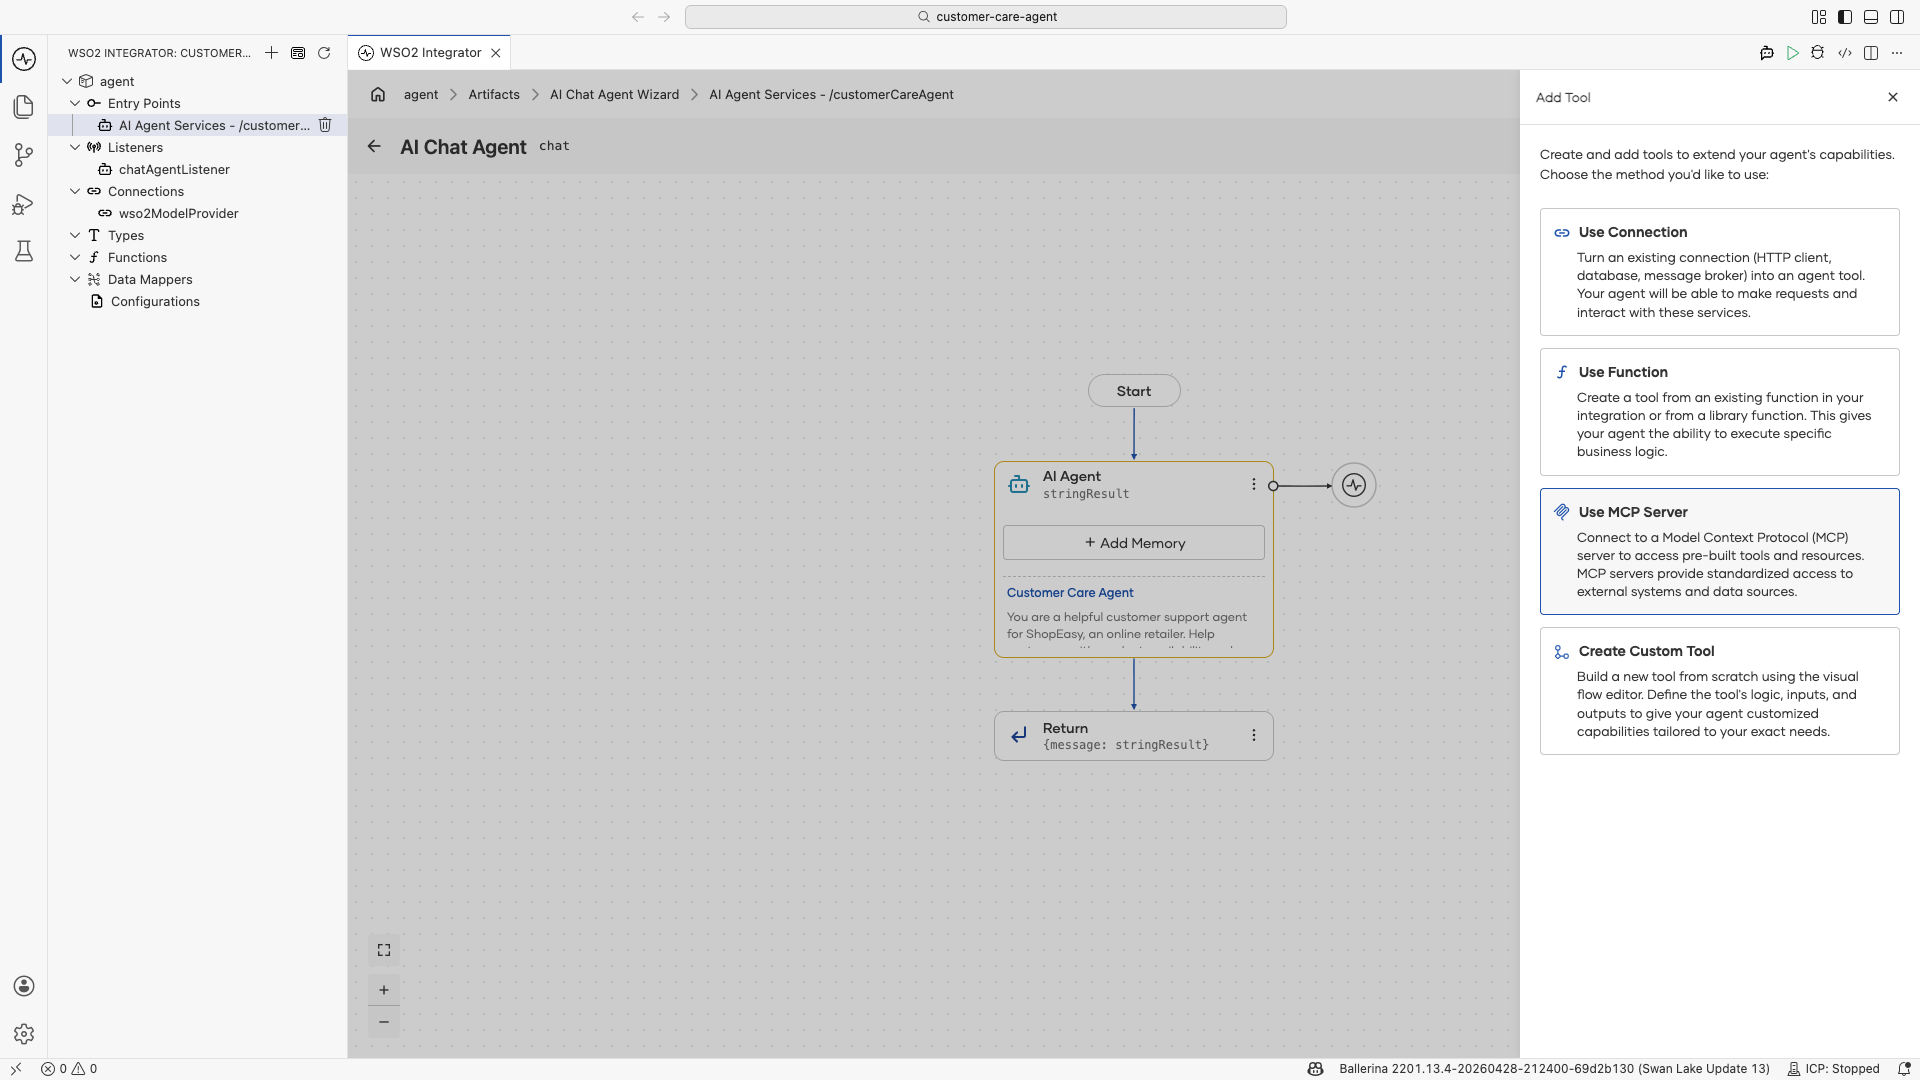
3.2 Configure the server URL
- Set Server URL to
http://localhost:8080/mcp. - Leave Requires Authentication off.
- Select Save.

The MCP toolkit appears as aiMcpbasetoolkit attached to the agent node in the visual designer. The agent will discover the available tools from the server at startup.
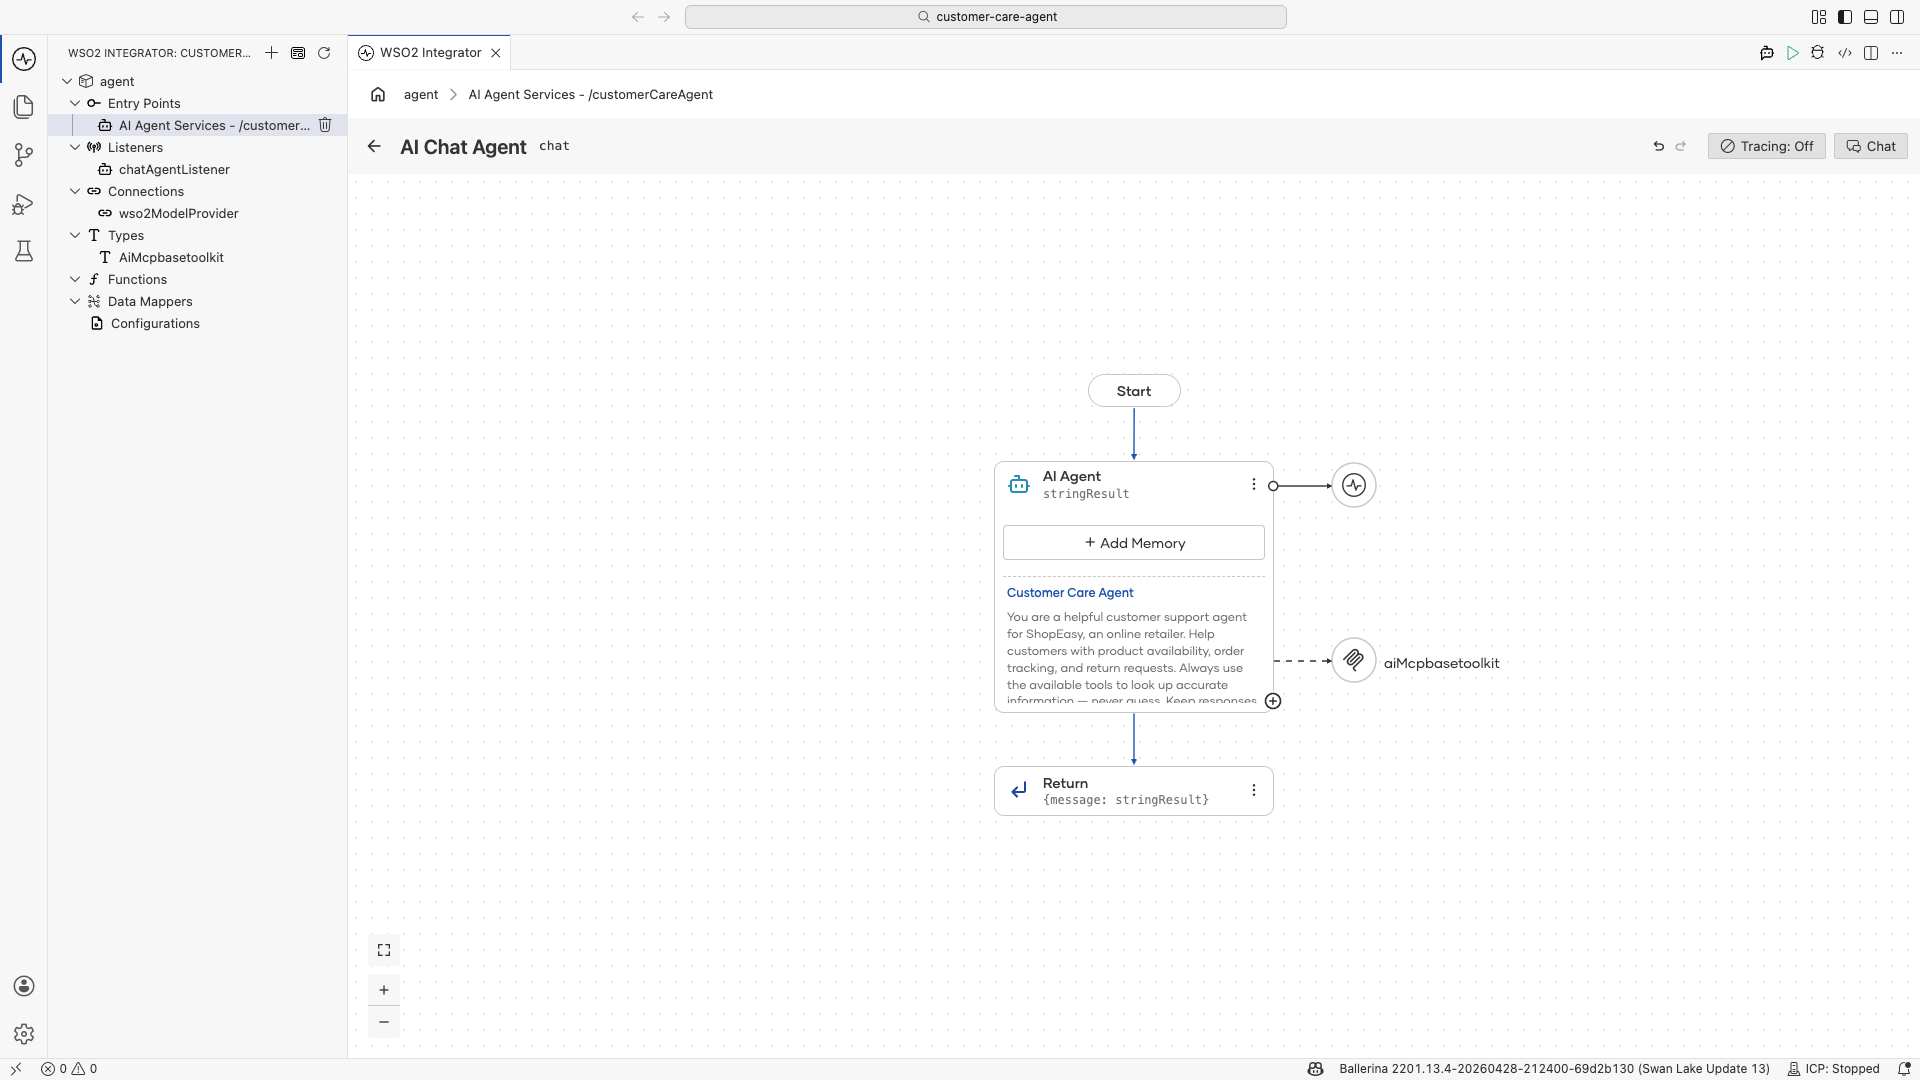
Step 4: Run and test
Make sure the ShopEasy MCP server is running, then click the Play button in the top-right corner of the WSO2 Integrator IDE to start the agent.
Once the agent is running, click Chat in the toolbar (next to Tracing: Off) to open the built-in chat panel. Type your message in the input field and press Enter to send it.
Try the following messages to exercise all three tools:
- "Do you have any wireless headphones in stock?"
- "What is the status of my order ORD-042?"
- "I want to return ORD-001. The item arrived damaged."
For more detail on using the chat panel, see Try-It experiences.
connections.bal: model provider and MCP toolkit connection:
import ballerina/ai;

final ai:Wso2ModelProvider wso2ModelProvider = check ai:getDefaultModelProvider();

final AiMcpbasetoolkit aiMcpbasetoolkit = check new ("http://localhost:8080/mcp");
agents.bal: agent definition:
import ballerina/ai;
import ballerina/mcp;

final ai:Agent customerCareAgent = check new (
    systemPrompt = {
        role: string `Customer Care Agent`,
        instructions: string `You are a helpful customer support agent for ShopEasy, an online retailer.
Help customers with product availability, order tracking, and return requests.
Always use the available tools to look up accurate information. Never guess.
Keep responses friendly and concise. Include relevant IDs (order ID, return ID) in your responses.`
    }, maxIter = 10, model = wso2ModelProvider, tools = [aiMcpbasetoolkit]
);

isolated class AiMcpbasetoolkit {
    *ai:McpBaseToolKit;
    private final mcp:StreamableHttpClient mcpClient;
    private final readonly & ai:ToolConfig[] tools;

    public isolated function init(string serverUrl, mcp:Implementation info = {name: "MCP", version: "1.0.0"},
            *mcp:StreamableHttpClientTransportConfig config) returns ai:Error? {
        do {
            self.mcpClient = check new mcp:StreamableHttpClient(serverUrl, config);
            self.tools = check ai:getPermittedMcpToolConfigs(self.mcpClient, info, self.callTool).cloneReadOnly();
        } on fail error e {
            return error ai:Error("Failed to initialize MCP toolkit", e);
        }
    }

    public isolated function getTools() returns ai:ToolConfig[] => self.tools;

    @ai:AgentTool
    public isolated function callTool(mcp:CallToolParams params) returns mcp:CallToolResult|error {
        return self.mcpClient->callTool(params);
    }
}
main.bal: HTTP chat service:
import ballerina/ai;
import ballerina/http;

listener ai:Listener chatAgentListener = new (listenOn = check http:getDefaultListener());

service /customerCareAgent on chatAgentListener {
    resource function post chat(@http:Payload ai:ChatReqMessage request) returns ai:ChatRespMessage|error {
        string stringResult = check customerCareAgent.run(request.message, request.sessionId);
        return {message: stringResult};
    }
}
To run and test the agent, follow the same steps in the Visual Designer tab under Step 4: Run and test.
What you built
- Connected an agent to a live MCP server using
ai:McpToolKit - The agent dynamically discovered three tools (
searchProducts,getOrderStatus,submitReturnRequest) at startup with no hardcoded tool definitions - Exposed the agent as an HTTP chat service with session-scoped memory
What's next
- Exposing a service as an MCP server — Build your own MCP server like the one used in this tutorial
- Consuming MCP from an agent — Deeper reference for
ai:McpToolKitoptions - Adding memory to an agent — Persist conversation history across sessions
- AI agent observability — Trace tool calls and monitor agent performance