Email Generator with Direct LLM
This tutorial walks through building an HTTP service that generates professional emails using an LLM. It's a complete, end-to-end scenario that exercises the Direct LLM Calls feature surface.
By the end you will have a POST /emails/generate endpoint that takes recipient details and a meeting intent, and returns a fully written, structured email, subject and body, produced by an LLM.
What you'll build
- Create the HTTP service with typed request and response payloads.
- Add a model provider as the connection to the LLM.
- Add a
generatenode with a prompt that writes the email. - Bind the response to the structured response type.
- Run and test the service end to end.
1. Create the service
Step 1.1: Create an HTTP service
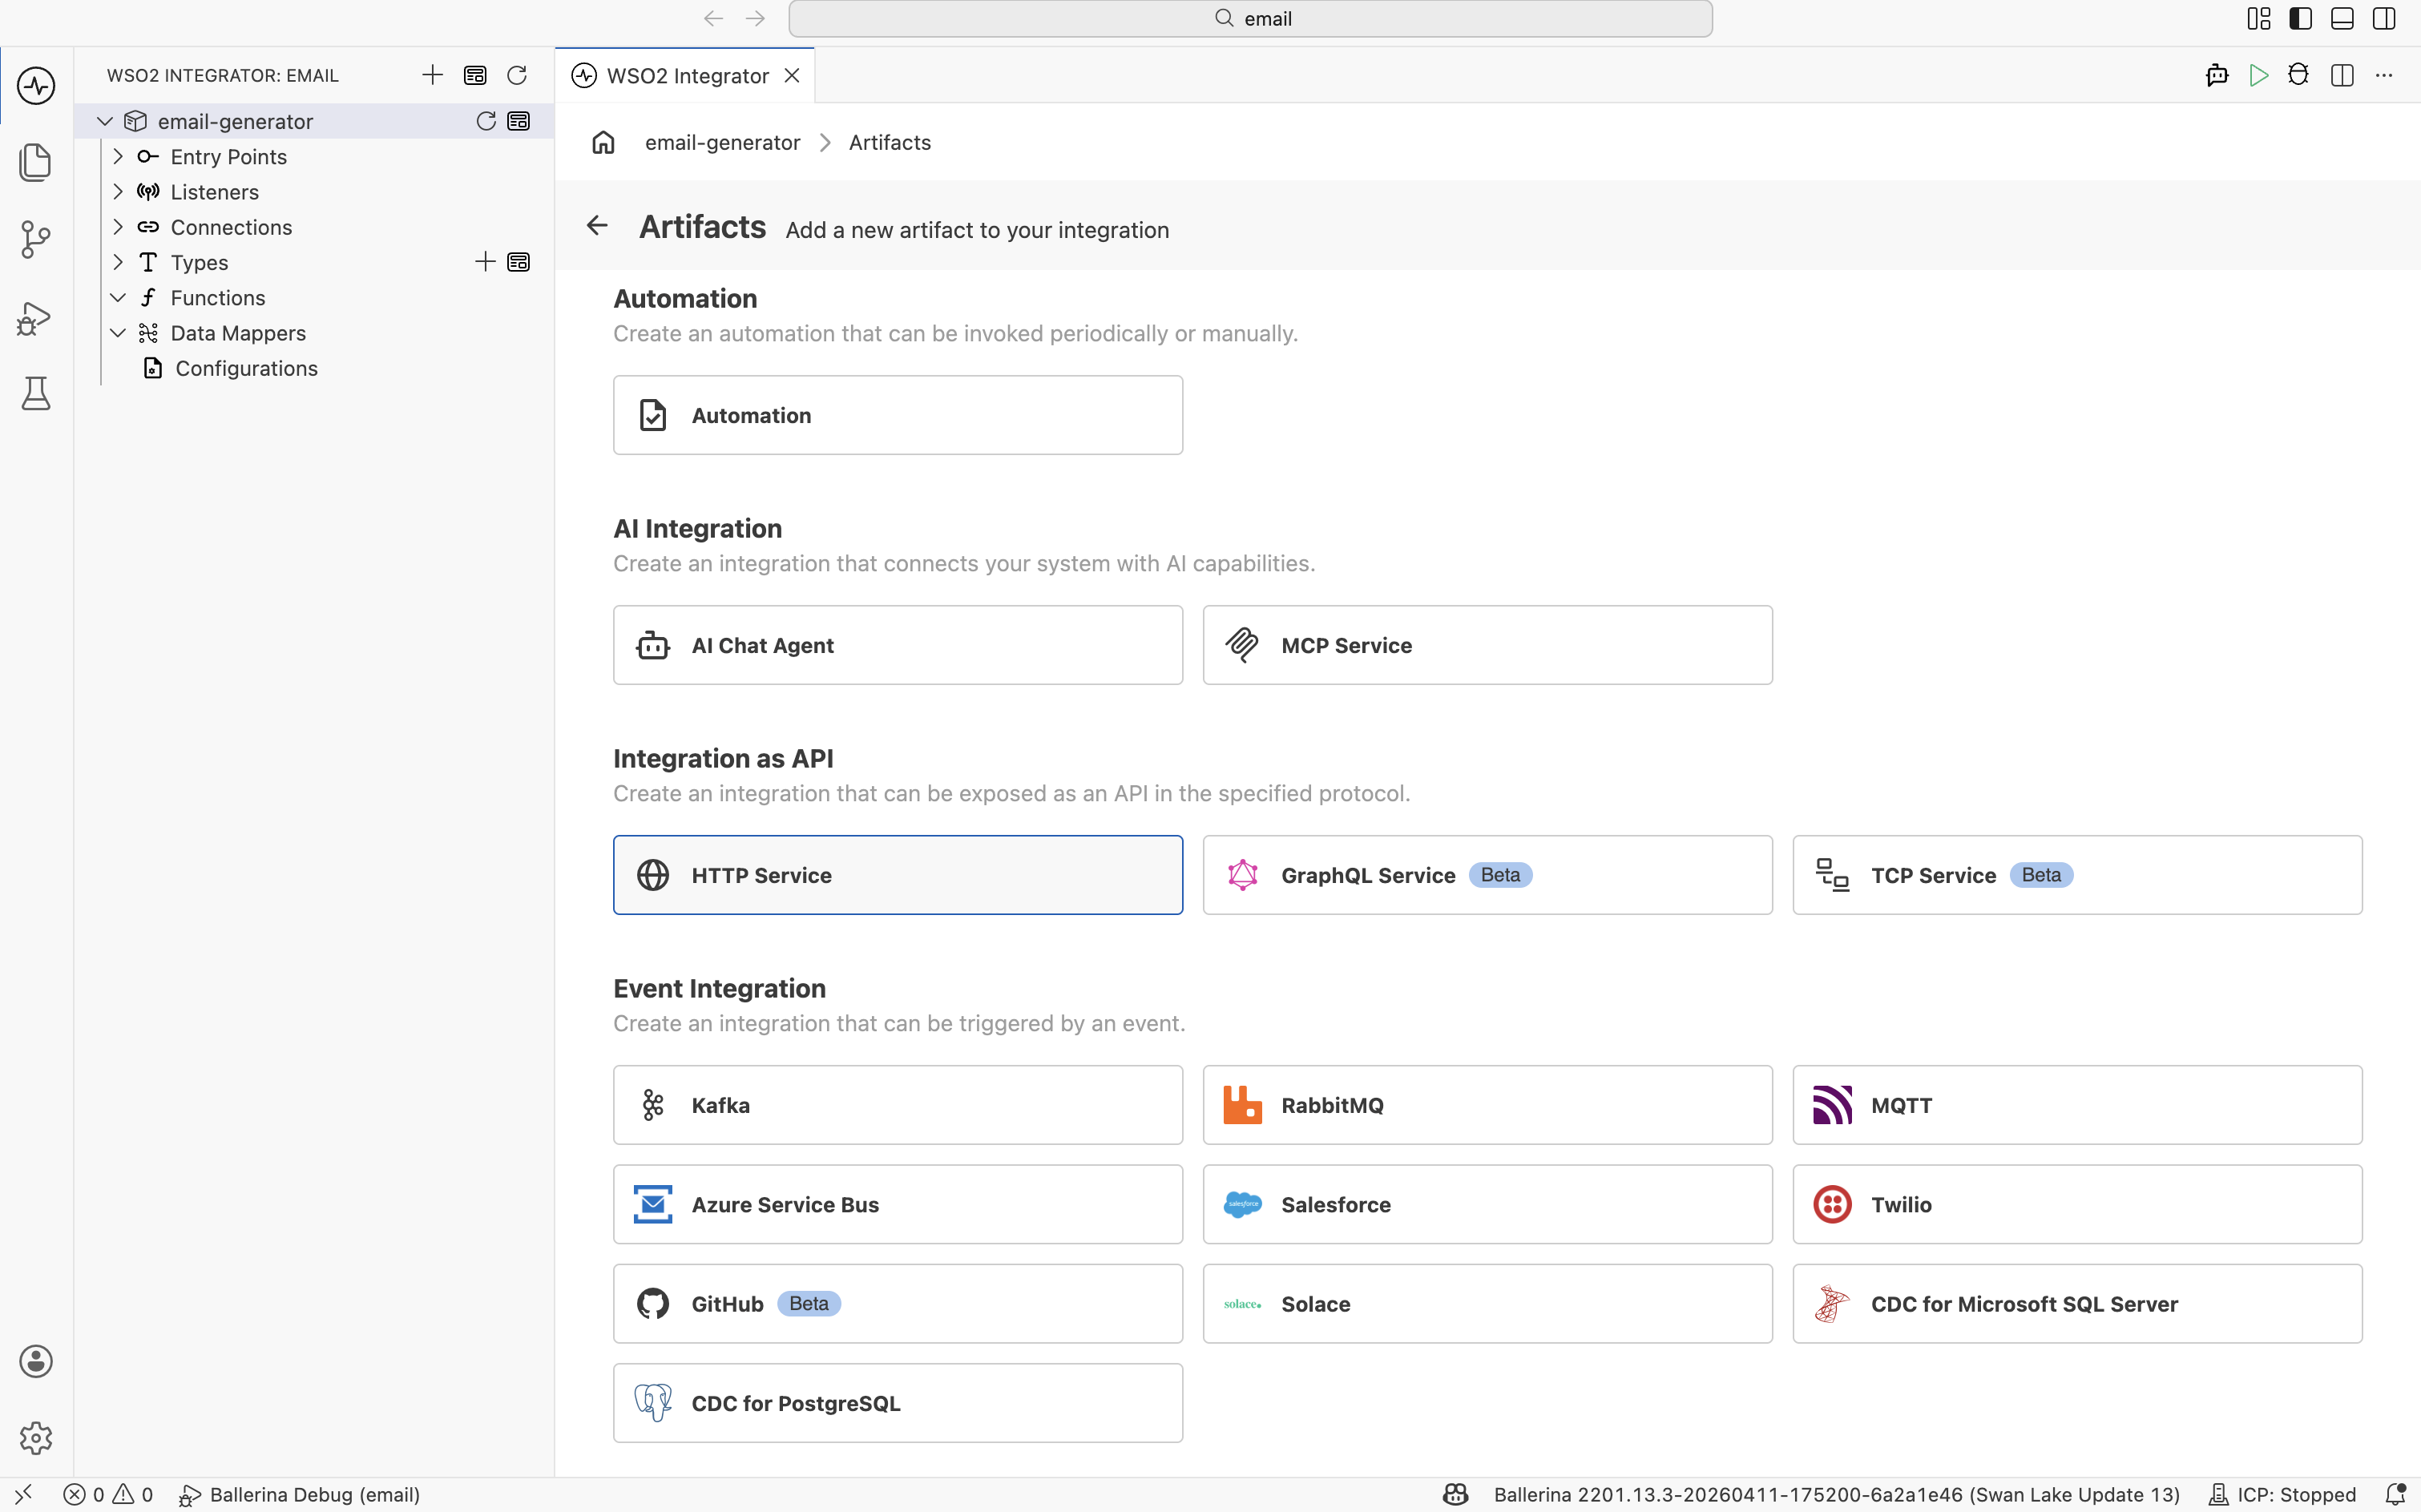
- From the left sidebar, open the Artifacts page.
- Under Integration as API, click HTTP Service.
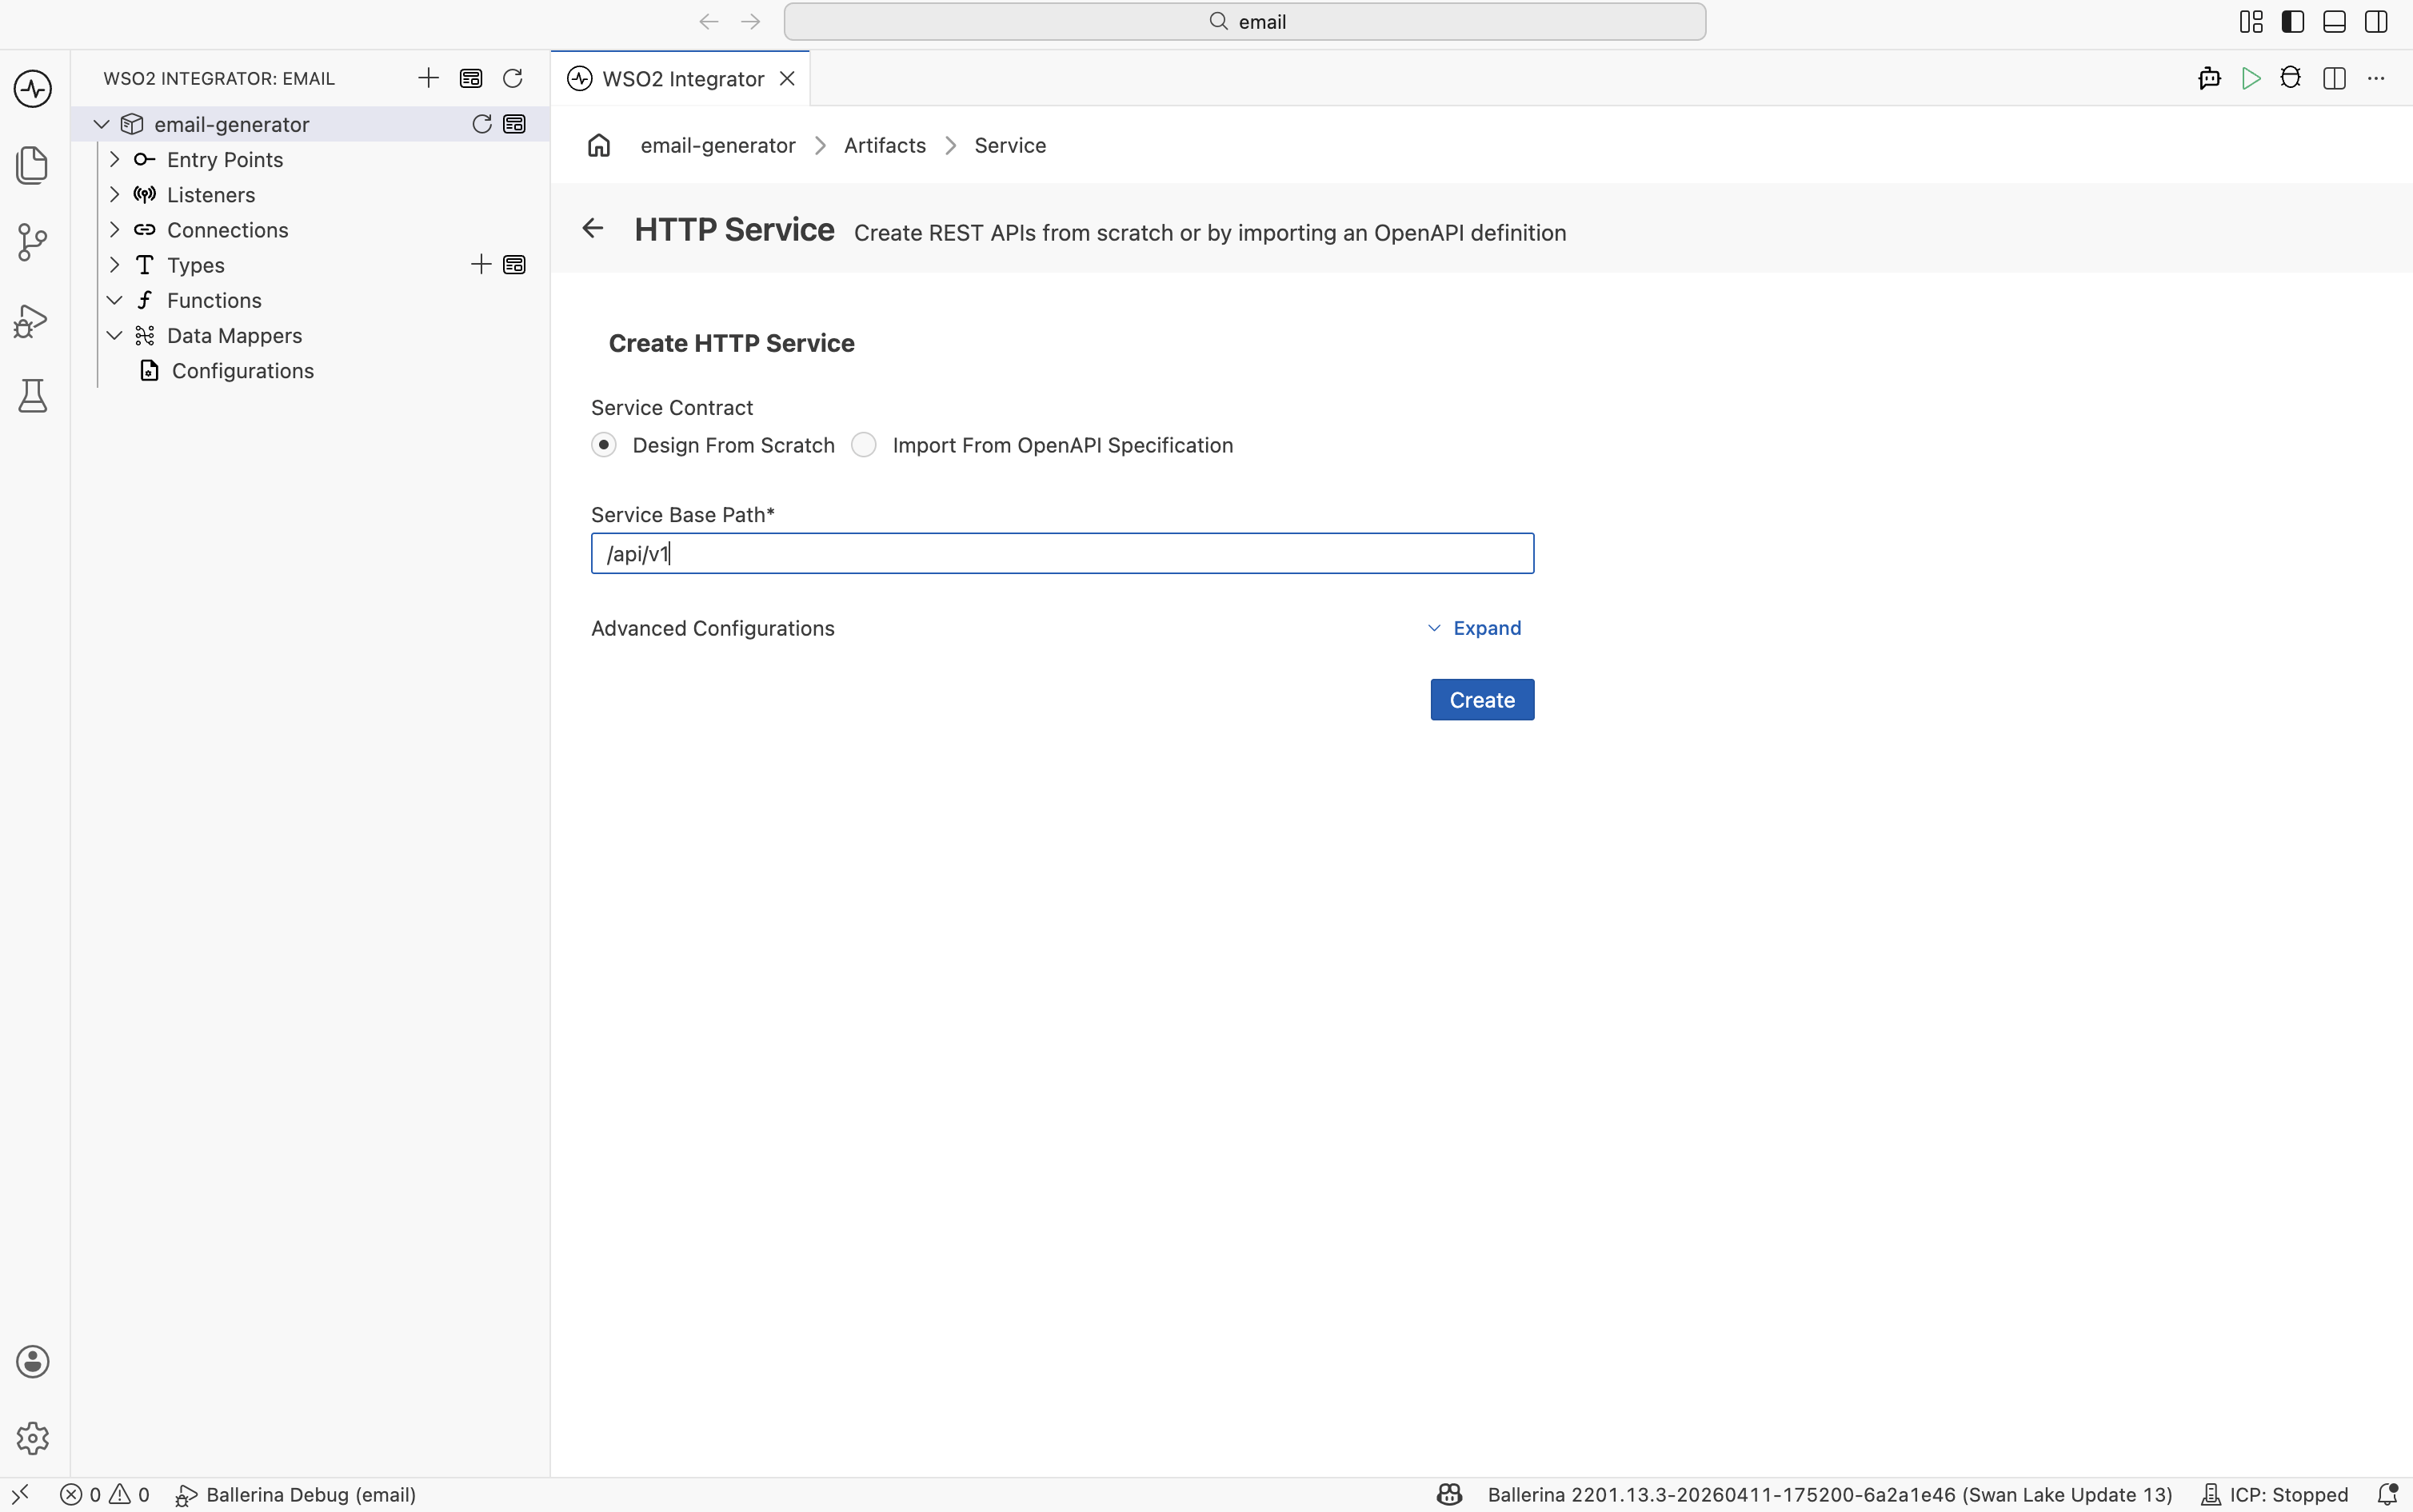
- In the Create HTTP Service form, select Design From Scratch, enter
/api/v1as the Service Base Path, and click the blue Create button.
Step 1.2: Define the request payload
The New Resource Configuration panel opens. Set the HTTP Method to POST and the Resource Path to /emails/generate.
Click Define Payload and:
-
Switch to the Import tab.
-
Paste the following sample JSON into Sample data:
{
  "recipientName": "Sarah Fernando",
  "senderName": "John Perera",
  "timeSlots": ["2026-01-15 10:00 AM", "2026-01-16 02:00 PM"],
  "intent": "Discuss a new website project"
} -
Set Type Name to
EmailGeneratePayload. -
Click Import Type.
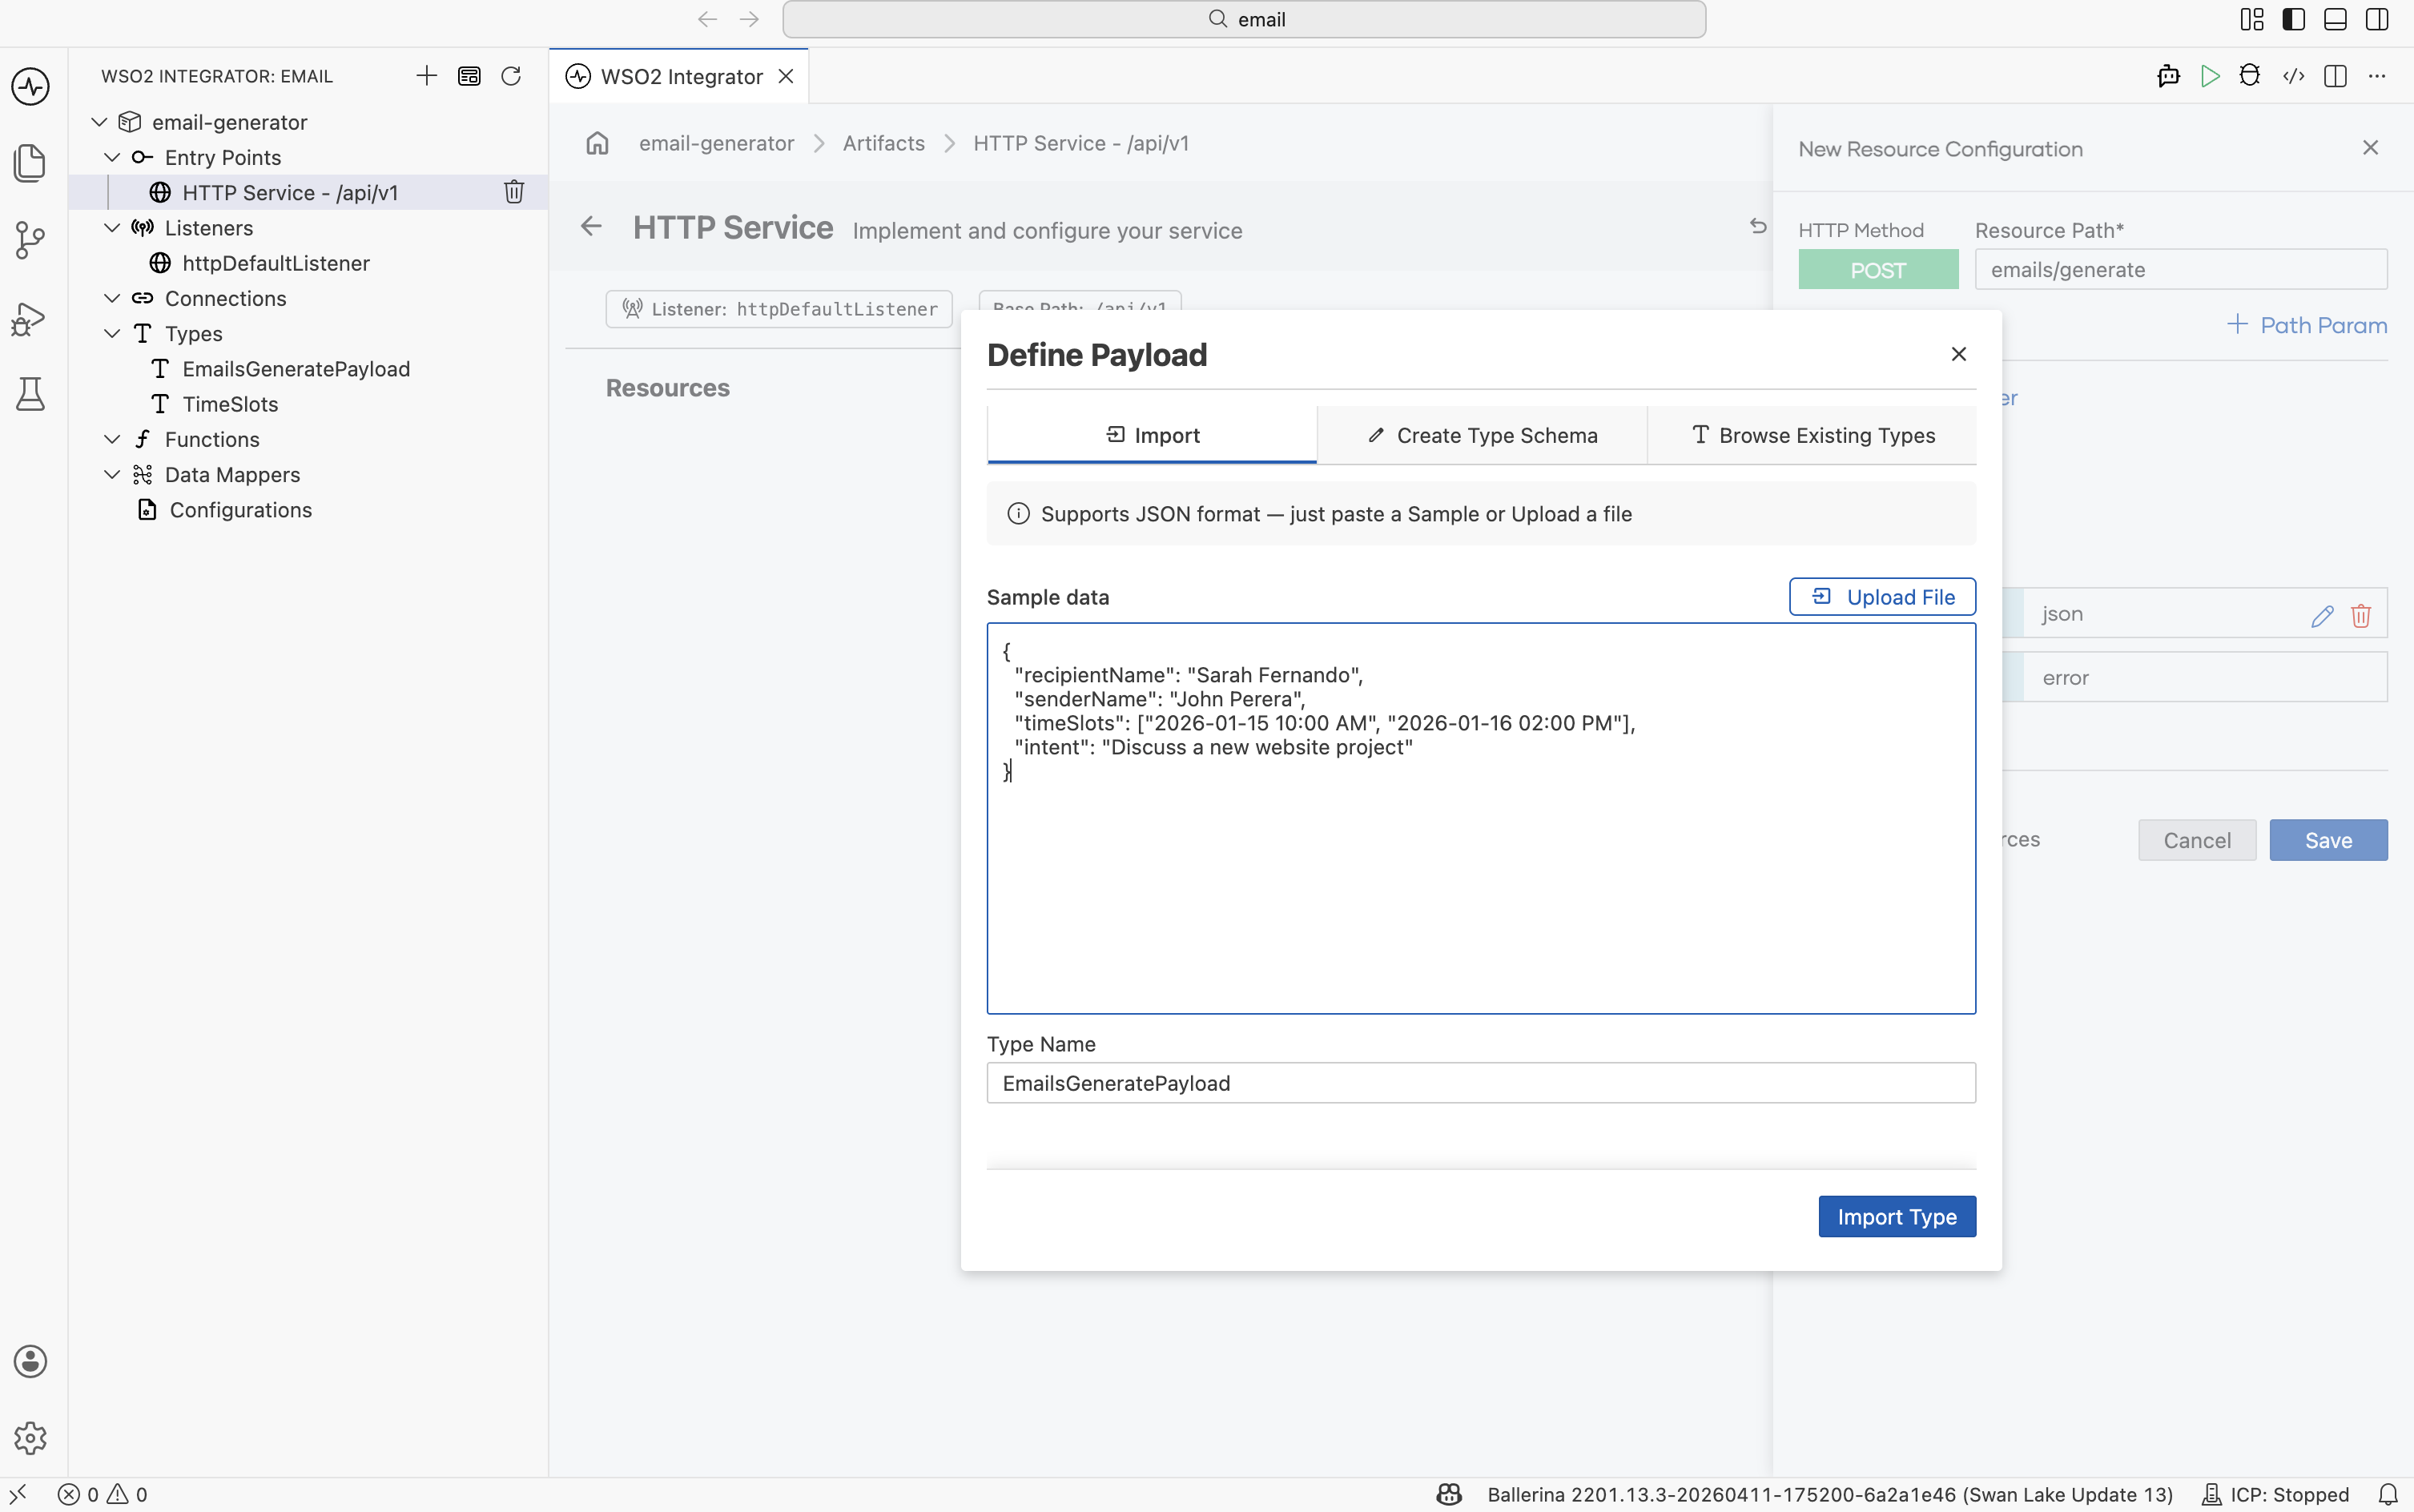
The dialog produces a record with the right fields. There is no need to write the type by hand — the JSON sample drives it.
Step 1.3: Define the response type
Still on the resource configuration, click the response type for status 201 (Ballerina returns 201 Created for POST resources by default) and choose Create New Type:
-
Switch to the Import tab.
-
Set Name to
EmailGenerateResponse. -
Paste:
{
  "subject": "Meeting Request - New Website Project",
  "content": "Dear Sarah, I hope this message finds you well..."
} -
Click Import.
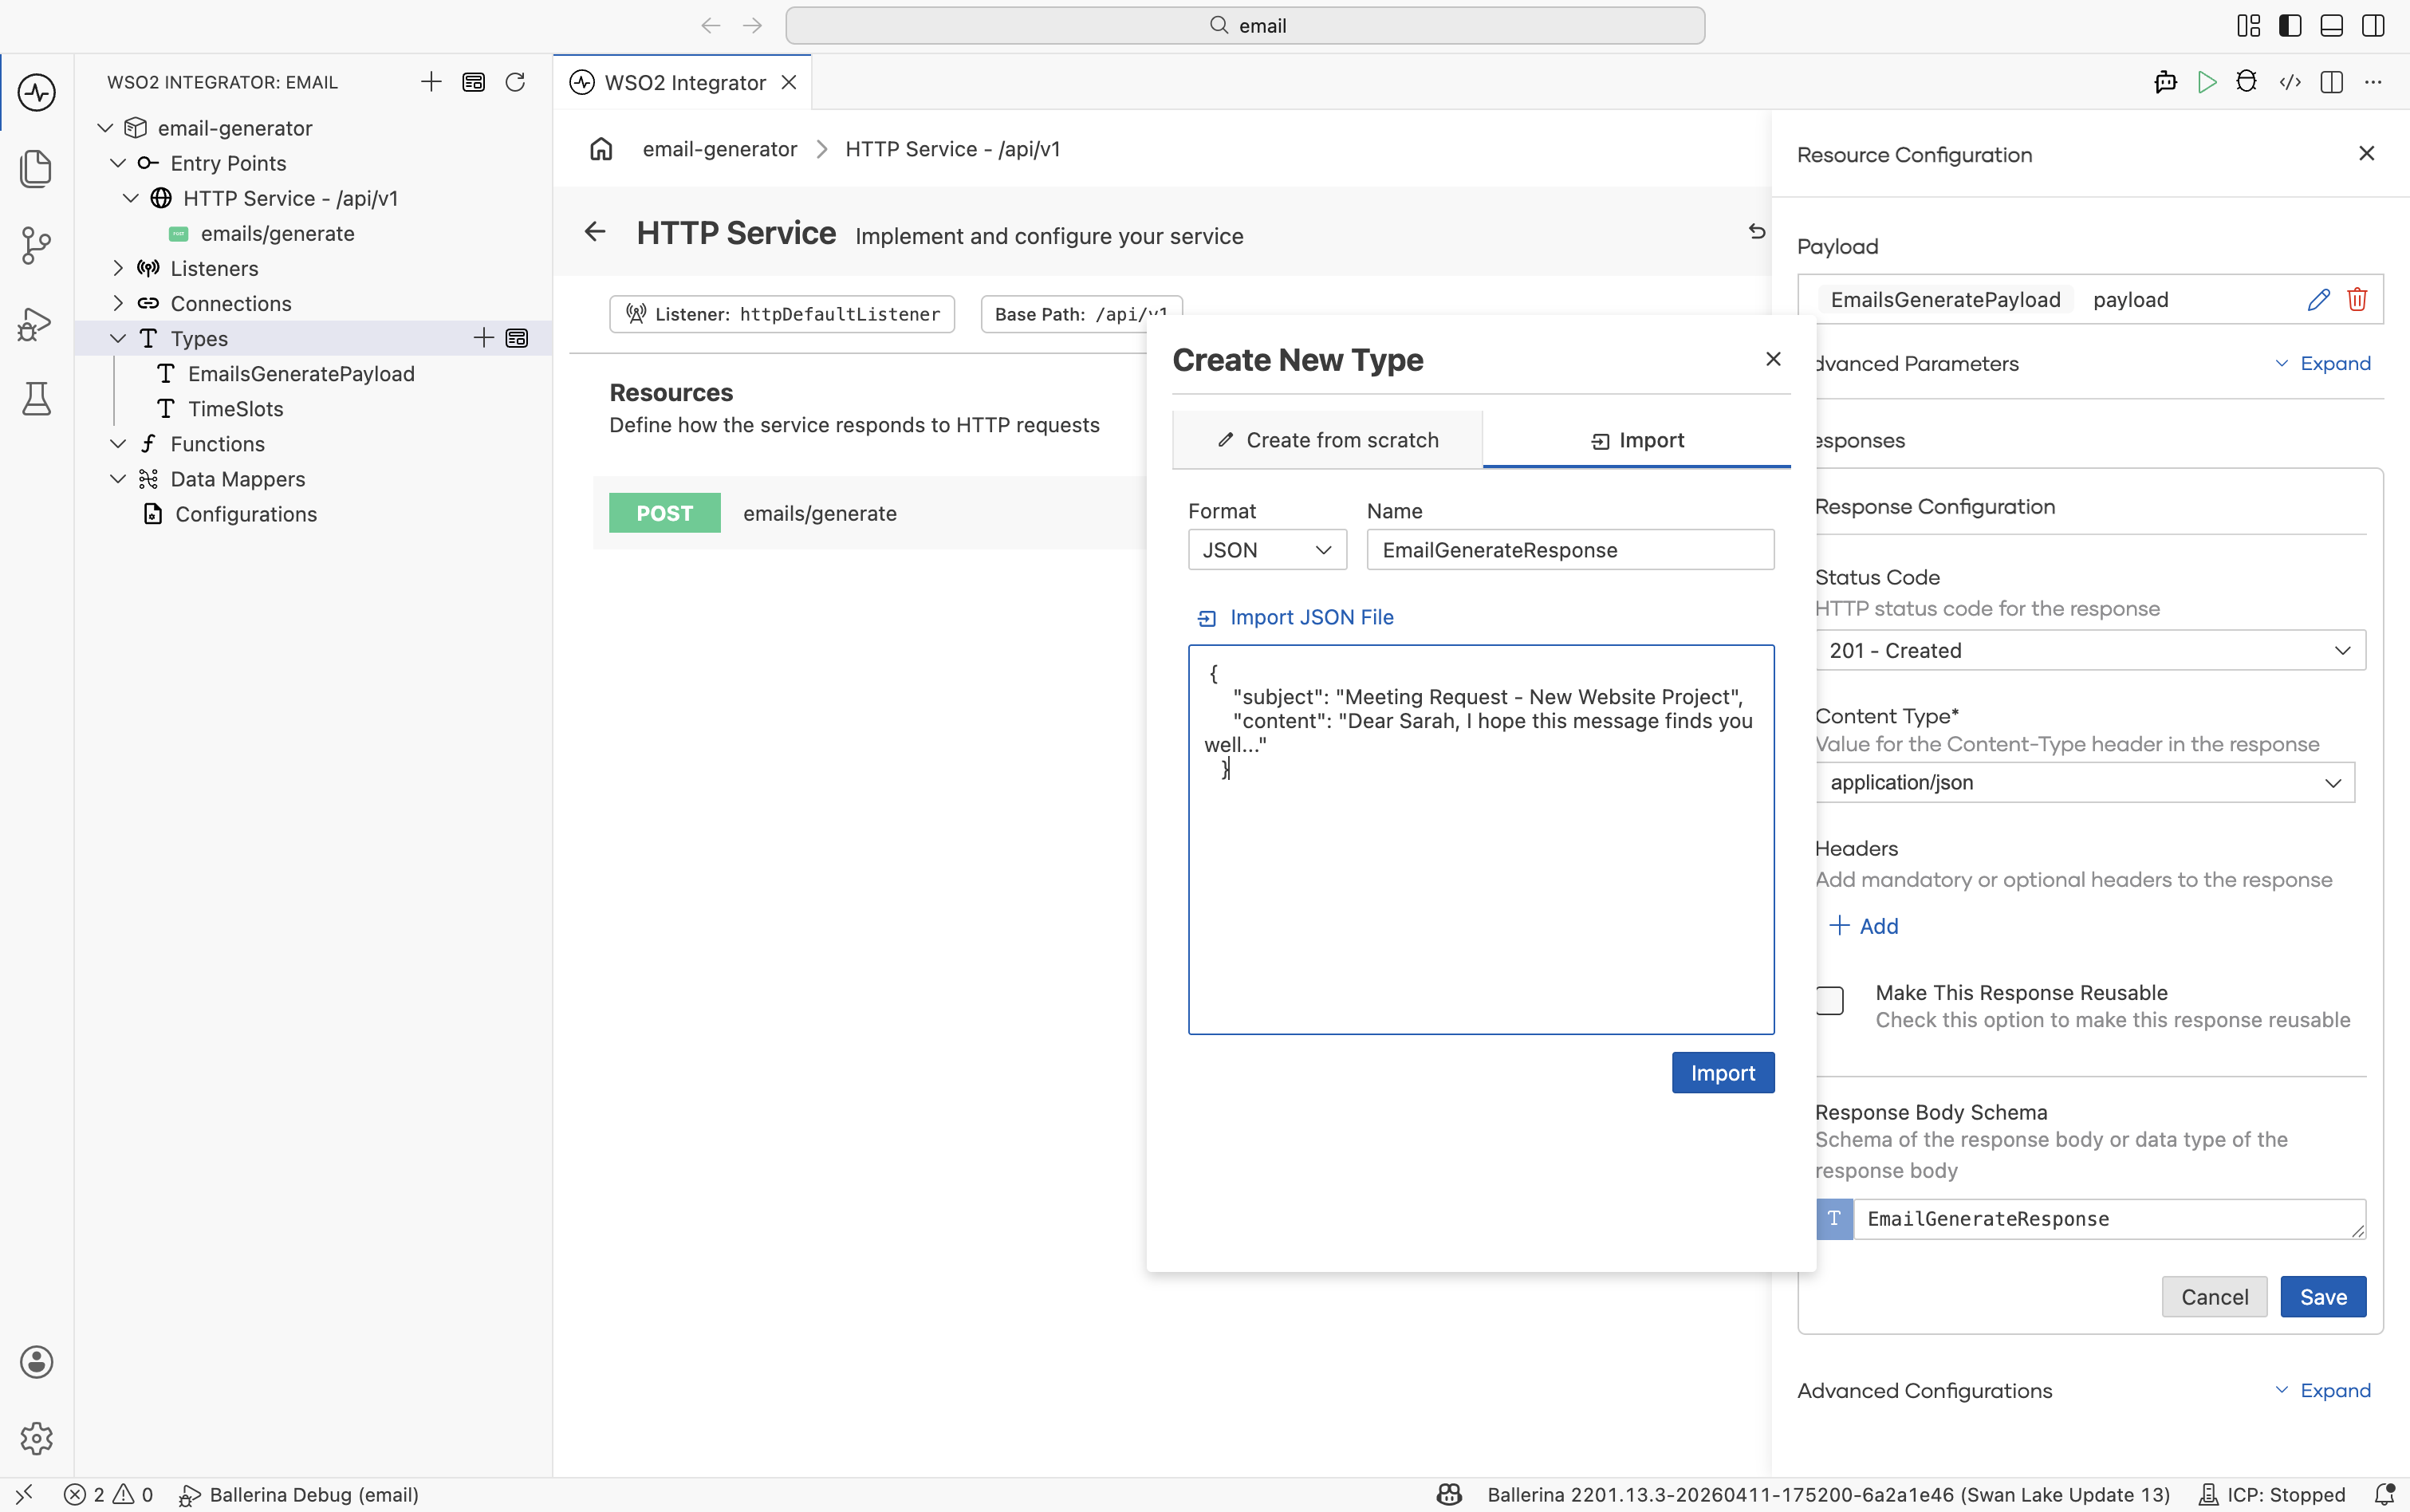
Click Save on the resource. The configuration should now show EmailGeneratePayload for the request and EmailGenerateResponse for the 201 response.

2. Add a model provider
After saving, the flow editor opens. Click + between Start and Error Handler. In the Add Node panel, scroll to the AI section and click Model Provider. Then click Add Model Provider. The provider list appears on the right side.
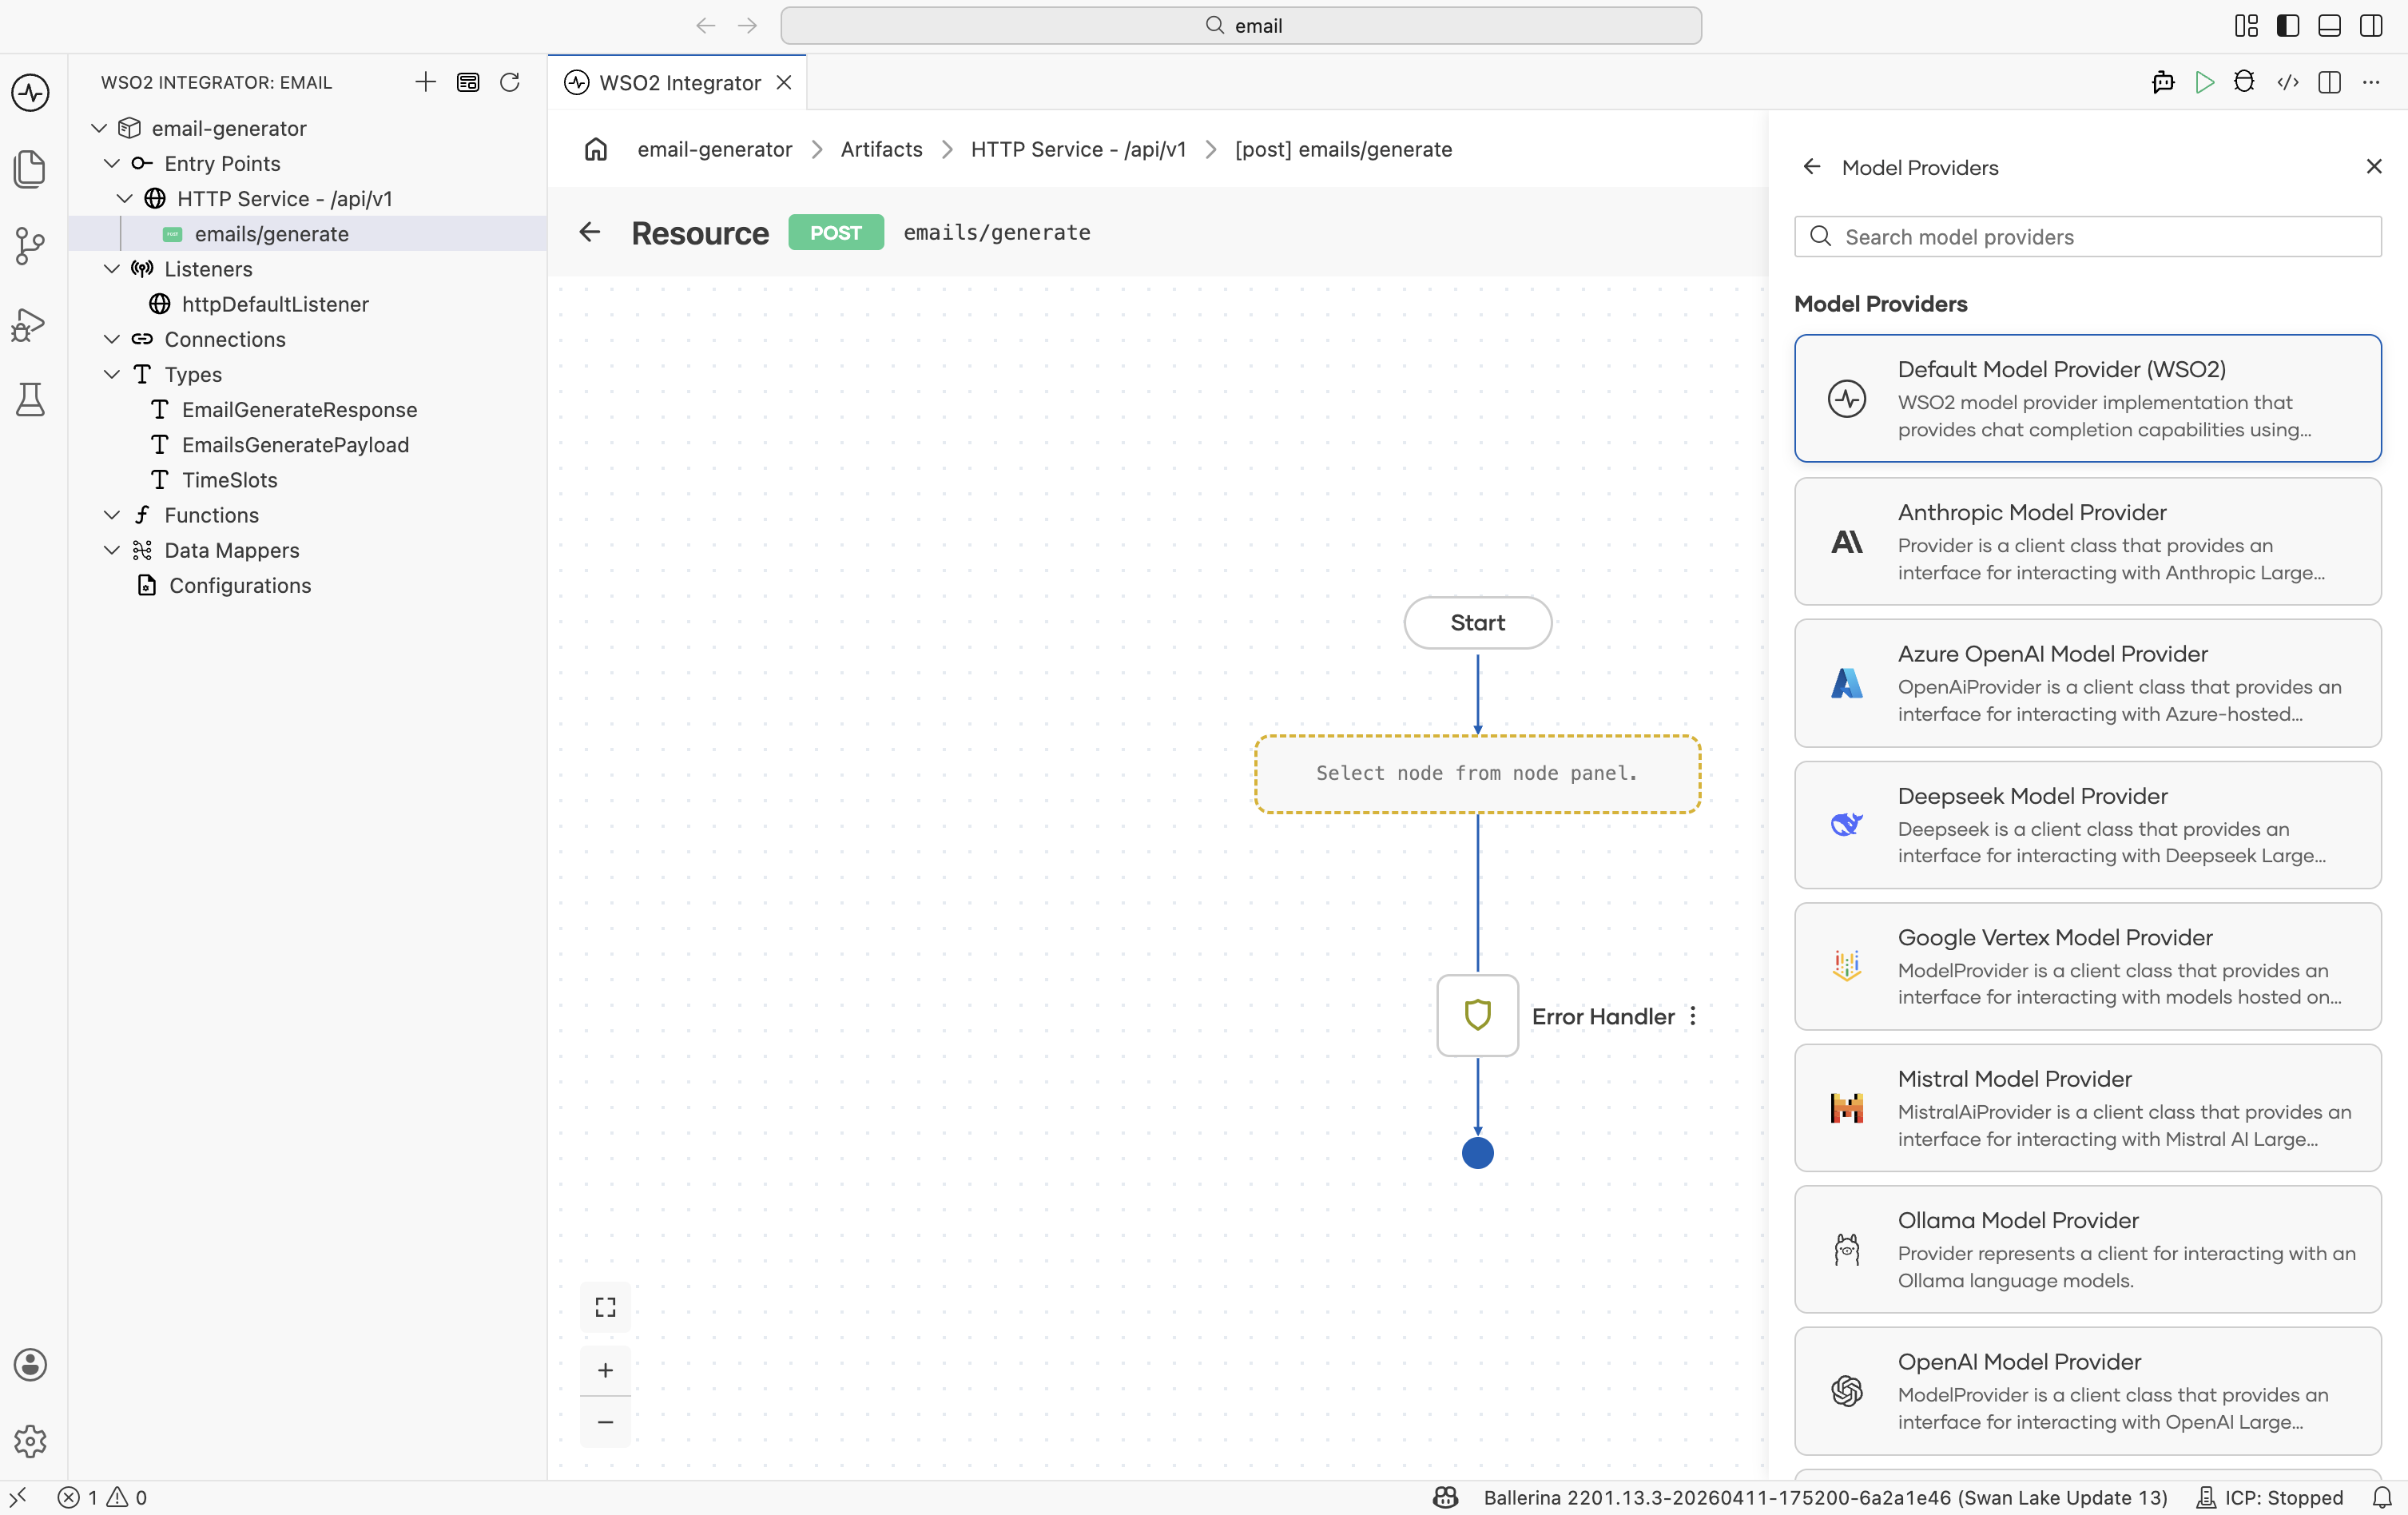
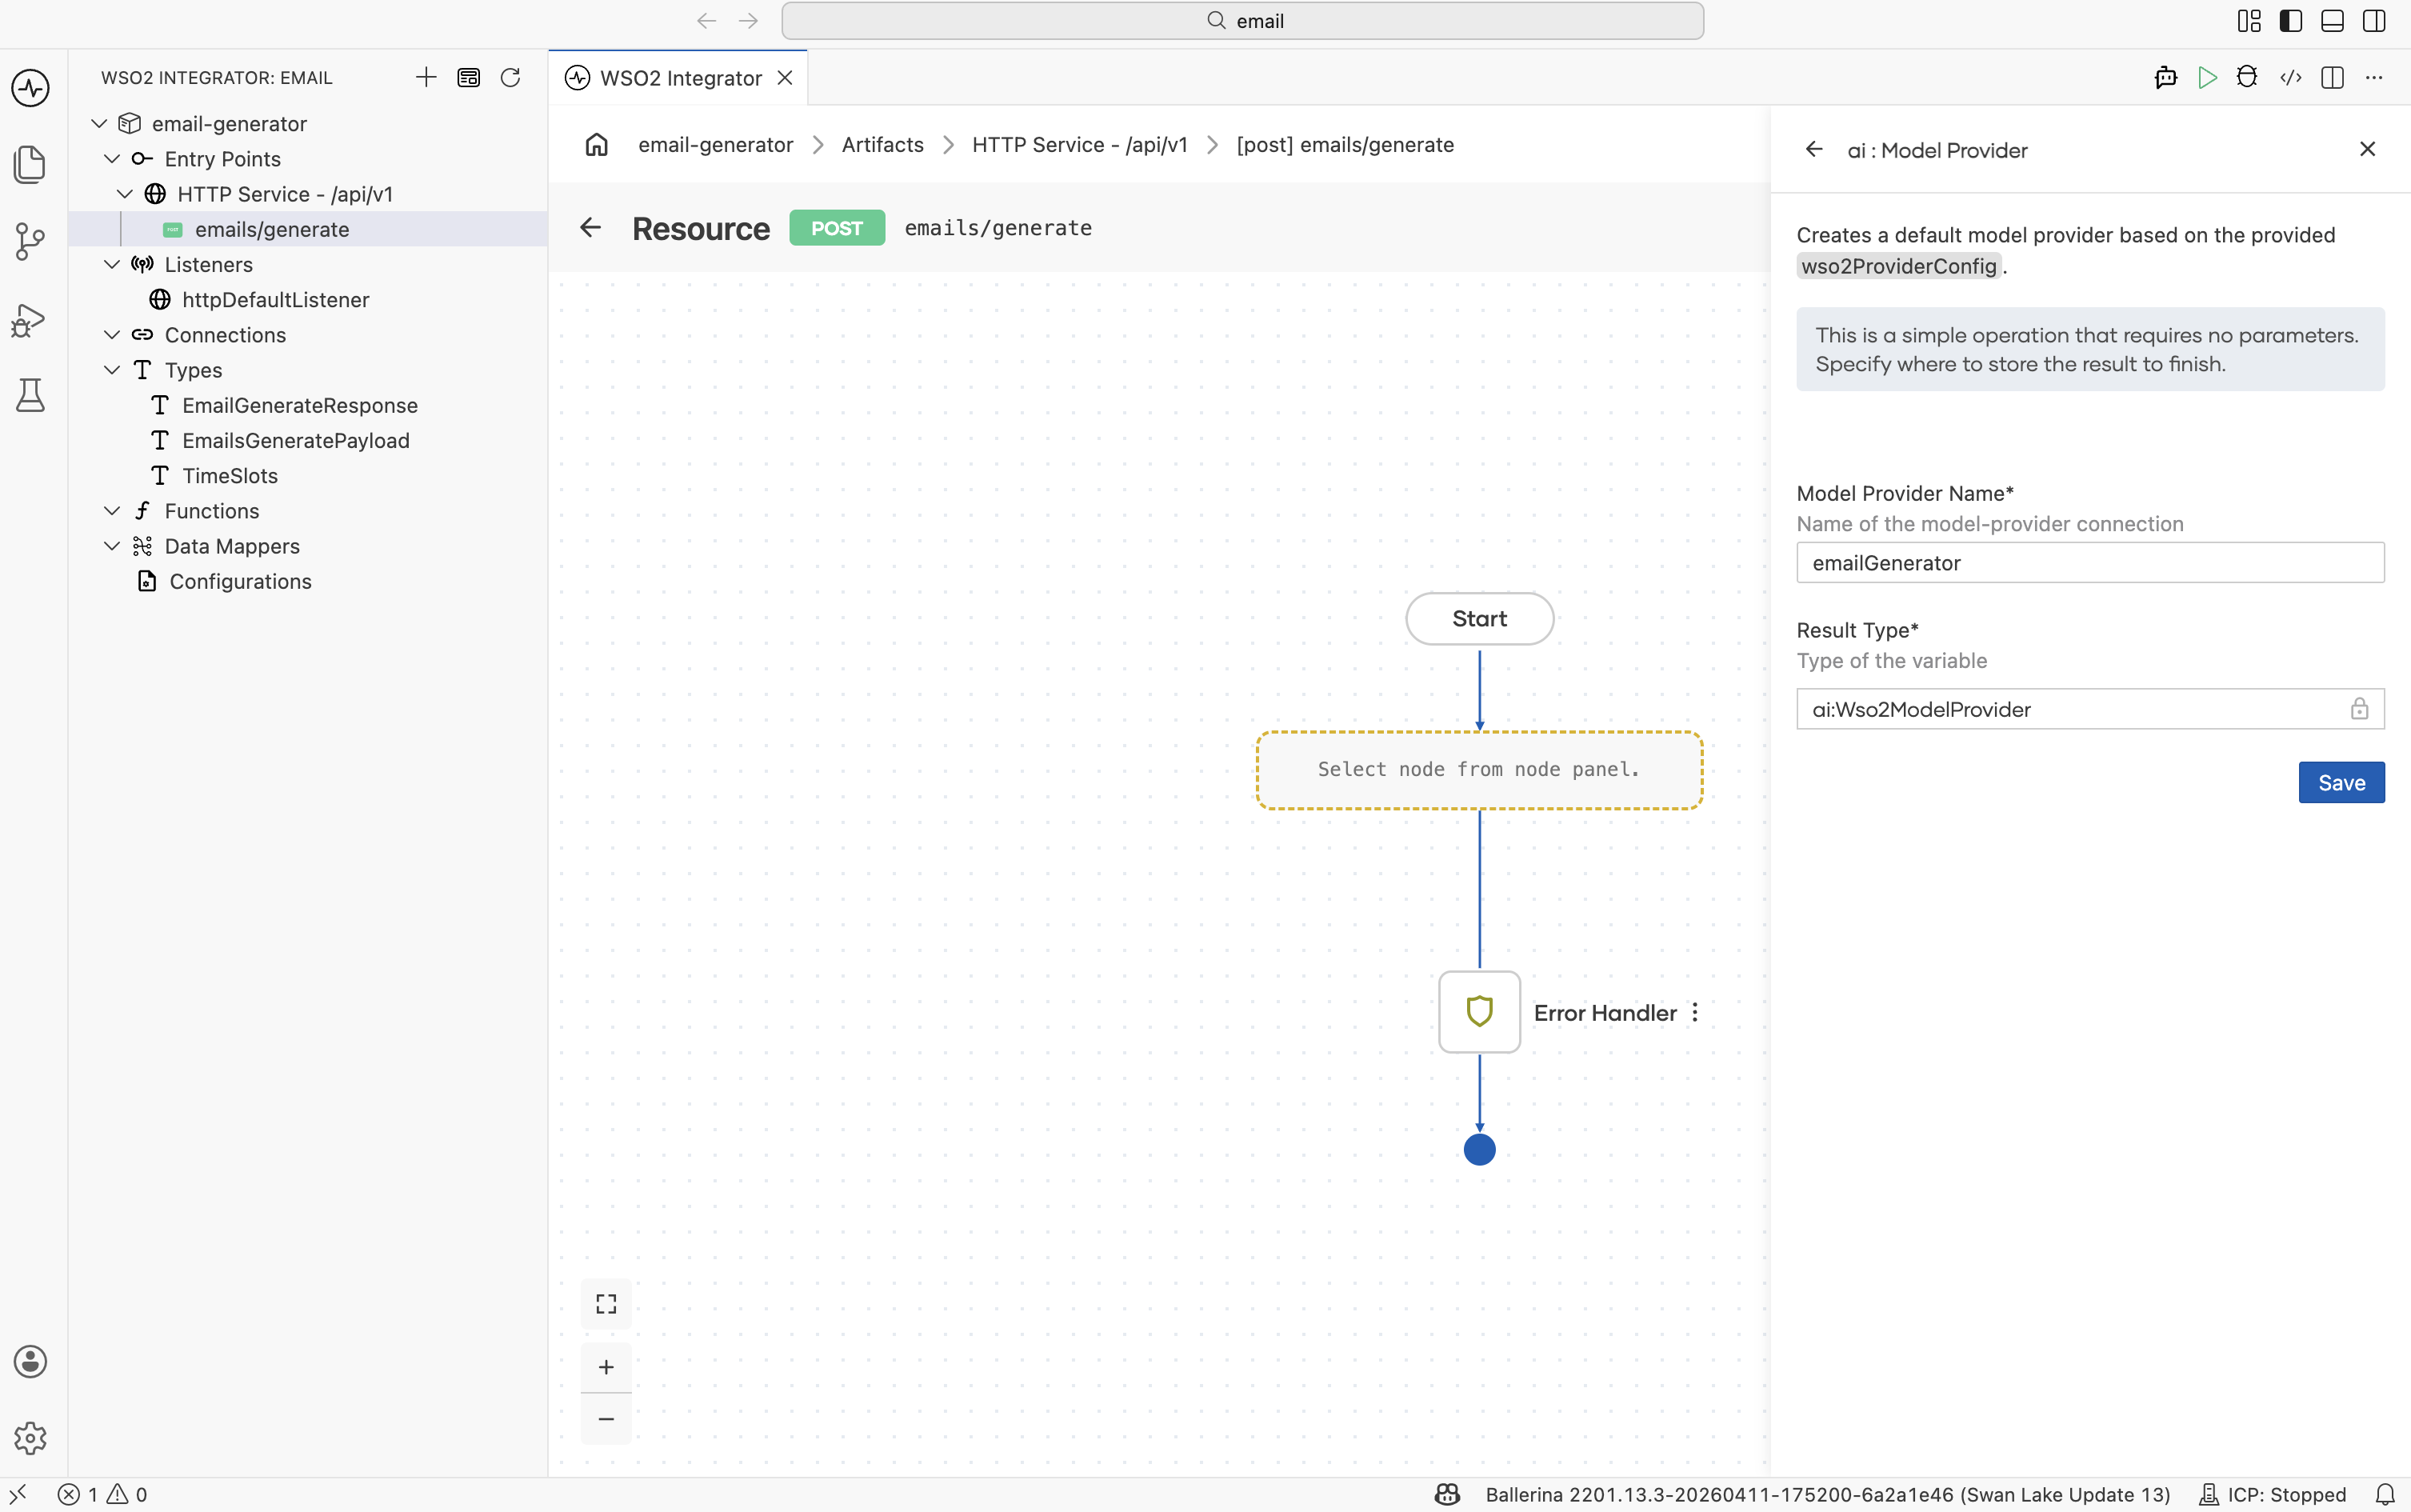
Click Default Model Provider (WSO2). In the configuration form:
- Model Provider Name =
emailGenerator. - Result Type is fixed to the provider's connection type (
ai:Wso2ModelProviderfor the WSO2 default) and cannot be edited. - Click Save.
Tip: The Default WSO2 Model Provider does not require an API key. For a different provider see AI Connections and Stores → Model Providers.
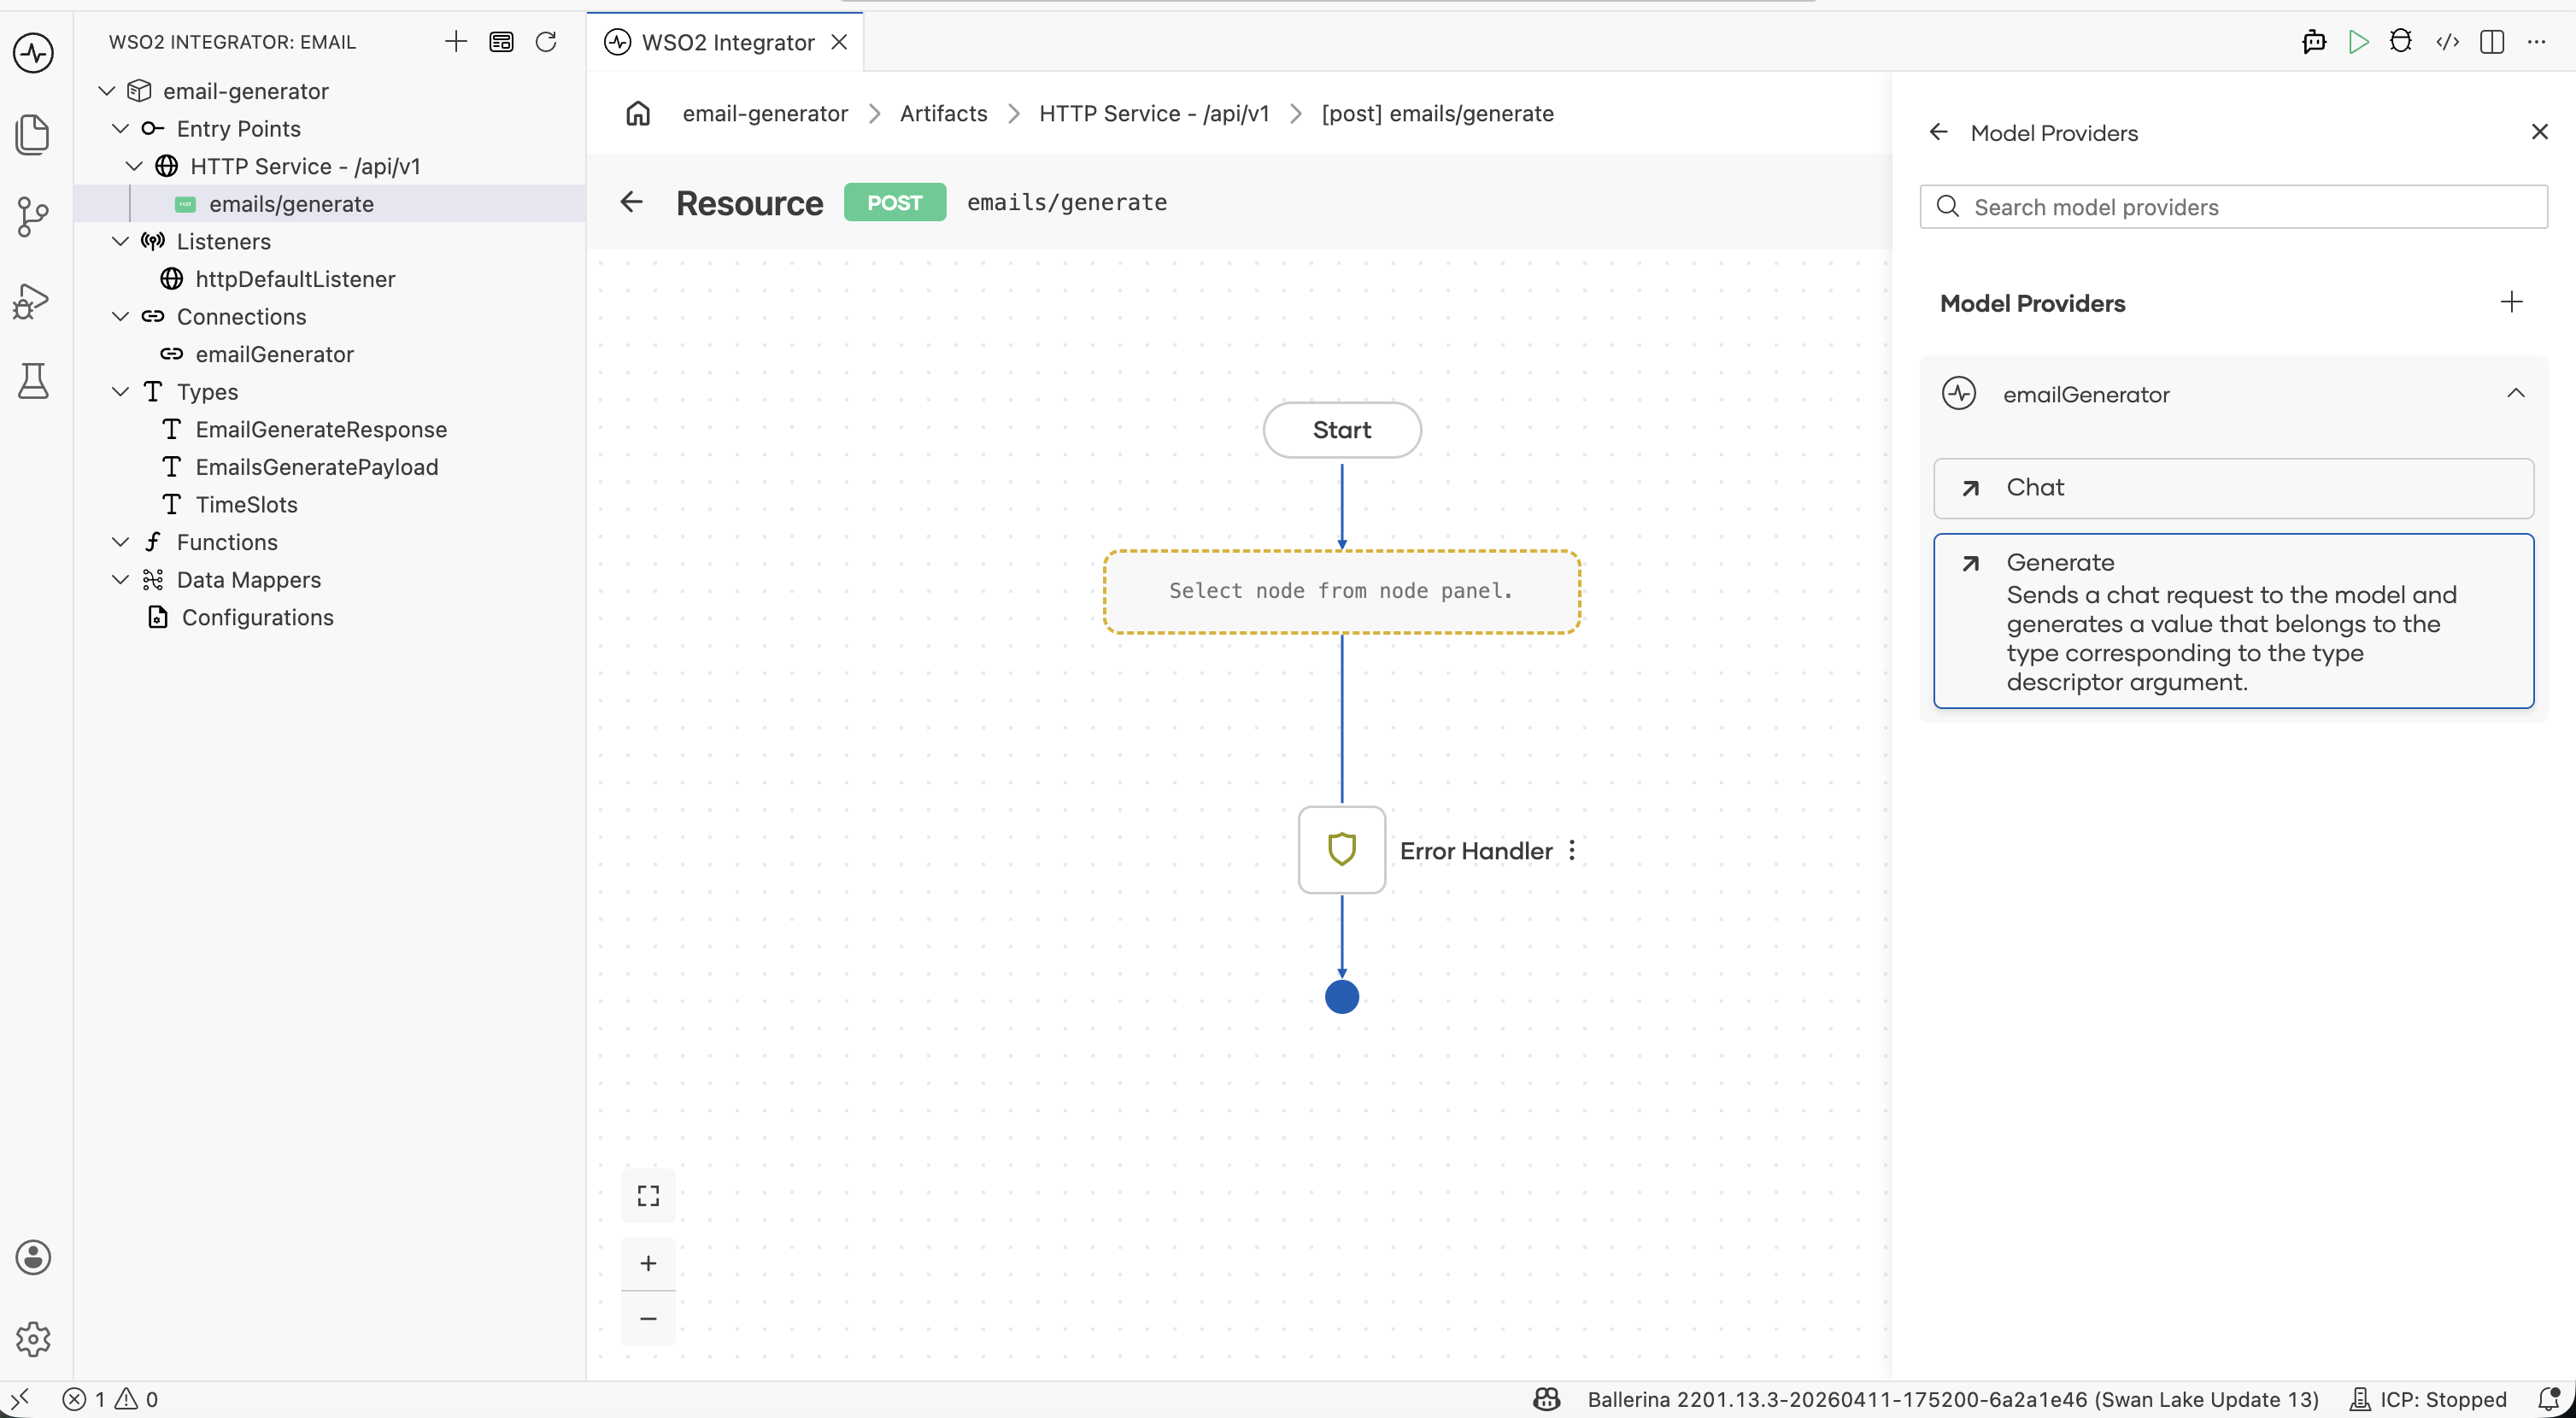
3. Add the generate node
In the Model Providers panel on the right, expand the emailGenerator section and click Generate.
Step 3.1: Write the prompt
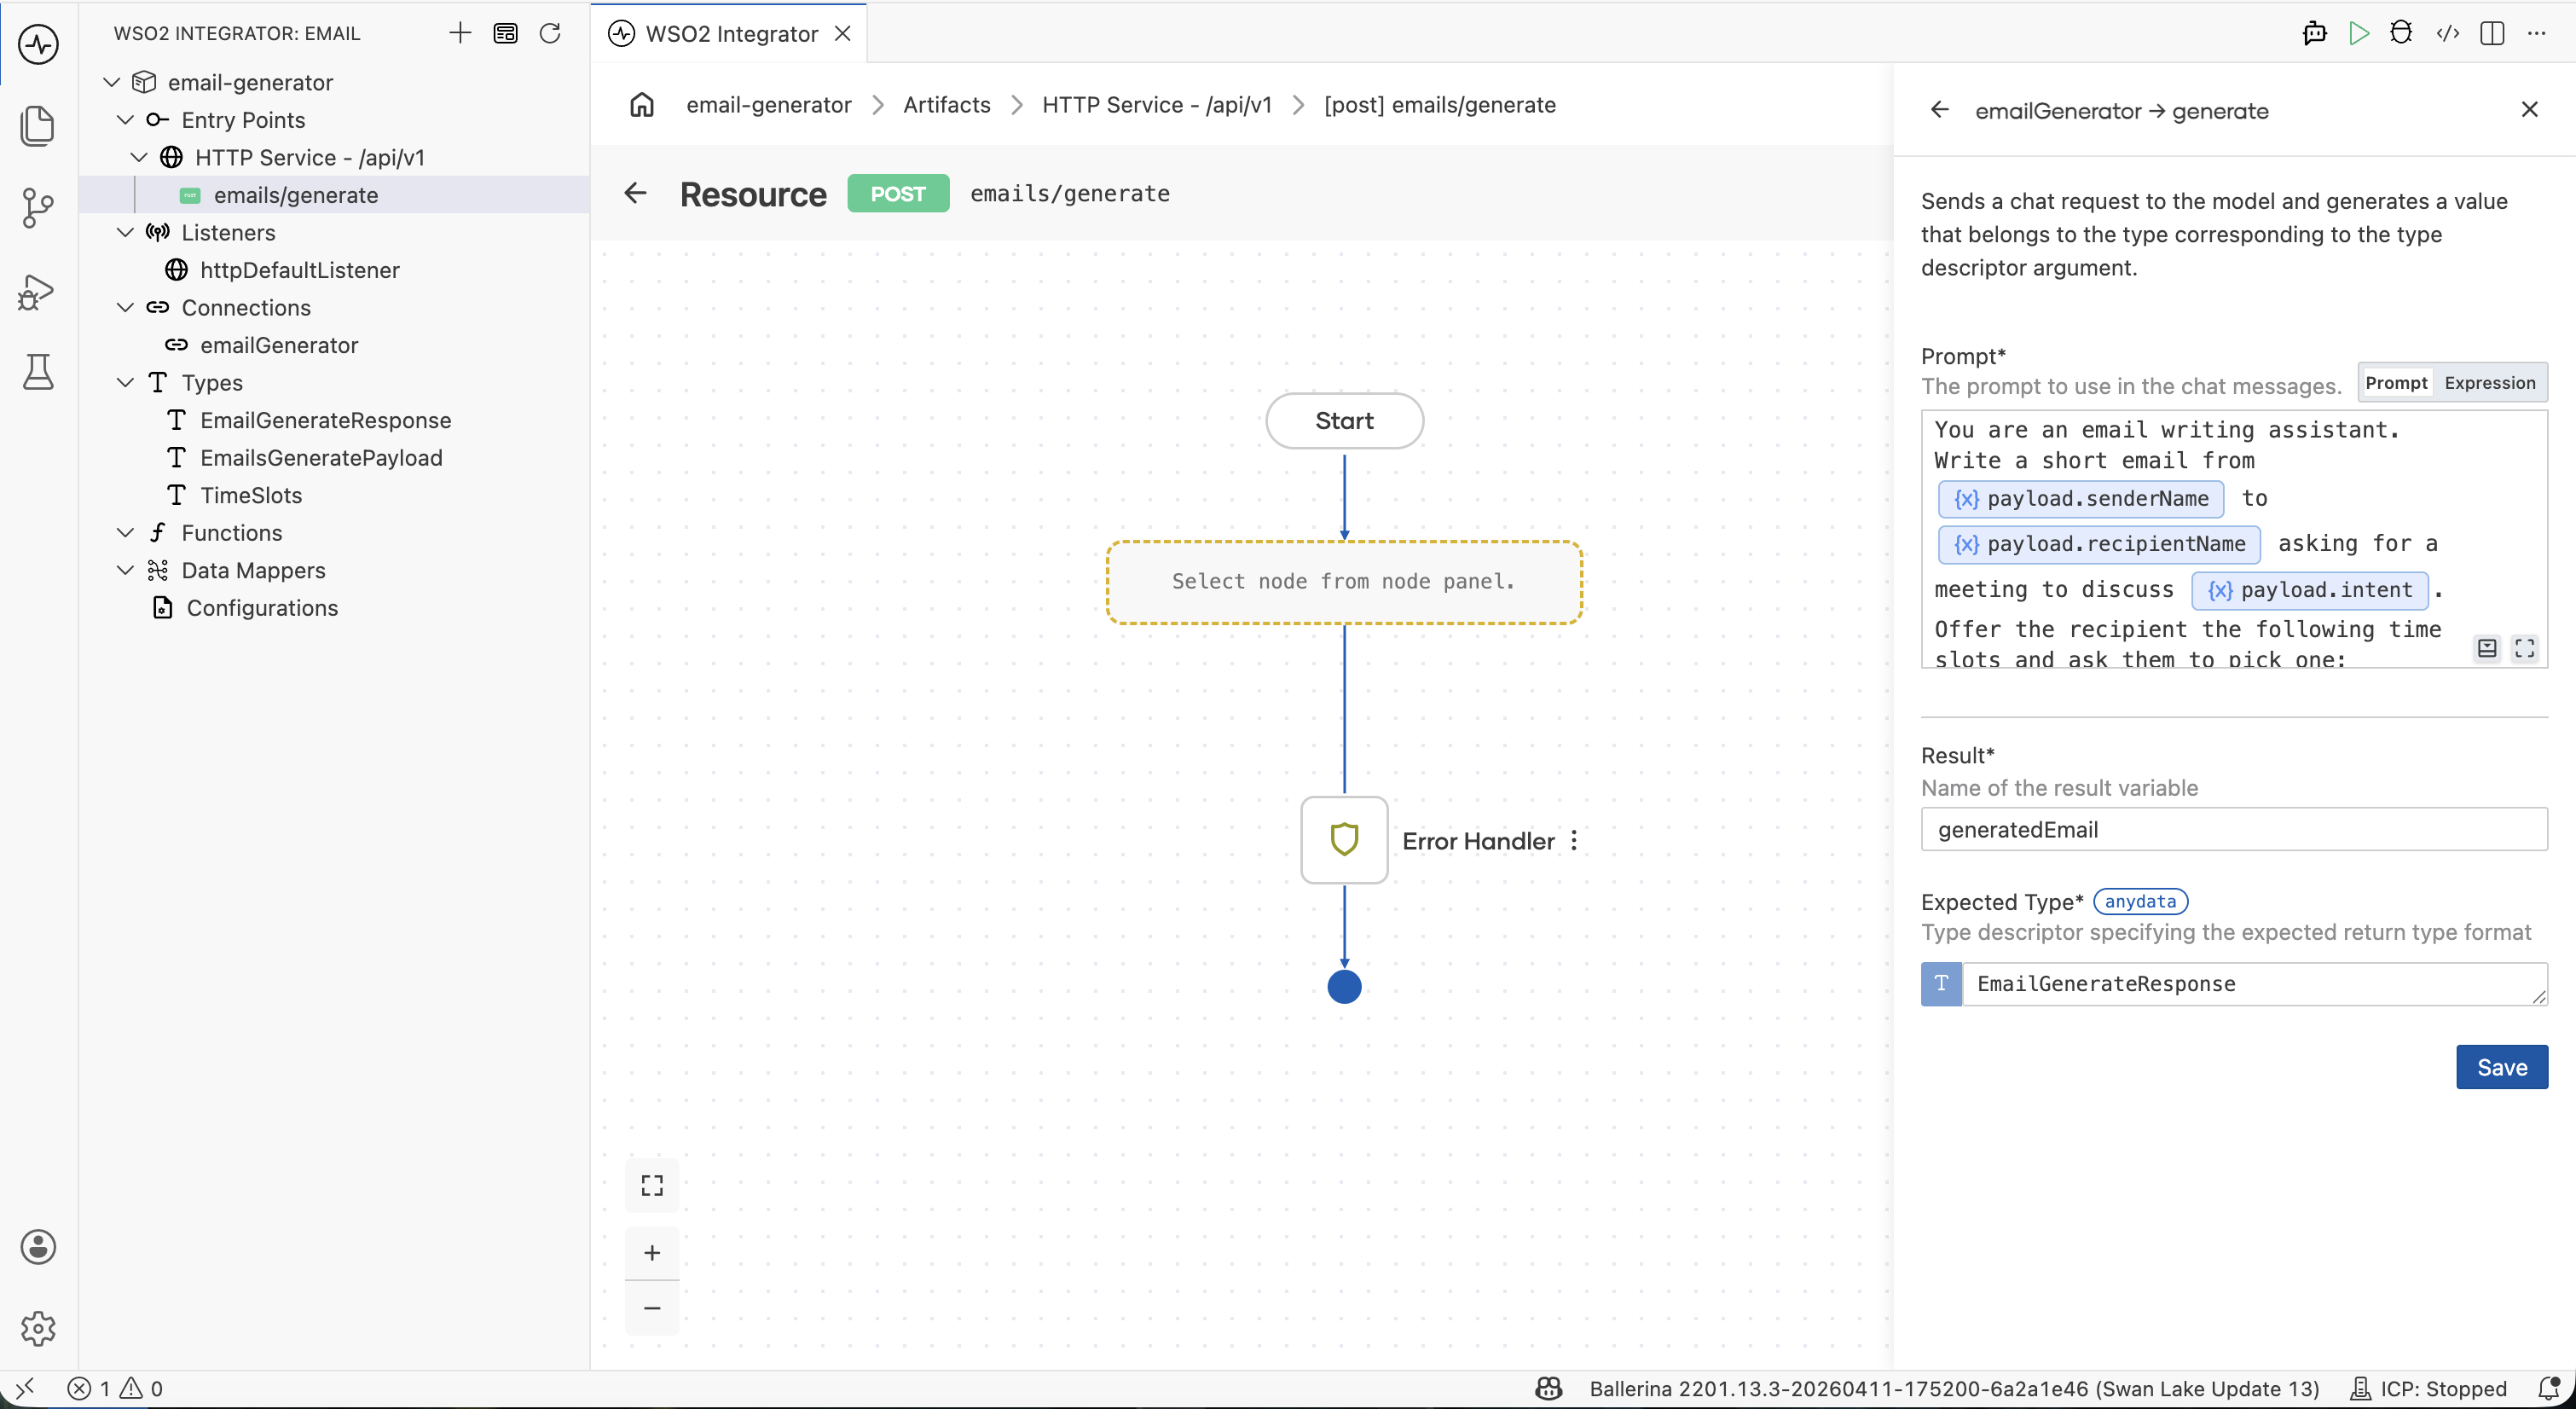
Click the Prompt field to open the rich-text editor and enter:
"You are an email writing assistant. Write a short email from
${senderName}to${recipientName}asking for a 30-minute meeting to discuss${intent}. Offer the recipient the following time slots and ask them to pick one:${timeSlots}. Keep it under 150 words and use a polite, professional tone."
Use the Insert → Inputs menu to add each ${...} reference, or just type the placeholders by hand — the editor stores them as a Ballerina template literal.
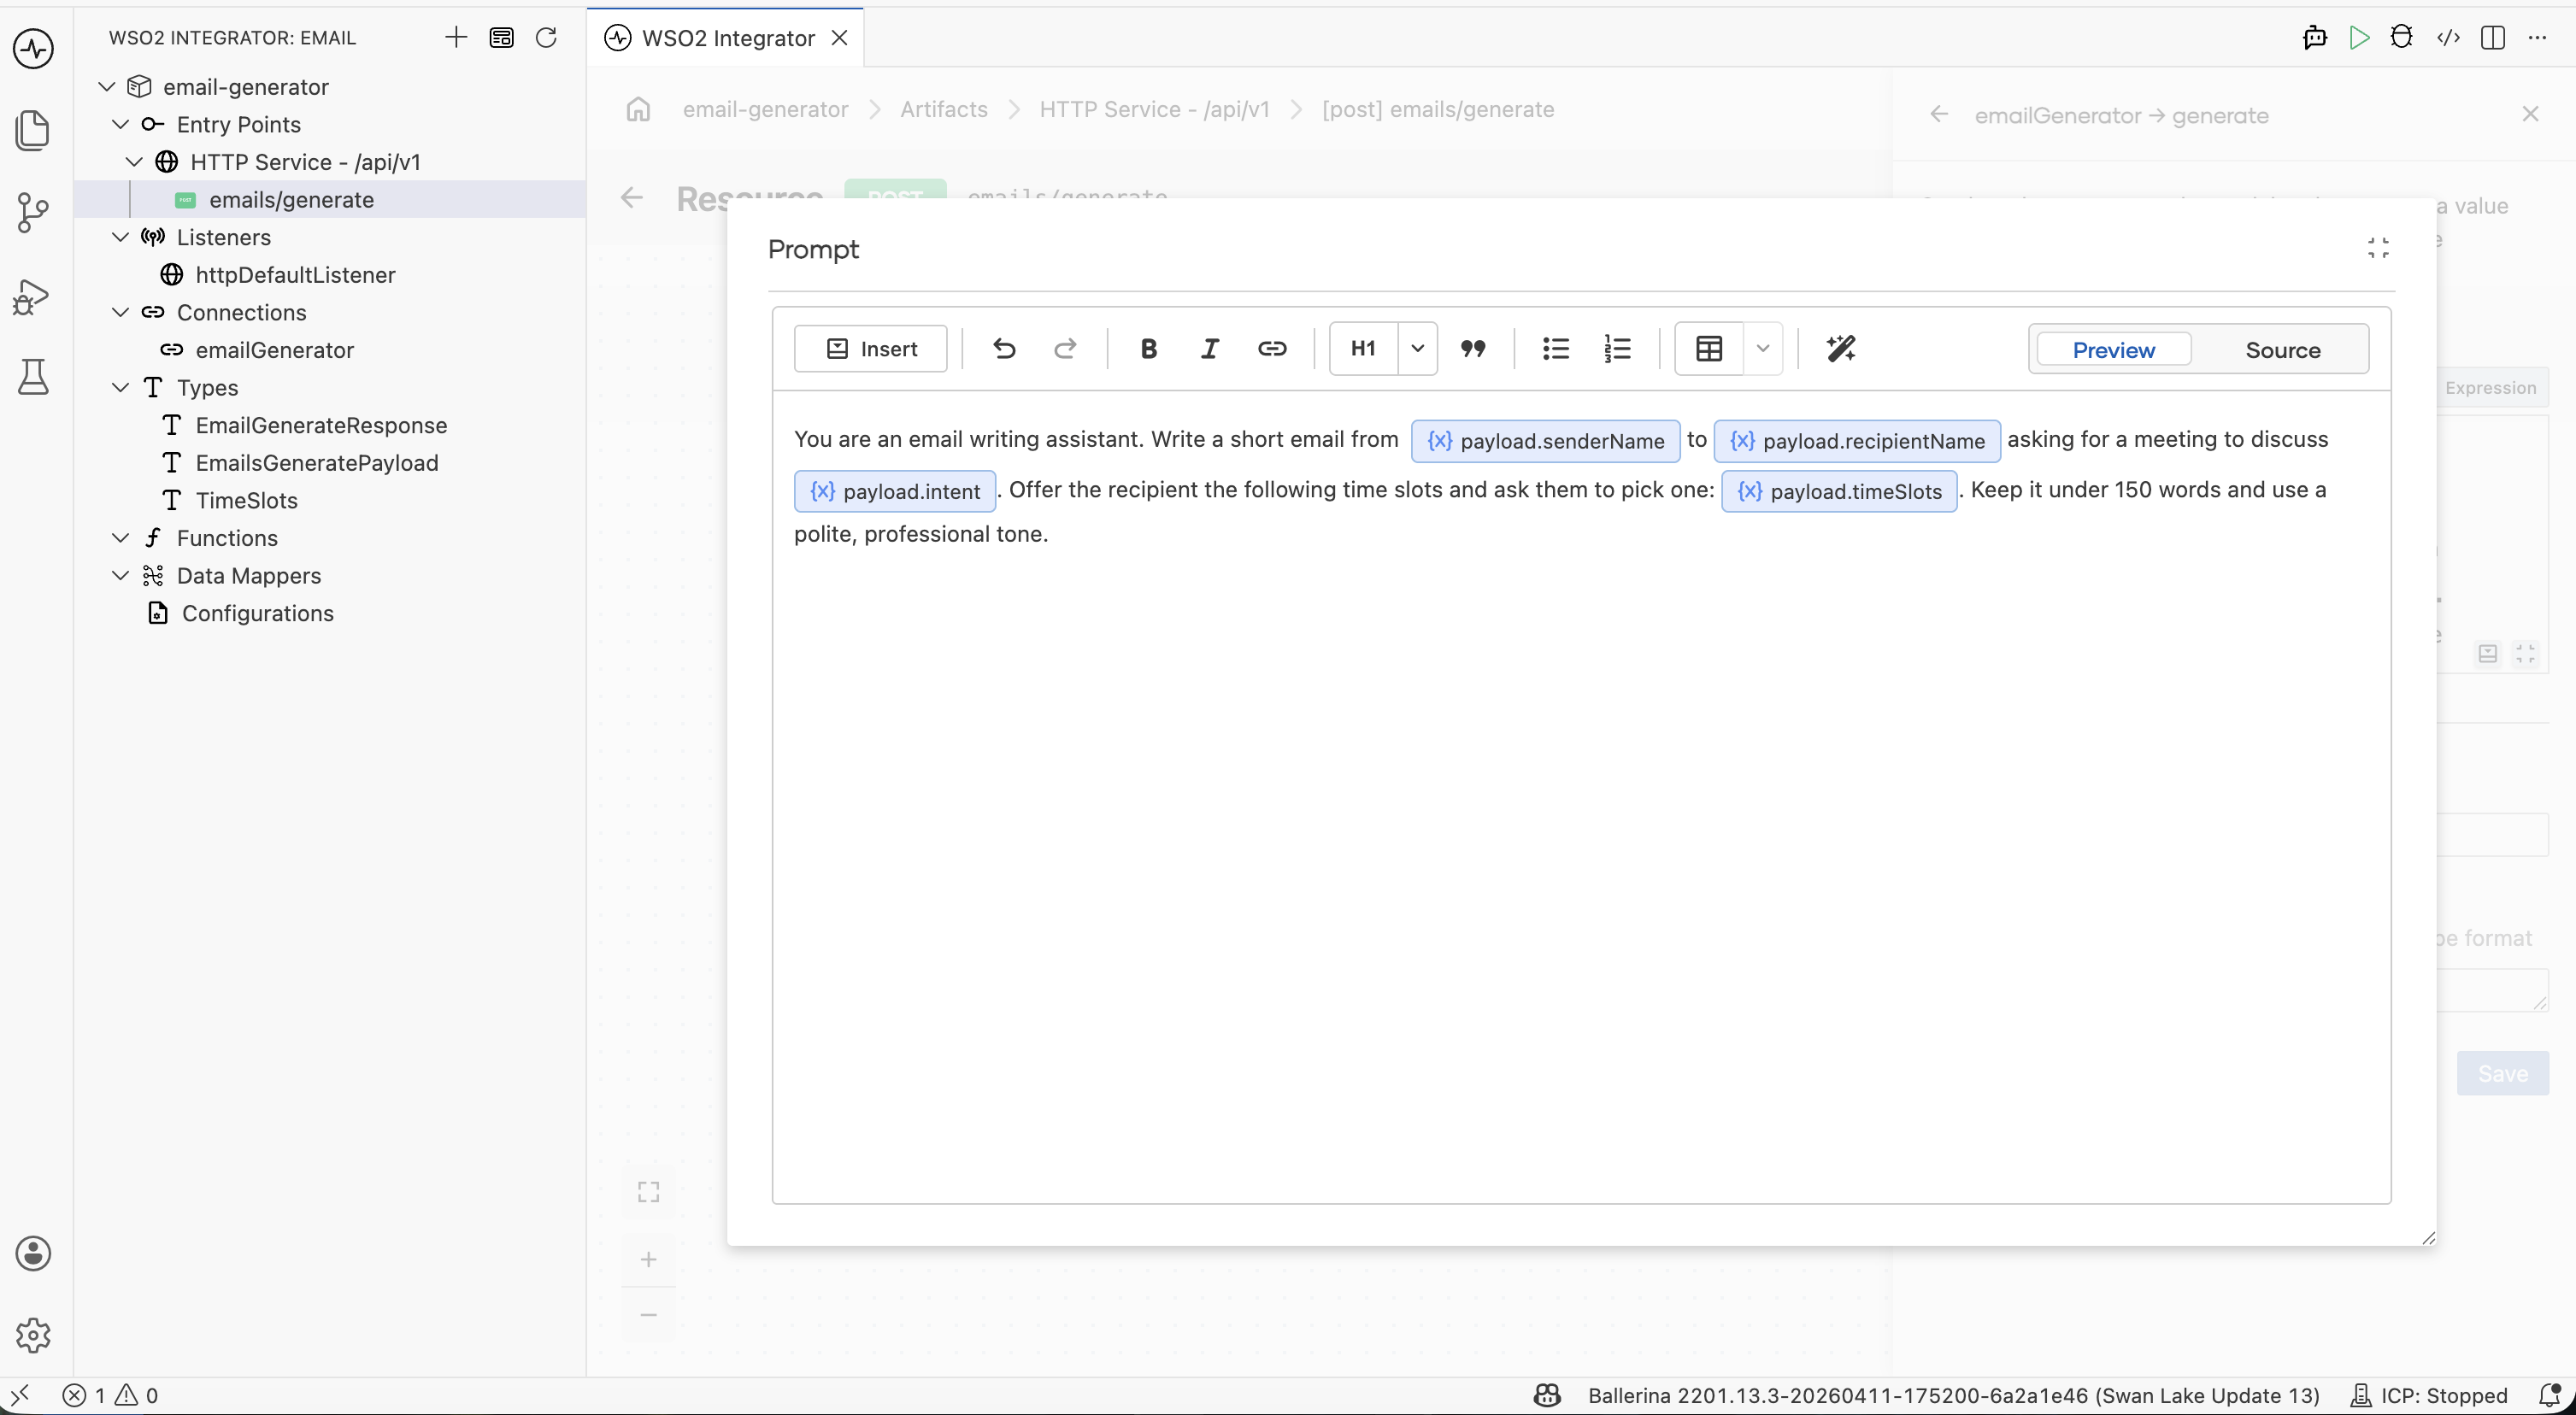
The prompt has three natural parts:
| Role | "You are an email writing assistant." |
| Inputs | ${senderName}, ${recipientName}, ${intent}, ${timeSlots} — pulled in from EmailGeneratePayload. |
| Task | "Write a short email… ask them to pick one… polite, professional tone." |
Why no "return JSON" instruction? The Expected Type field on the next step handles that for you — you don't have to put the schema in the prompt.
Step 3.2: Bind the result and save
In the same form fill in:
| Field | Value |
|---|---|
| Result | generatedEmail |
| Expected Type | EmailGenerateResponse |
Click Save.
The Expected Type is what makes the response come back structured. Without it you'd get a string and have to parse JSON yourself; with it, you get a typed EmailGenerateResponse directly.
Step 3.3: Add a return step
- Click + below the
ai:generatenode. - In Add Node under Control, pick Return.
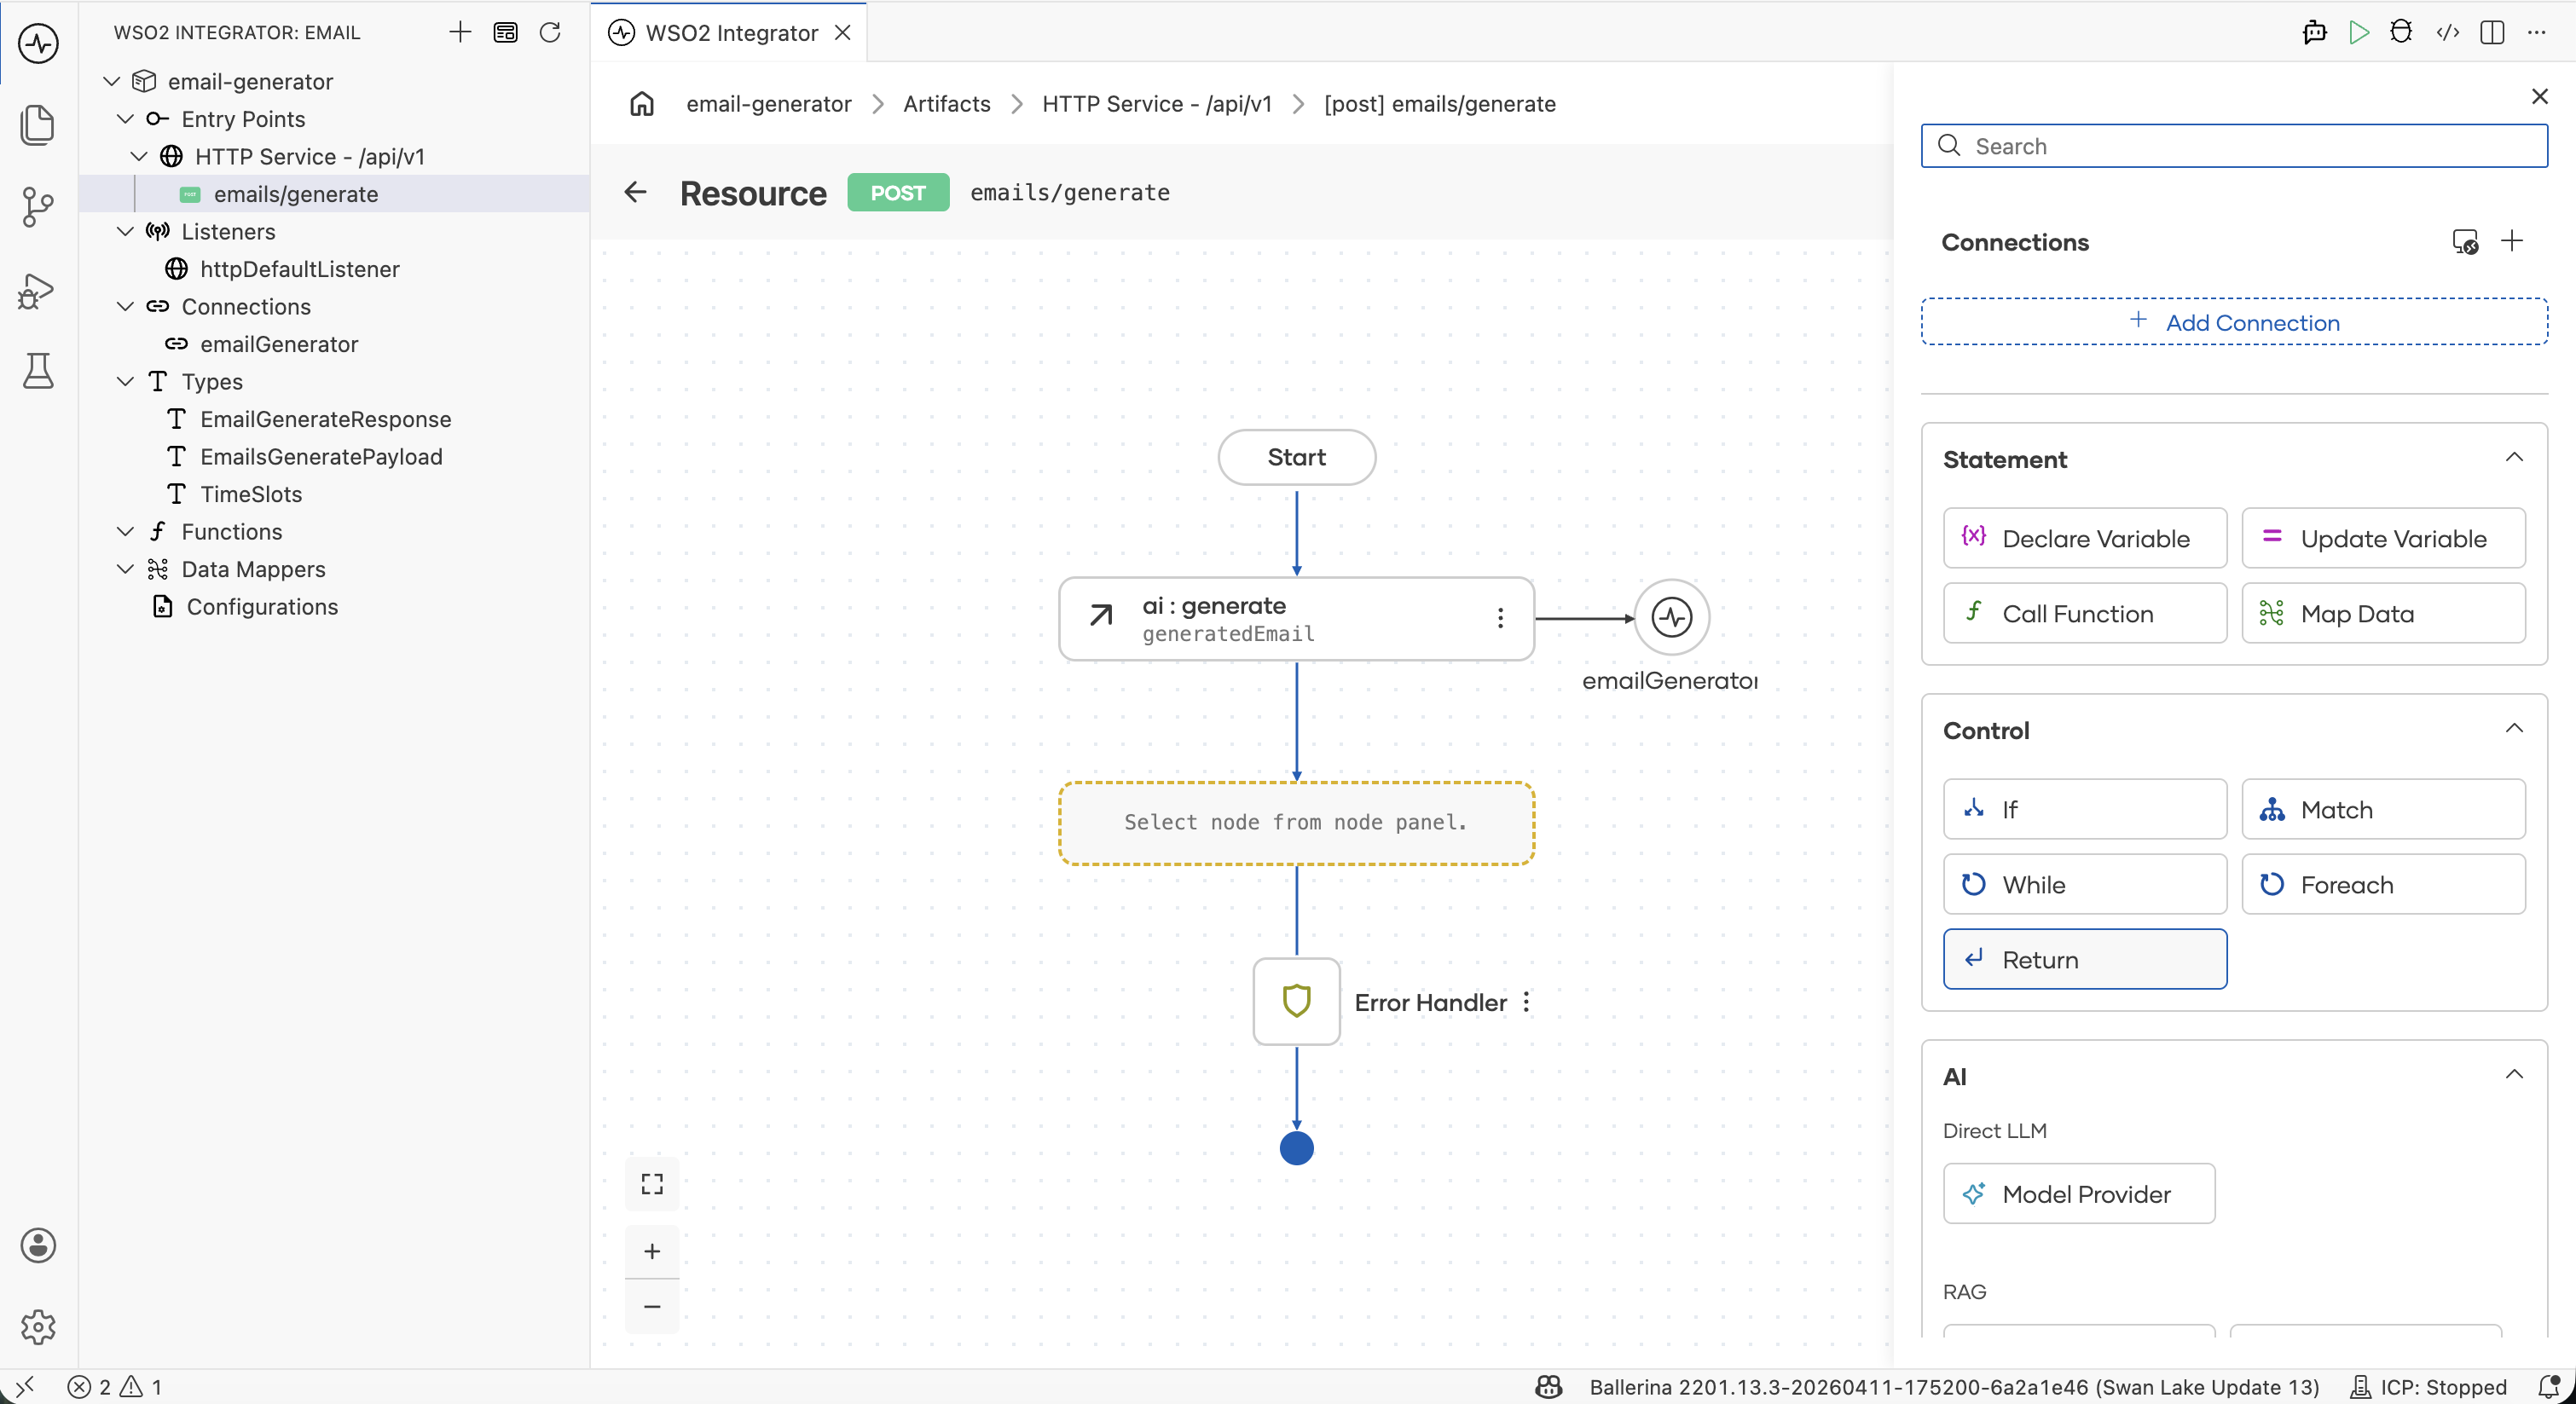
- Set the return expression to
generatedEmailand click Save.
The completed flow has three nodes between Start and Error Handler: the model provider connection, the ai:generate node bound to generatedEmail, and the Return step.

4. Run and test
Step 4.1: Try it
- Click Try It at the top right.
- When prompted, click Run Integration to start the service.
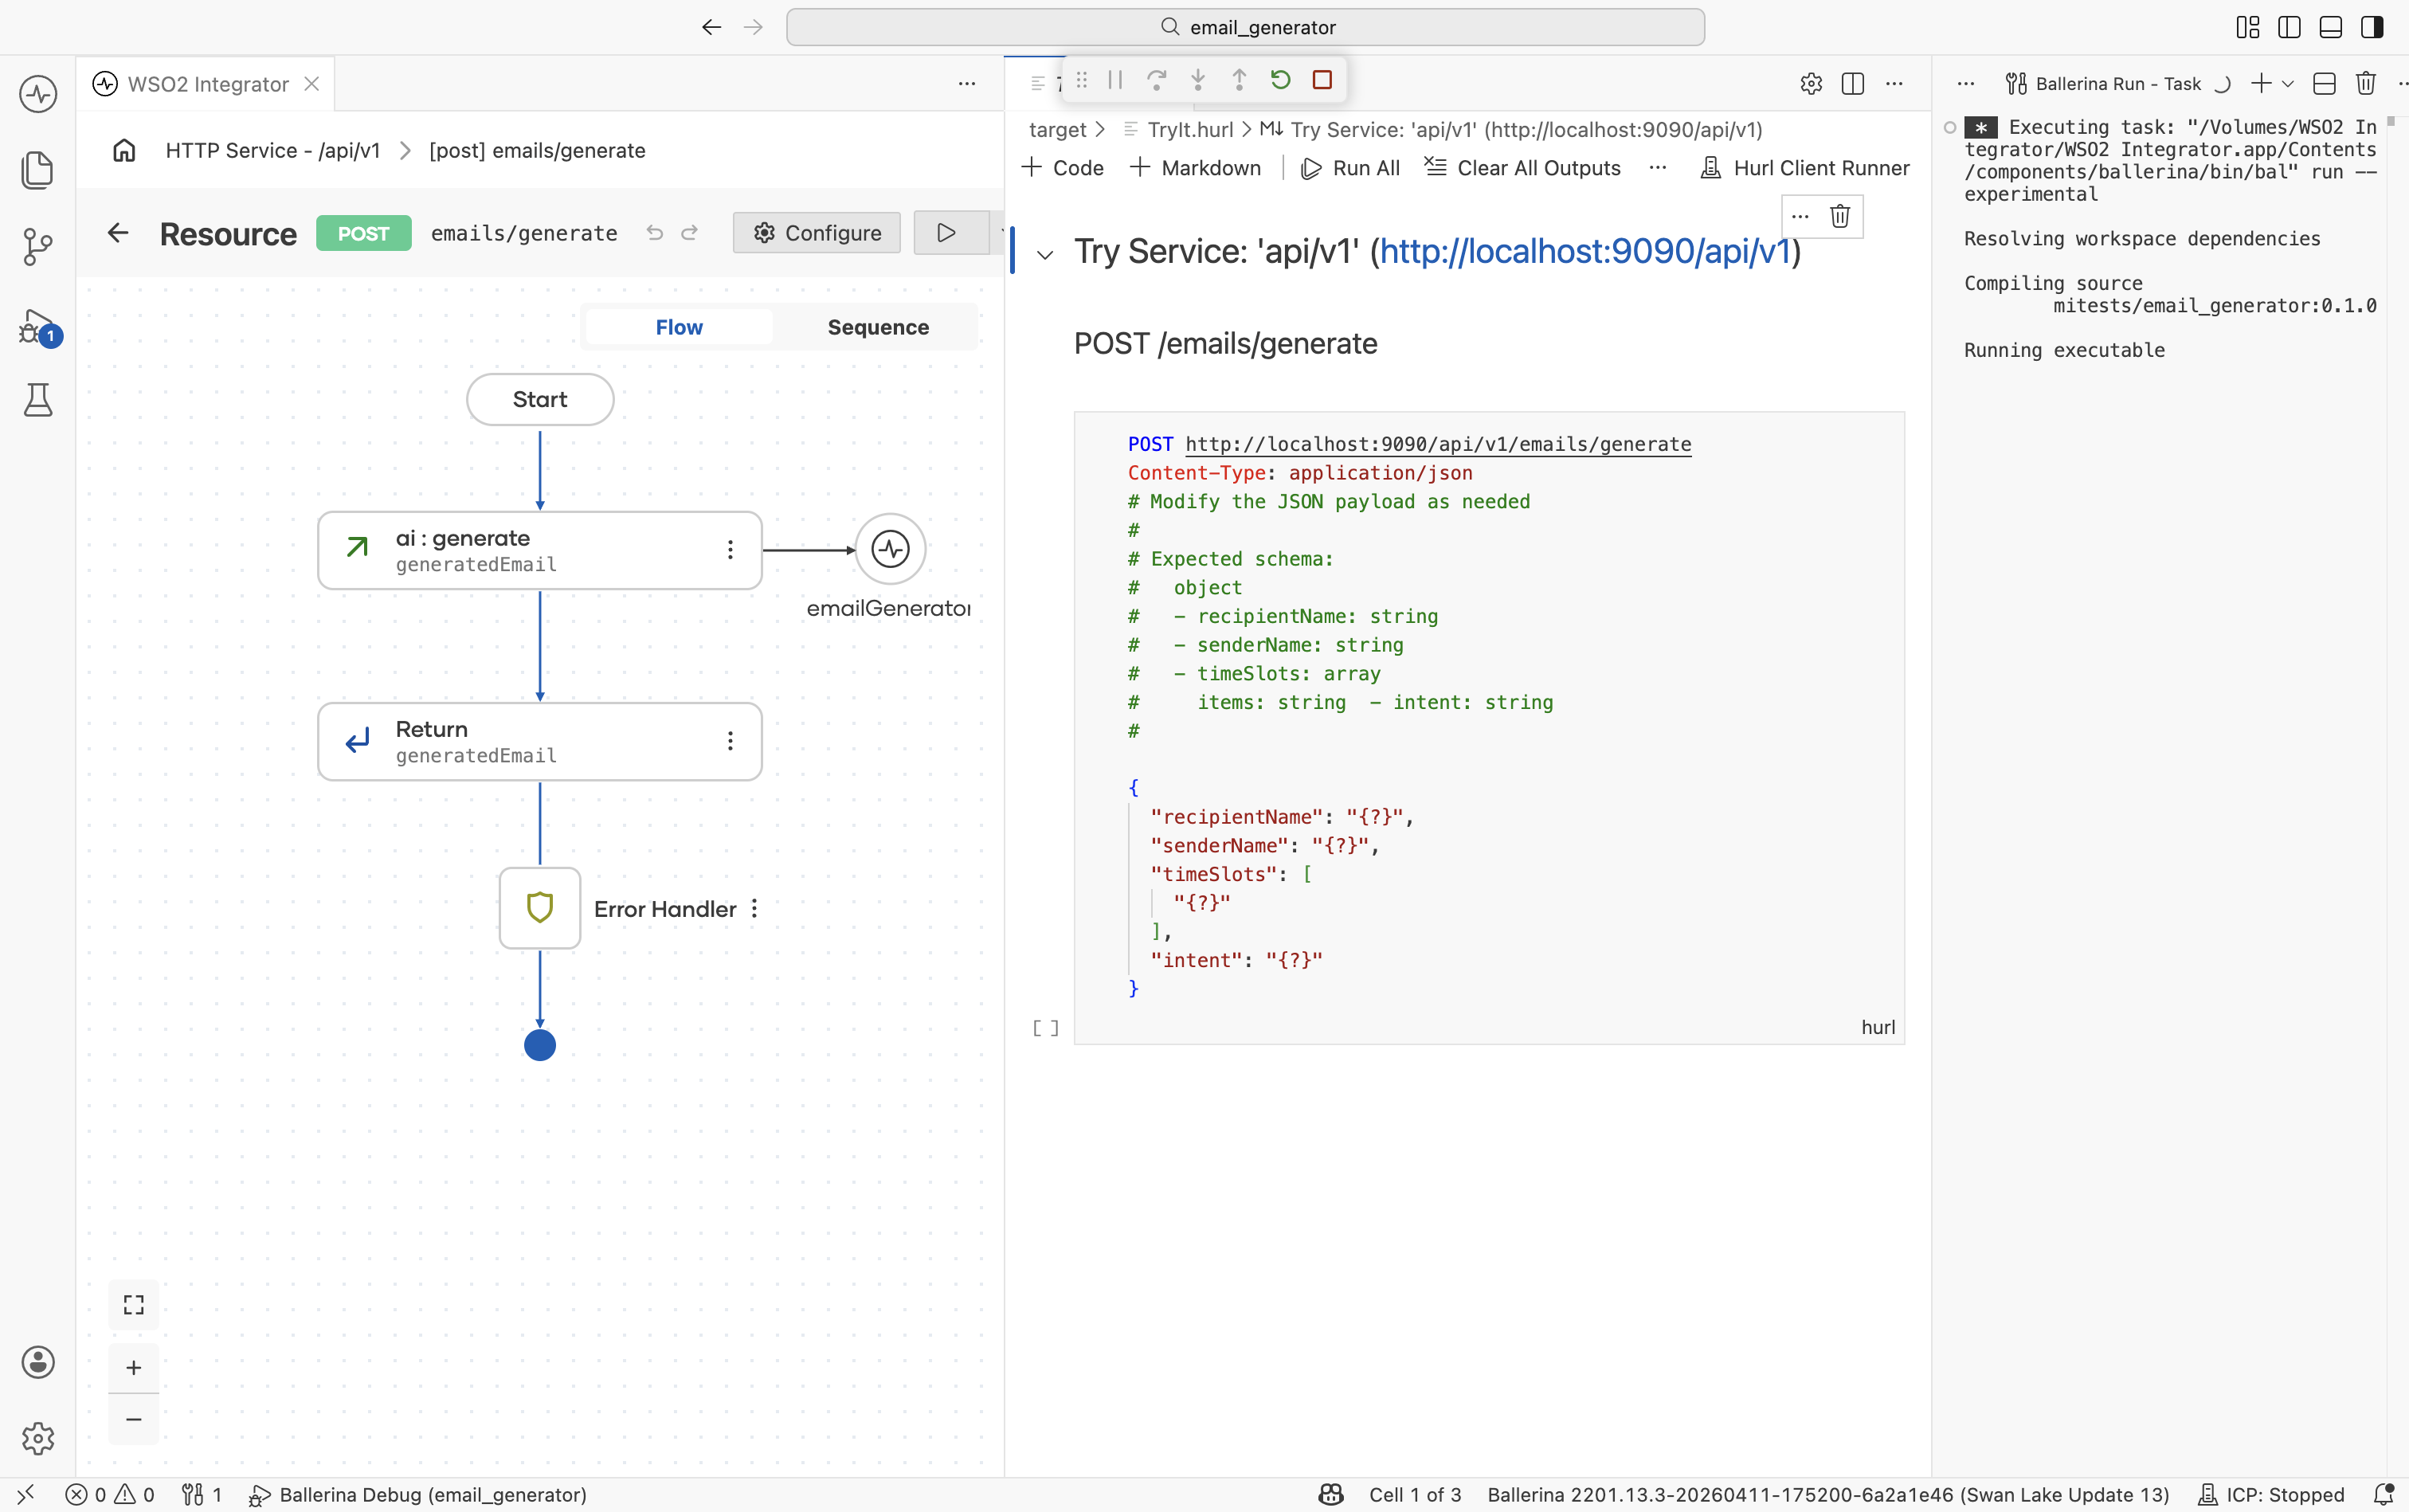
The Try Service panel opens with the POST /emails/generate endpoint and the request schema.
Step 4.2: Send a request
Paste the following body and click Run:
{
  "recipientName": "Jane Doe",
  "senderName": "James Smith",
  "timeSlots": ["2026-01-18 10:00 AM", "2026-01-21 11:00 AM"],
  "intent": "Discuss a new project"
}
Step 4.3: Read the response
The service responds with 201 Created (Ballerina's default for POST resources — see Step 1.3) and a JSON body matching EmailGenerateResponse:
{
  "subject": "Request for Meeting to Discuss New Project",
  "content": "Dear Jane Doe,\nI hope this message finds you well. I am reaching out to see if we could schedule a 30-minute meeting next week to discuss an exciting new project..."
}
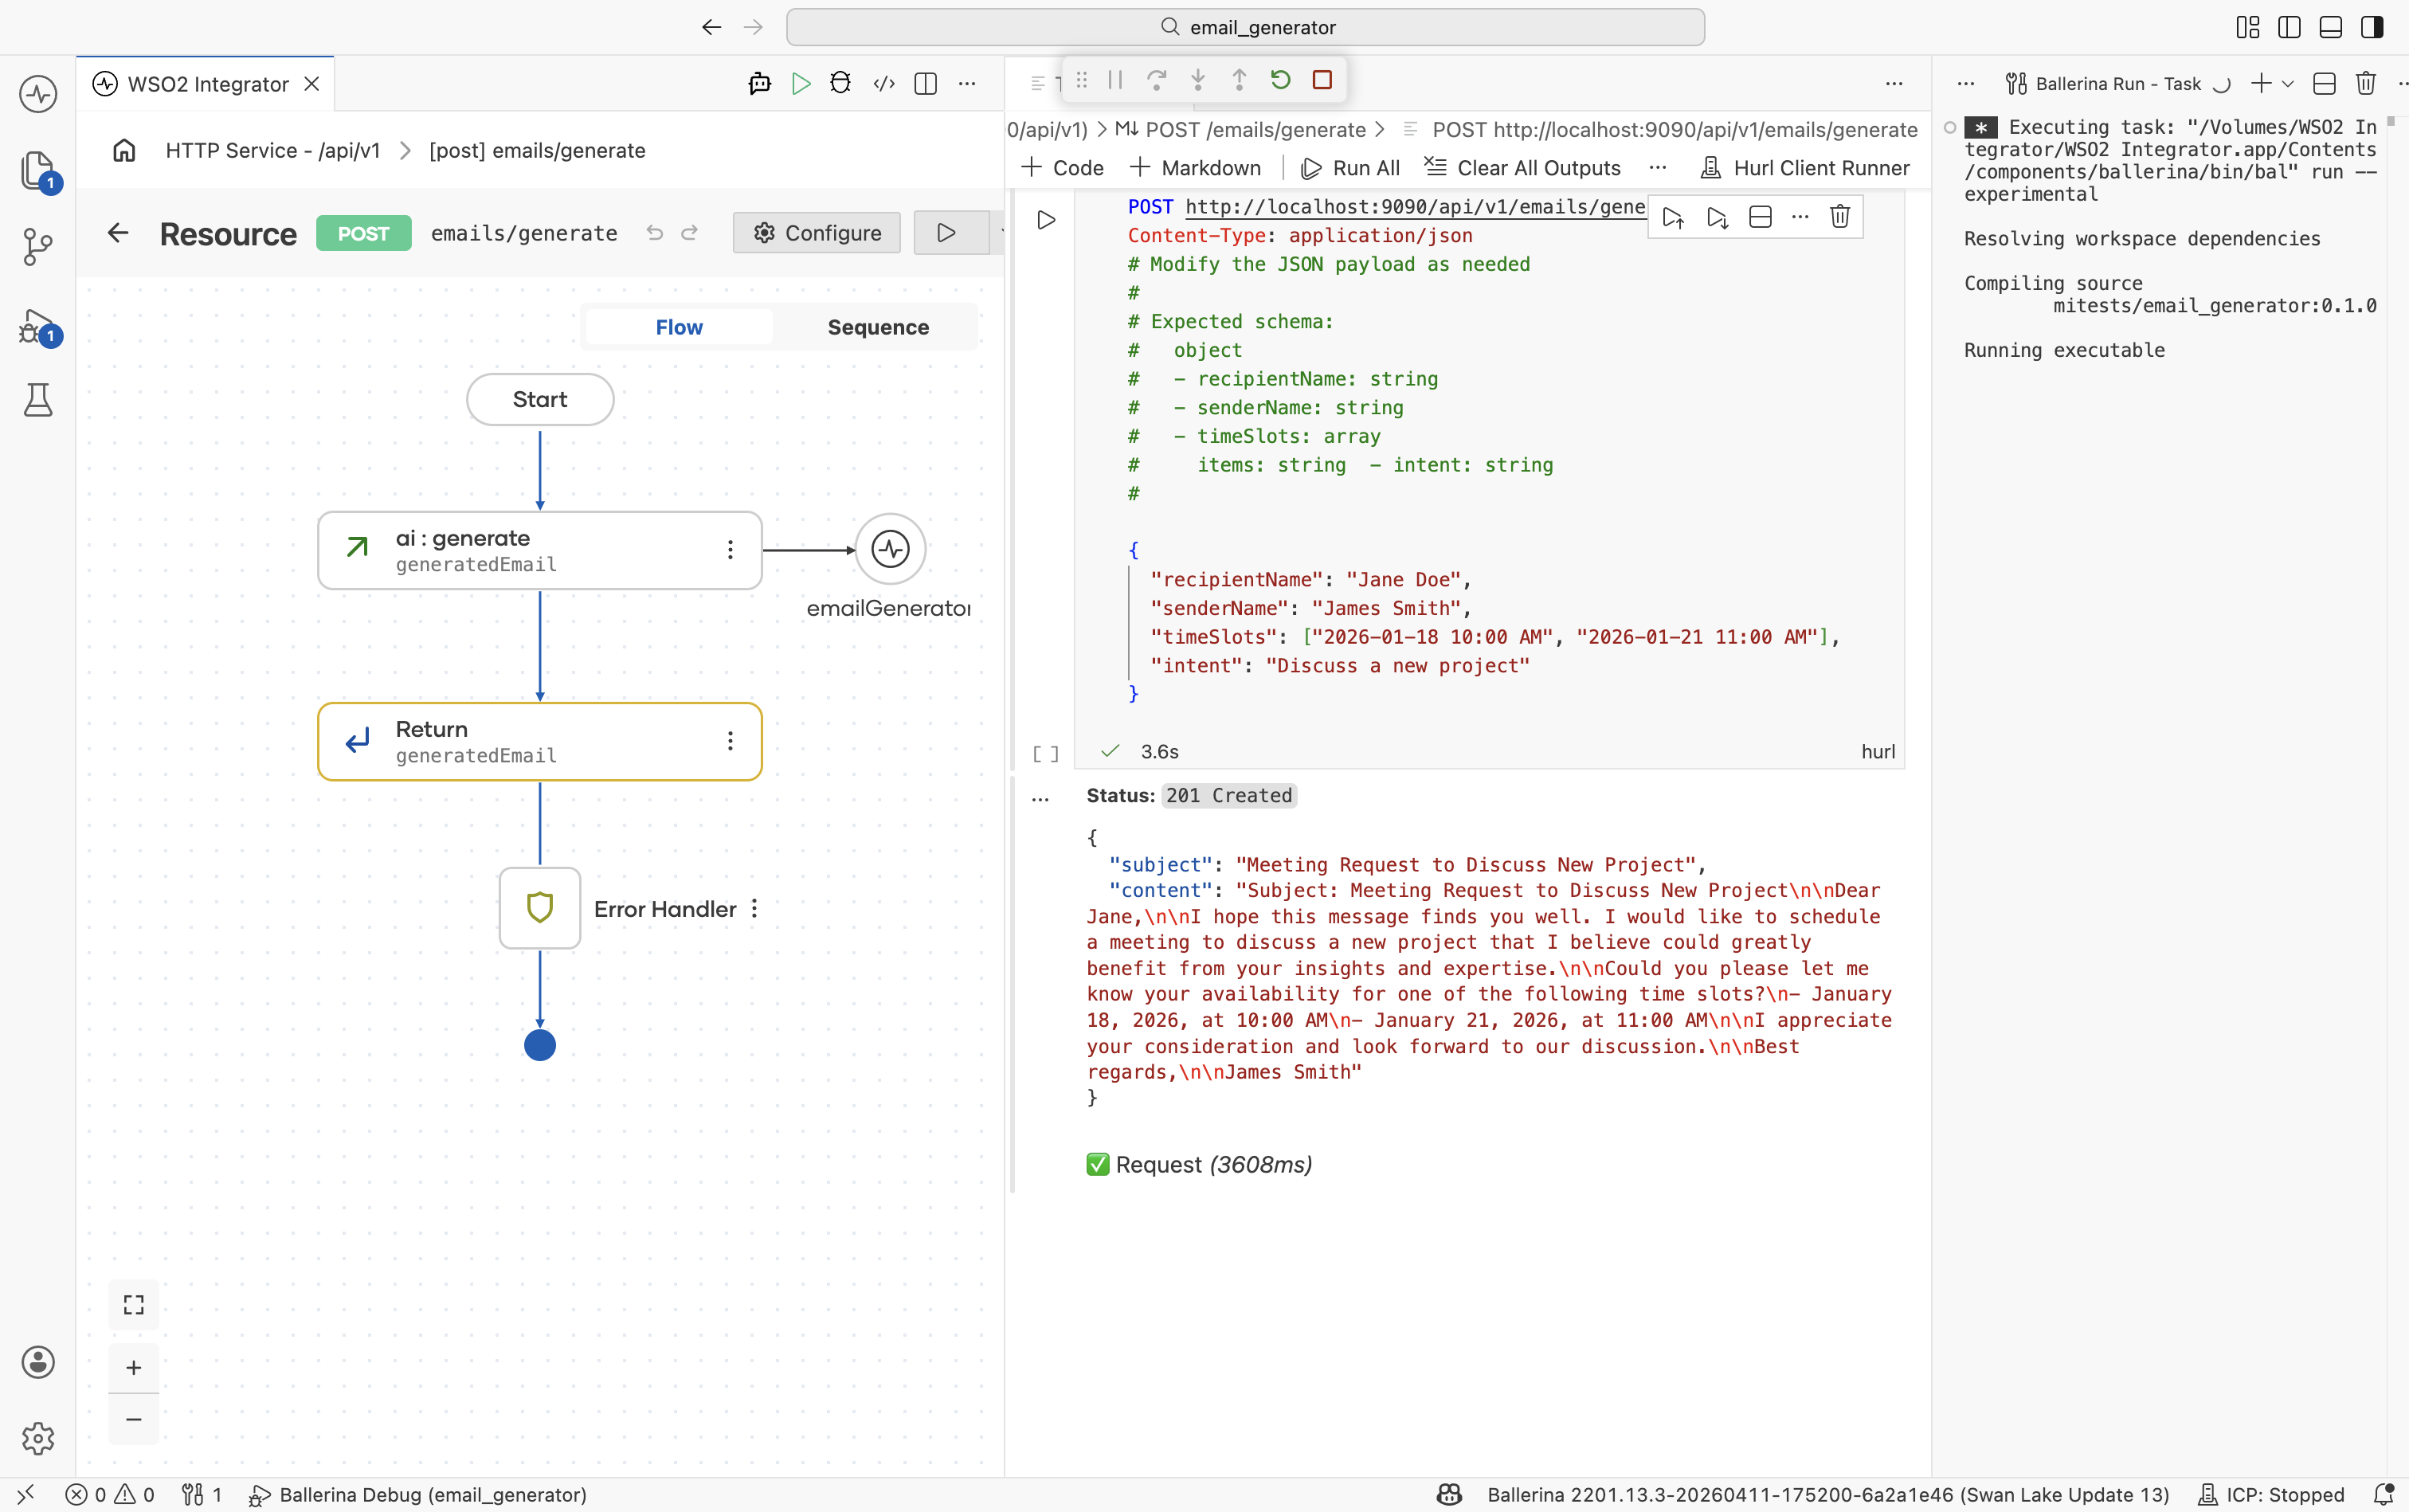
The LLM produced a complete, professionally written email — subject and body — exactly in the shape declared by EmailGenerateResponse.
What's next
- Direct LLM Calls reference -- the single-page feature reference covering the
generatenode, prompt editor, and typed responses. - Model Providers -- switch the LLM provider for production (init params, supported models, advanced HTTP configs for OpenAI, Azure, Anthropic, Vertex, Mistral, DeepSeek, Ollama, OpenRouter).