Direct LLM Calls
A direct LLM call is the simplest way to use AI in WSO2 Integrator. You add a node to a flow, write a prompt, and get a typed response back. No agent loop, no memory, no tools. One round-trip.
This page is a single, end-to-end reference for everything you need to make that call work in WSO2 Integrator: adding a model provider, dropping a generate node, writing the prompt, and binding the response to a Ballerina type.
See the Email Generator with Direct LLM tutorial. It builds a POST /emails/generate service end-to-end using everything described on this page.
When to use direct LLM calls
| Use direct LLM when… | Look elsewhere when… |
|---|---|
| You need a single-shot LLM call inside a flow. | You want a typed function with an English body. Use Natural Functions. |
| You want full control over the prompt at the point of use. | The same prompt is reused all over the codebase. Wrap it in a natural function instead. |
| The LLM doesn't need to call any tools or remember earlier turns. | The task needs tool calls, multi-step reasoning, or conversation history. Use an AI Agent. |
| You need to ground answers in your own documents. | Add RAG and pass the retrieved context into the prompt. |
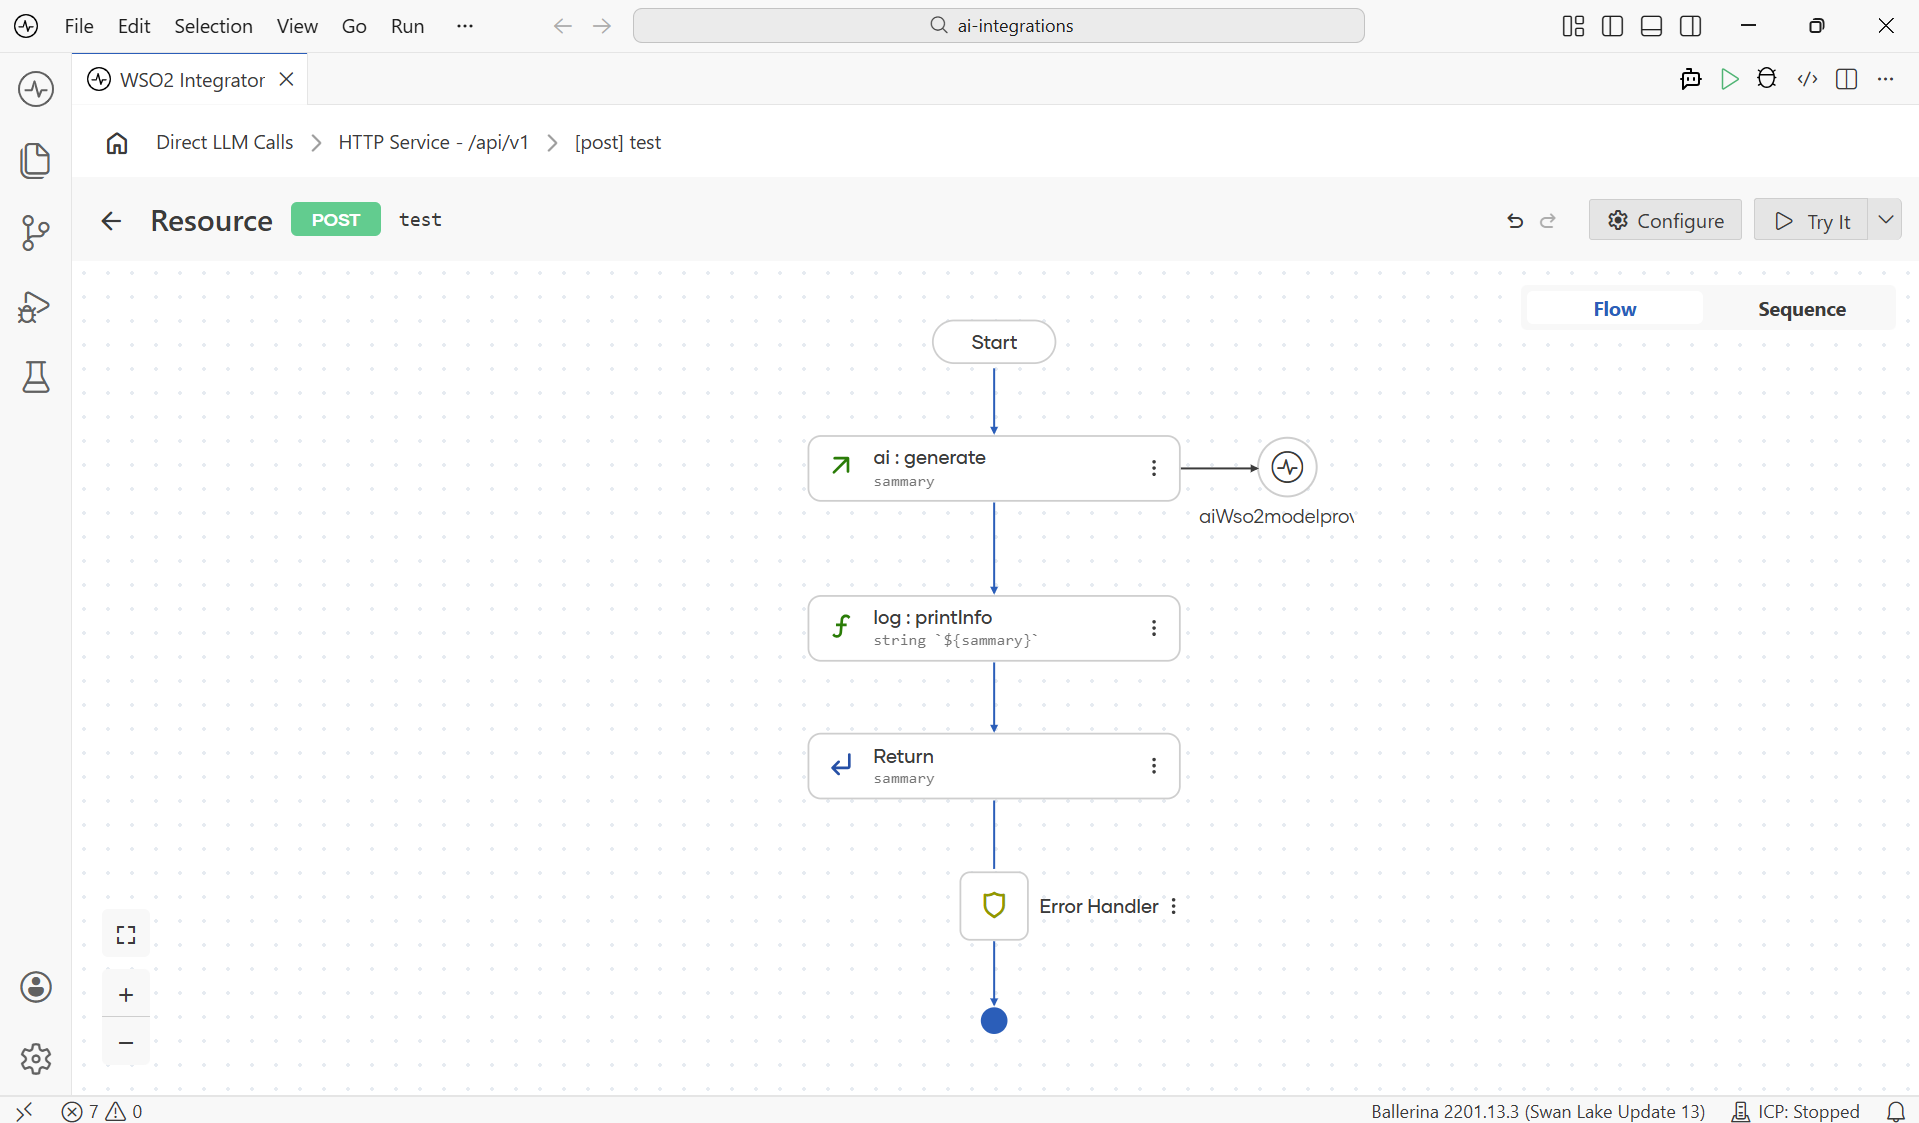
How a direct LLM call looks in a flow
A typical flow with a direct LLM call has a generate node sitting between your inputs and the next step, with a small wire to the model-provider connection on the right.
To build this you do three things, in order:
- Pick a Model Provider connection. You can use the Default WSO2 Model Provider, or see Model Providers for other providers (OpenAI, Anthropic, Azure OpenAI, etc.).
- Add the Generate Node, the call itself.
- Write the prompt and pick the expected type.
The rest of this page walks each step in order.
If your project does not have a model provider yet, head over to Model Providers first. The fastest one is the Default WSO2 Model Provider. No API key required, just a one-time WSO2 sign-in.
The generate node
The generate node is the workhorse of direct LLM calls. It sends a single prompt to a model provider and binds the response to a variable.
Where to find it
The generate action lives on the model-provider connection itself, not as a standalone node under AI. Once a provider exists, open the Model Providers panel on the right side of the flow editor, expand the connection, and click Generate.

The configuration form
When the form opens, three fields are all you need: the Prompt, the Result variable, and the Expected Type. Add the prompt that describes the work, pick the type you want the response in for your use case, and click Save.
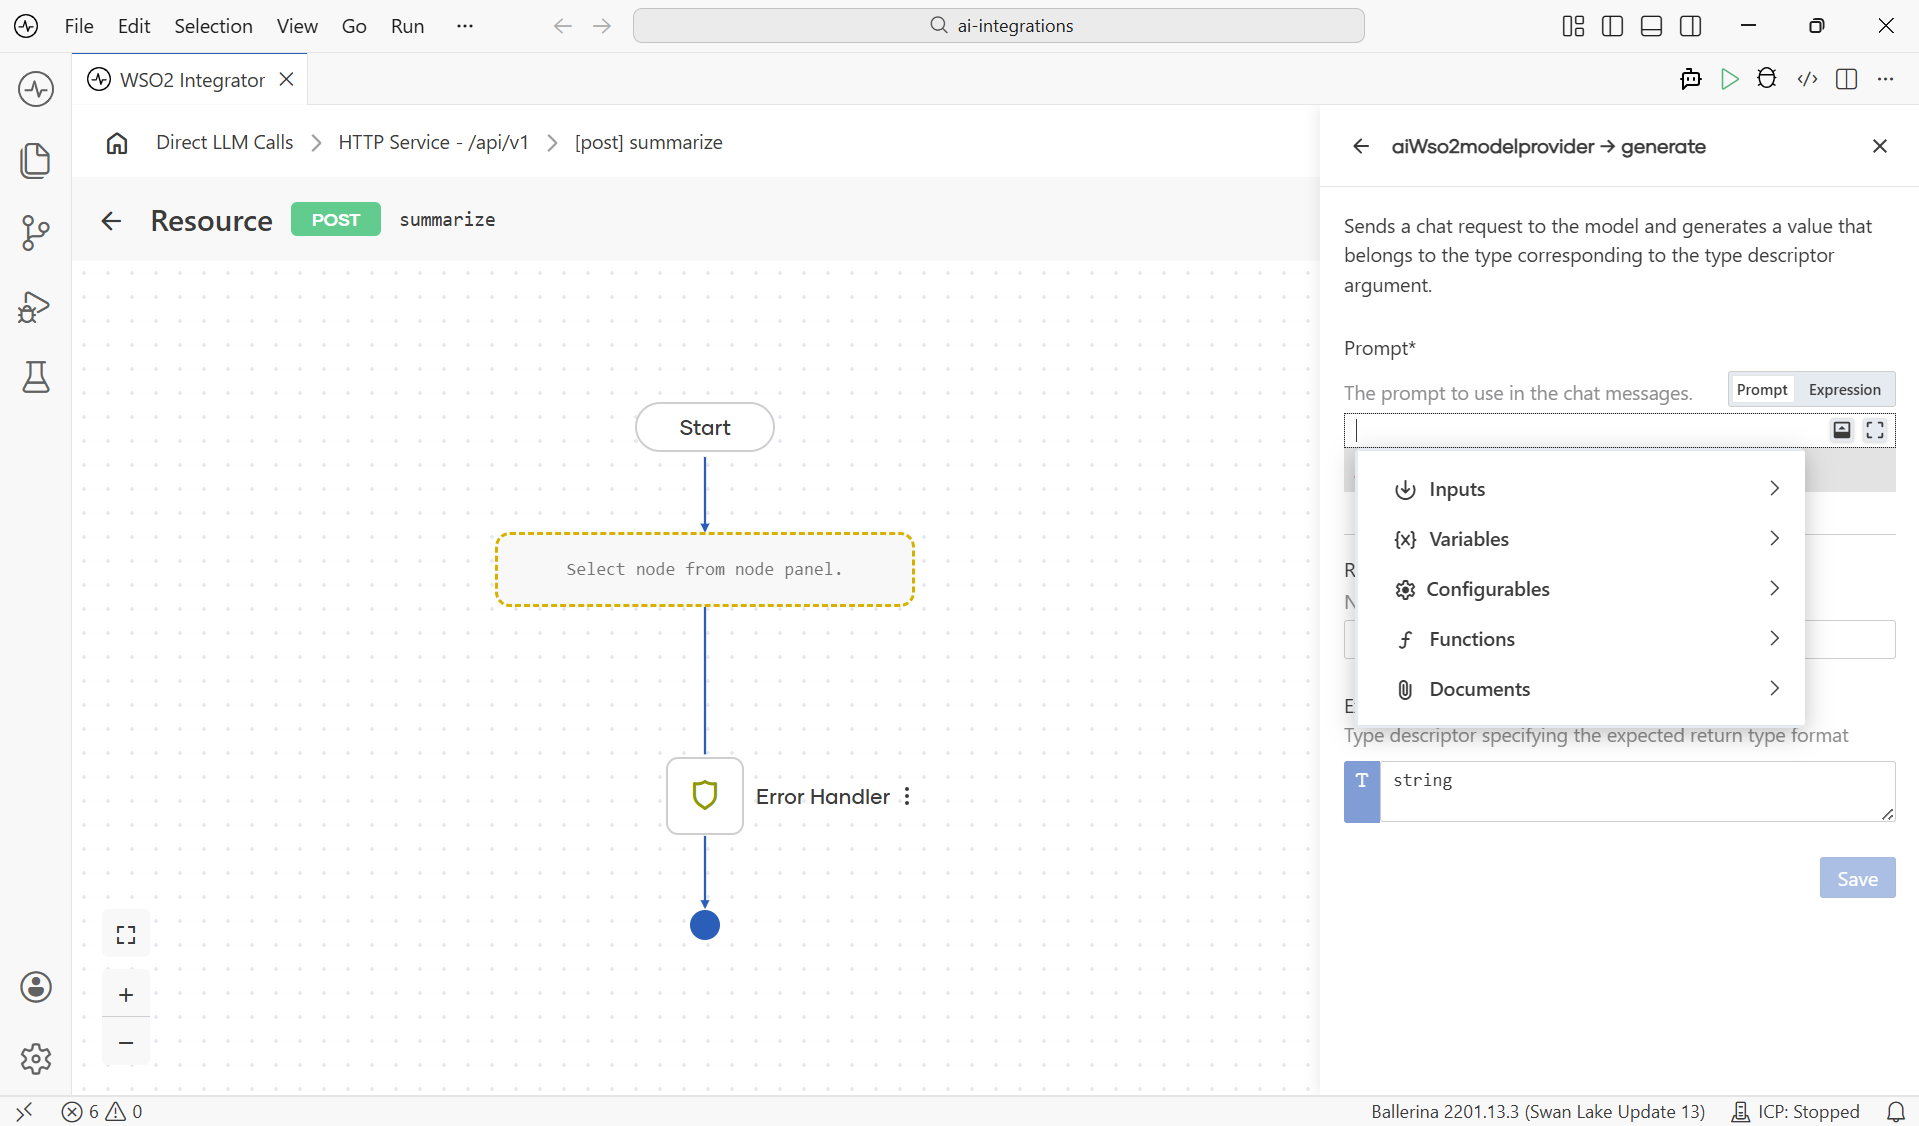
| Field | Required | What it does |
|---|---|---|
| Prompt | Yes | The instruction sent to the LLM. Detailed in The prompt editor. |
| Result | Yes | The variable name where the response is stored. Used by later nodes. |
| Expected Type | Yes | The Ballerina type the response should be parsed into. |
The Expected Type field is what makes the response come back as a typed value. A string, an int, a record, an array. Not a blob of text you have to parse yourself. The runtime derives a JSON schema from the type, asks the model to fill it, parses the response back, and hands the typed value to the next node. You don't need to write any schema instructions in the prompt. The type drives that automatically.
There are no per-call overrides on the generate node. Anything you'd tune (temperature, max tokens, and so on) lives on the model provider connection and applies to every call that uses it. See Model Providers for the full list of advanced configurations per provider.
After saving
Click Save and the node lands in the flow as <provider>:generate (for example ai:generate for the WSO2 default provider, openai:generate for OpenAI, azure:generate for Azure OpenAI), with a small connection wire to its model-provider node on the right. From here you can chain follow-up nodes the same way you would after any other call. (See the canvas screenshot at the top of this page.)
The prompt editor
The Prompt is the instruction you send to the LLM. Click any Prompt field and WSO2 Integrator opens a rich-text editor in a dialog. The toolbar gives you the usual formatting tools (Insert, undo/redo, Bold, Italic, Link, headings, quote, lists, tables, magic-wand AI assist) and a Preview / Source toggle.
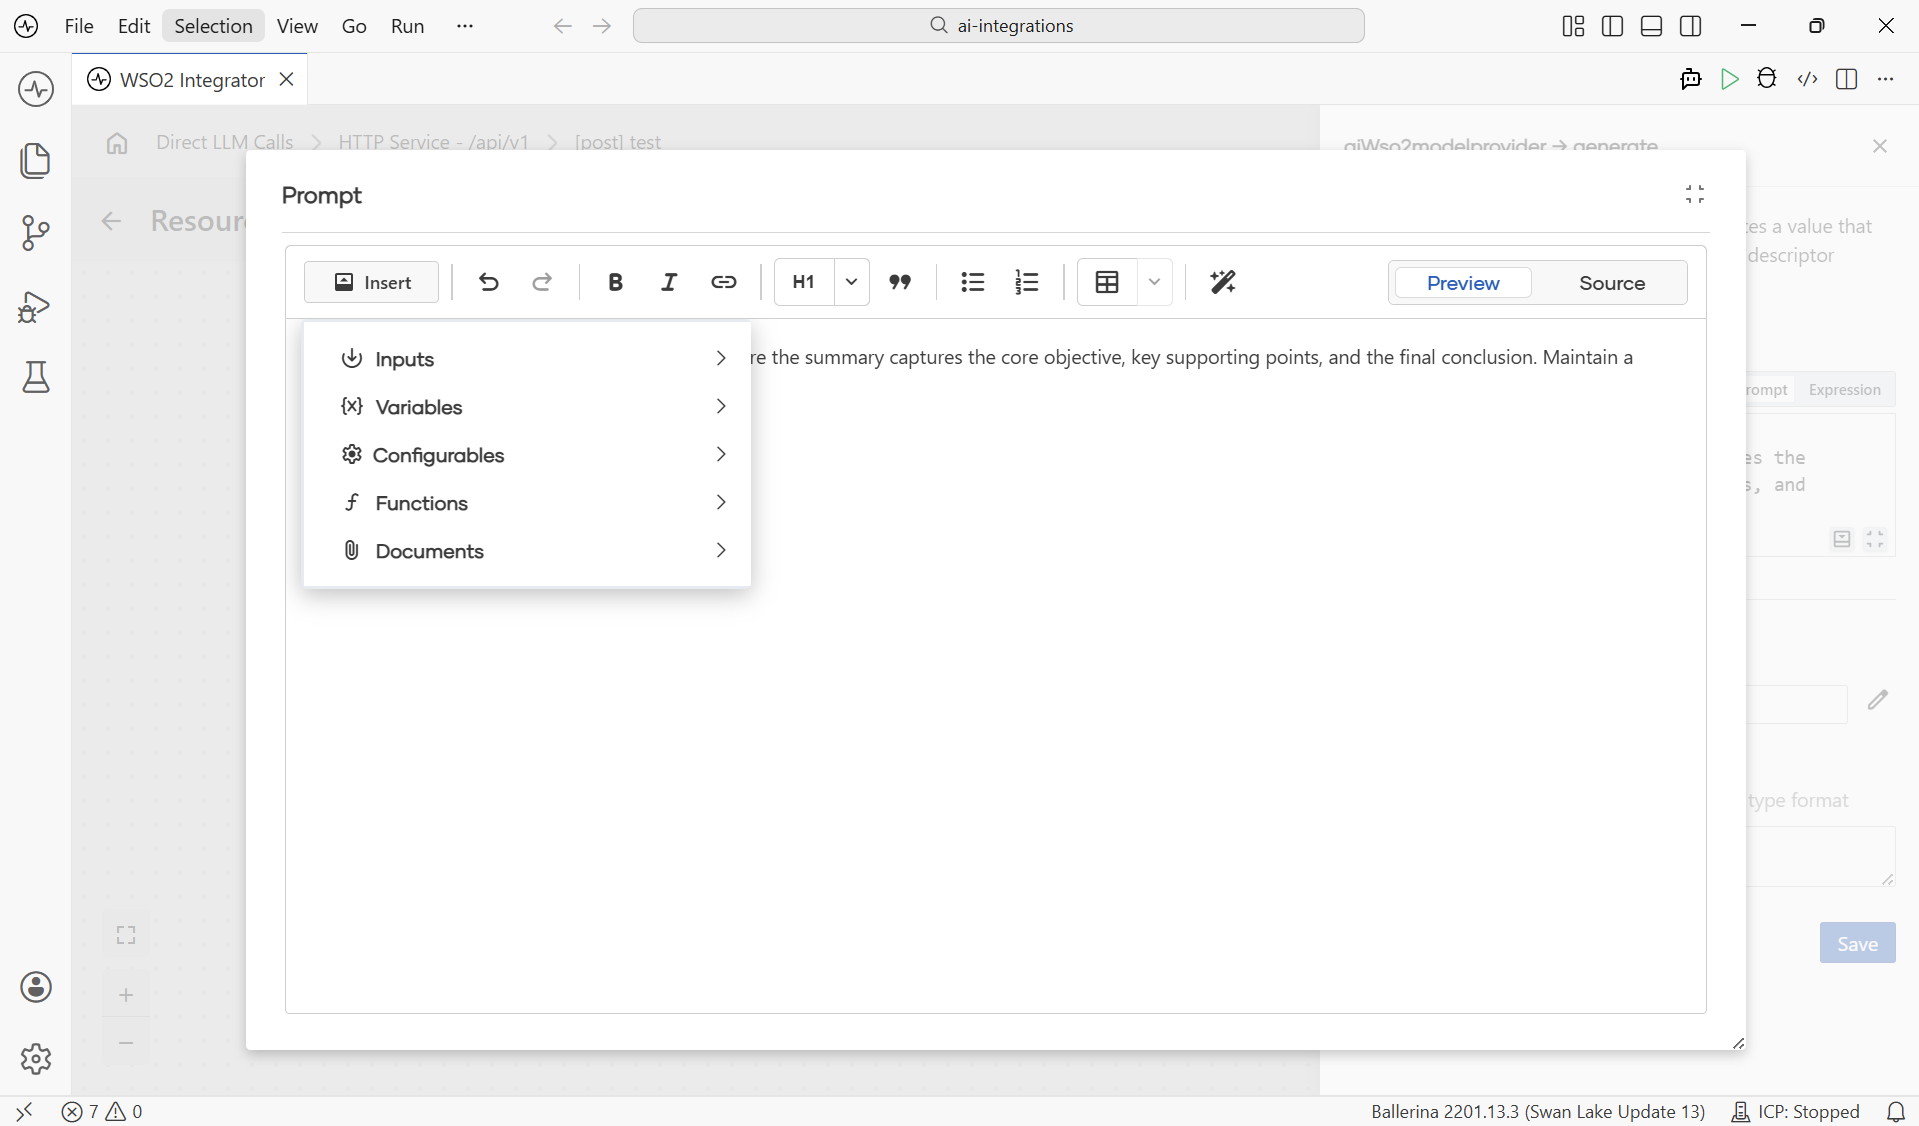
The Insert menu is the bridge between the prompt and the rest of your project. Open it to pull in values from anywhere in scope: request inputs, flow variables, configurables, project functions, or RAG documents.
| Element | What it does |
|---|---|
| Insert | Pull a value into the prompt: Inputs (resource path/query/payload params), Variables (anything in scope in the flow), Configurables (Config.toml values), Functions (calls into project functions), Documents (RAG retrieval results). |
| Bold / Italic / Link | Standard text formatting (rendered as plain text in the prompt). |
| H1 / Quote / Lists / Tables | Structure the prompt visually. Helpful for long prompts. |
| Magic-wand AI assist | Suggests a prompt scaffold for you when you describe the task in one line. |
| Preview / Source | Toggle between the rendered preview and the raw template source. |
What's next
- Email Generator with Direct LLM (Tutorial) — build a complete
POST /emails/generateservice from scratch using everything on this page. - Model Providers — switch the LLM provider for production; tune temperature, max tokens, retries.
- Natural Functions — when the same prompt is used in many places, package it as a typed function.
- RAG — ground the model's answers in your own documents.
- AI Agents — if the task needs tools or multi-turn reasoning.