Building an HR Knowledge Base with RAG
Build a complete HR retrieval-augmented generation pipeline in the WSO2 Integrator visual designer. You'll create two artifacts in one integration: an Automation that ingests HR policy documents into a vector knowledge base, and an HTTP Service that answers employee questions over HTTP, grounded in the ingested chunks.
What you'll learn:
- How to load and ingest documents into a vector knowledge base.
- How to configure a vector store, embedding provider, and chunker visually.
- How to retrieve relevant chunks and ground an LLM response with them.
- How to expose the result over HTTP as a reusable service.
Time: 30 minutes
- An HR policy document in plain-text form (for example, a leave policy or code of conduct). A short
.mdfile is enough to follow the tutorial.
What you'll build
The Automation flow walks documents through a chunker, embedding model, and vector store. The query flow walks an employee question through retrieval, augmentation, generation, and a JSON response.
Step 1: Open the integration
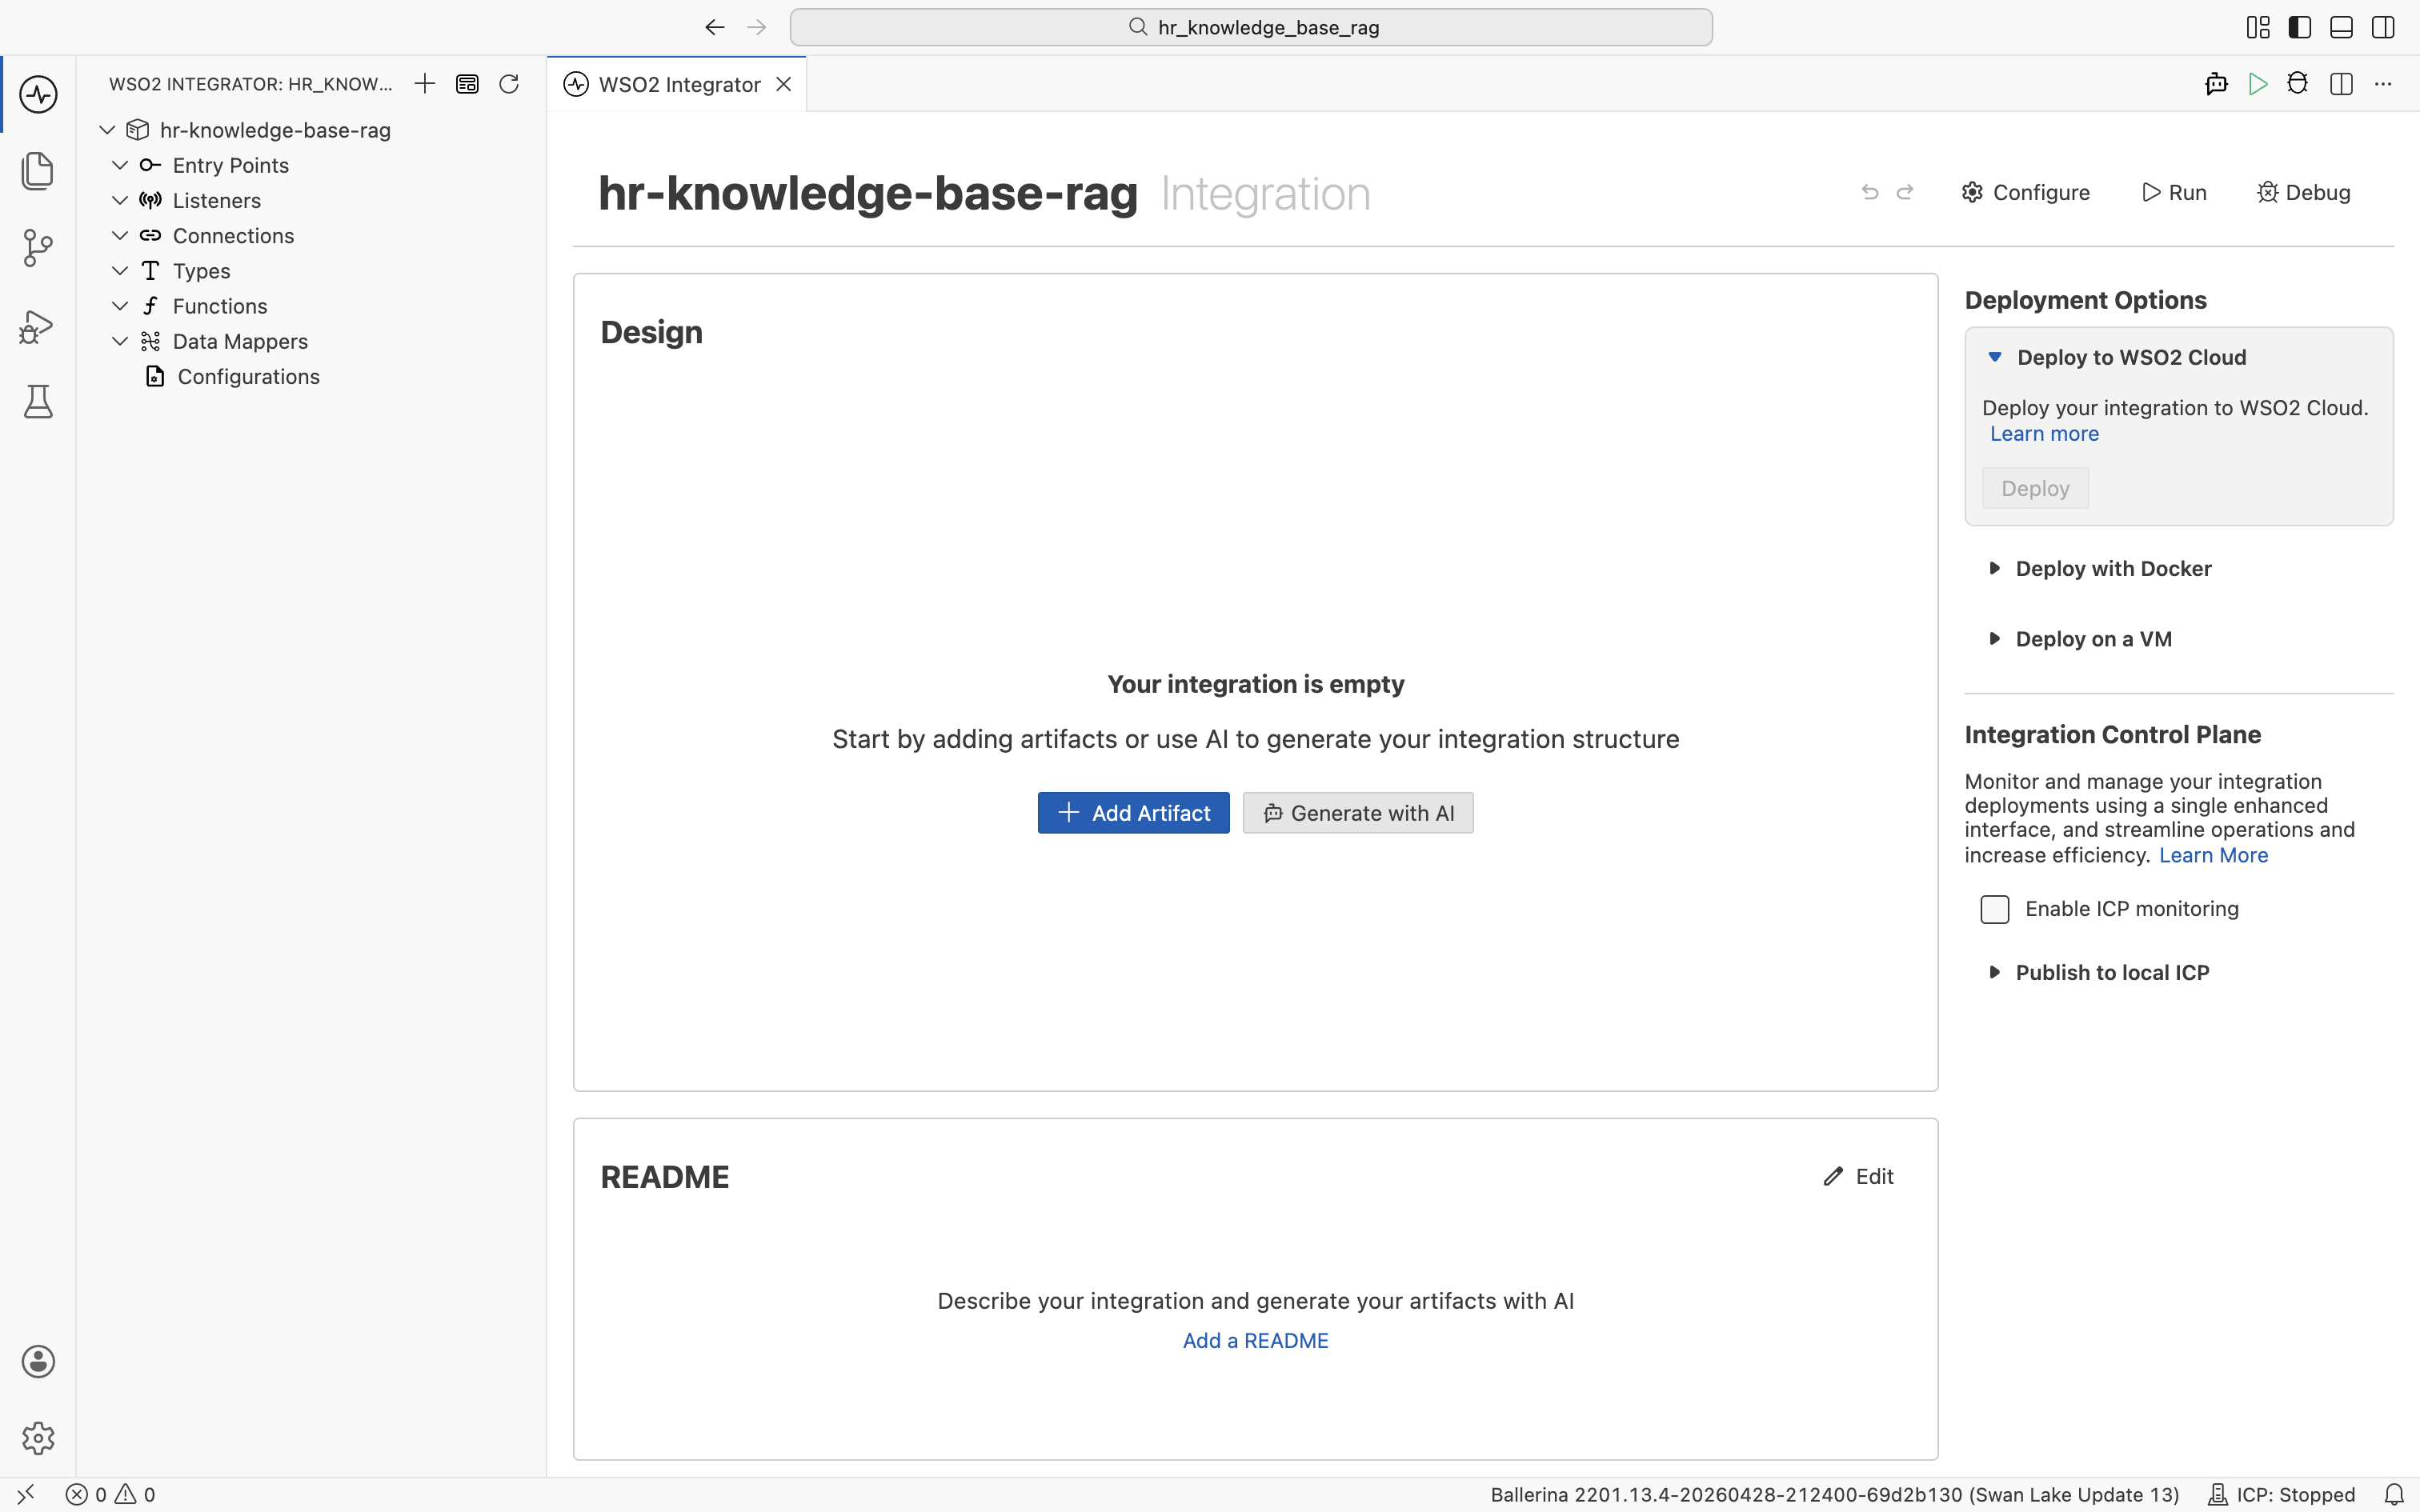
Open or create an integration project in WSO2 Integrator. The empty integration view shows an + Add Artifact button. That's your starting point for the whole tutorial.
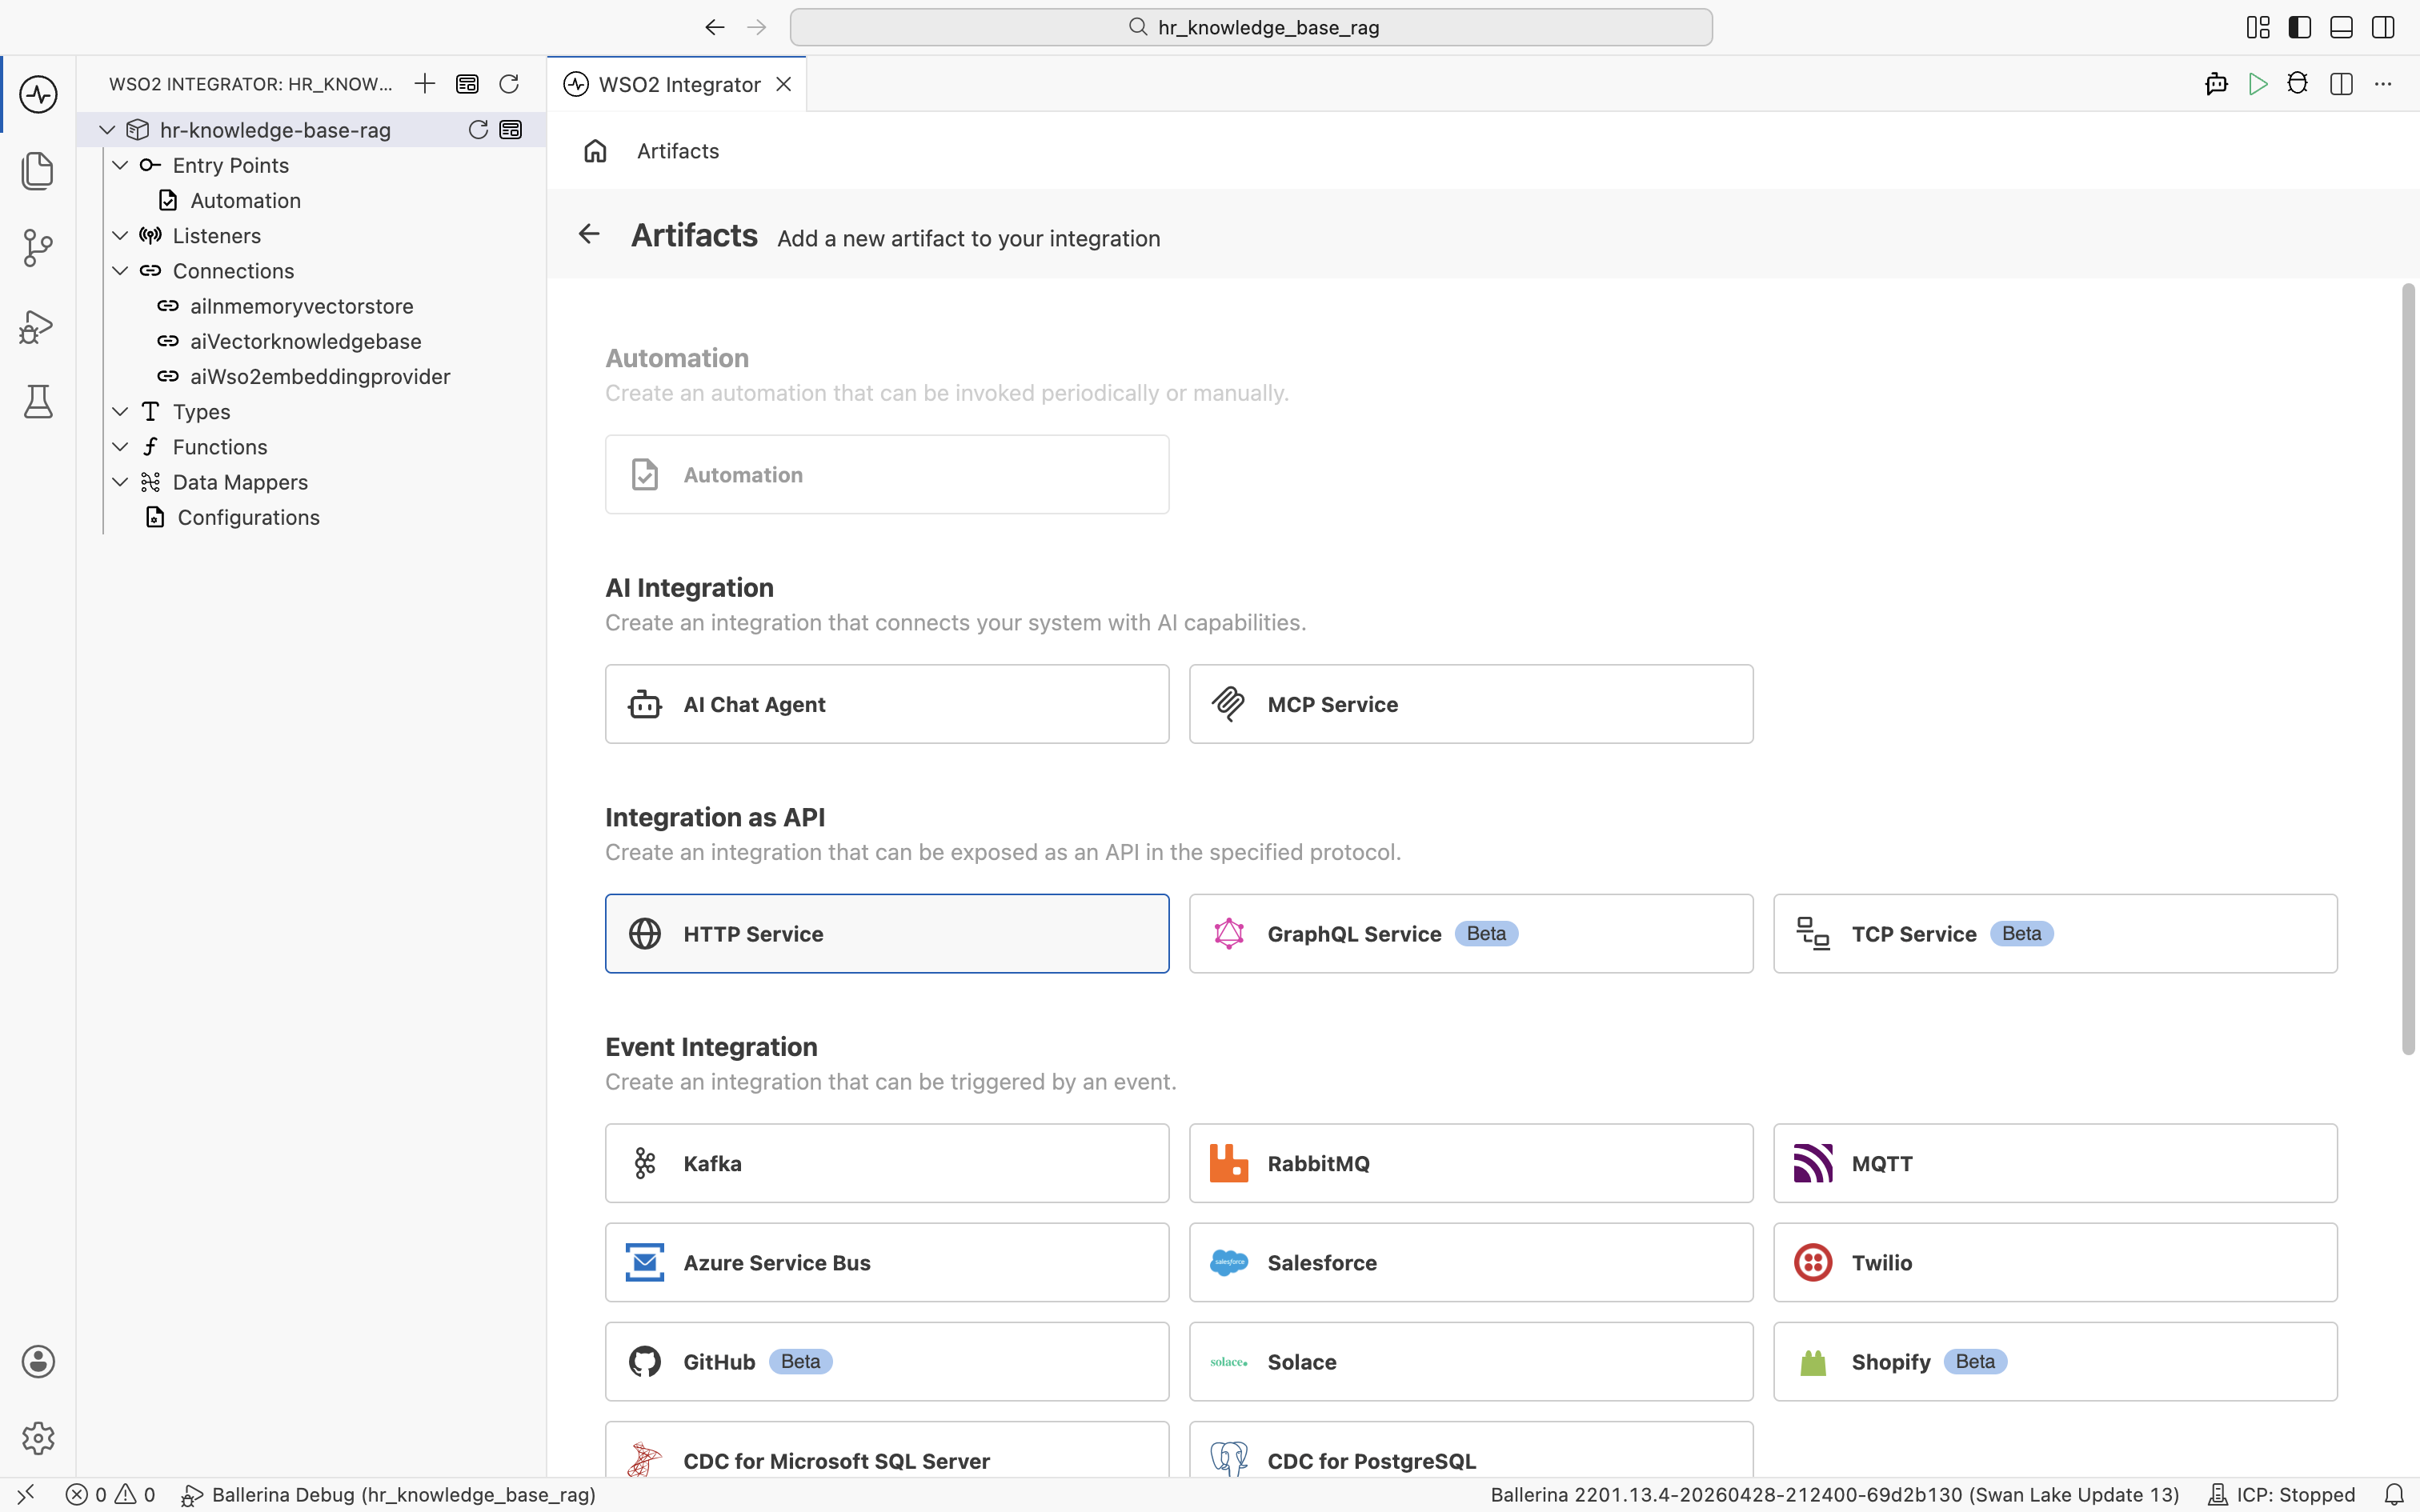
Click + Add Artifact. The artifact catalog opens, grouping the artifact types by category.
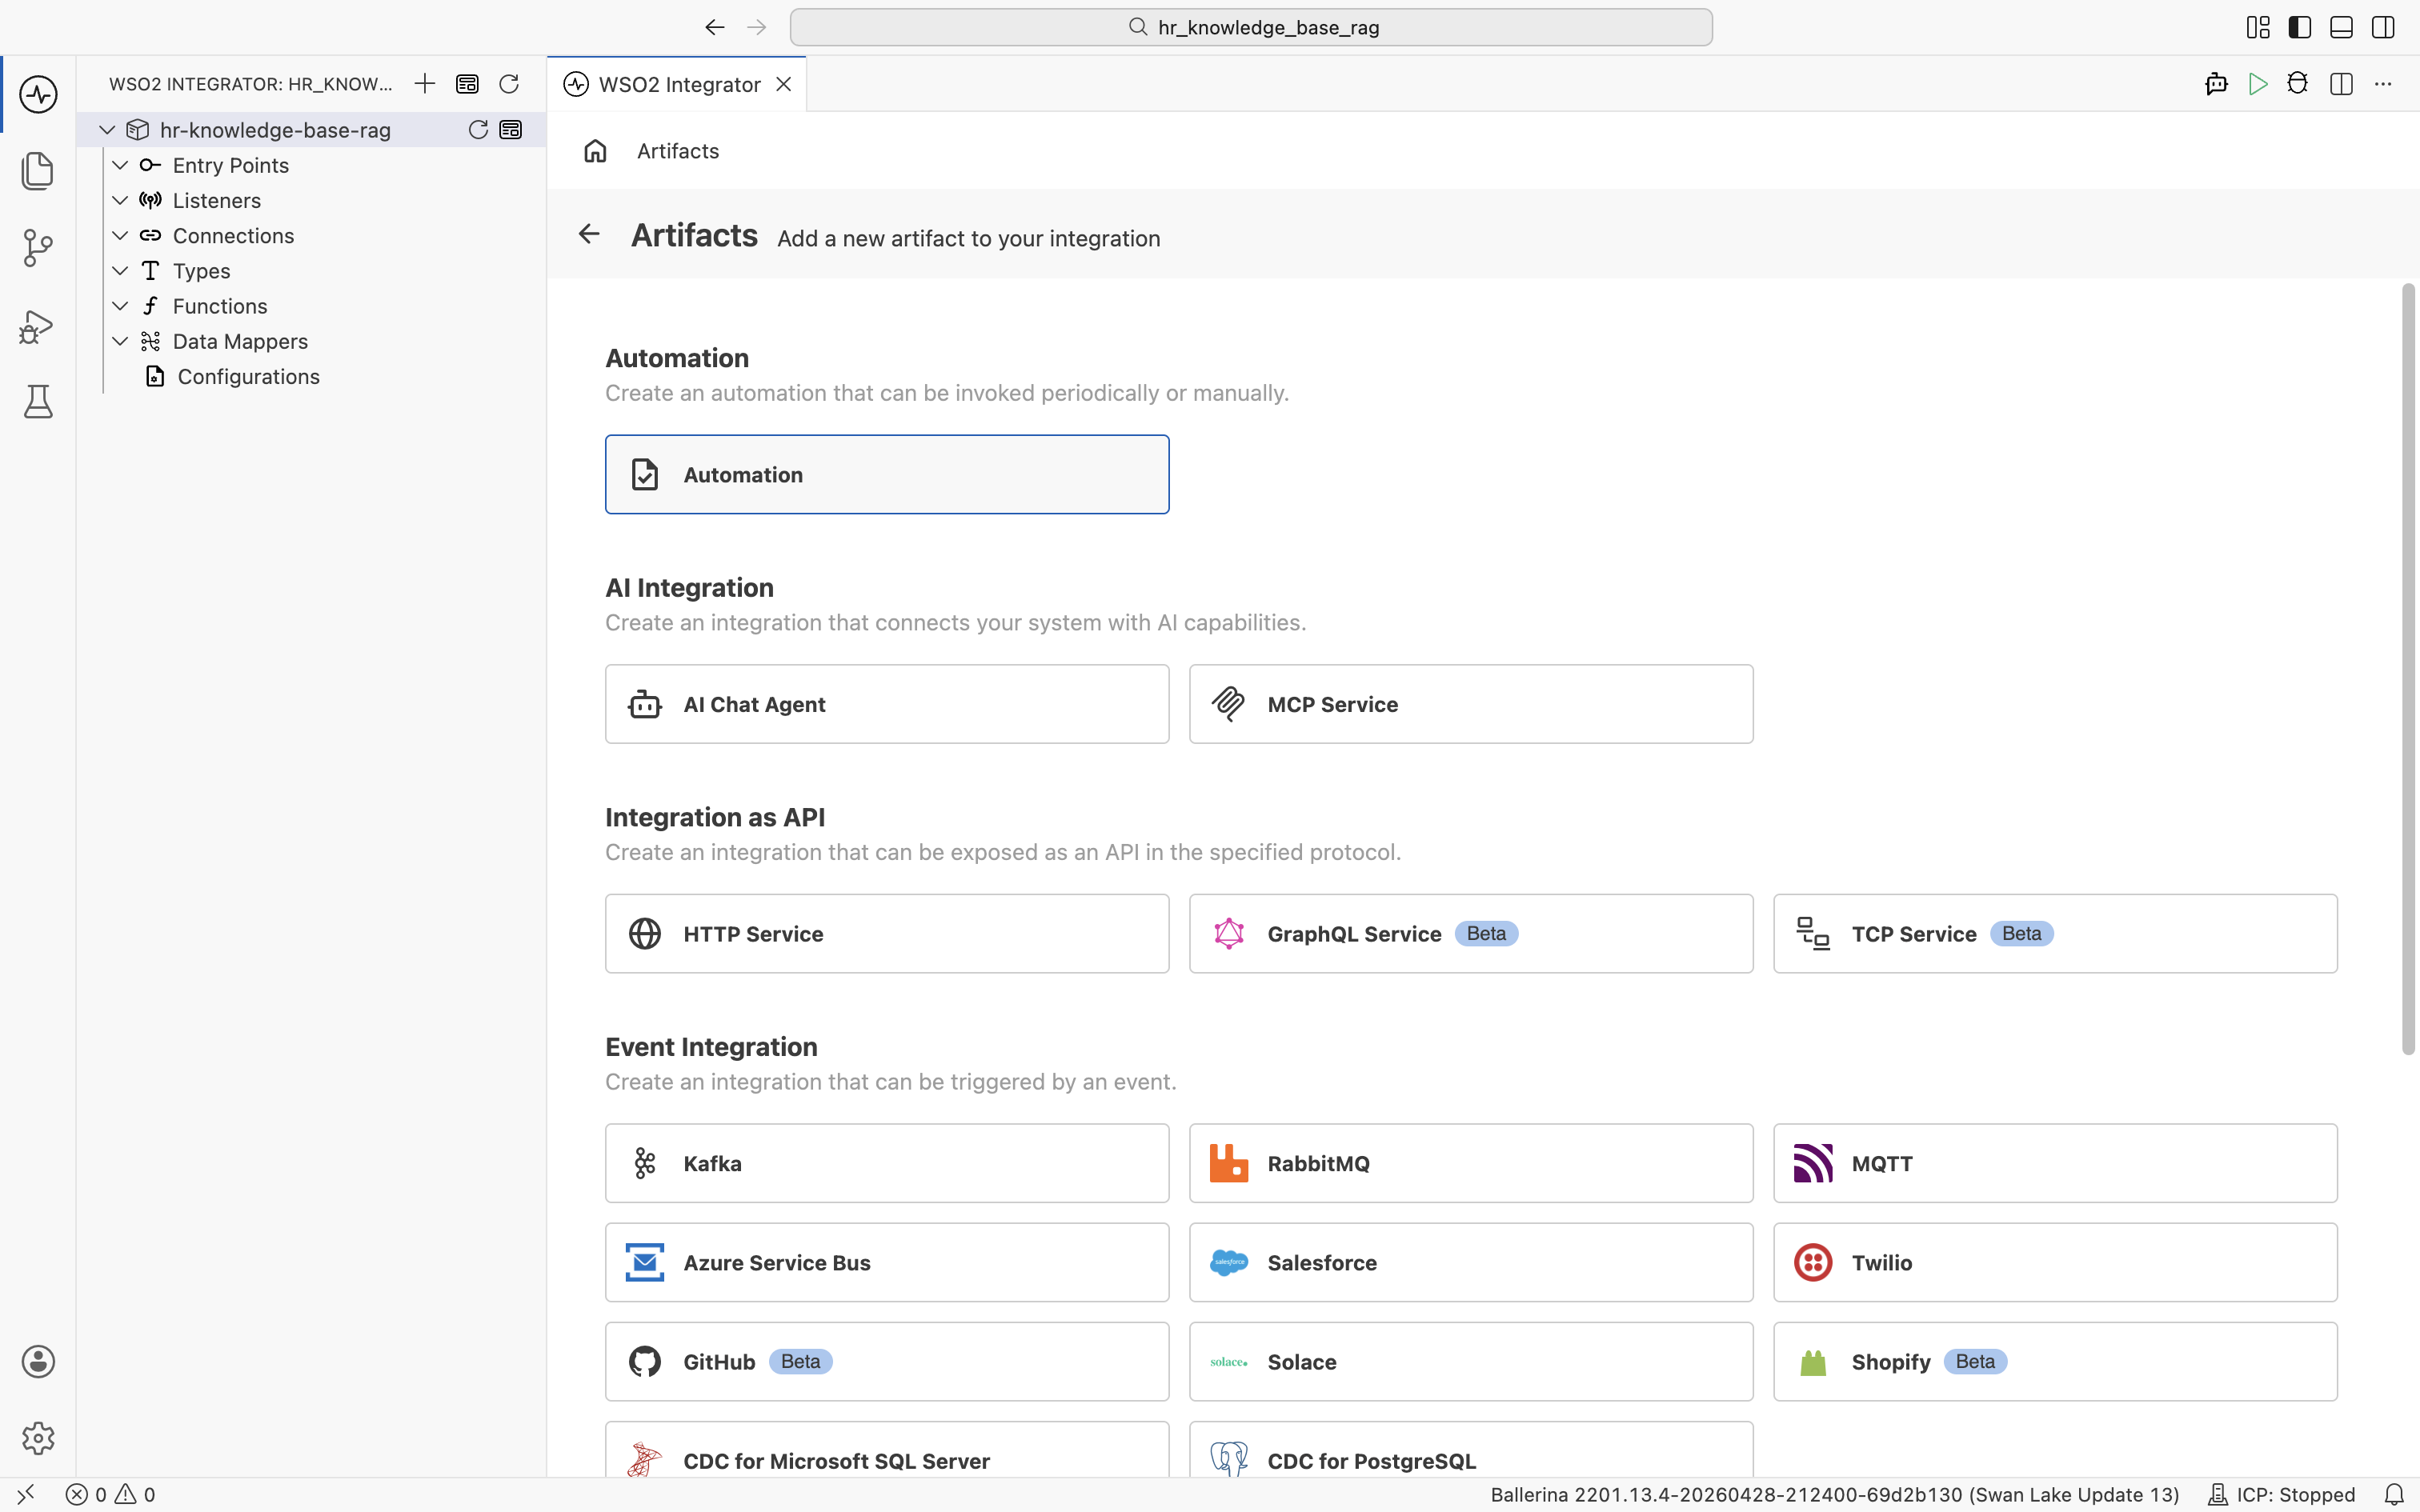
You will create two artifacts in this catalog. An Automation (under Automation) for ingestion, then an HTTP Service (under Integration as API) for querying.
Step 2: Create the ingestion automation
2.1 Pick the automation artifact
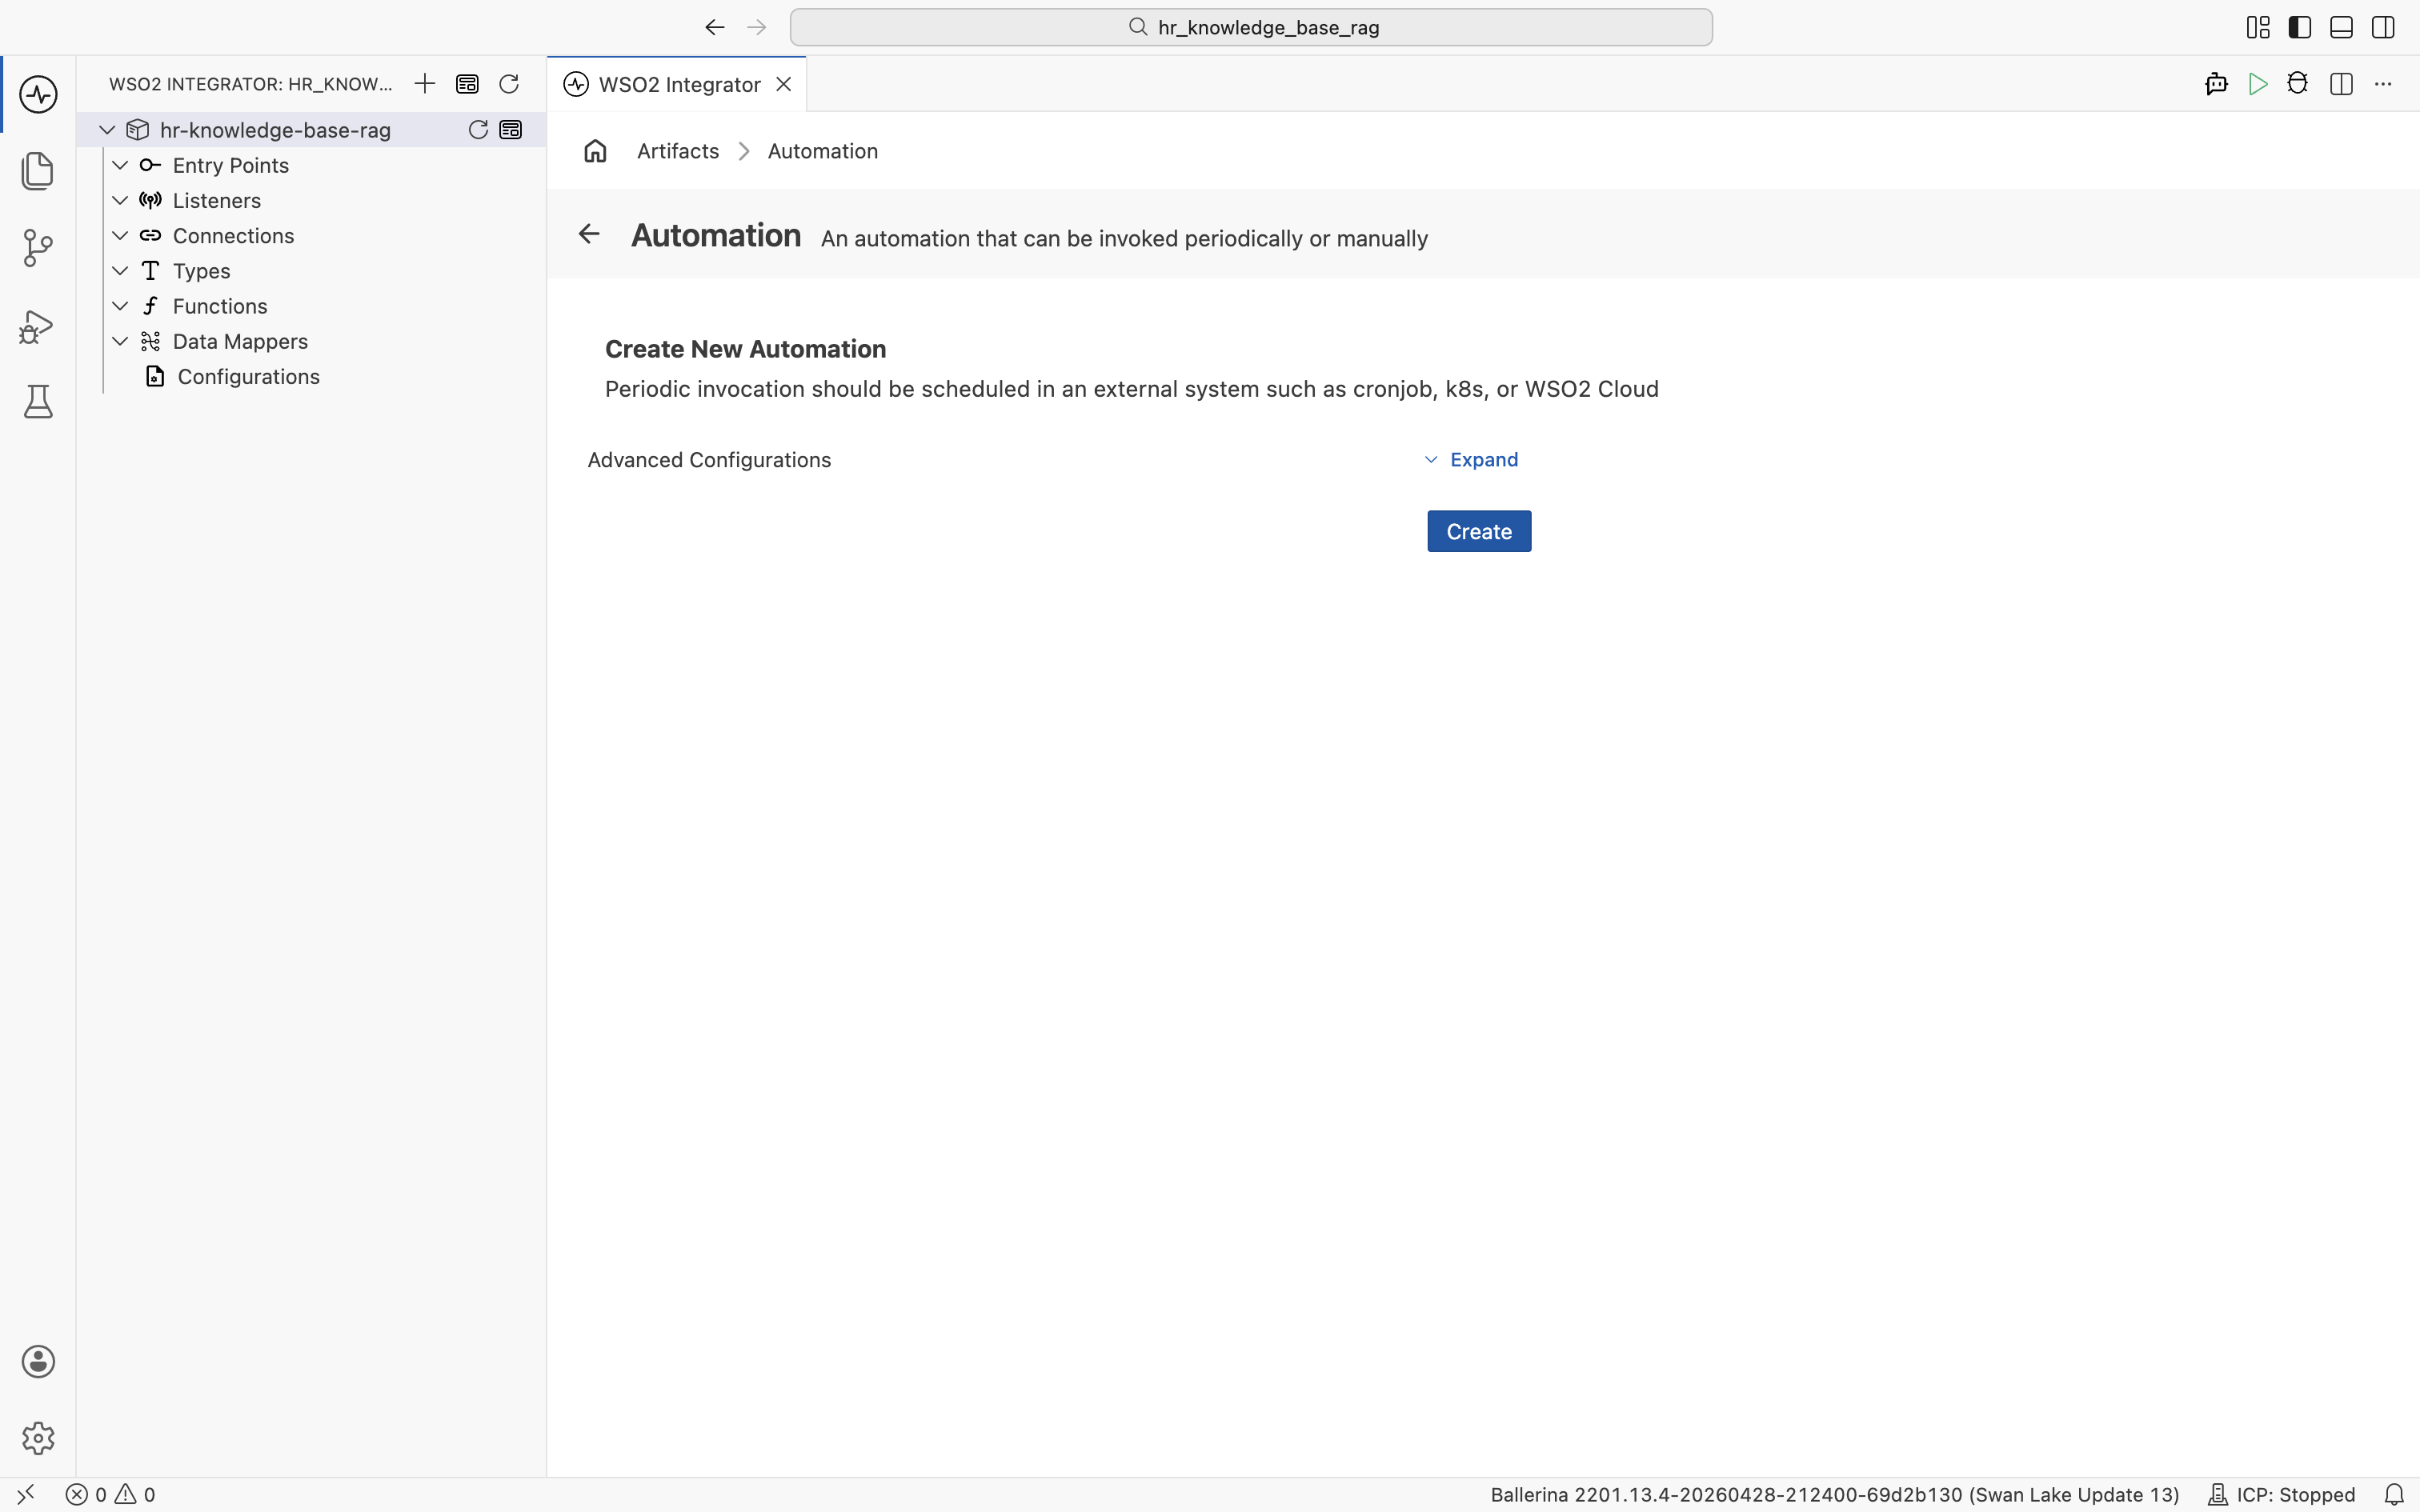
Click the Automation card. WSO2 Integrator opens the Create New Automation dialog. Accept the defaults and click Create.
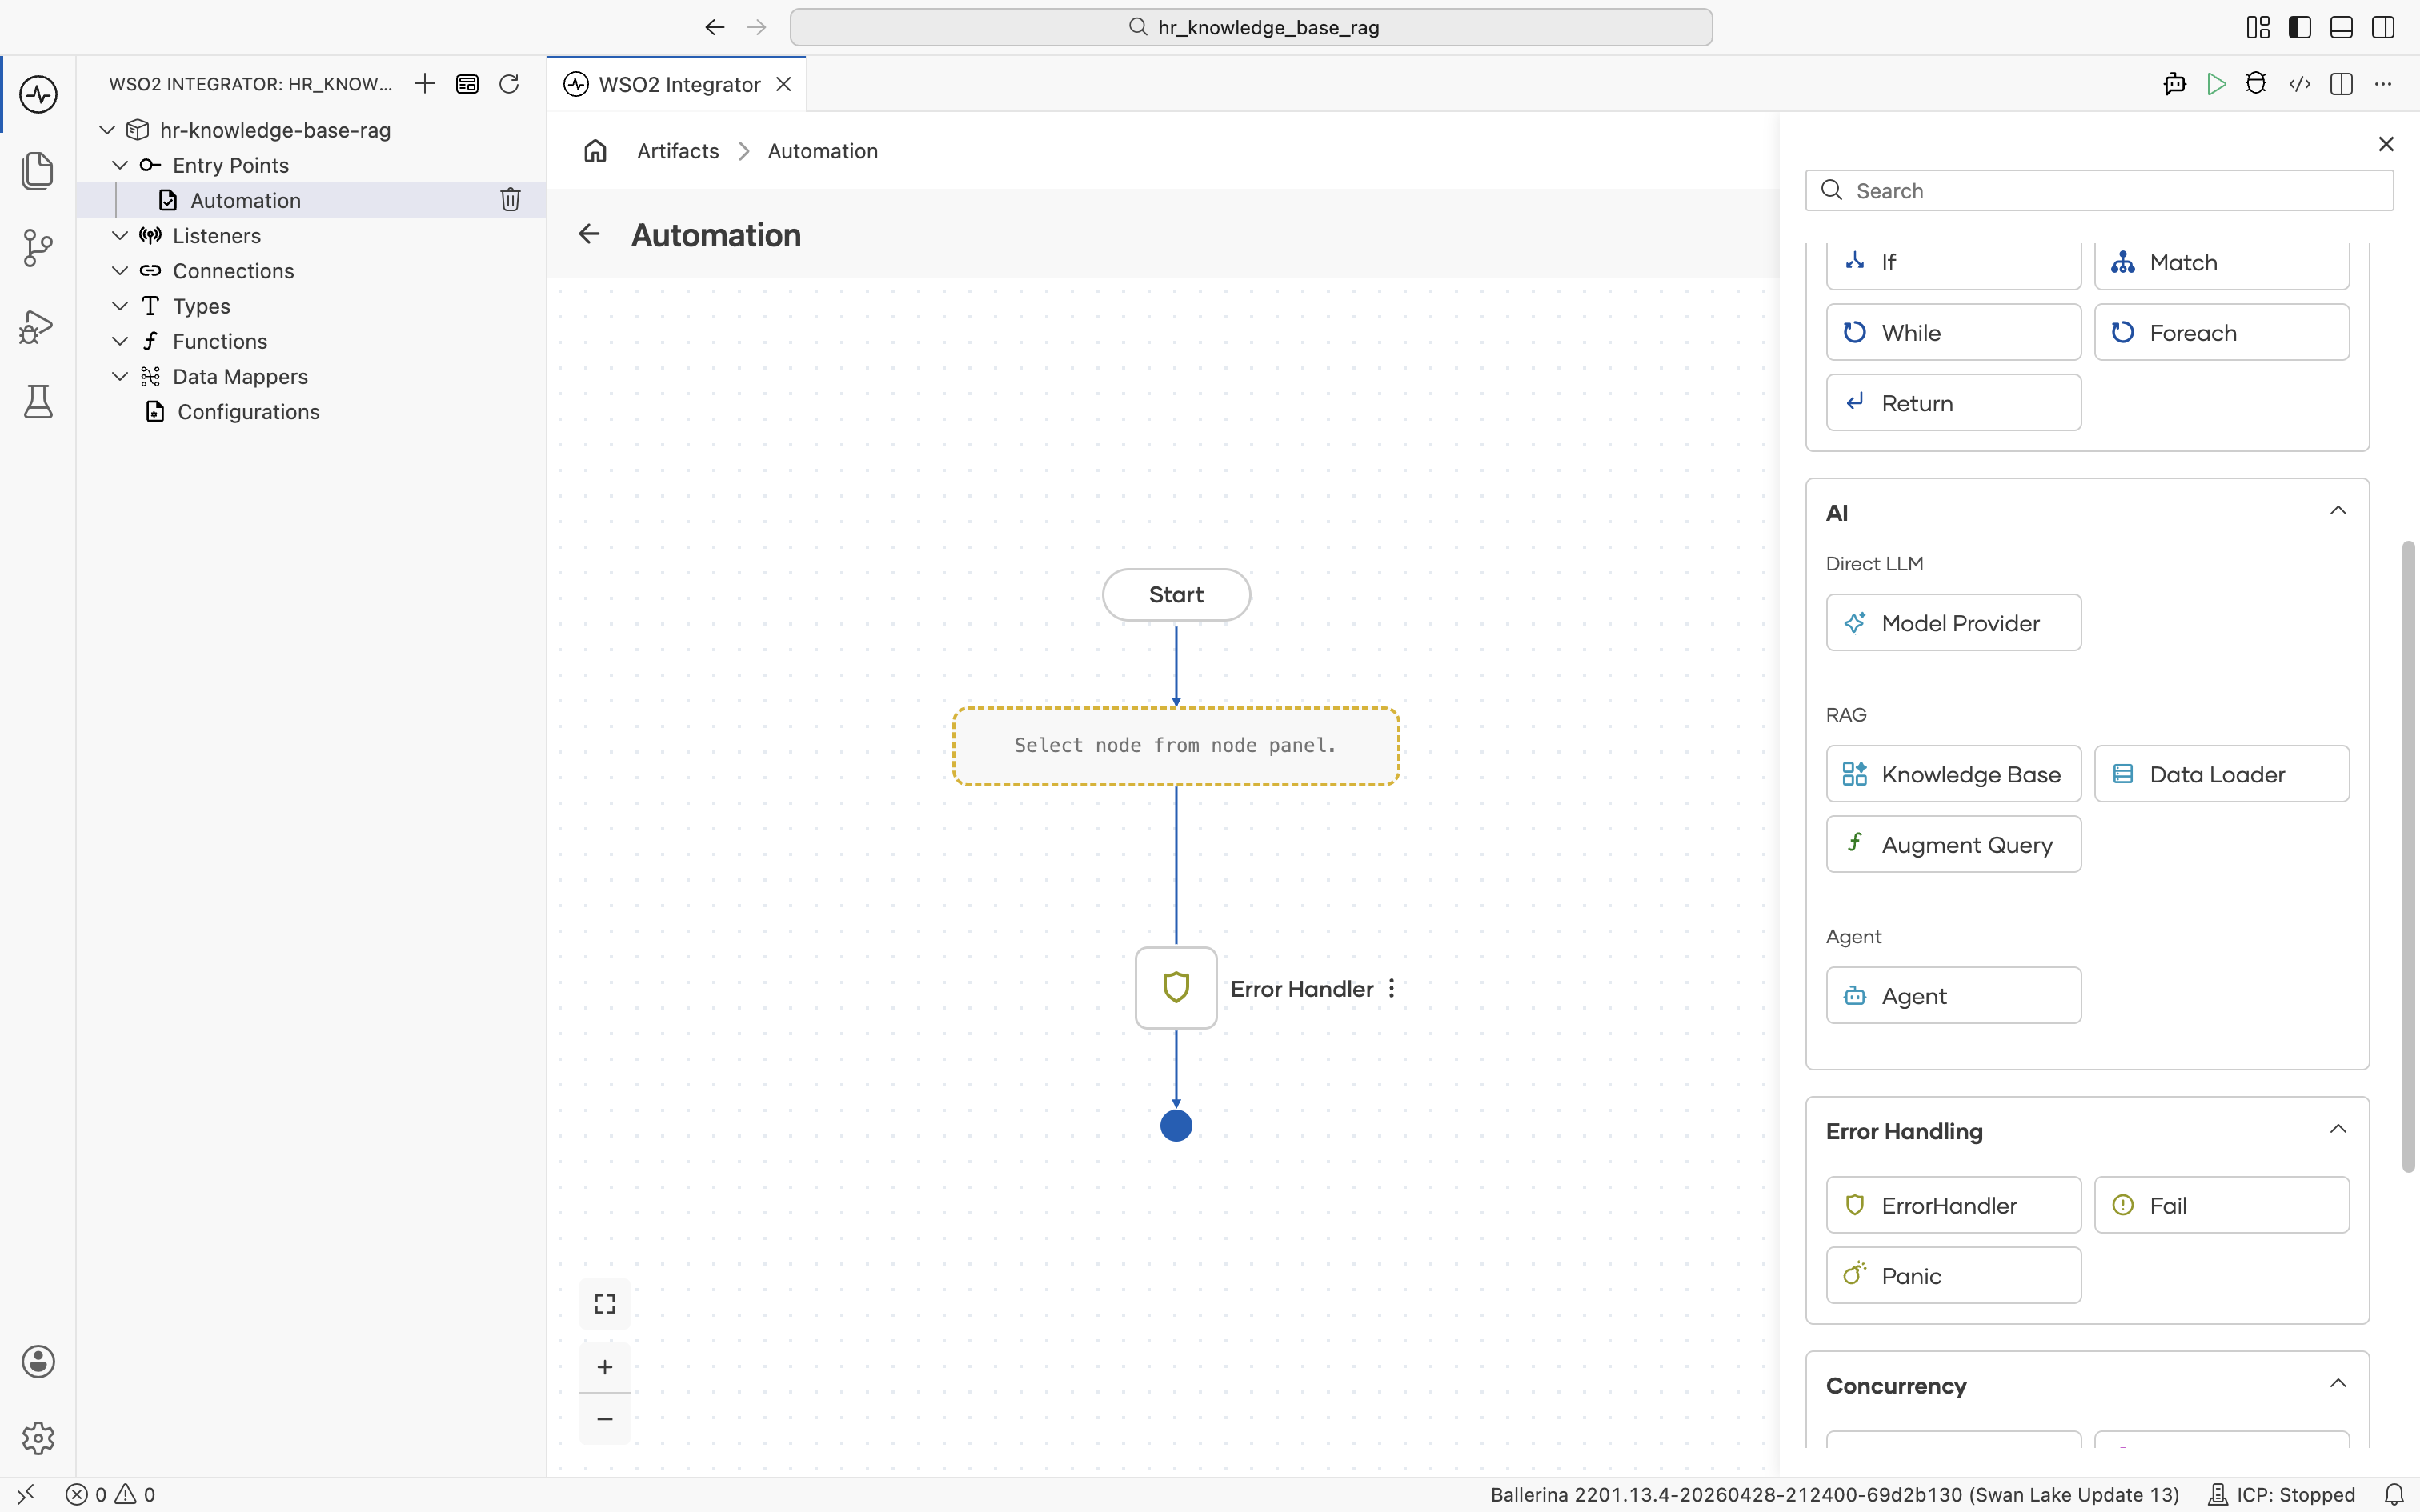
The automation flow editor opens with an empty Start node and an Error Handler end node. Click the + between them to open the node palette.
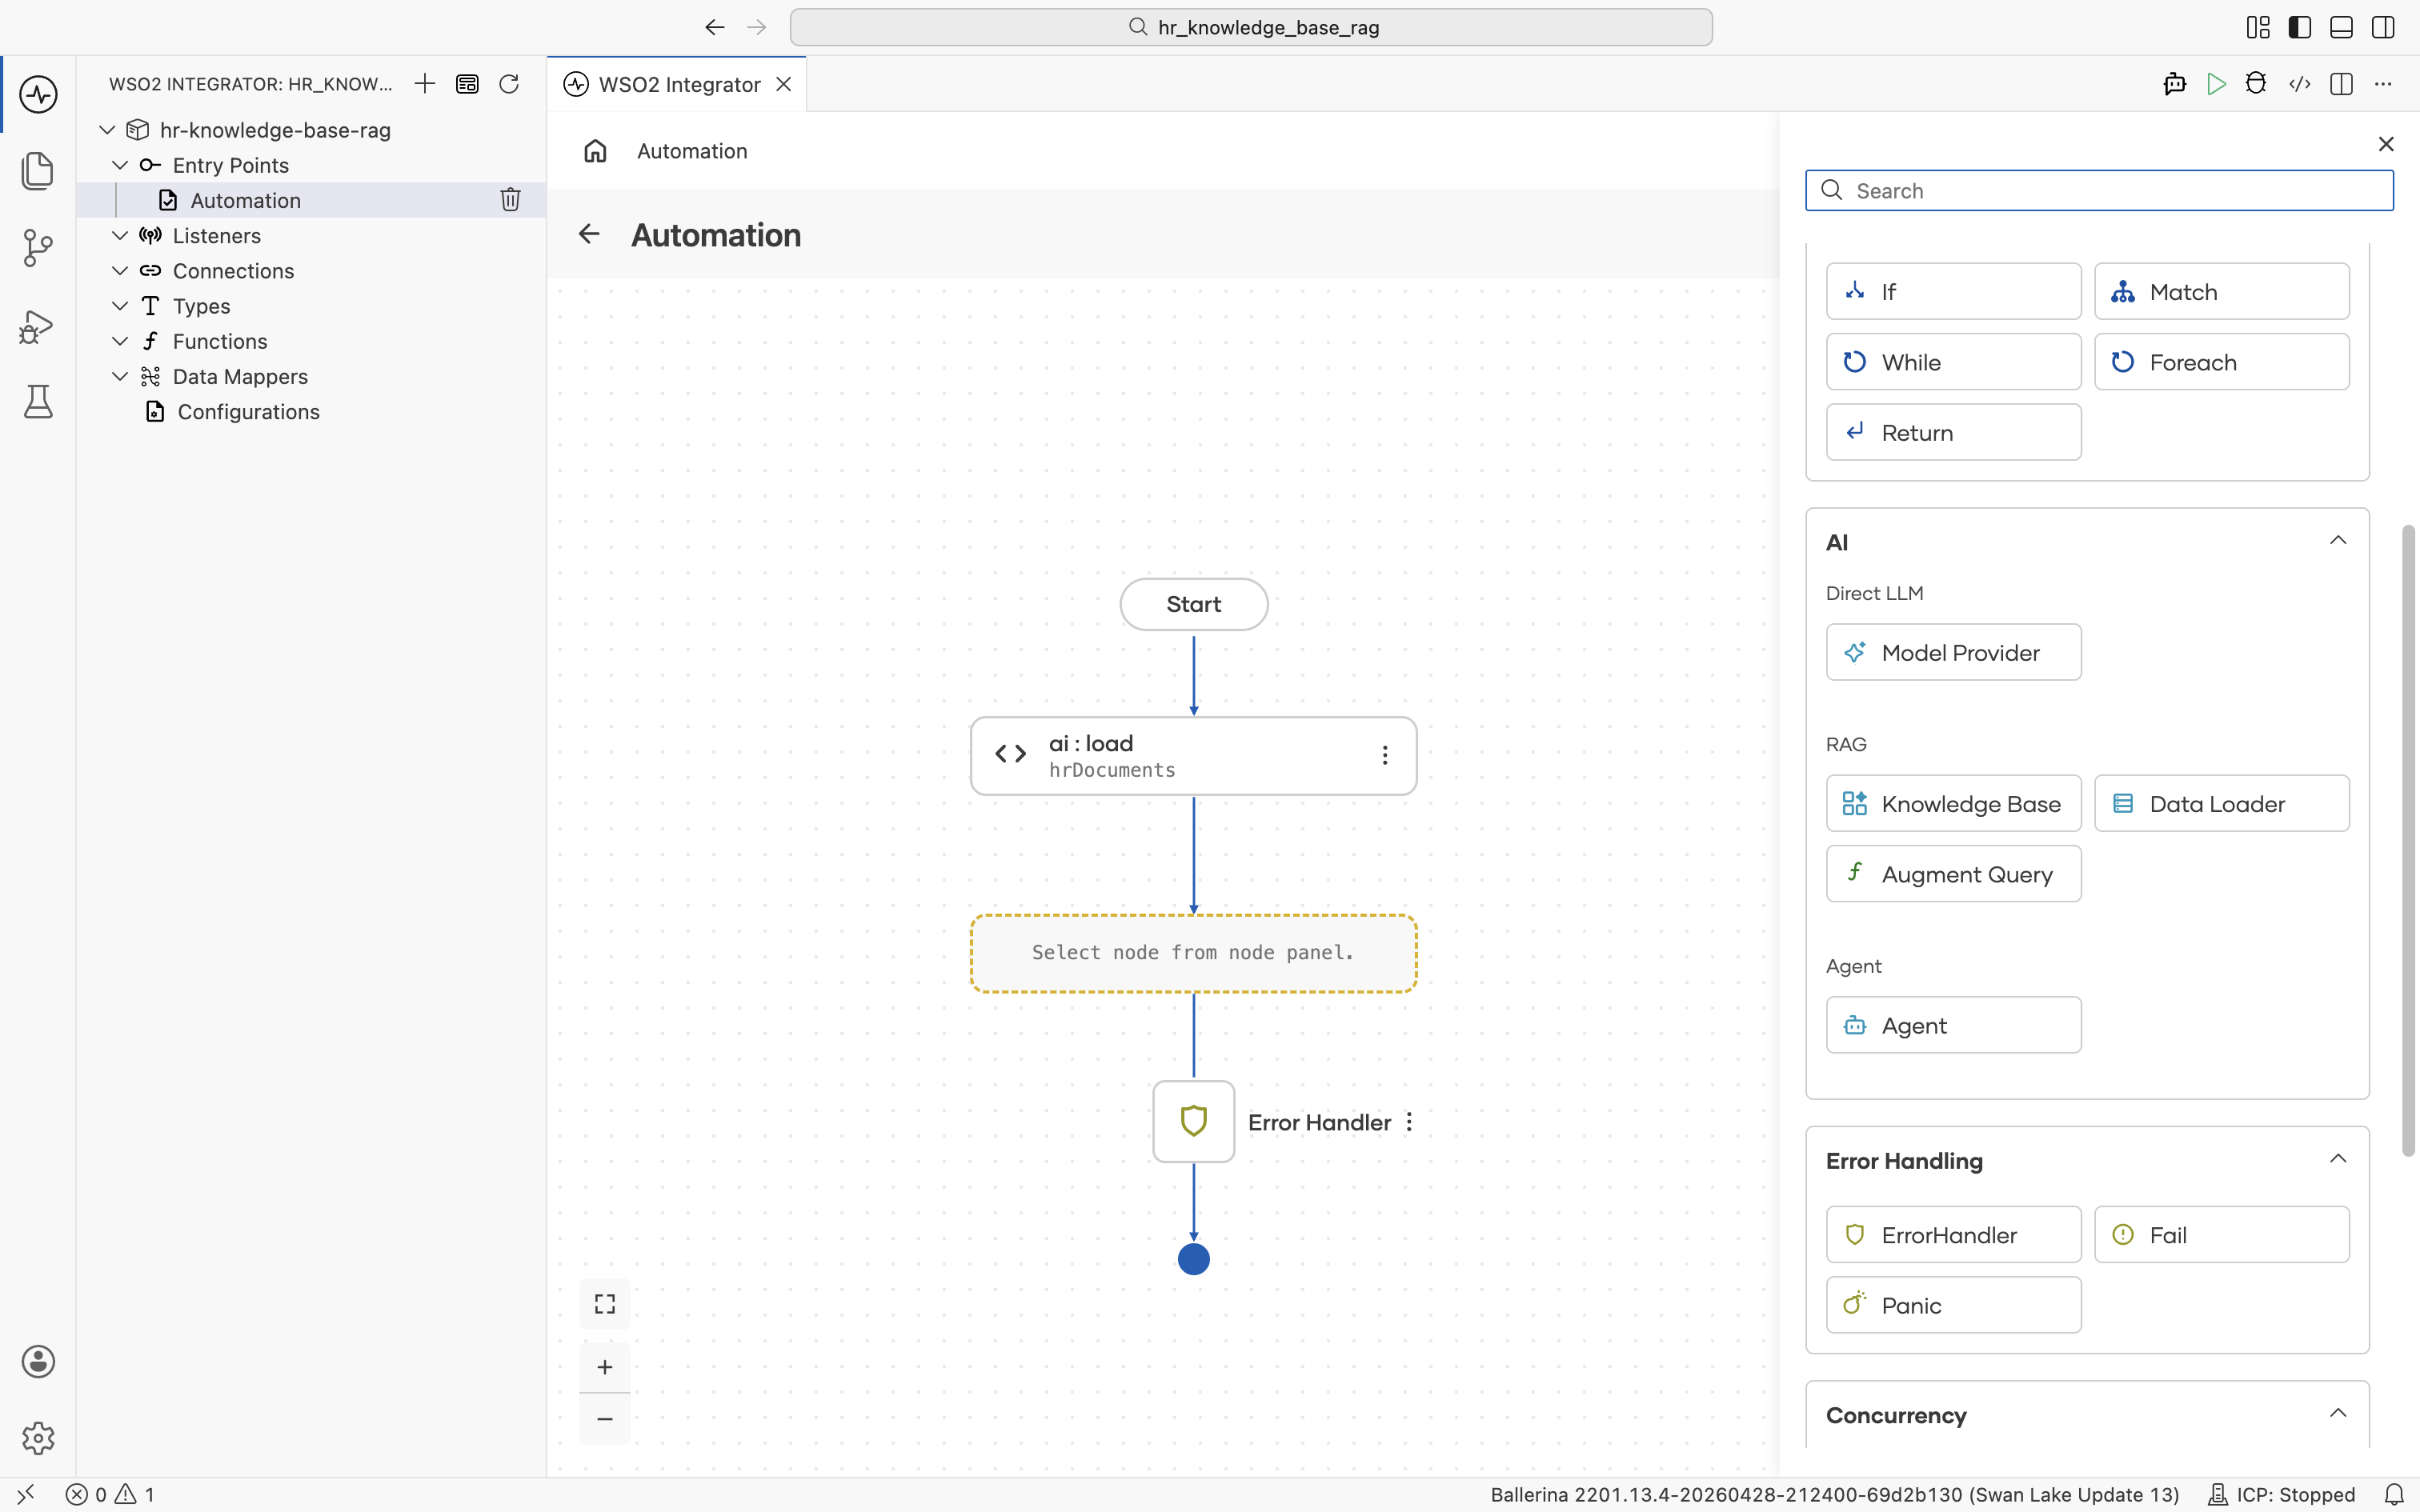
The palette groups every node type, including Statement (Declare/Update Variable, Call Function, Map Data), Control (If, Match, While, Foreach, Return), AI (Direct LLM, RAG, Agent), and so on.
2.2 Add a data loader
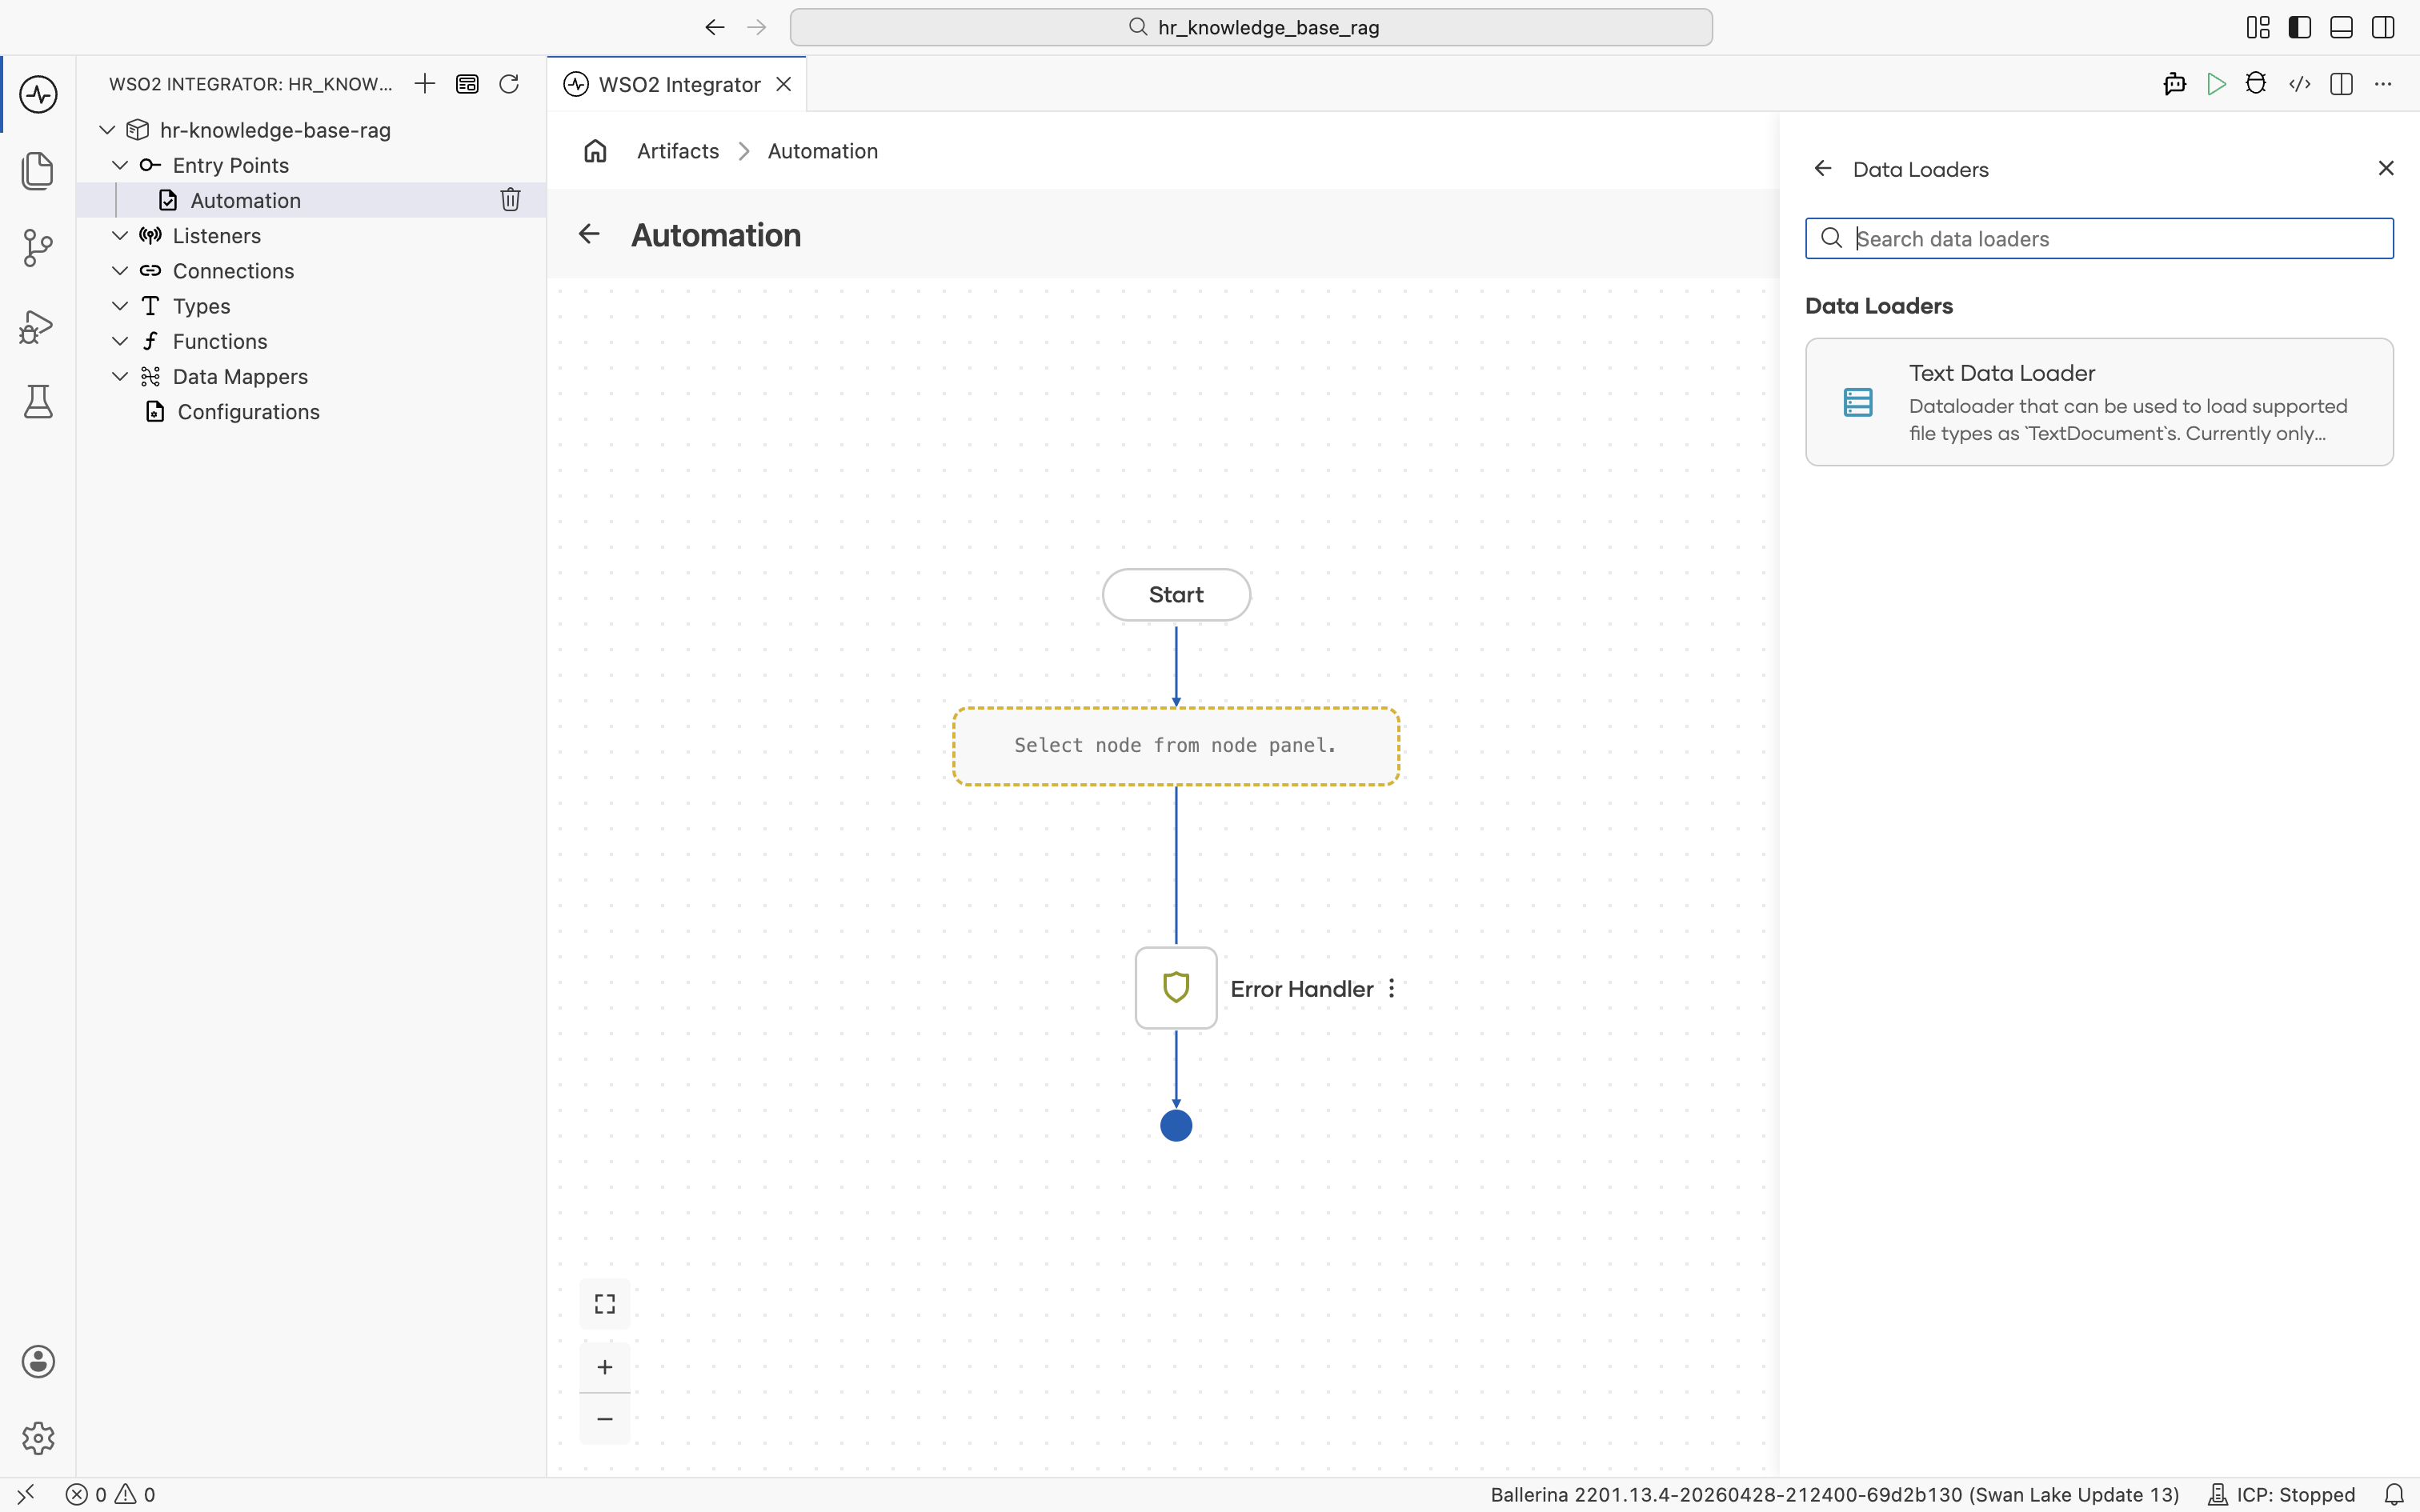
Under AI > RAG, click Data Loader. The Data Loaders panel opens.
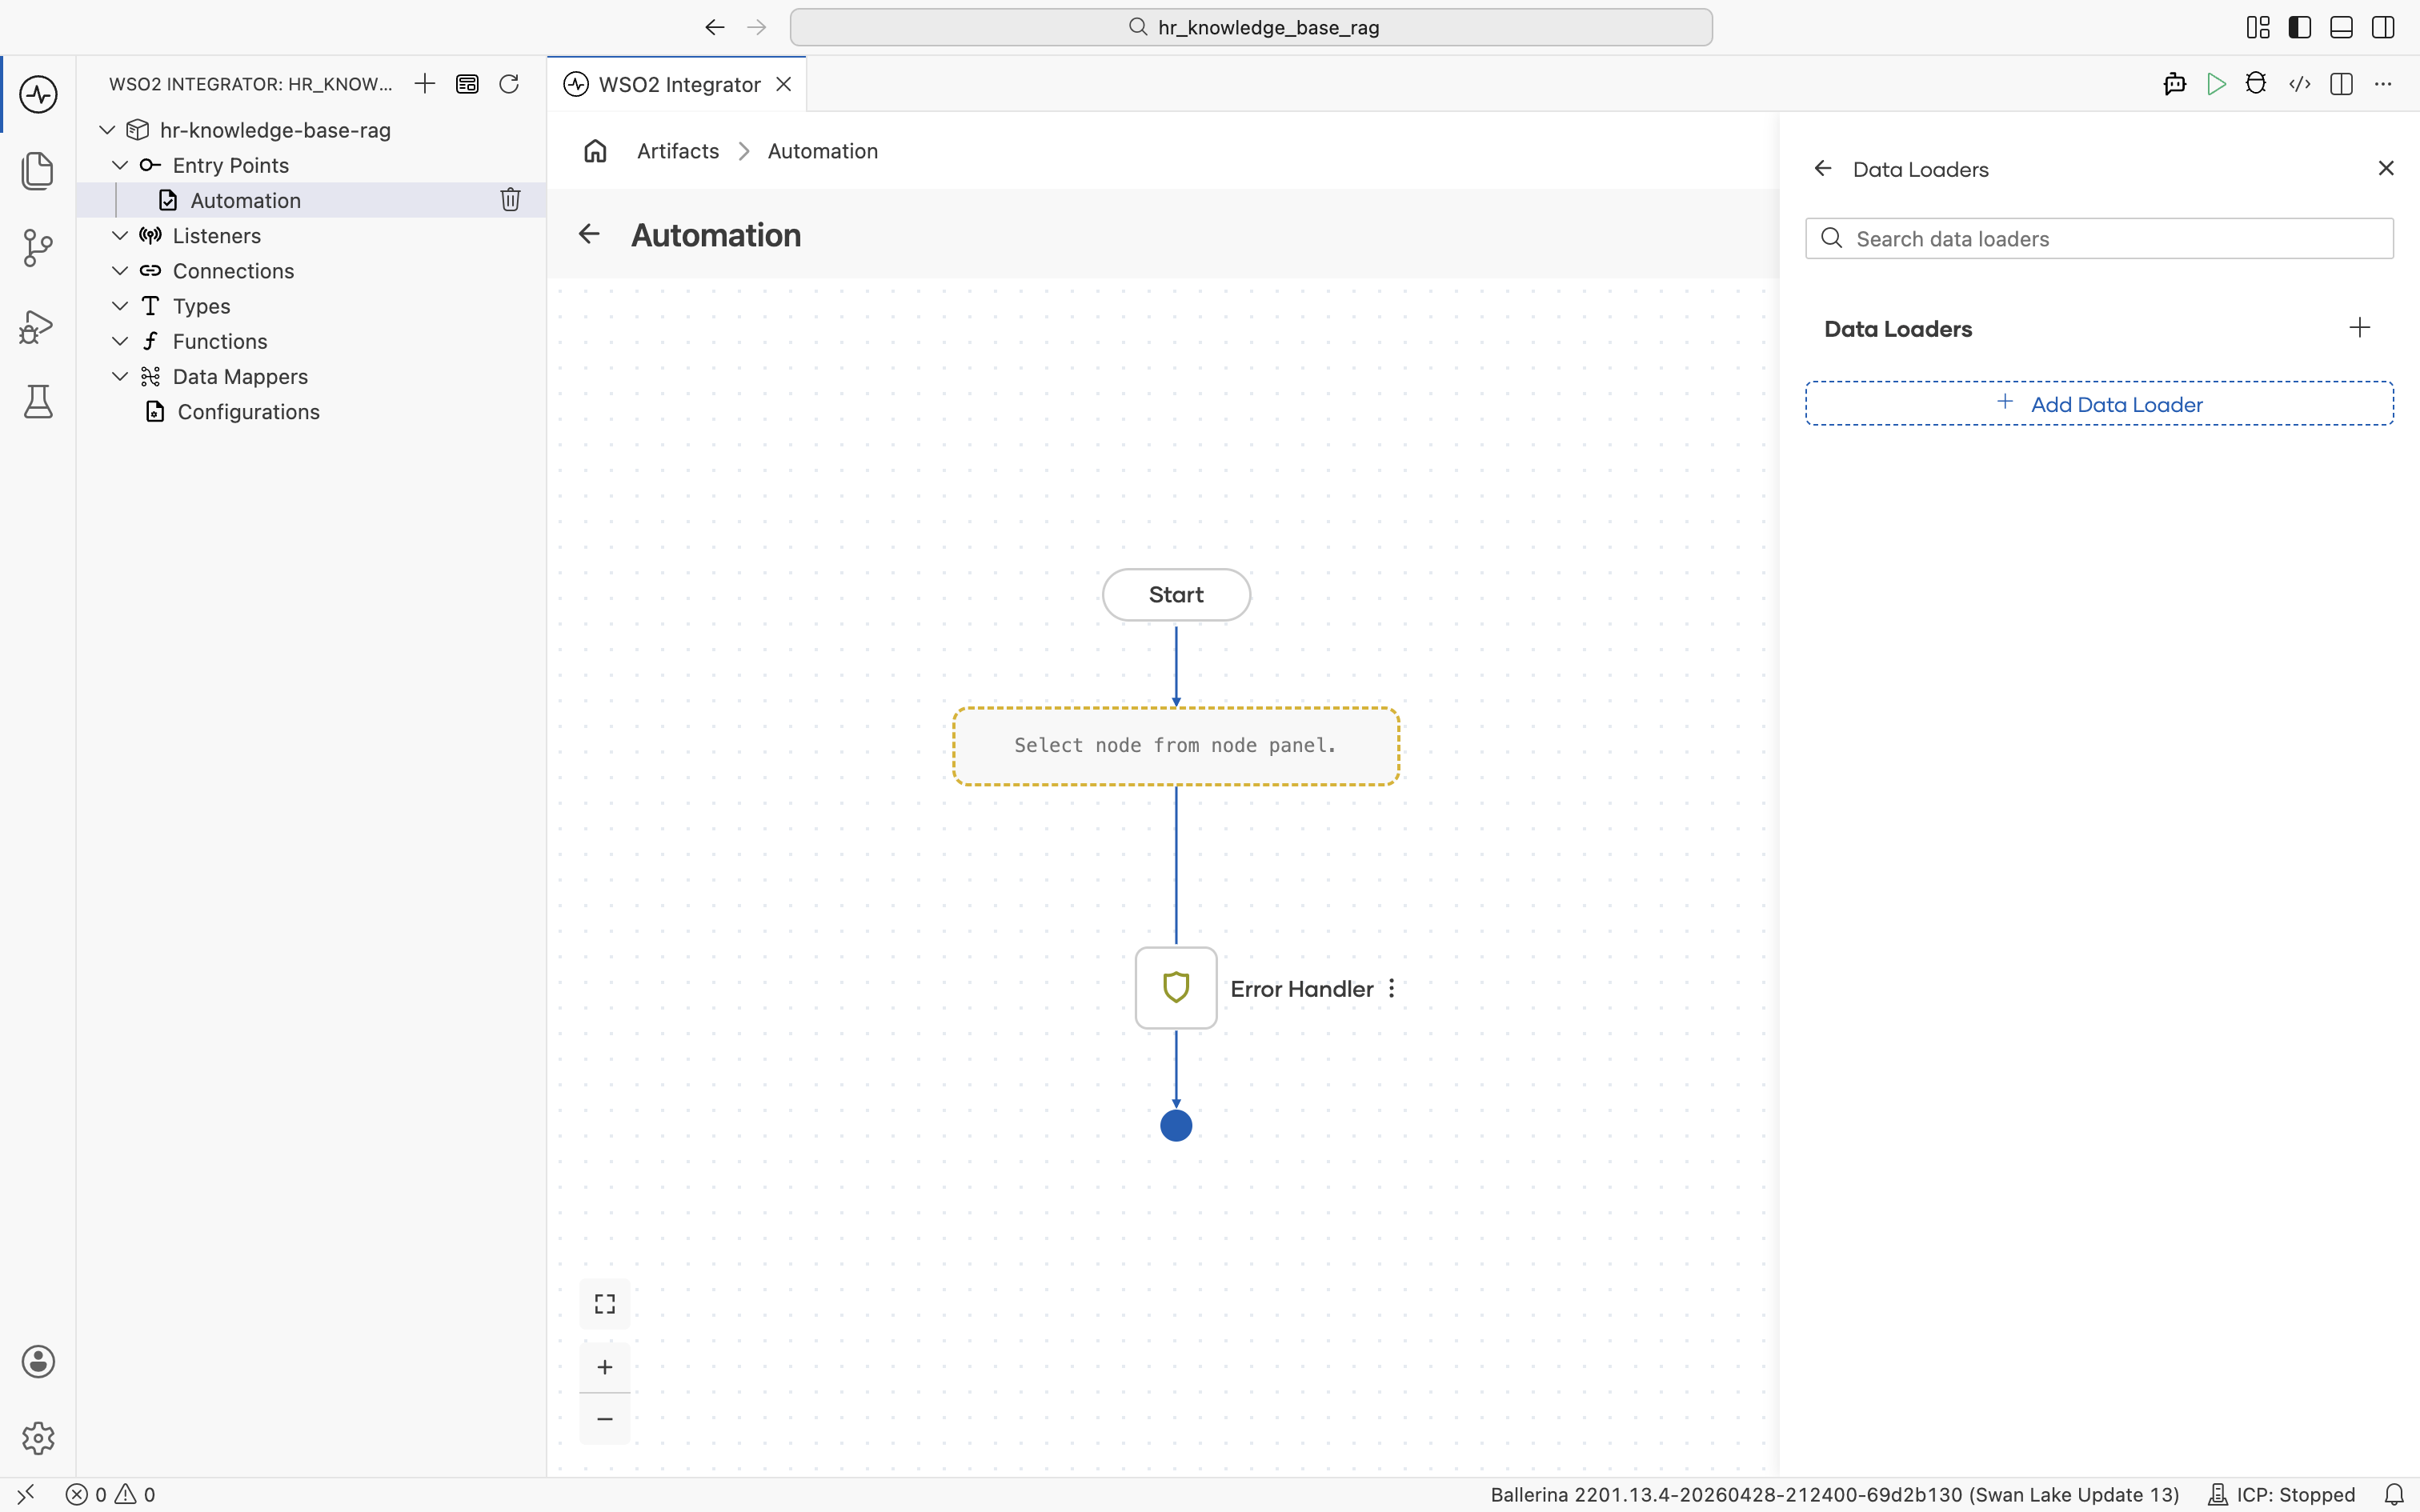
Click + Add Data Loader. The picker lists the available loader types. Pick Text Data Loader.
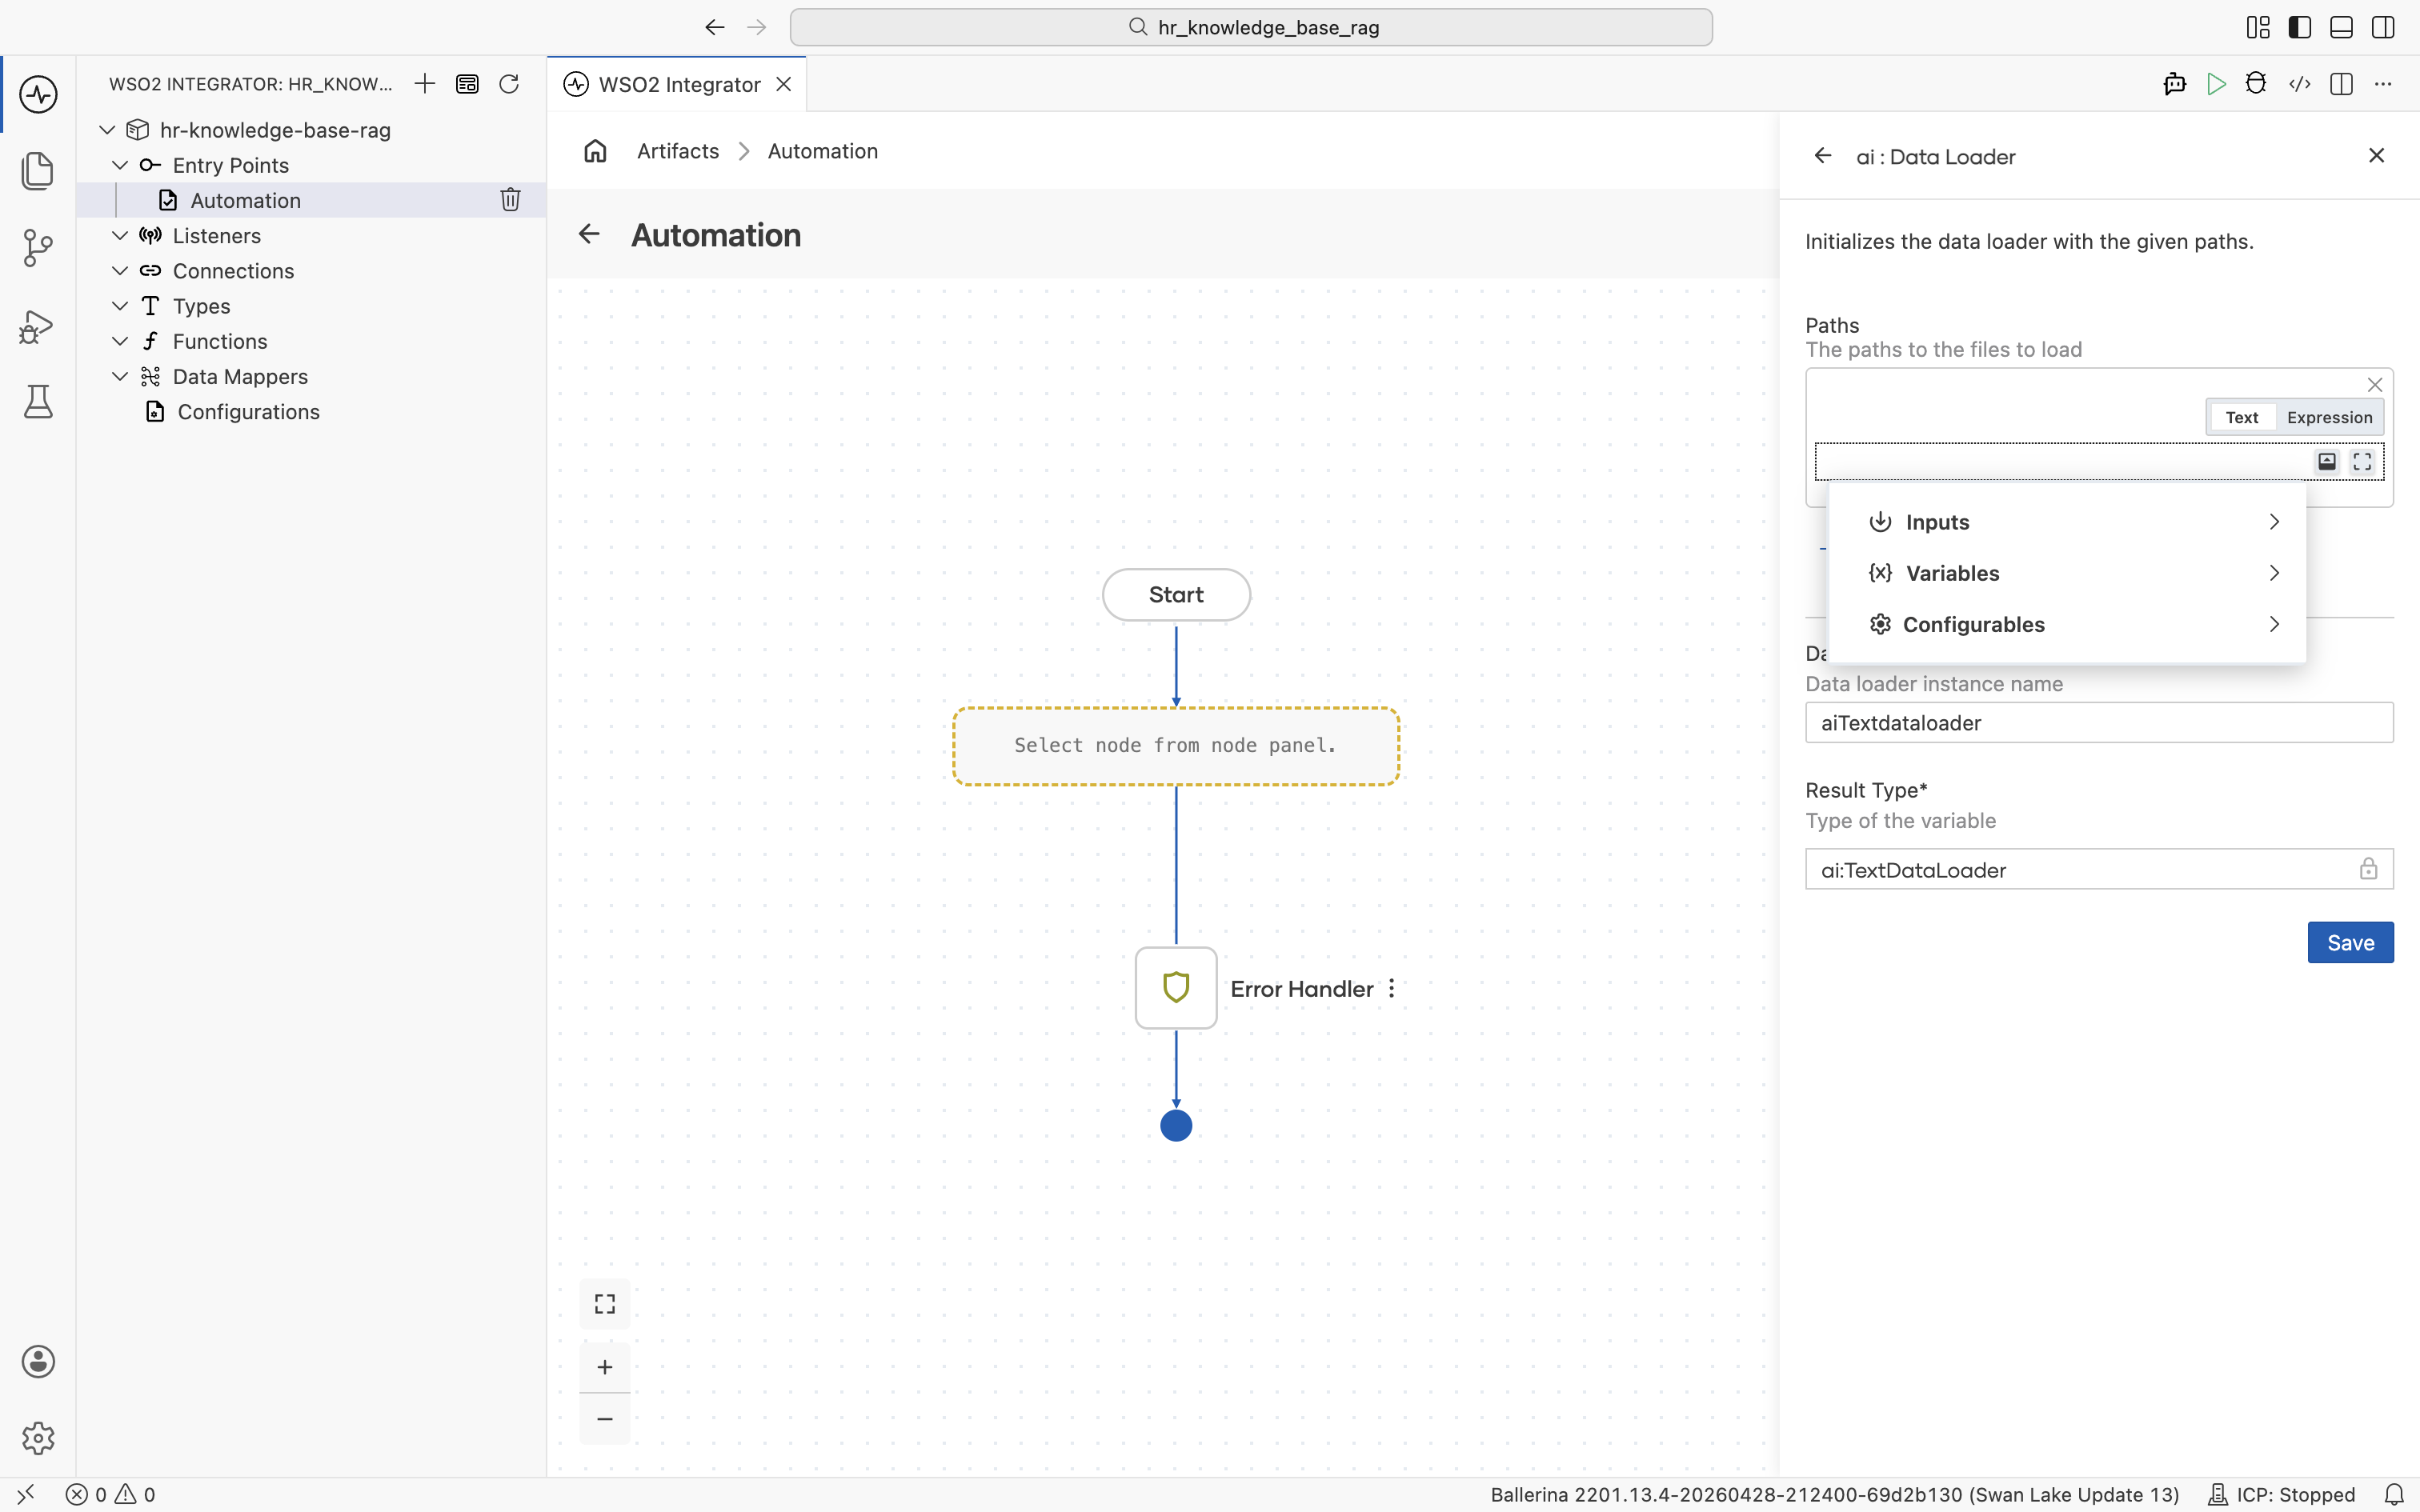
The ai : Data Loader side panel opens. Set Data Loader Name to textDocumentLoader. Result Type stays at the auto-filled ai:TextDataLoader.
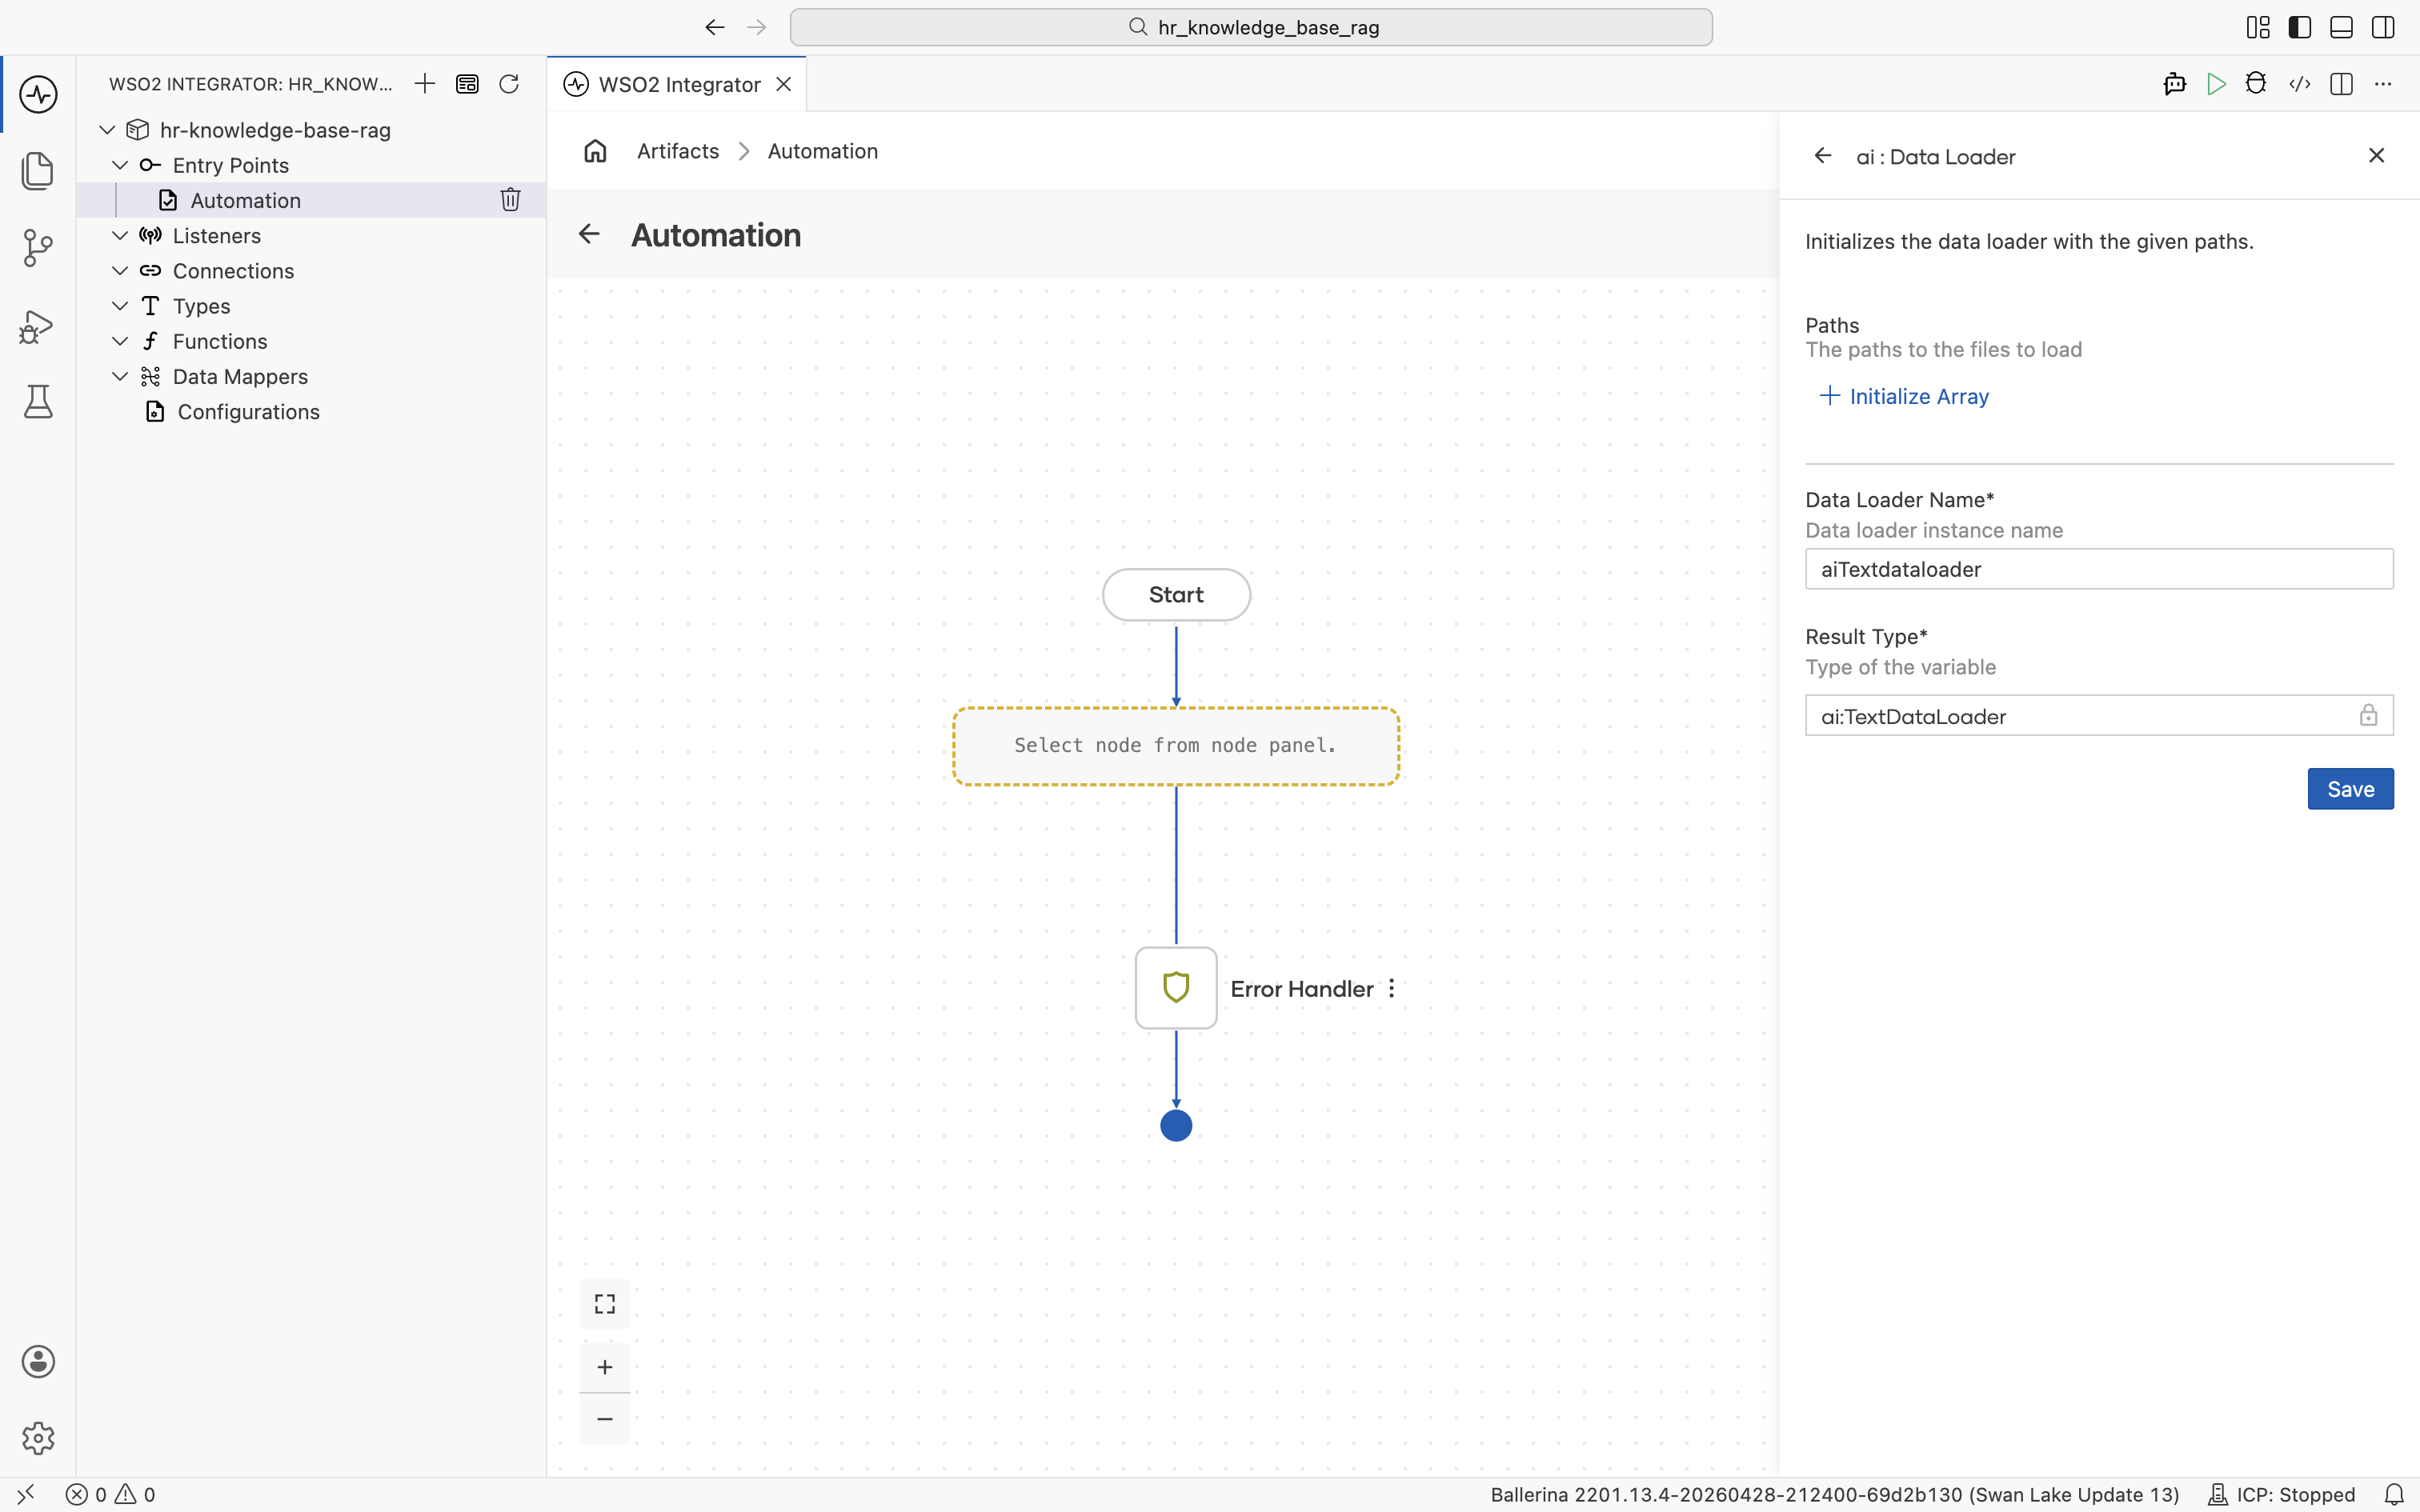
Configure the Paths field with a configurable so the file path can be changed without editing the flow:
-
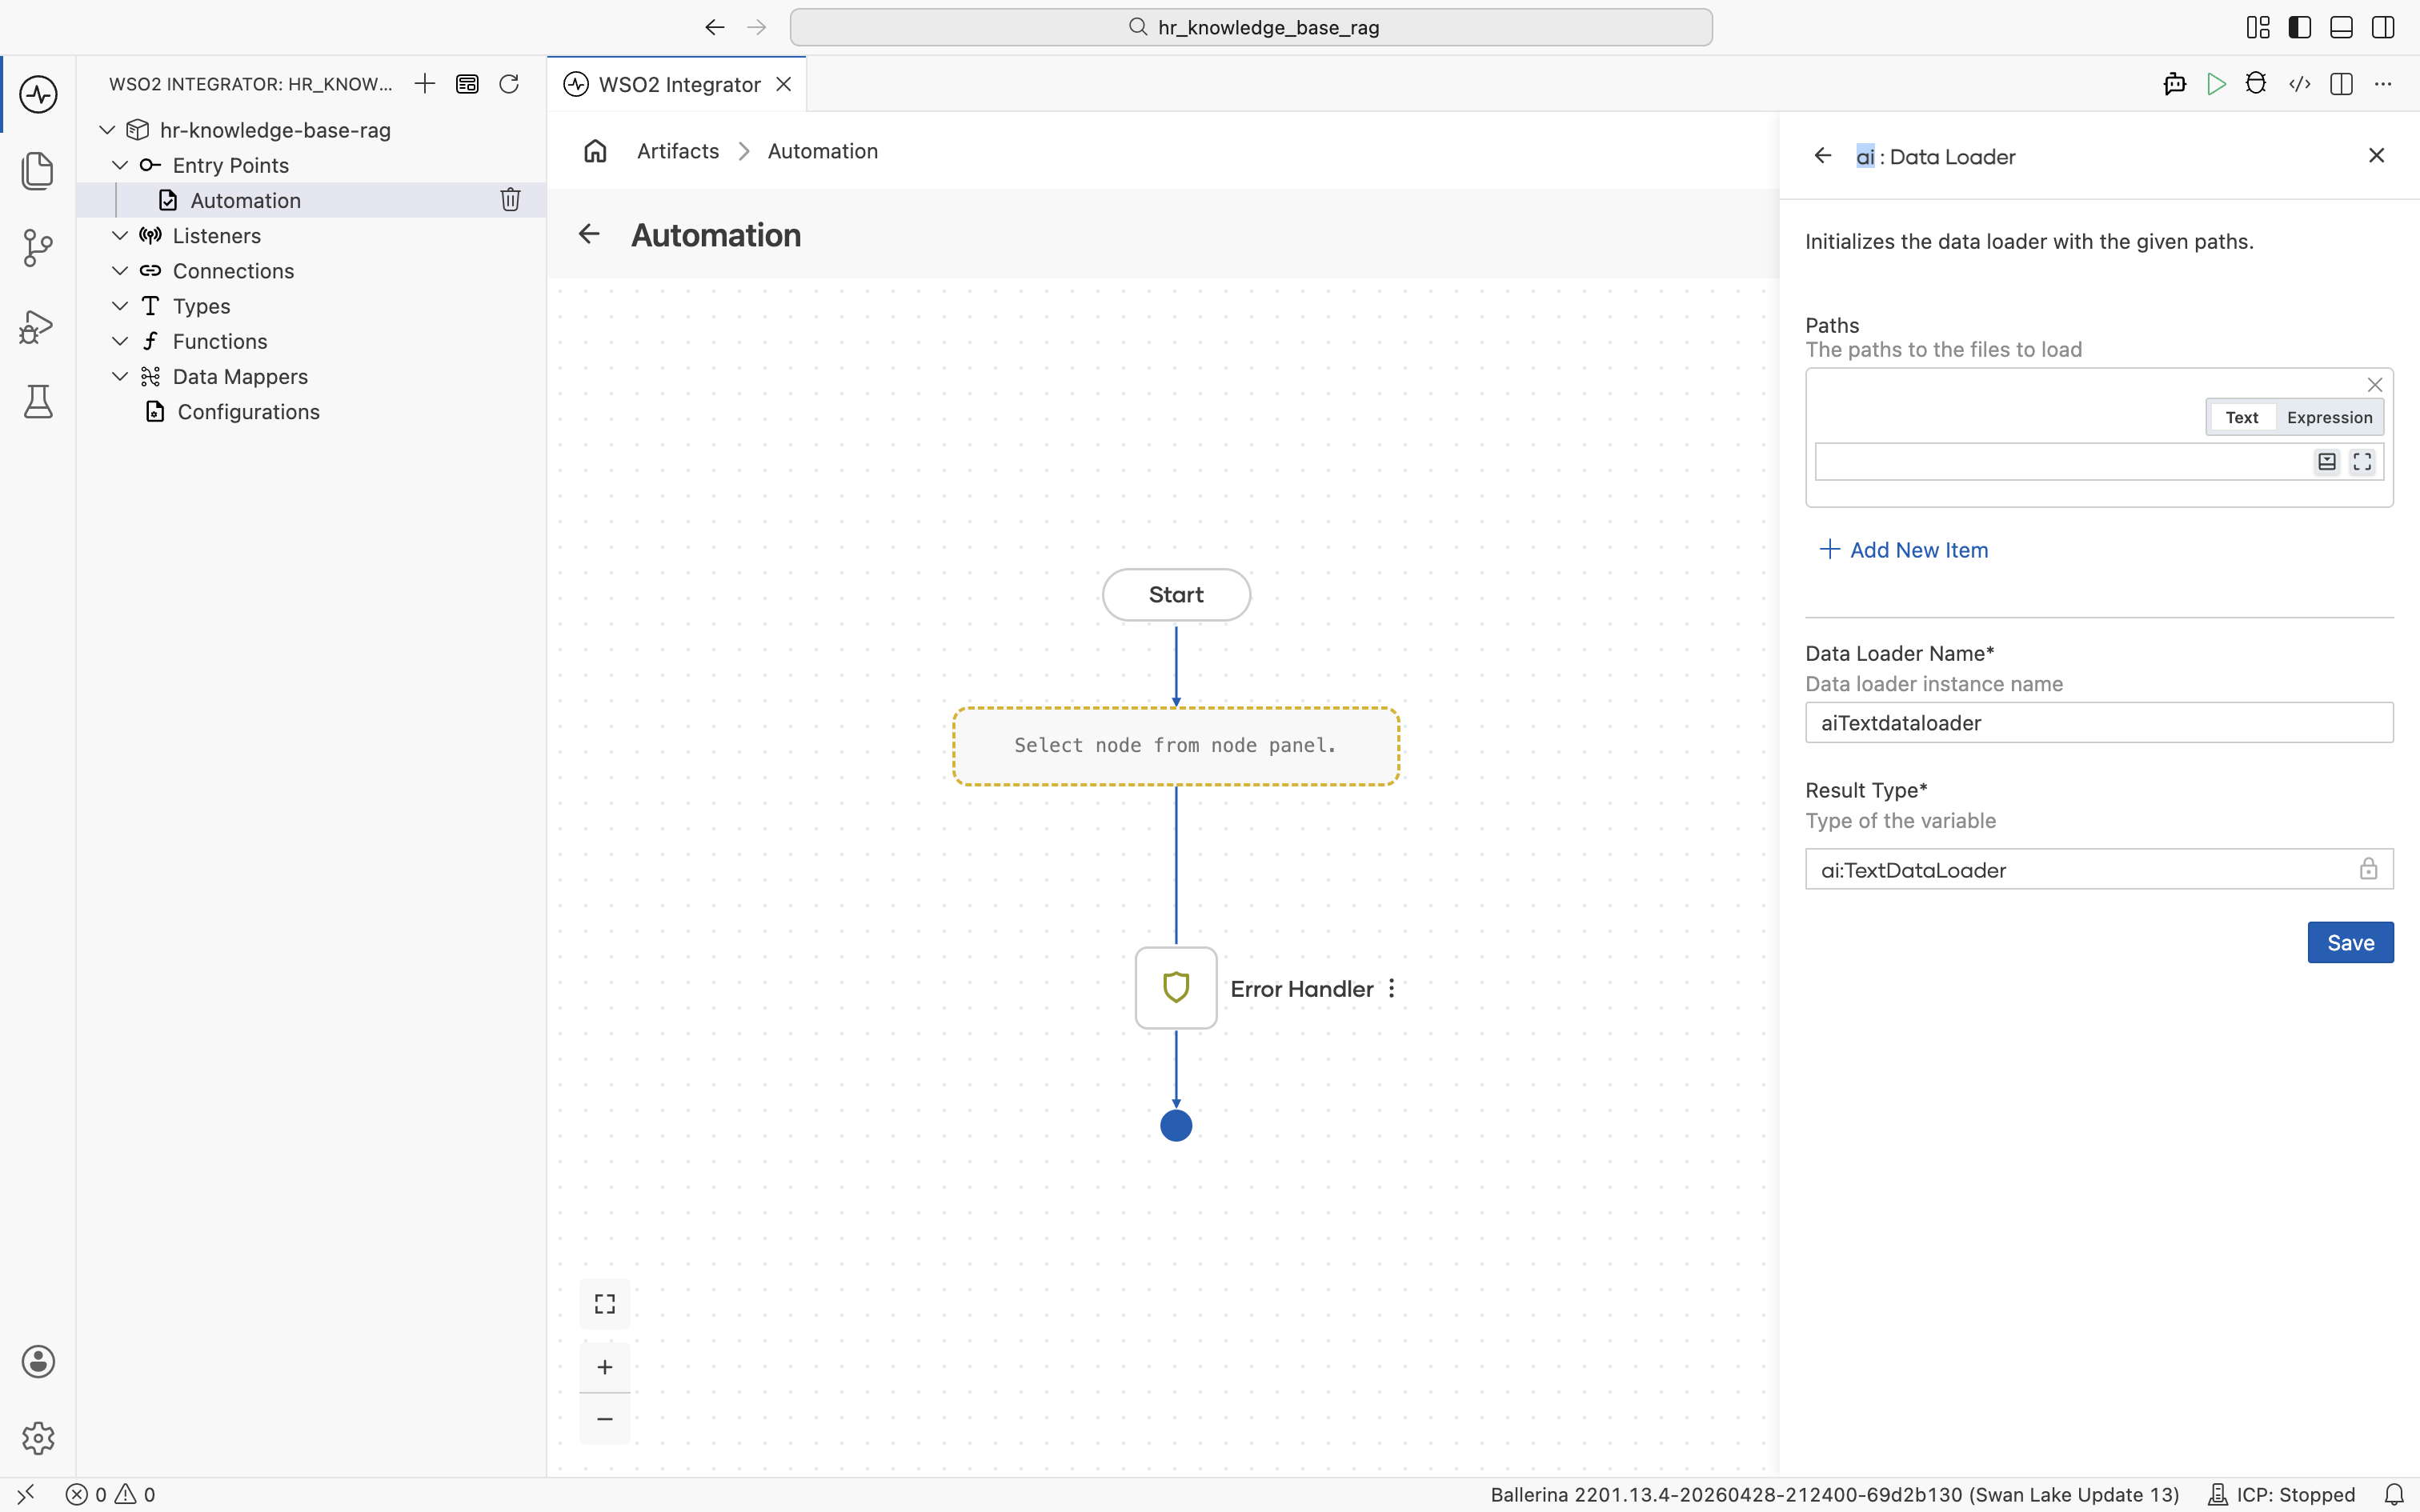
Click + Initialize Array under Paths.
-
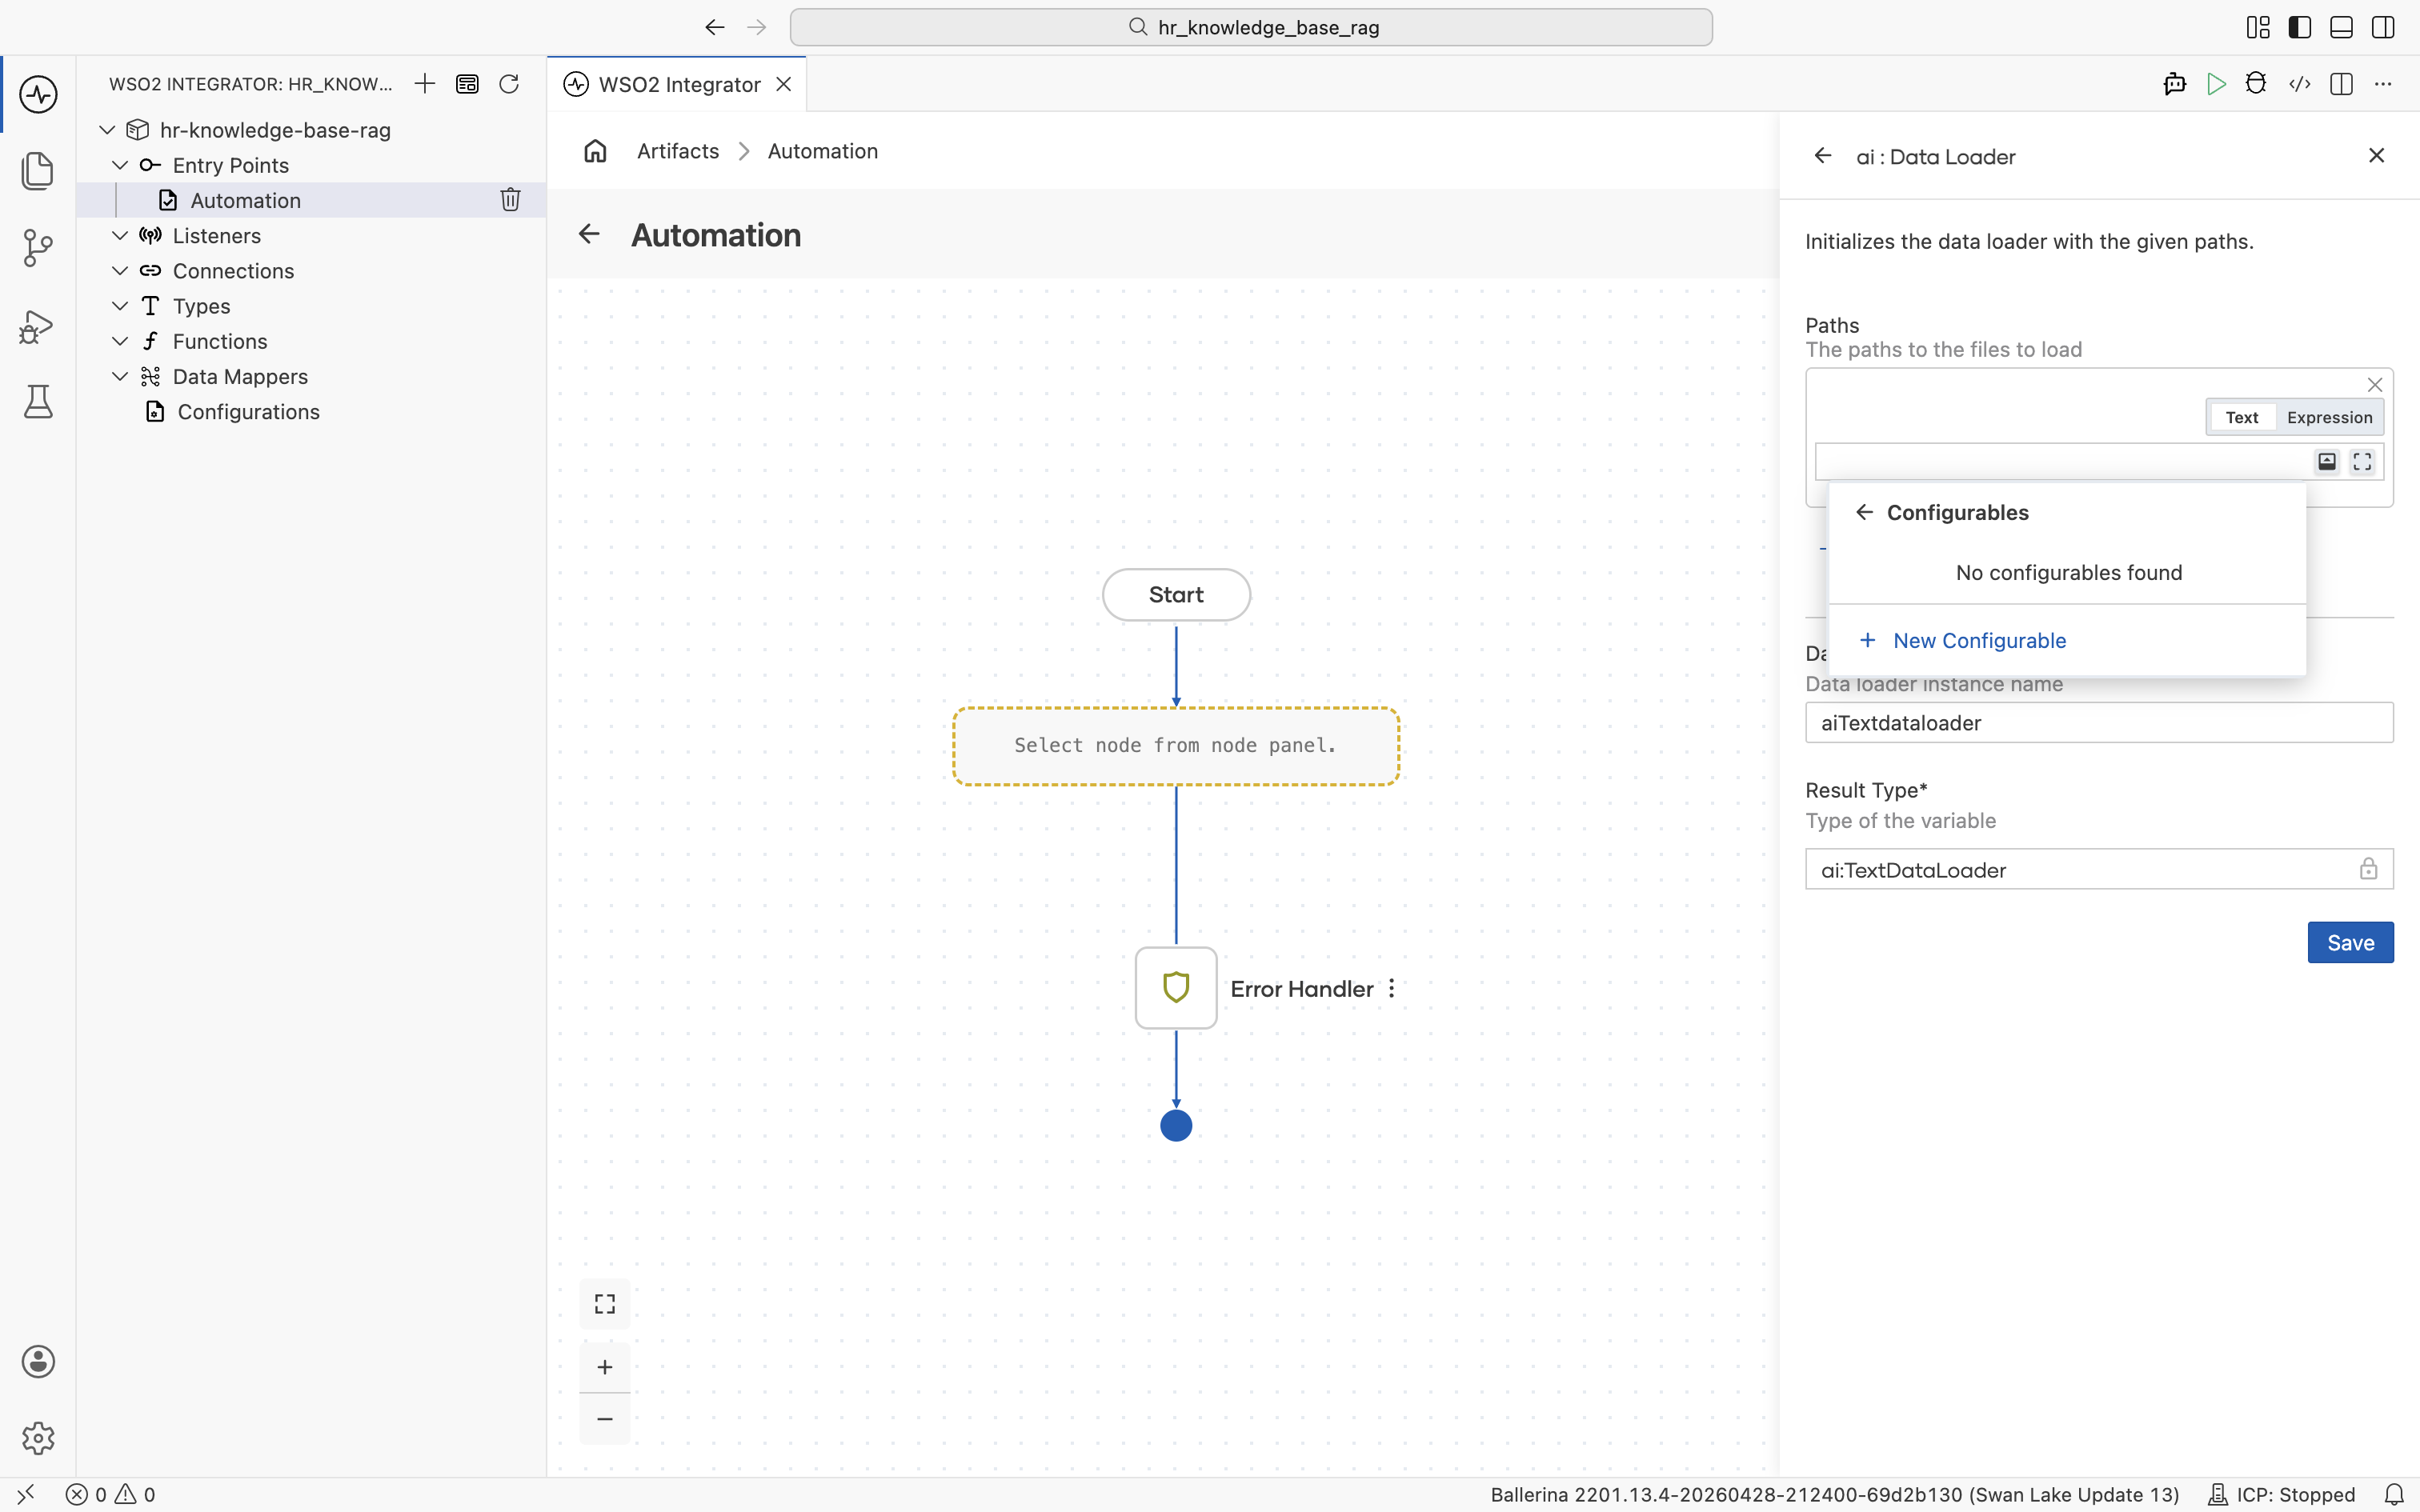
Click into the empty path expression. The helper pane opens with Inputs, Variables, and Configurables.
-
Select Configurables, then click + New Configurable.
-
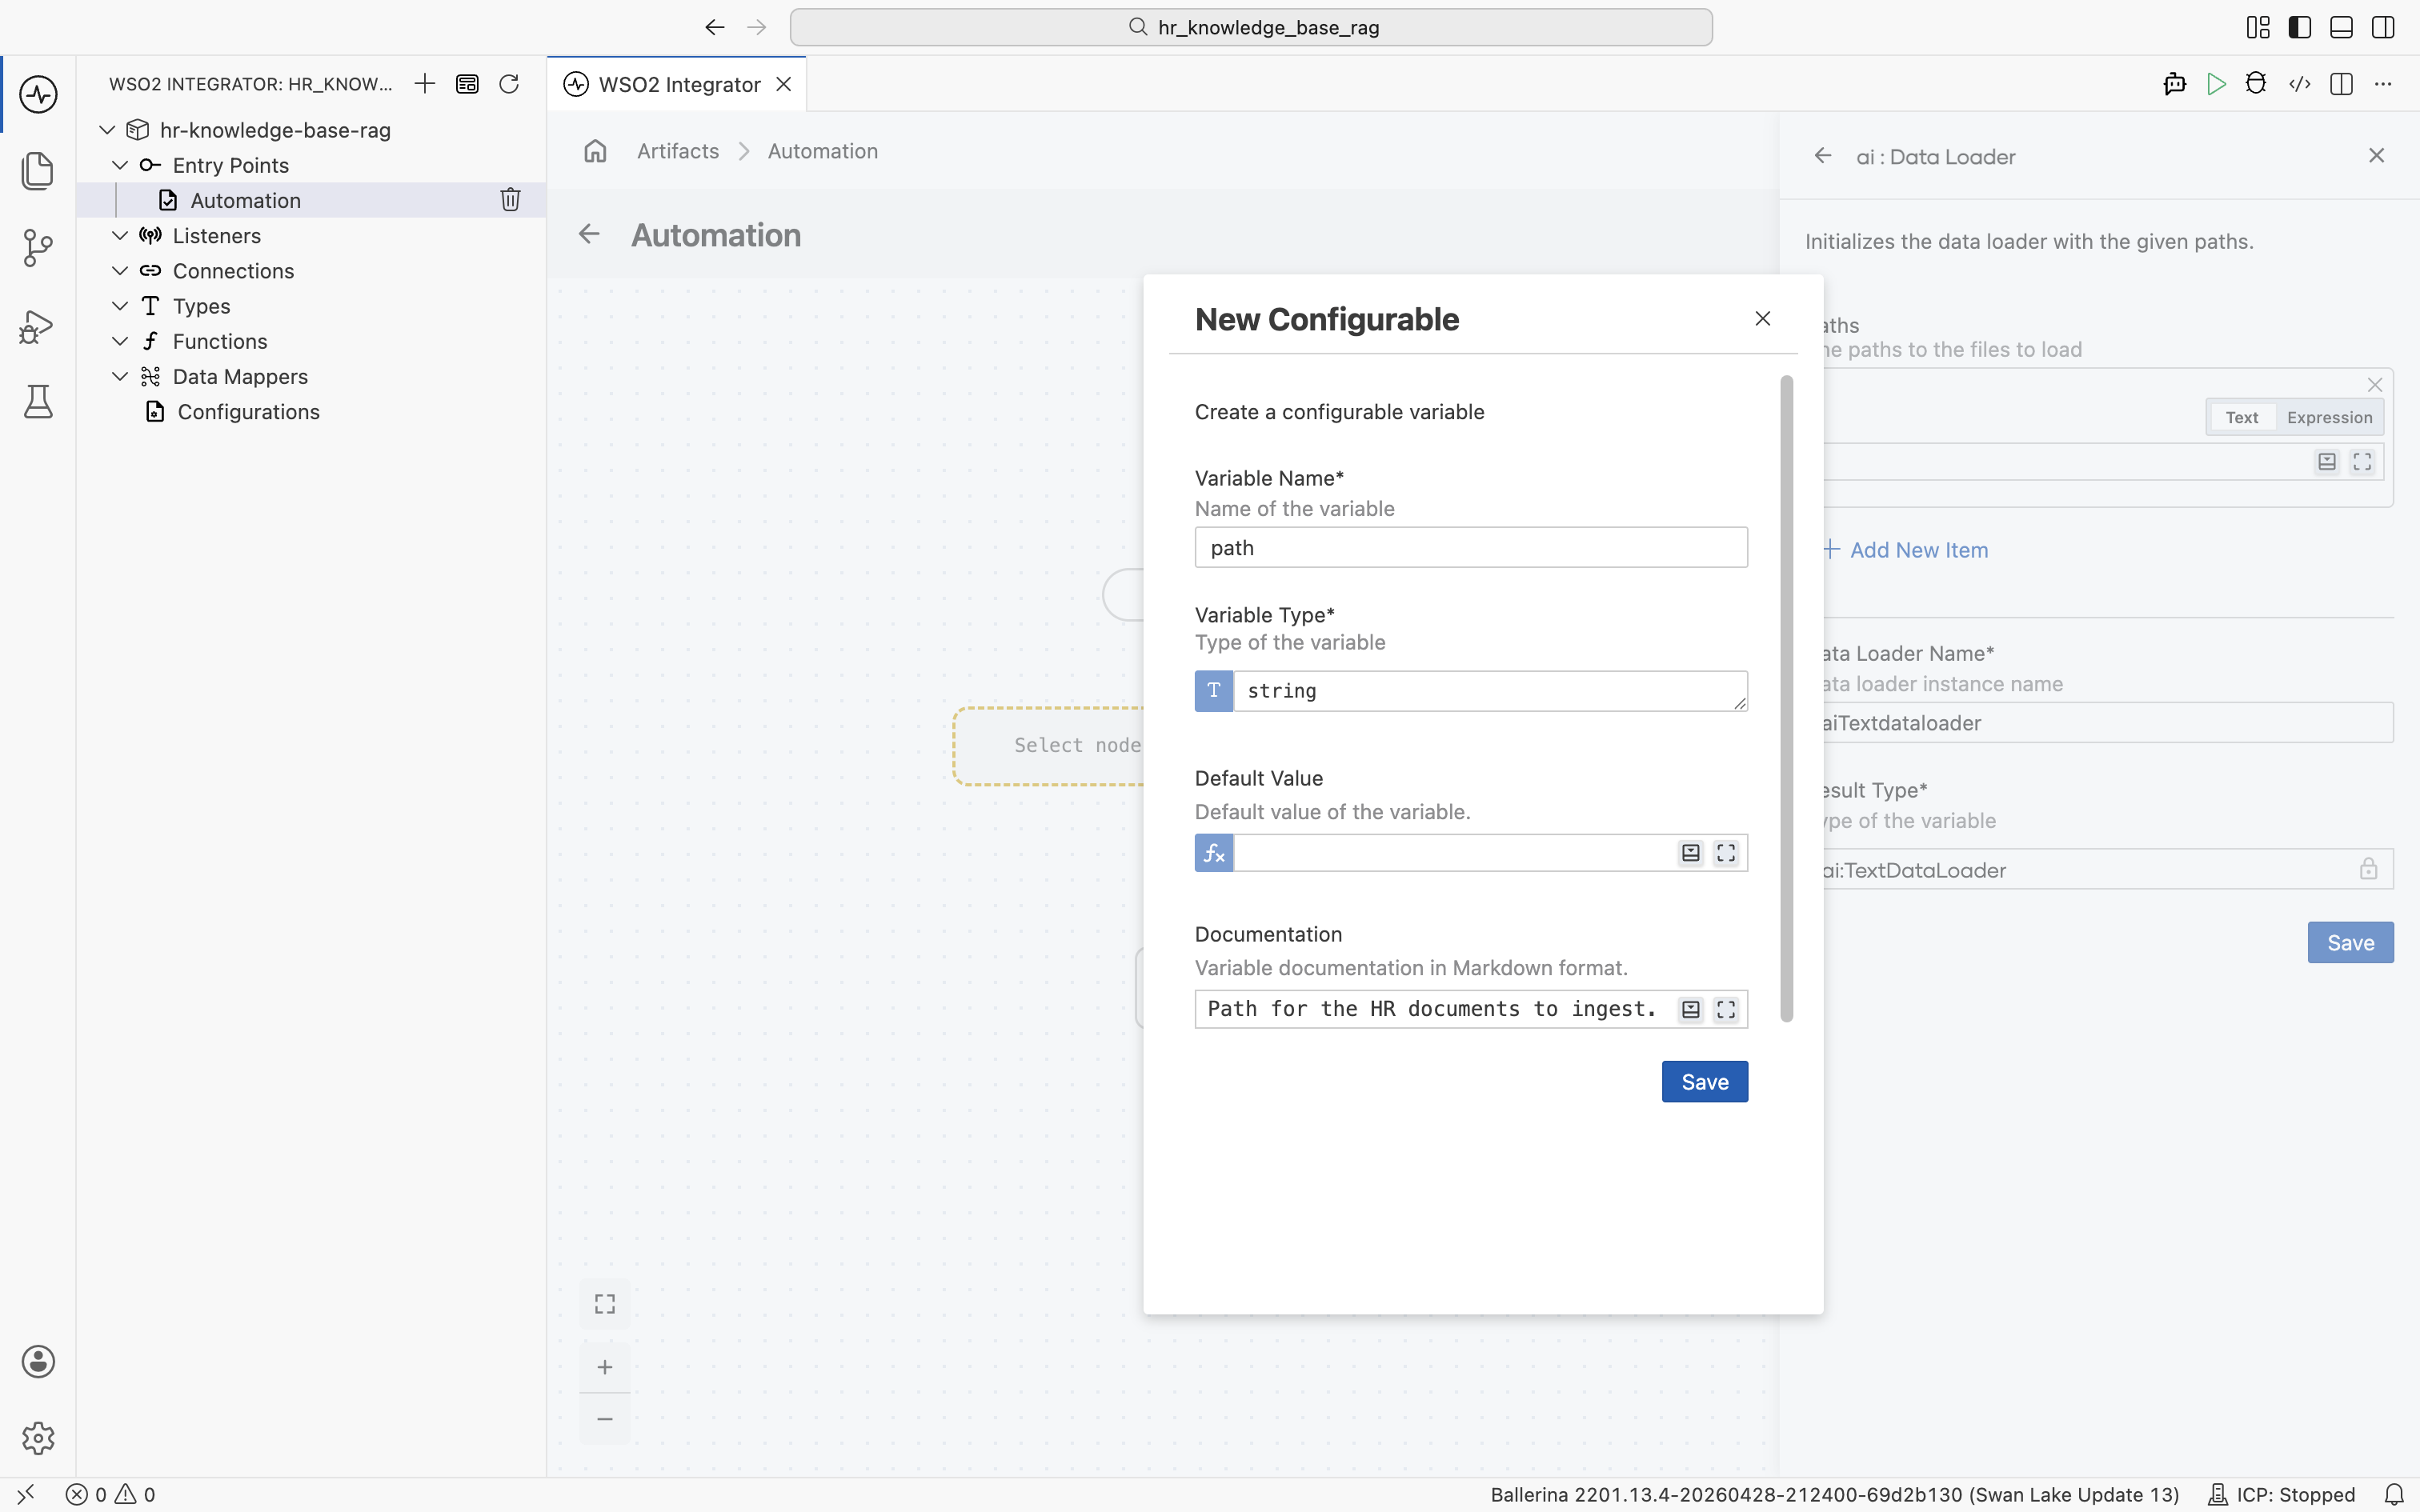
In the New Configurable dialog, fill in:
- Variable Name:
path - Variable Type:
string - Documentation: Path of the HR policy document to ingest.
- Variable Name:
-
Click Save.
Save the configurable and complete the Data Loader form:
- Paths:
path(uses the configurable) - Data Loader Name:
textDocumentLoader - Result Type:
ai:TextDataLoader

Click Save.
The Paths field is an array of file paths, not a folder. To ingest several HR documents, add another path expression to the array for each file you want to load.
2.3 Add the ai : load node
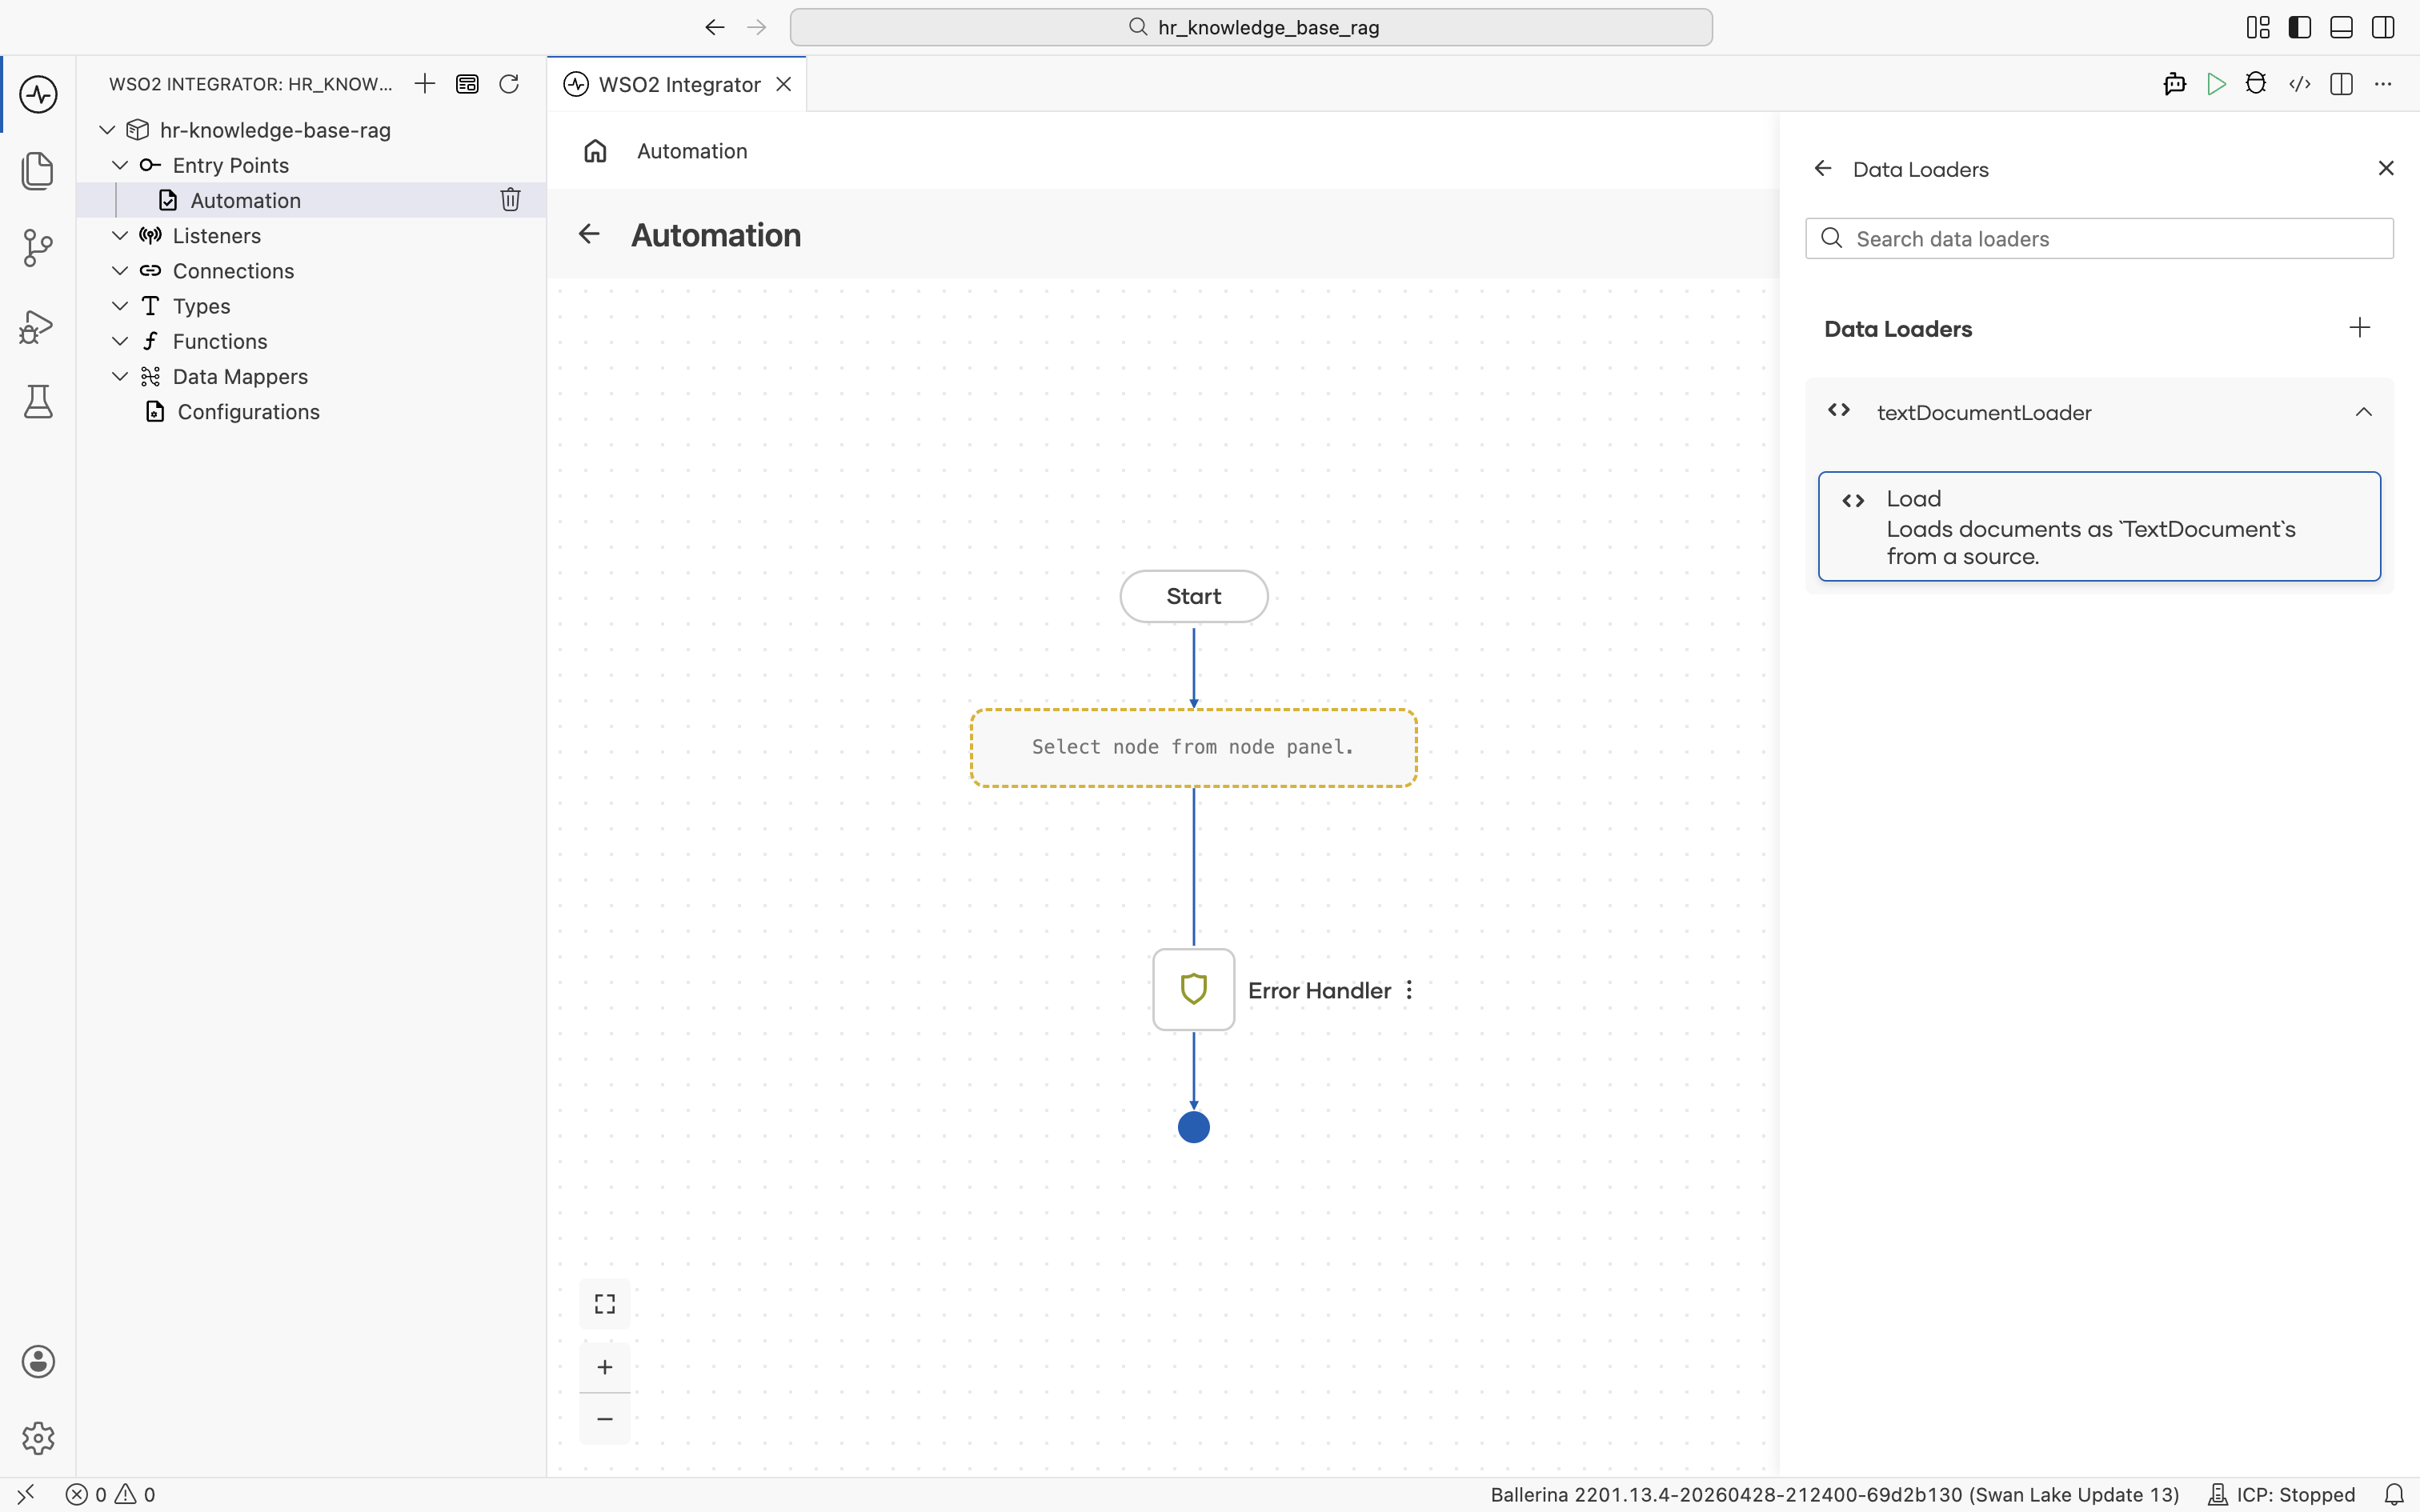
After you save the data loader, the Data Loaders panel reopens and lists the textDocumentLoader connection you just created.
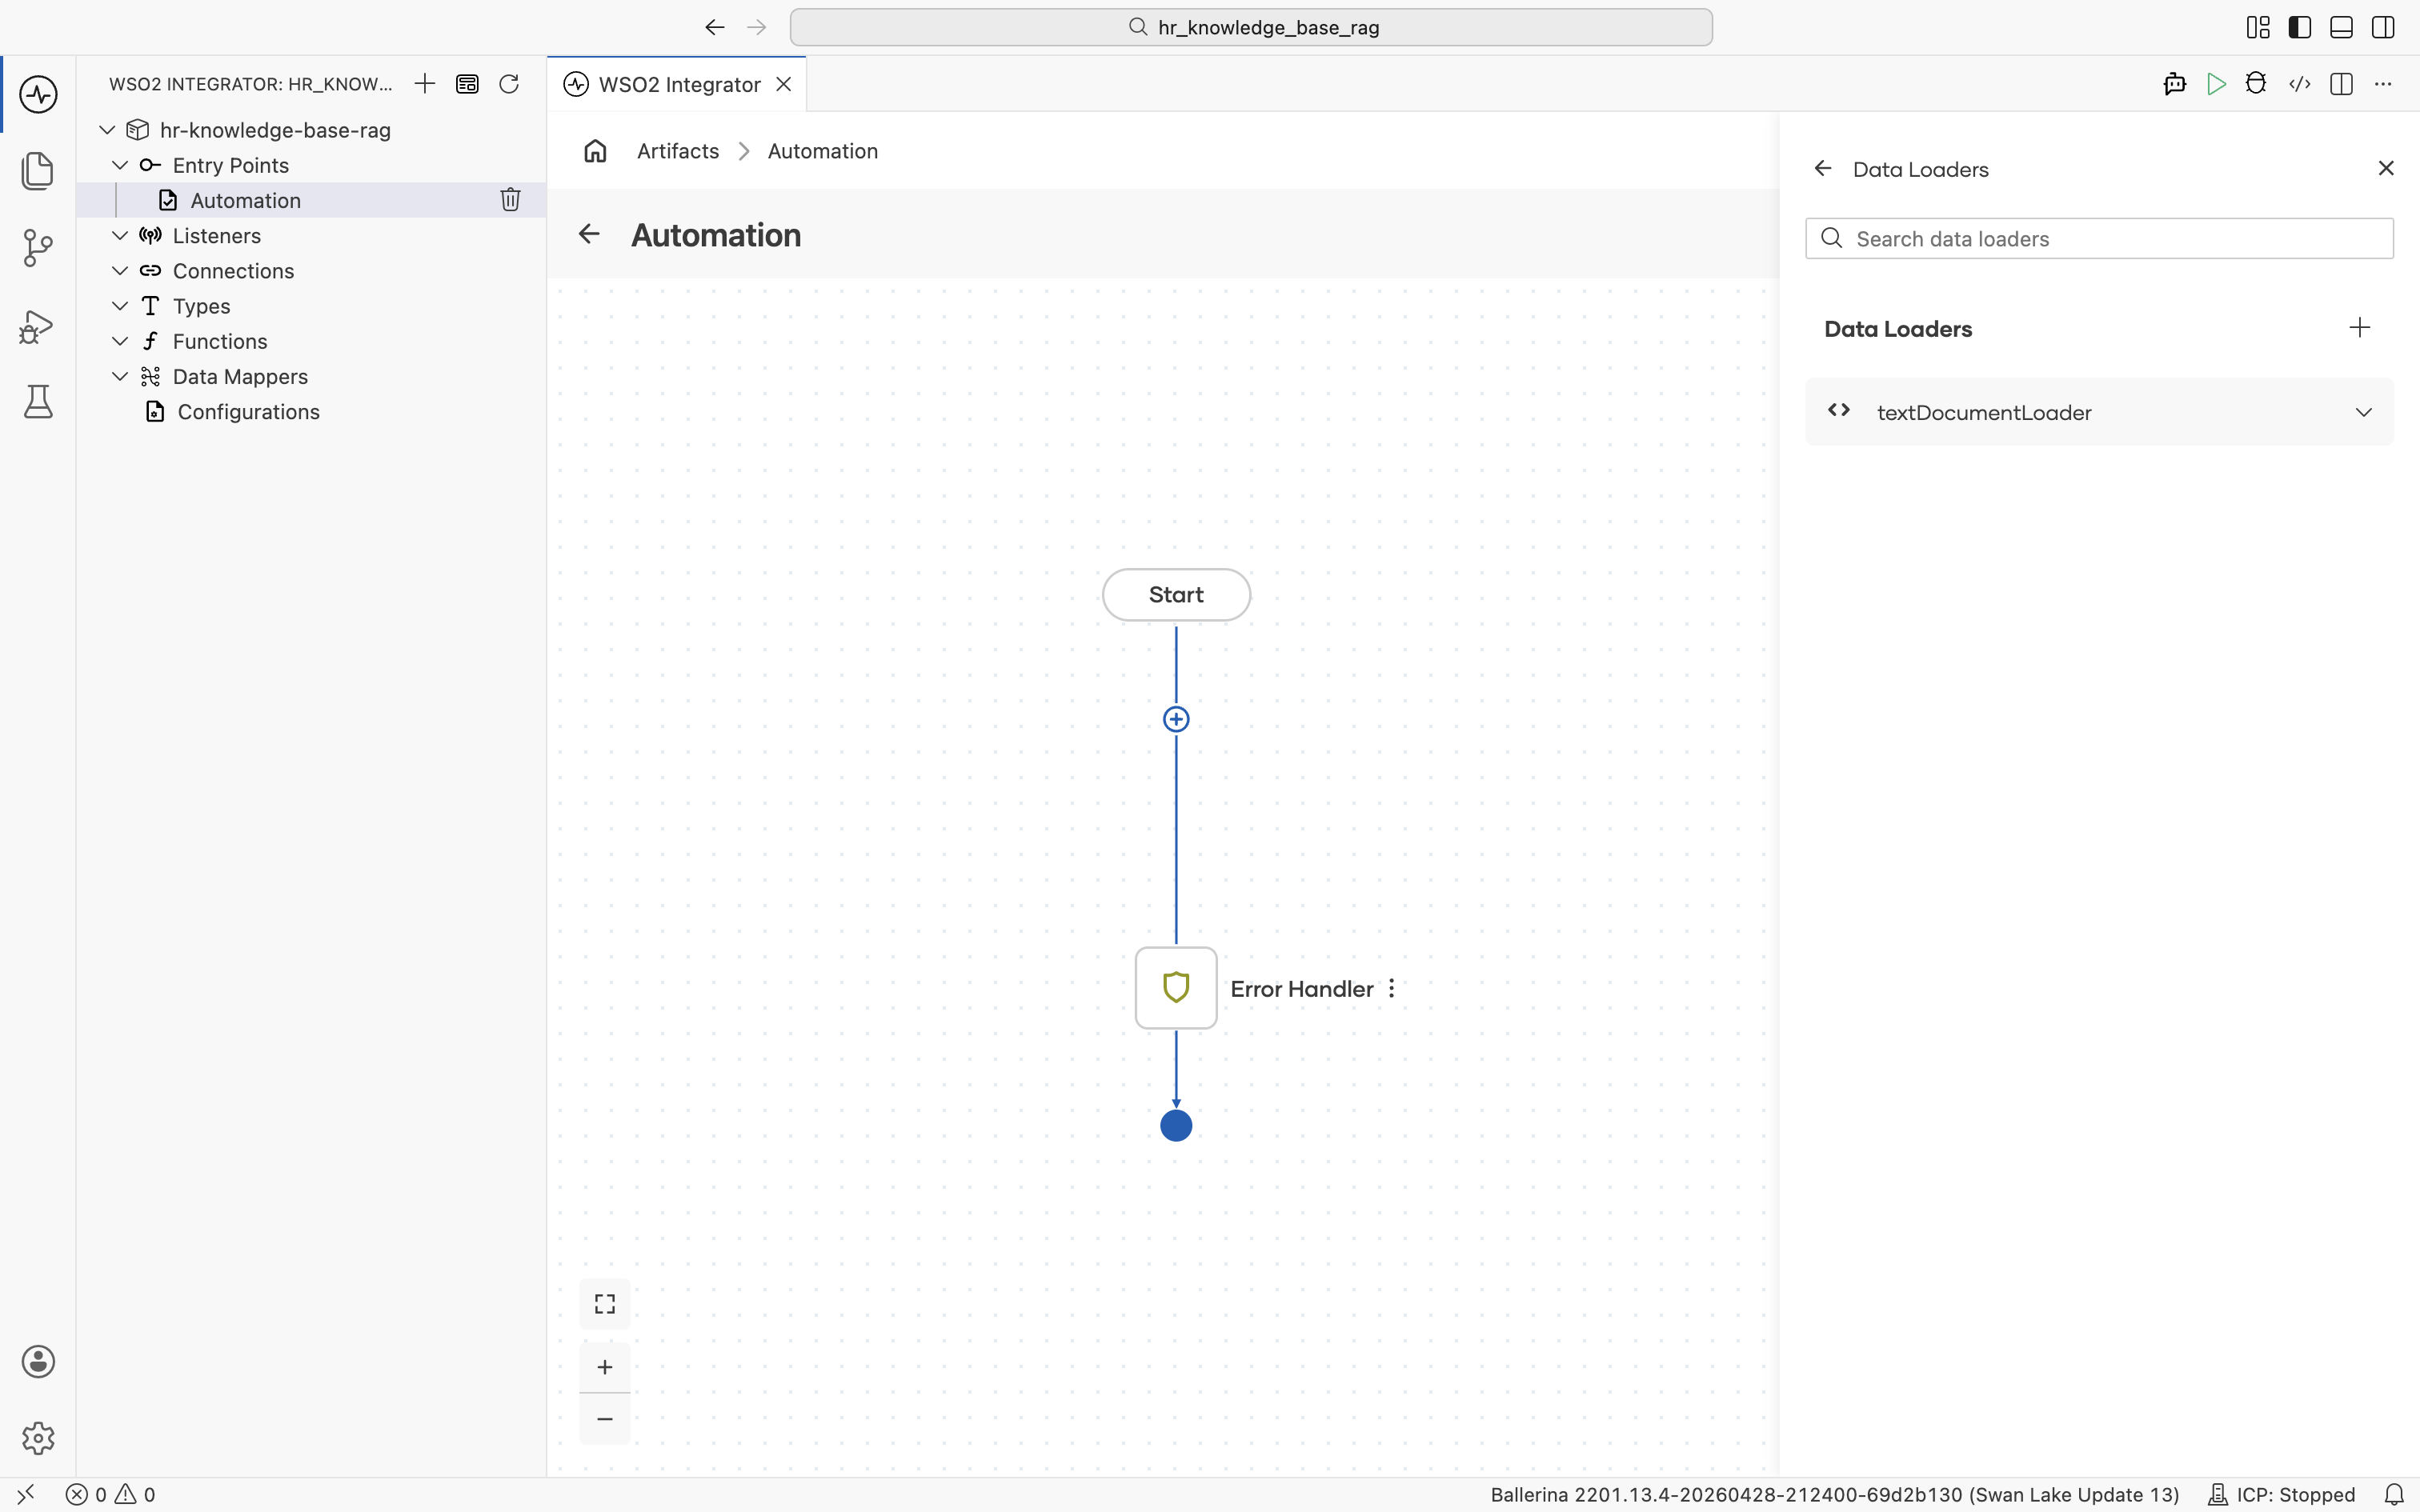
Click textDocumentLoader to expand it and reveal its Load action: "Loads documents as TextDocuments from a source.". Click Load.
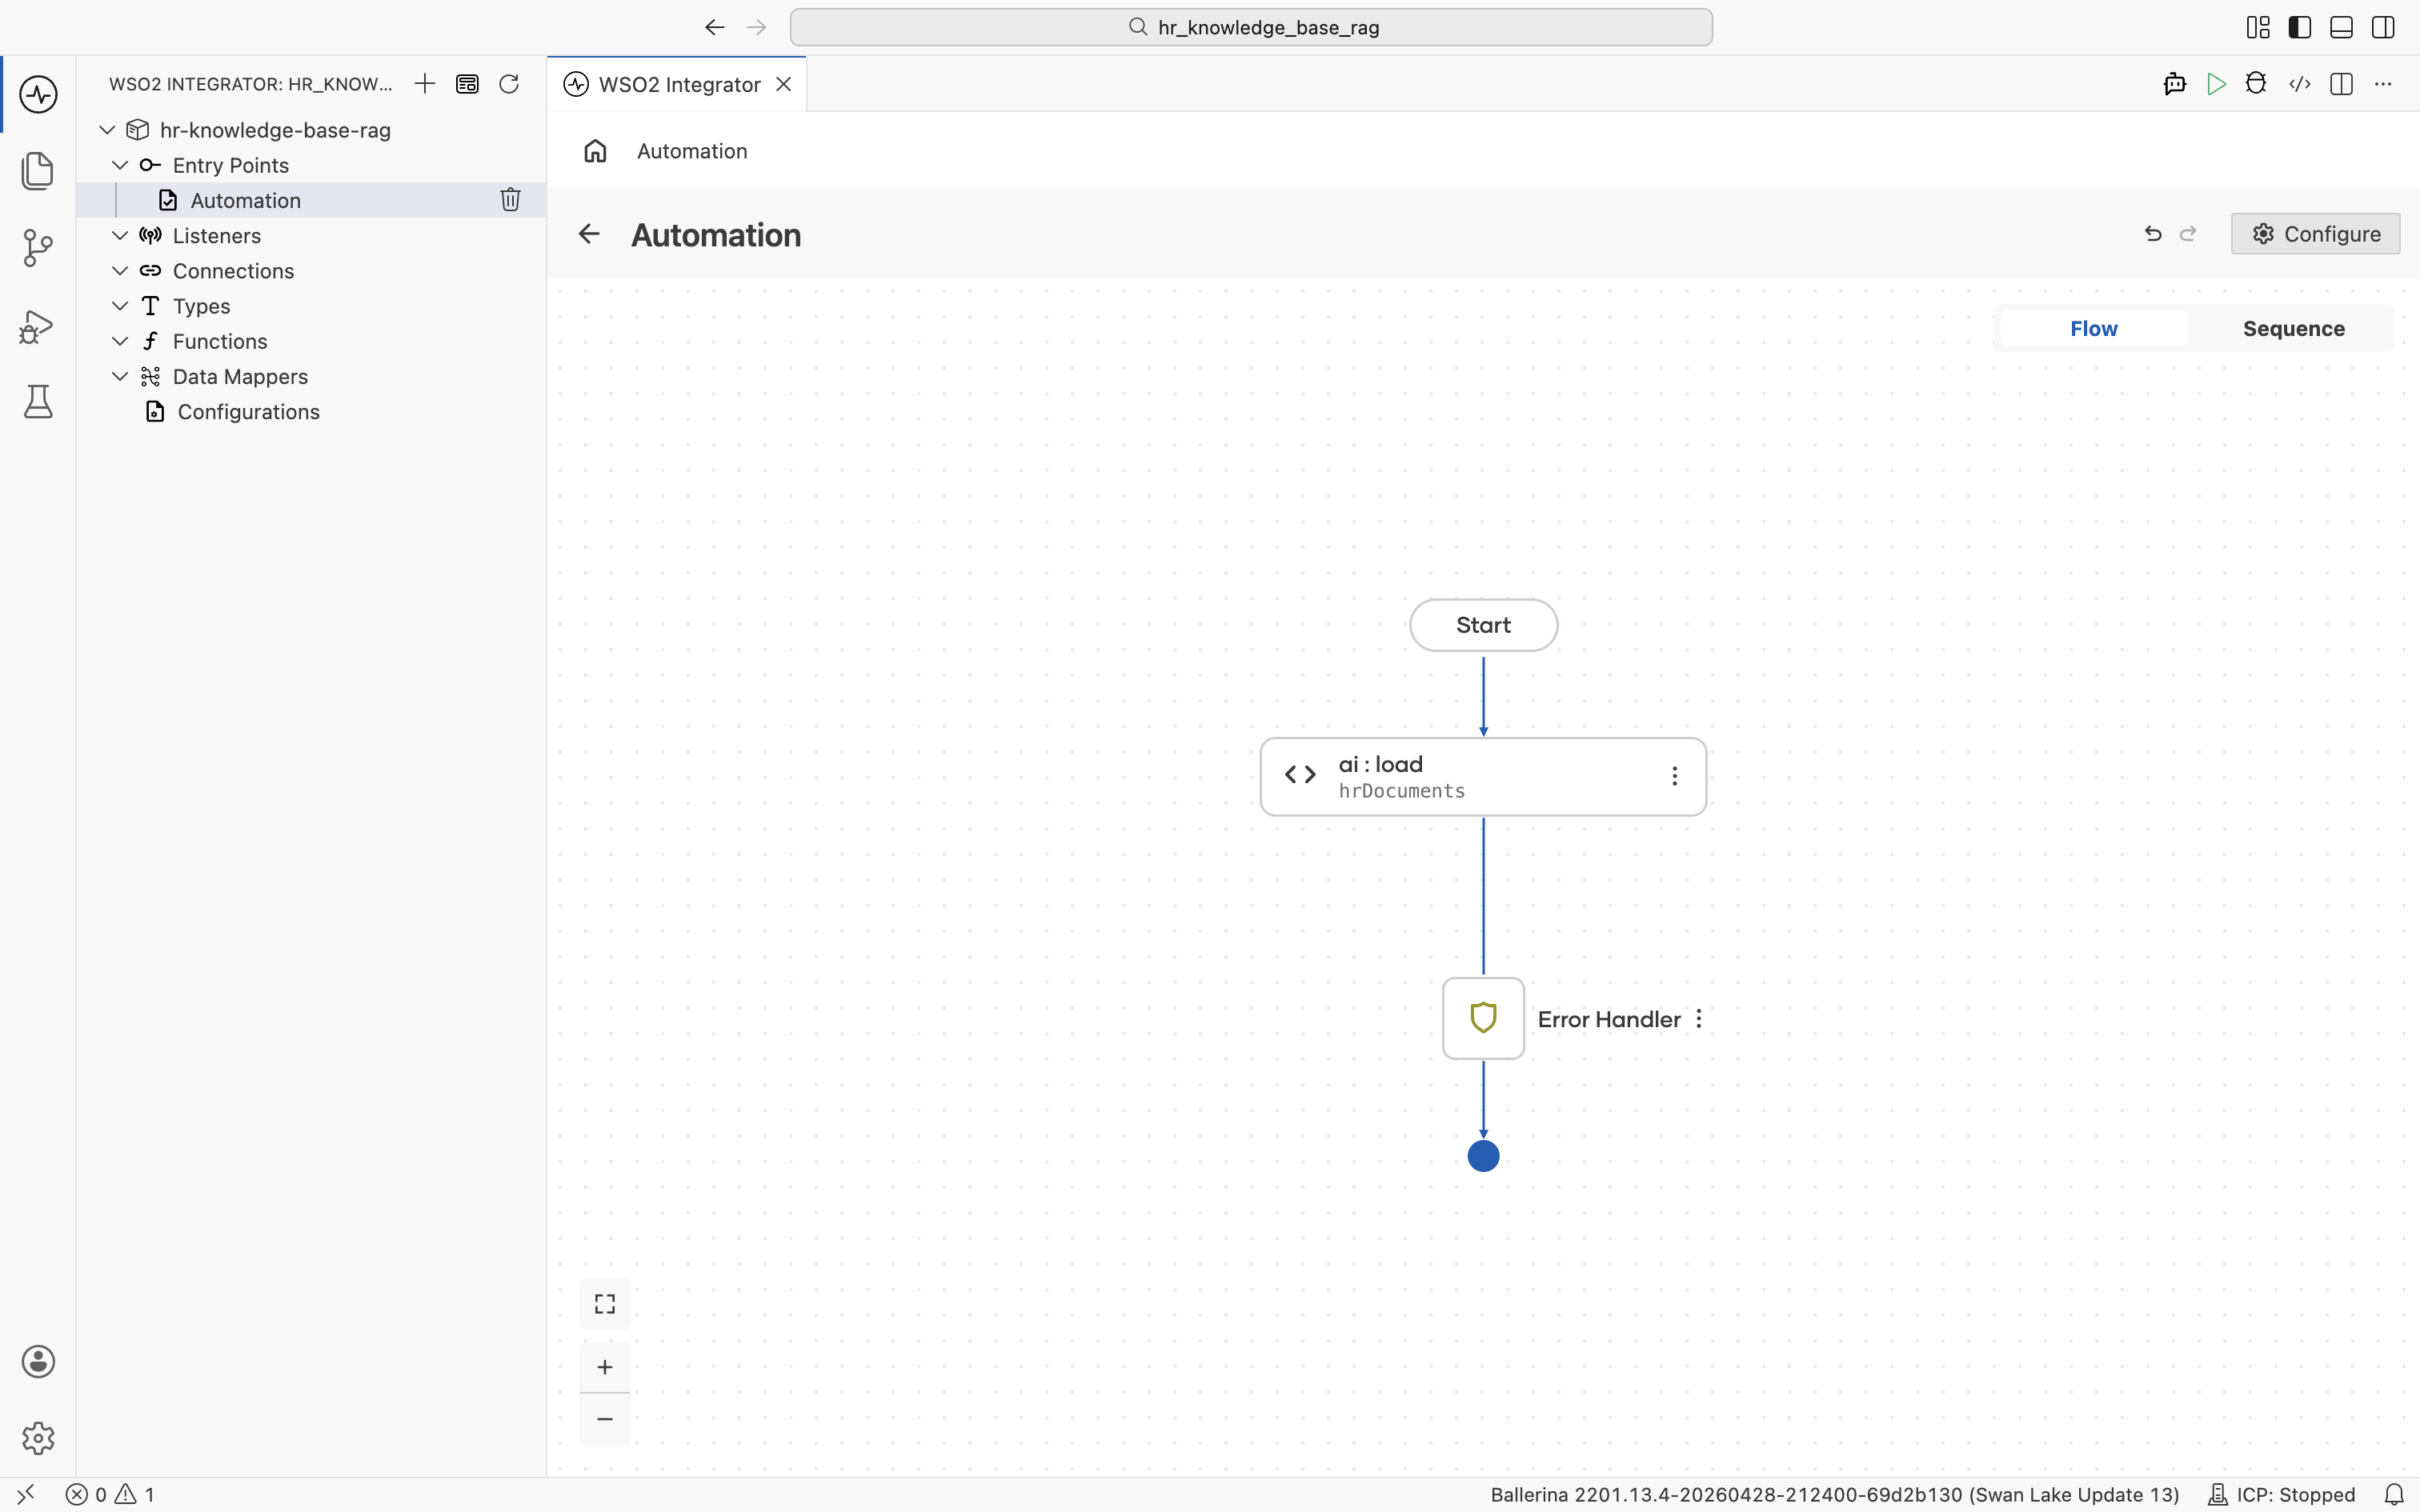
The ai : load form opens. Set:
- Result:
hrDocuments - Result Type:
ai:Document[] | ai:Document

Click Save. The ai:load node is added to the flow between the Start node and the Error Handler.
2.4 Create the vector knowledge base
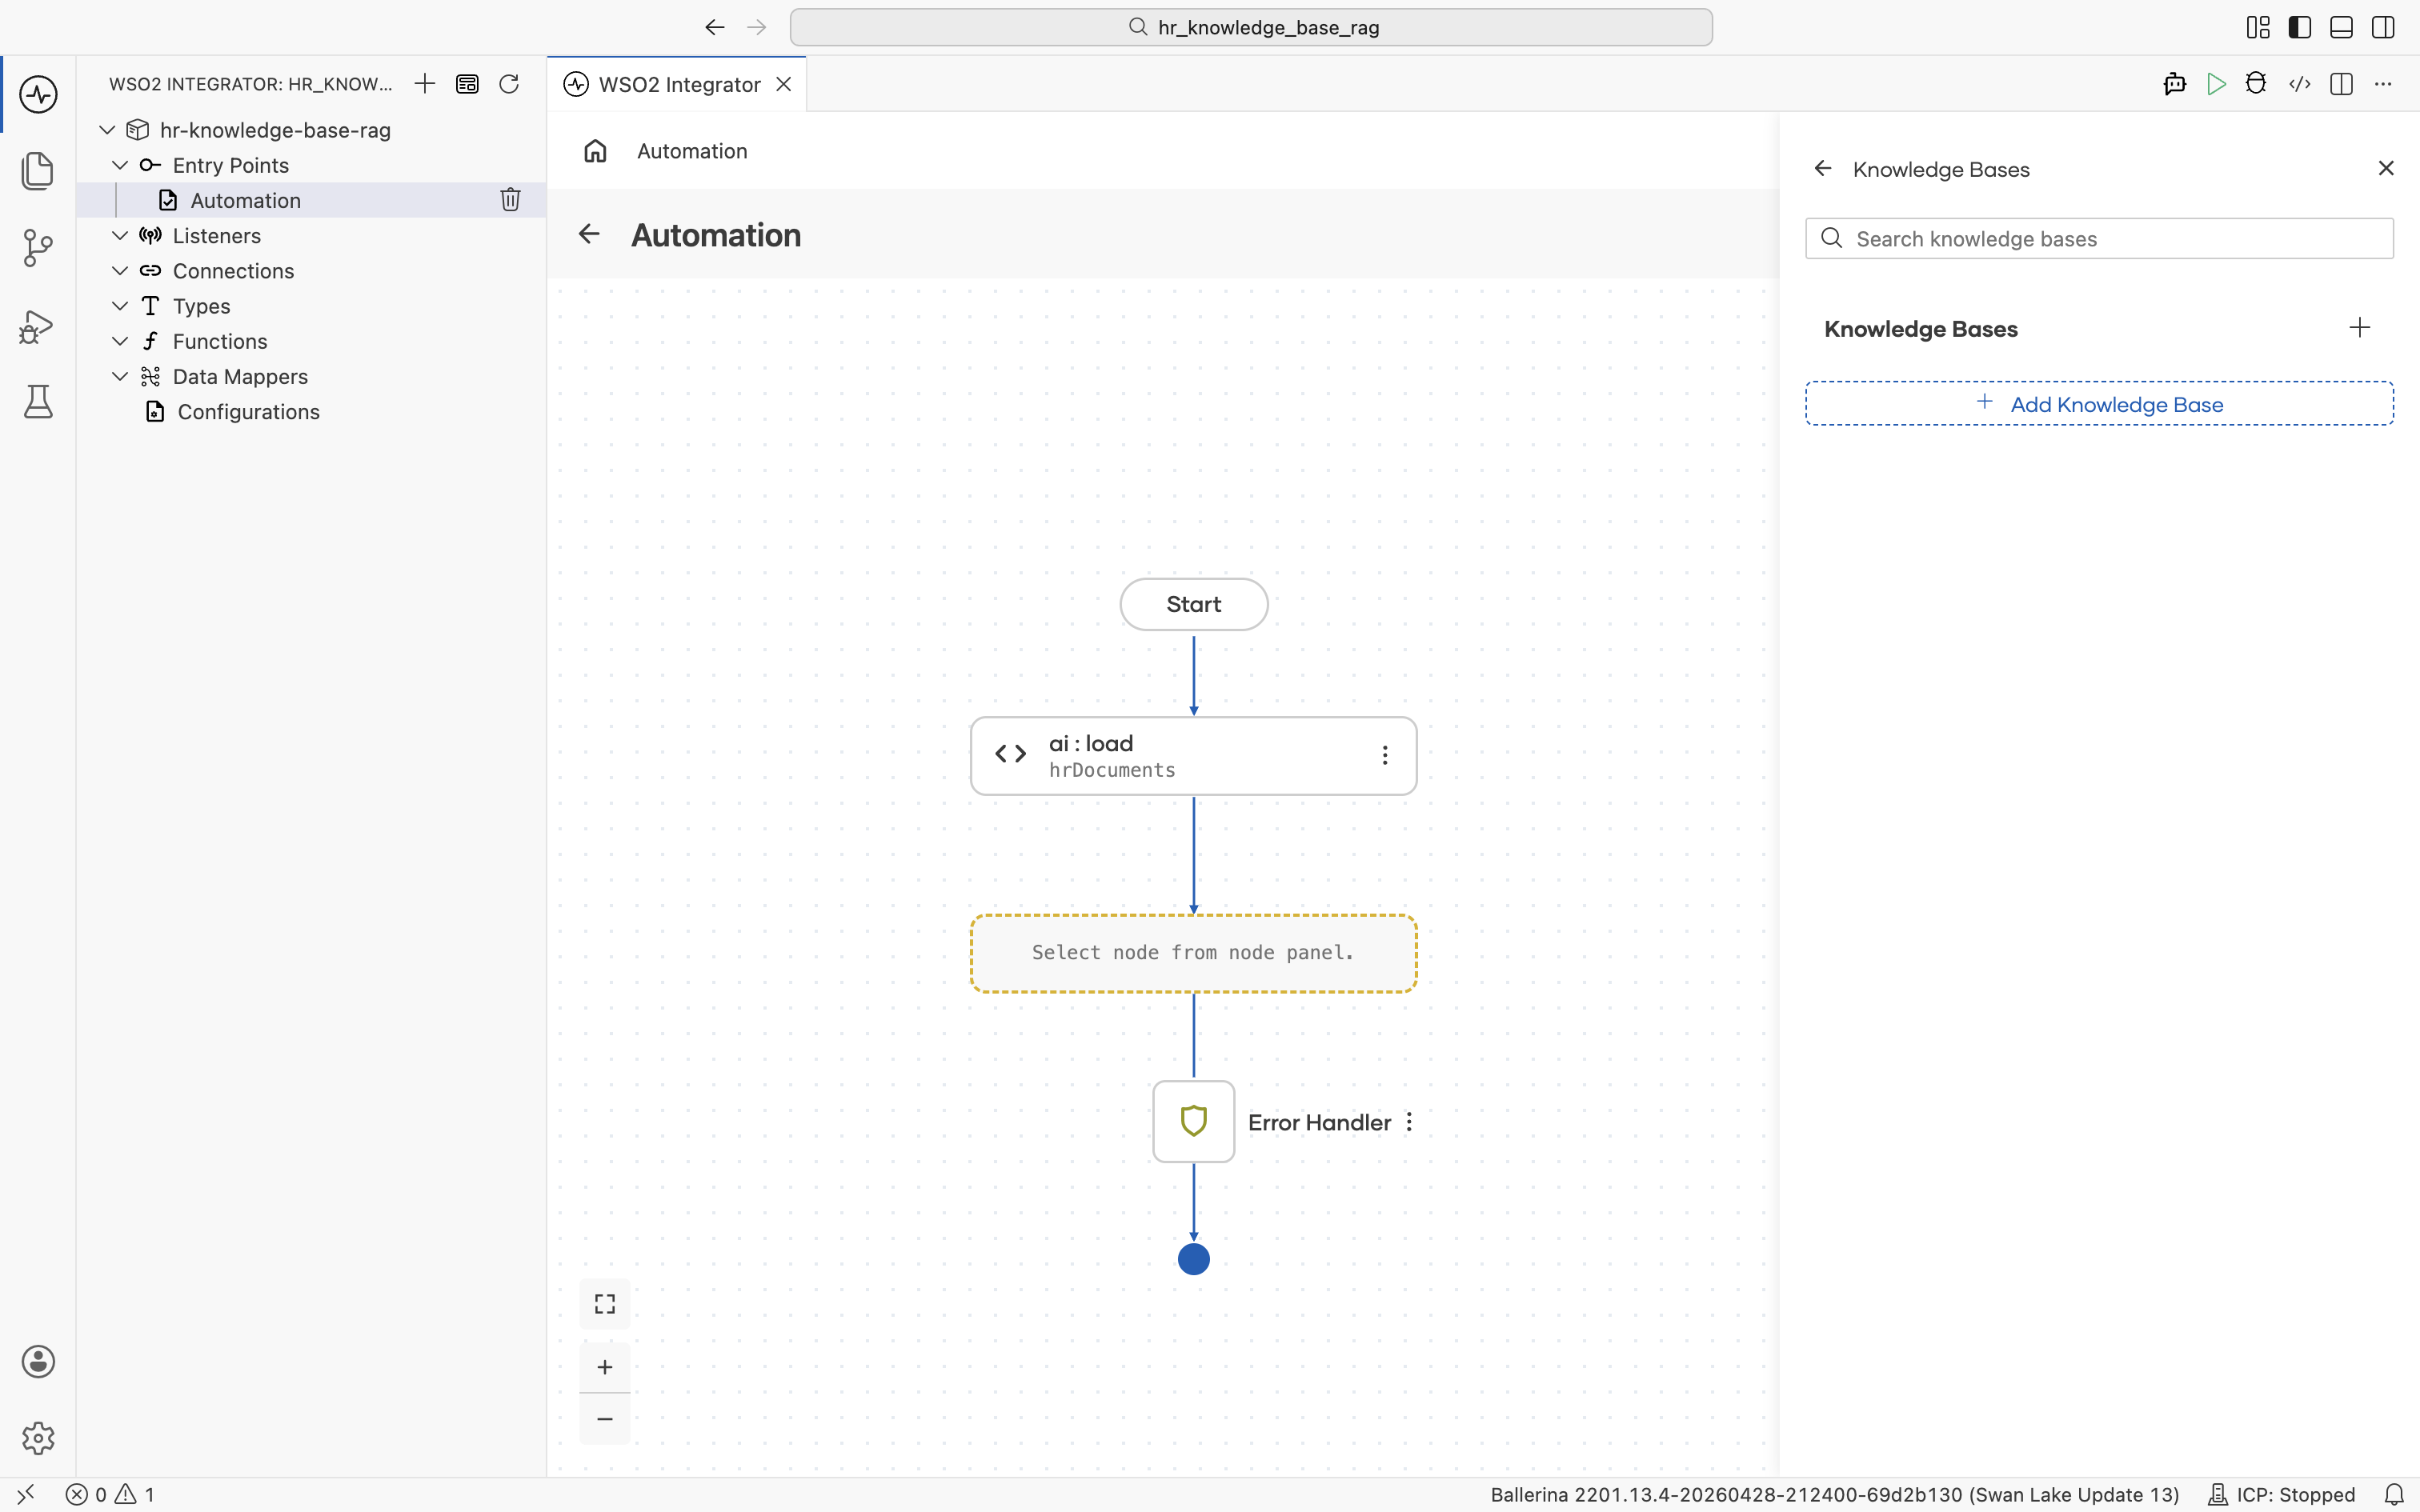
Click the + below the ai:load node to add the next node.
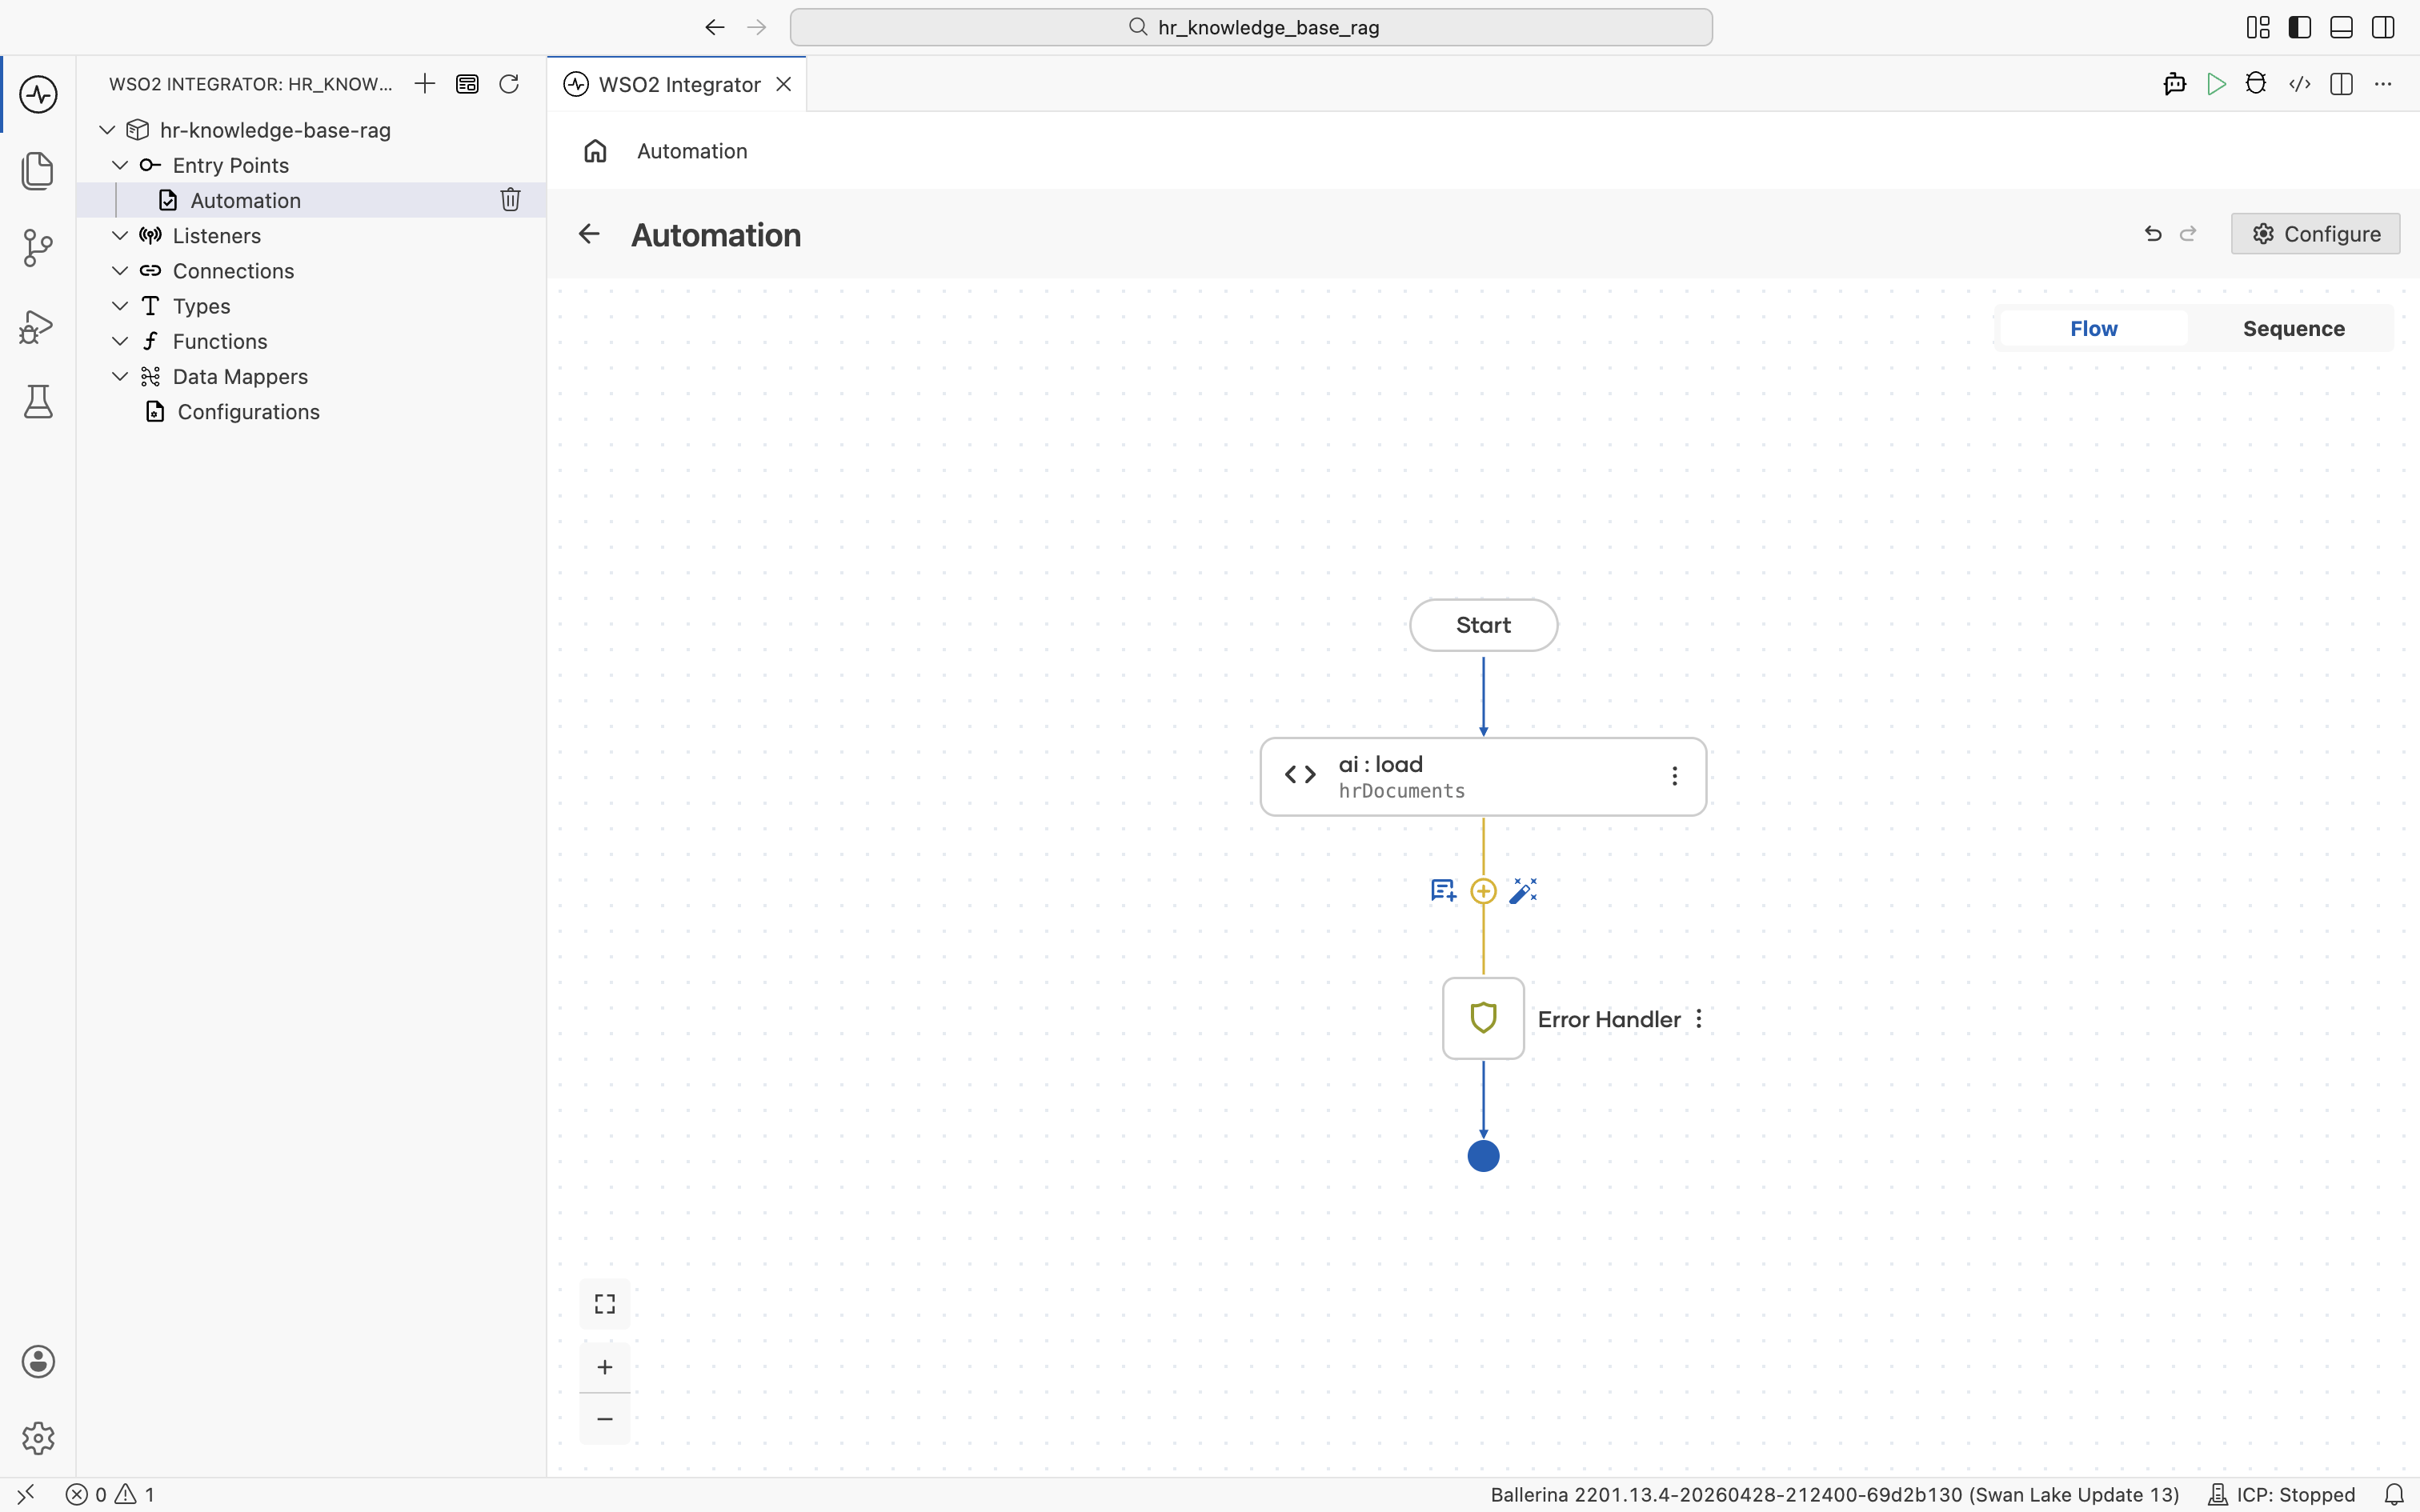
The node palette opens. Under AI > RAG, click Knowledge Base.
The Knowledge Bases panel opens. Click + Add Knowledge Base.
The picker lists the supported knowledge base types. Pick Vector Knowledge Base.
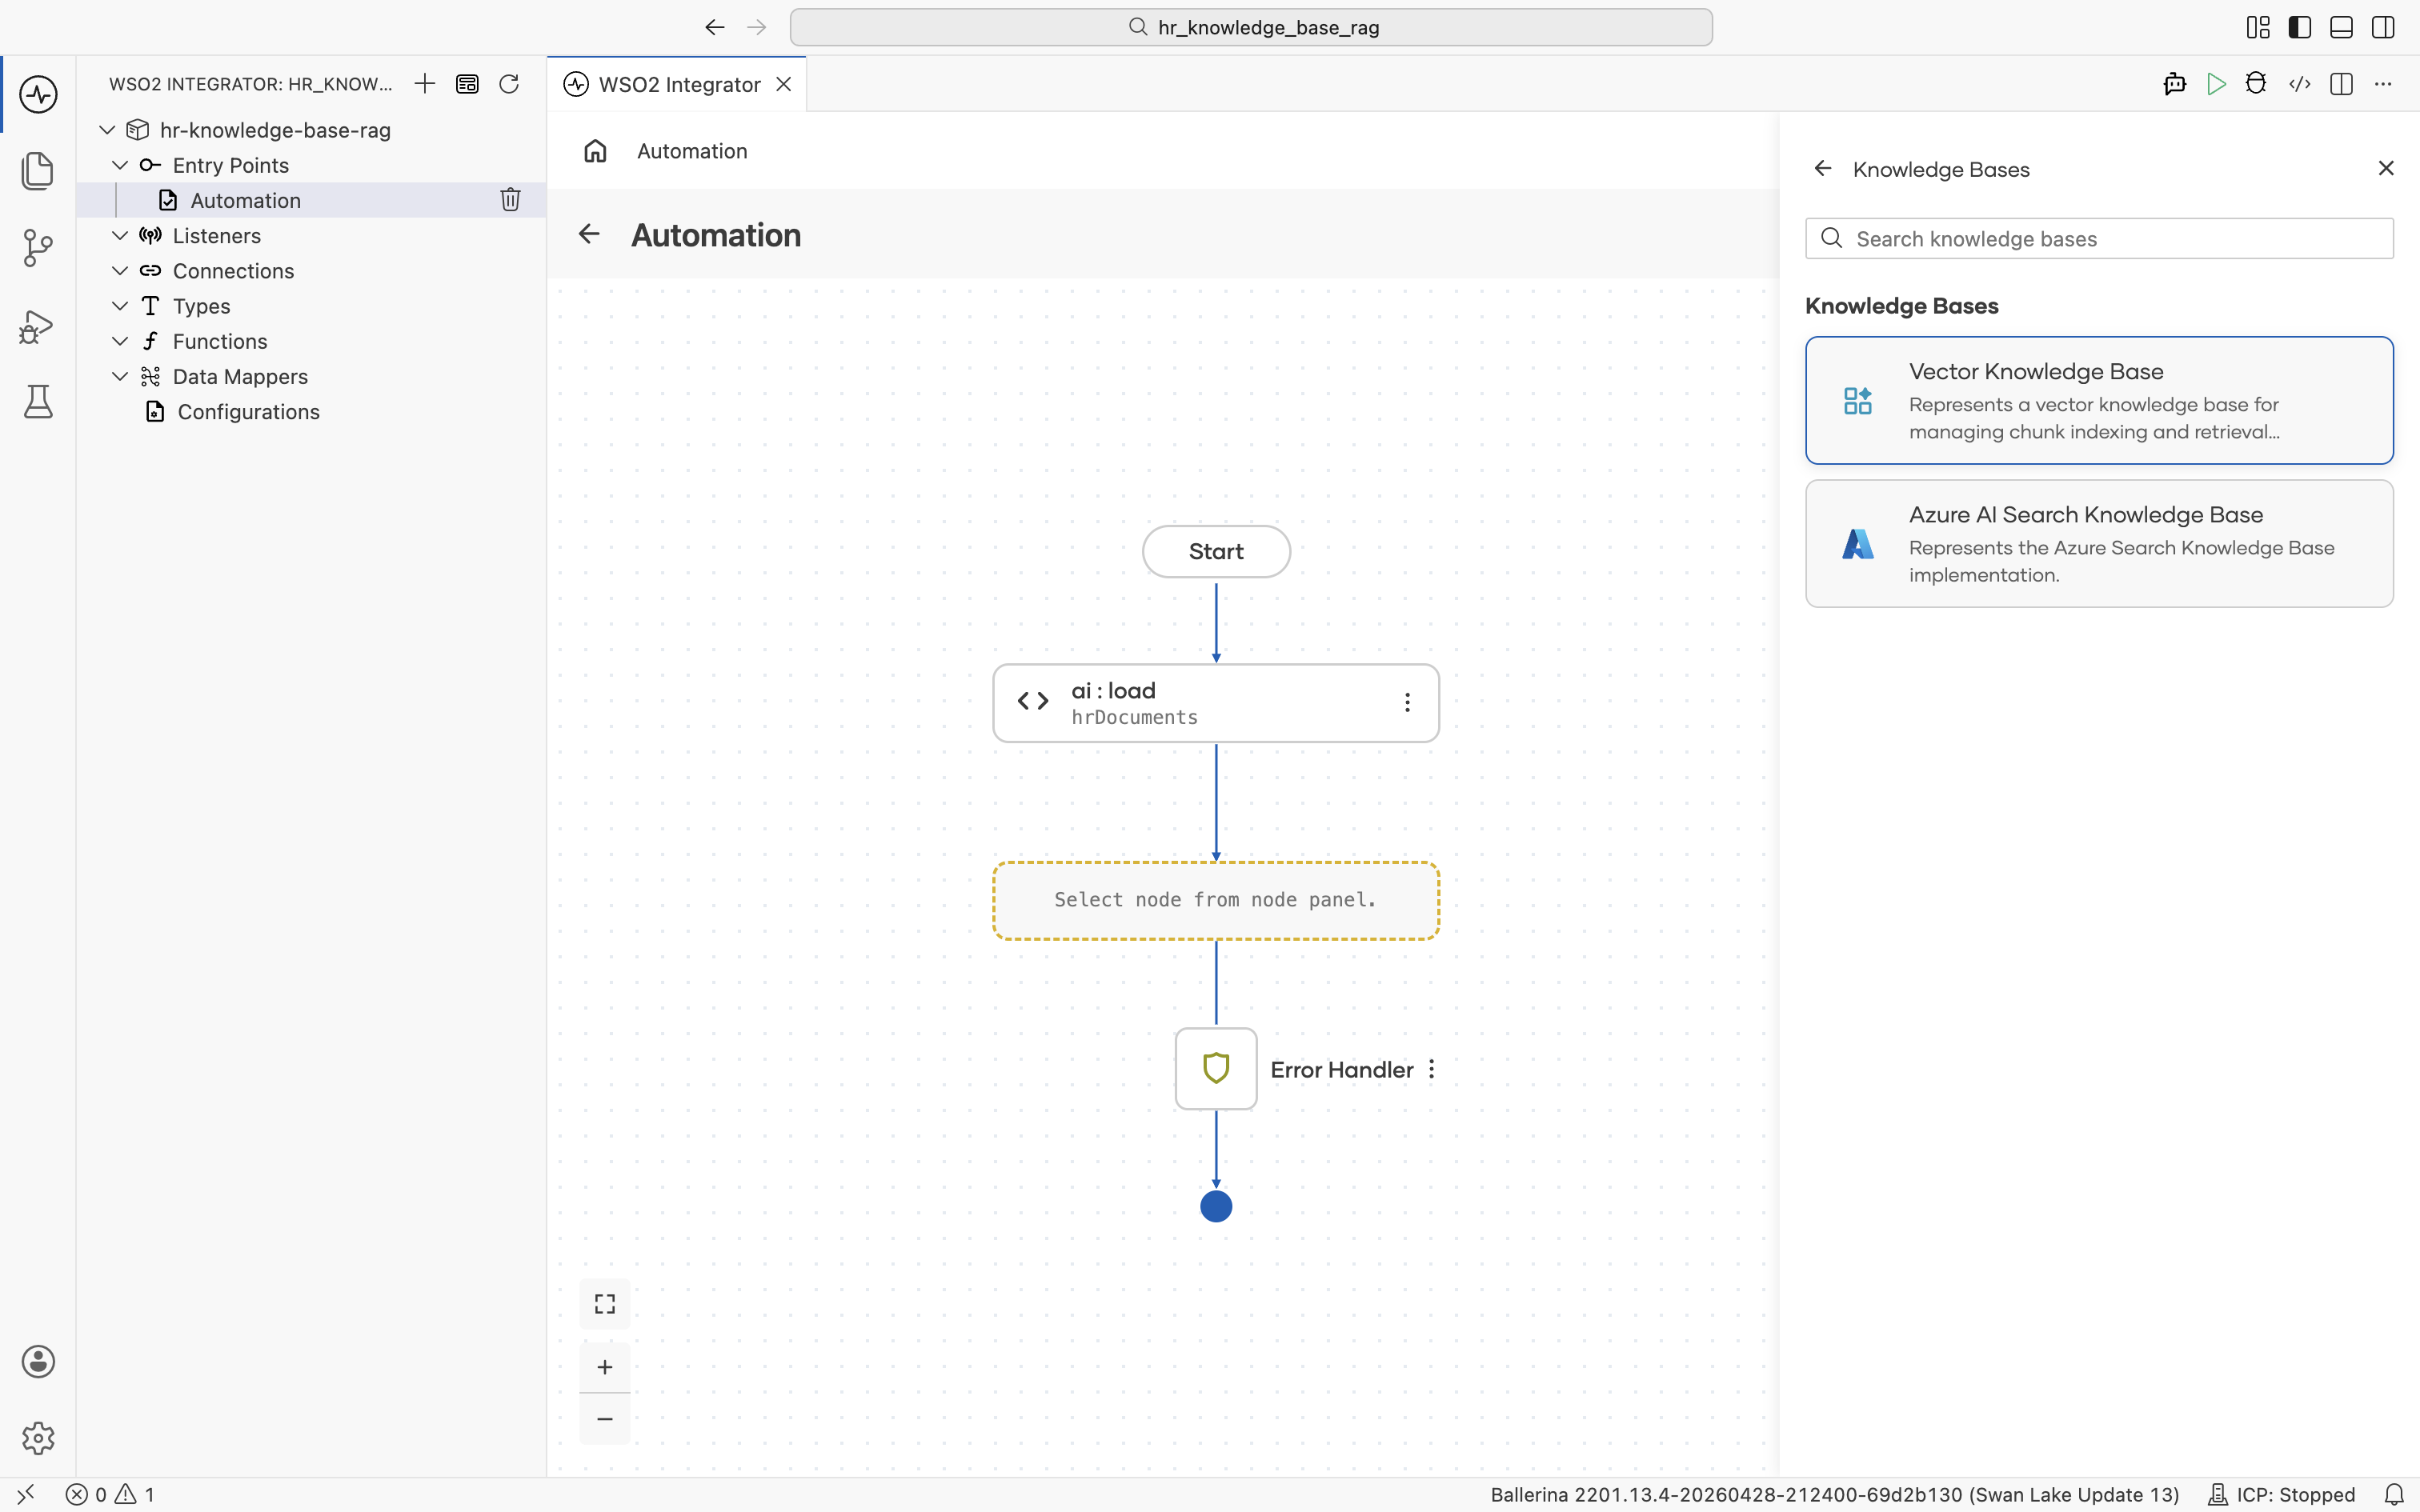
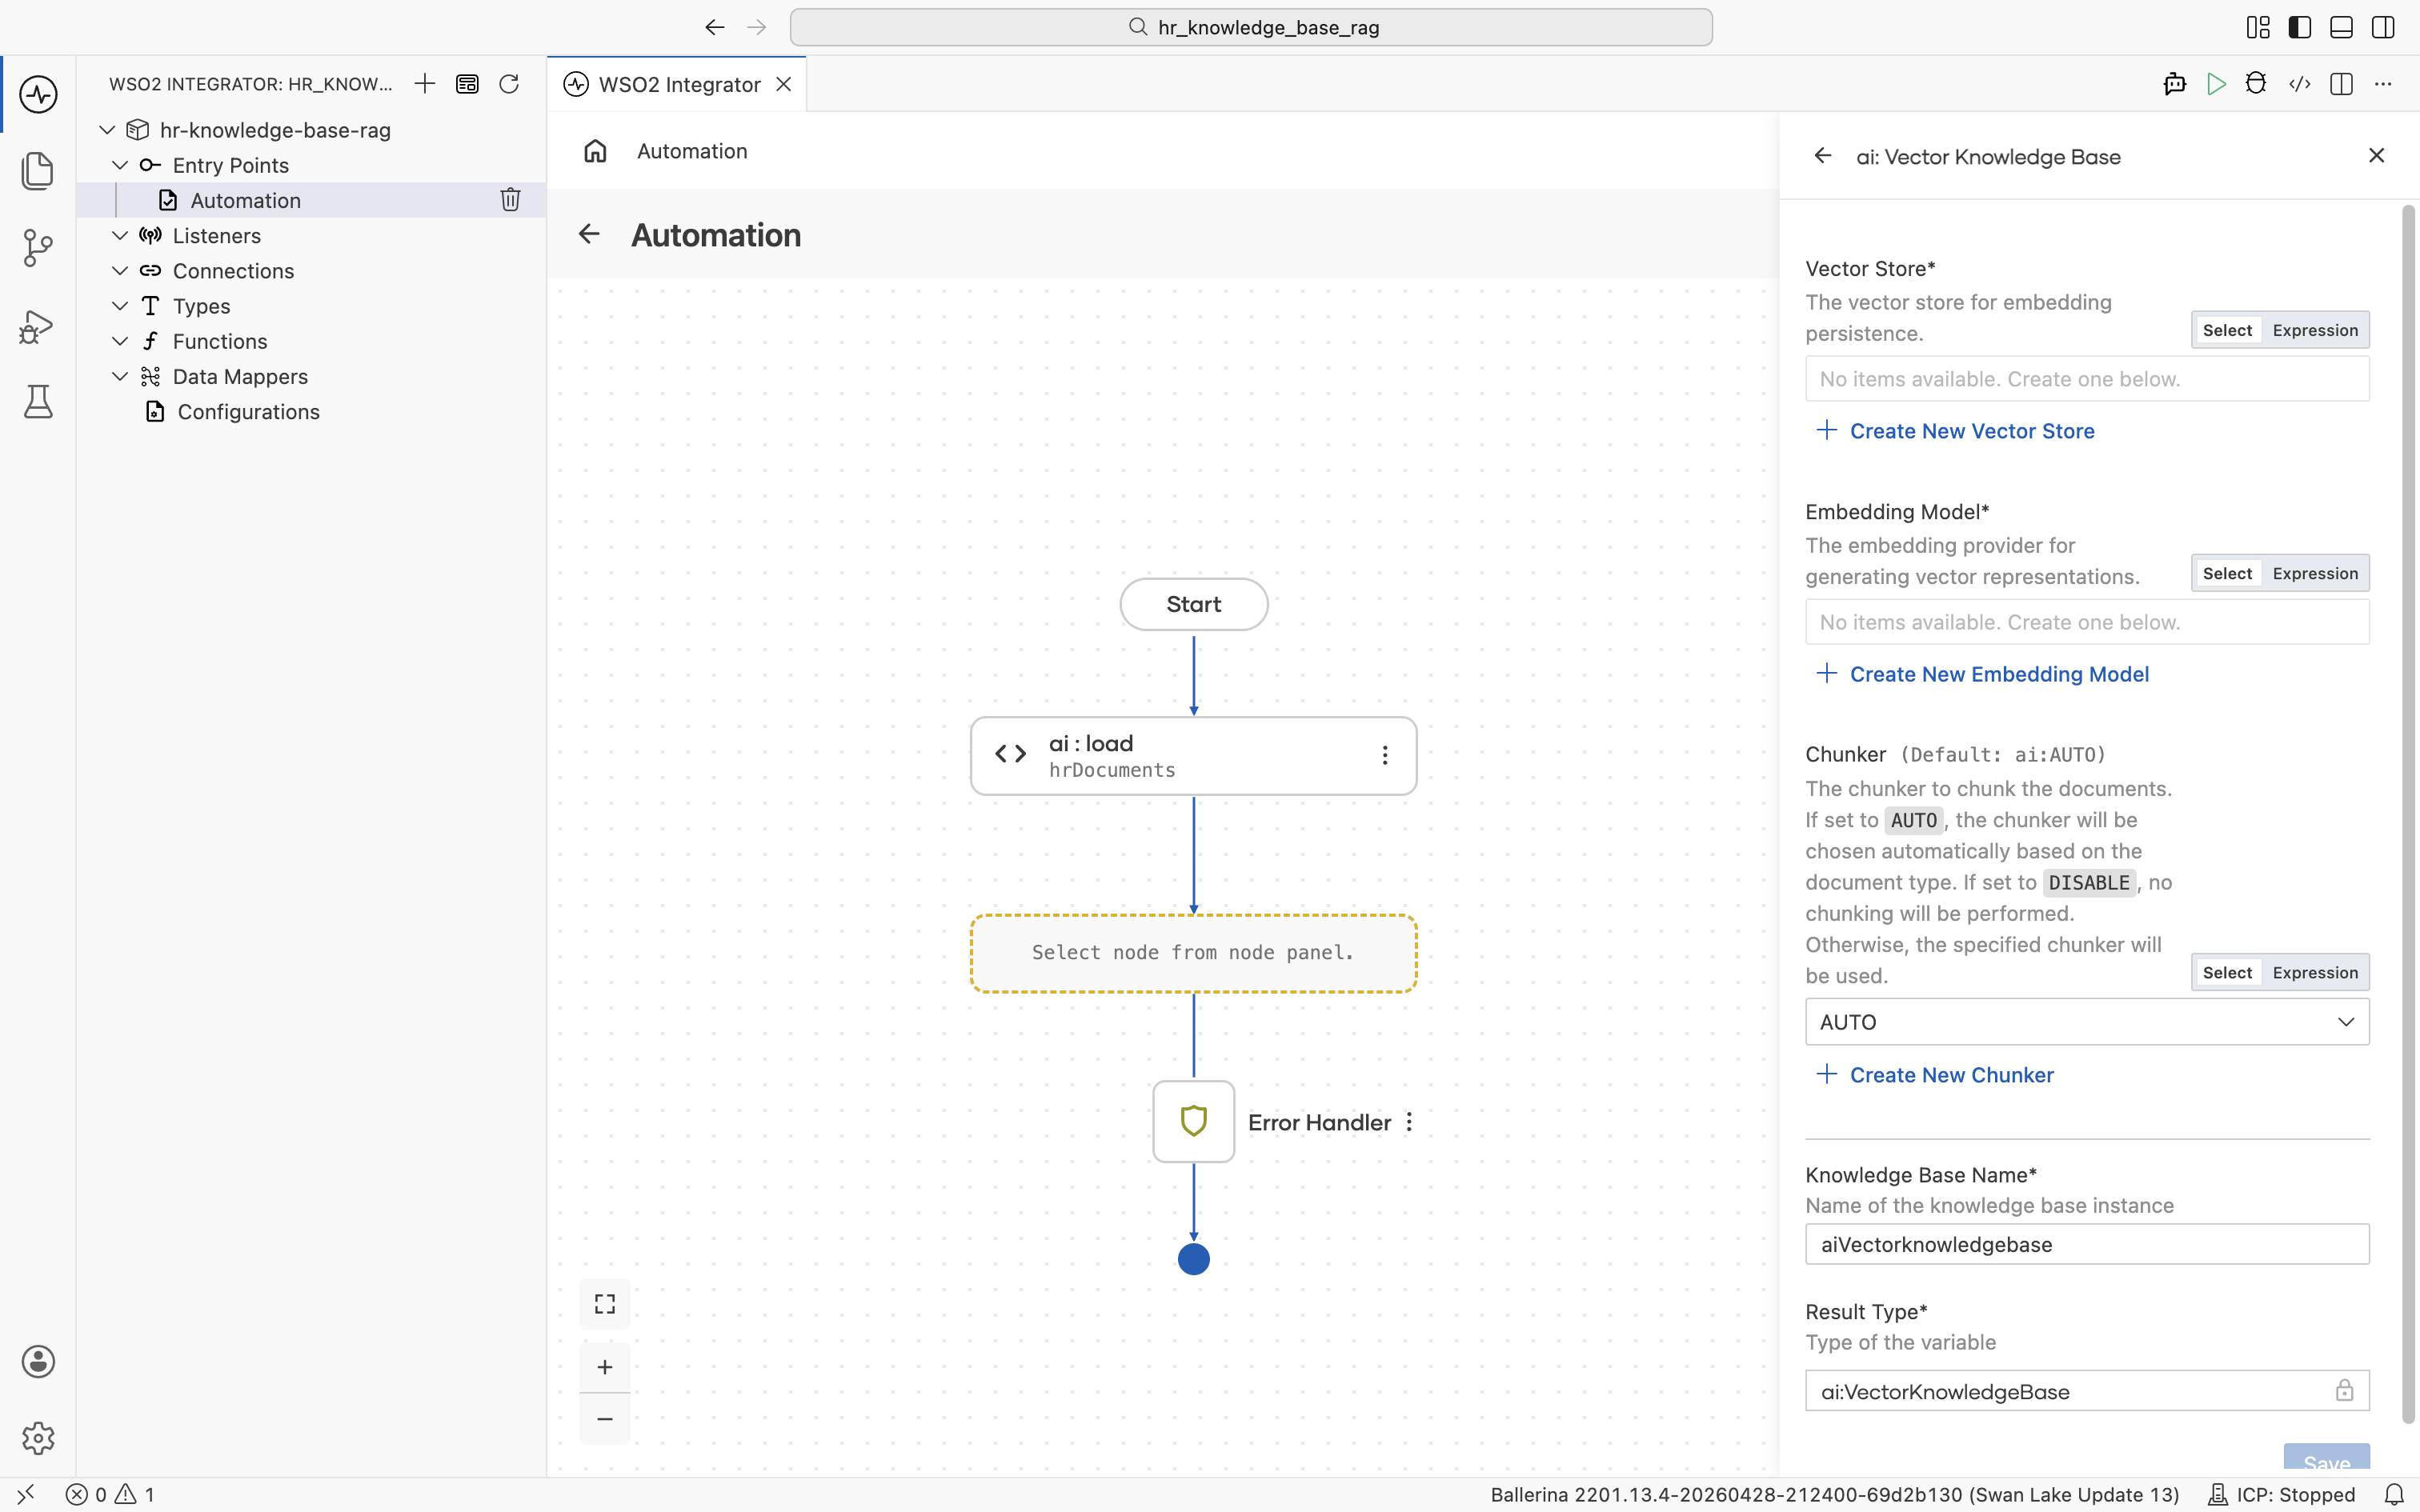
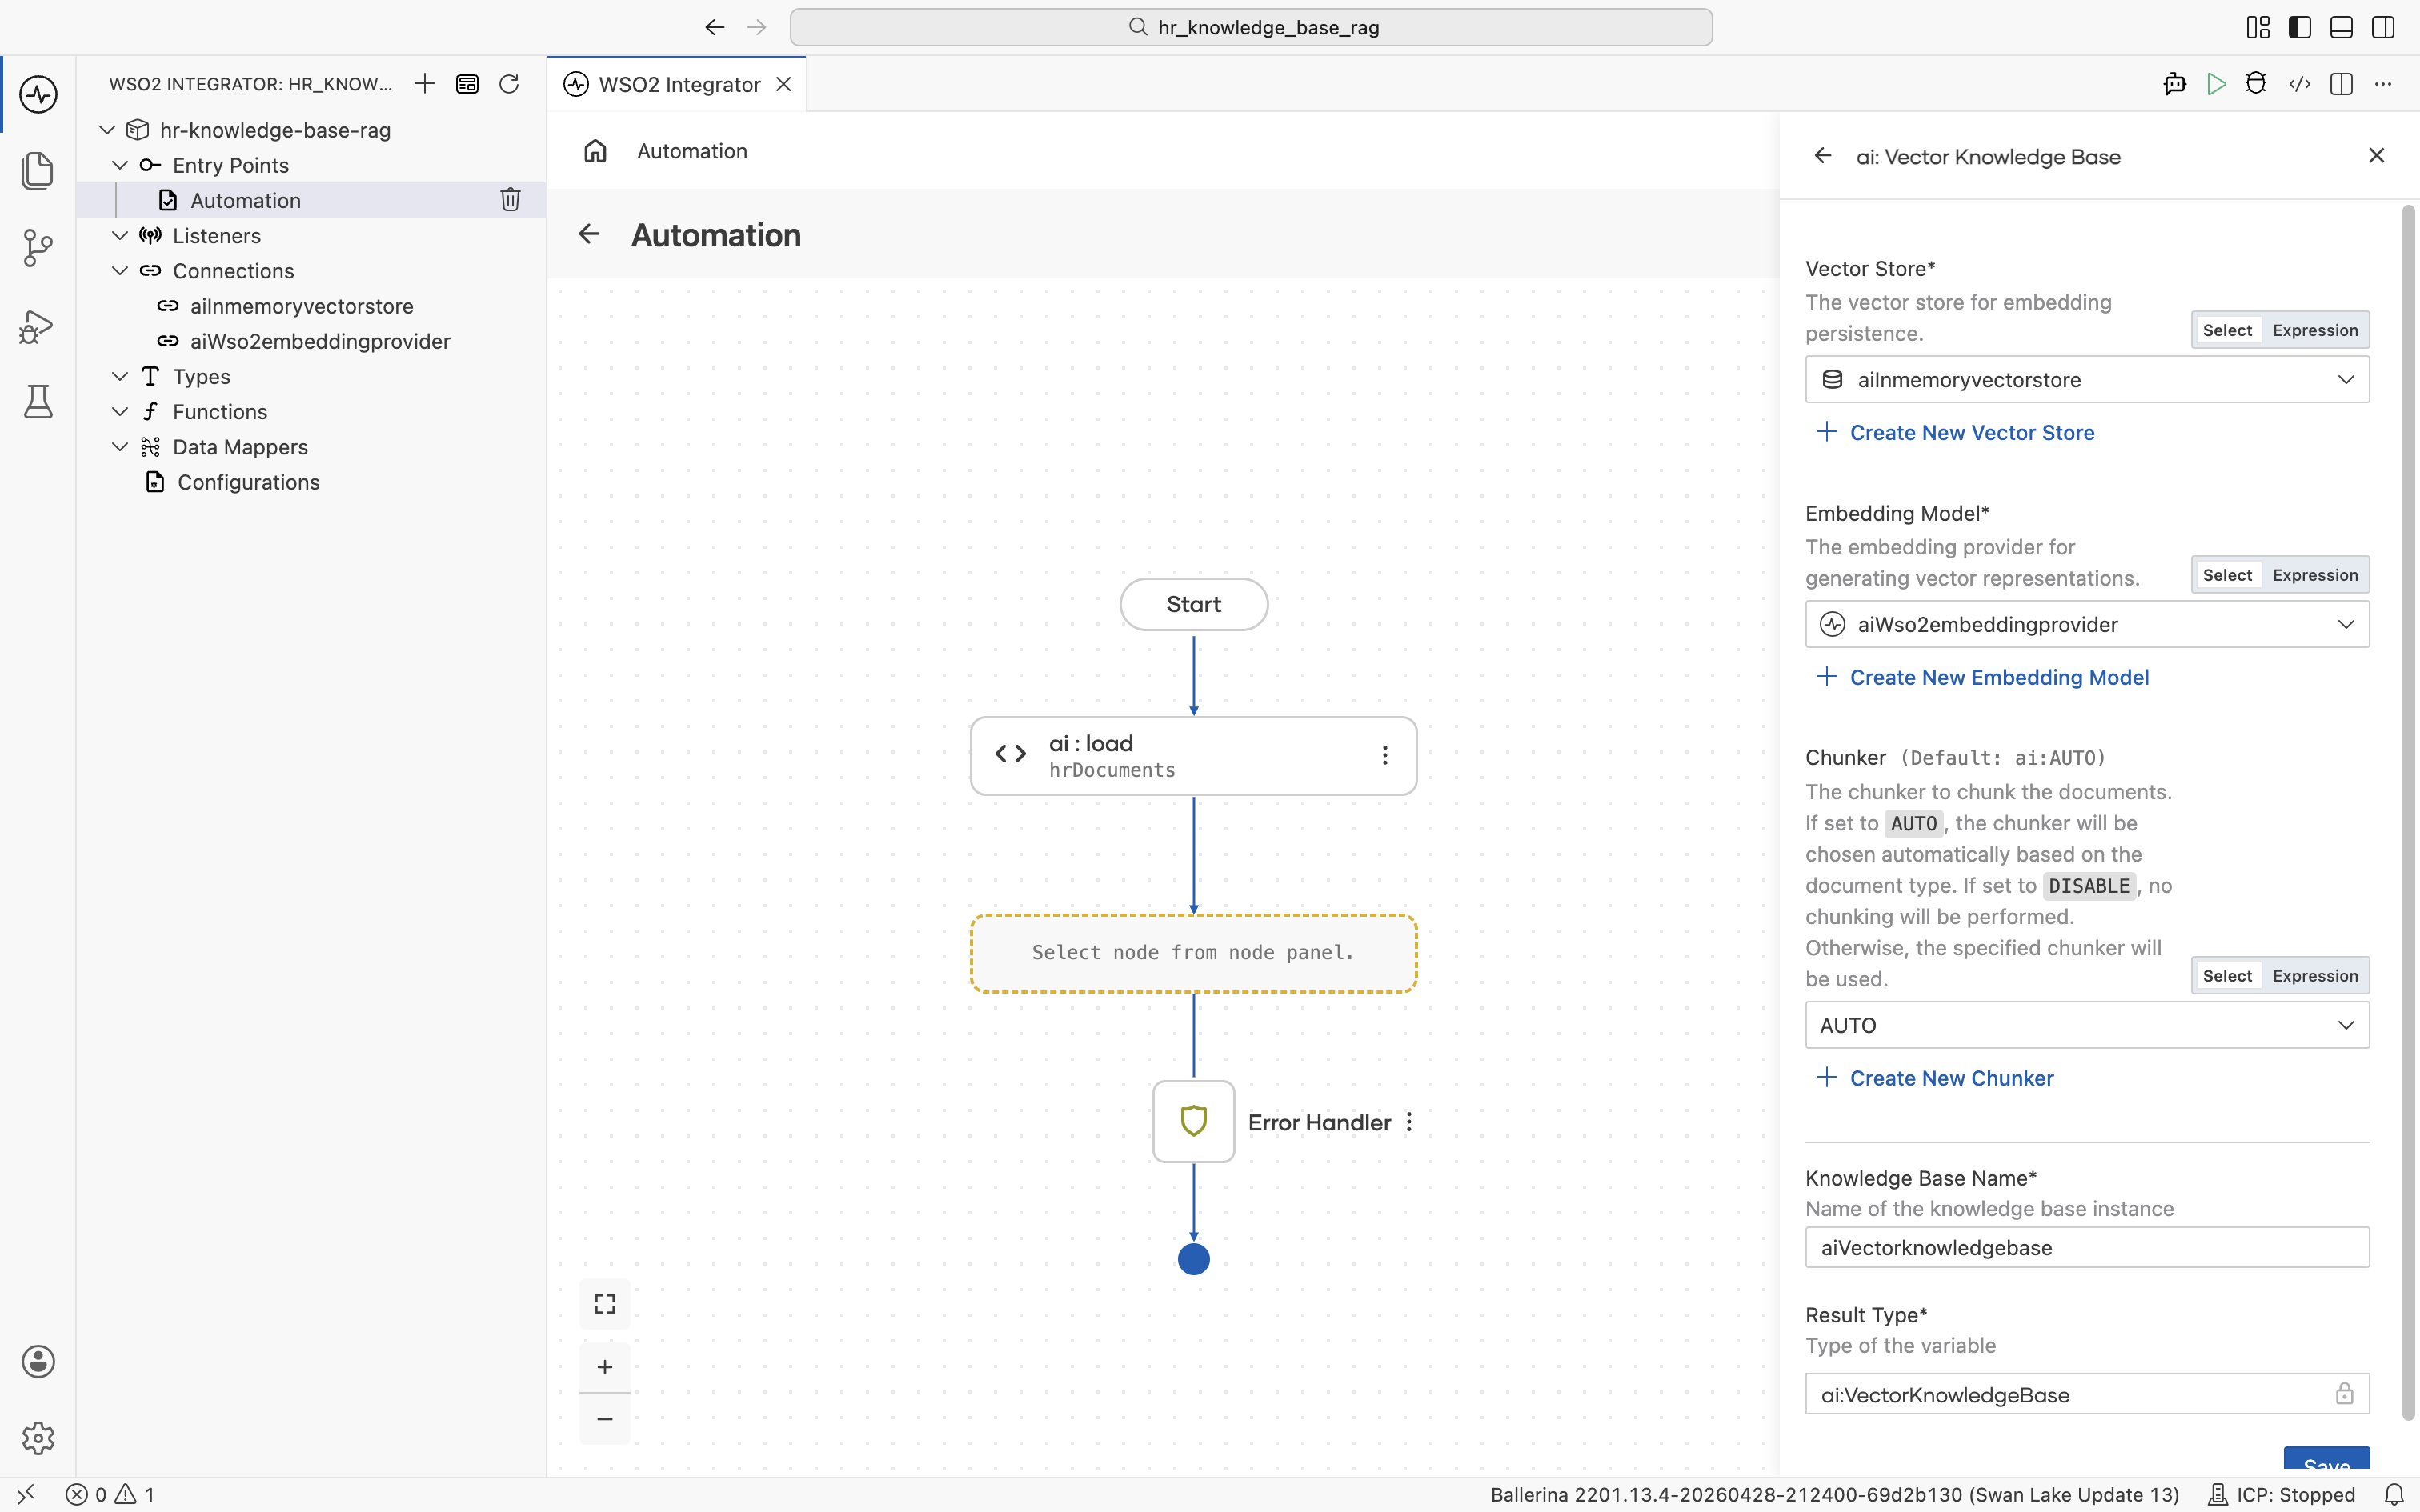
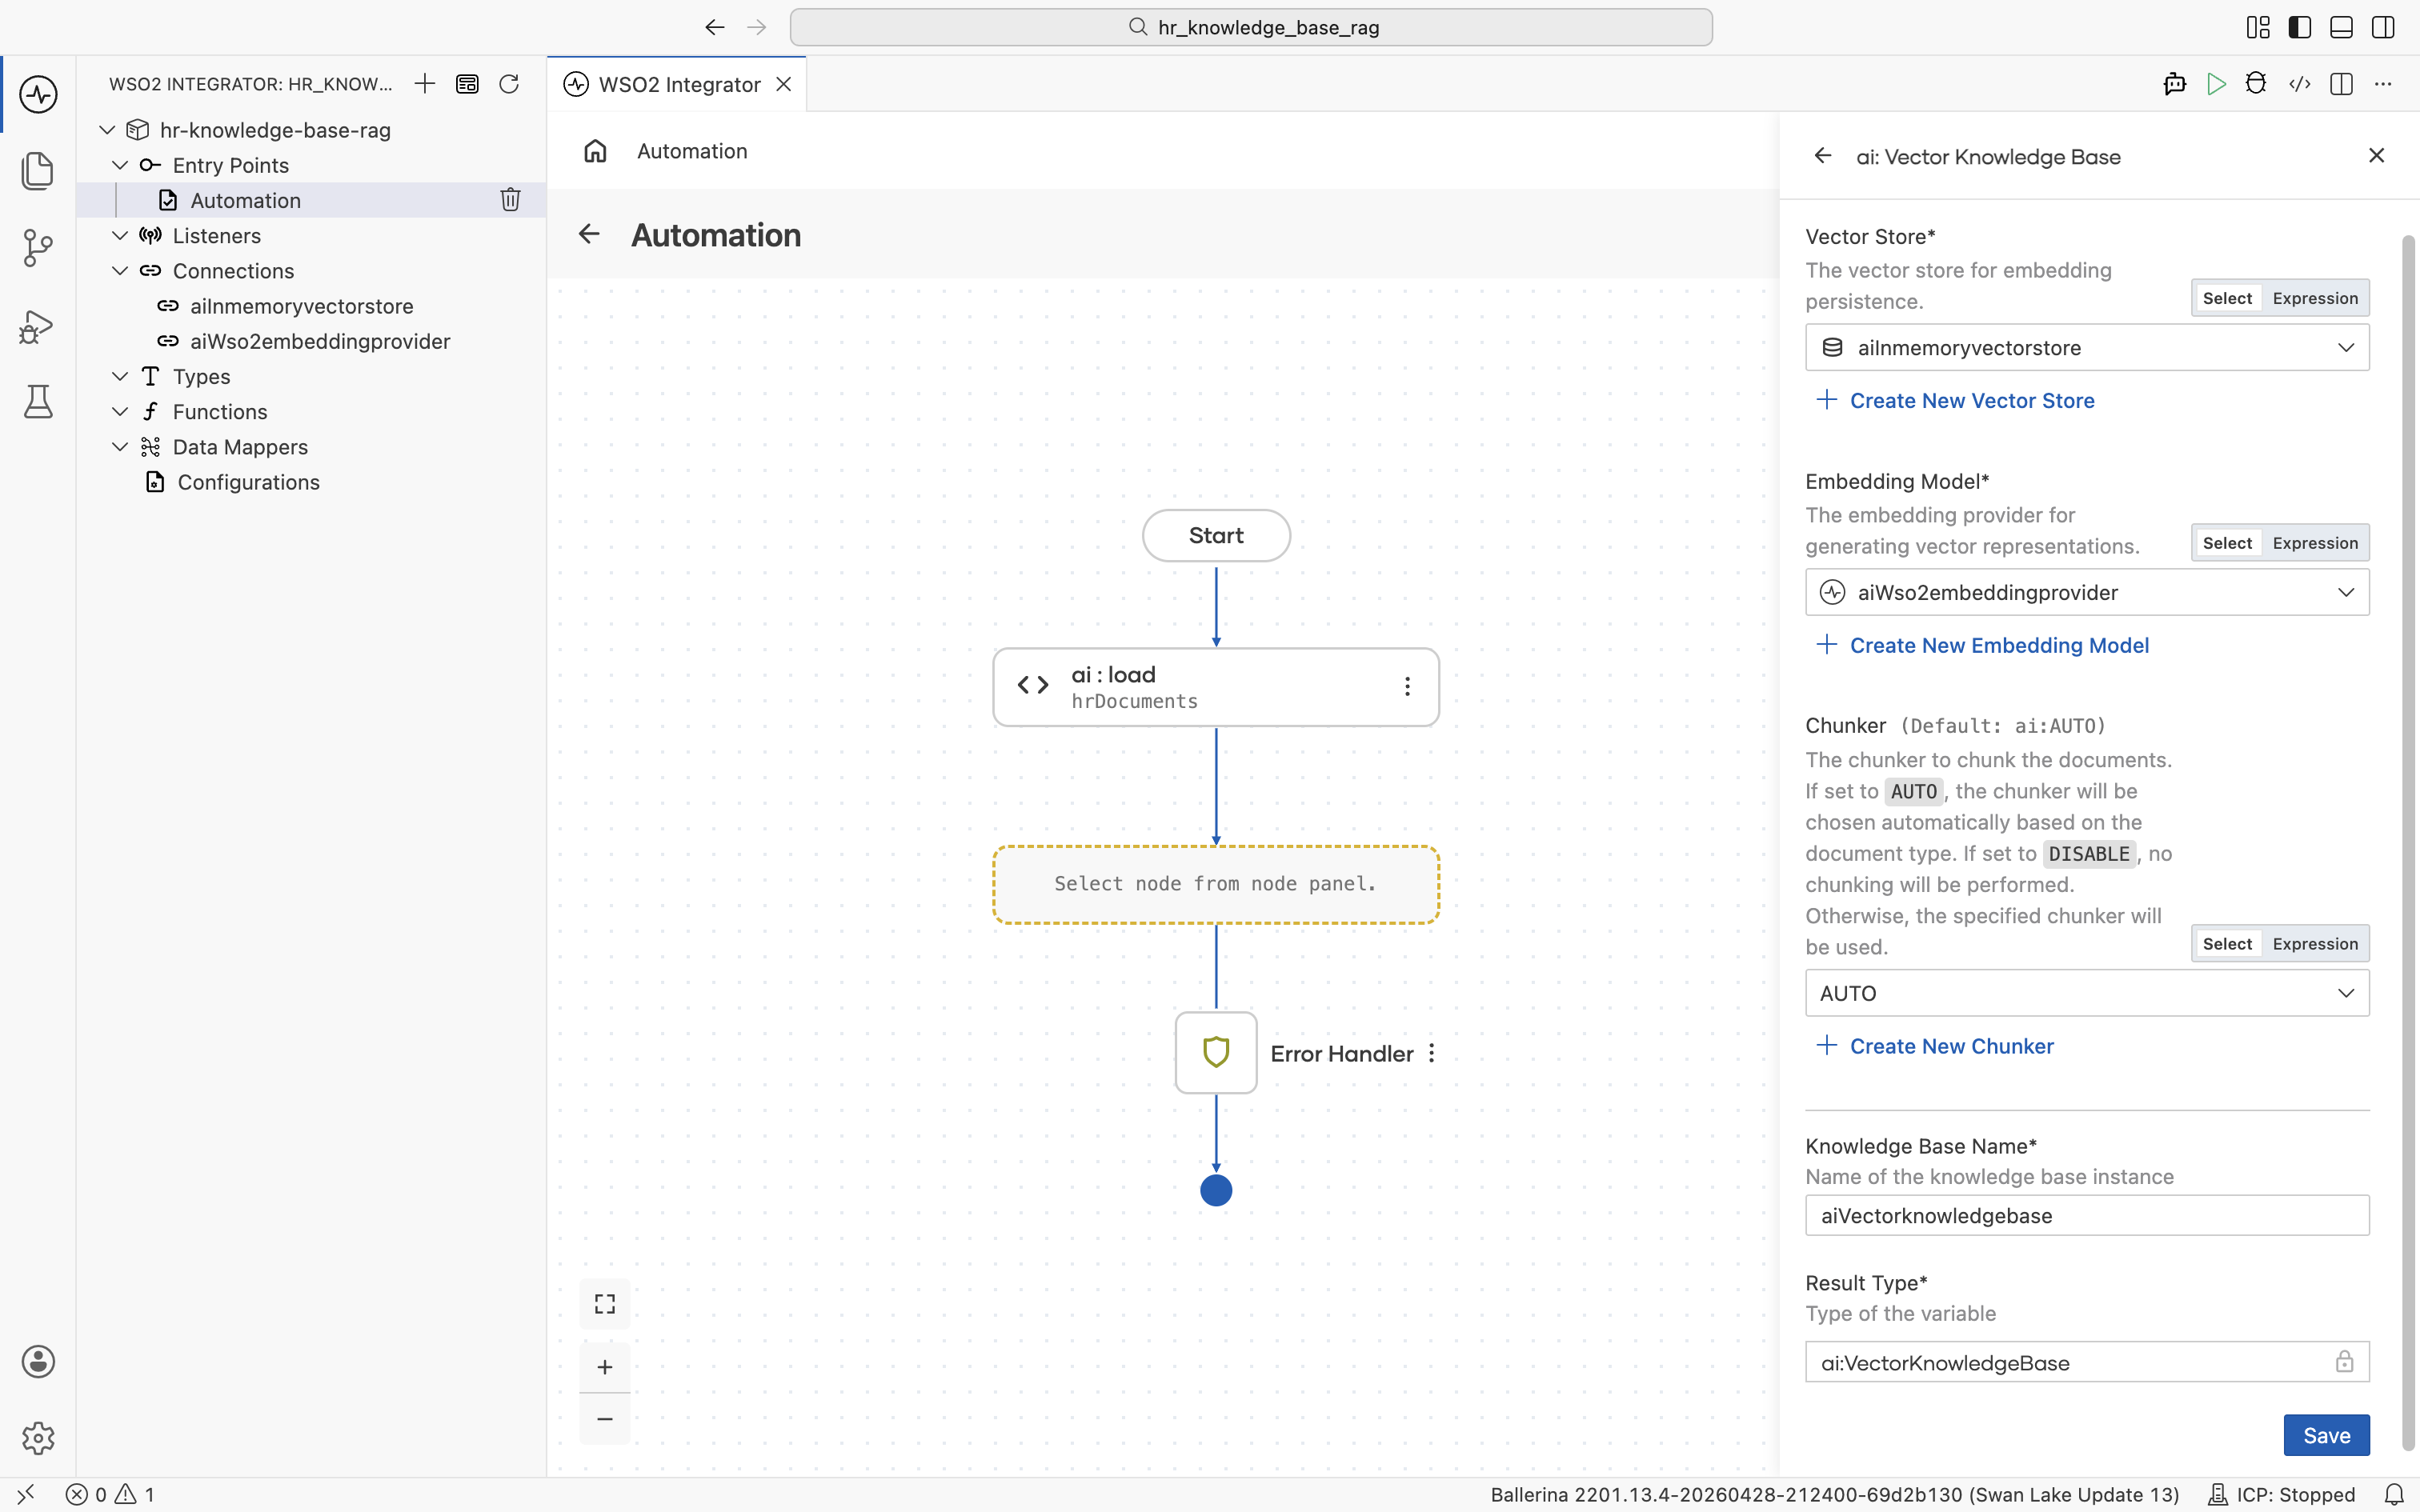
The ai : Vector Knowledge Base form opens with all fields empty. It has three required building blocks: Vector Store, Embedding Model, and Chunker. Each can be created inline.
Build them one at a time.
2.4.1 Create the vector store
Click + Create New Vector Store. The supported vector store types are listed.
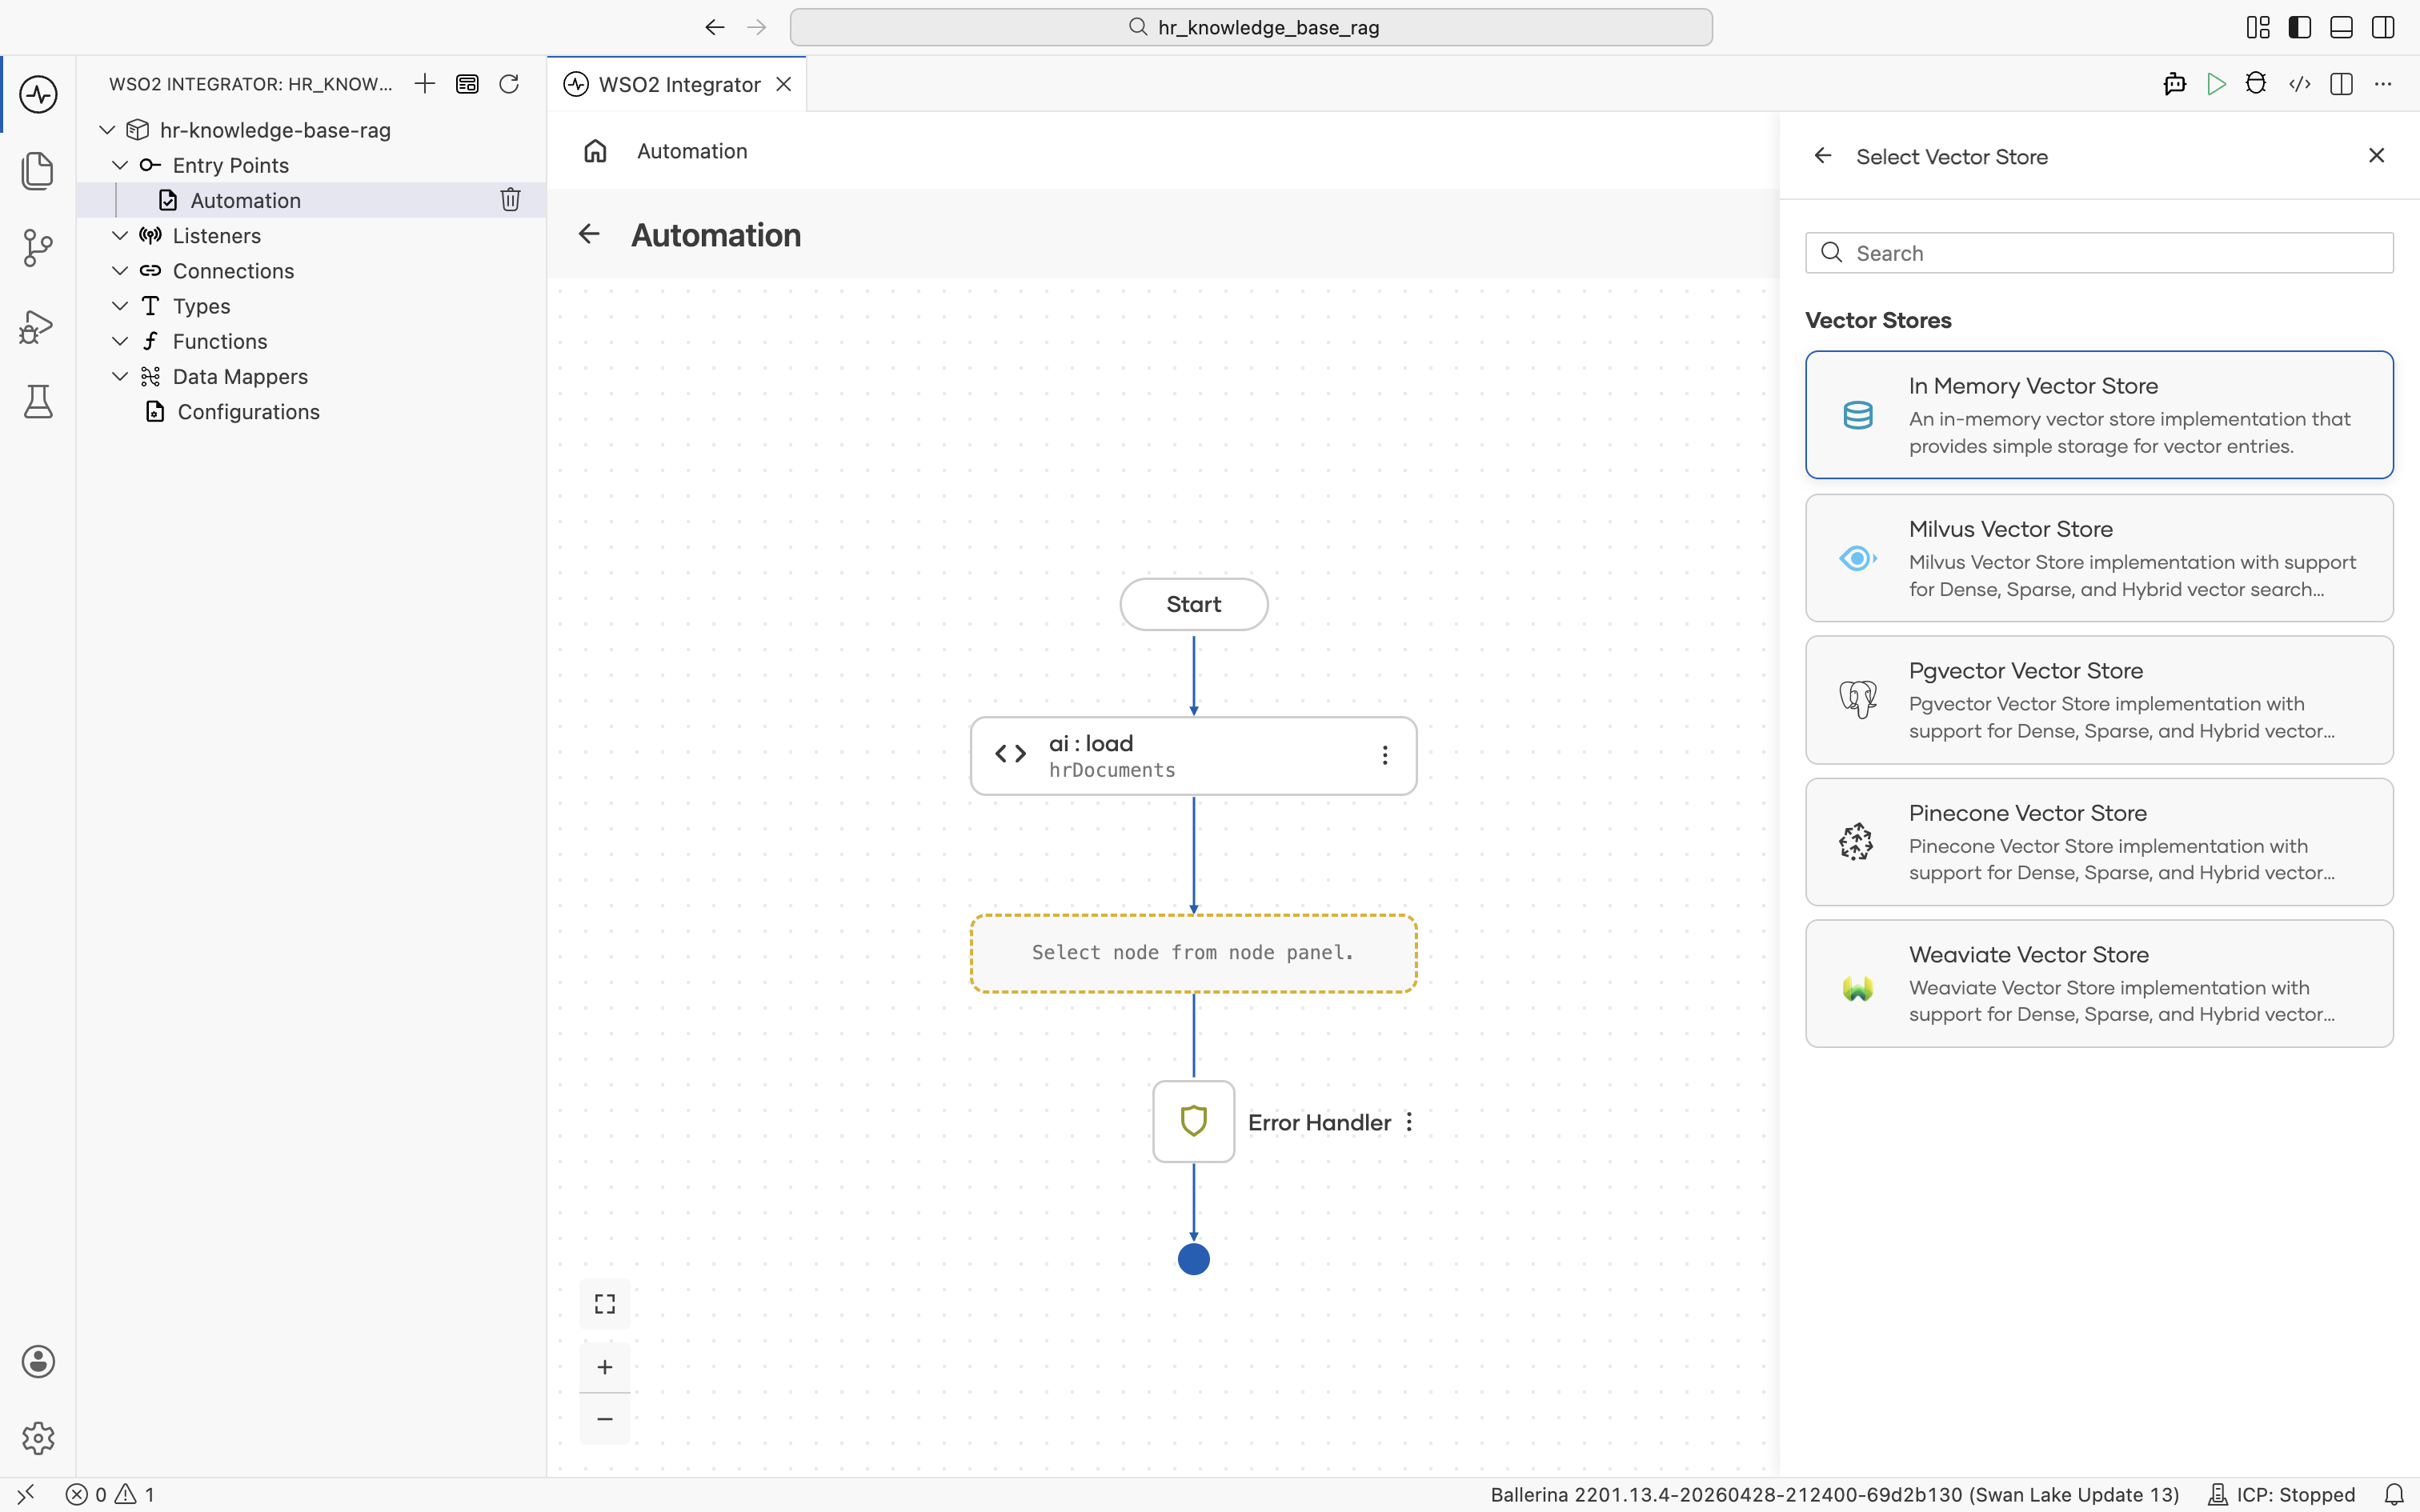
Pick In Memory Vector Store. No external infrastructure is required for this tutorial. The Create Vector Store form opens. Fill in:
- Vector Store Name:
aiInmemoryvectorstore - Result Type:
ai:InMemoryVectorStore
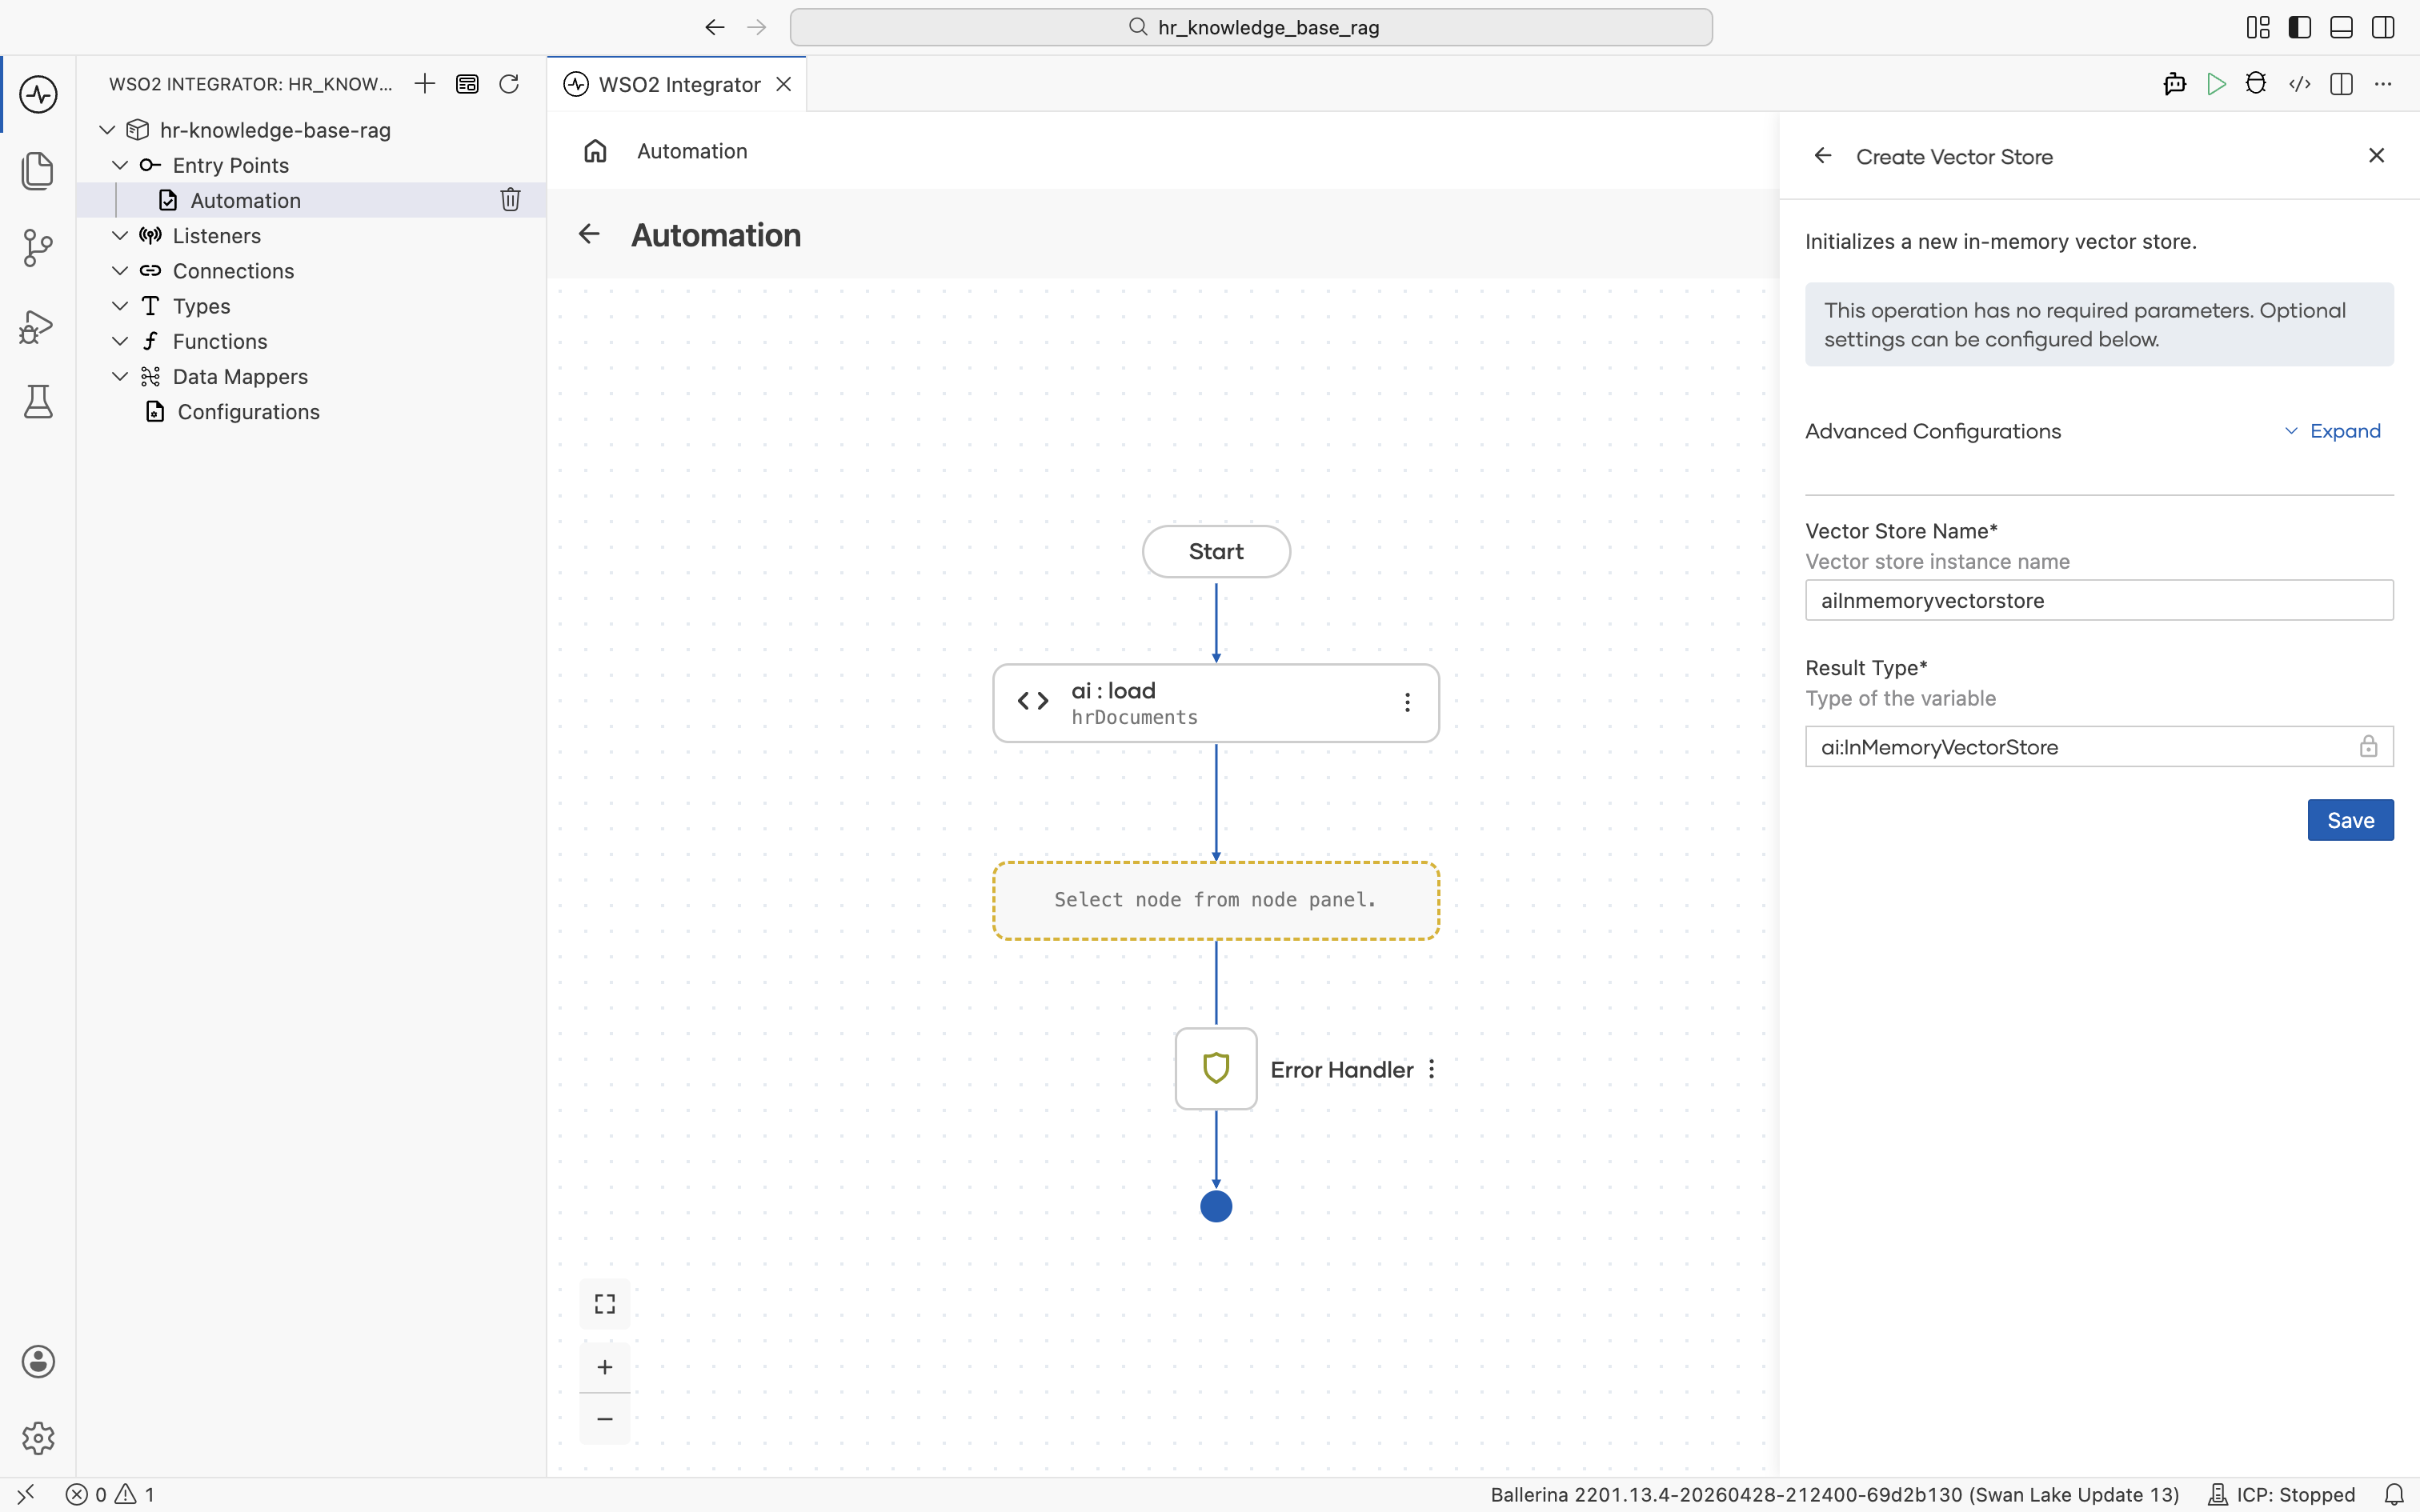
Click Save. You are returned to the ai : Vector Knowledge Base form with the Vector Store field now filled with aiInmemoryvectorstore. The new connection also appears in the left Connections tree.

2.4.2 Create the embedding provider
Back on the Vector Knowledge Base form, click + Create New Embedding Model. The supported embedding providers are listed.
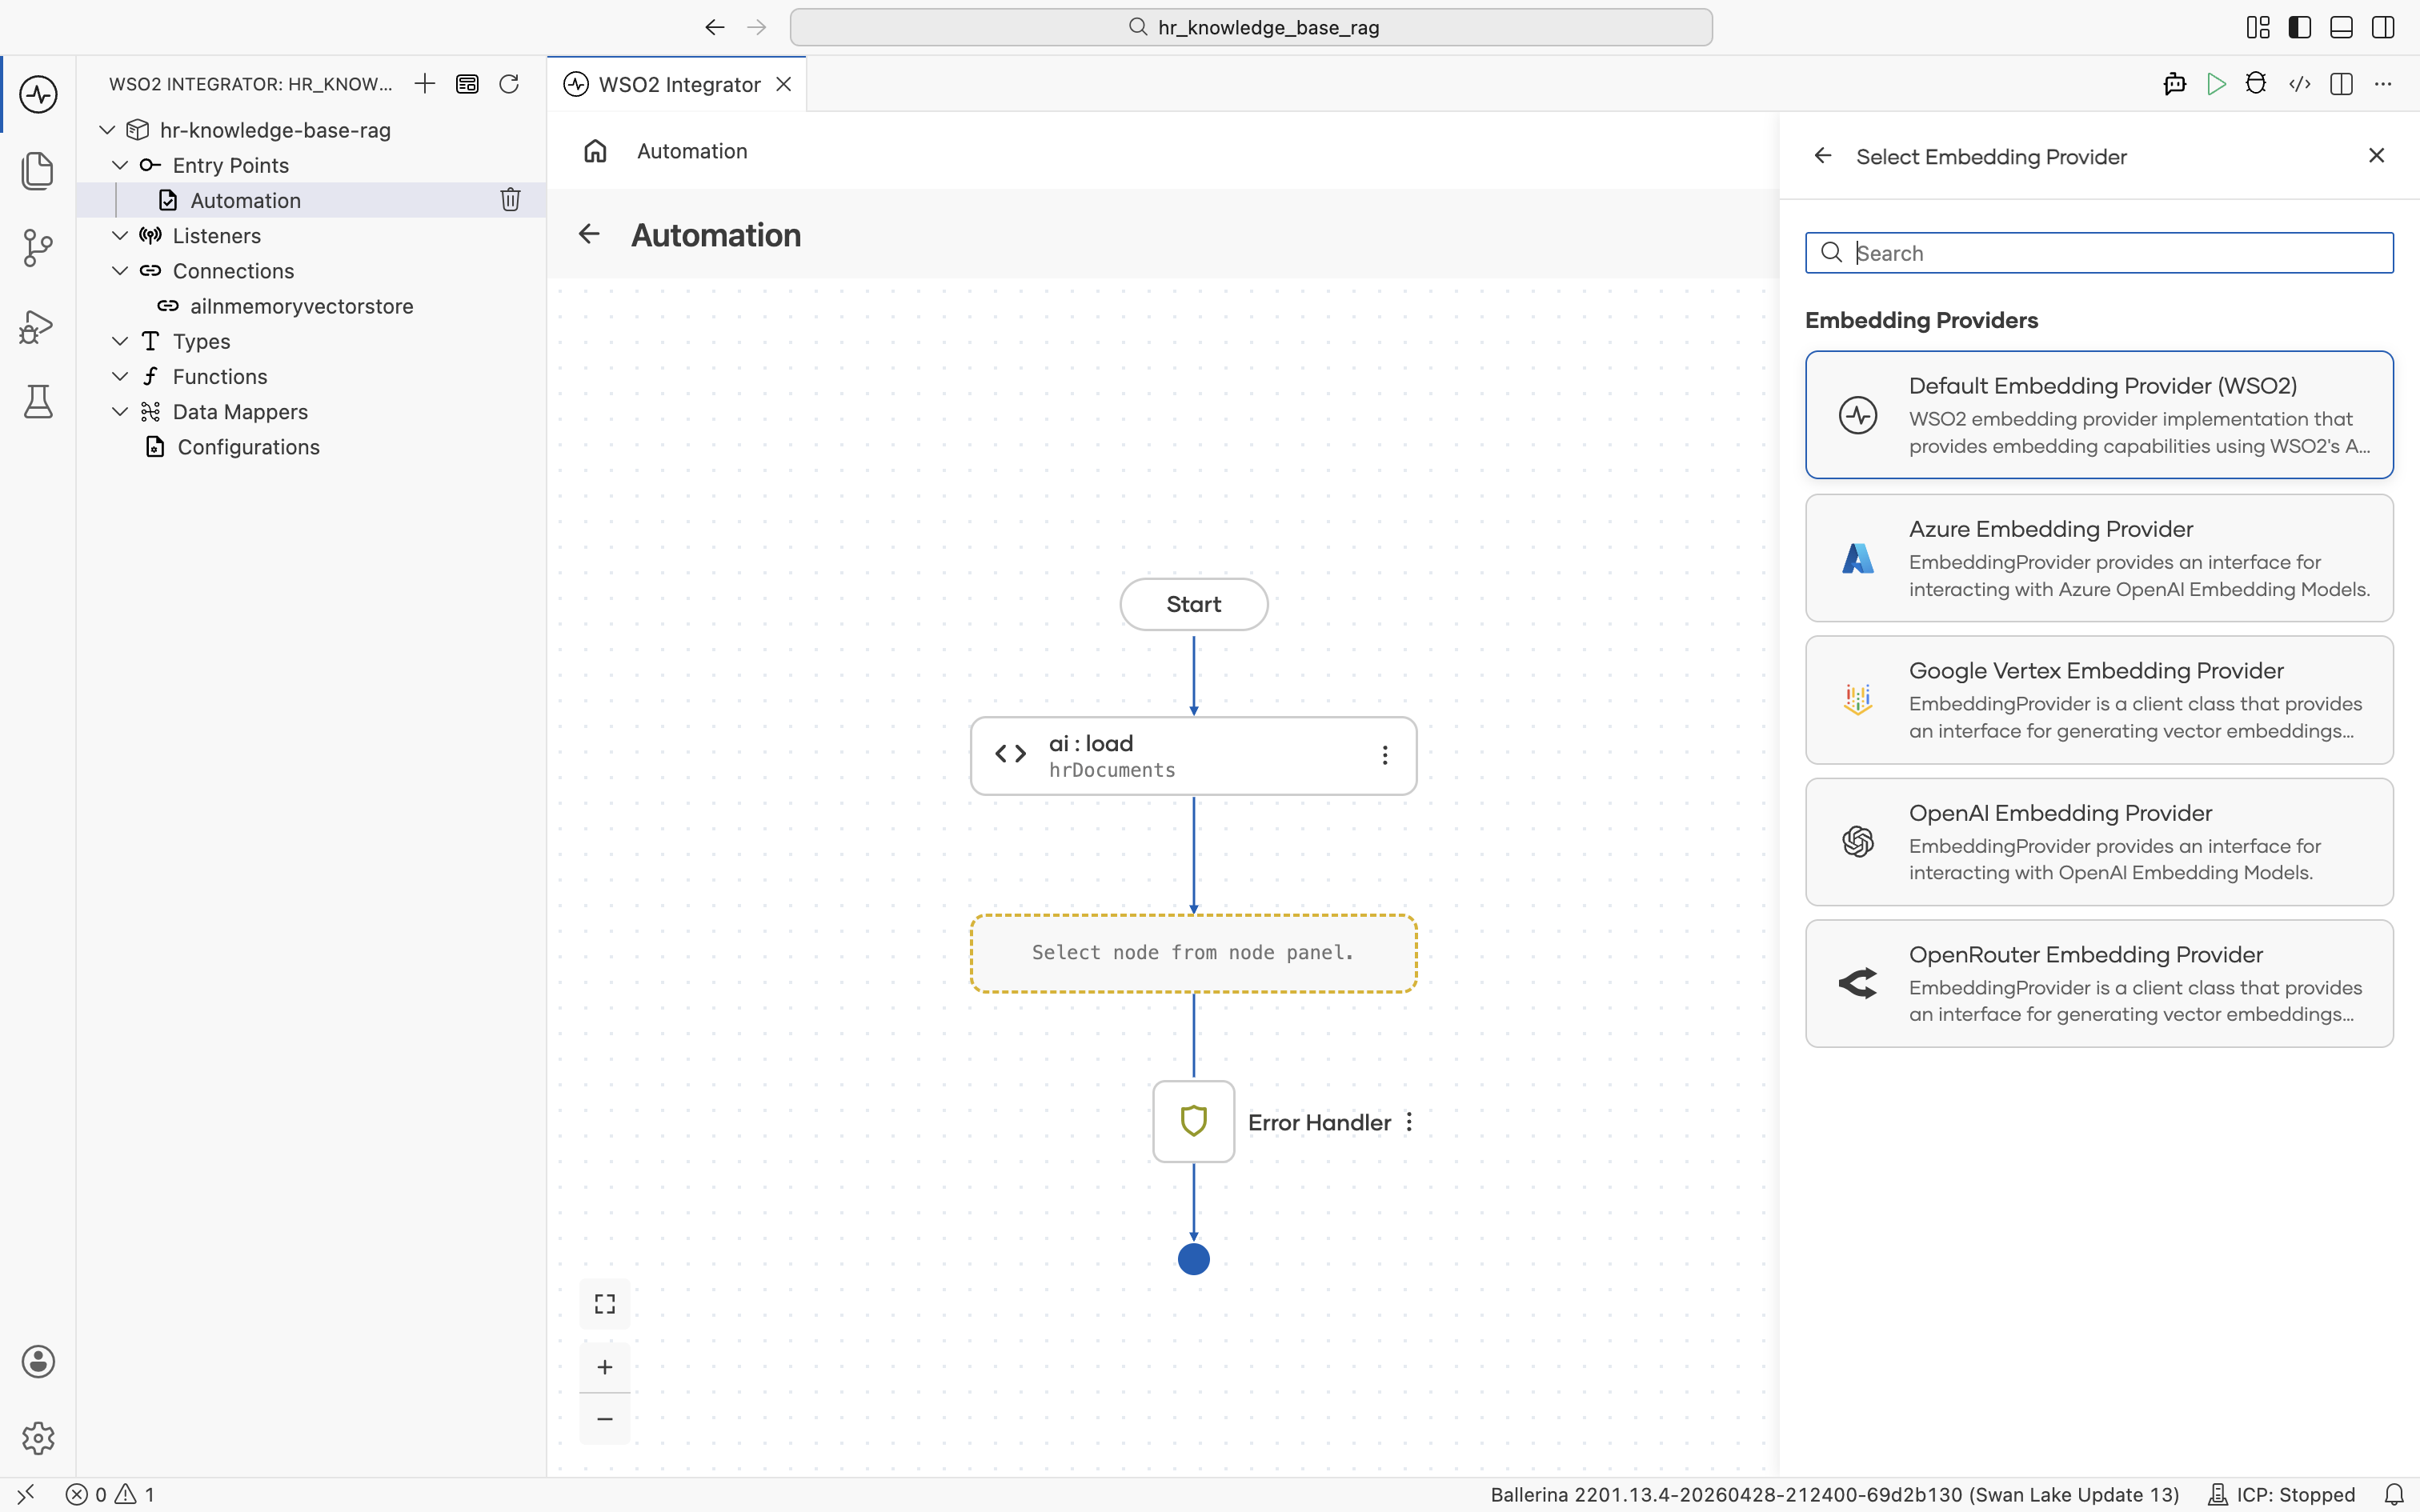
Pick Default Embedding Provider (WSO2). It is provisioned through your Copilot login, so no API key is required.
The default WSO2 model provider and embedding provider share the same access token. WSO2 Integrator prompts you to run Ballerina: Configure default WSO2 model provider from the Command Palette (Cmd+Shift+P / Ctrl+Shift+P) the first time you create either provider in a flow. Sign in with your WSO2 account when prompted, and WSO2 Integrator wires the configuration into your project automatically.
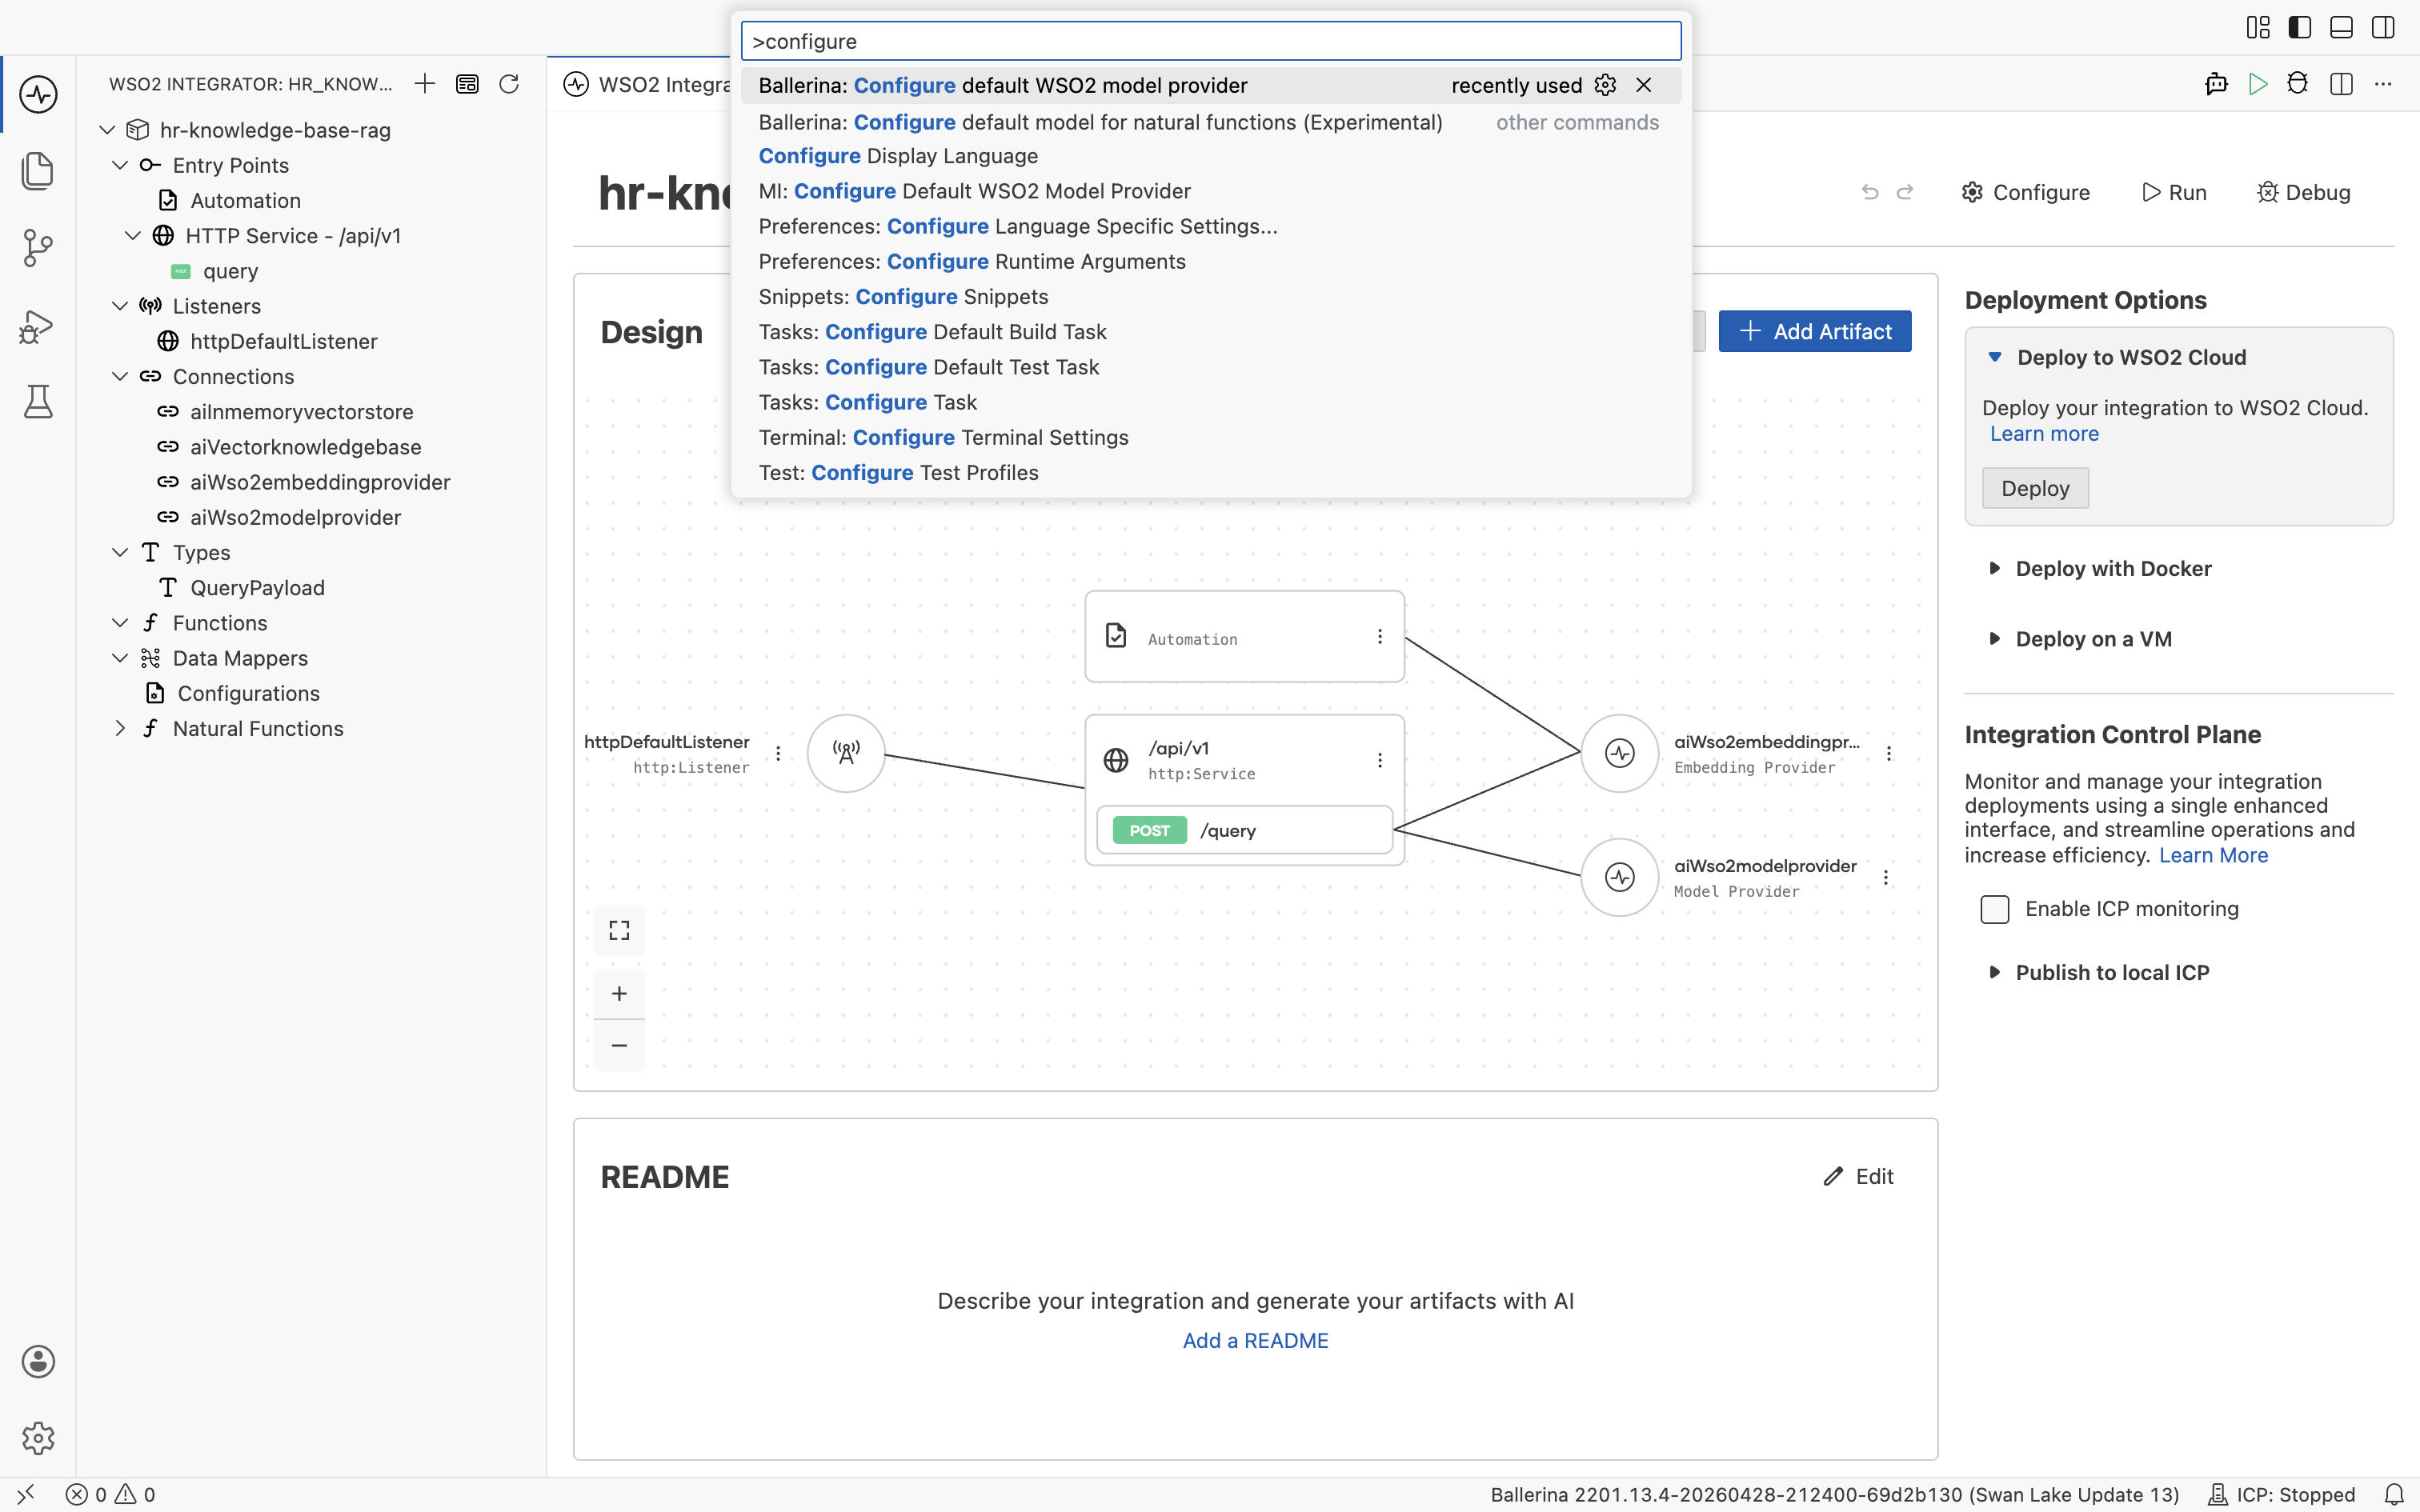
The access token expires after a few hours. If a request to the default model provider or embedding provider starts failing, rerun Ballerina: Configure default WSO2 model provider from the Command Palette to refresh the token.
The Create Embedding Provider form opens. Fill in:
- Embedding Provider Name:
aiWso2embeddingprovider - Result Type:
ai:Wso2EmbeddingProvider
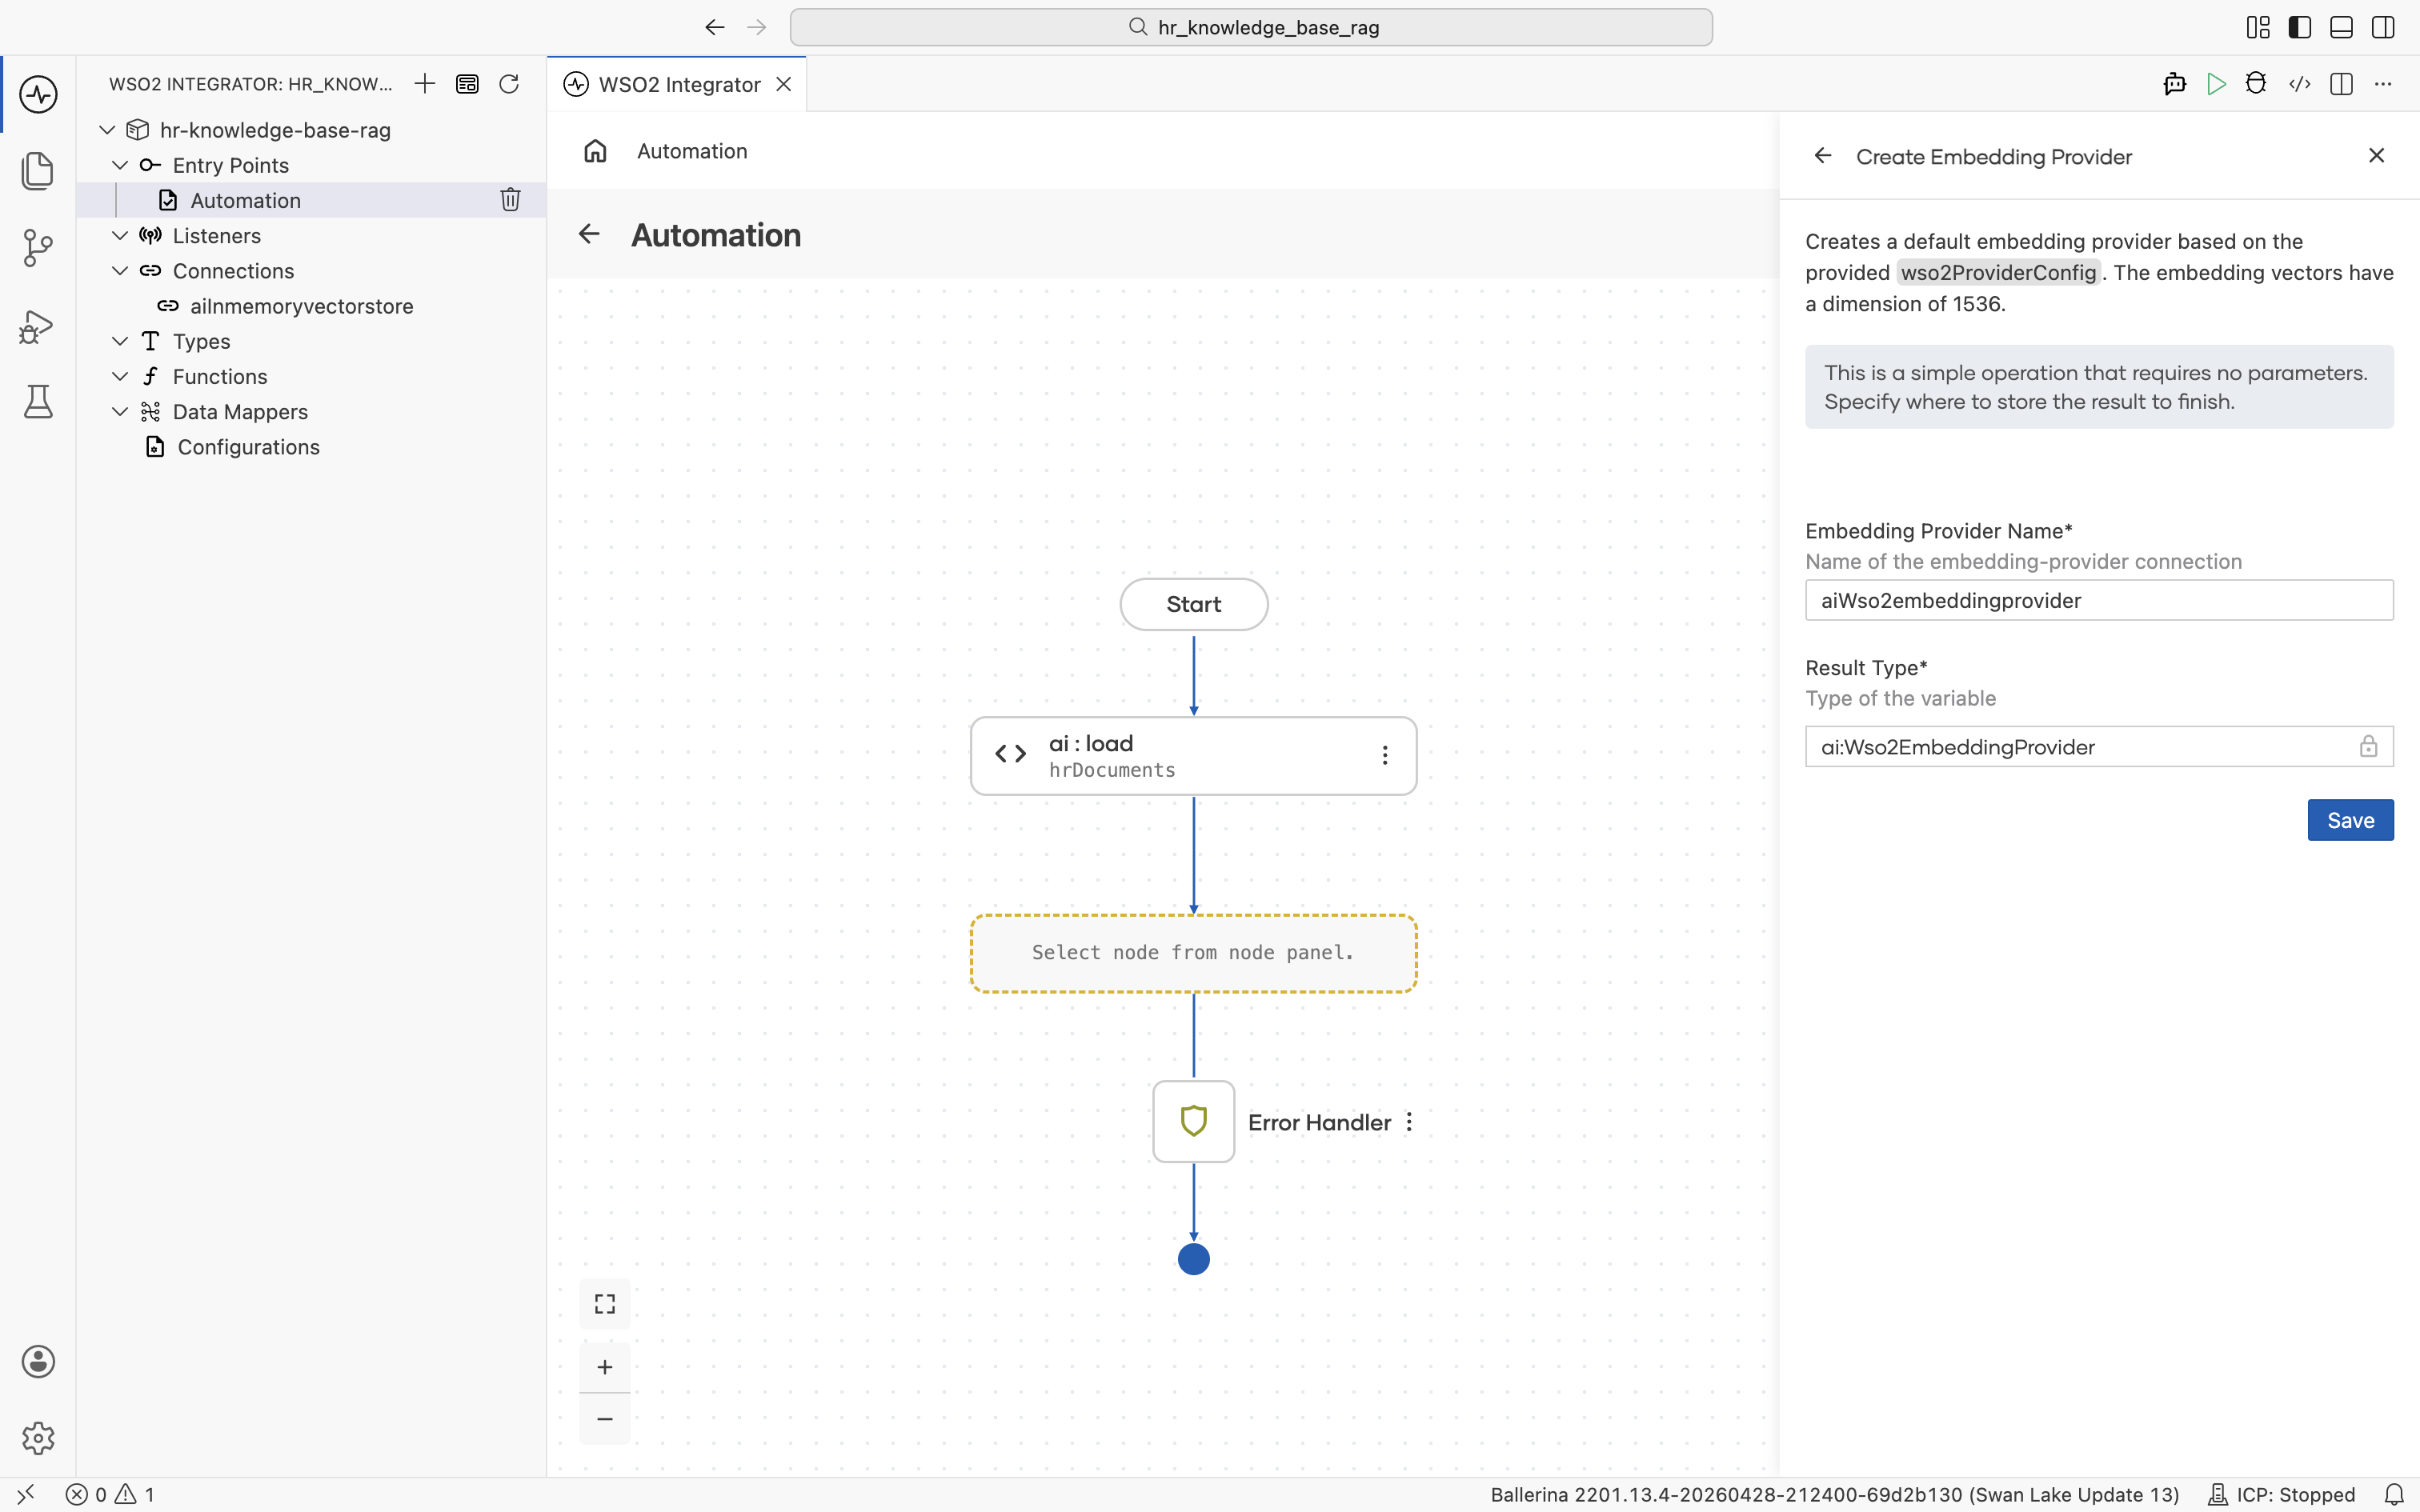
Click Save. You are returned to the ai : Vector Knowledge Base form with the Embedding Model field now filled with aiWso2embeddingprovider. The new connection also appears in the left Connections tree.
2.4.3 Pick (or create) a chunker
Back on the Vector Knowledge Base form, the Chunker field defaults to AUTO. The runtime selects a chunker based on document type. For most HR text documents this is fine.
If you want to control chunking explicitly, click + Create New Chunker. The supported chunker types are listed.

For this tutorial, leave the chunker at AUTO.
2.4.4 Save the knowledge base
The Vector Knowledge Base form is now fully populated:
- Vector Store:
aiInmemoryvectorstore - Embedding Model:
aiWso2embeddingprovider - Chunker:
AUTO - Knowledge Base Name:
aiVectorknowledgebase - Result Type:
ai:VectorKnowledgeBase
Click Save. The left Connections tree now lists aiInmemoryvectorstore, aiWso2embeddingprovider, and aiVectorknowledgebase. These connections are reusable from any artifact in the project.
2.5 Add the ai : ingest node
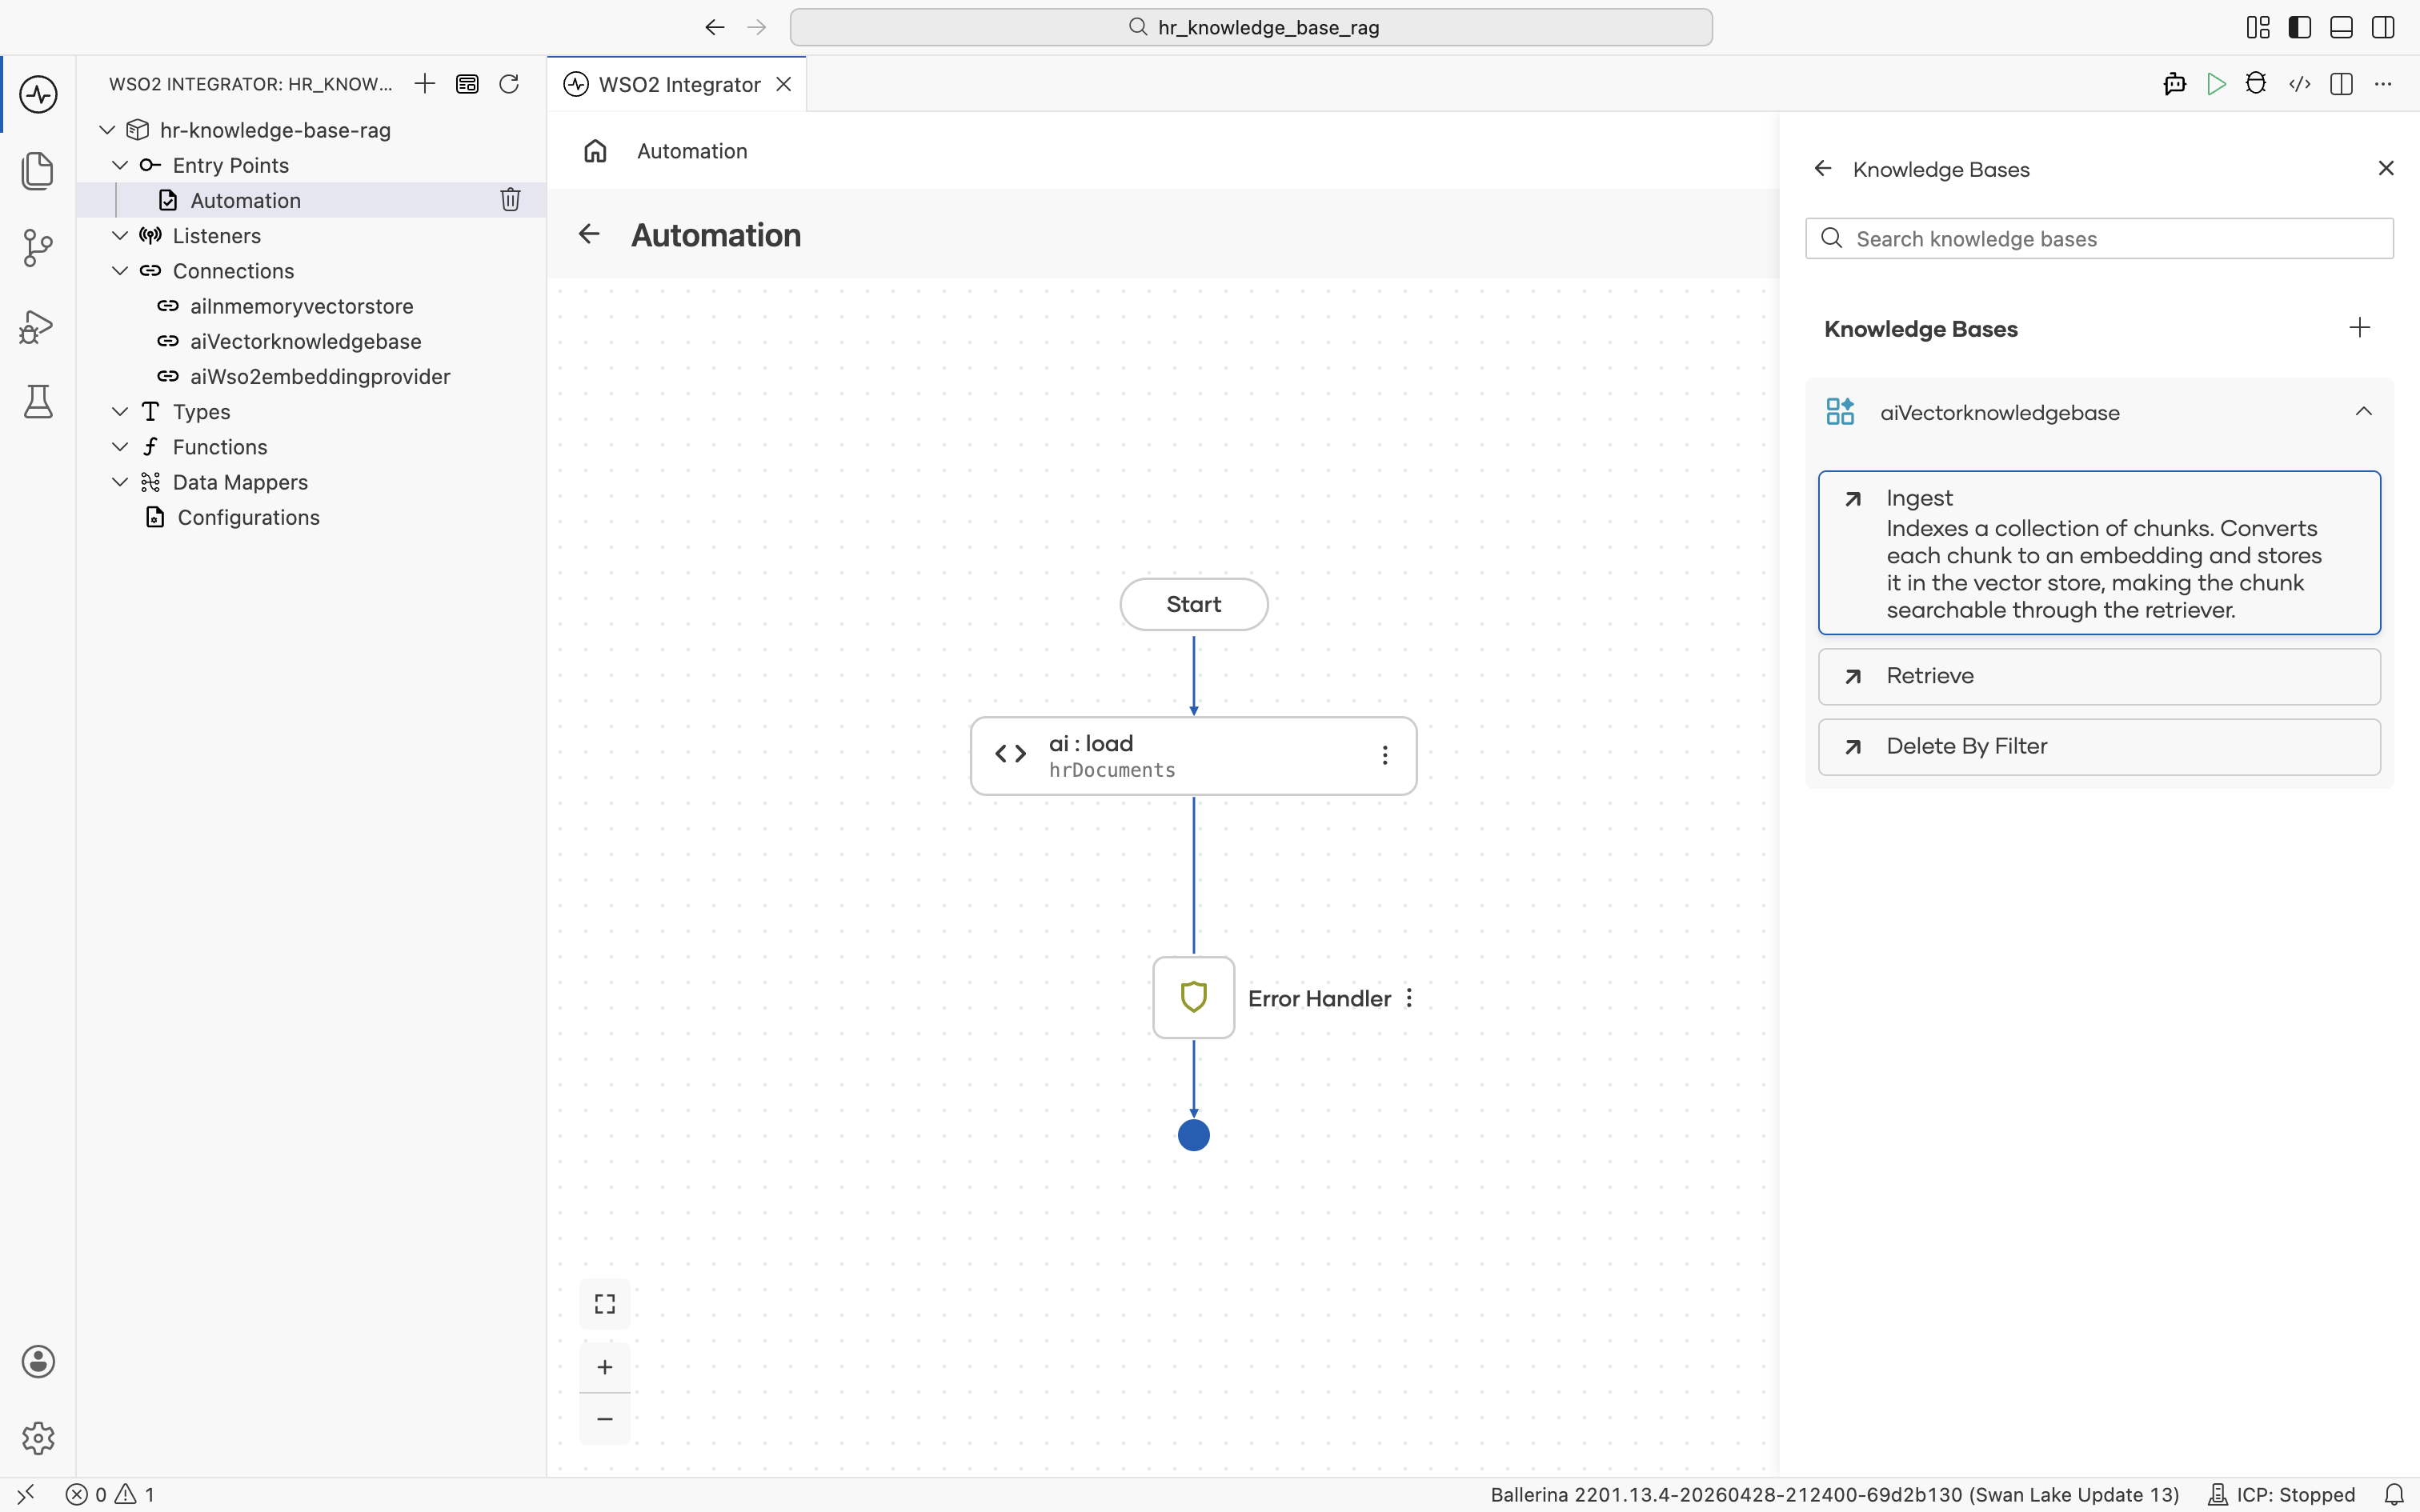
After you save the Vector Knowledge Base form, the Knowledge Bases panel reopens and lists the aiVectorknowledgebase connection you just created.
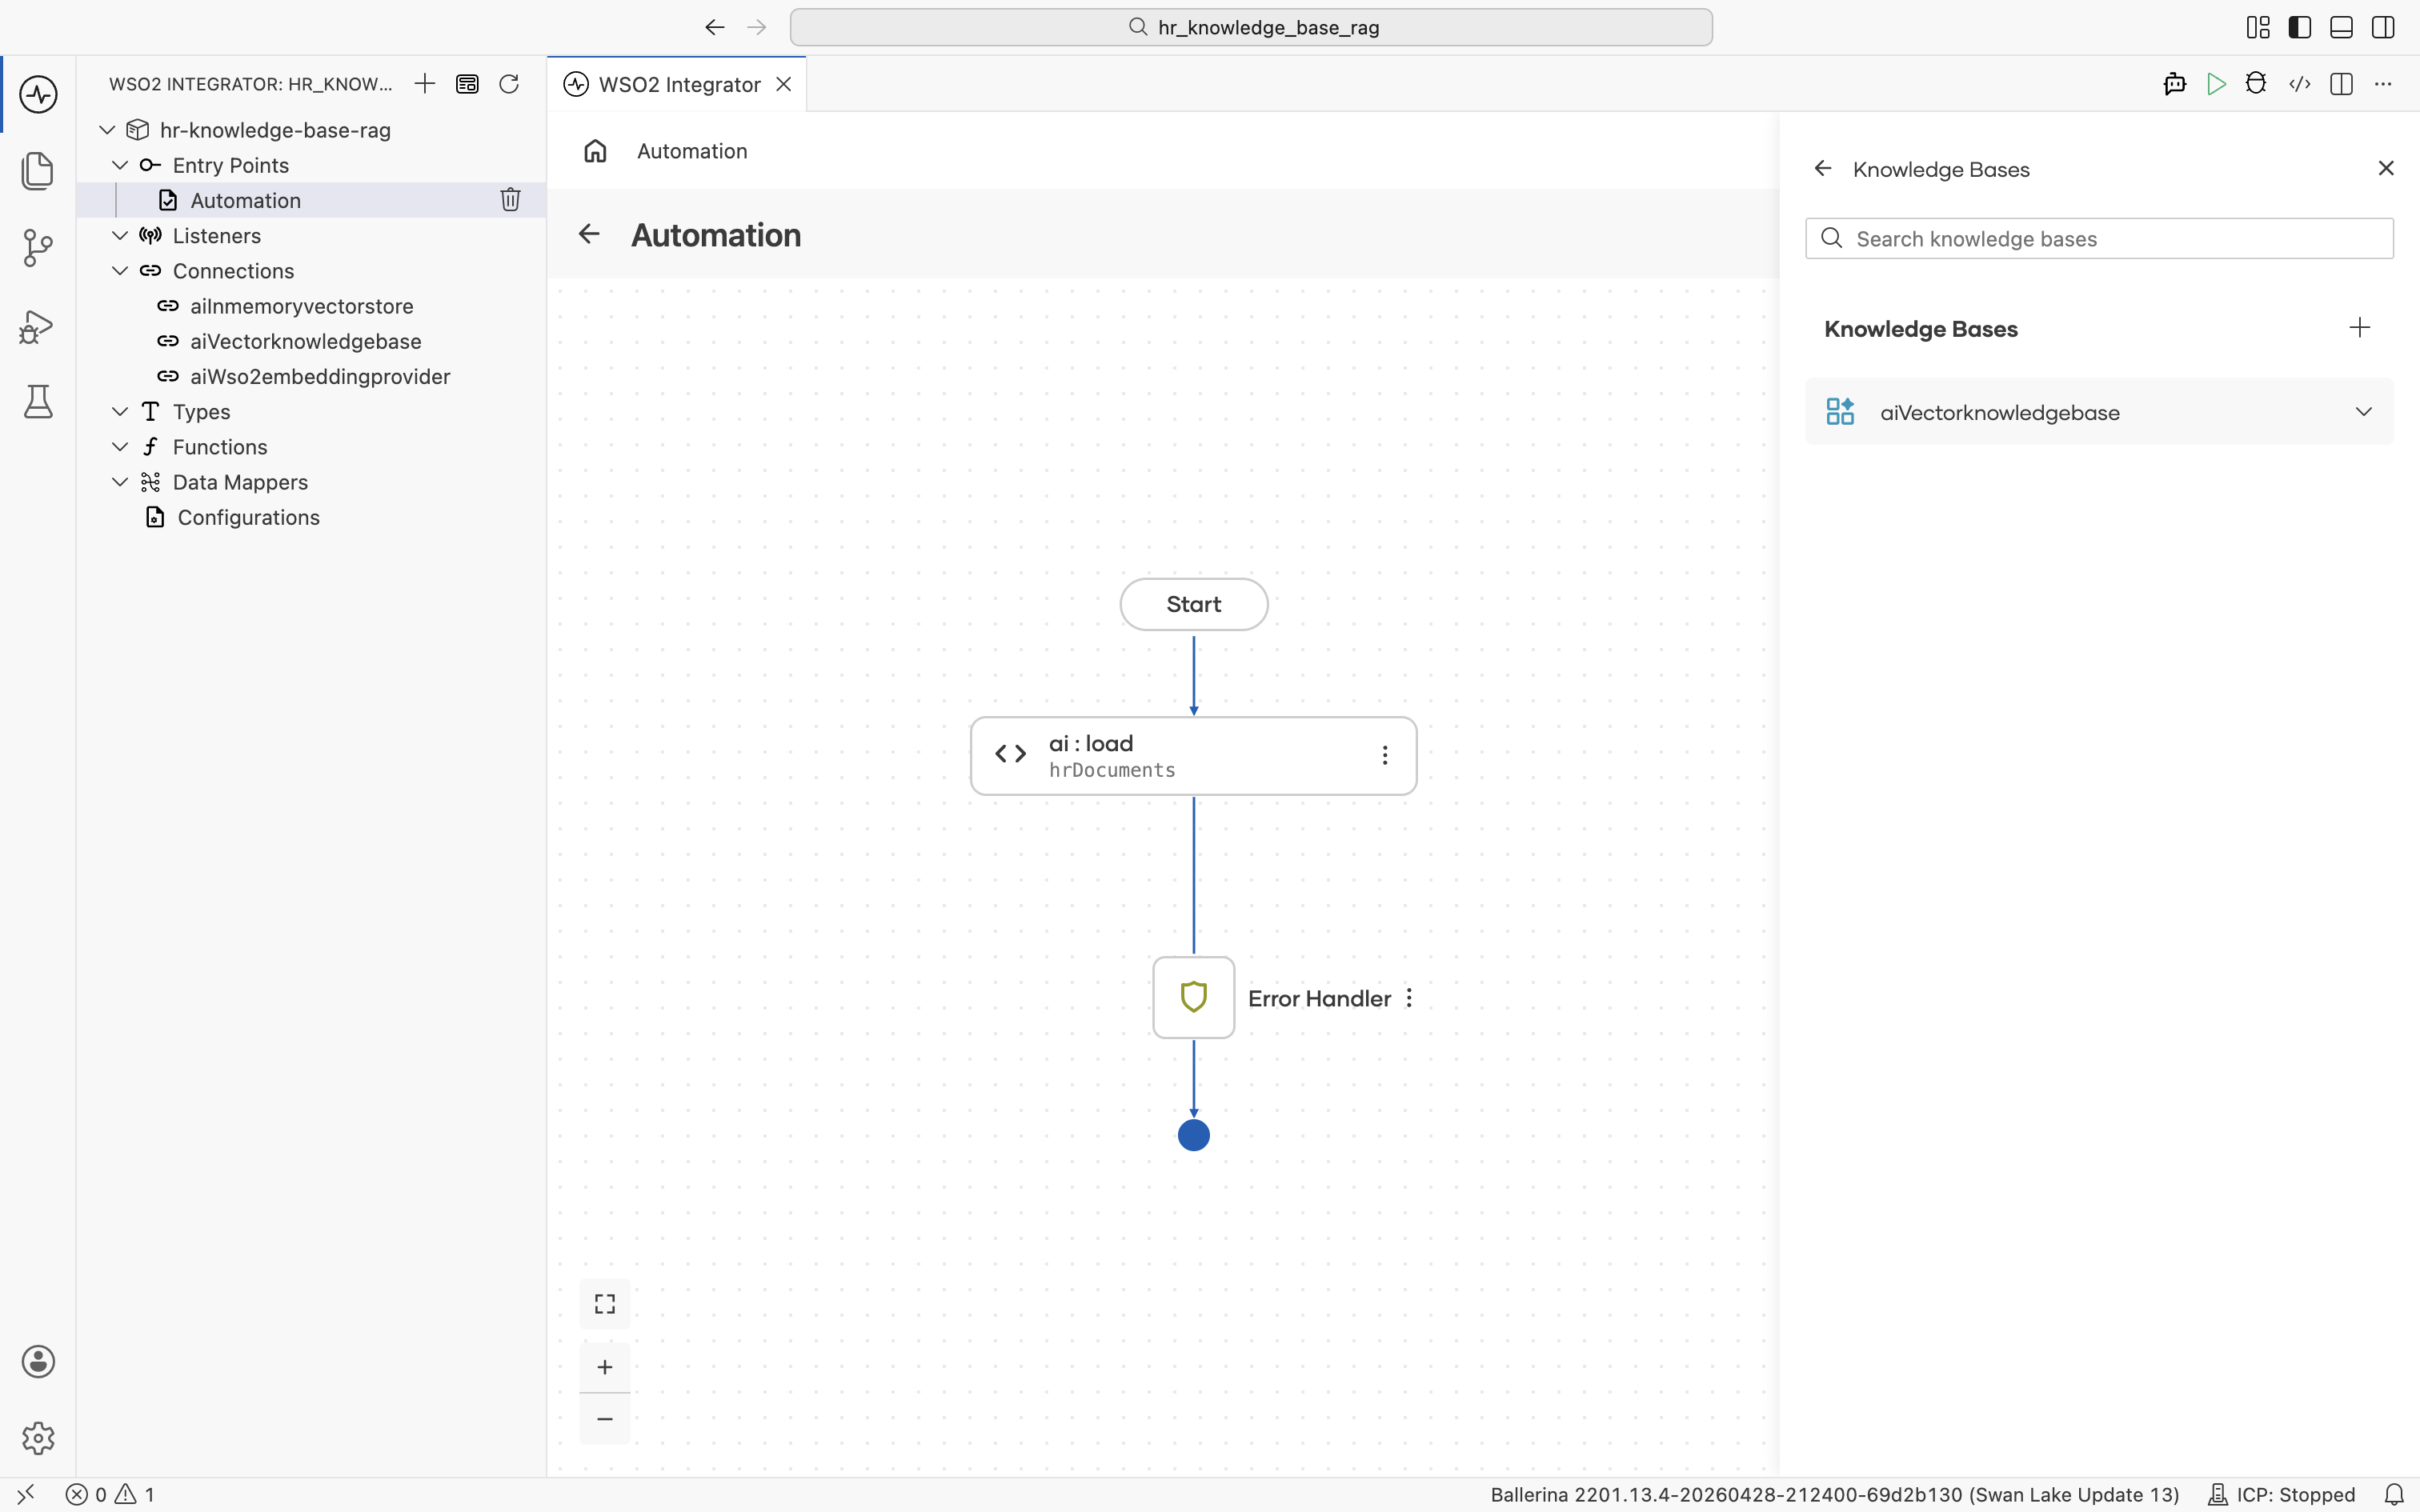
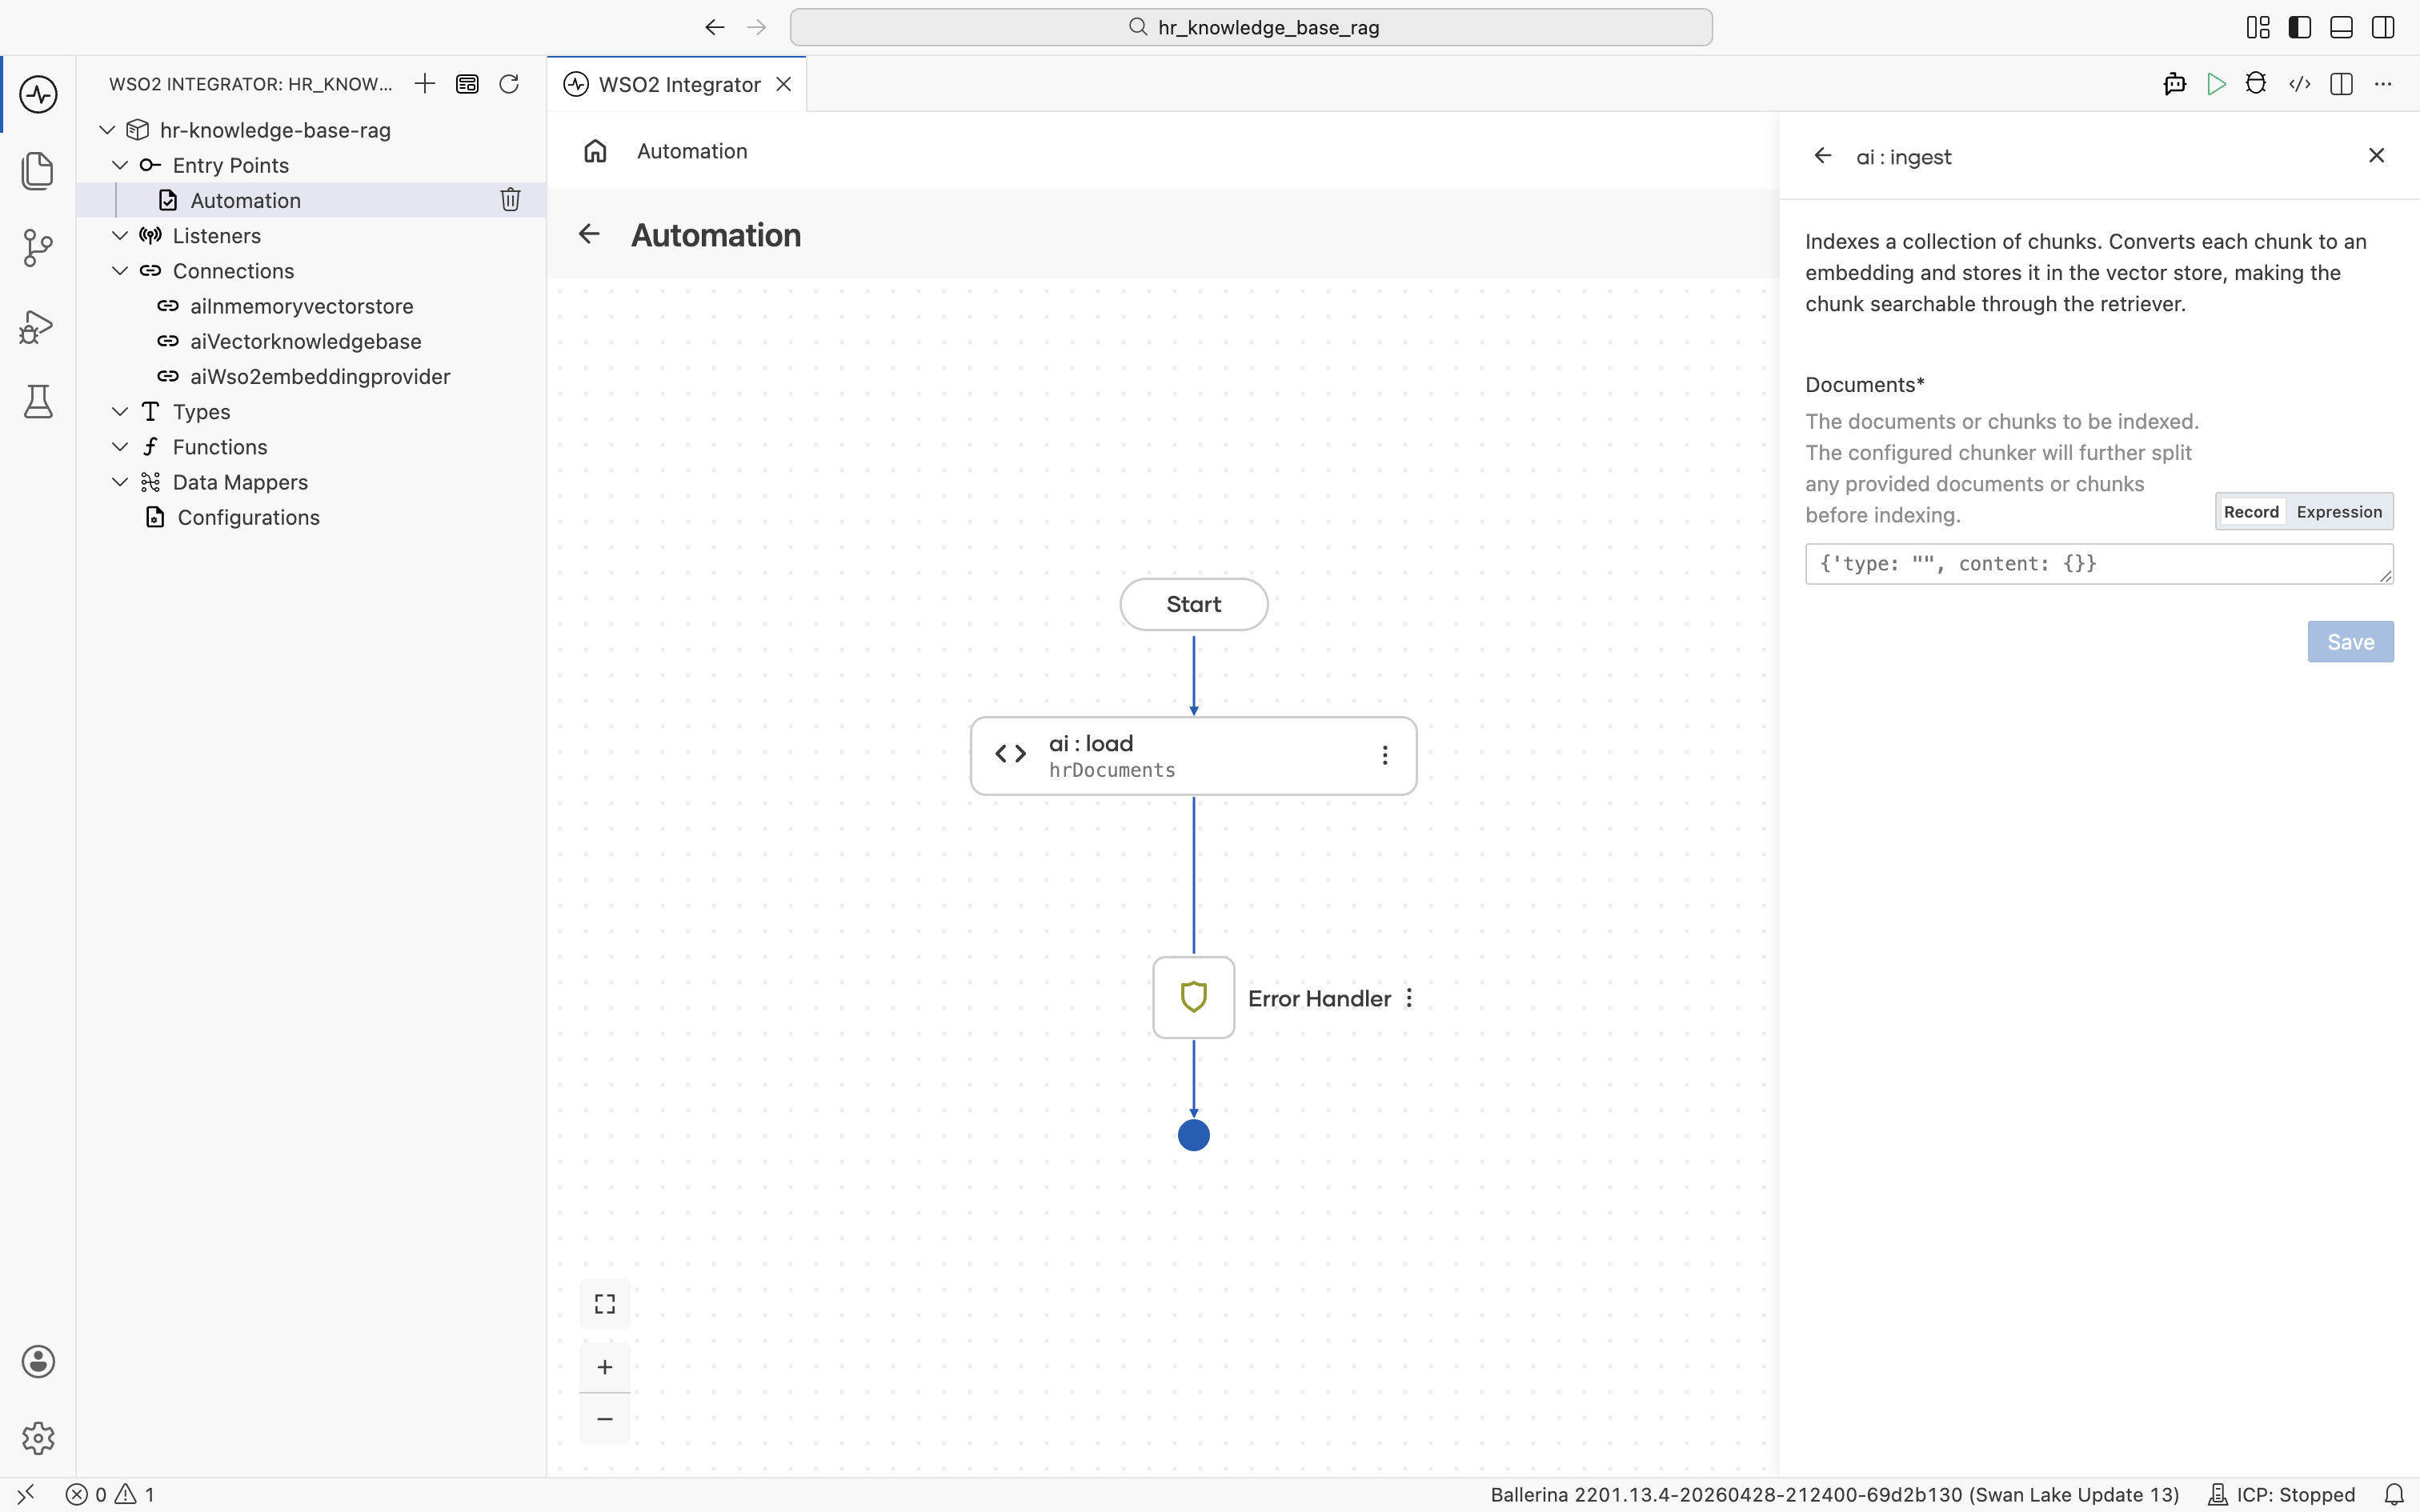
Click aiVectorknowledgebase to expand it and reveal its actions: Ingest, Retrieve, Delete By Filter. Click Ingest. The description reads "Indexes a collection of chunks. Converts each chunk to an embedding and stores it in the vector store, making the chunk searchable through the retriever."
The ai : ingest form opens. The Documents field defaults to Record mode with an empty record shape.
Switch the Documents field to Expression mode, then click into it and pick Variables > hrDocuments from the helper pane.
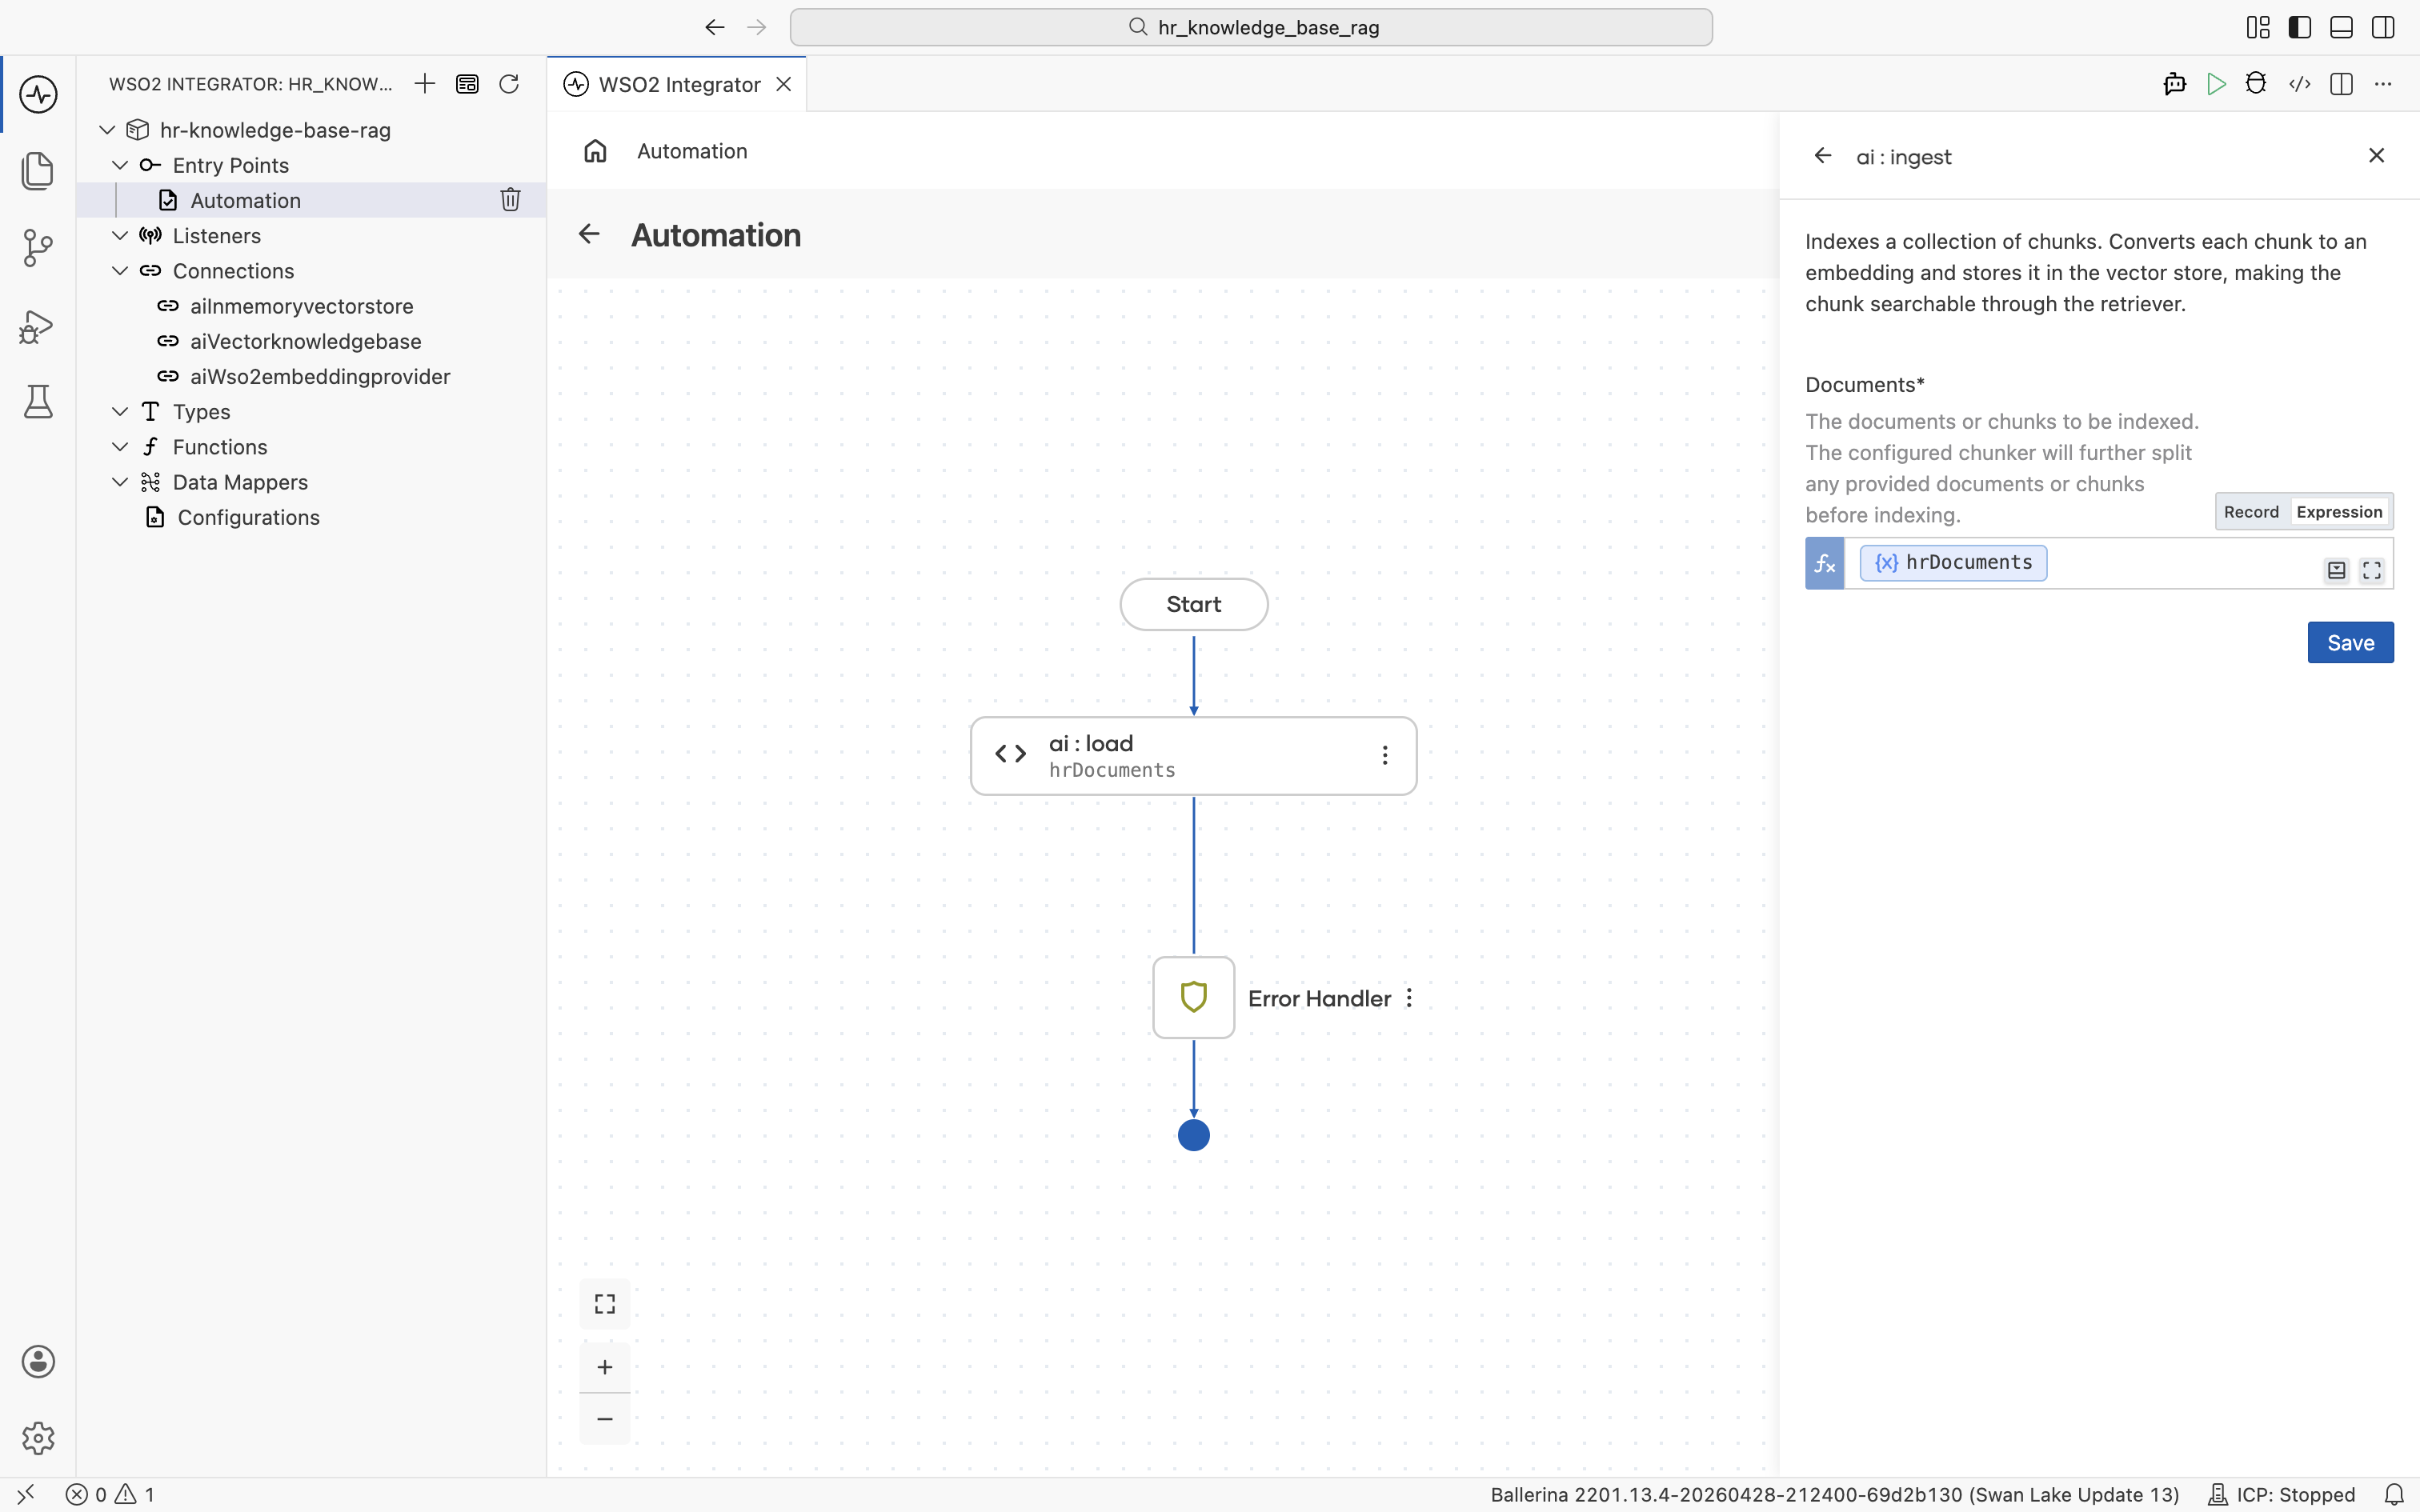
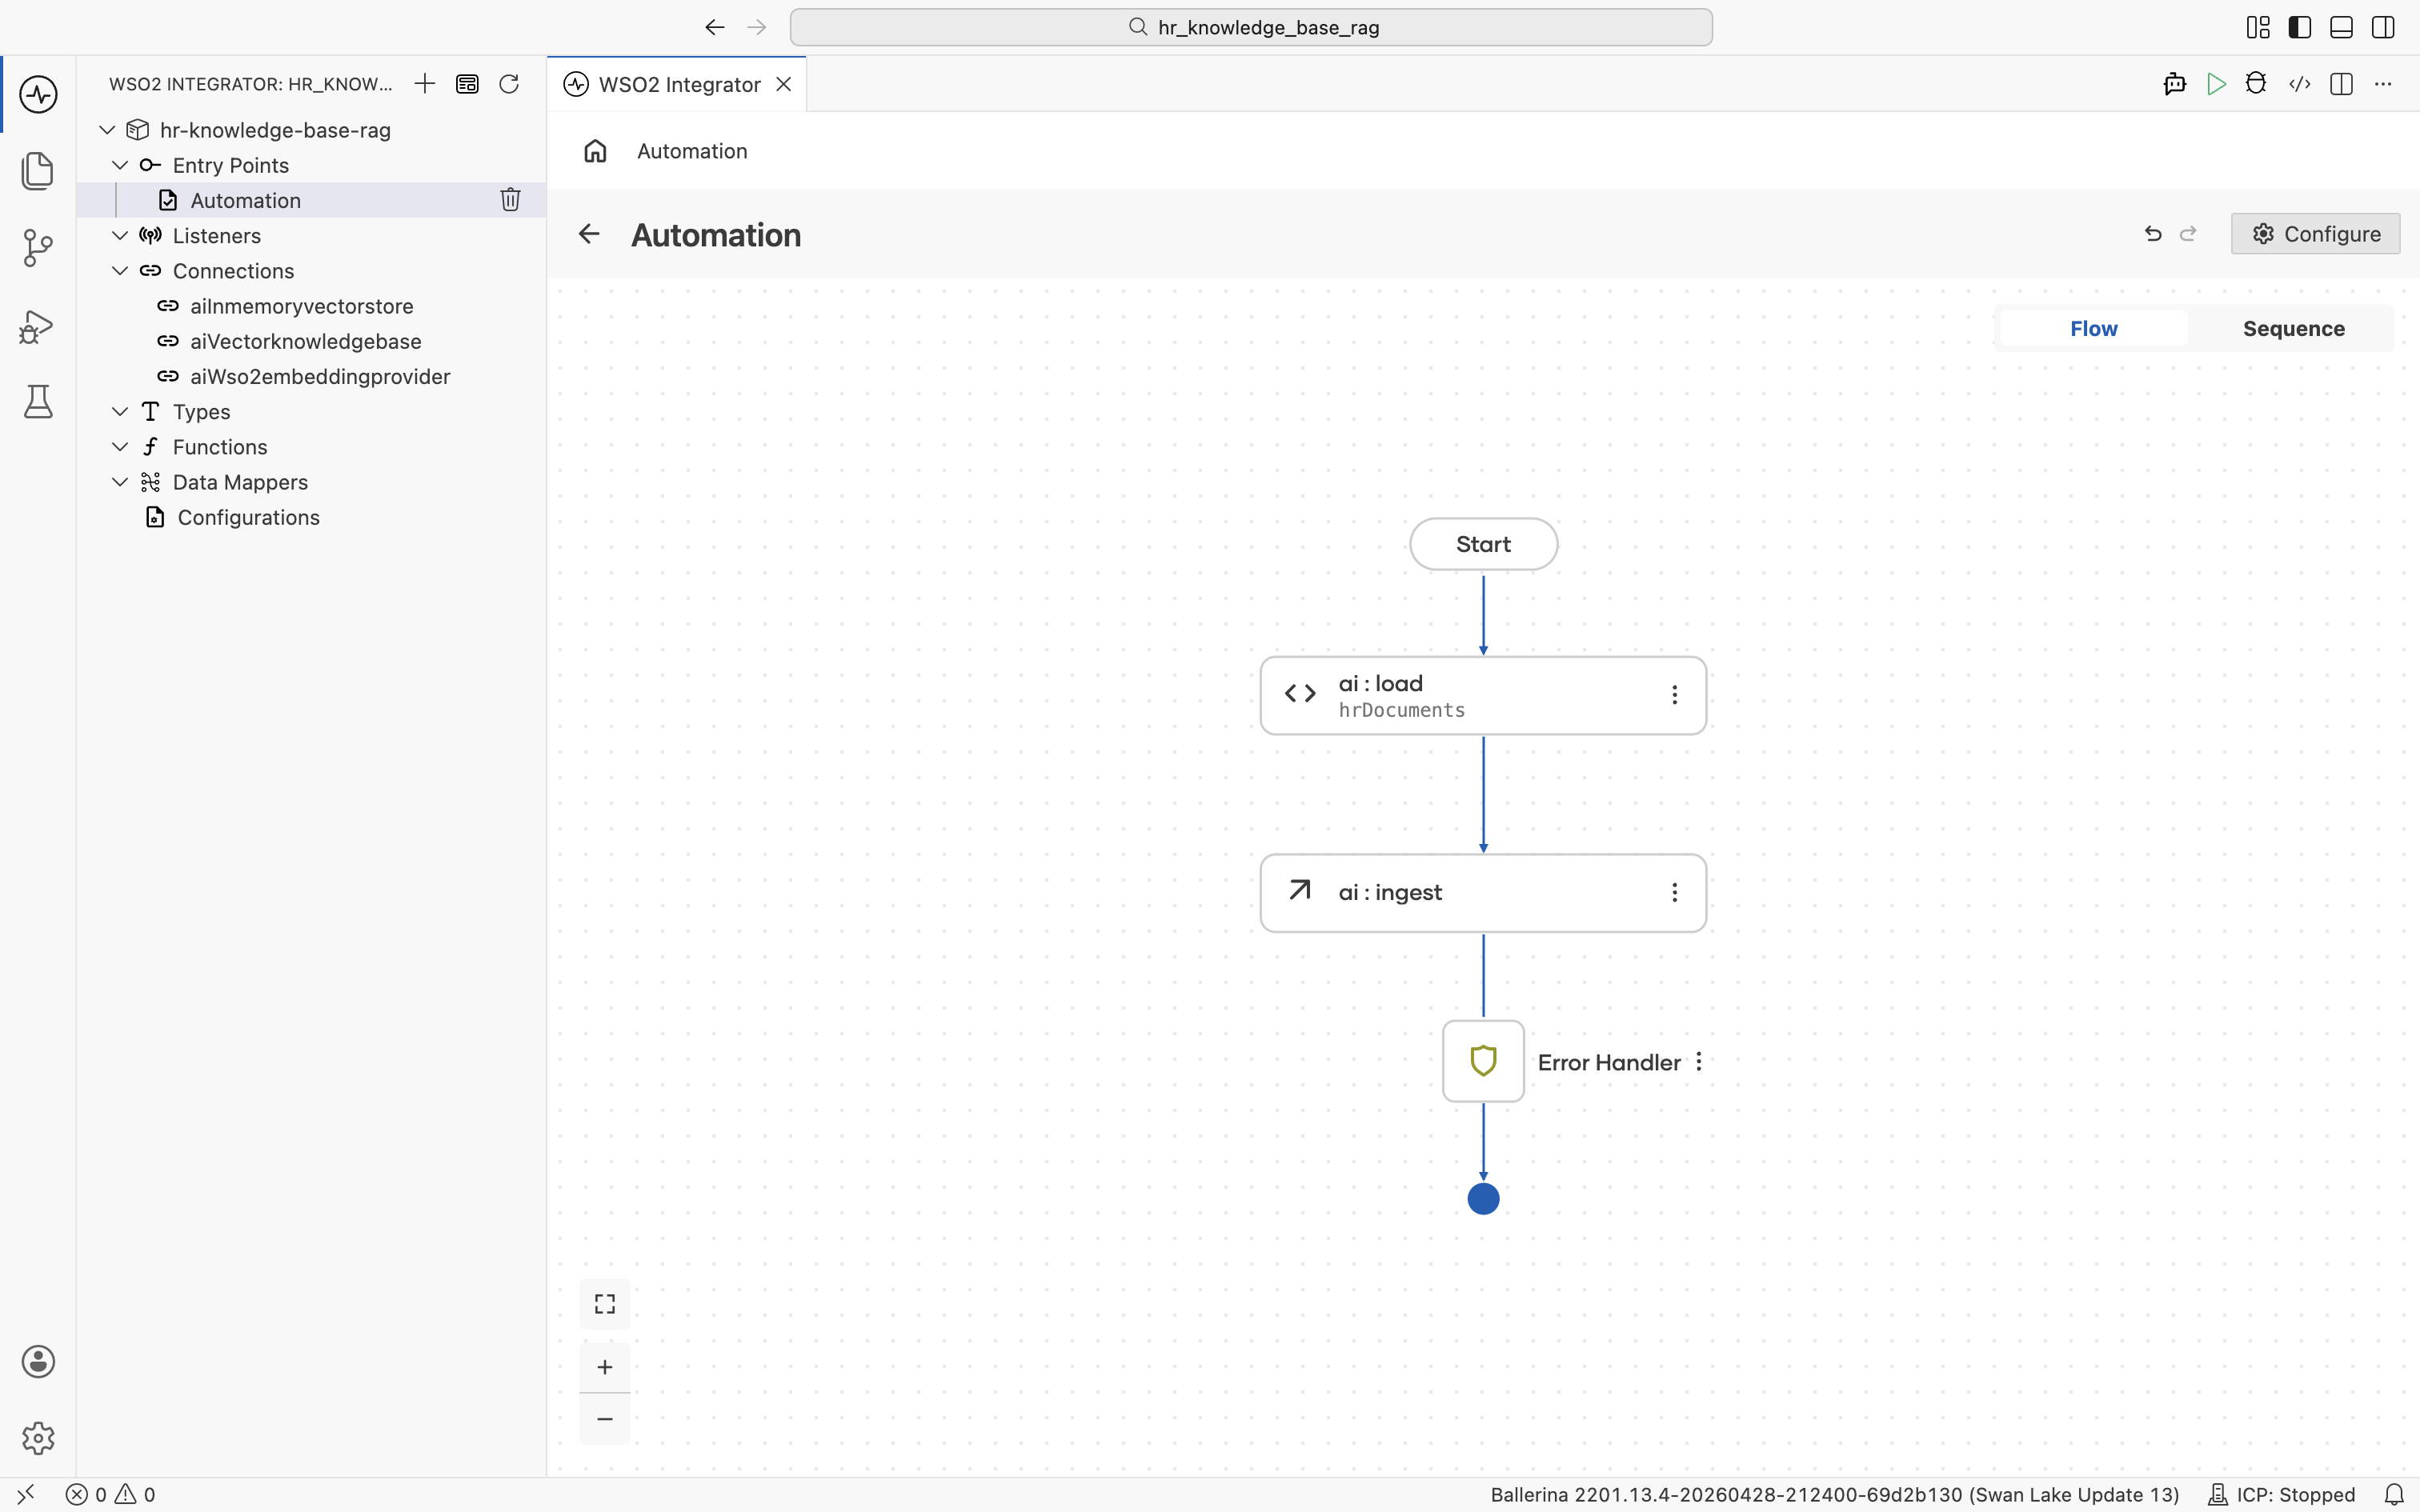
Click Save. The ai:ingest node is added to the flow between ai:load and the Error Handler.
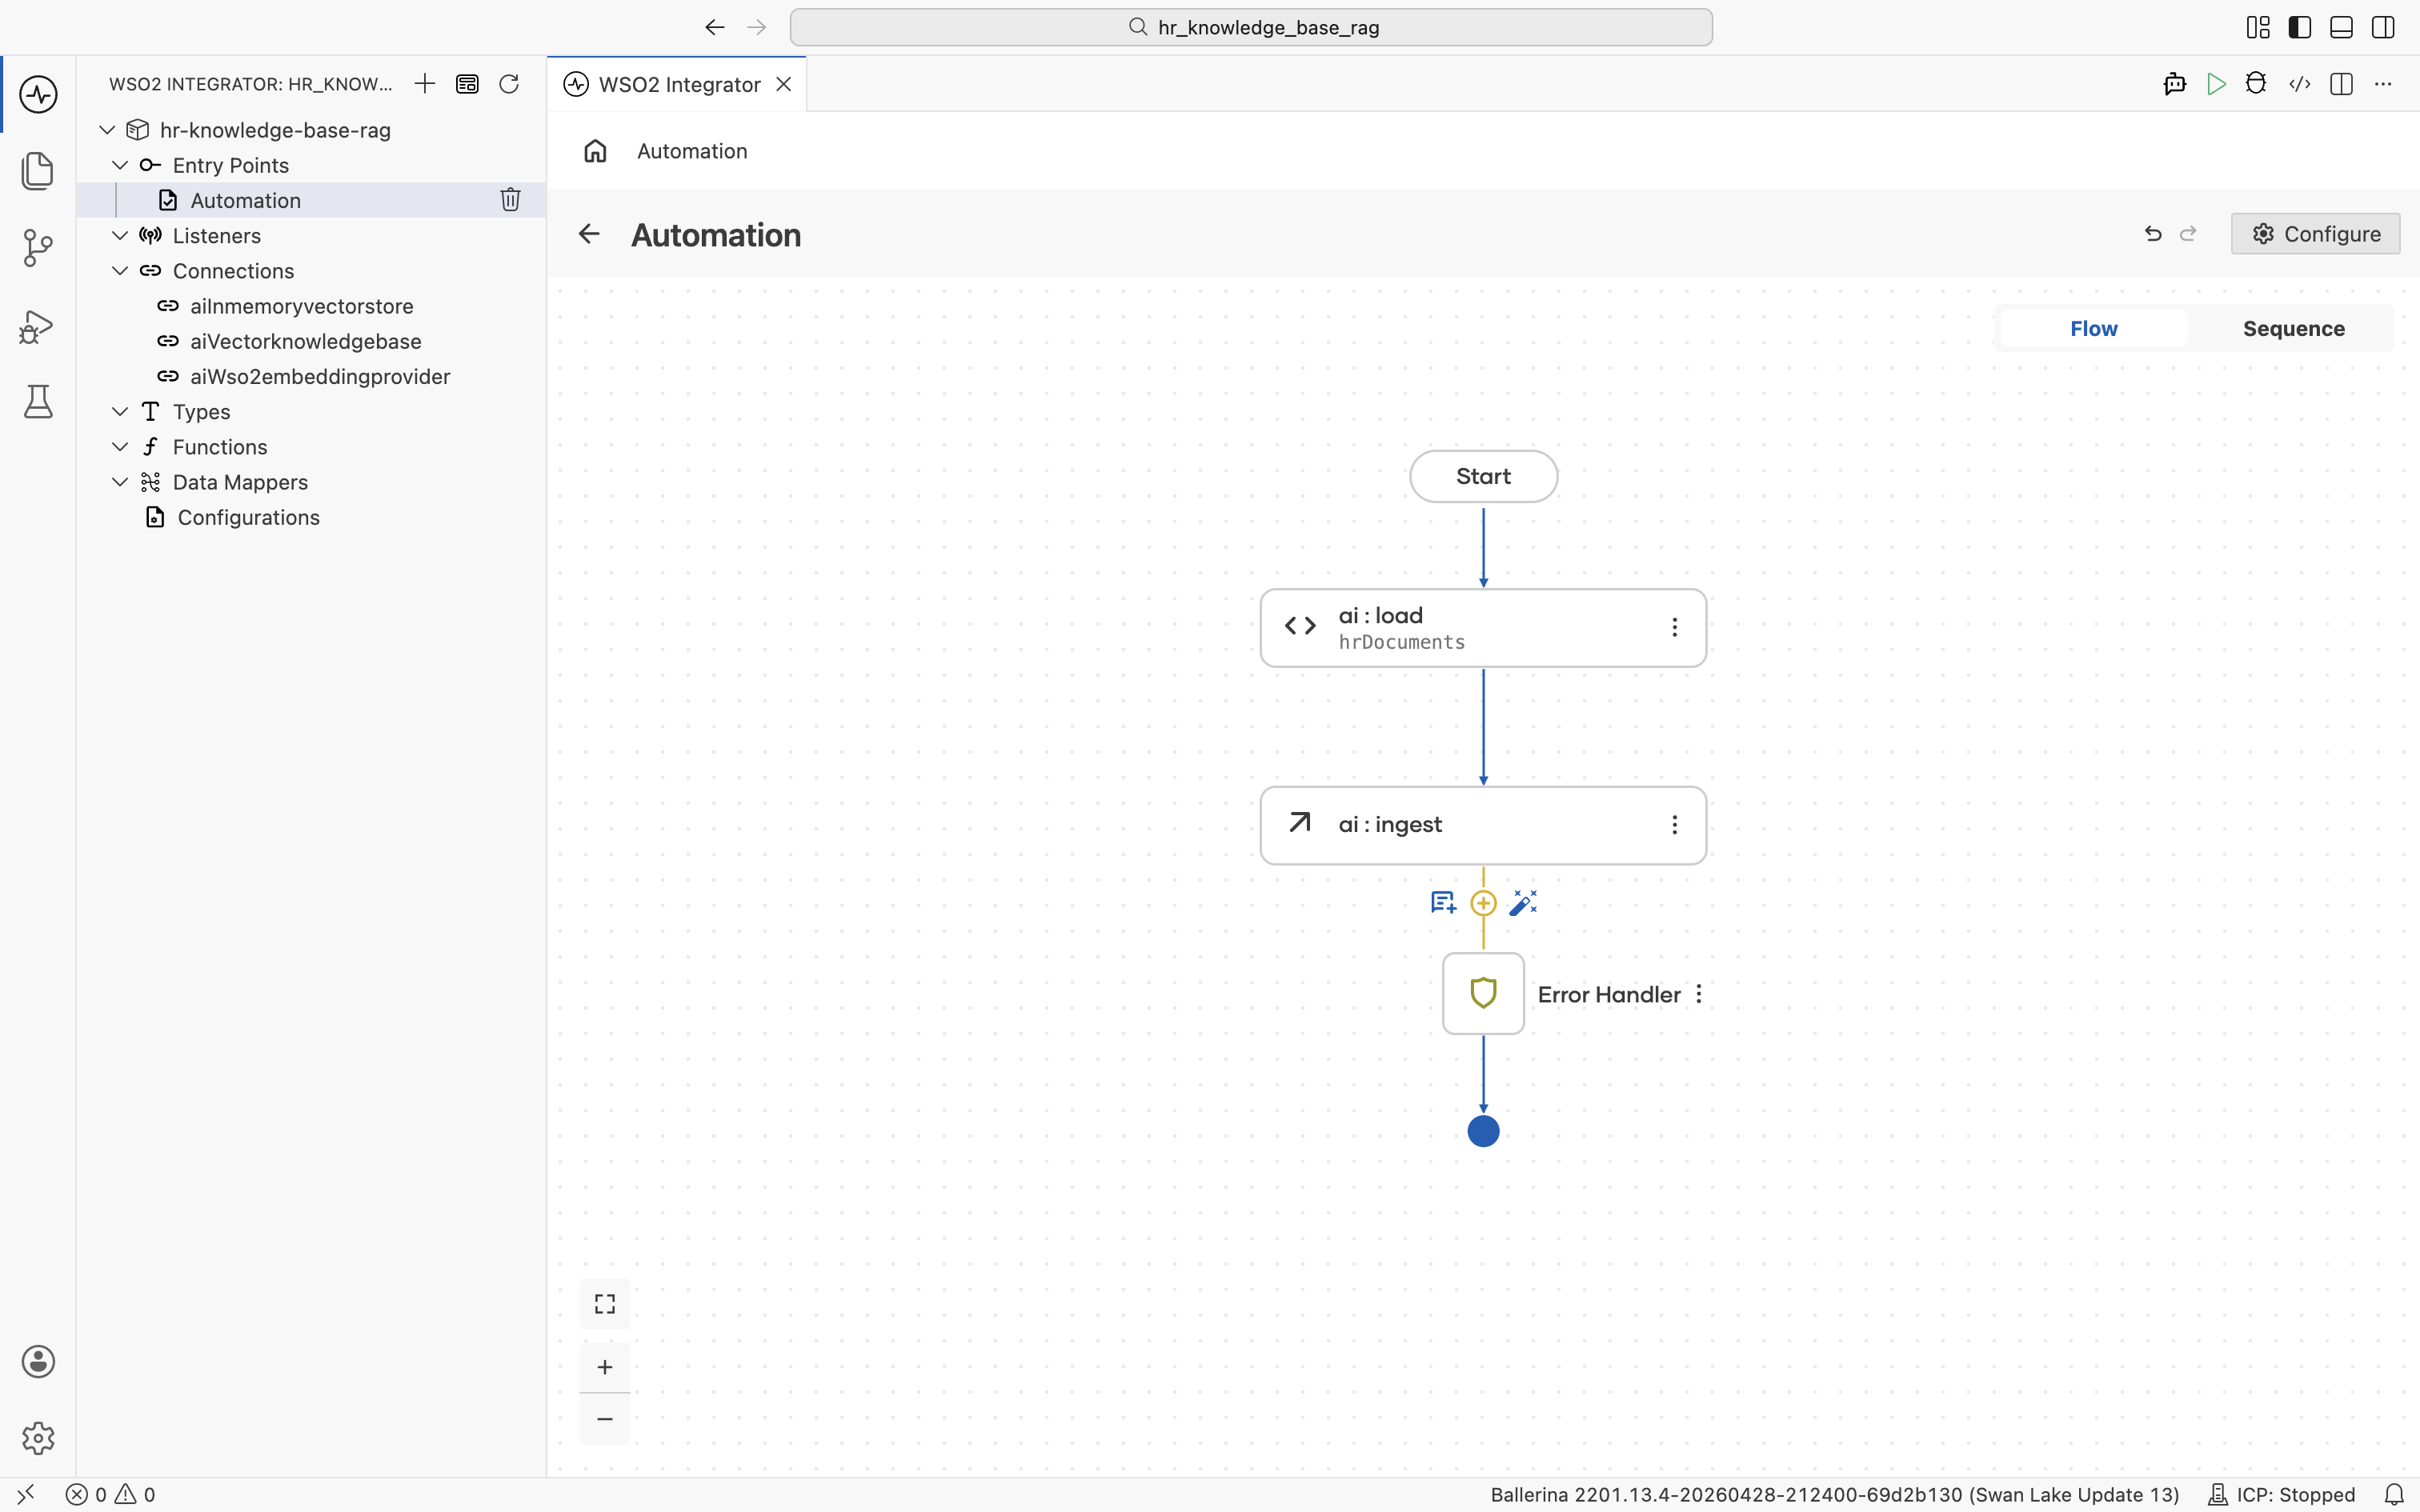
2.6 Log completion (optional)
Click the + below the ai:ingest node.
The node palette opens. Under Logging, click Log Info.
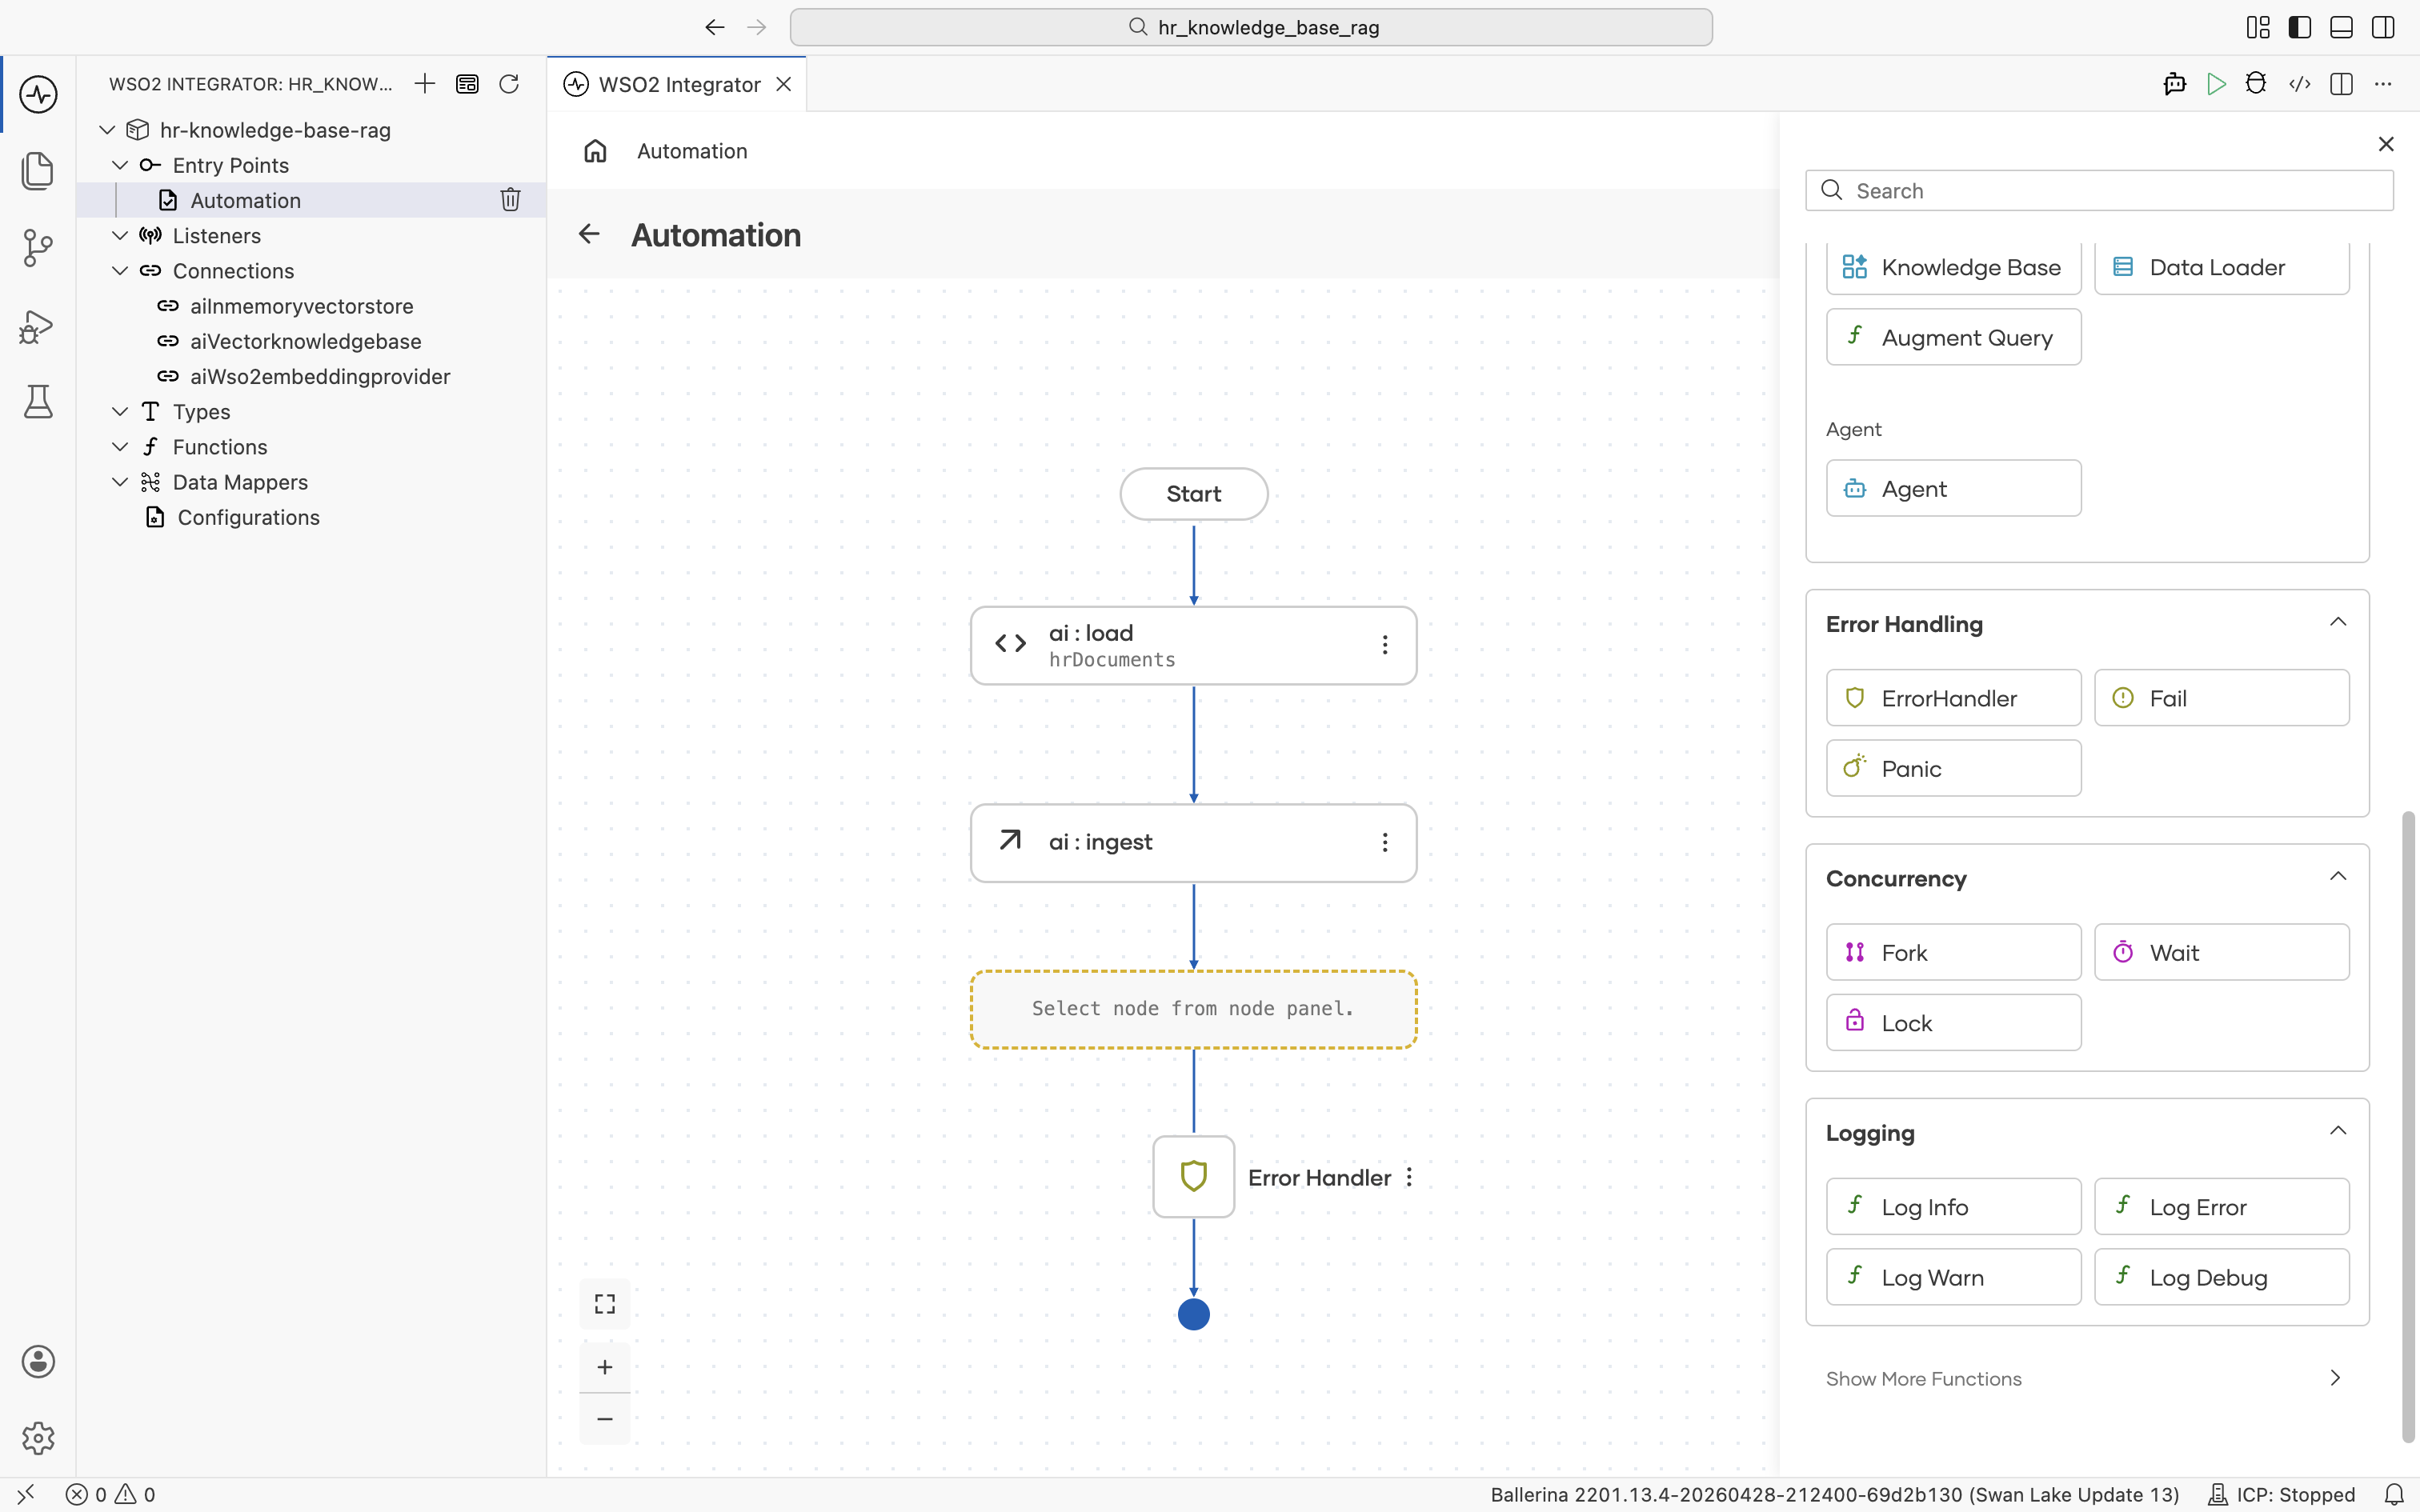
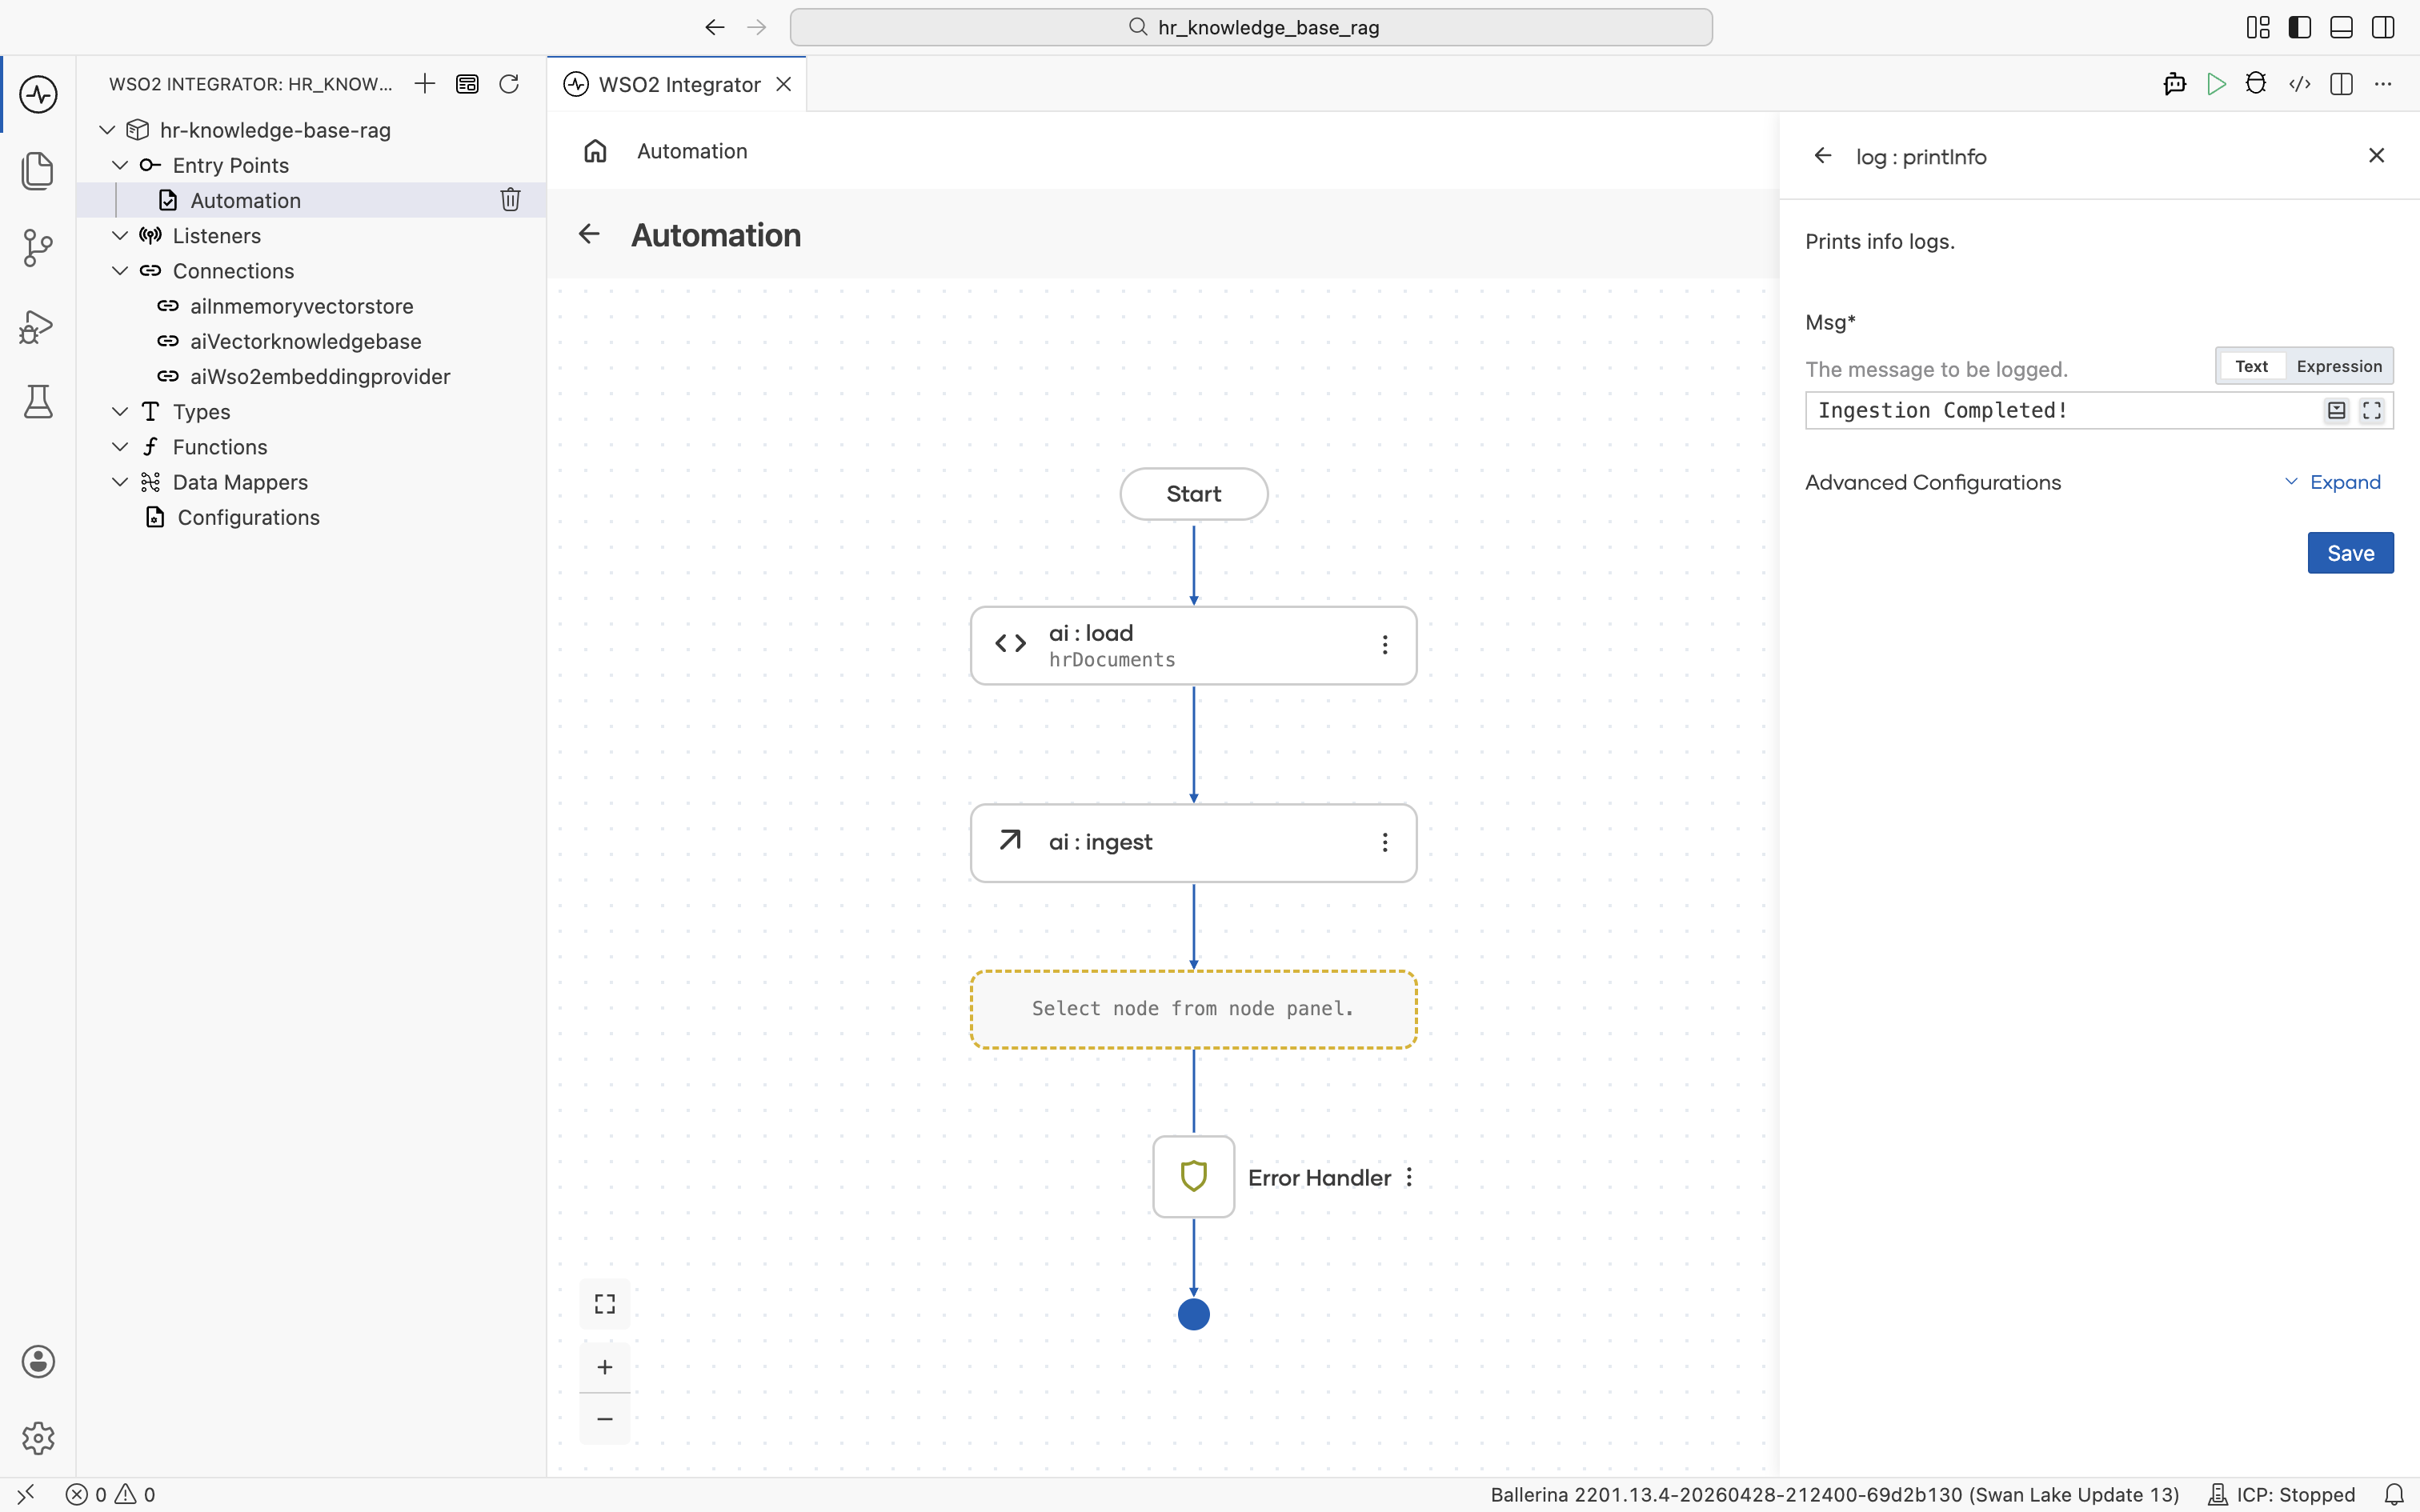
The log : printInfo form opens. Set Msg to Ingestion Completed! so you can confirm in the run log when ingestion has actually finished. This is useful before kicking off any queries against the store. Click Save.
2.7 Review the completed ingestion flow
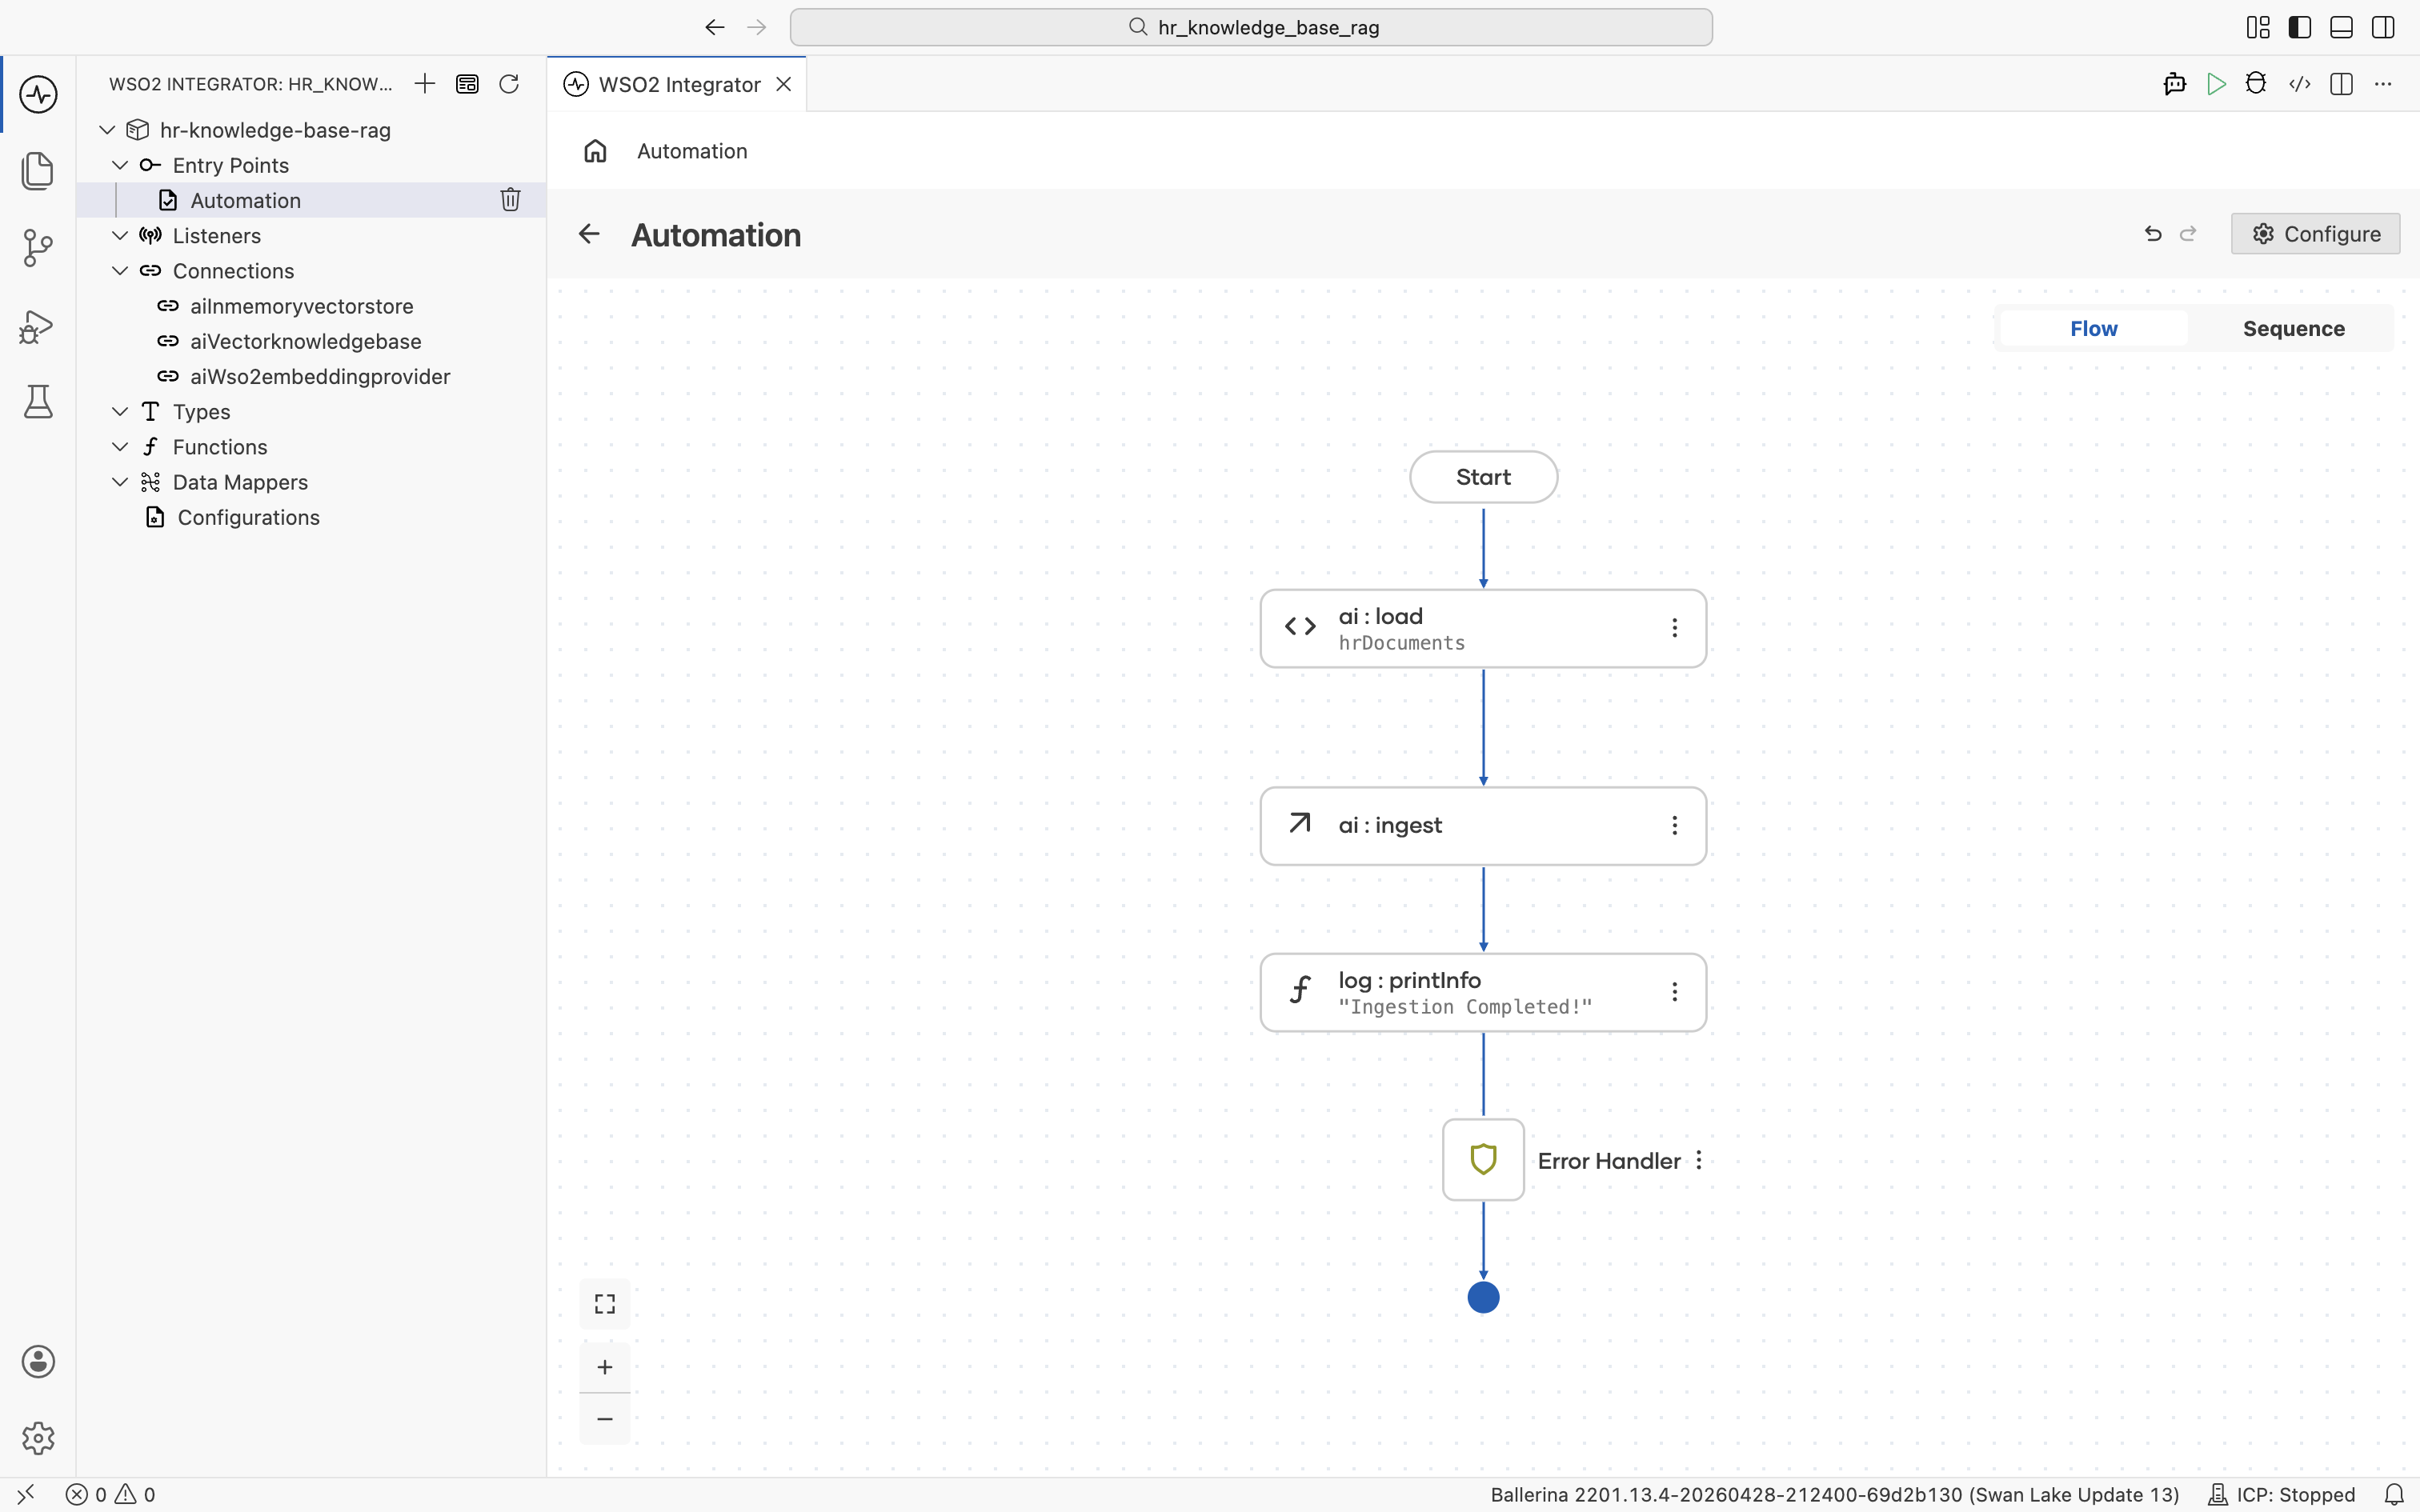
When the automation runs, it loads the file at path, chunks it, embeds it, and populates aiInmemoryvectorstore. You'll run it together with the HTTP Service at the end of the tutorial.
Restart the runtime and you must re-ingest. For a persistent store, swap the vector store for Pinecone, Milvus, Pgvector, or Weaviate. The rest of the flow stays the same.
Step 3: Create the query HTTP service
3.1 Add the HTTP service artifact
Go back to the project overview and click + Add Artifact again. Under Integration as API, pick HTTP Service.
The Create HTTP Service form opens. Keep Service Contract at Design From Scratch and set Service Base Path to /api/v1. Click Create.
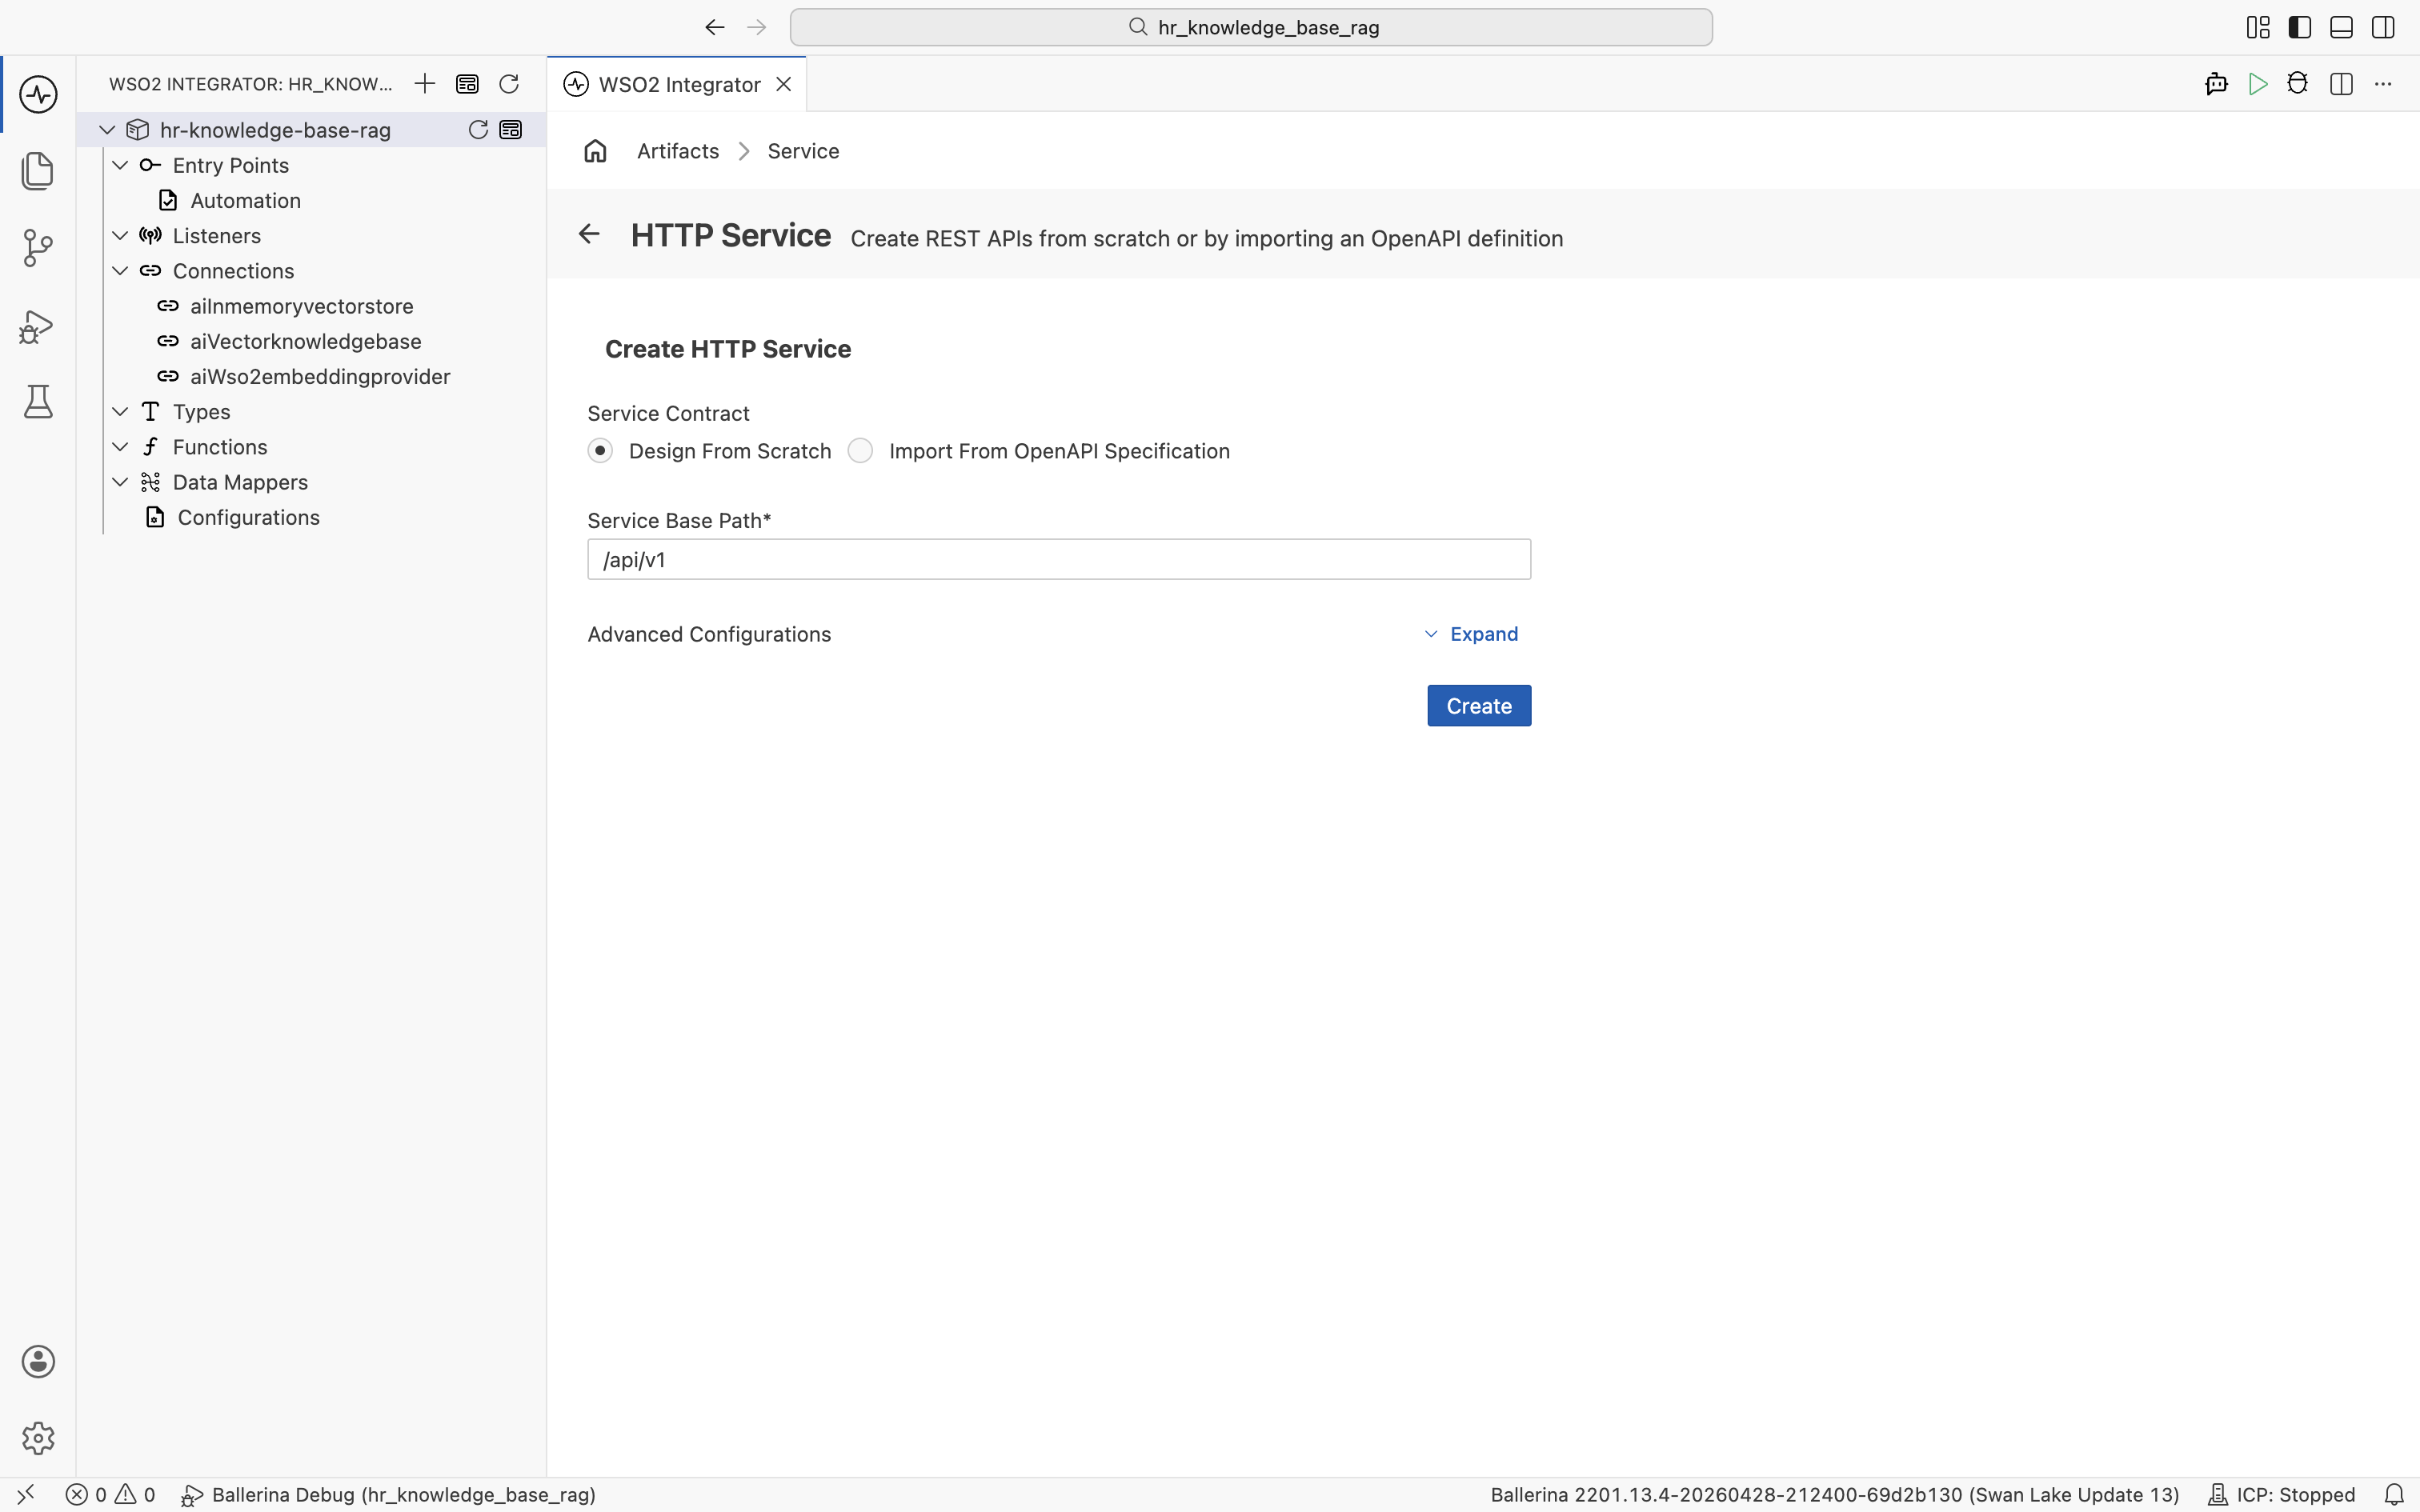
The HTTP Service designer opens with the default listener httpDefaultListener and your base path /api/v1. The Resources section is empty.
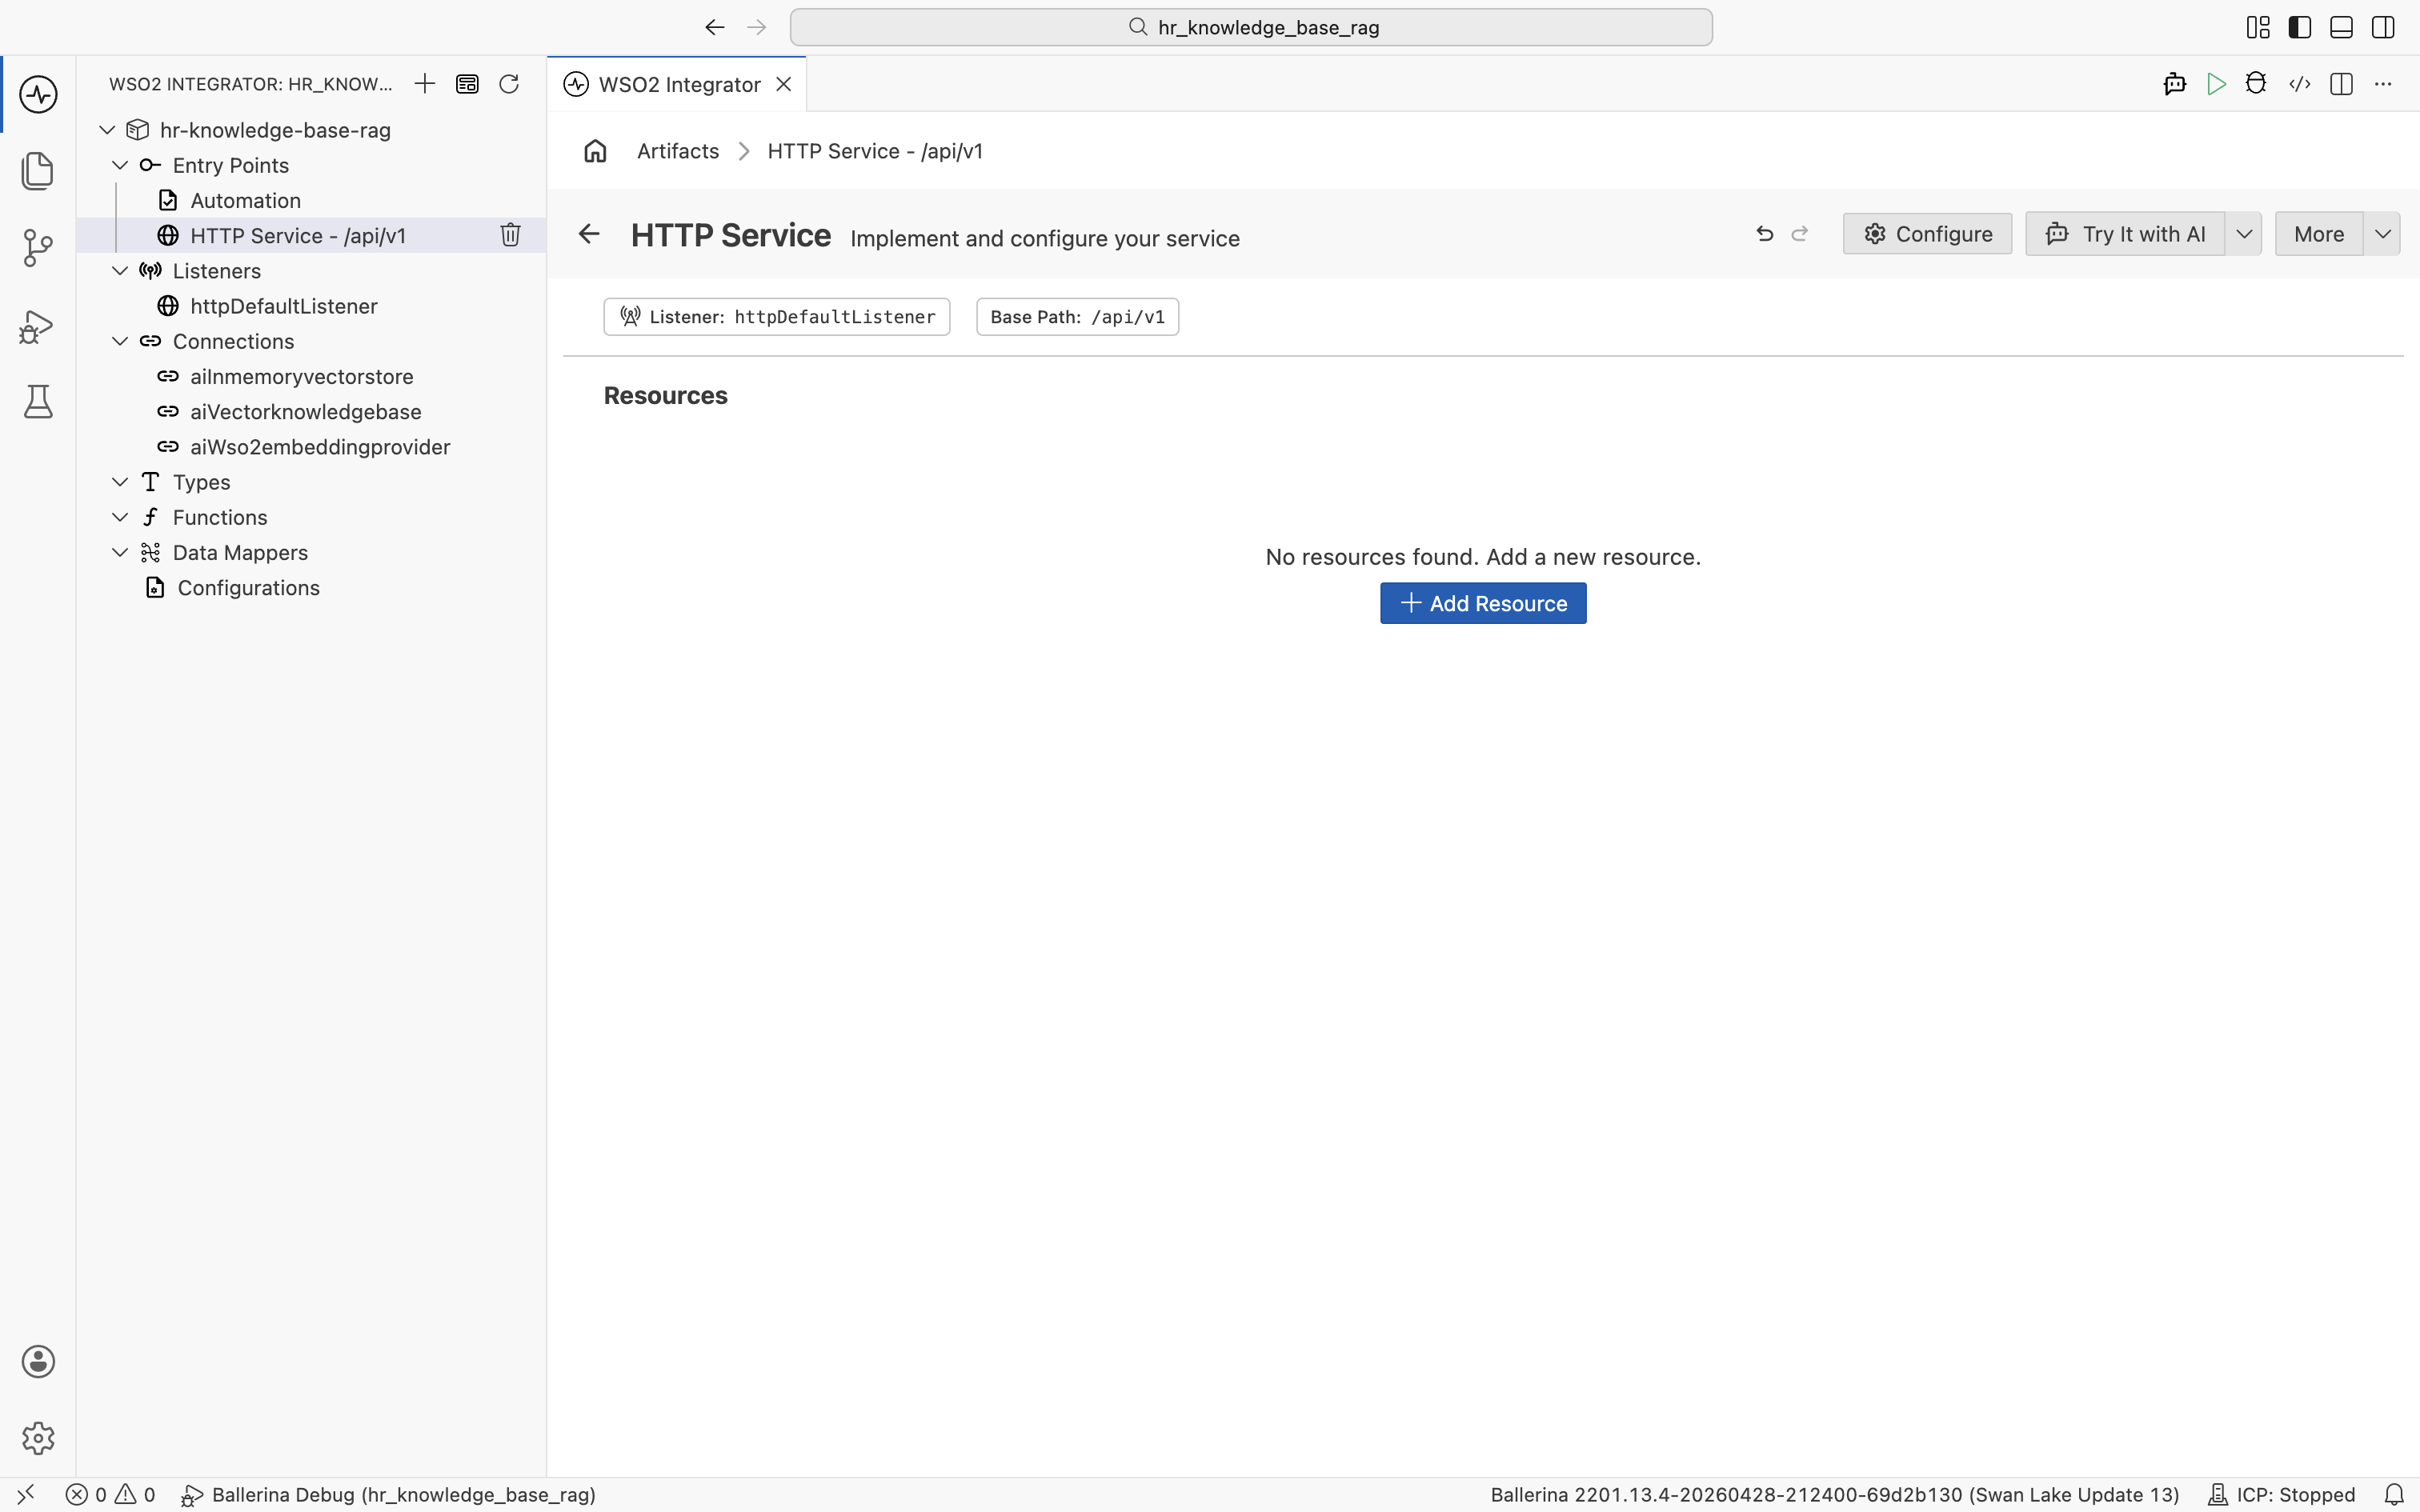
3.2 Add the query resource
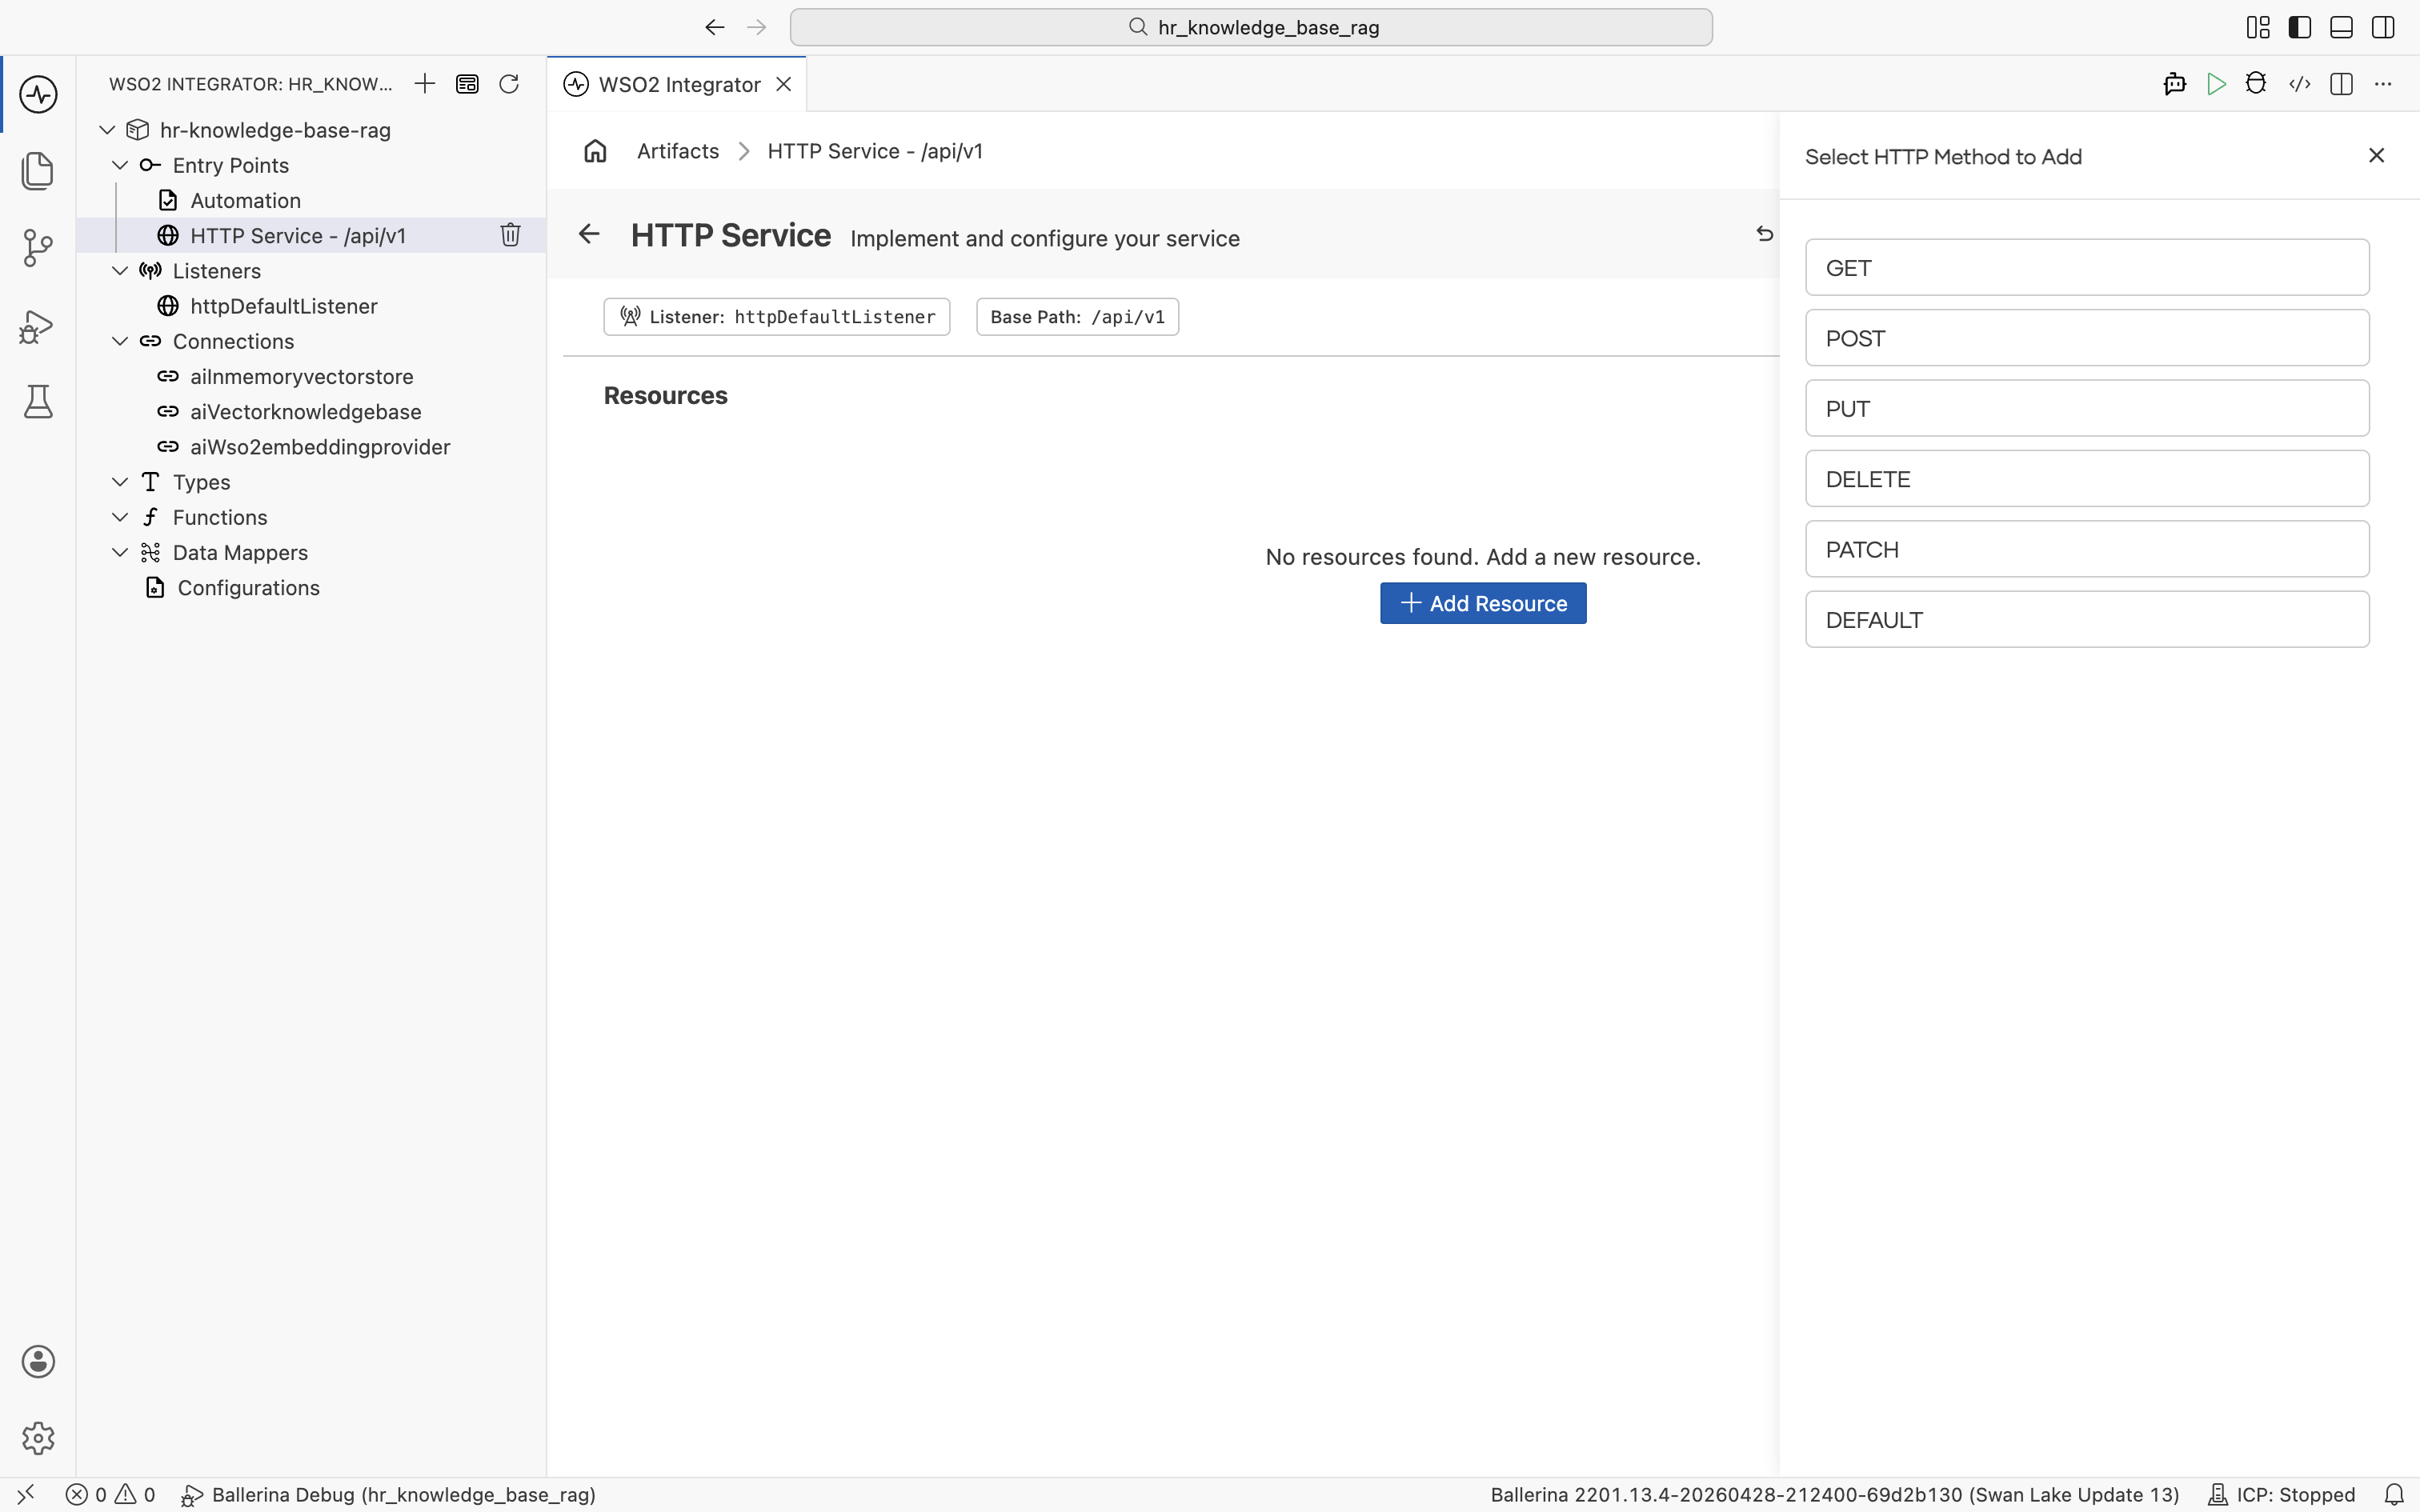
Click + Add Resource. The Select HTTP Method to Add panel opens. Pick POST.
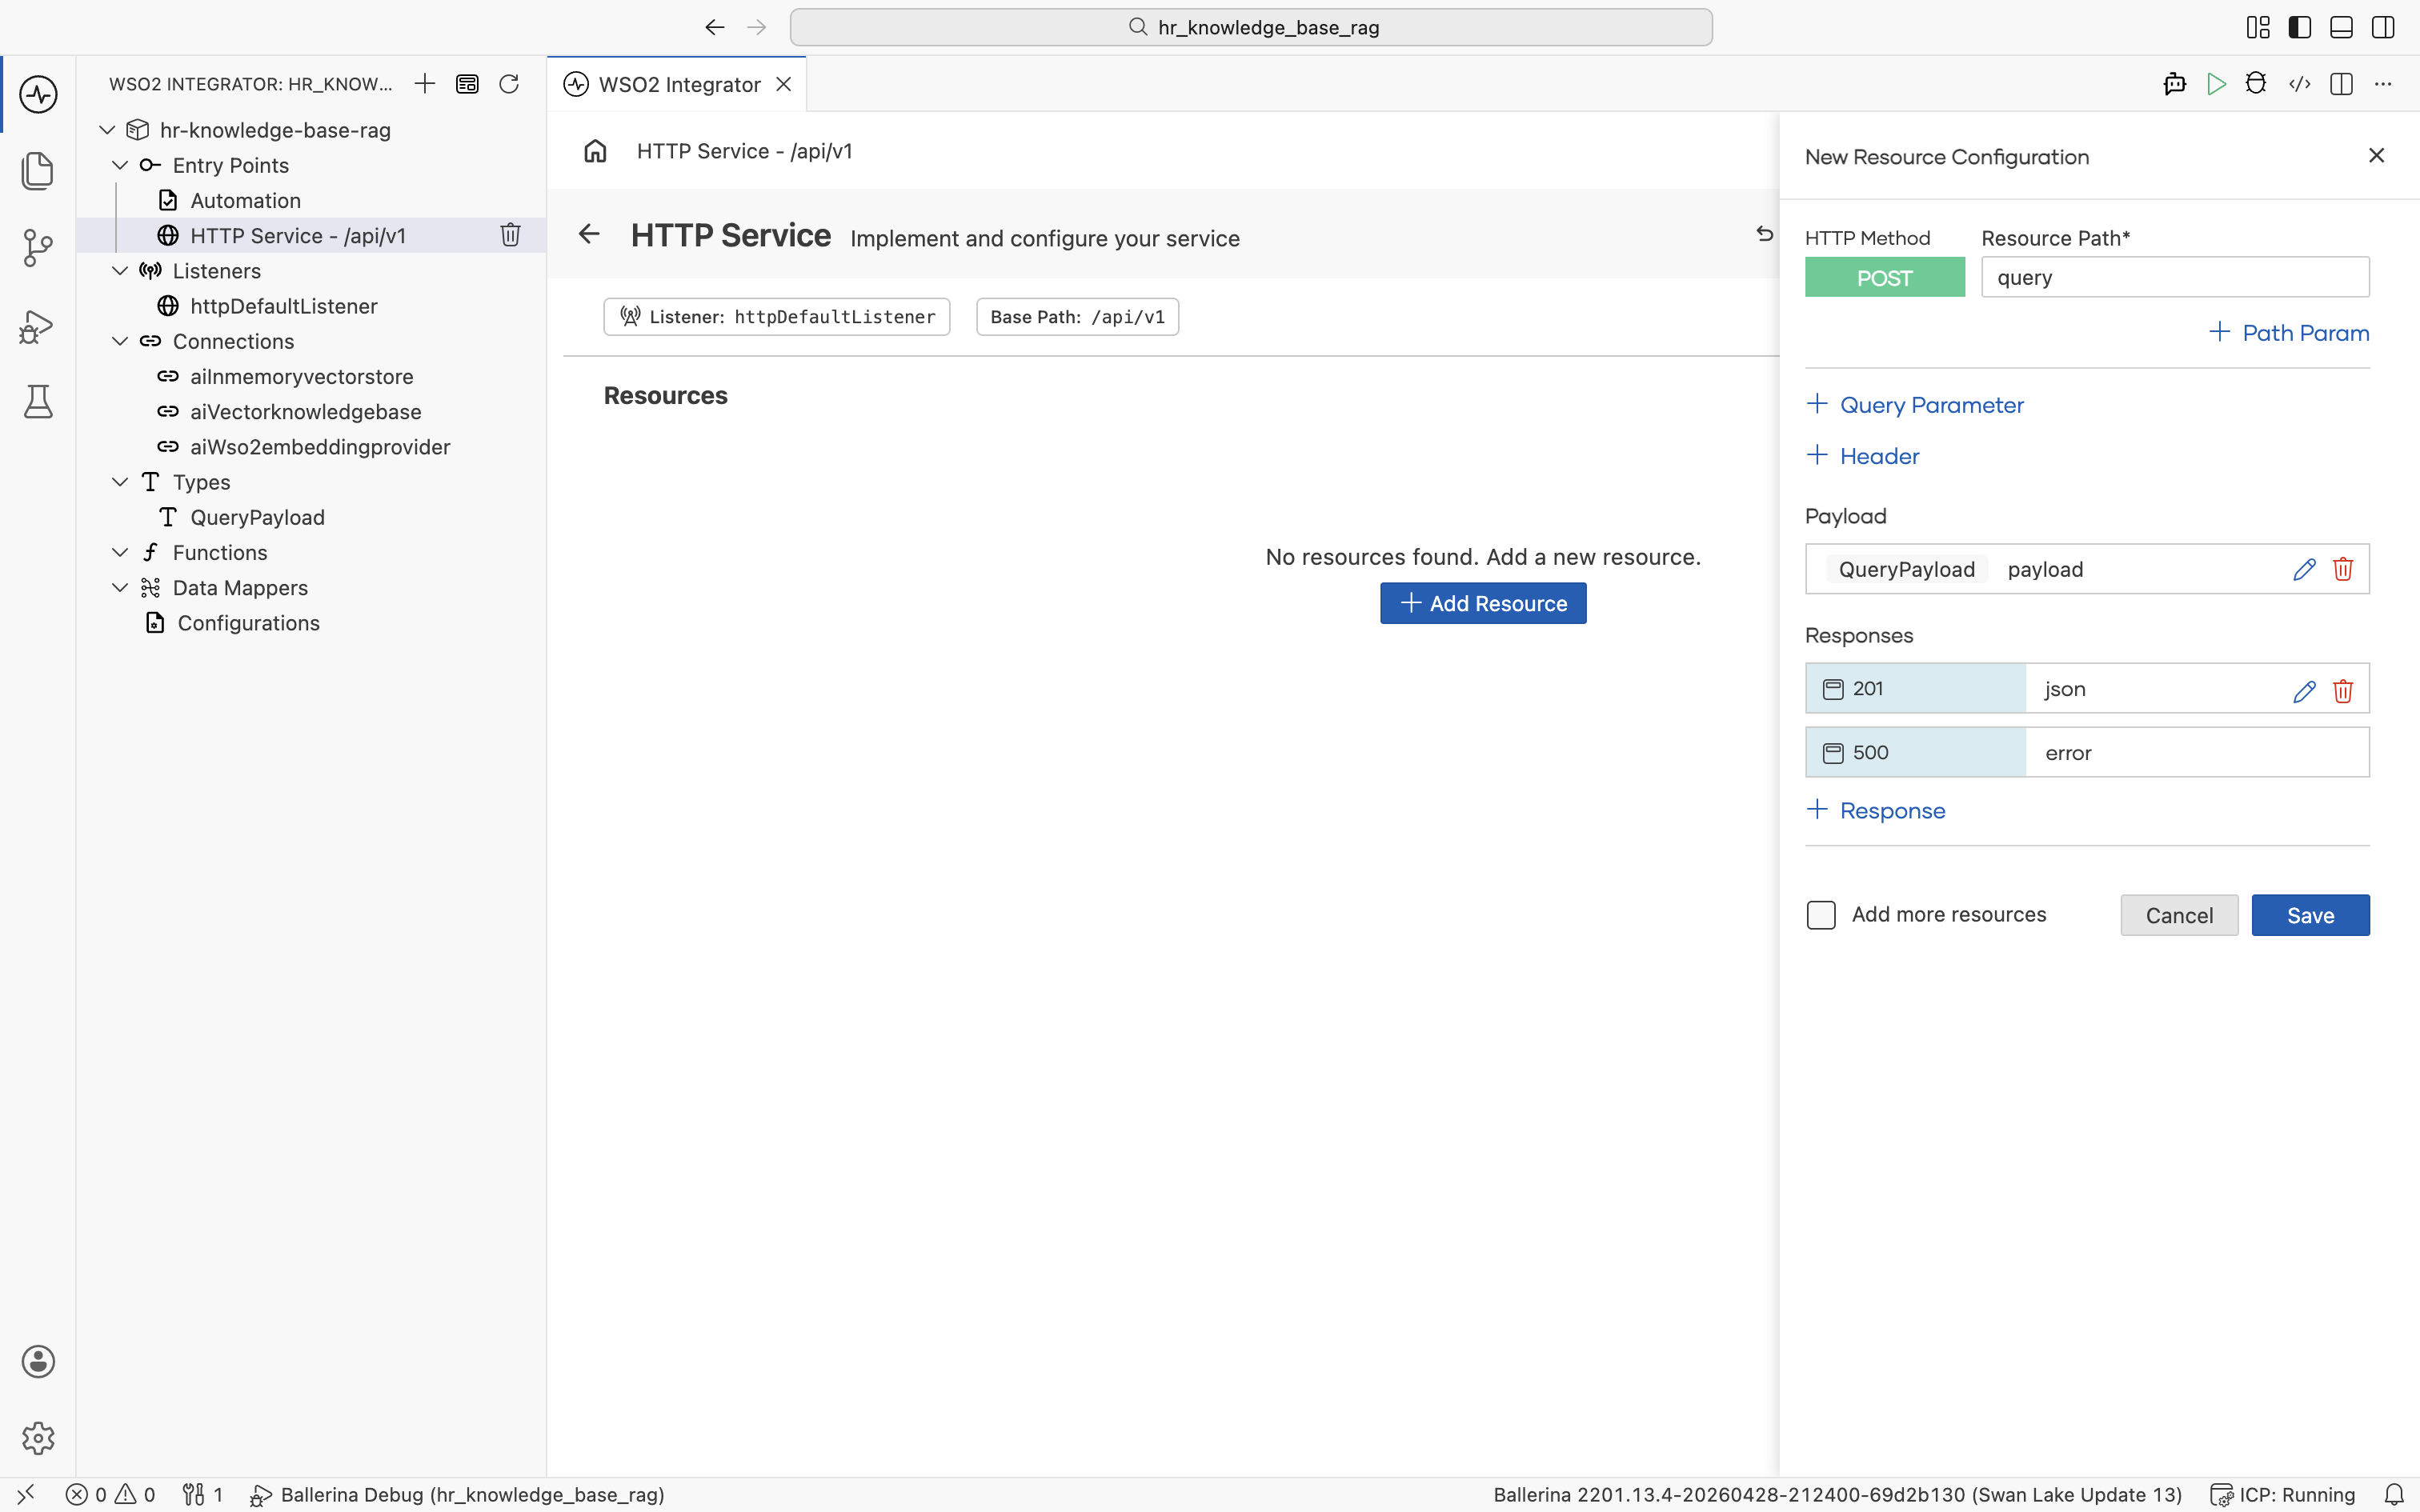
The New Resource Configuration panel opens with HTTP Method set to POST. Set:
- Resource Path:
query - Responses: keep the default
201returningjsonand500returningerror
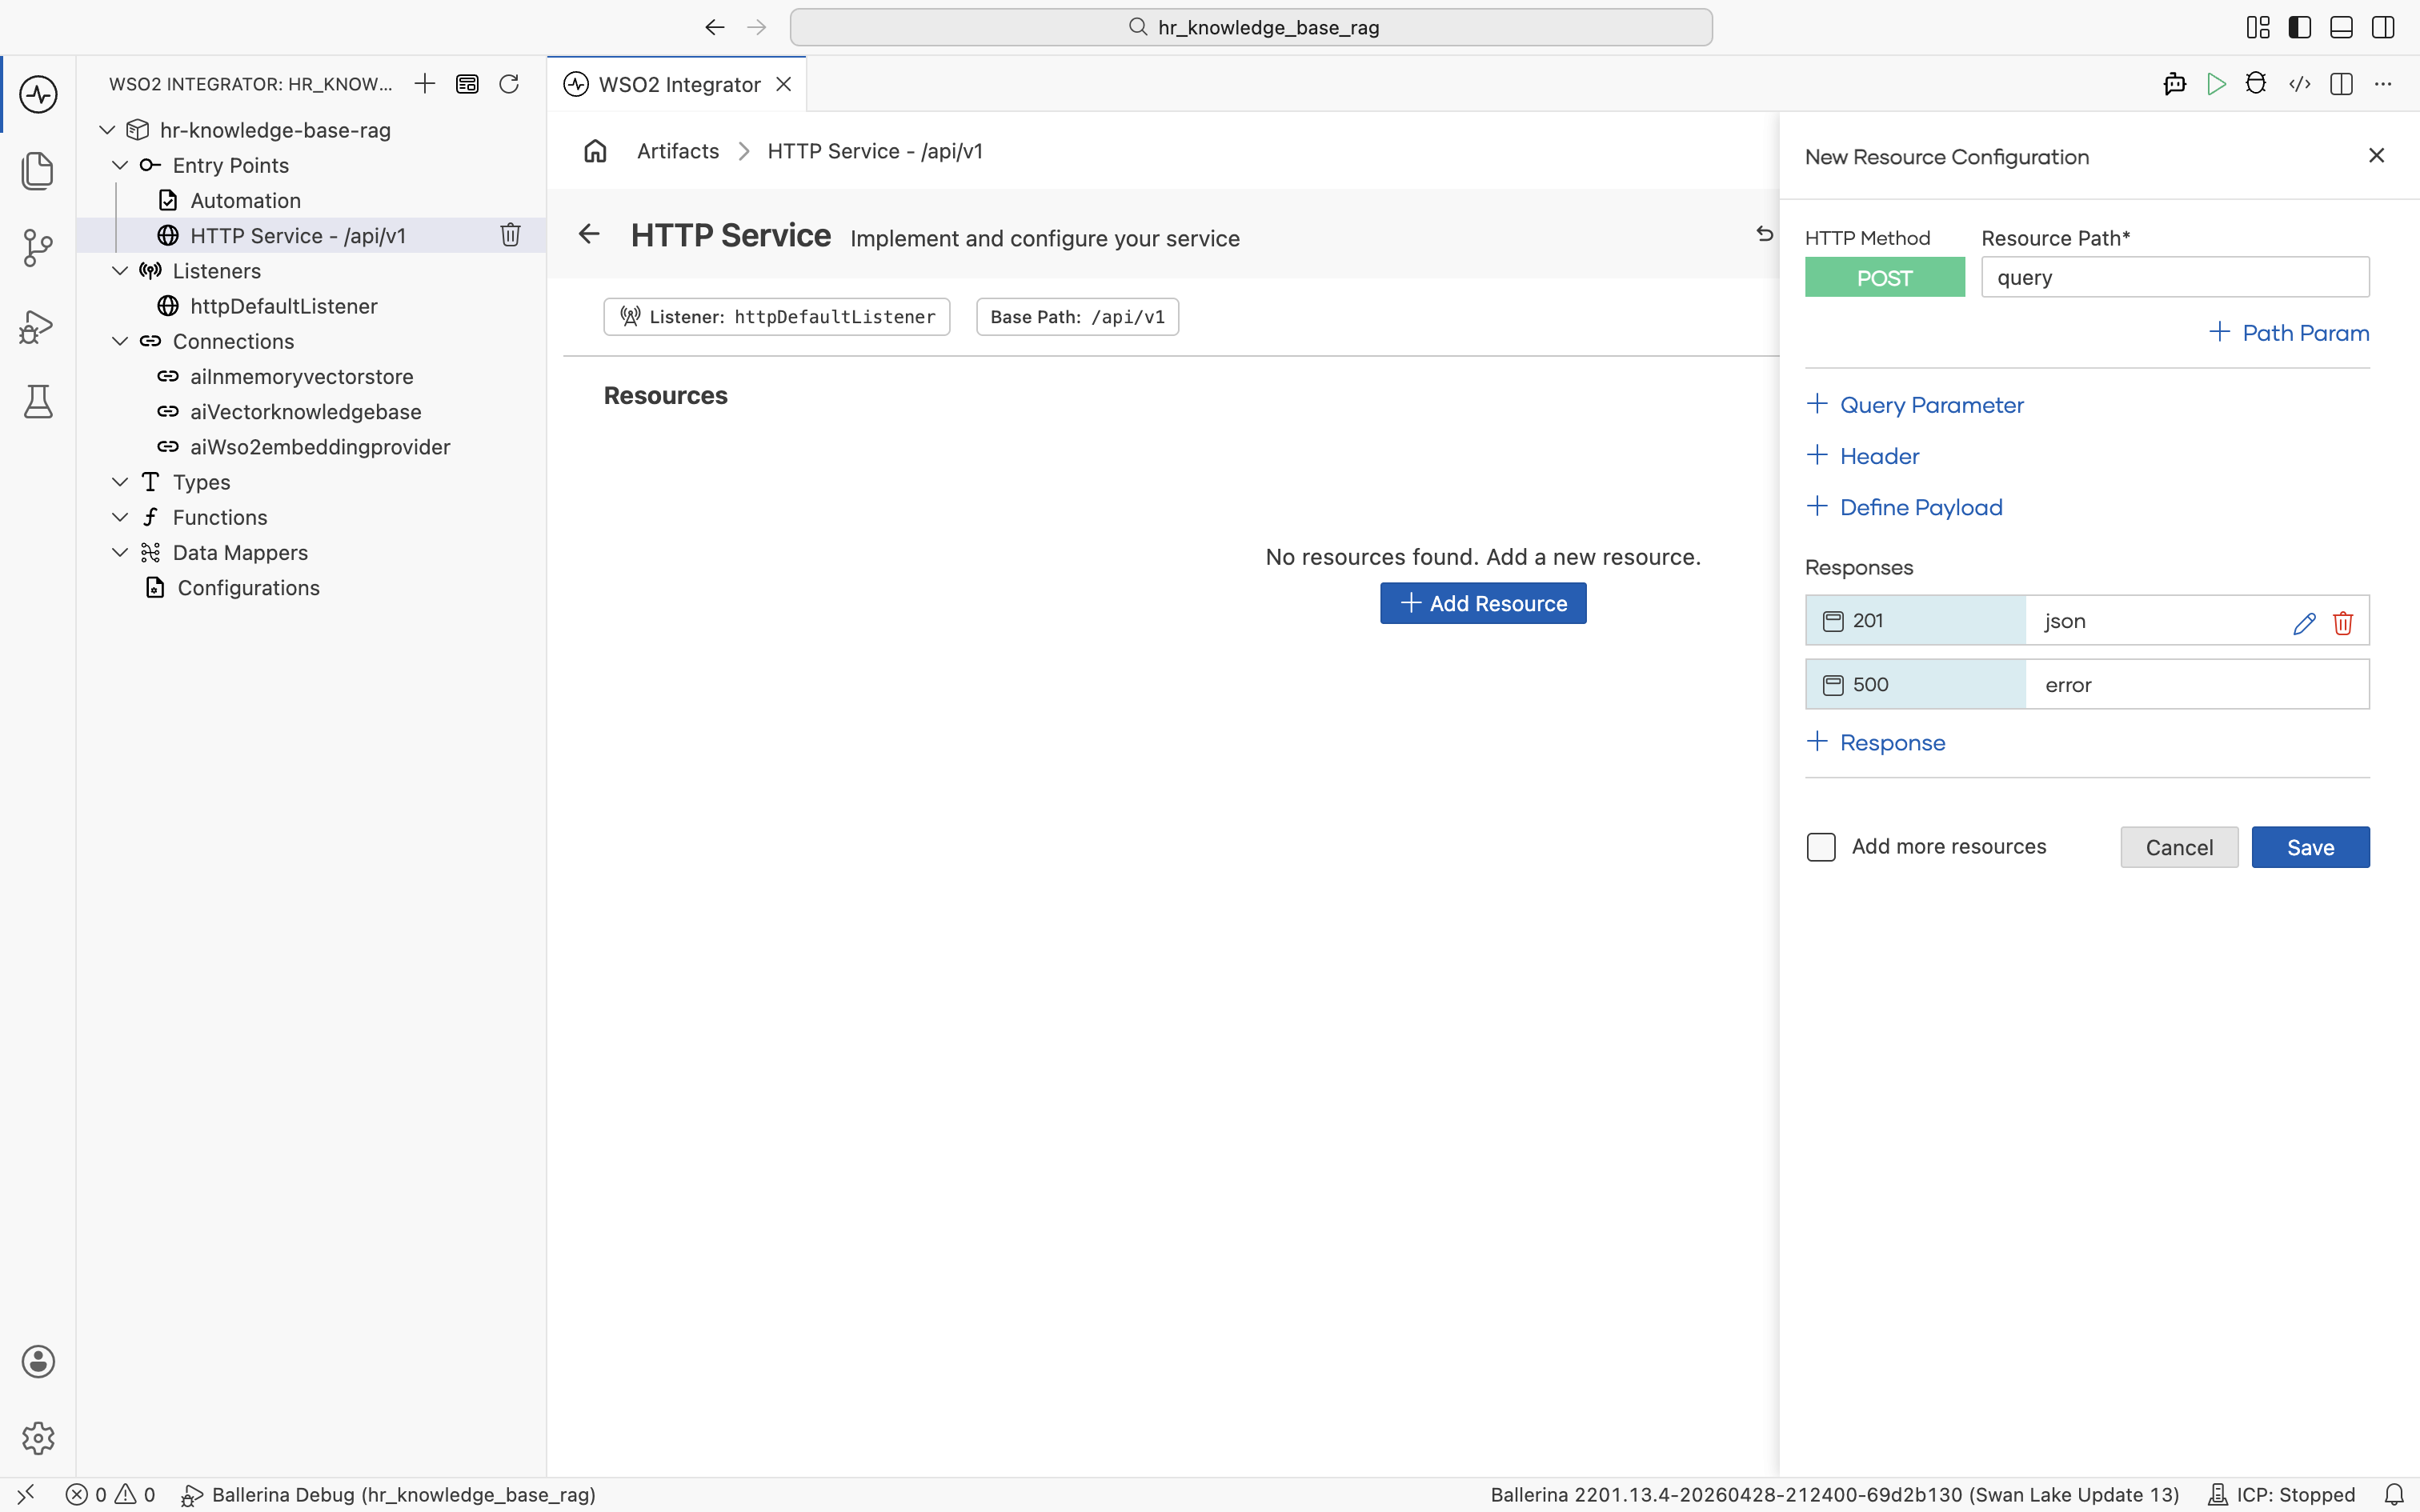
Click + Define Payload. The Define Payload dialog opens on the Import tab.
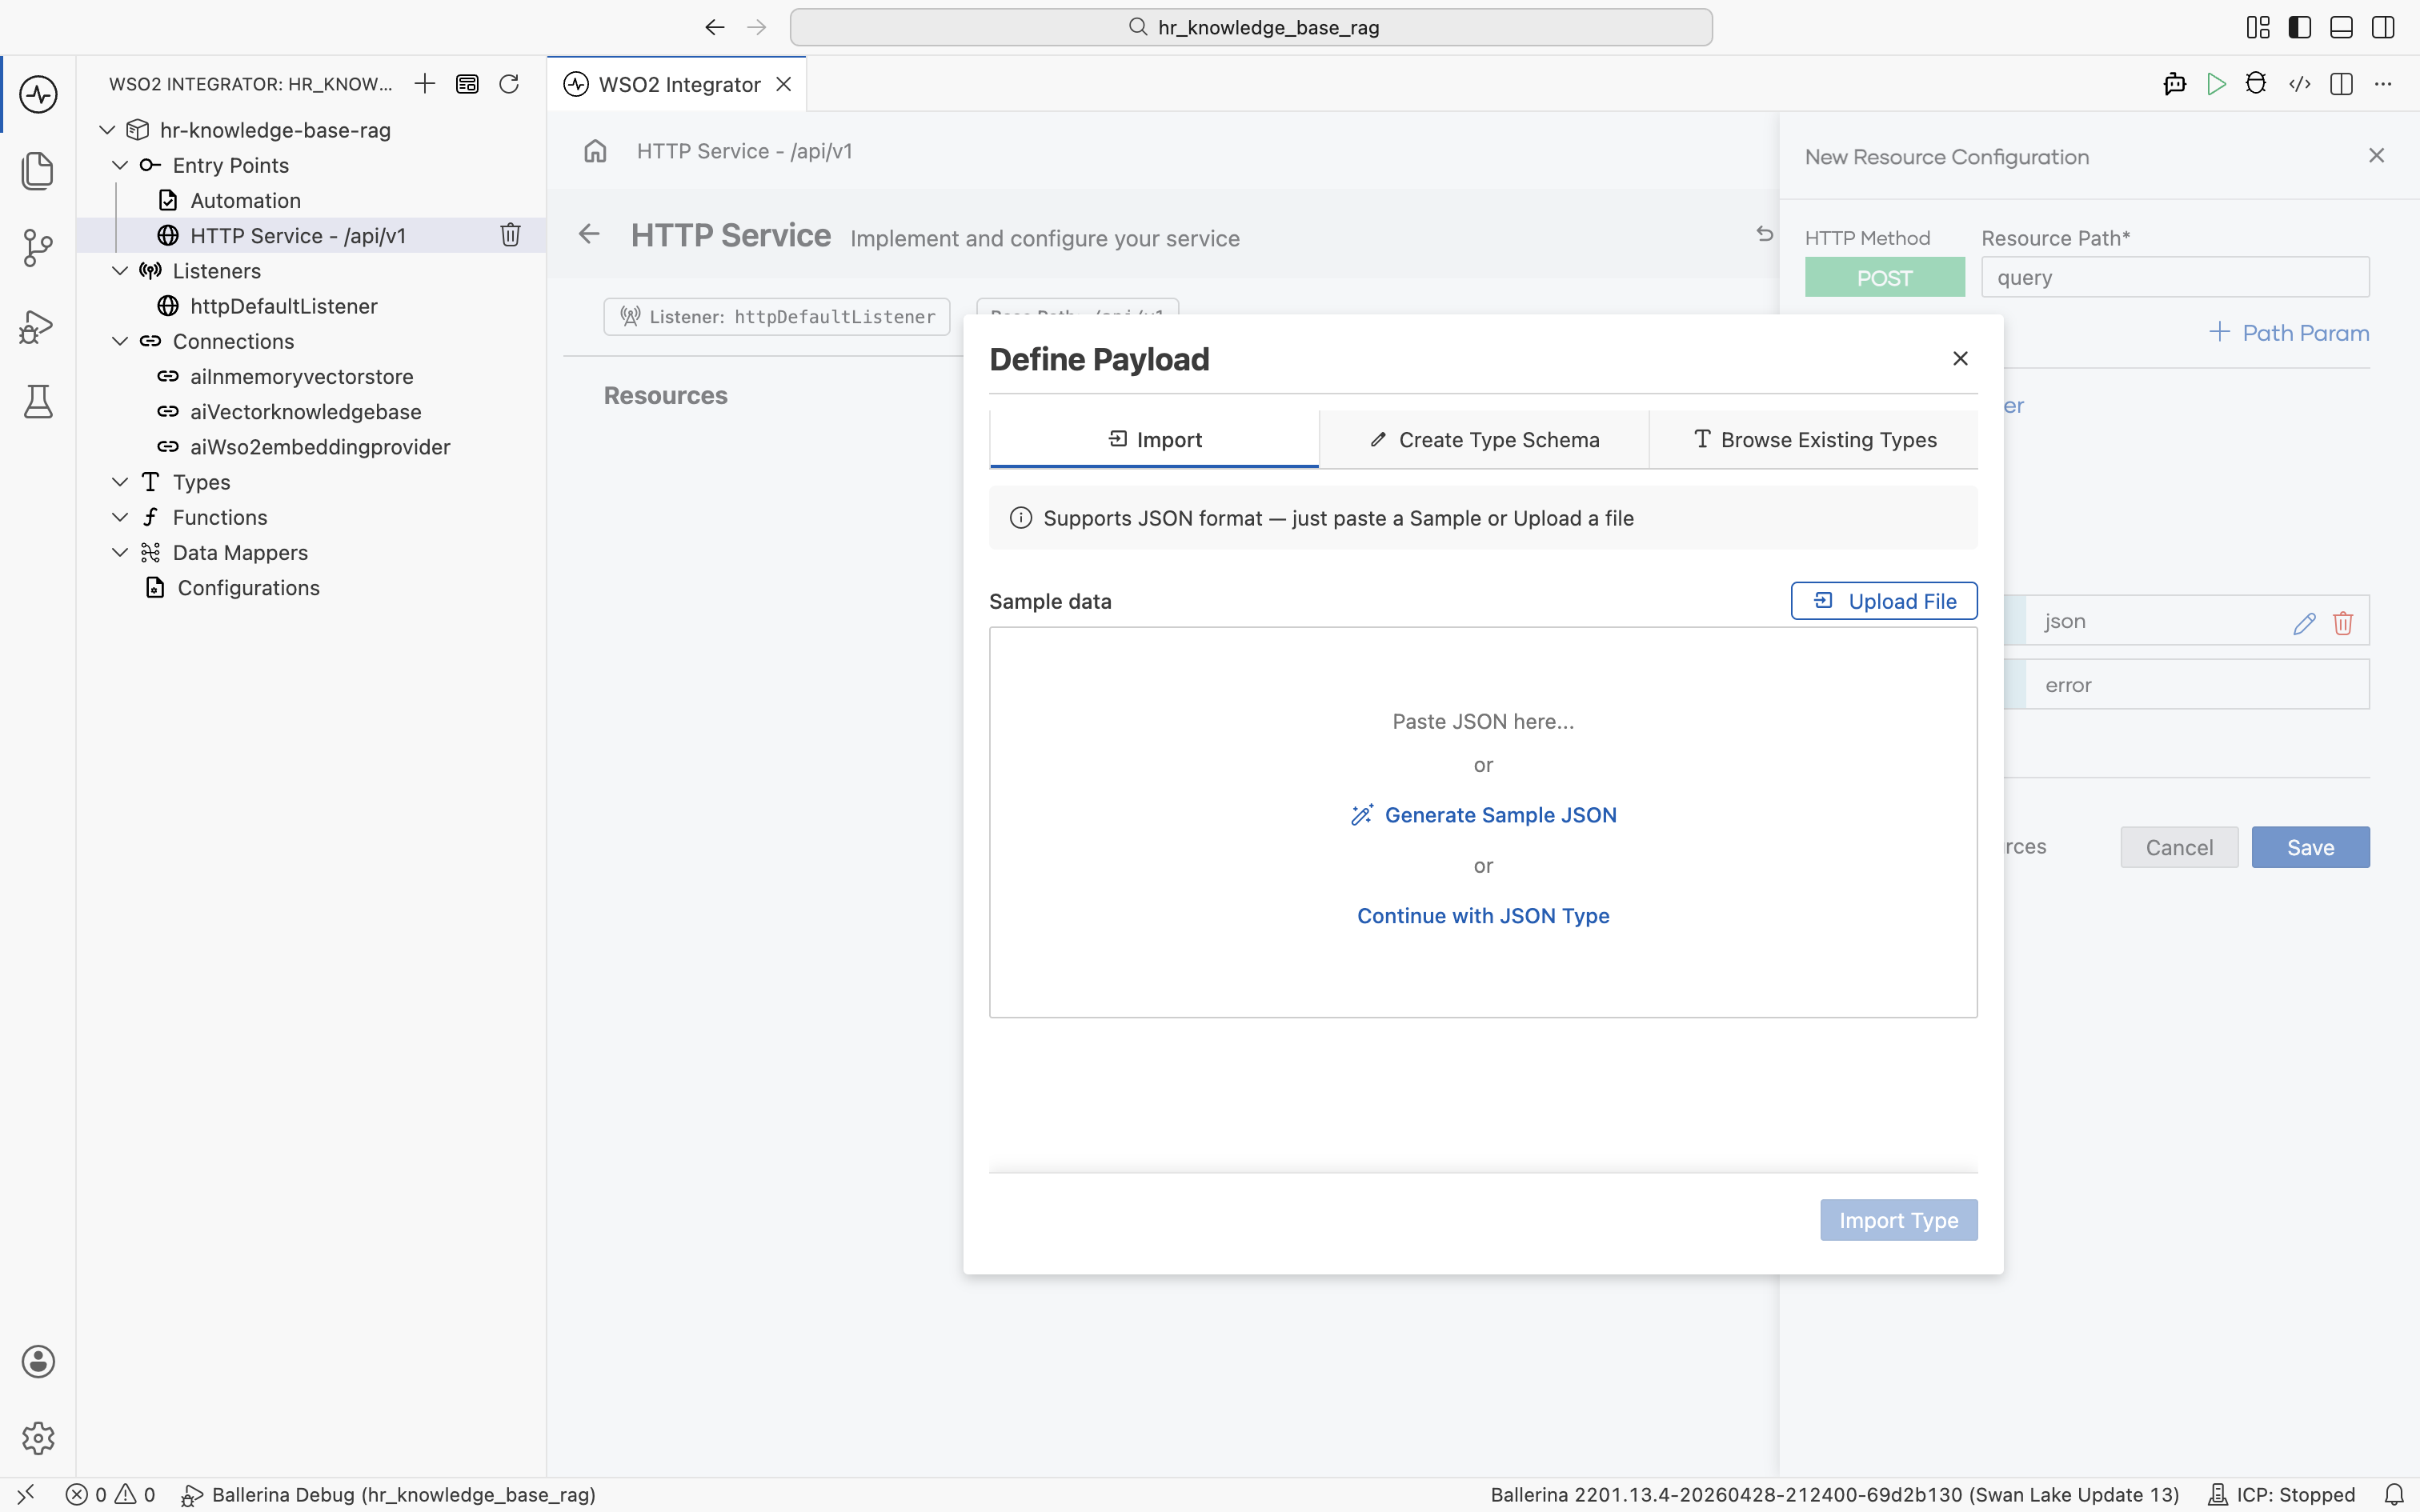
Paste the following JSON sample into Sample data and set Type Name to QueryPayload. Click Import Type.
{
  "userQuery": "What is the leave policy for new joiners?"
}
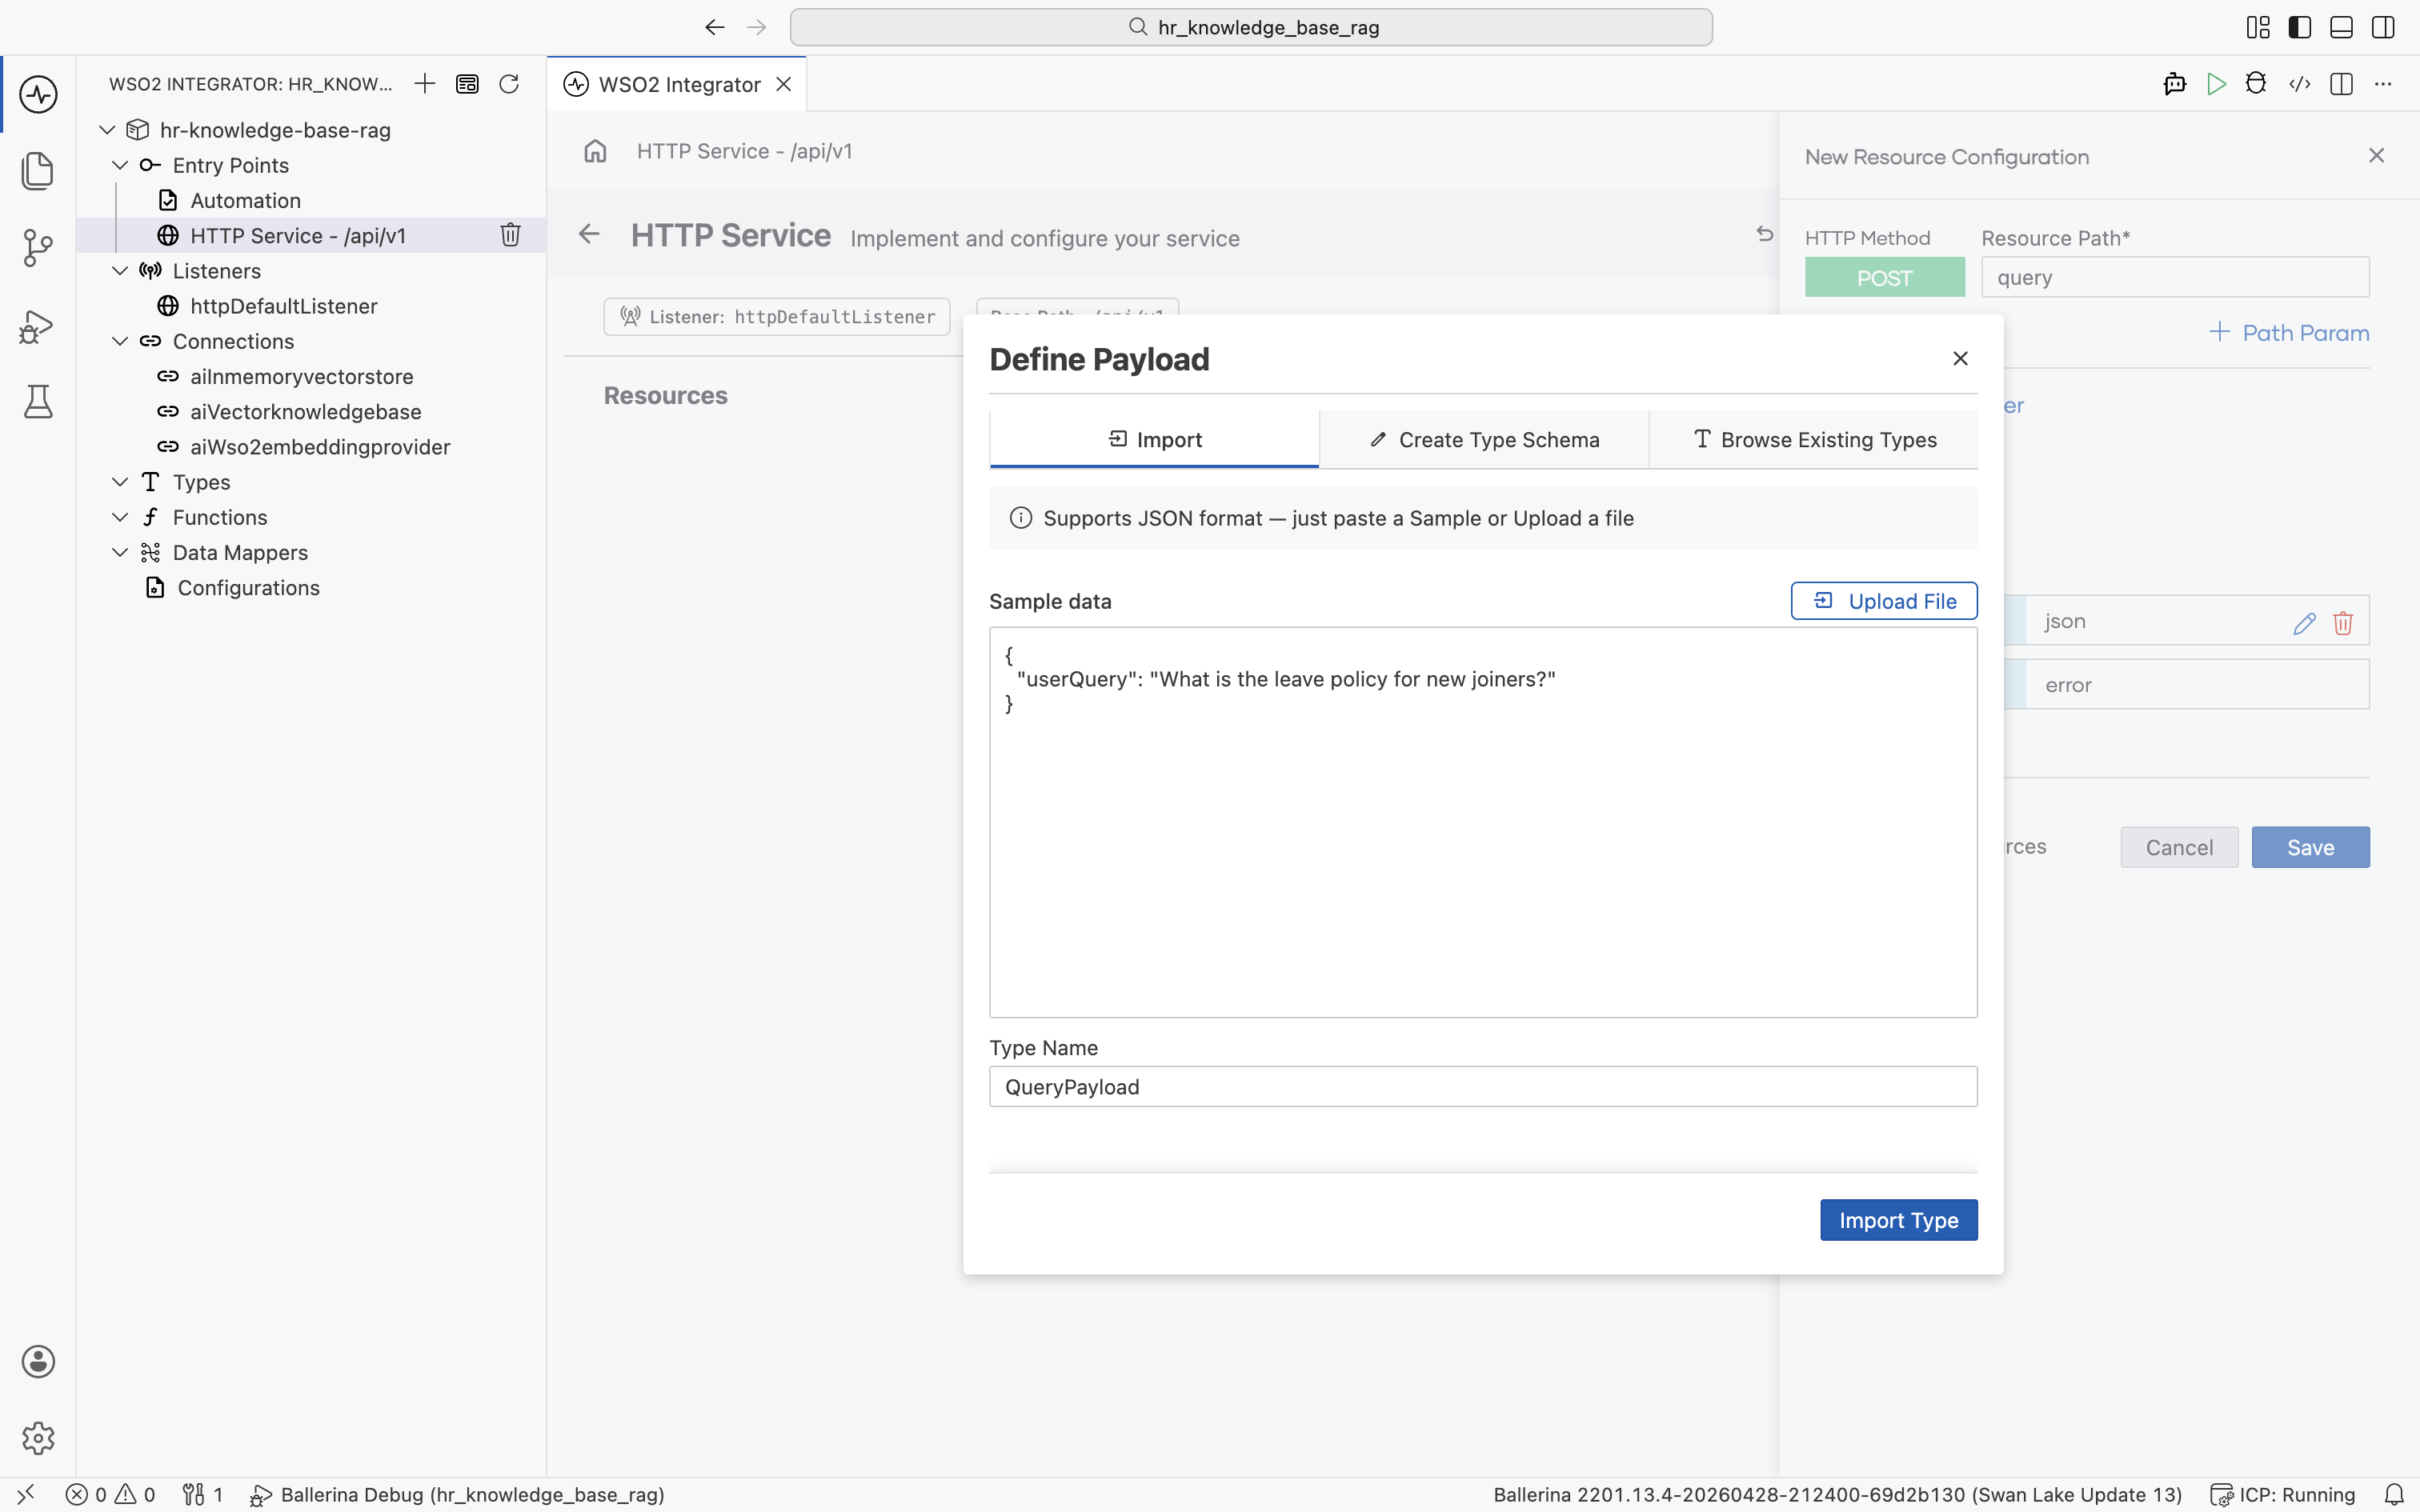
The payload is added as QueryPayload payload, and the new QueryPayload record type appears under Types in the left tree.
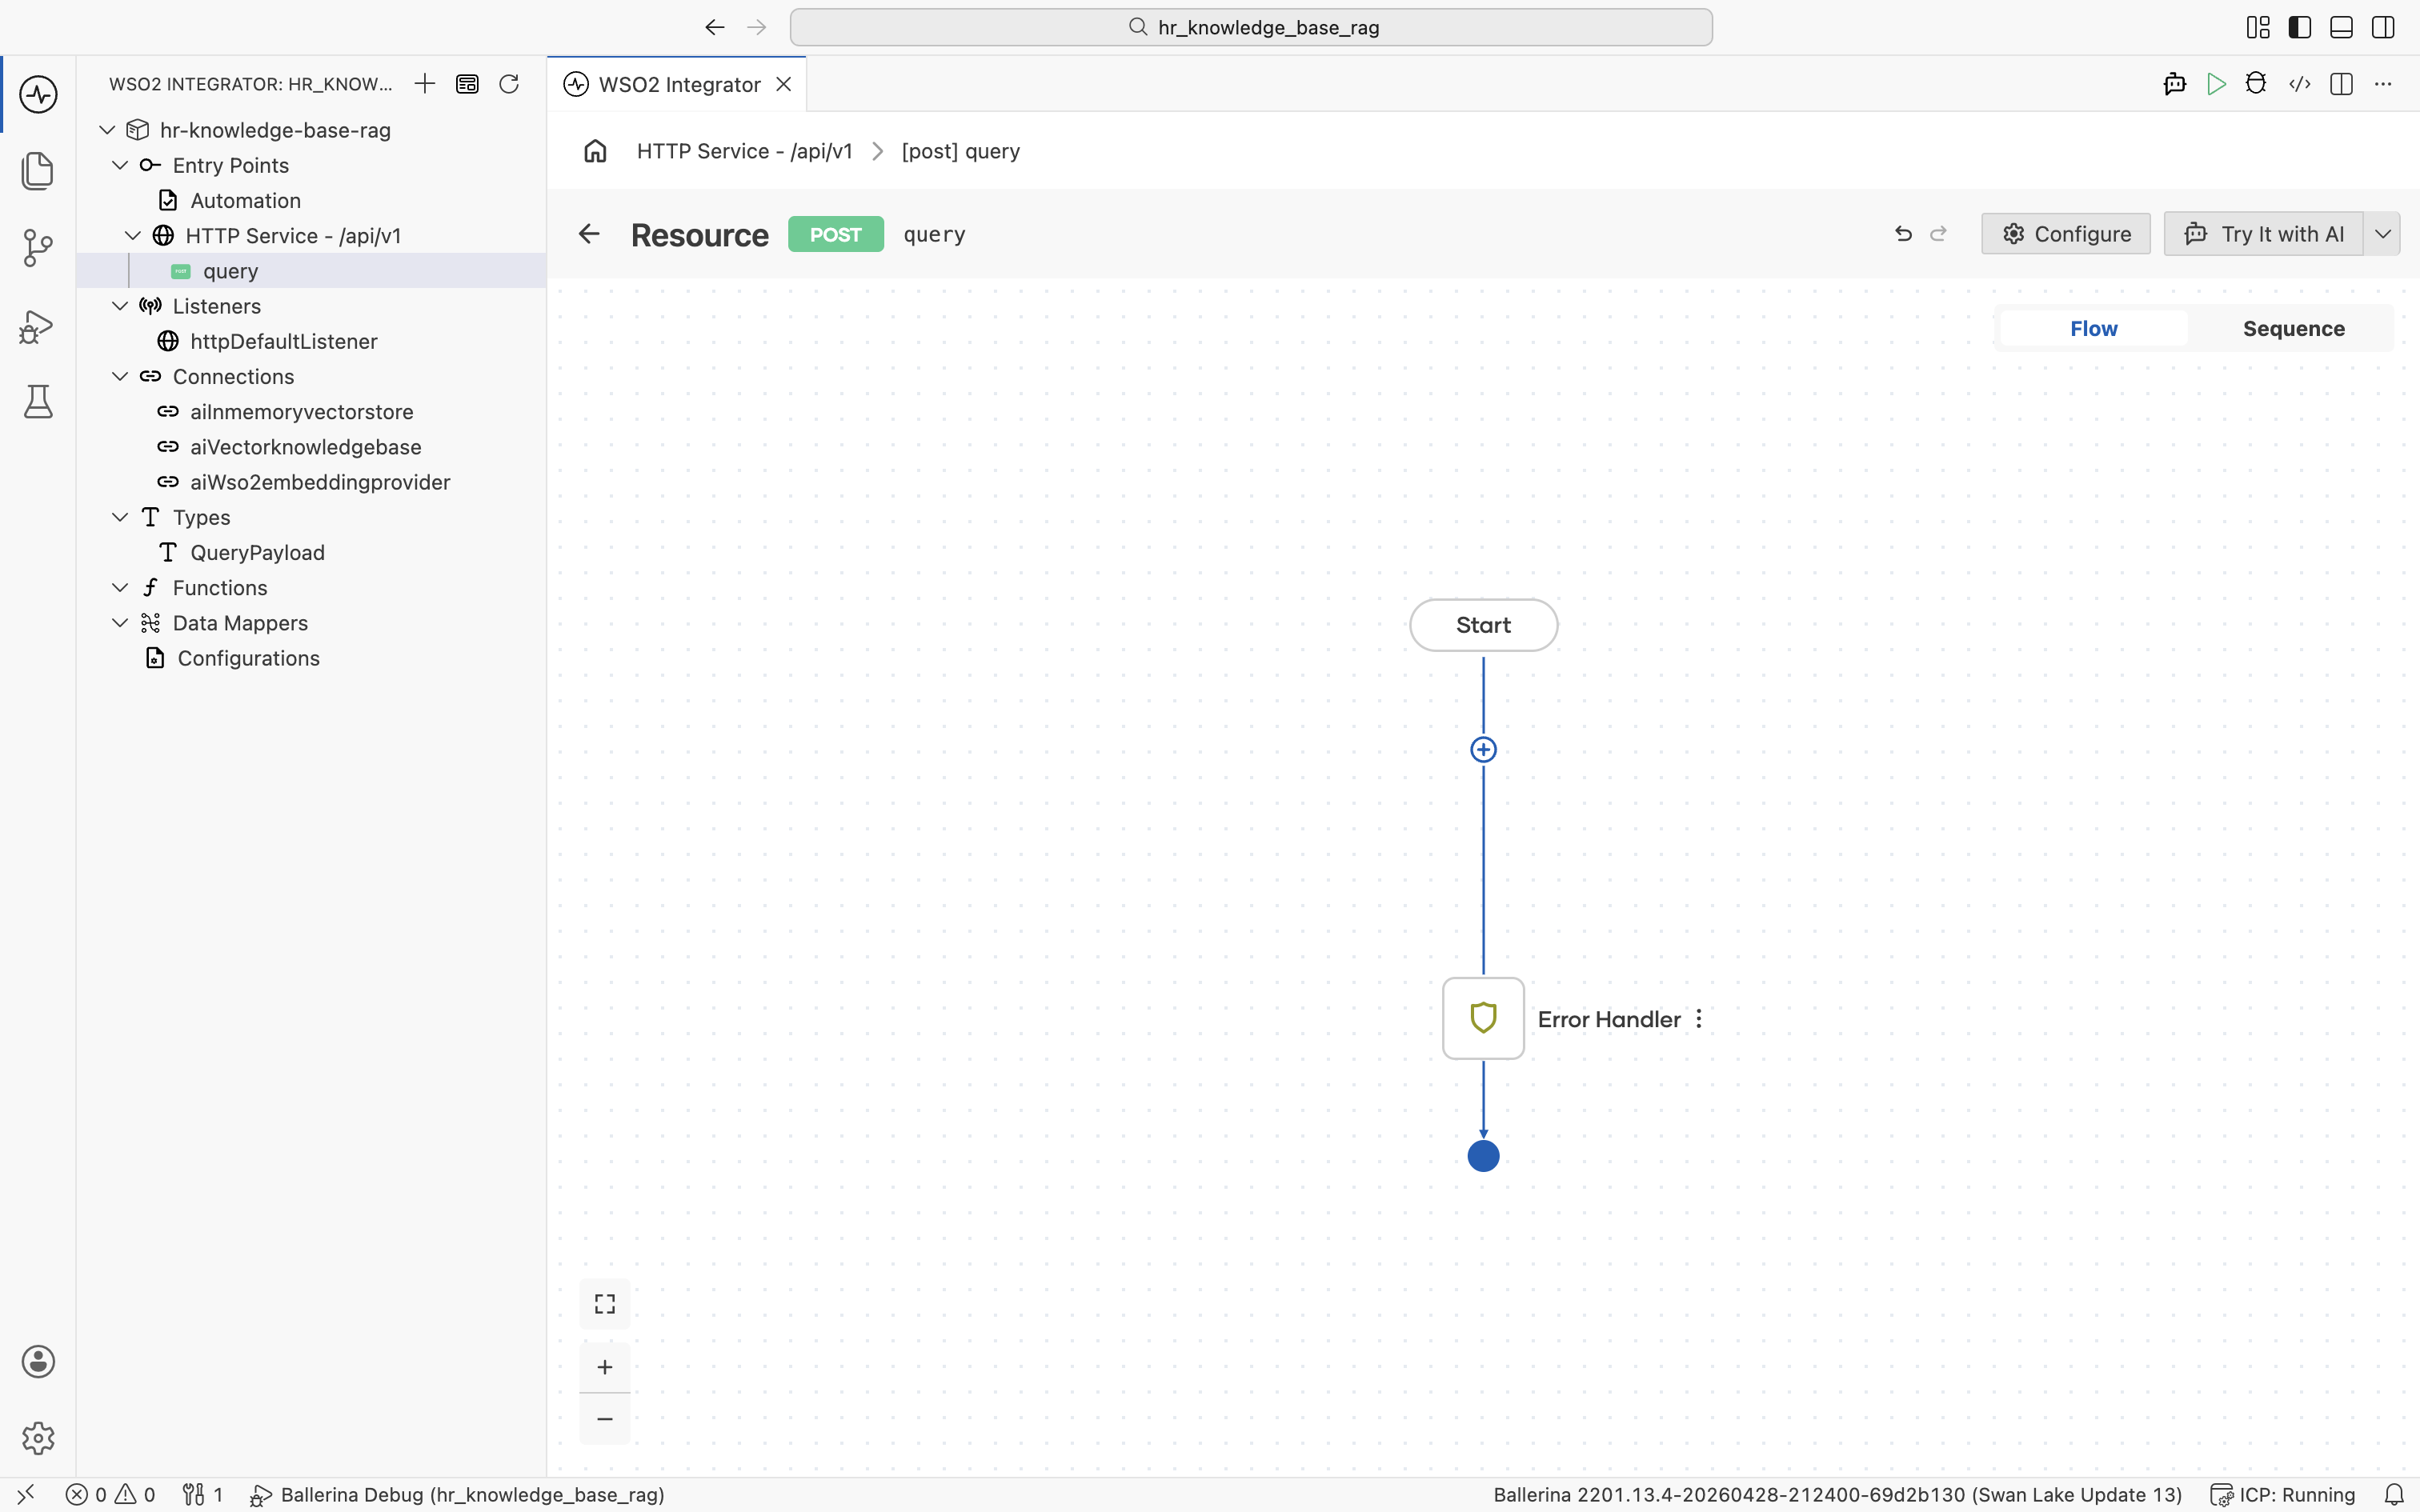
Click Save on the New Resource Configuration panel. The resource flow editor opens with an empty Start node and an Error Handler end node. The user's question is available inside the flow as payload.userQuery.
3.3 Retrieve relevant chunks
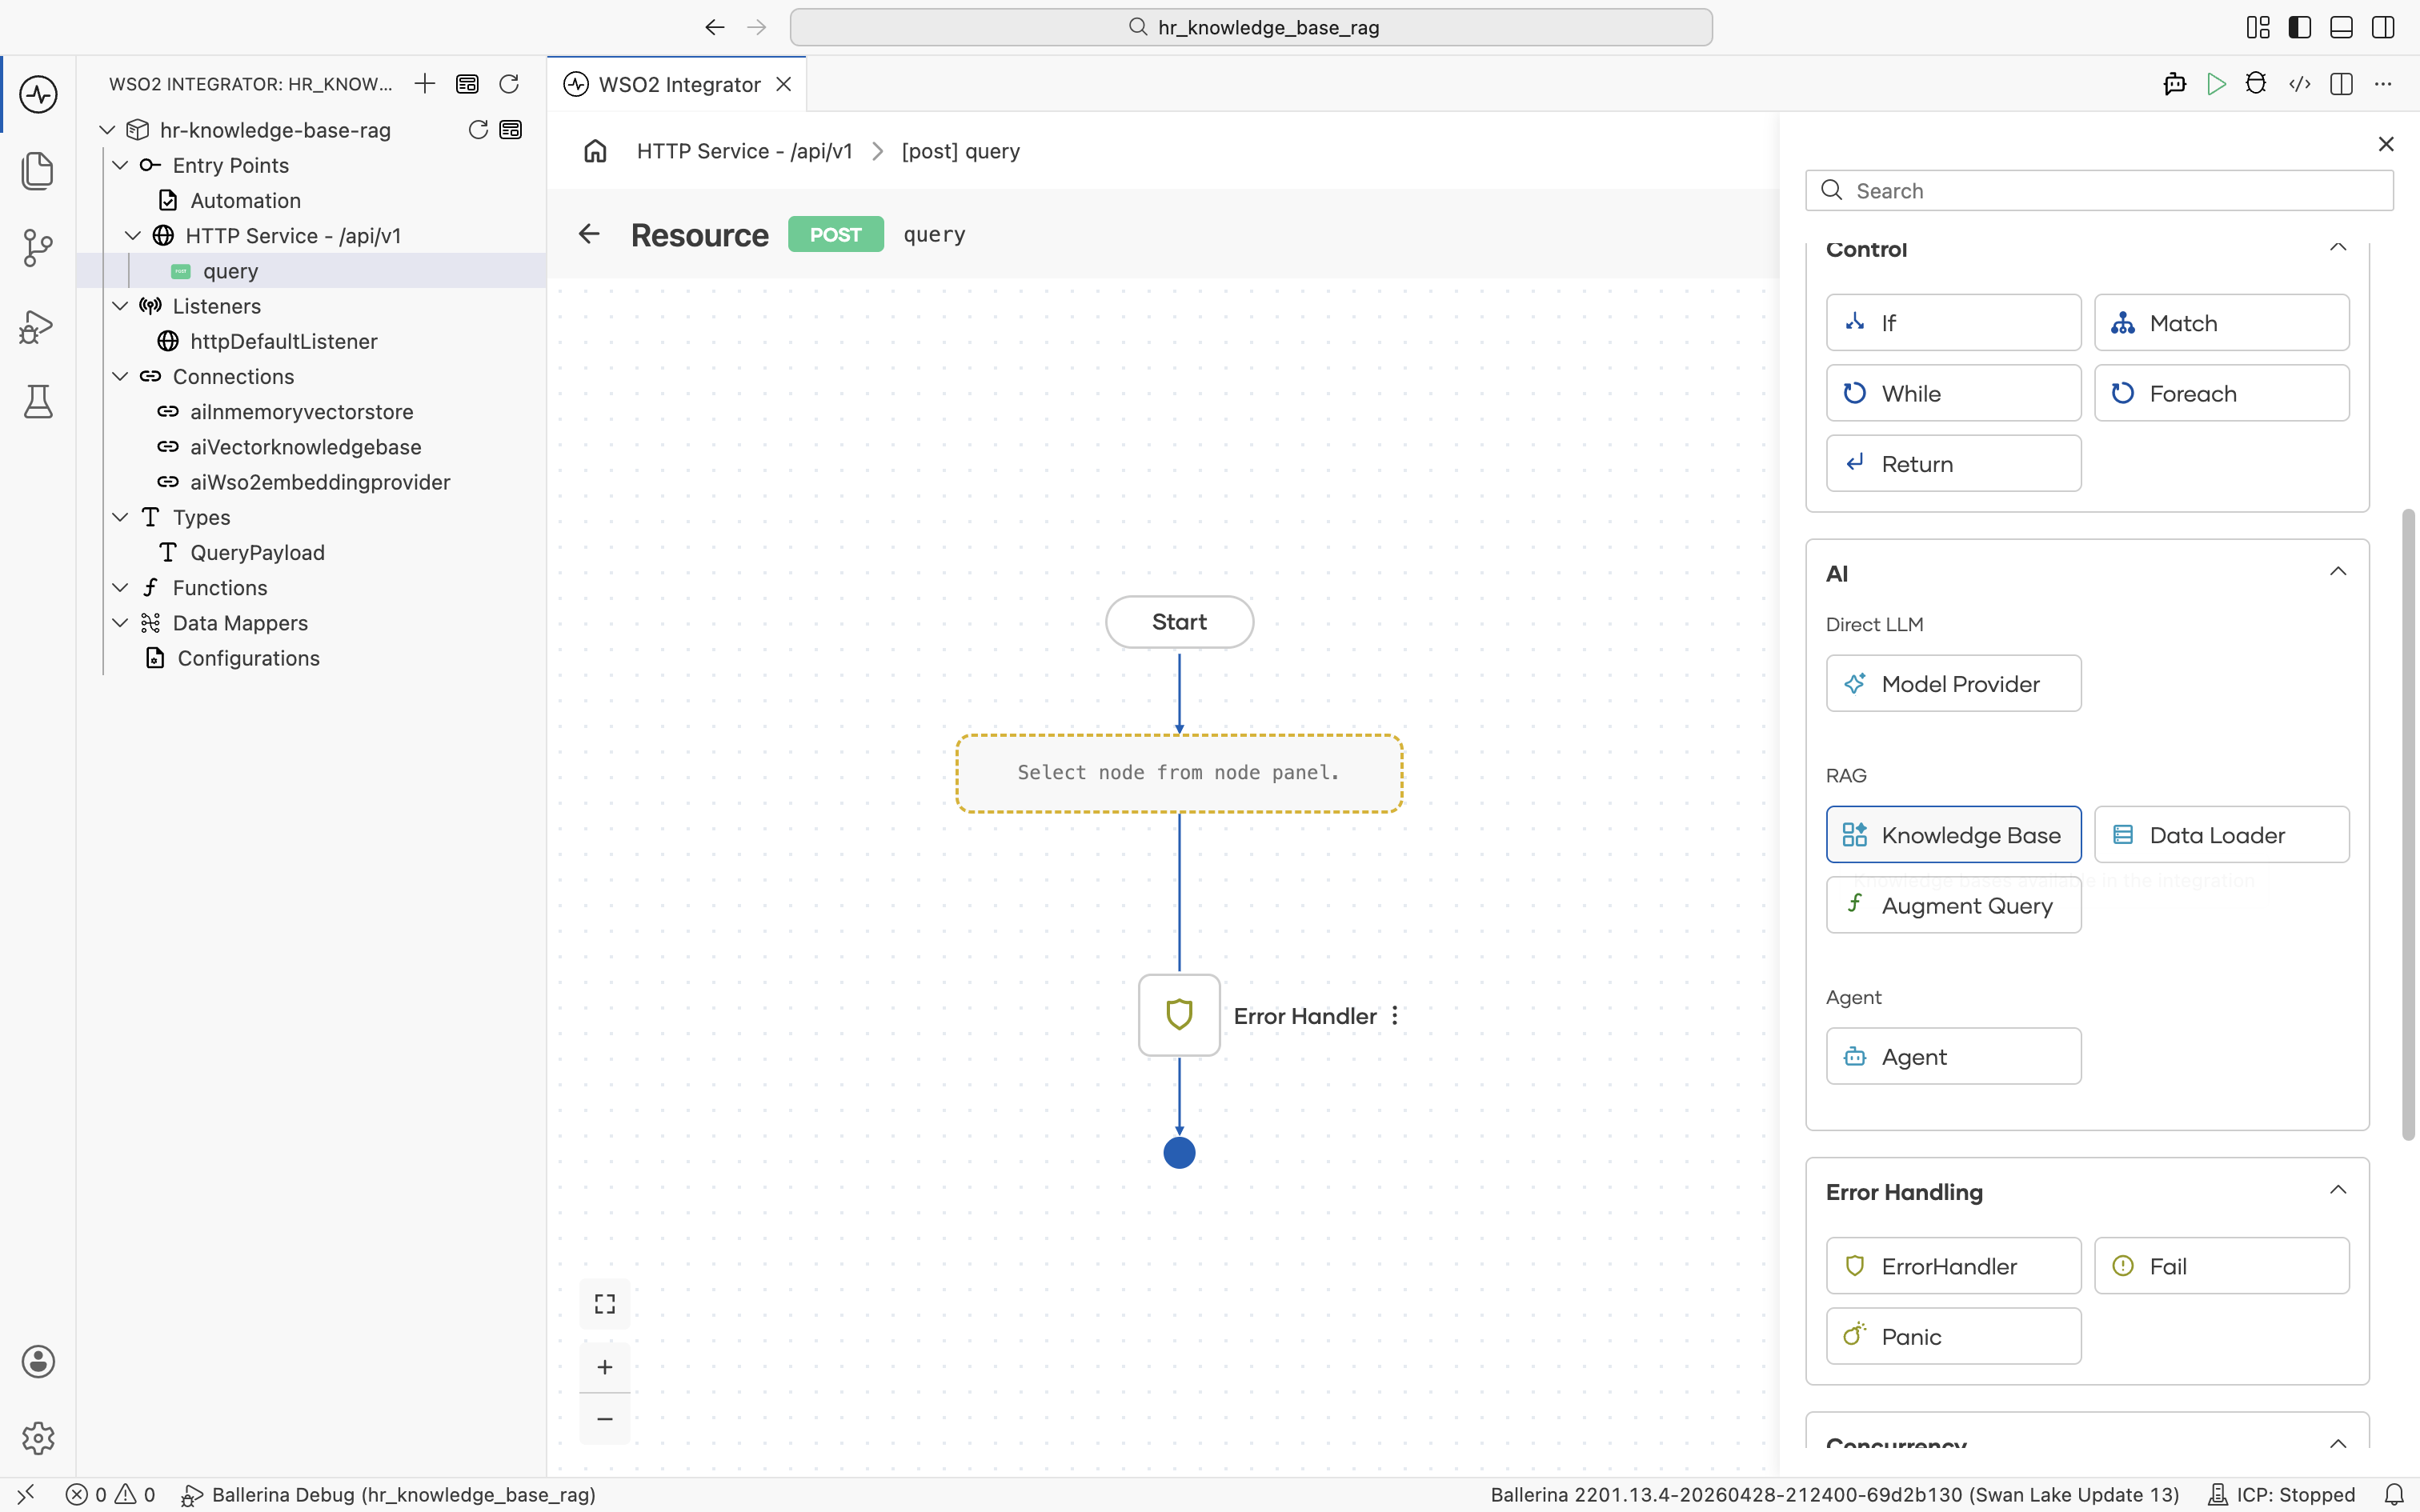
Click the + in the resource flow. The node palette opens. Under AI > RAG, click Knowledge Base.
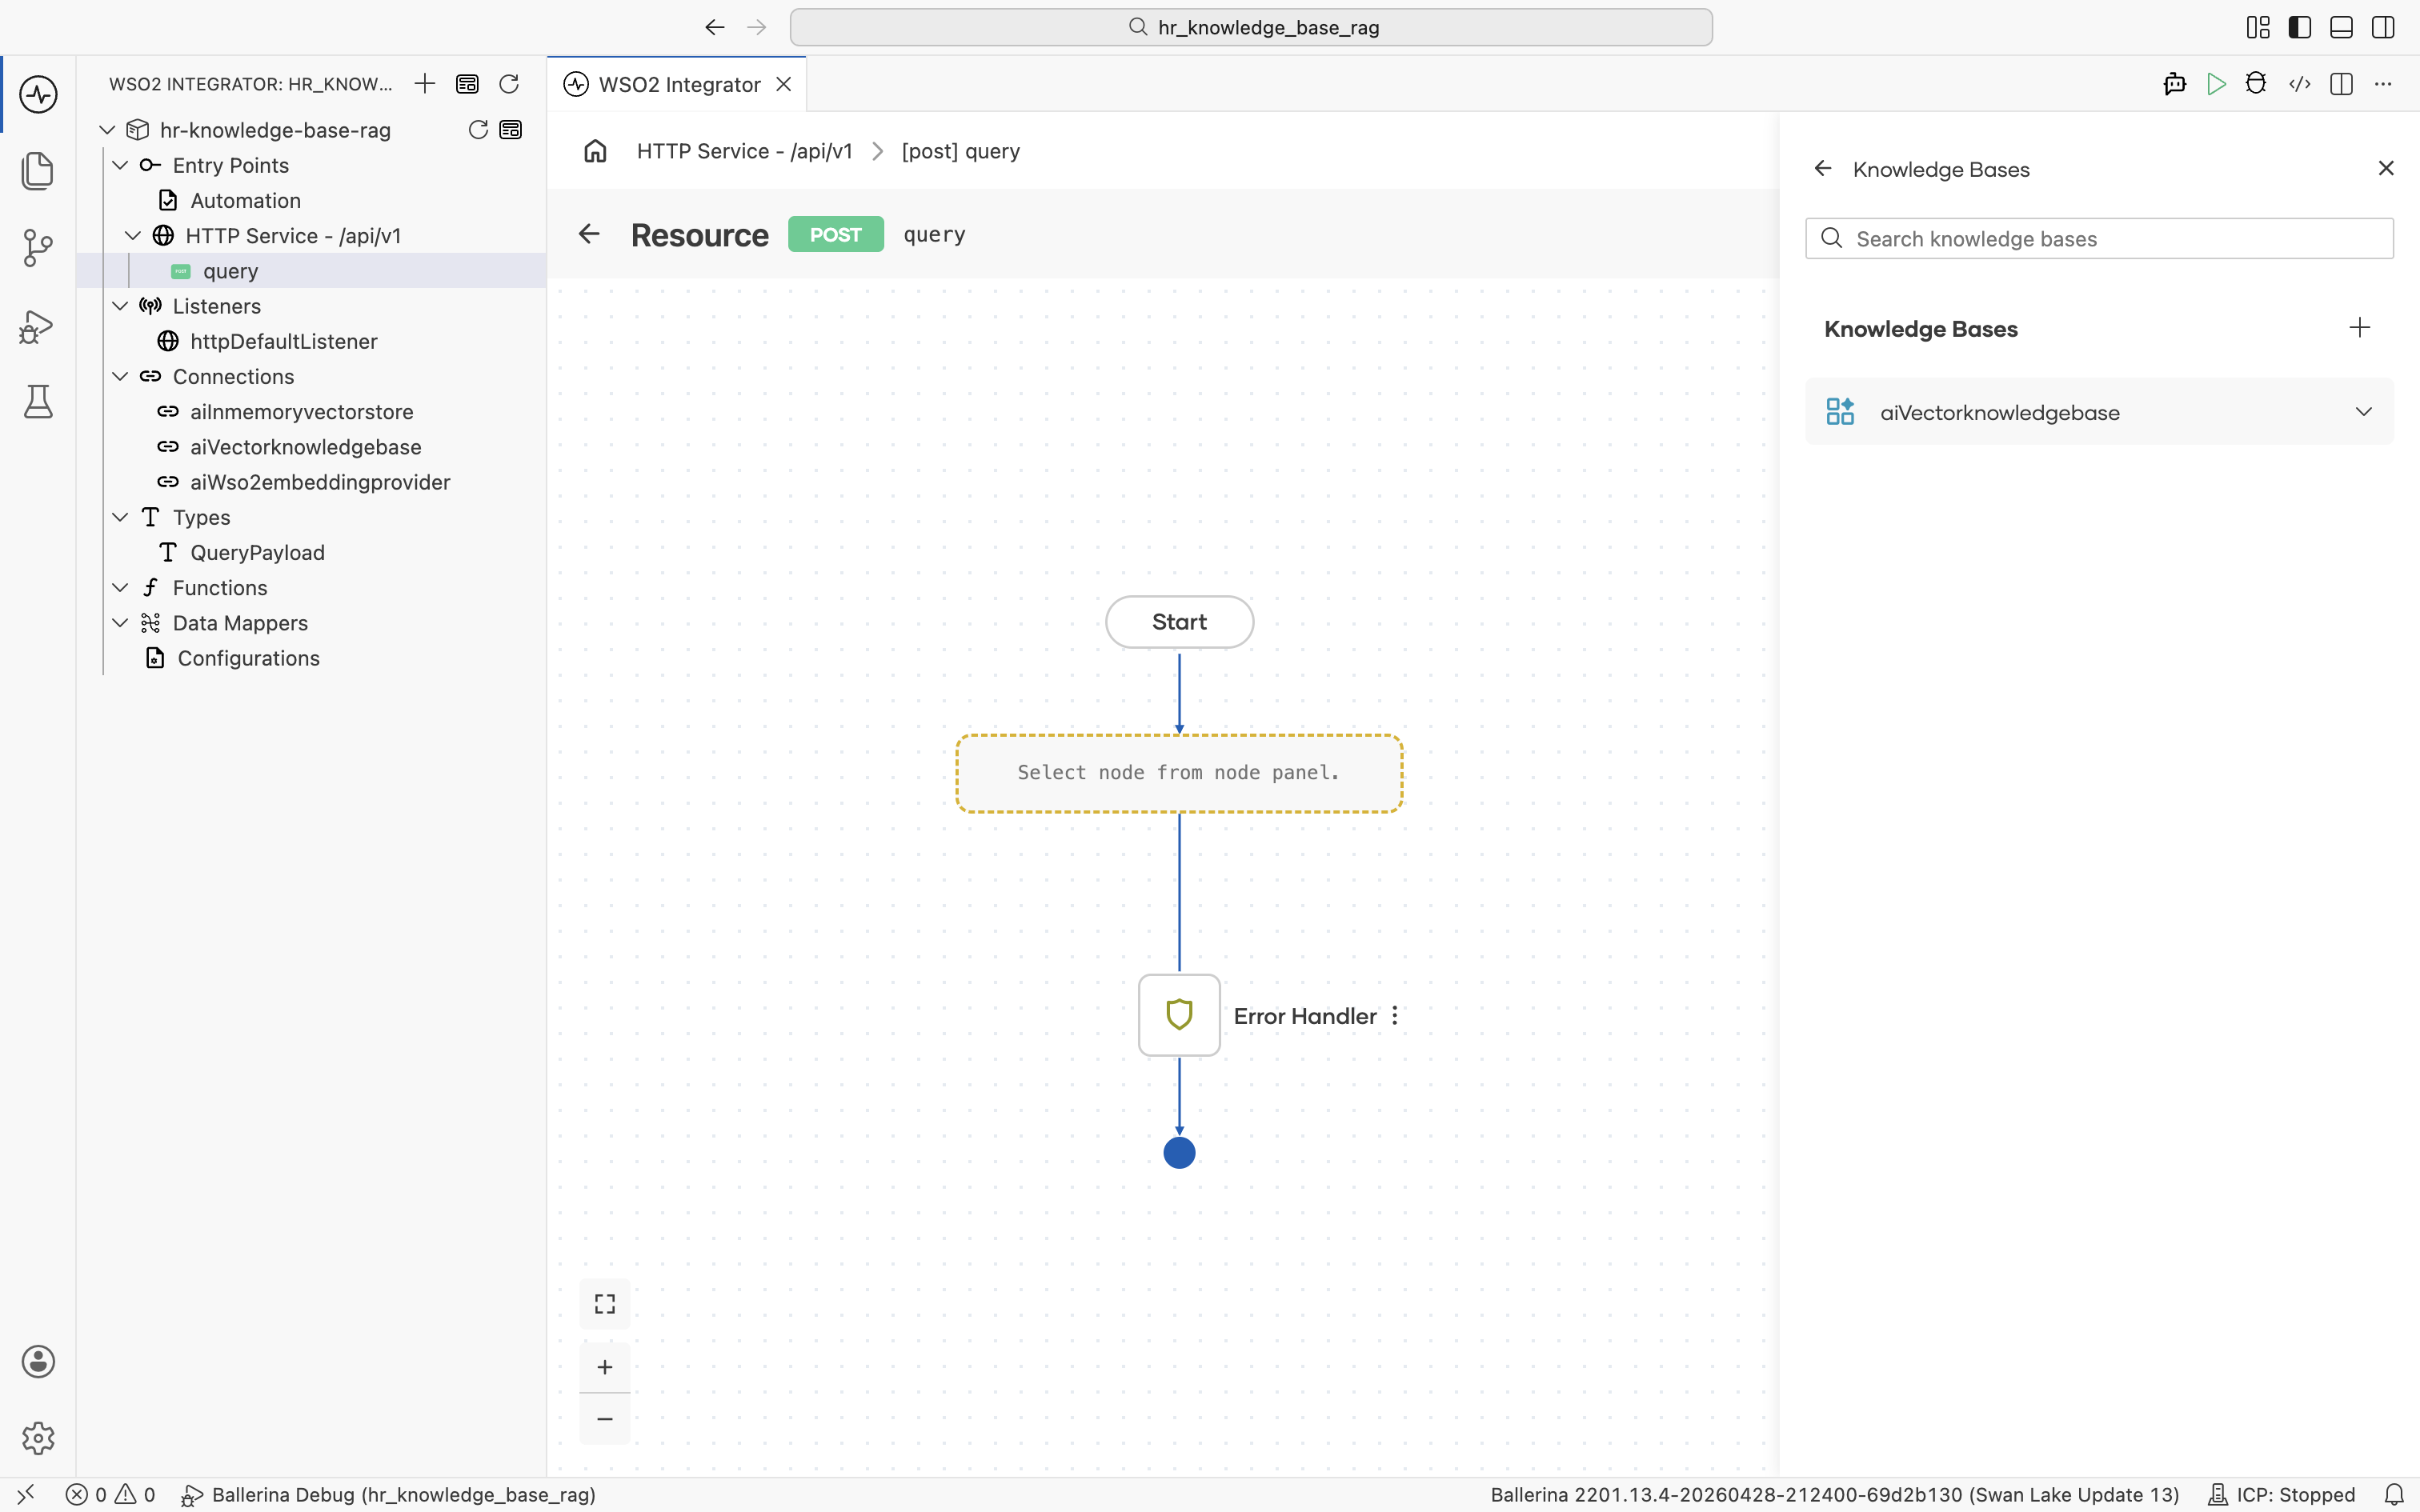
The Knowledge Bases panel lists aiVectorknowledgebase (the same connection you created in the Automation).
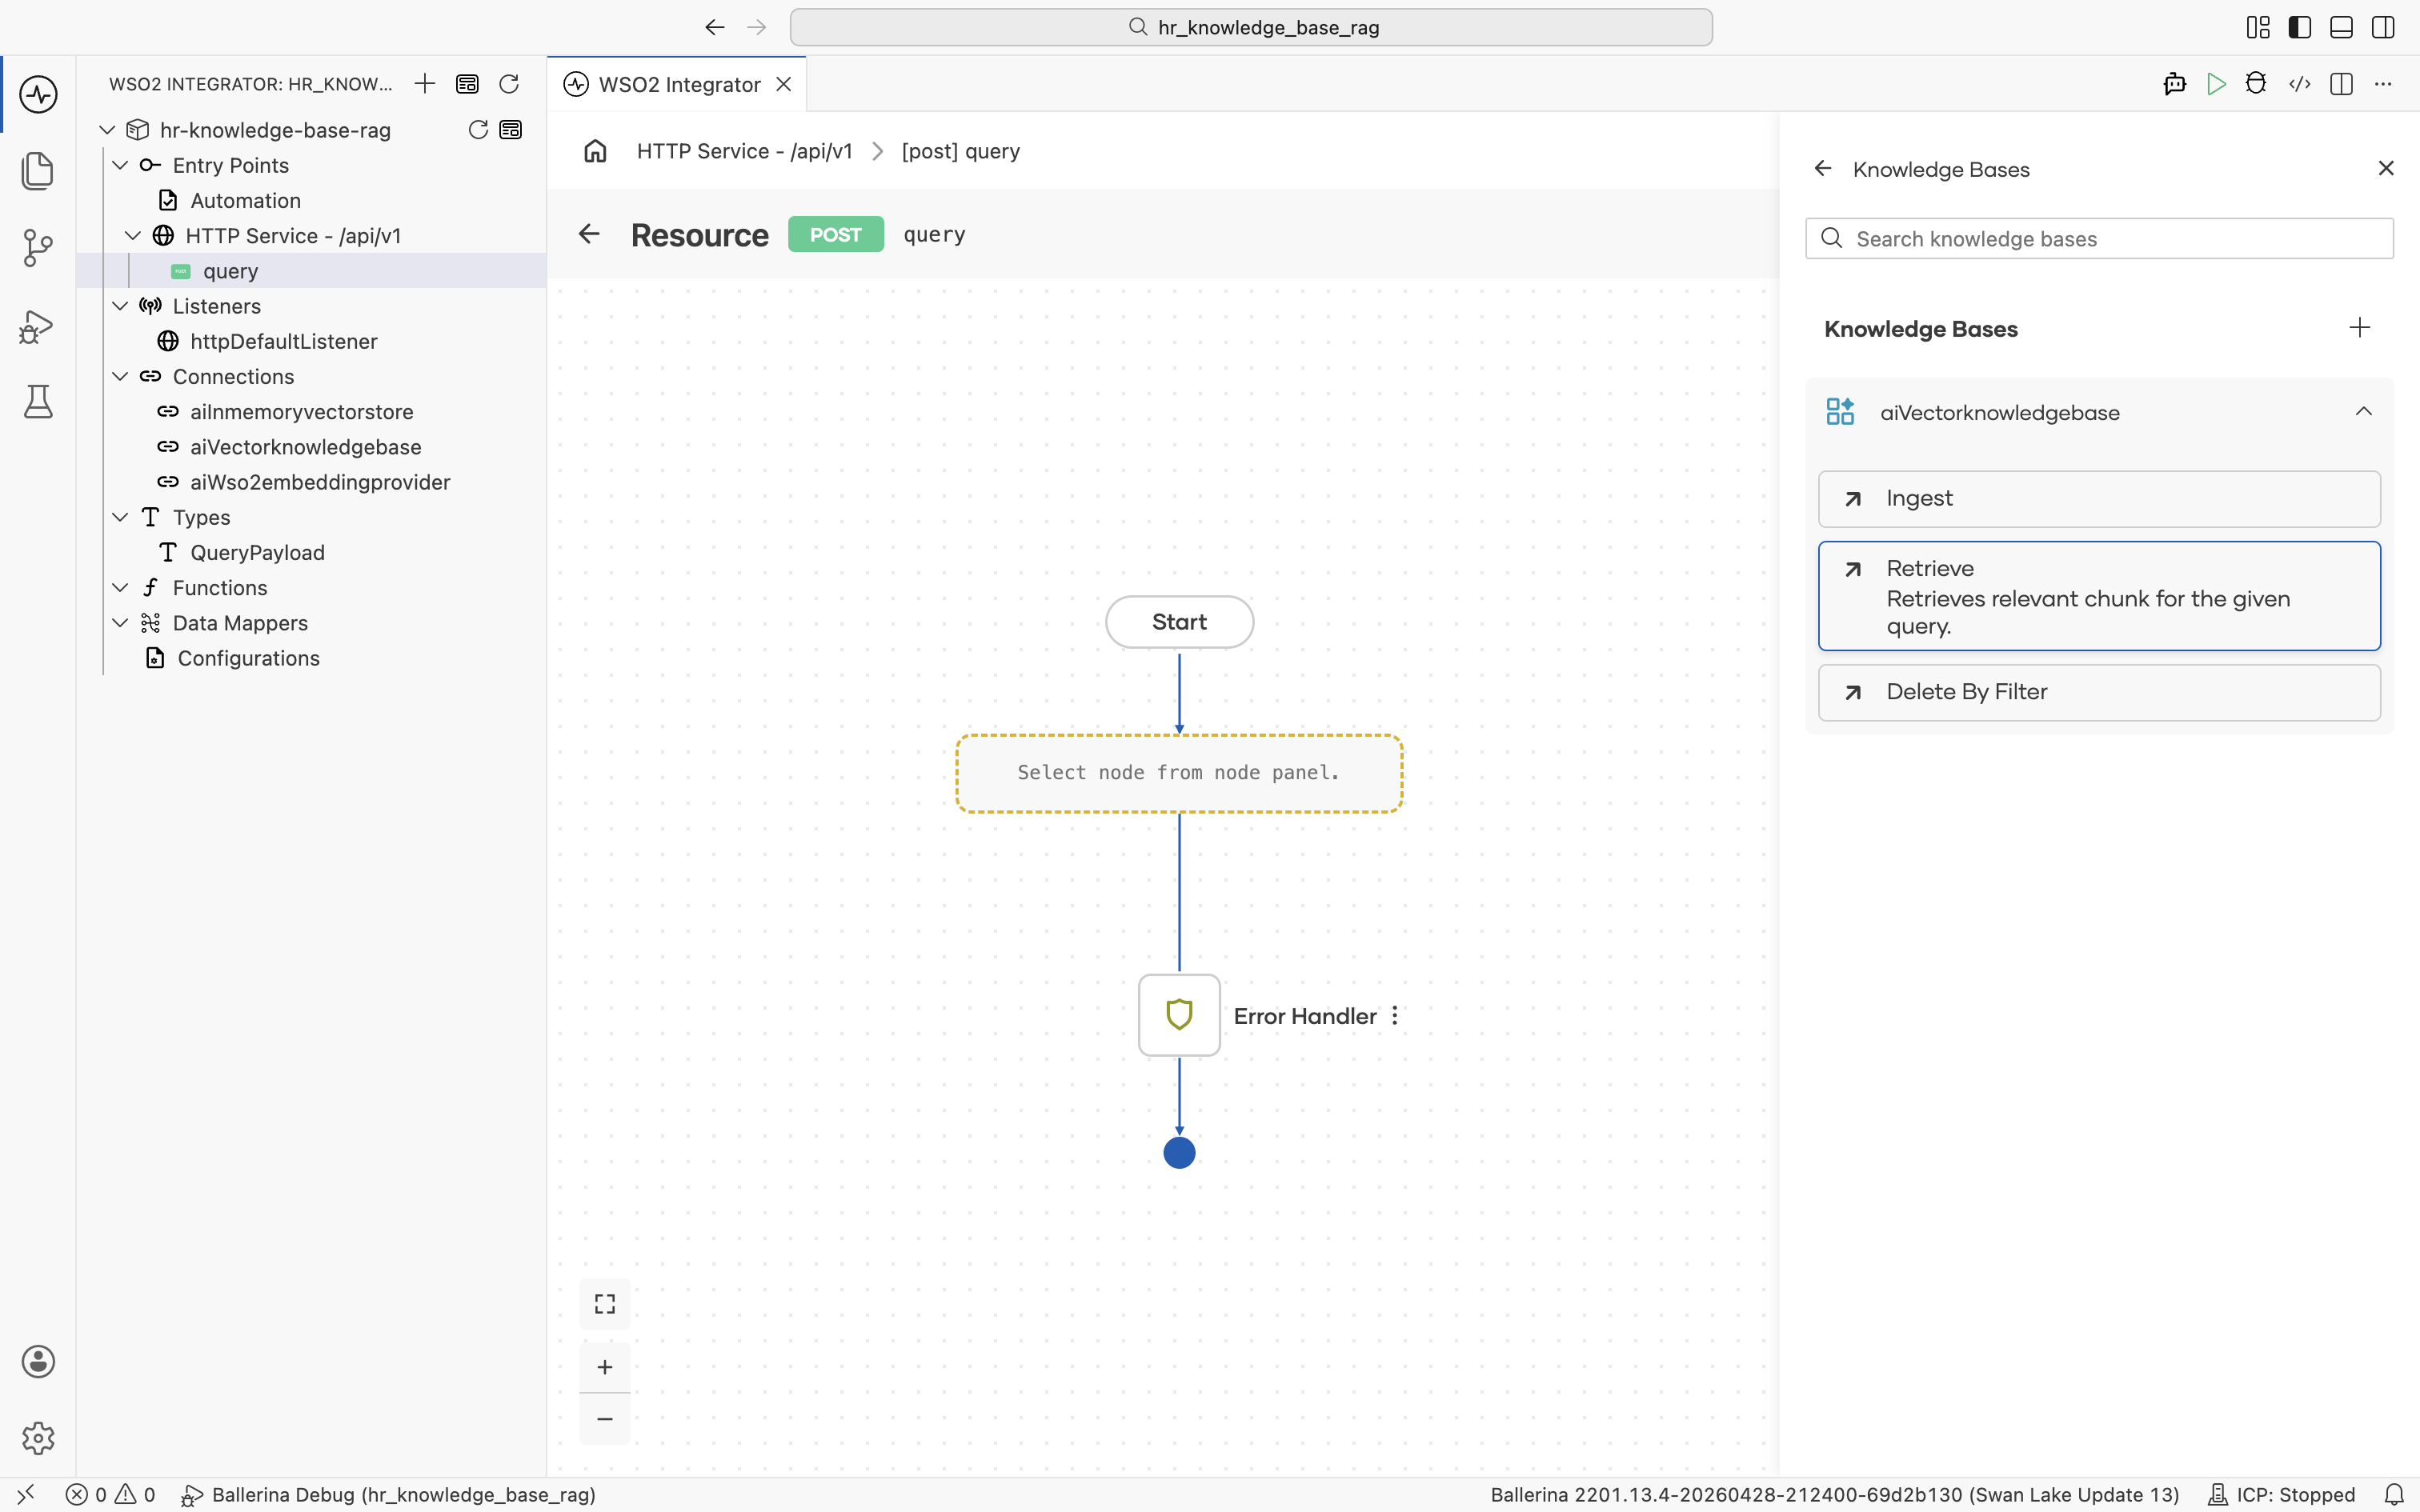
Click aiVectorknowledgebase to expand it and reveal its actions. Click Retrieve: "Retrieves relevant chunk for the given query."
The ai : retrieve form opens. Click into the Query field, then pick Inputs > payload > userQuery from the helper pane.
Set Result to queryMatch. Result Type stays at the auto-filled ai:QueryMatch[].
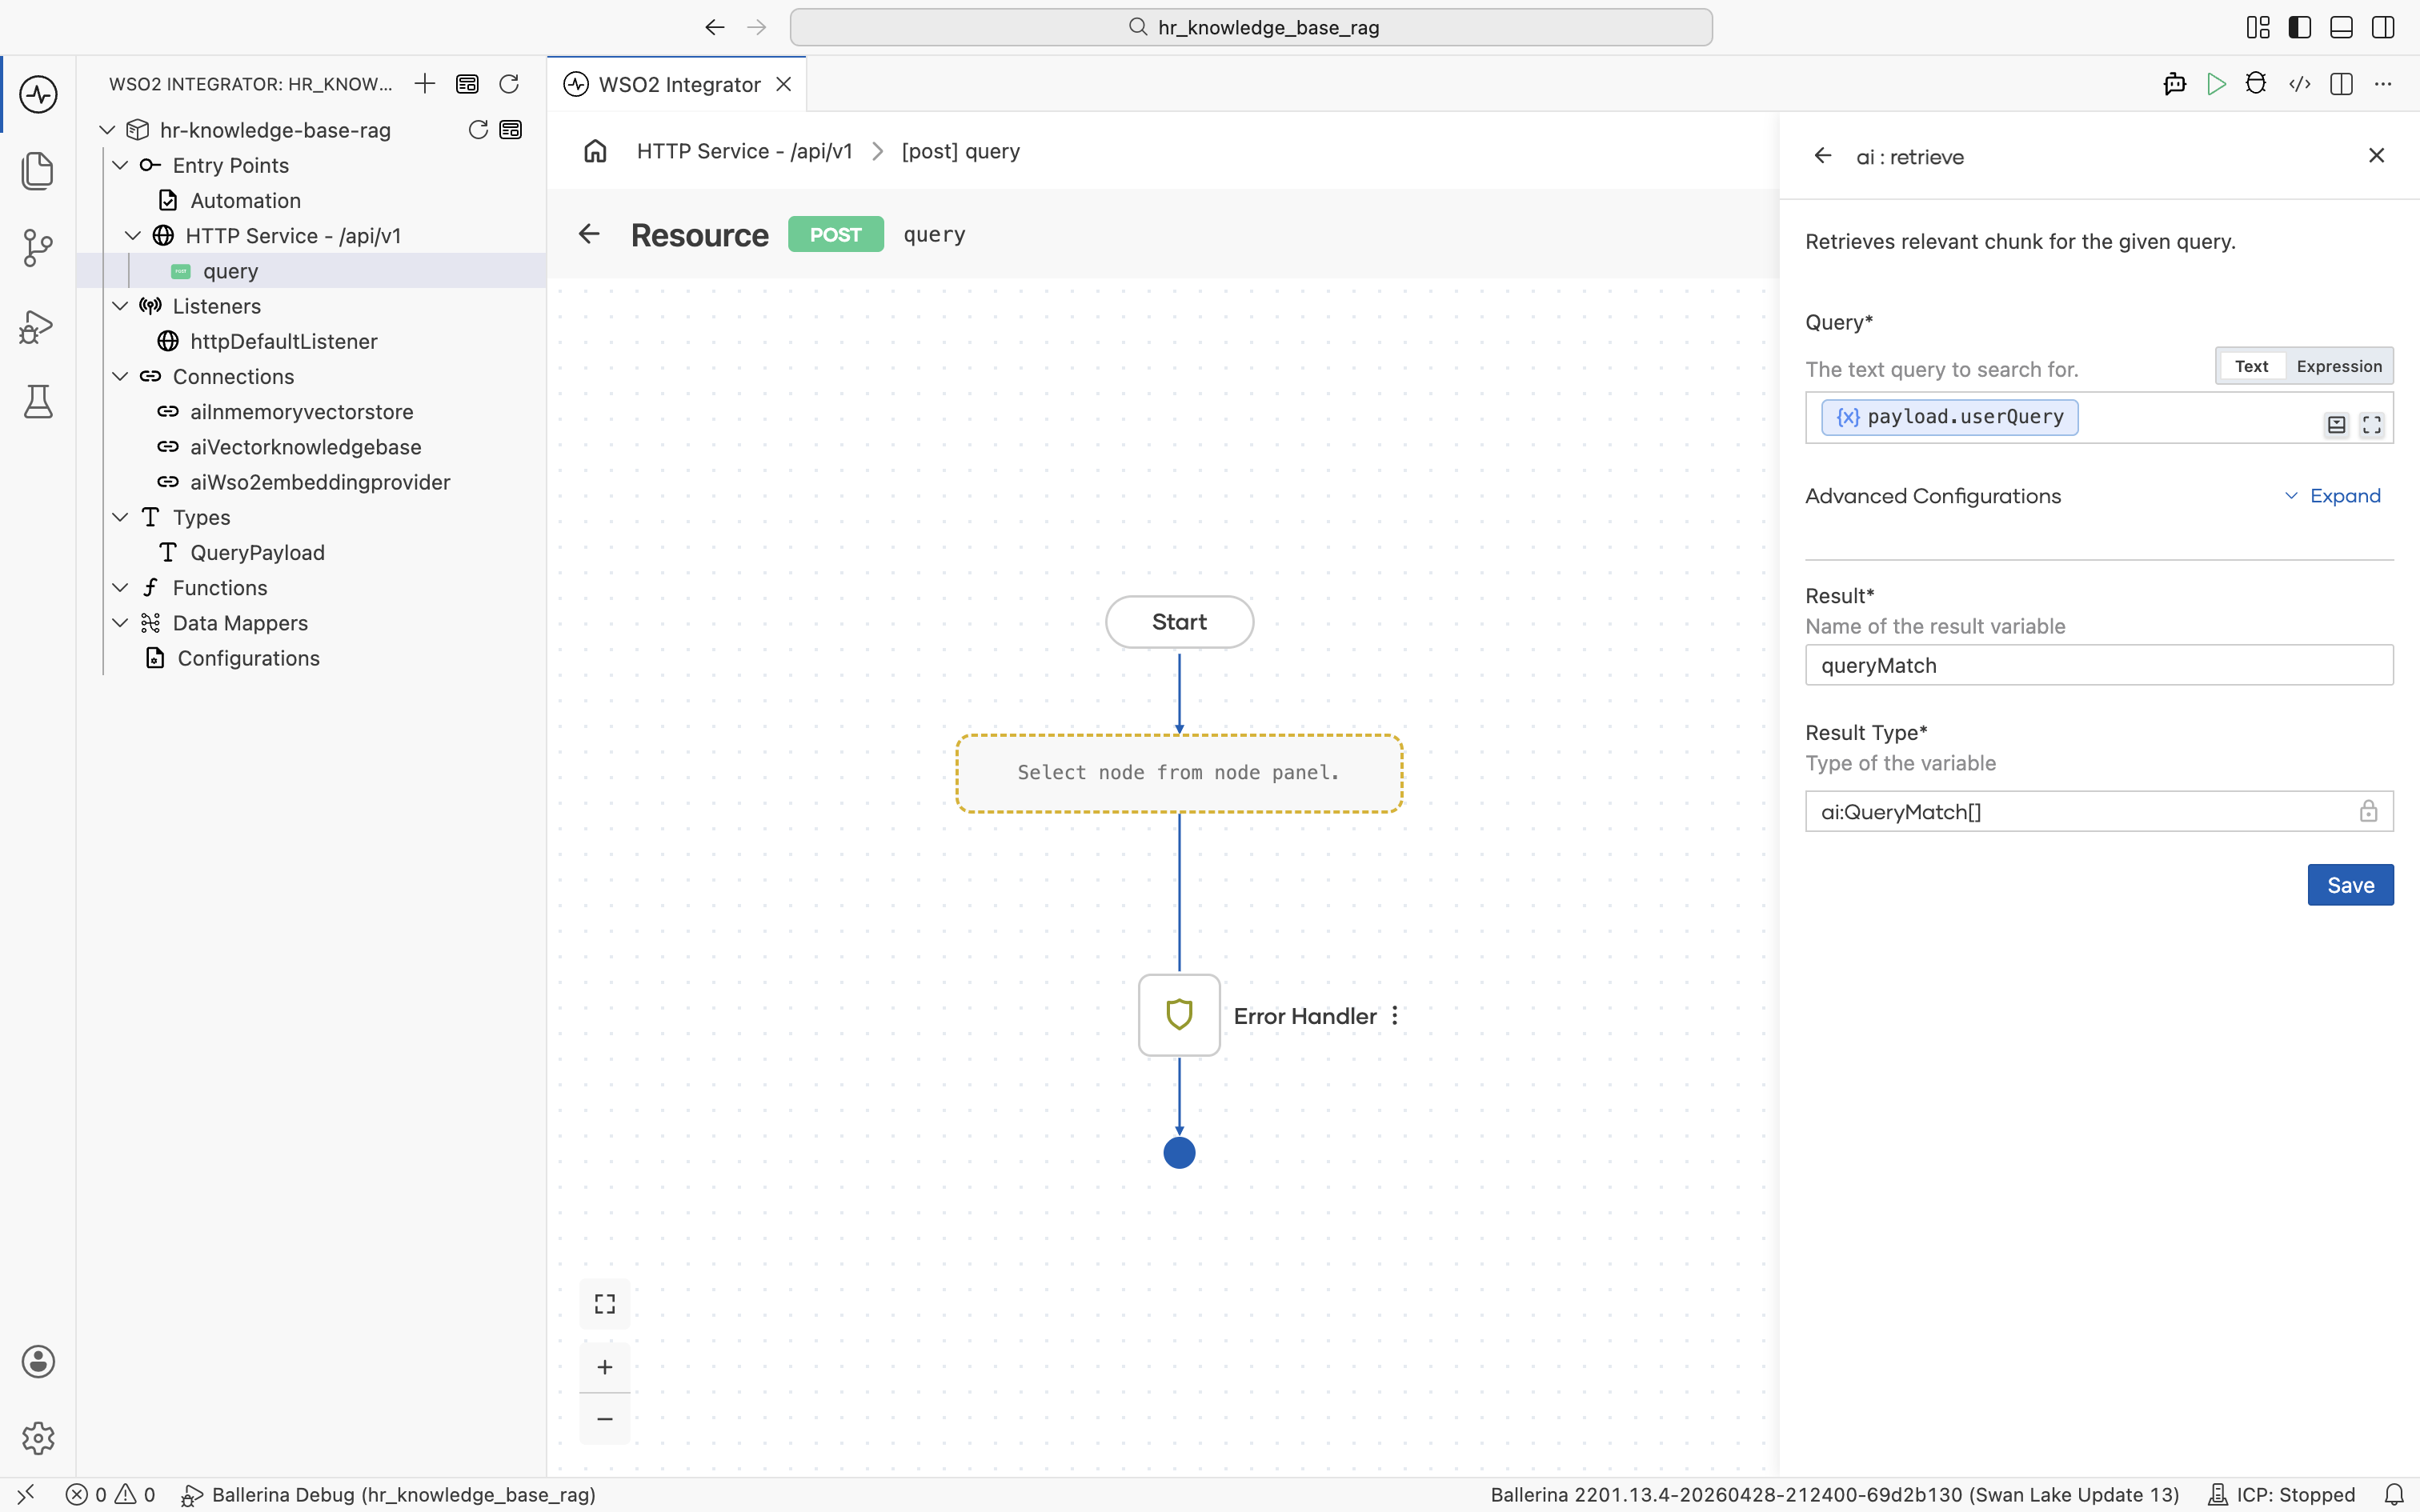
Click Save. The ai:retrieve node is added to the flow.
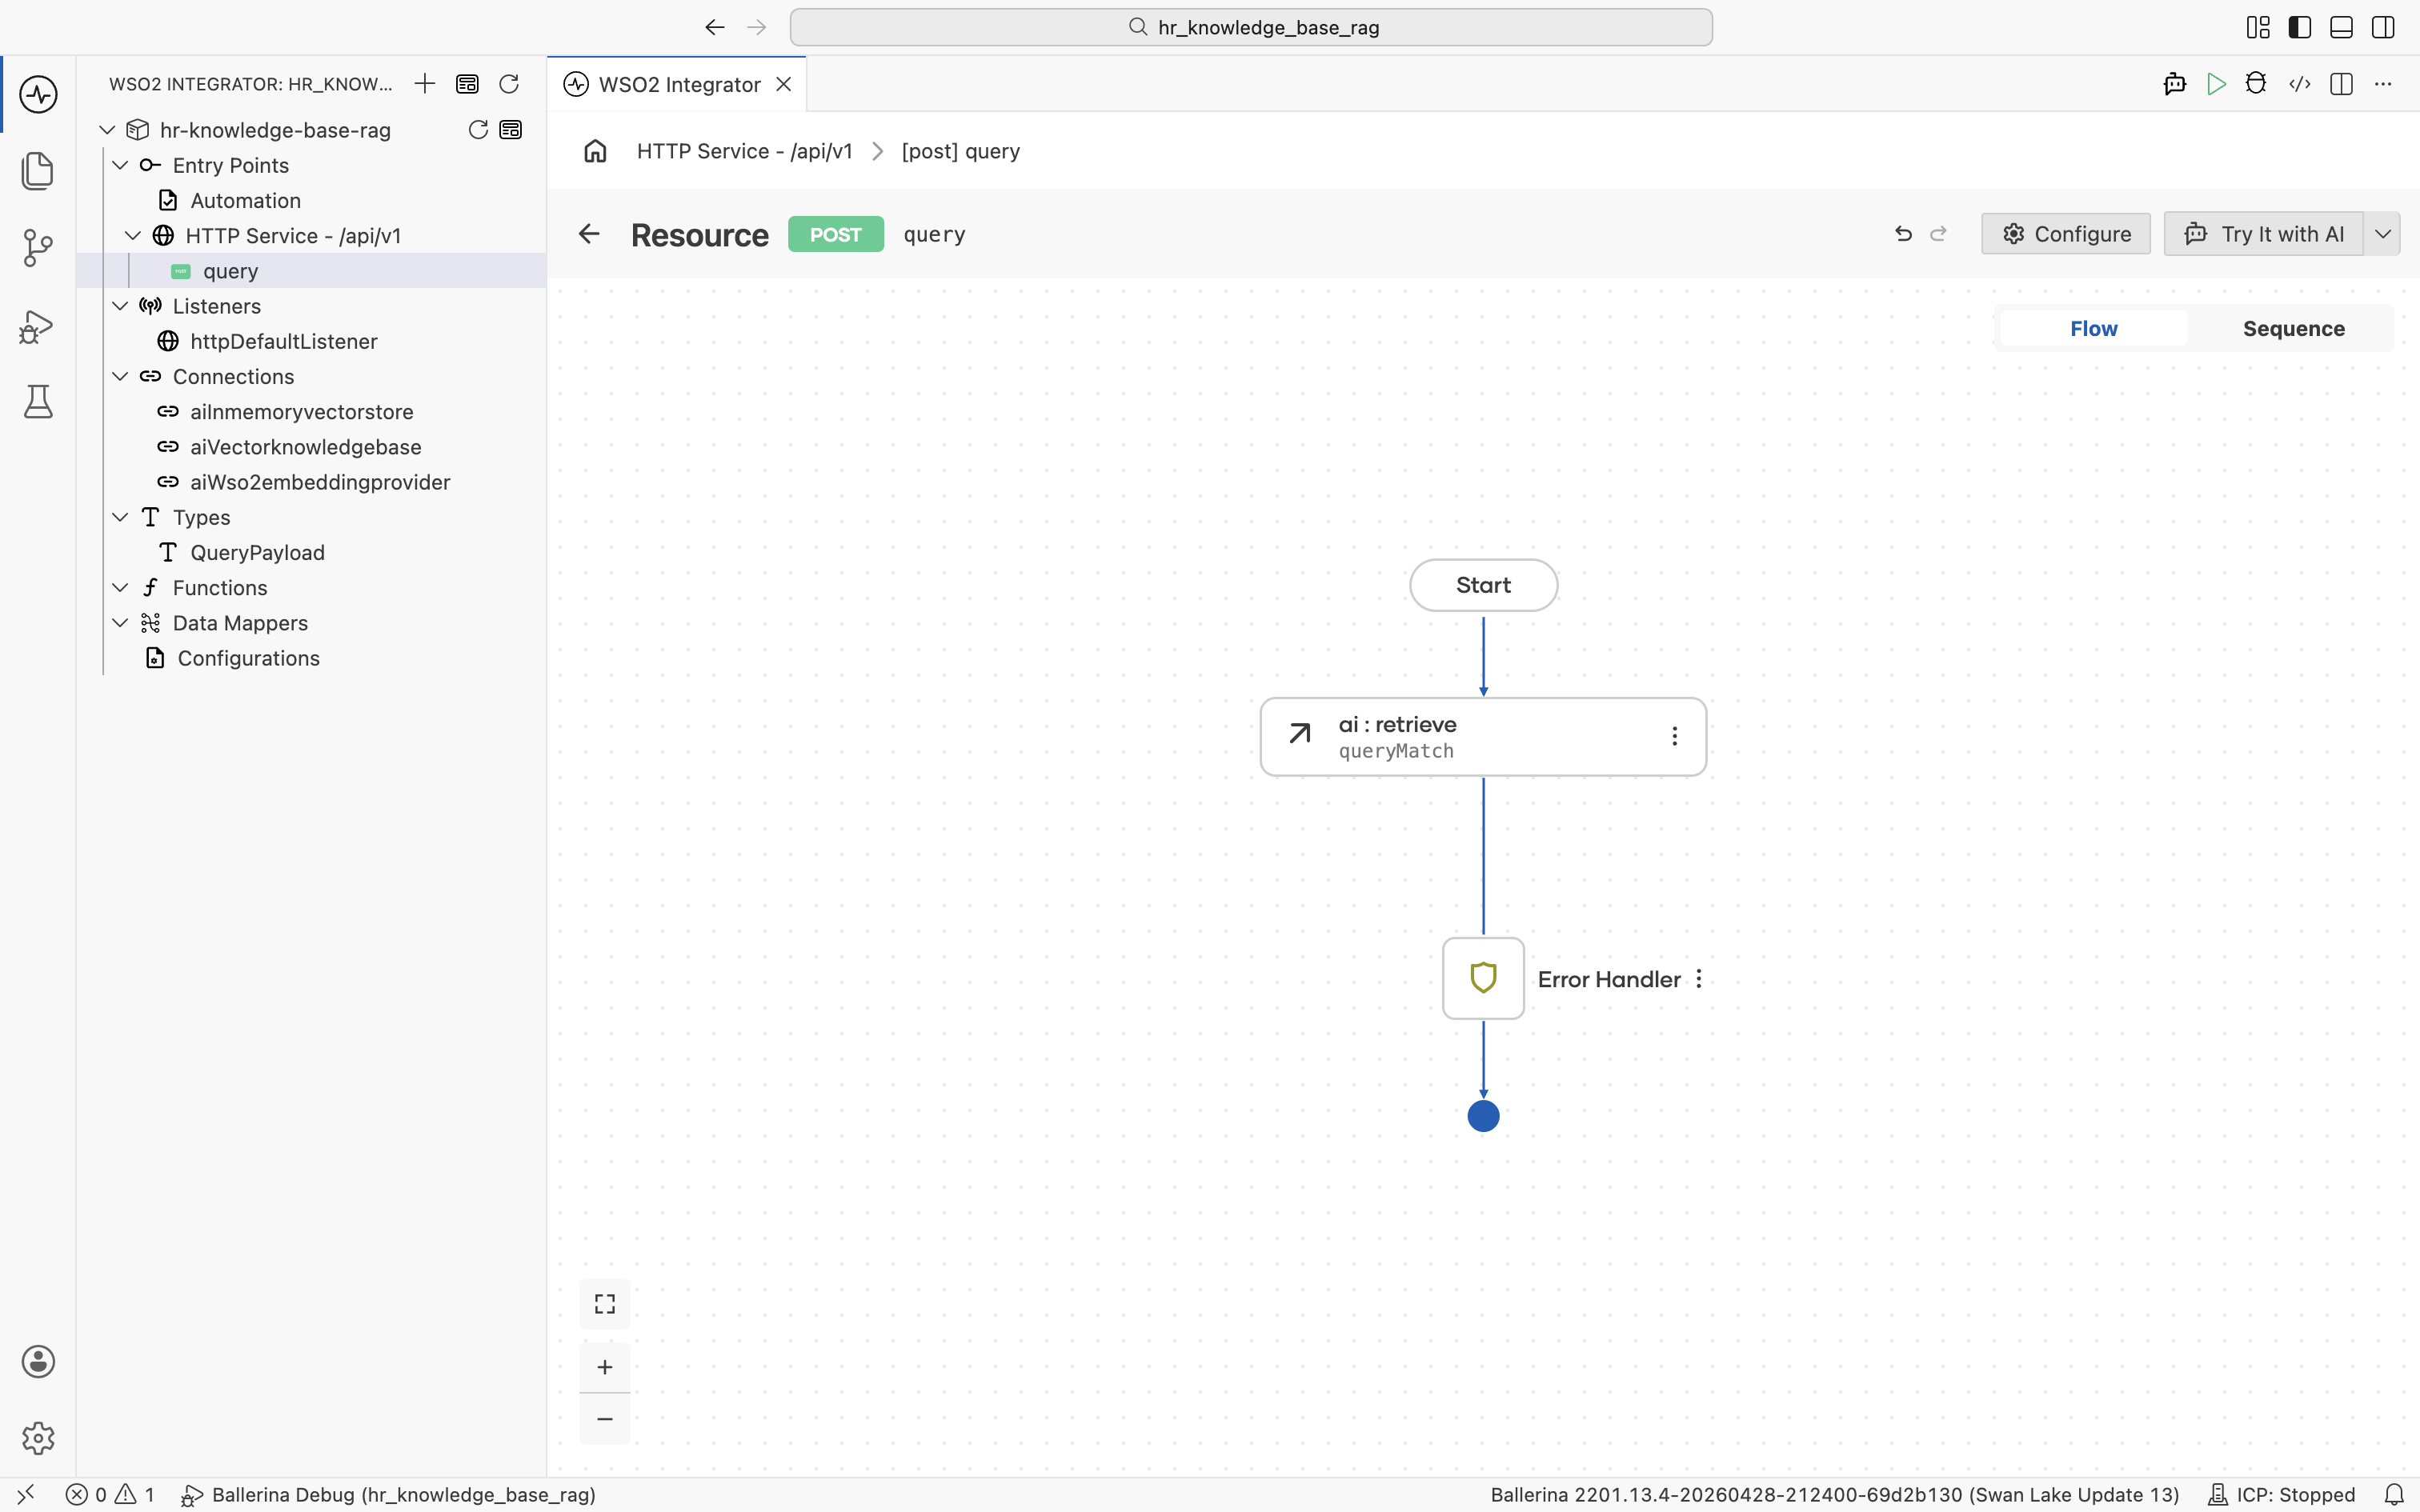
3.4 Augment the user query
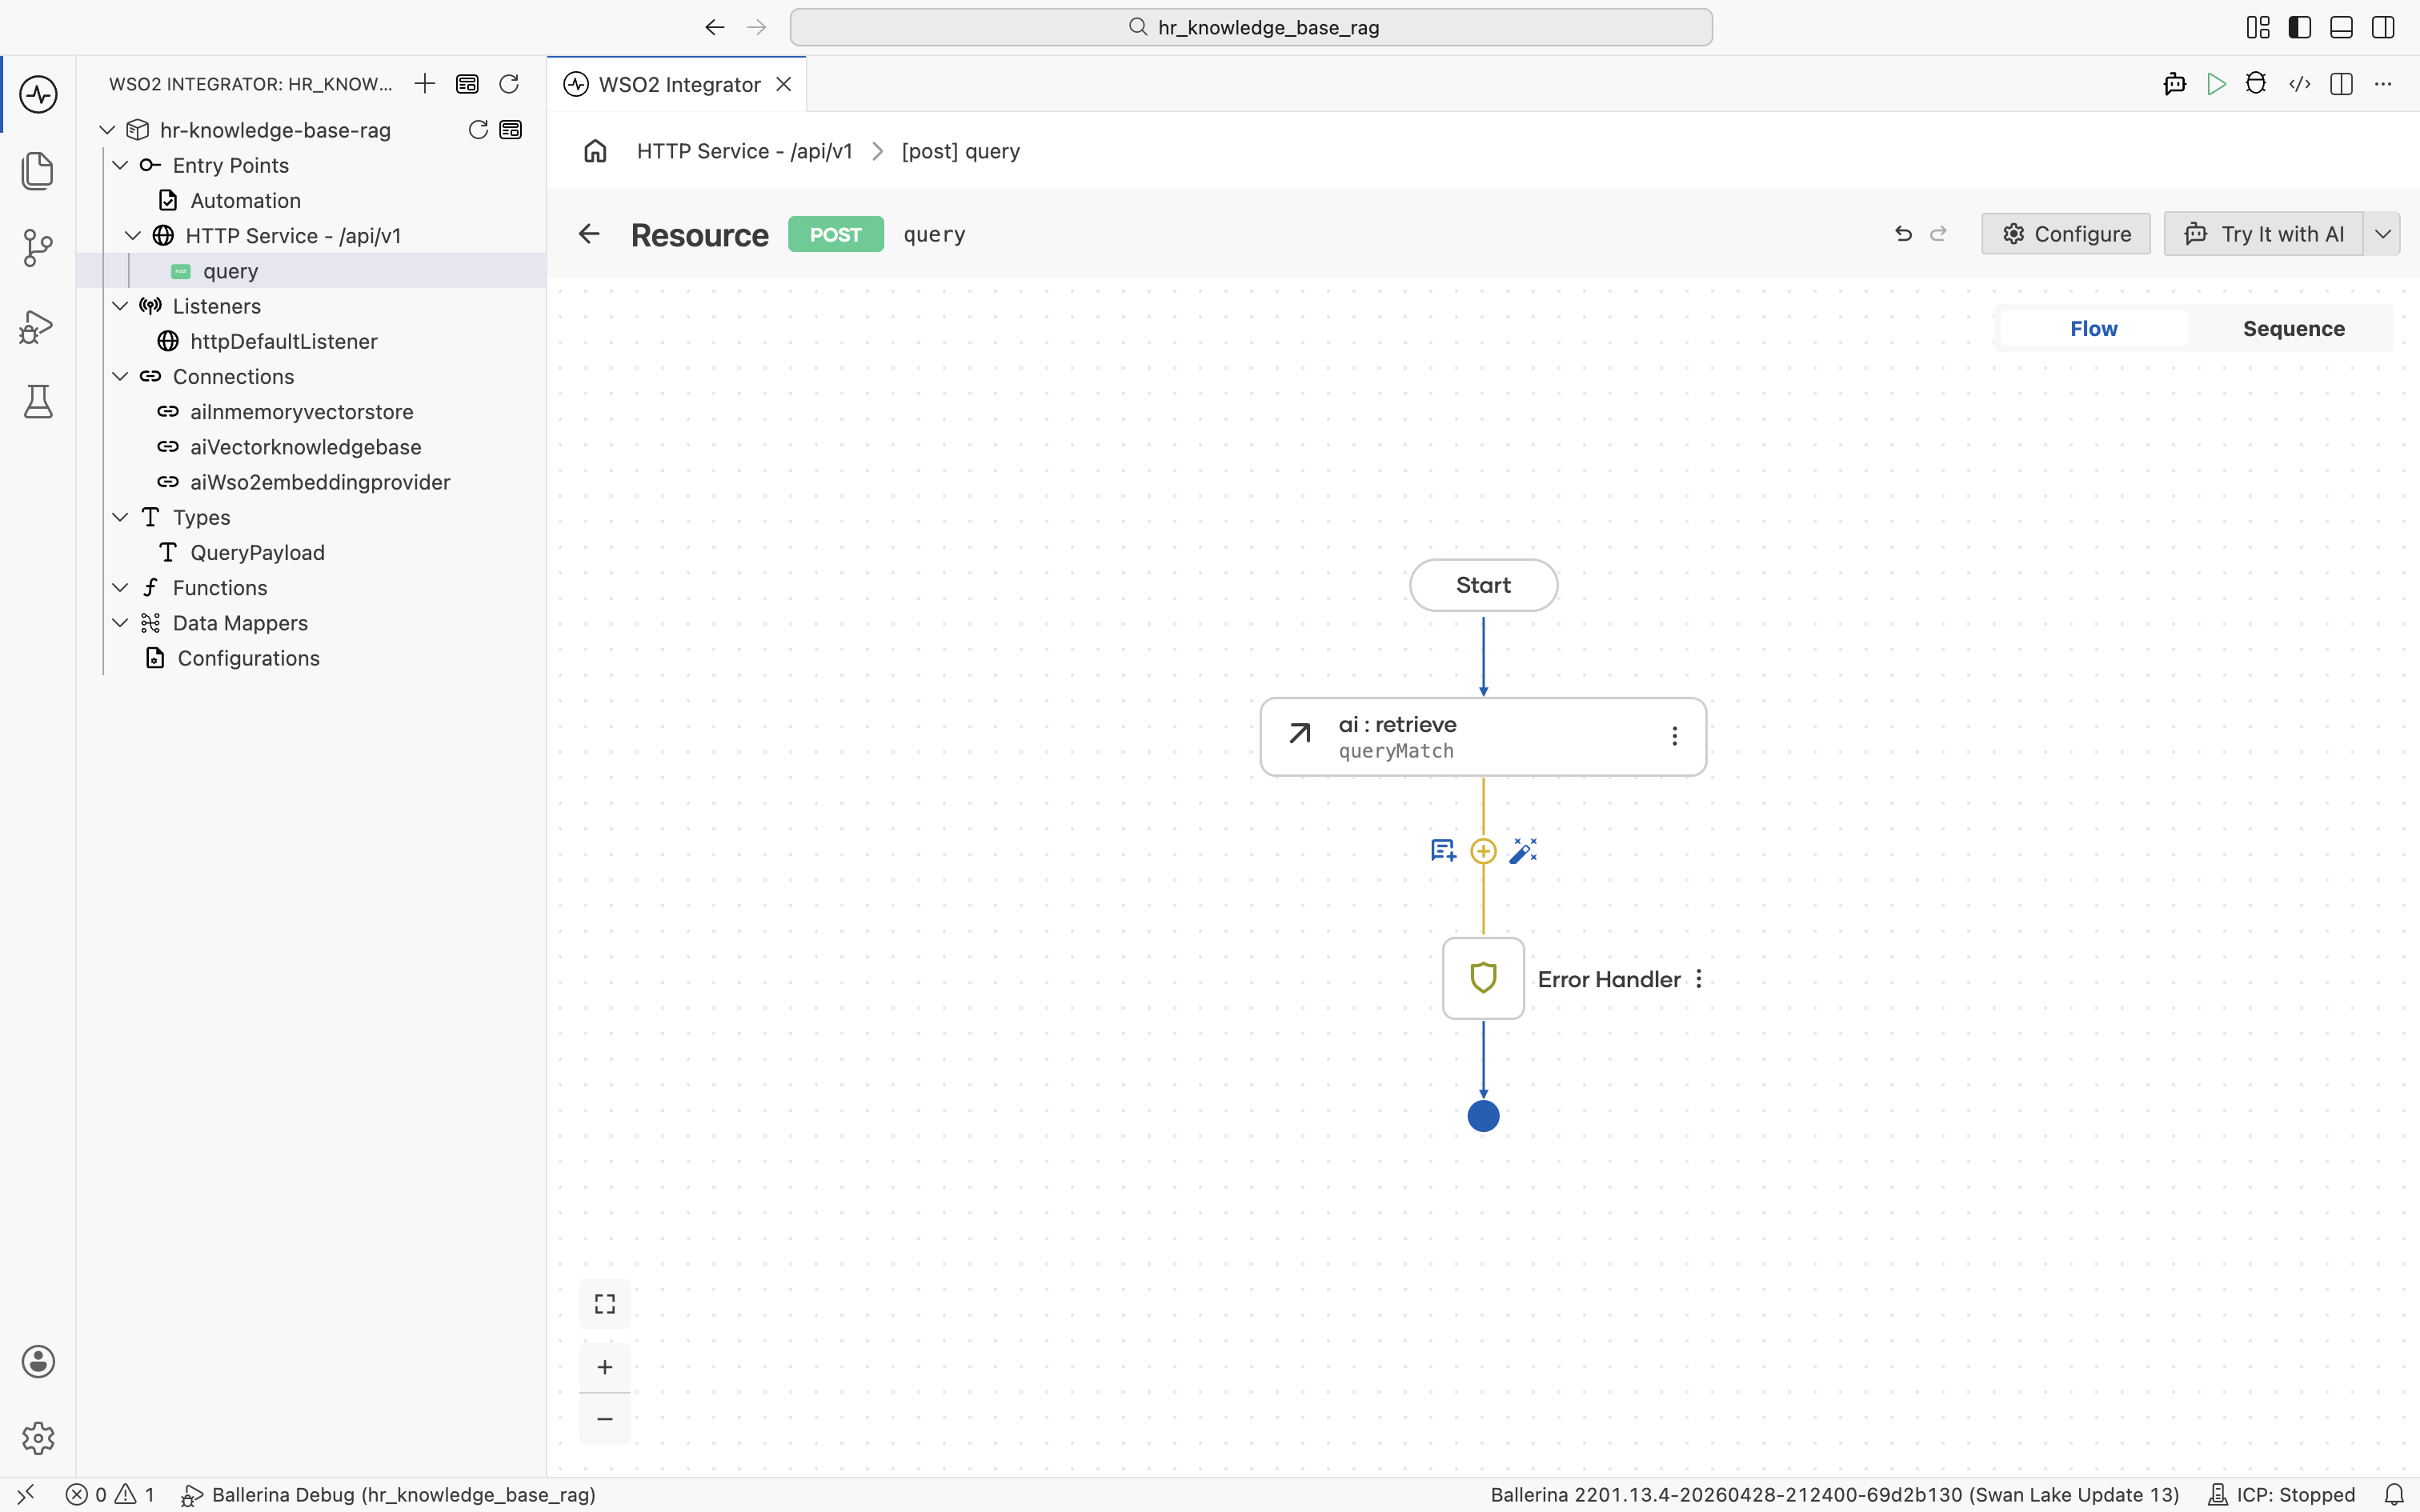
Click the + below the ai:retrieve node to add the next node.
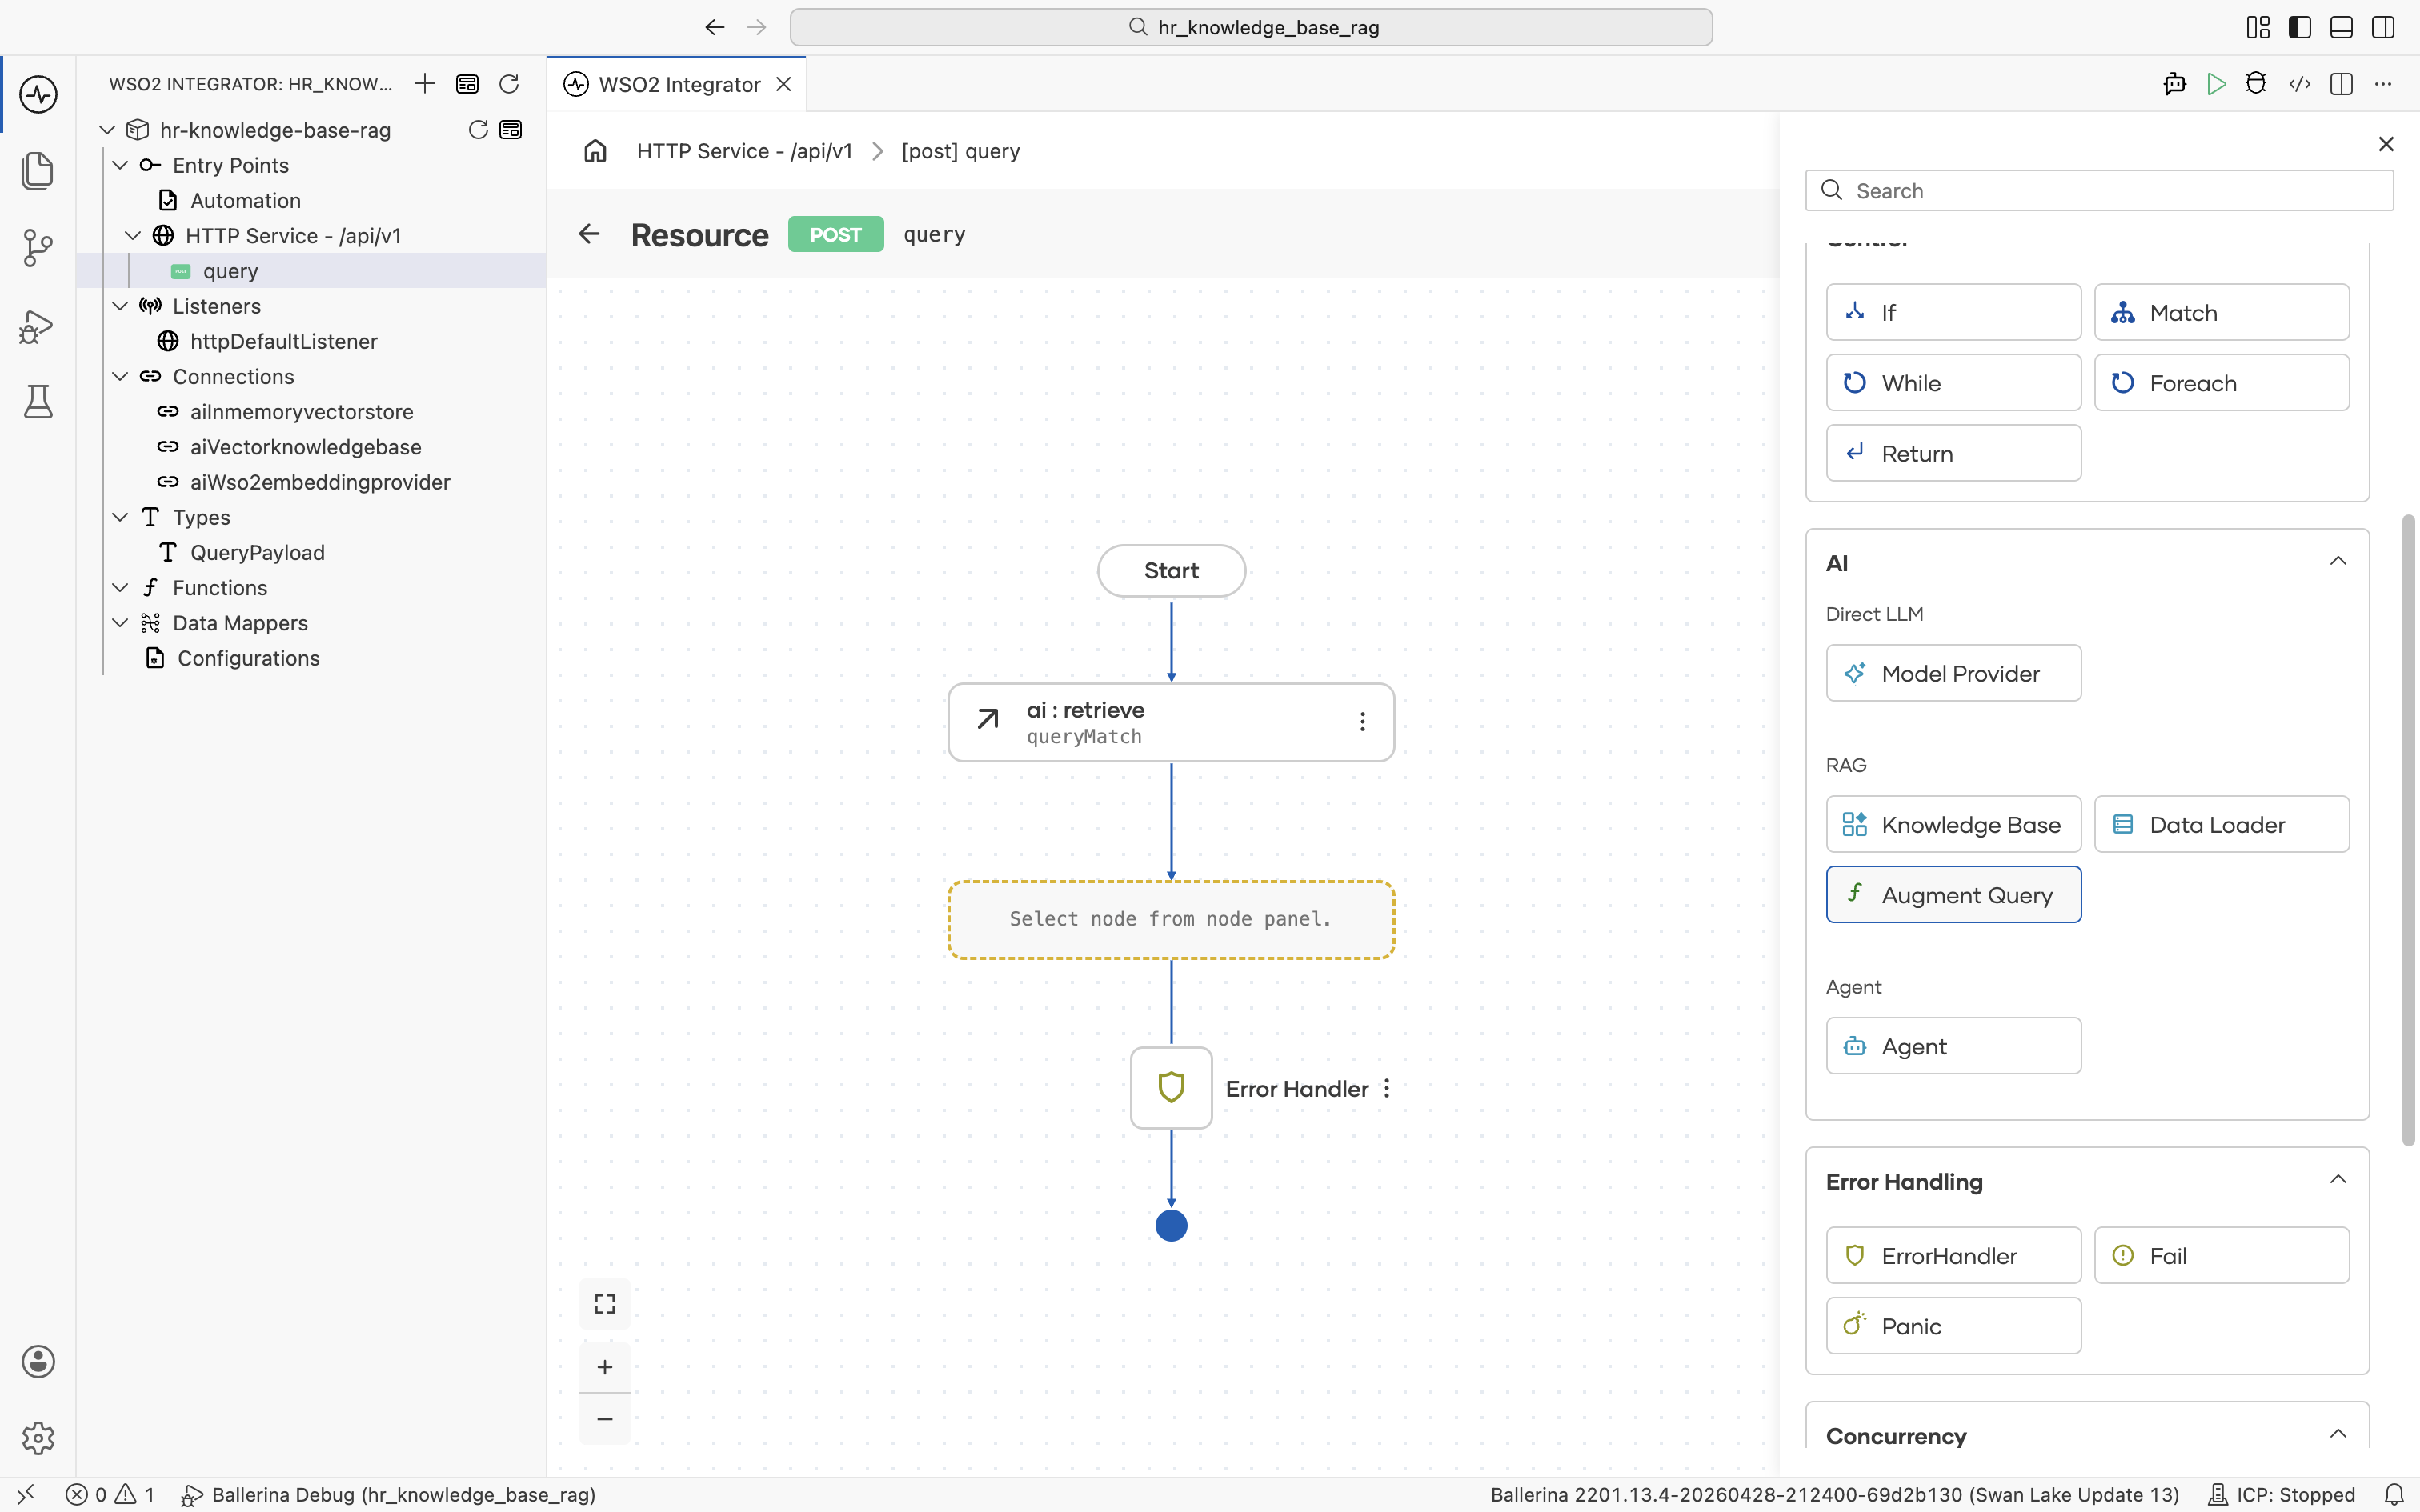
The node palette opens. Under AI > RAG, click Augment Query. It packages the employee's question together with the retrieved chunks into a ChatUserMessage ready for the LLM, with no manual prompt-templating required.
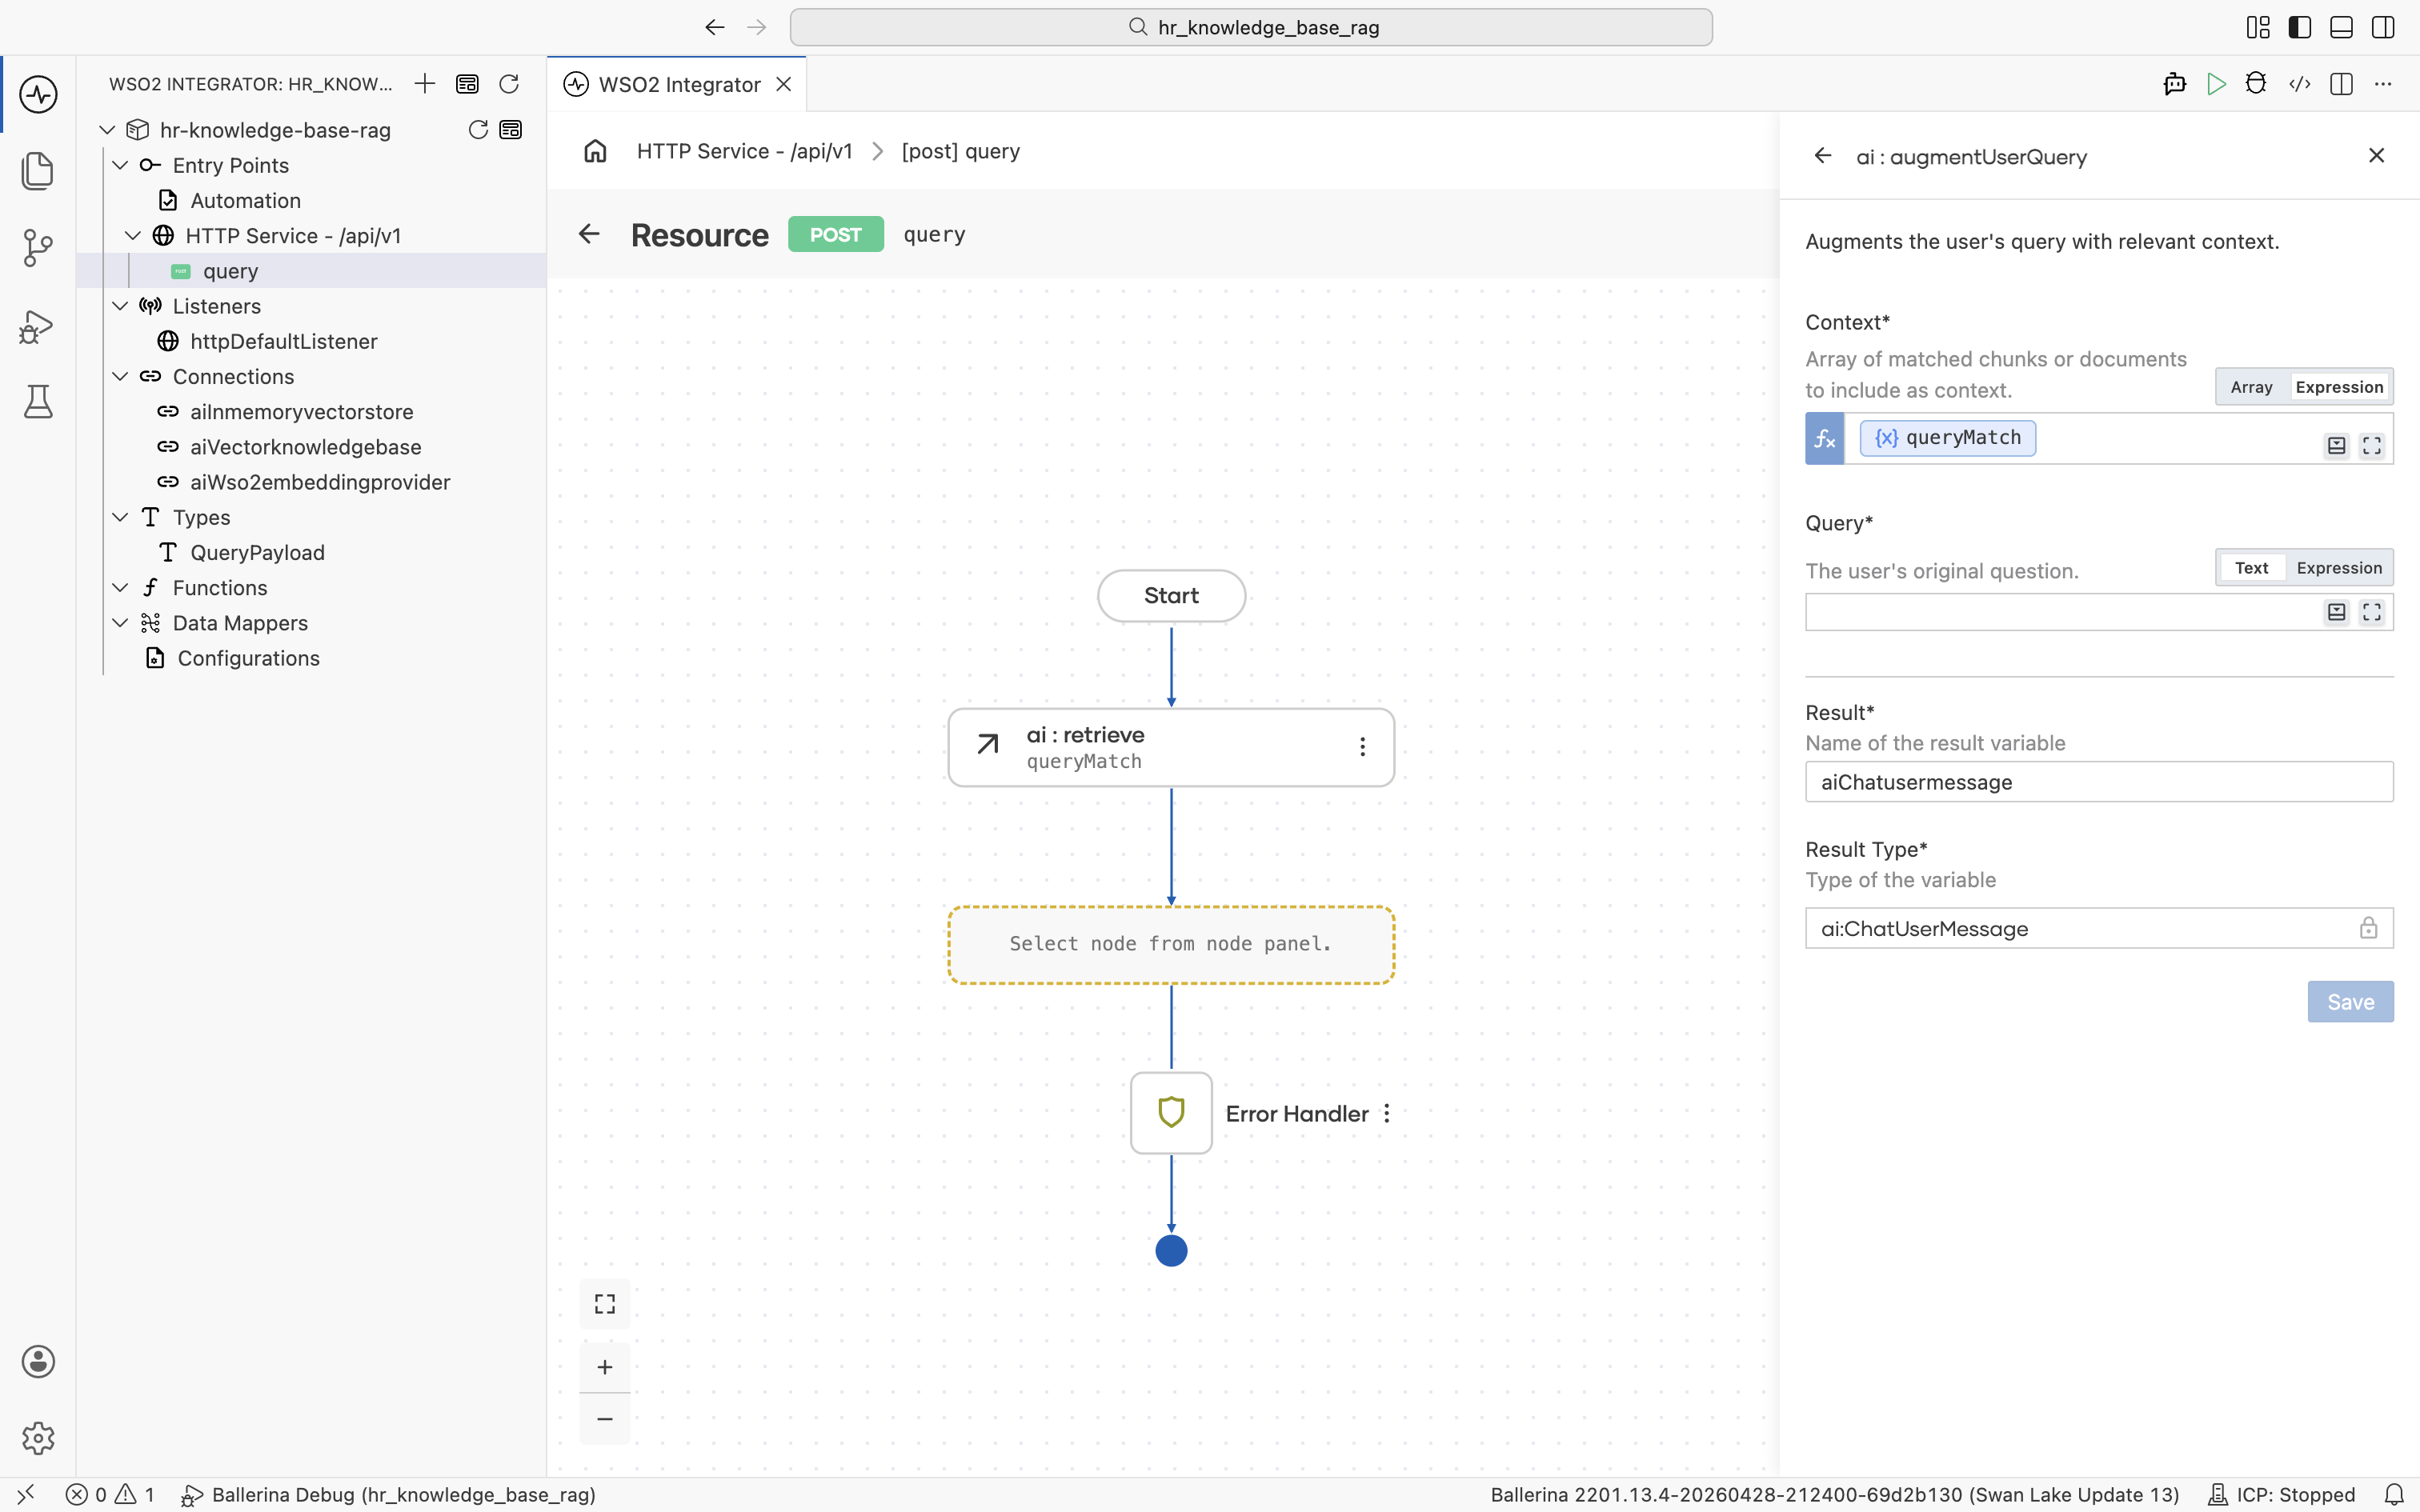
The ai : augmentUserQuery form opens. Result is pre-filled with aiChatusermessage and Result Type with ai:ChatUserMessage. The Context field defaults to Array mode.
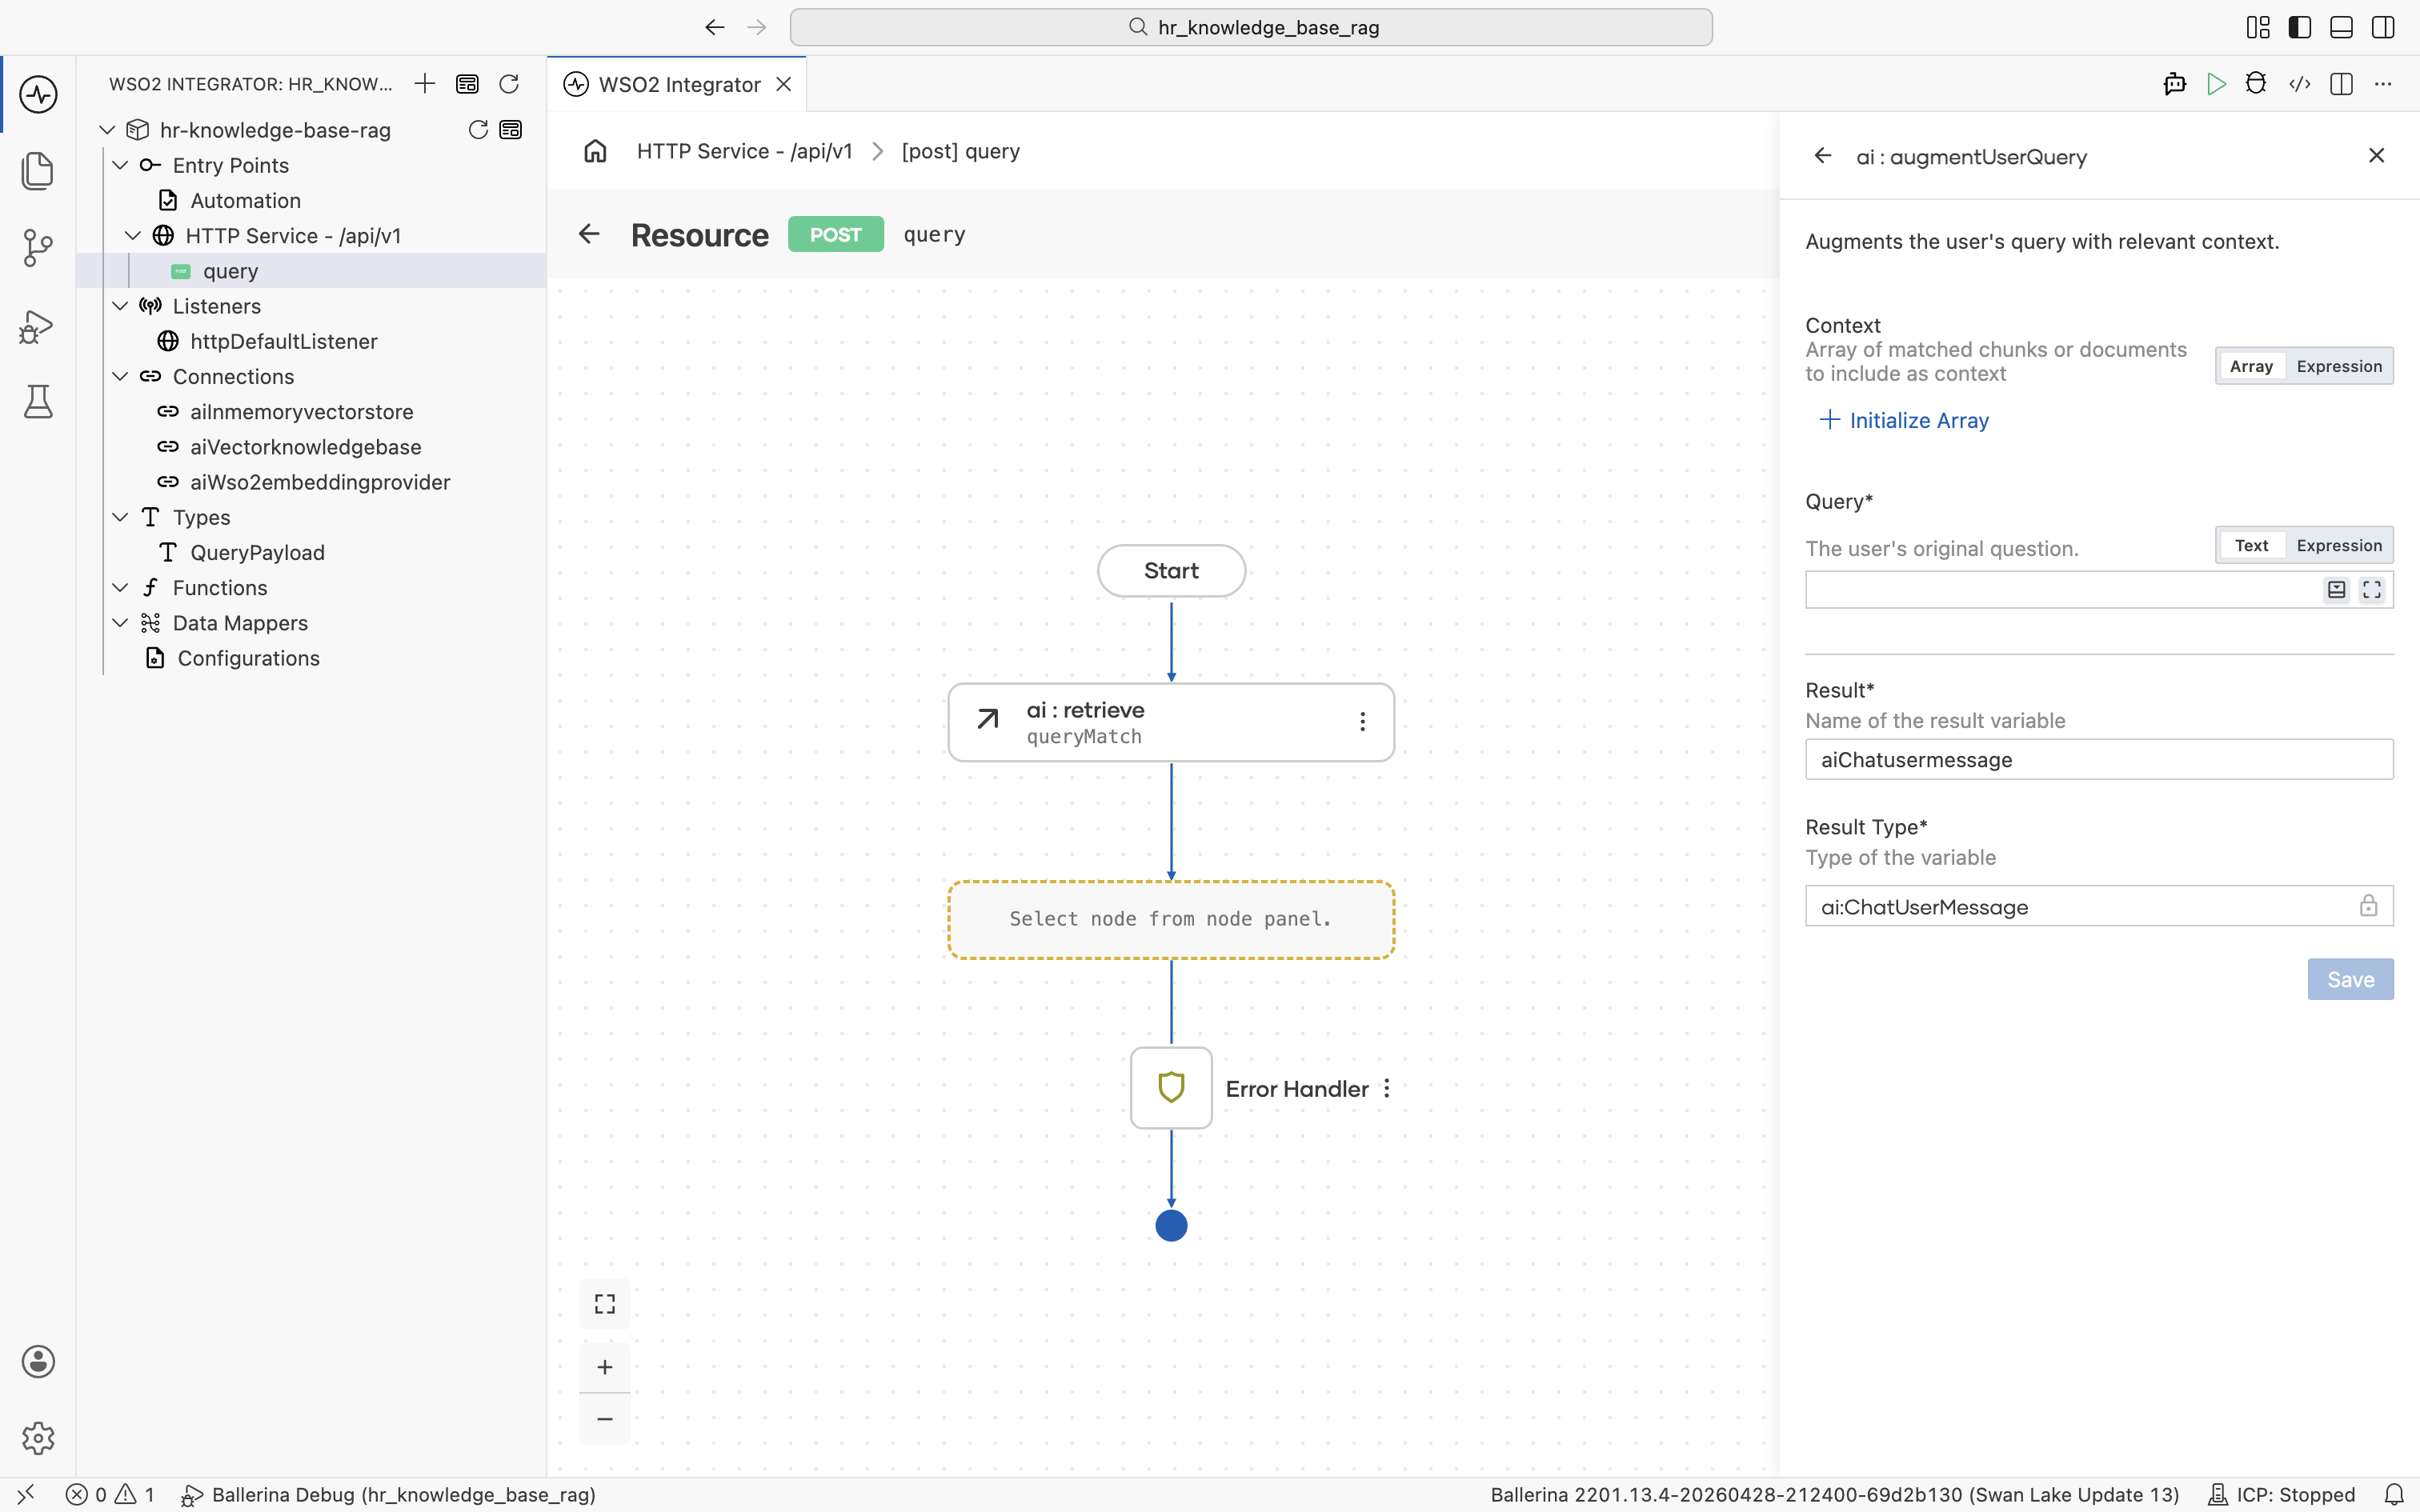
Switch the Context field to Expression mode, then click into it and pick Variables > queryMatch from the helper pane.
Click into the Query field and pick Inputs > payload > userQuery from the helper pane. Both fields are now populated.
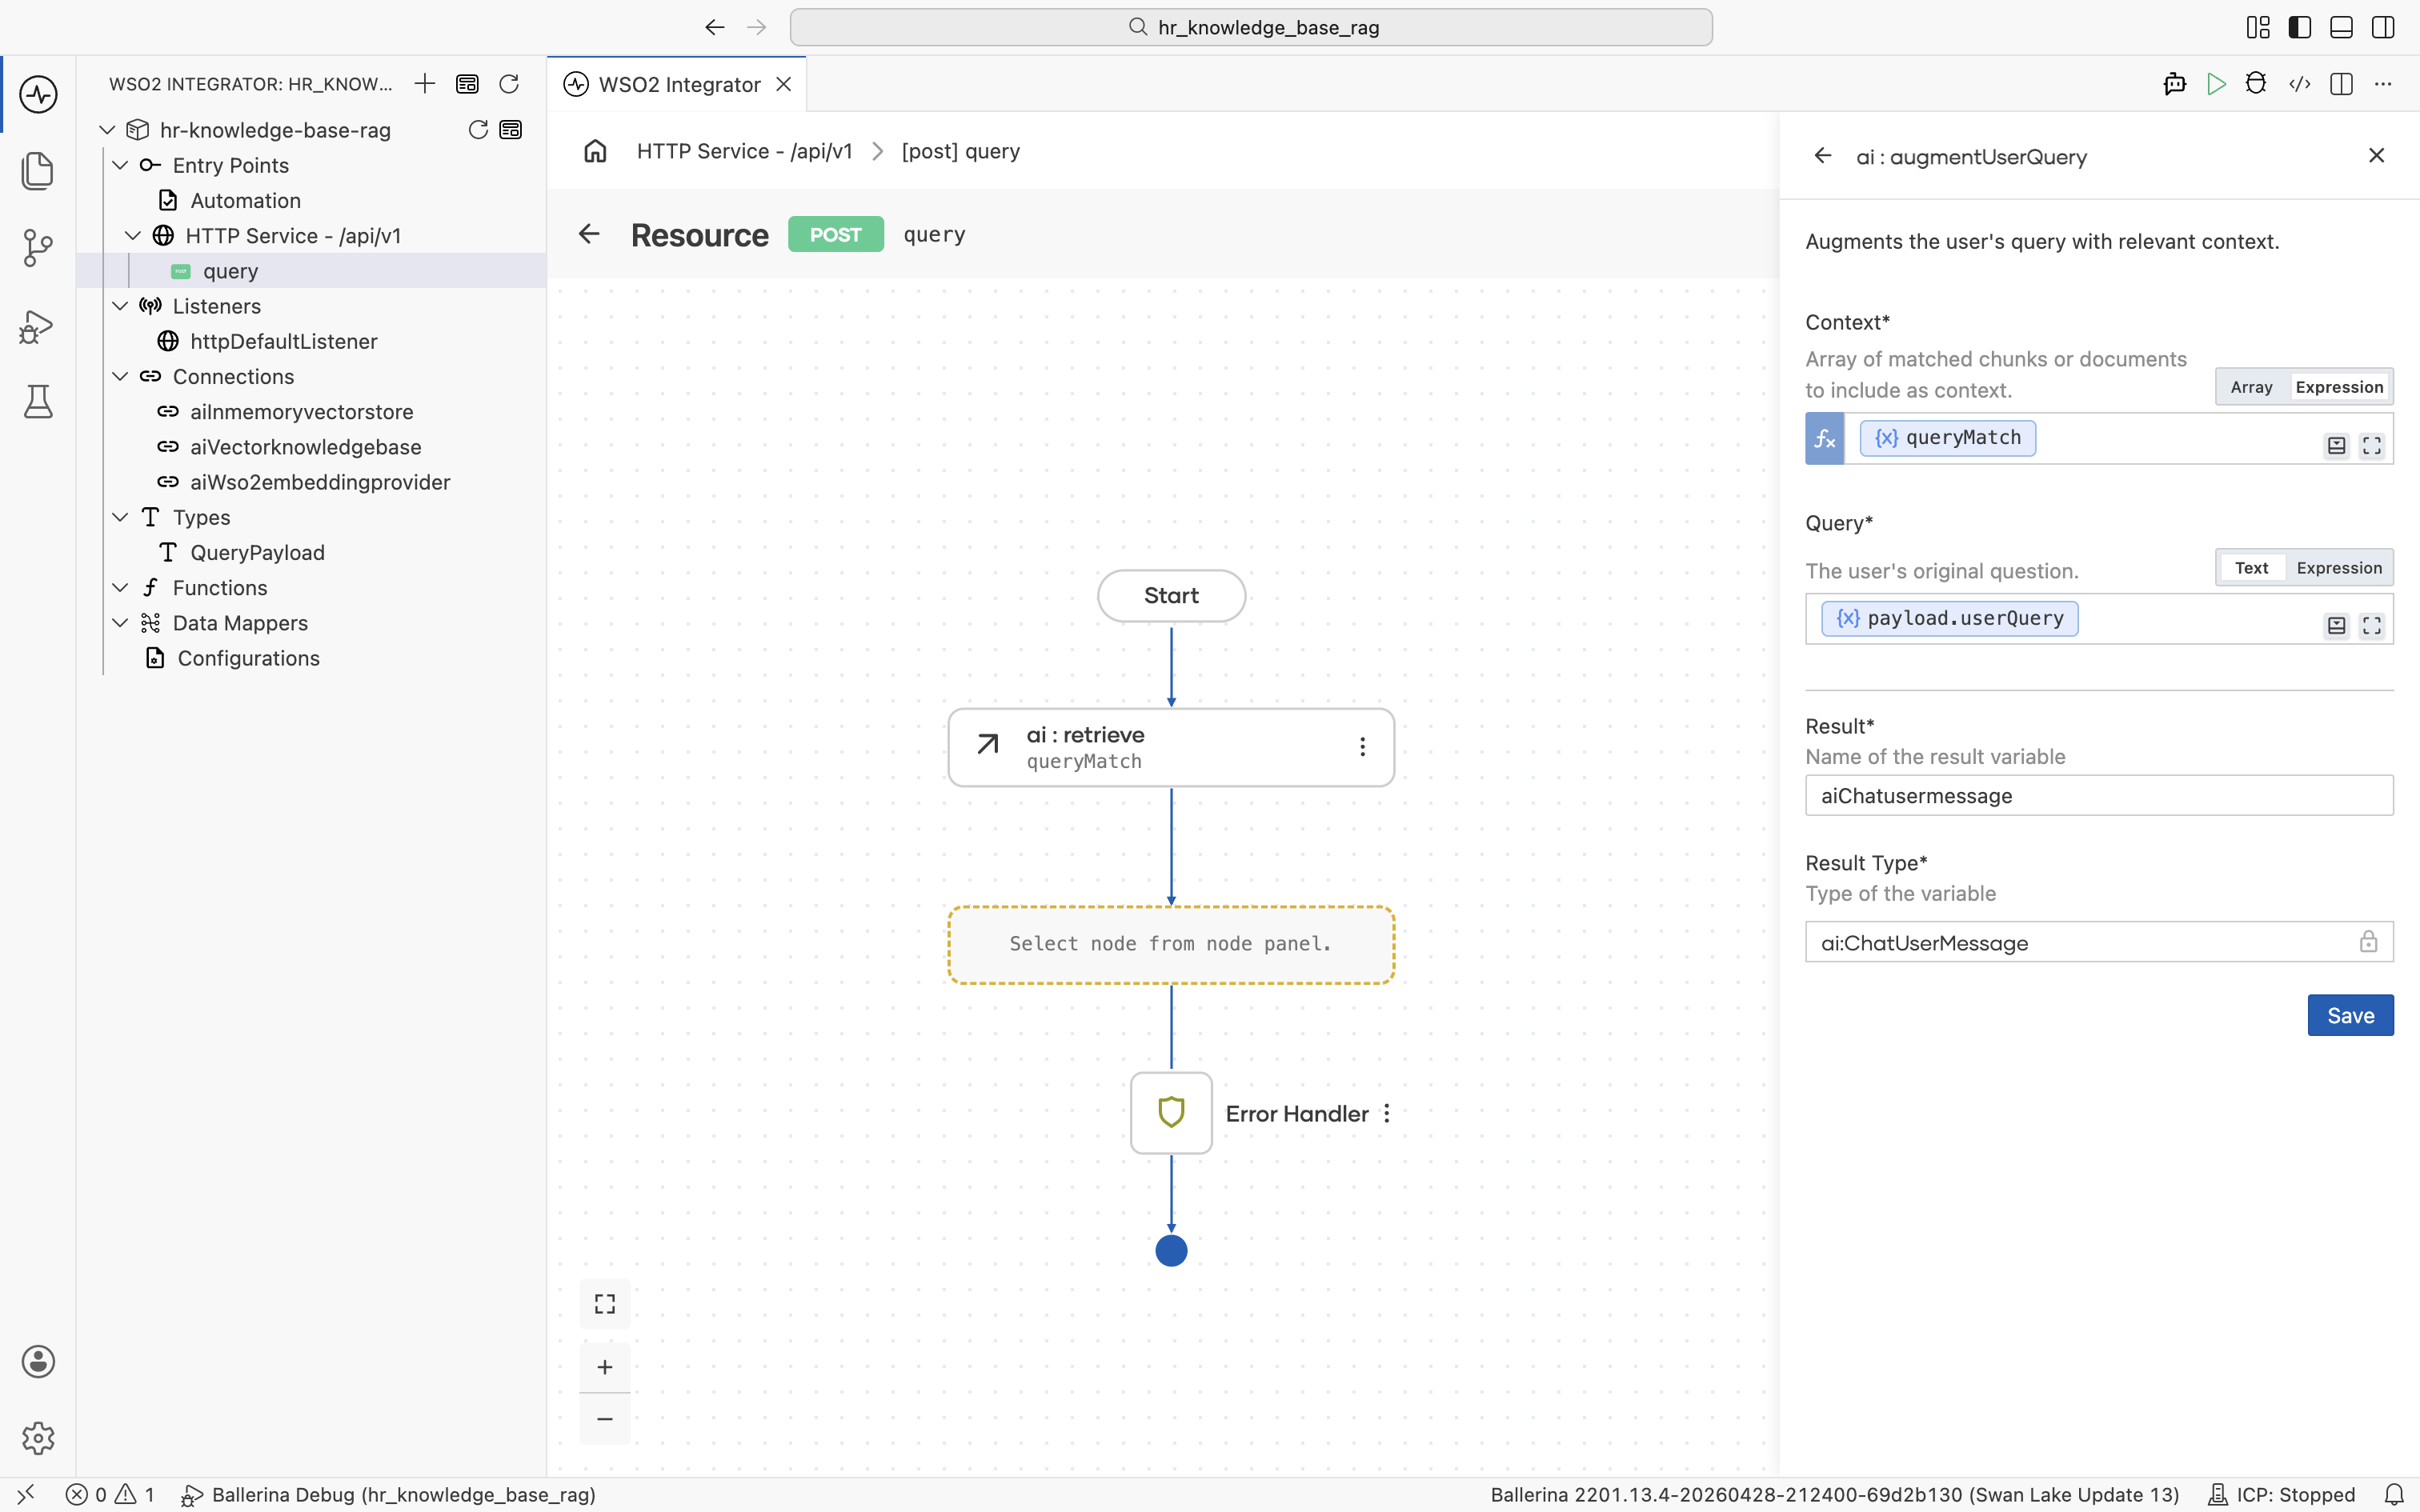
Click Save. The ai:augmentUserQuery node is added to the flow.
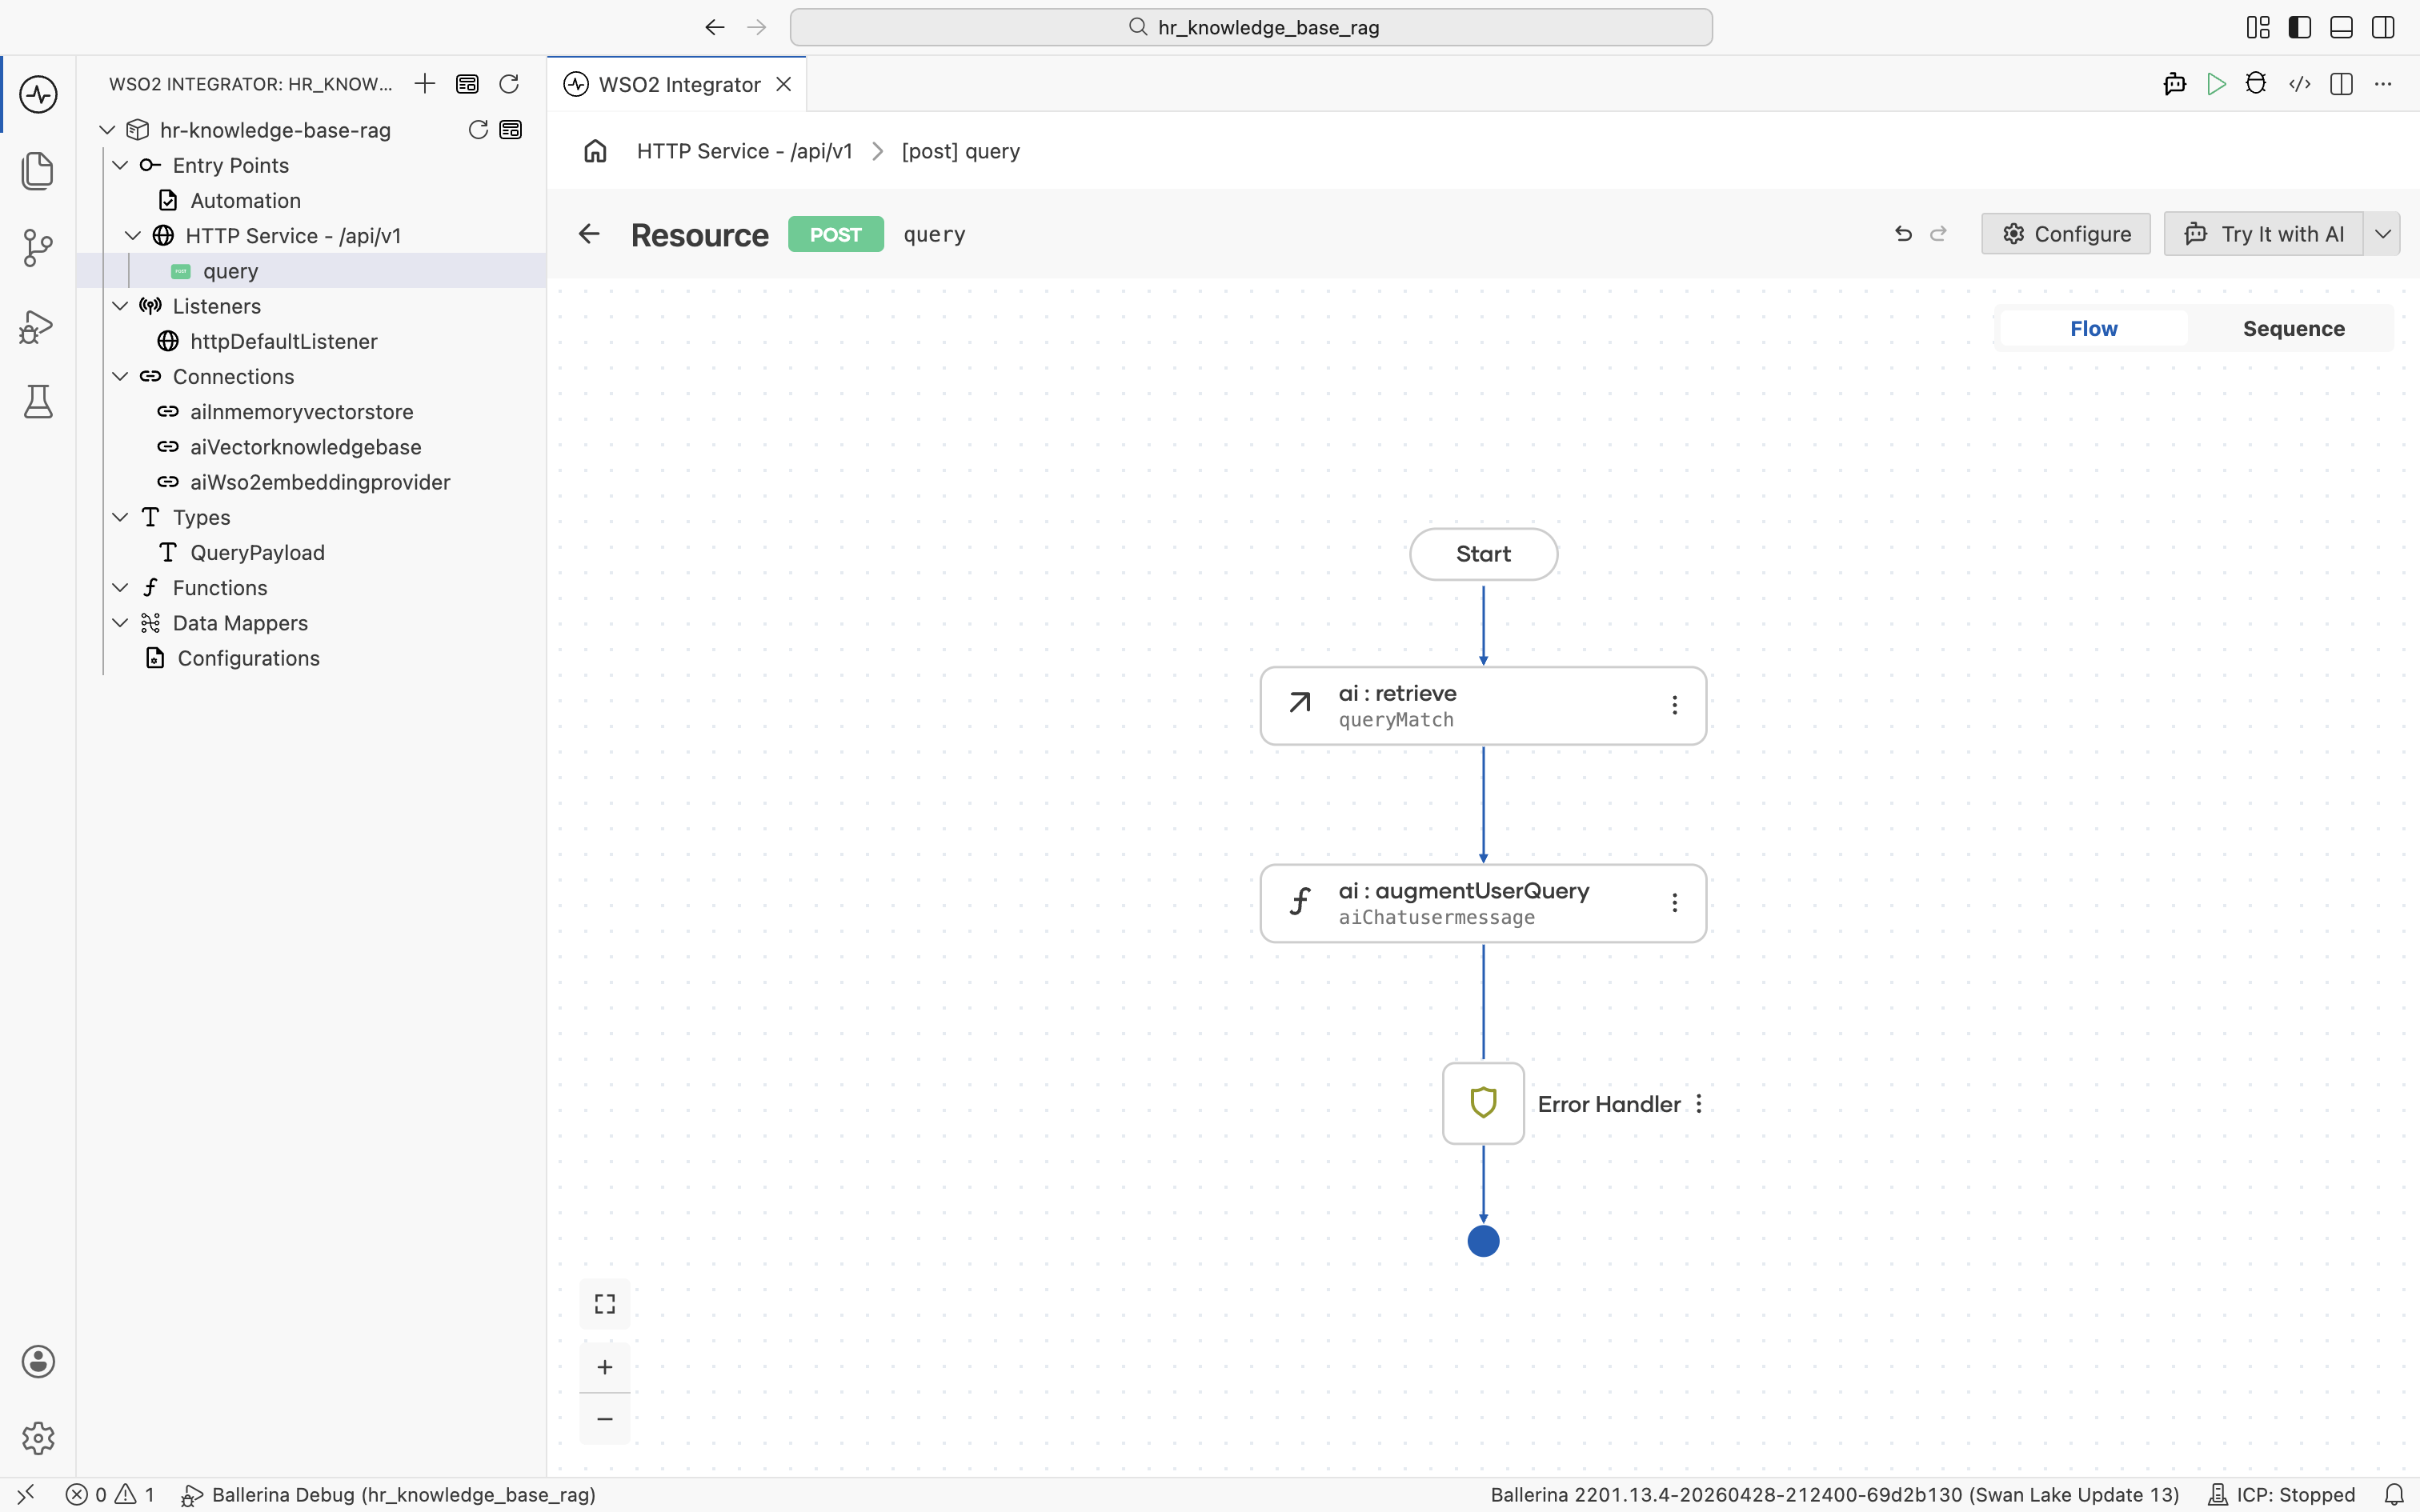
3.5 Add a model provider
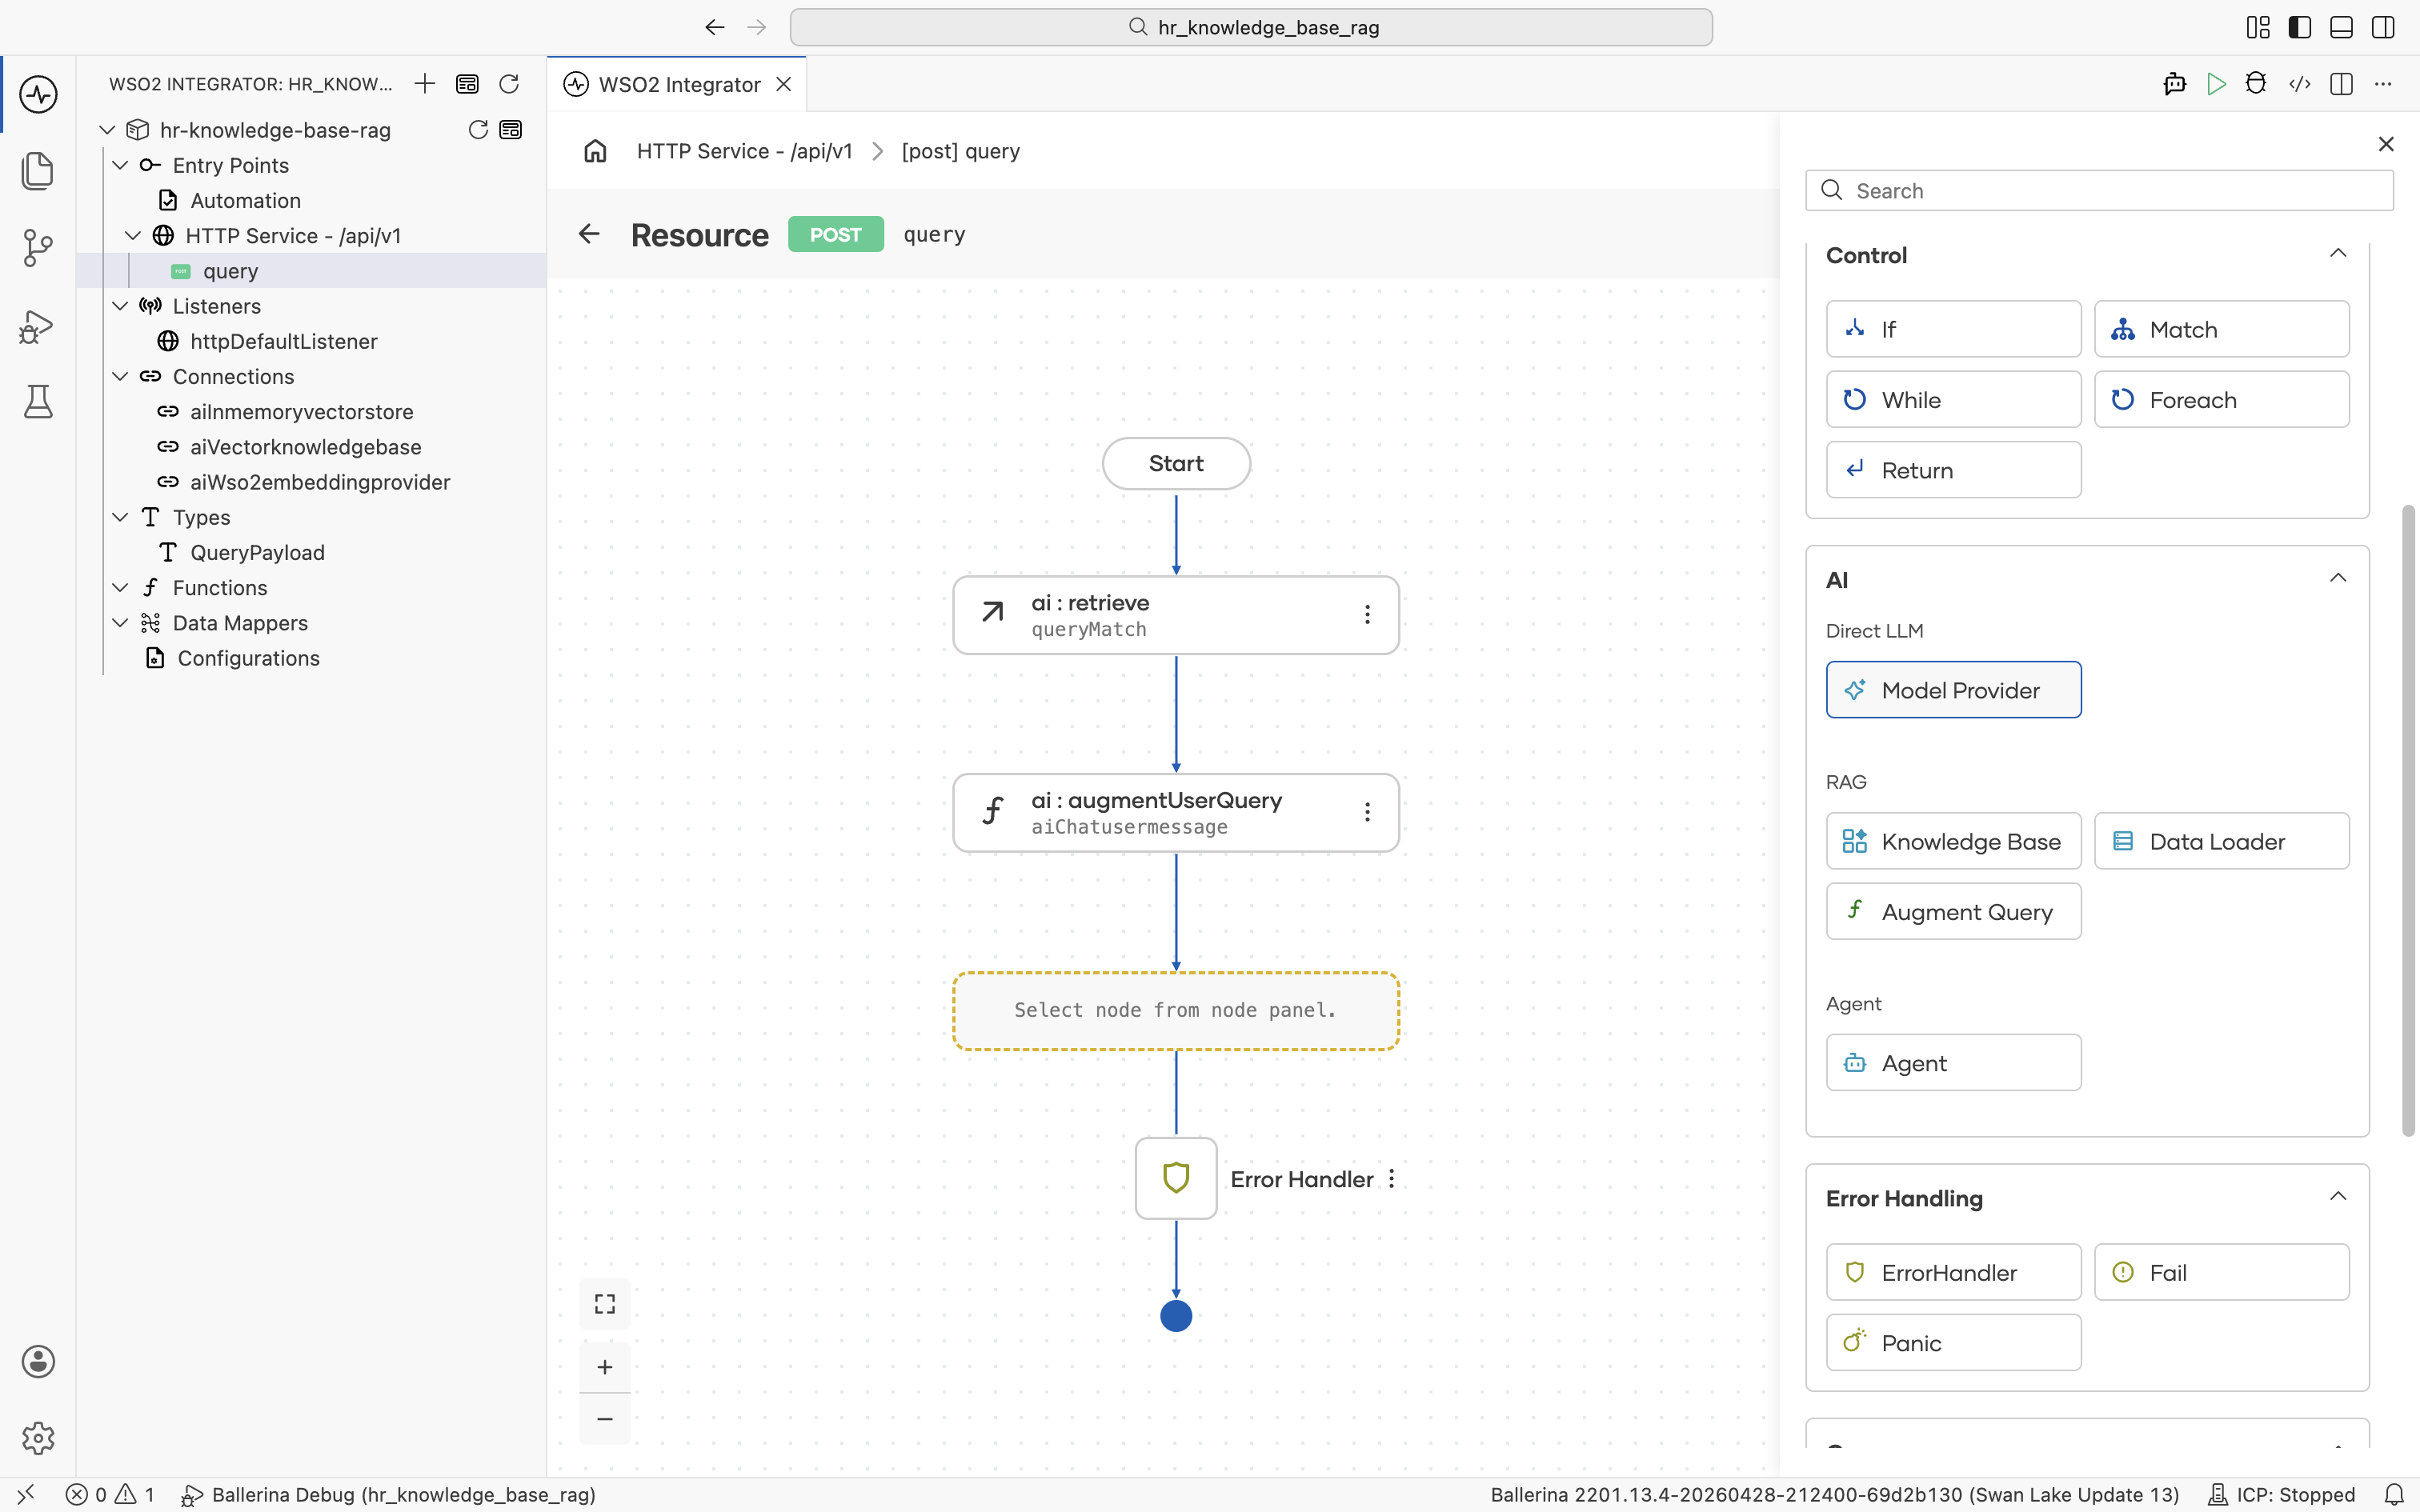
Click the + below the ai:augmentUserQuery node to add the next node.

The node palette opens. Under AI > Direct LLM, click Model Provider.
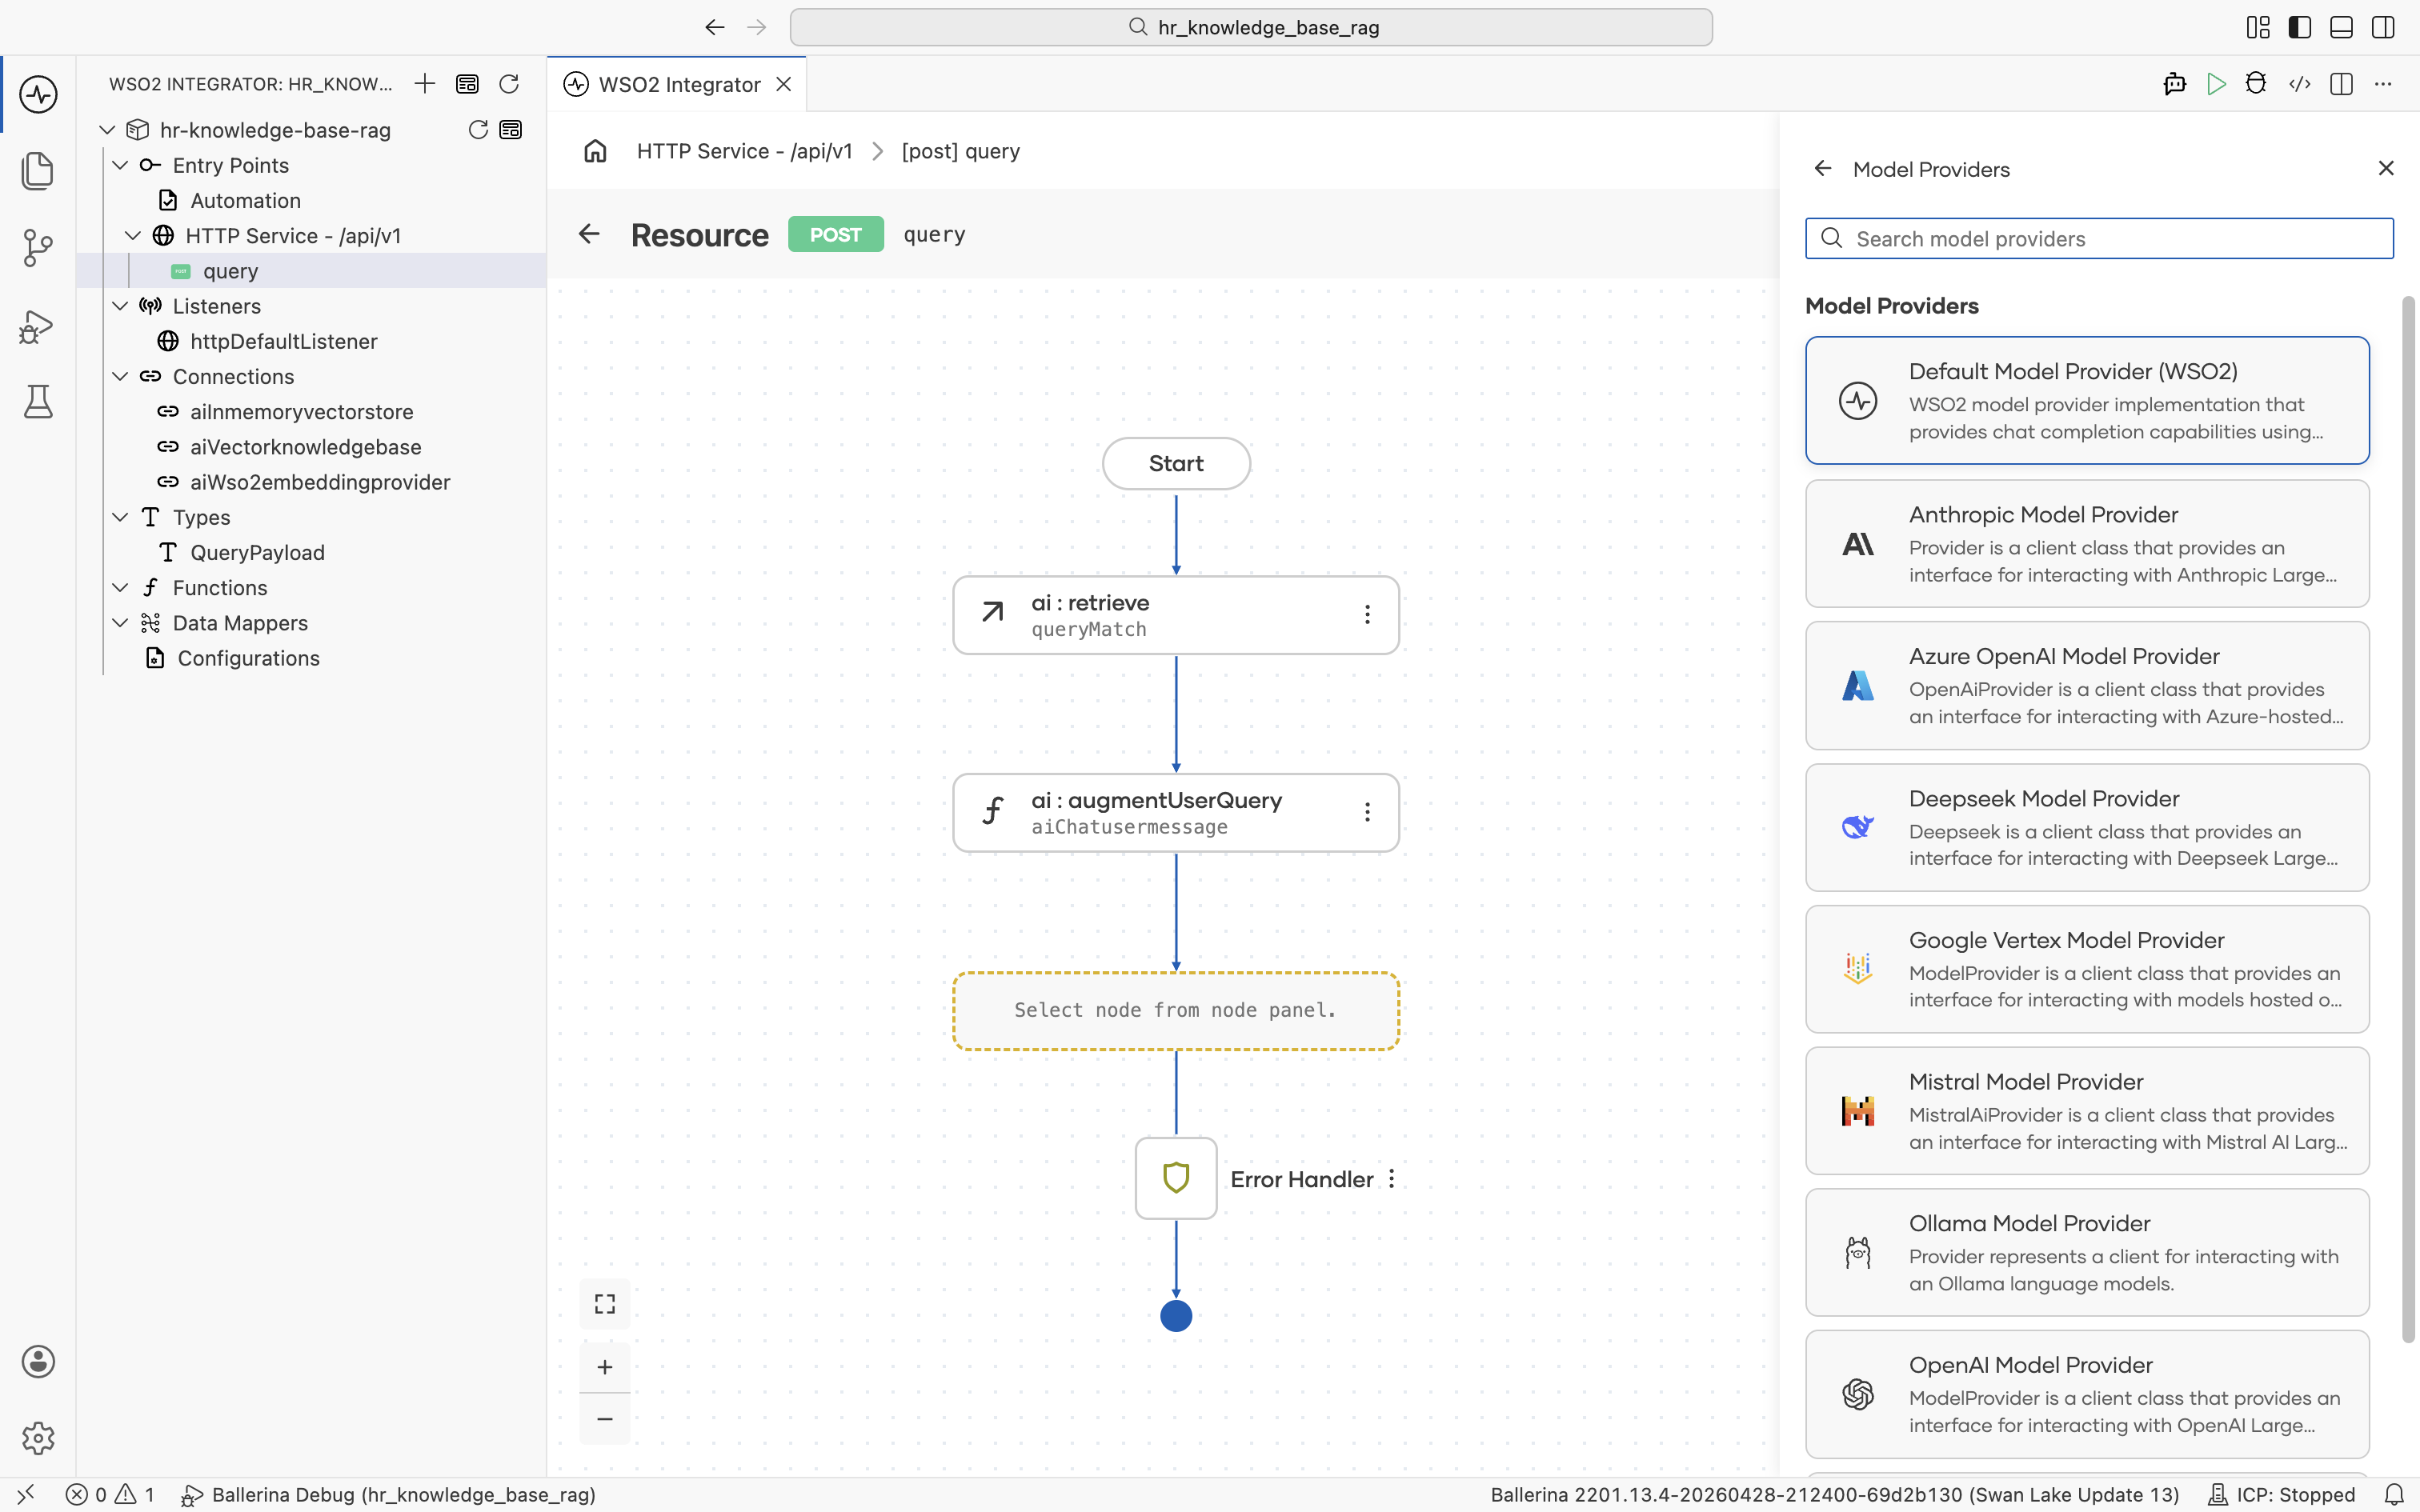
The Model Providers panel opens with no existing connections. Click + Add Model Provider.
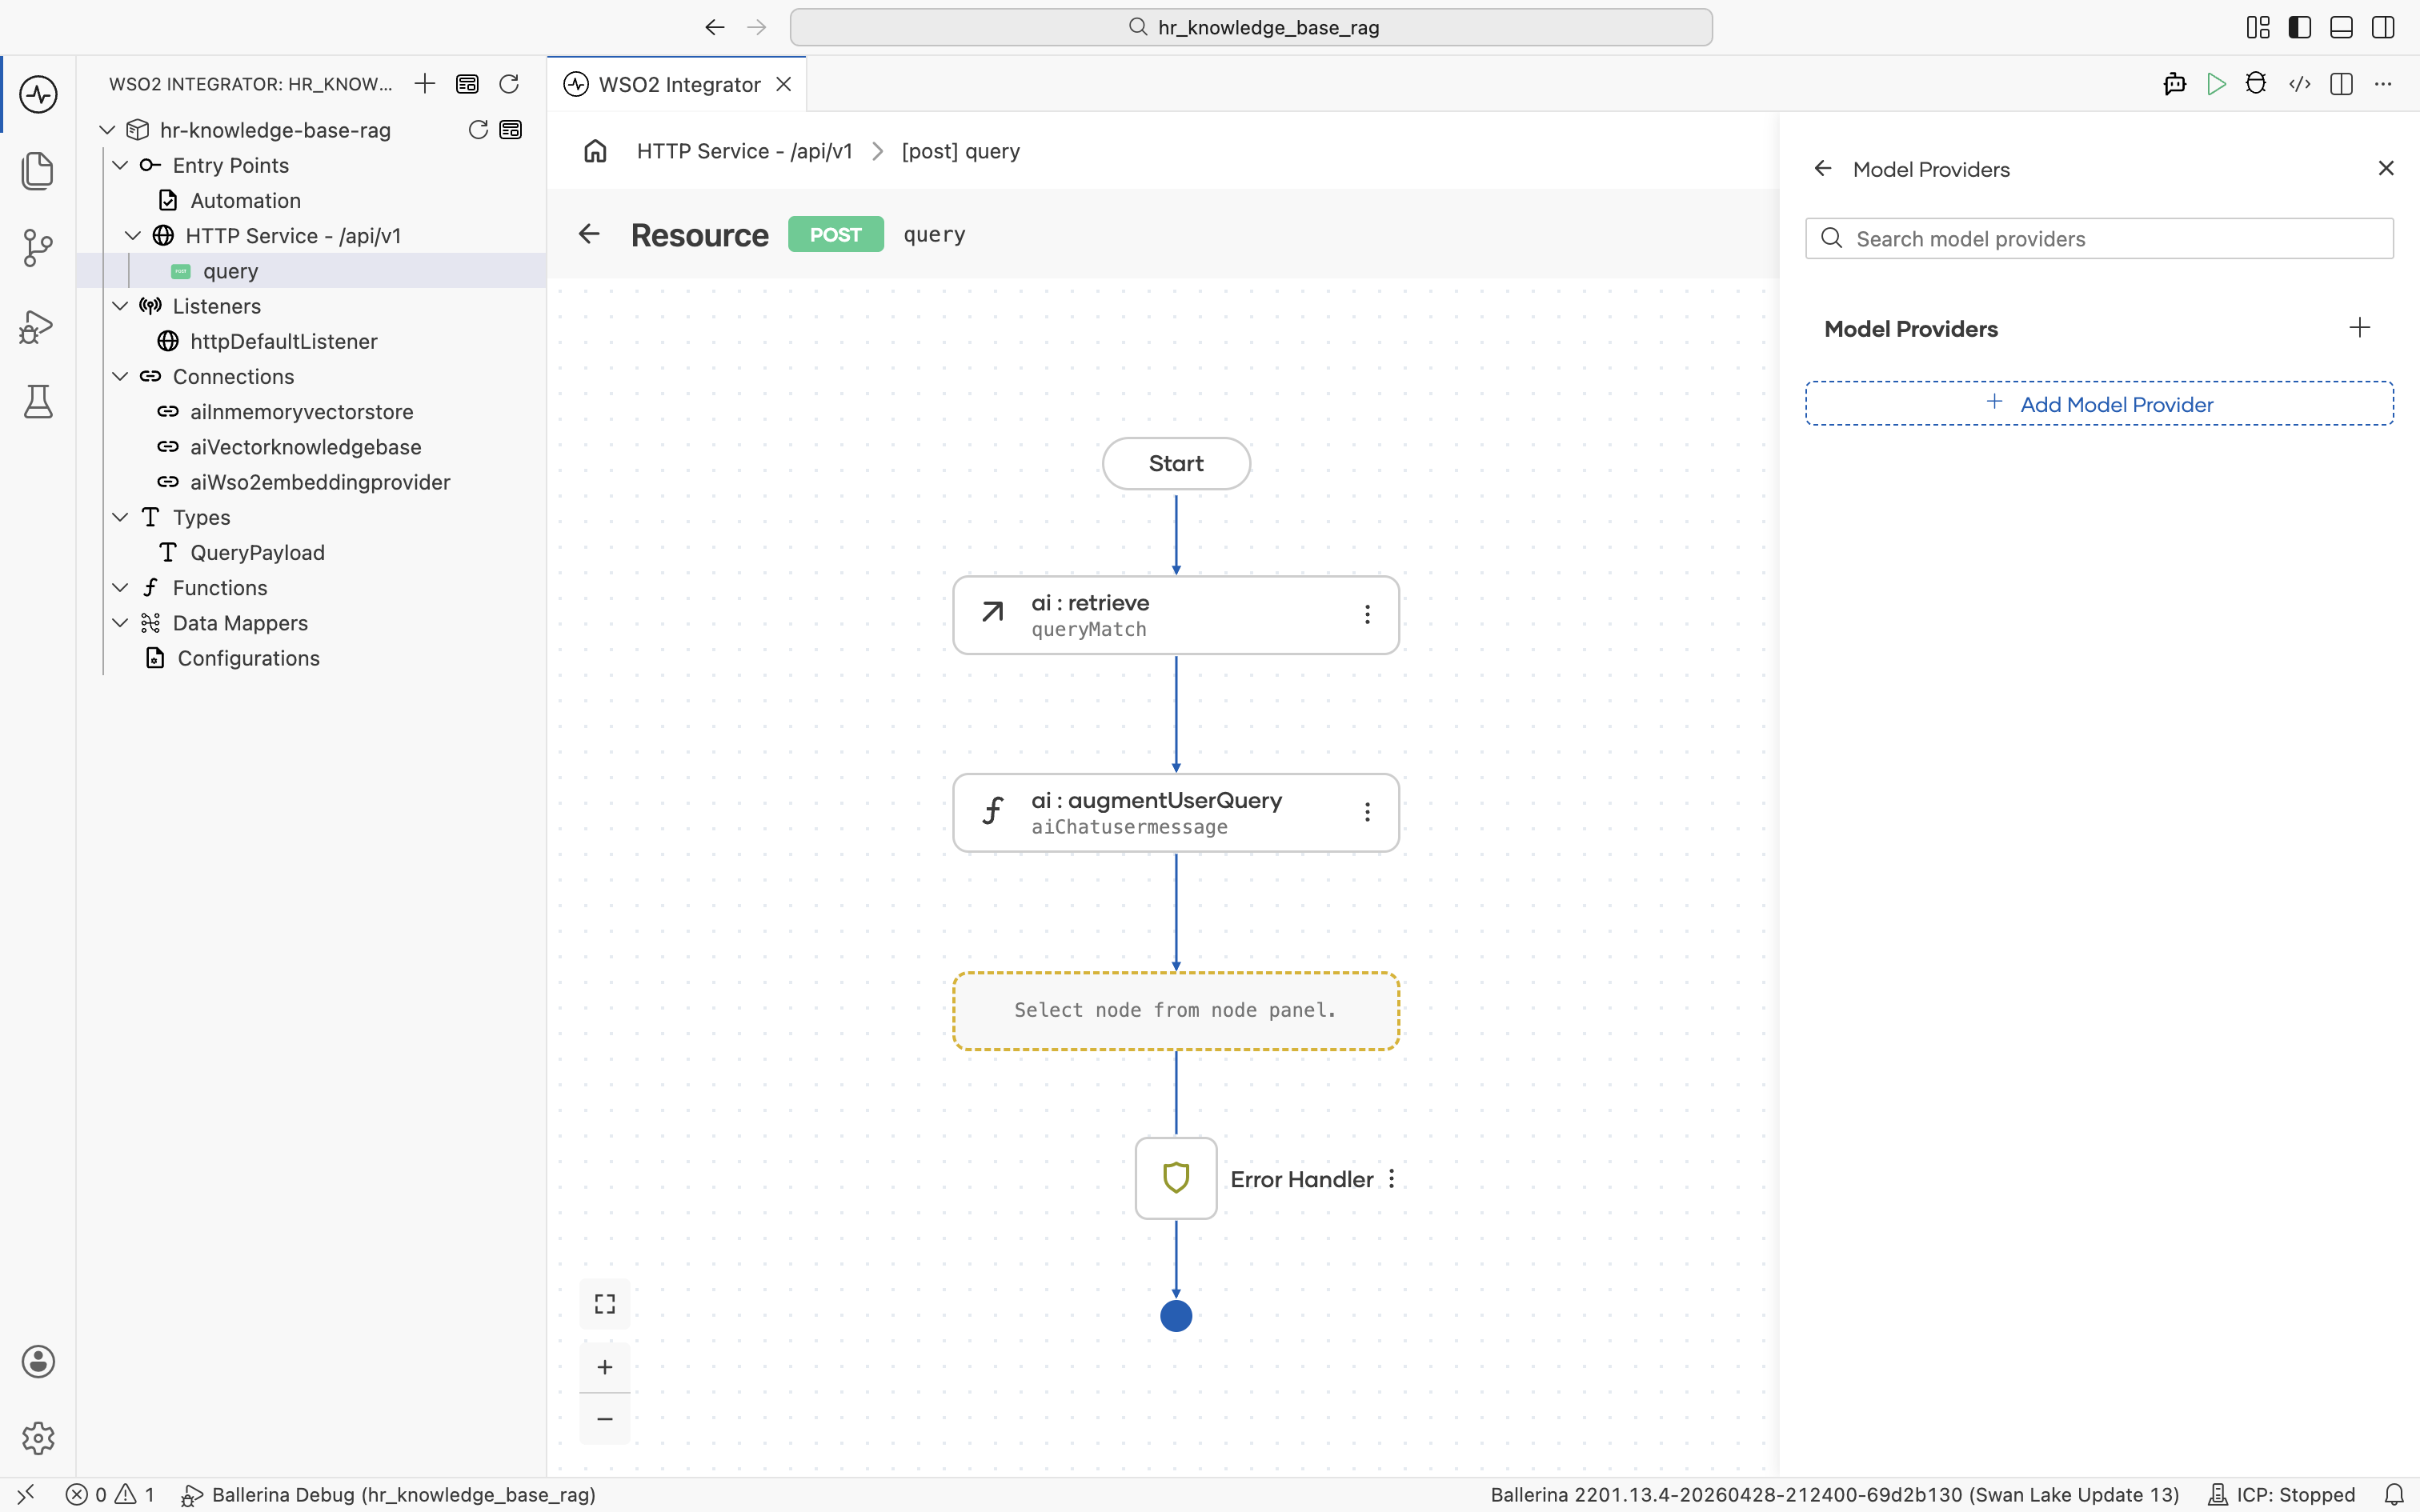
The supported model providers are listed. Pick Default Model Provider (WSO2).
The Create Model Provider form opens. Fill in:
- Model Provider Name:
aiWso2modelprovider - Result Type:
ai:Wso2ModelProvider

Click Save. You are returned to the Model Providers panel with aiWso2modelprovider listed. The new connection also appears in the left Connections tree.
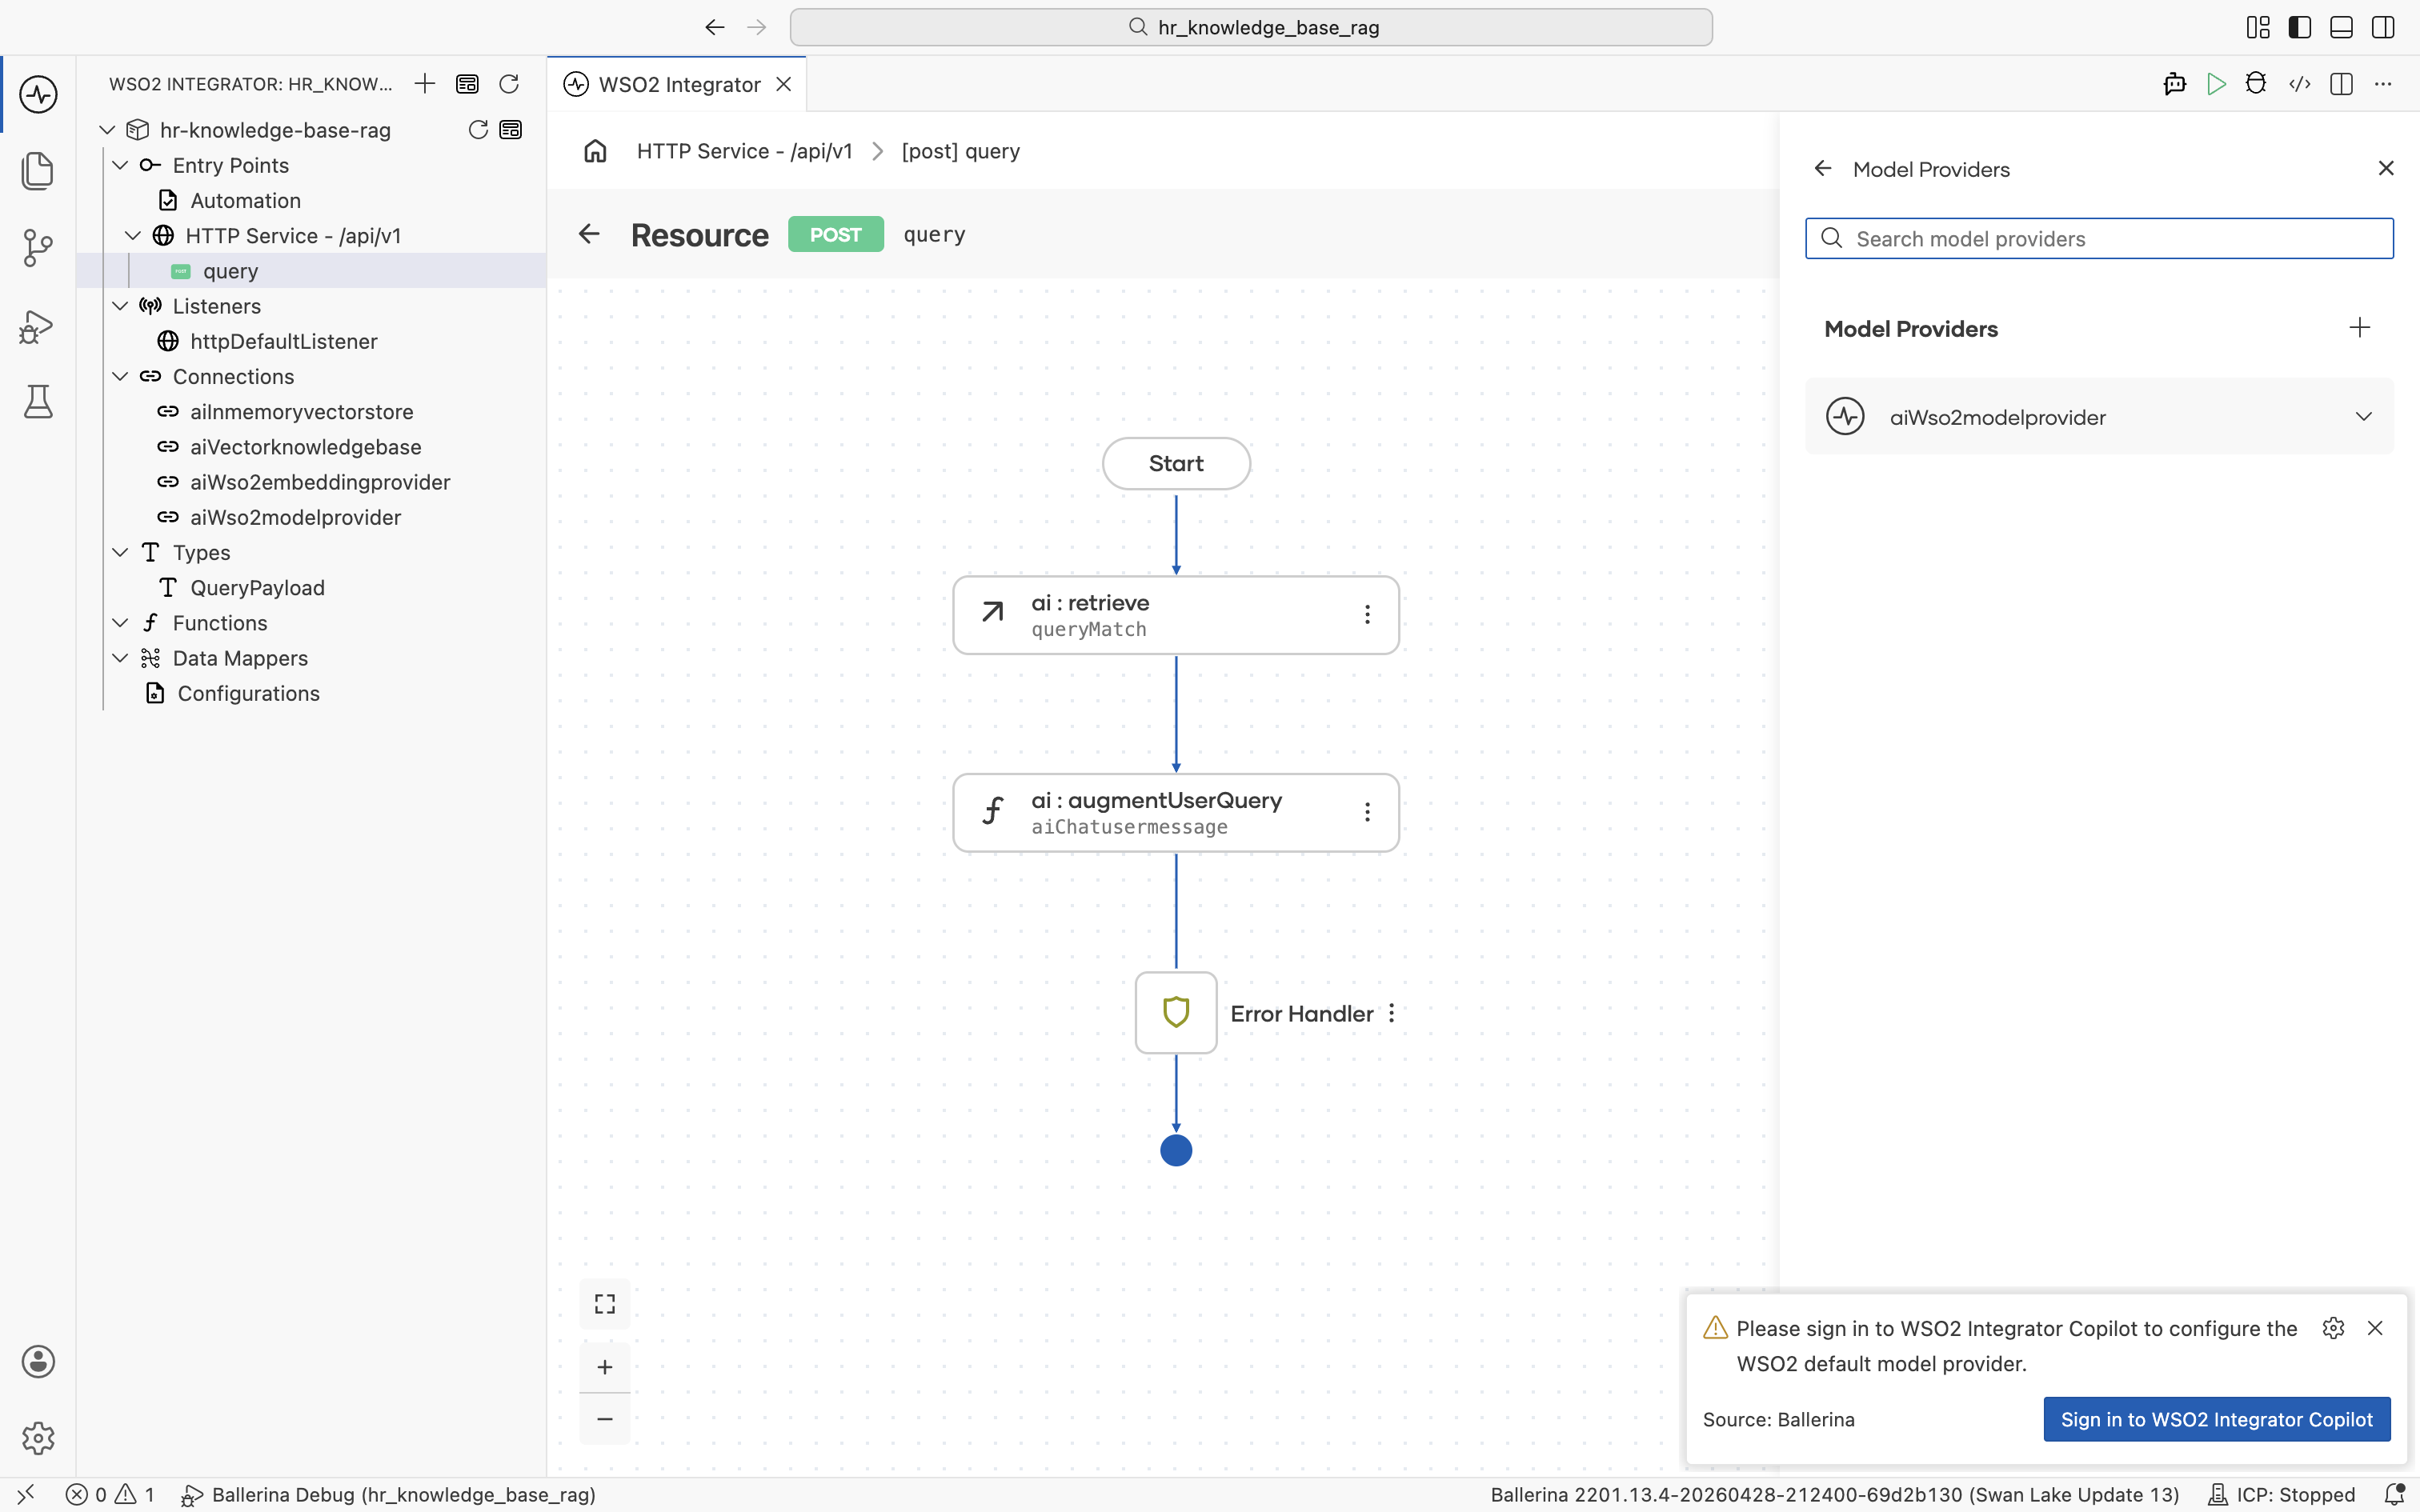
If you have not signed into WSO2 Integrator Copilot yet, a sign-in prompt appears at this point. Sign in so the Copilot can configure the default model provider.
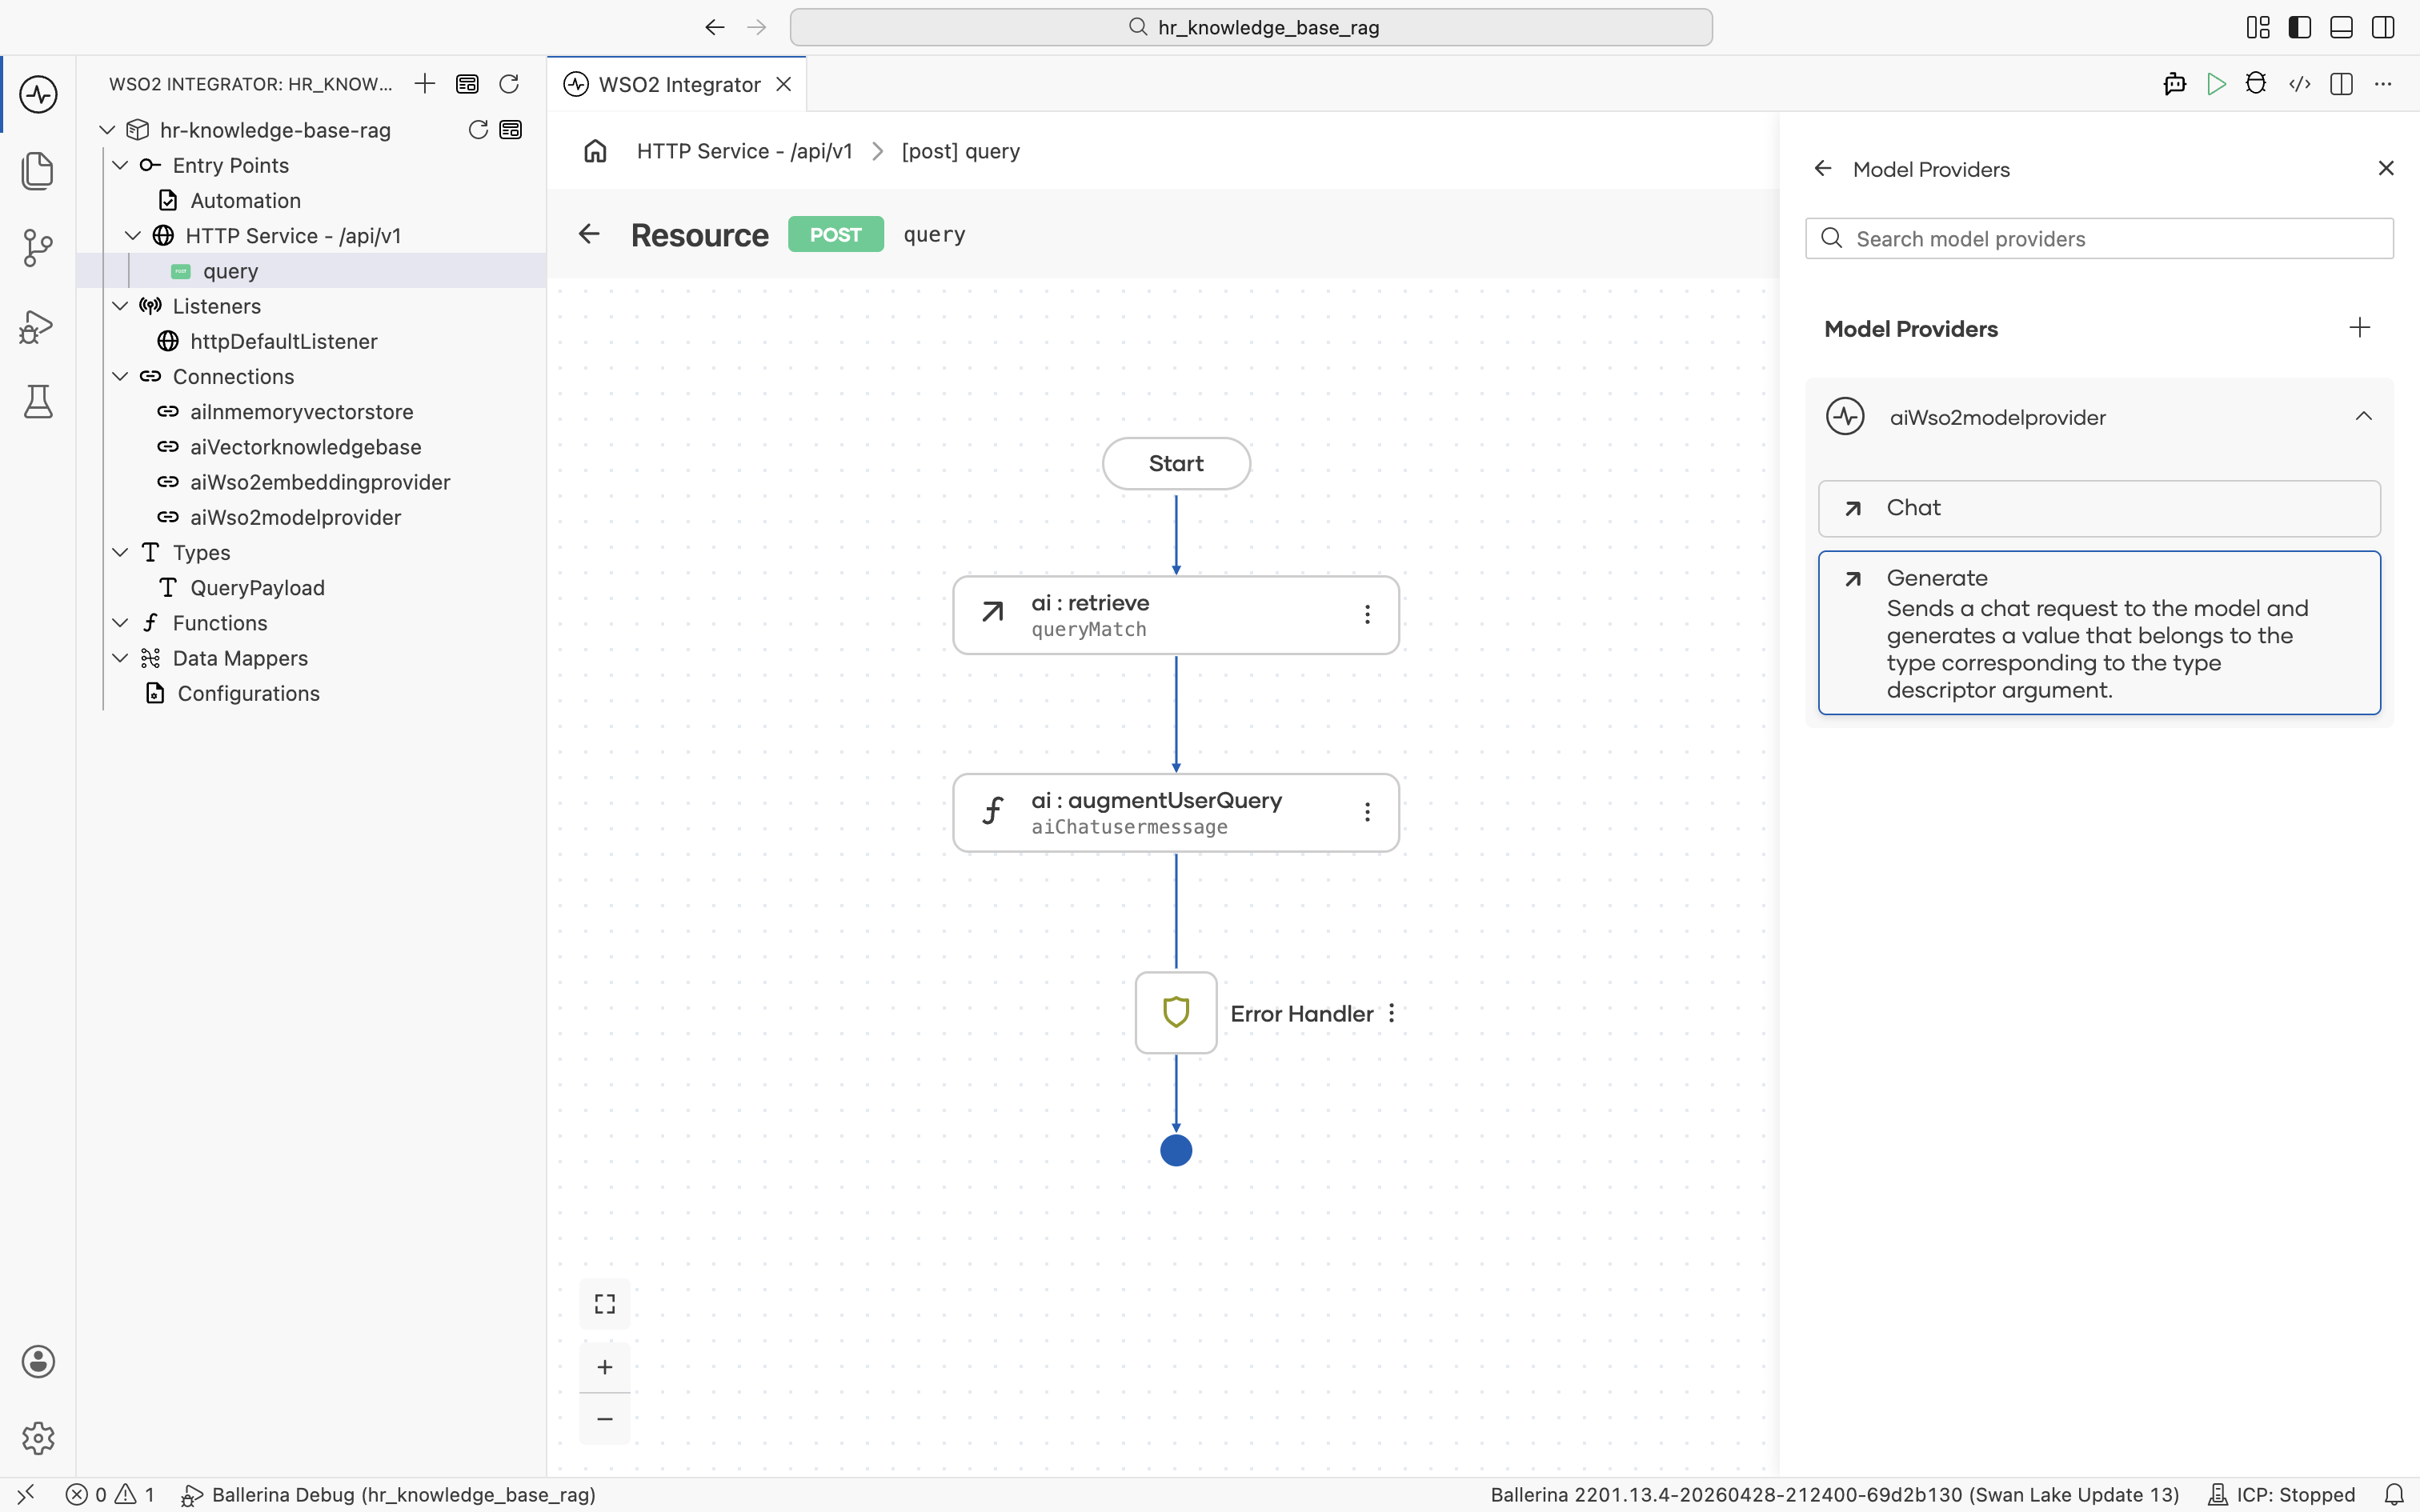
3.6 Generate the answer
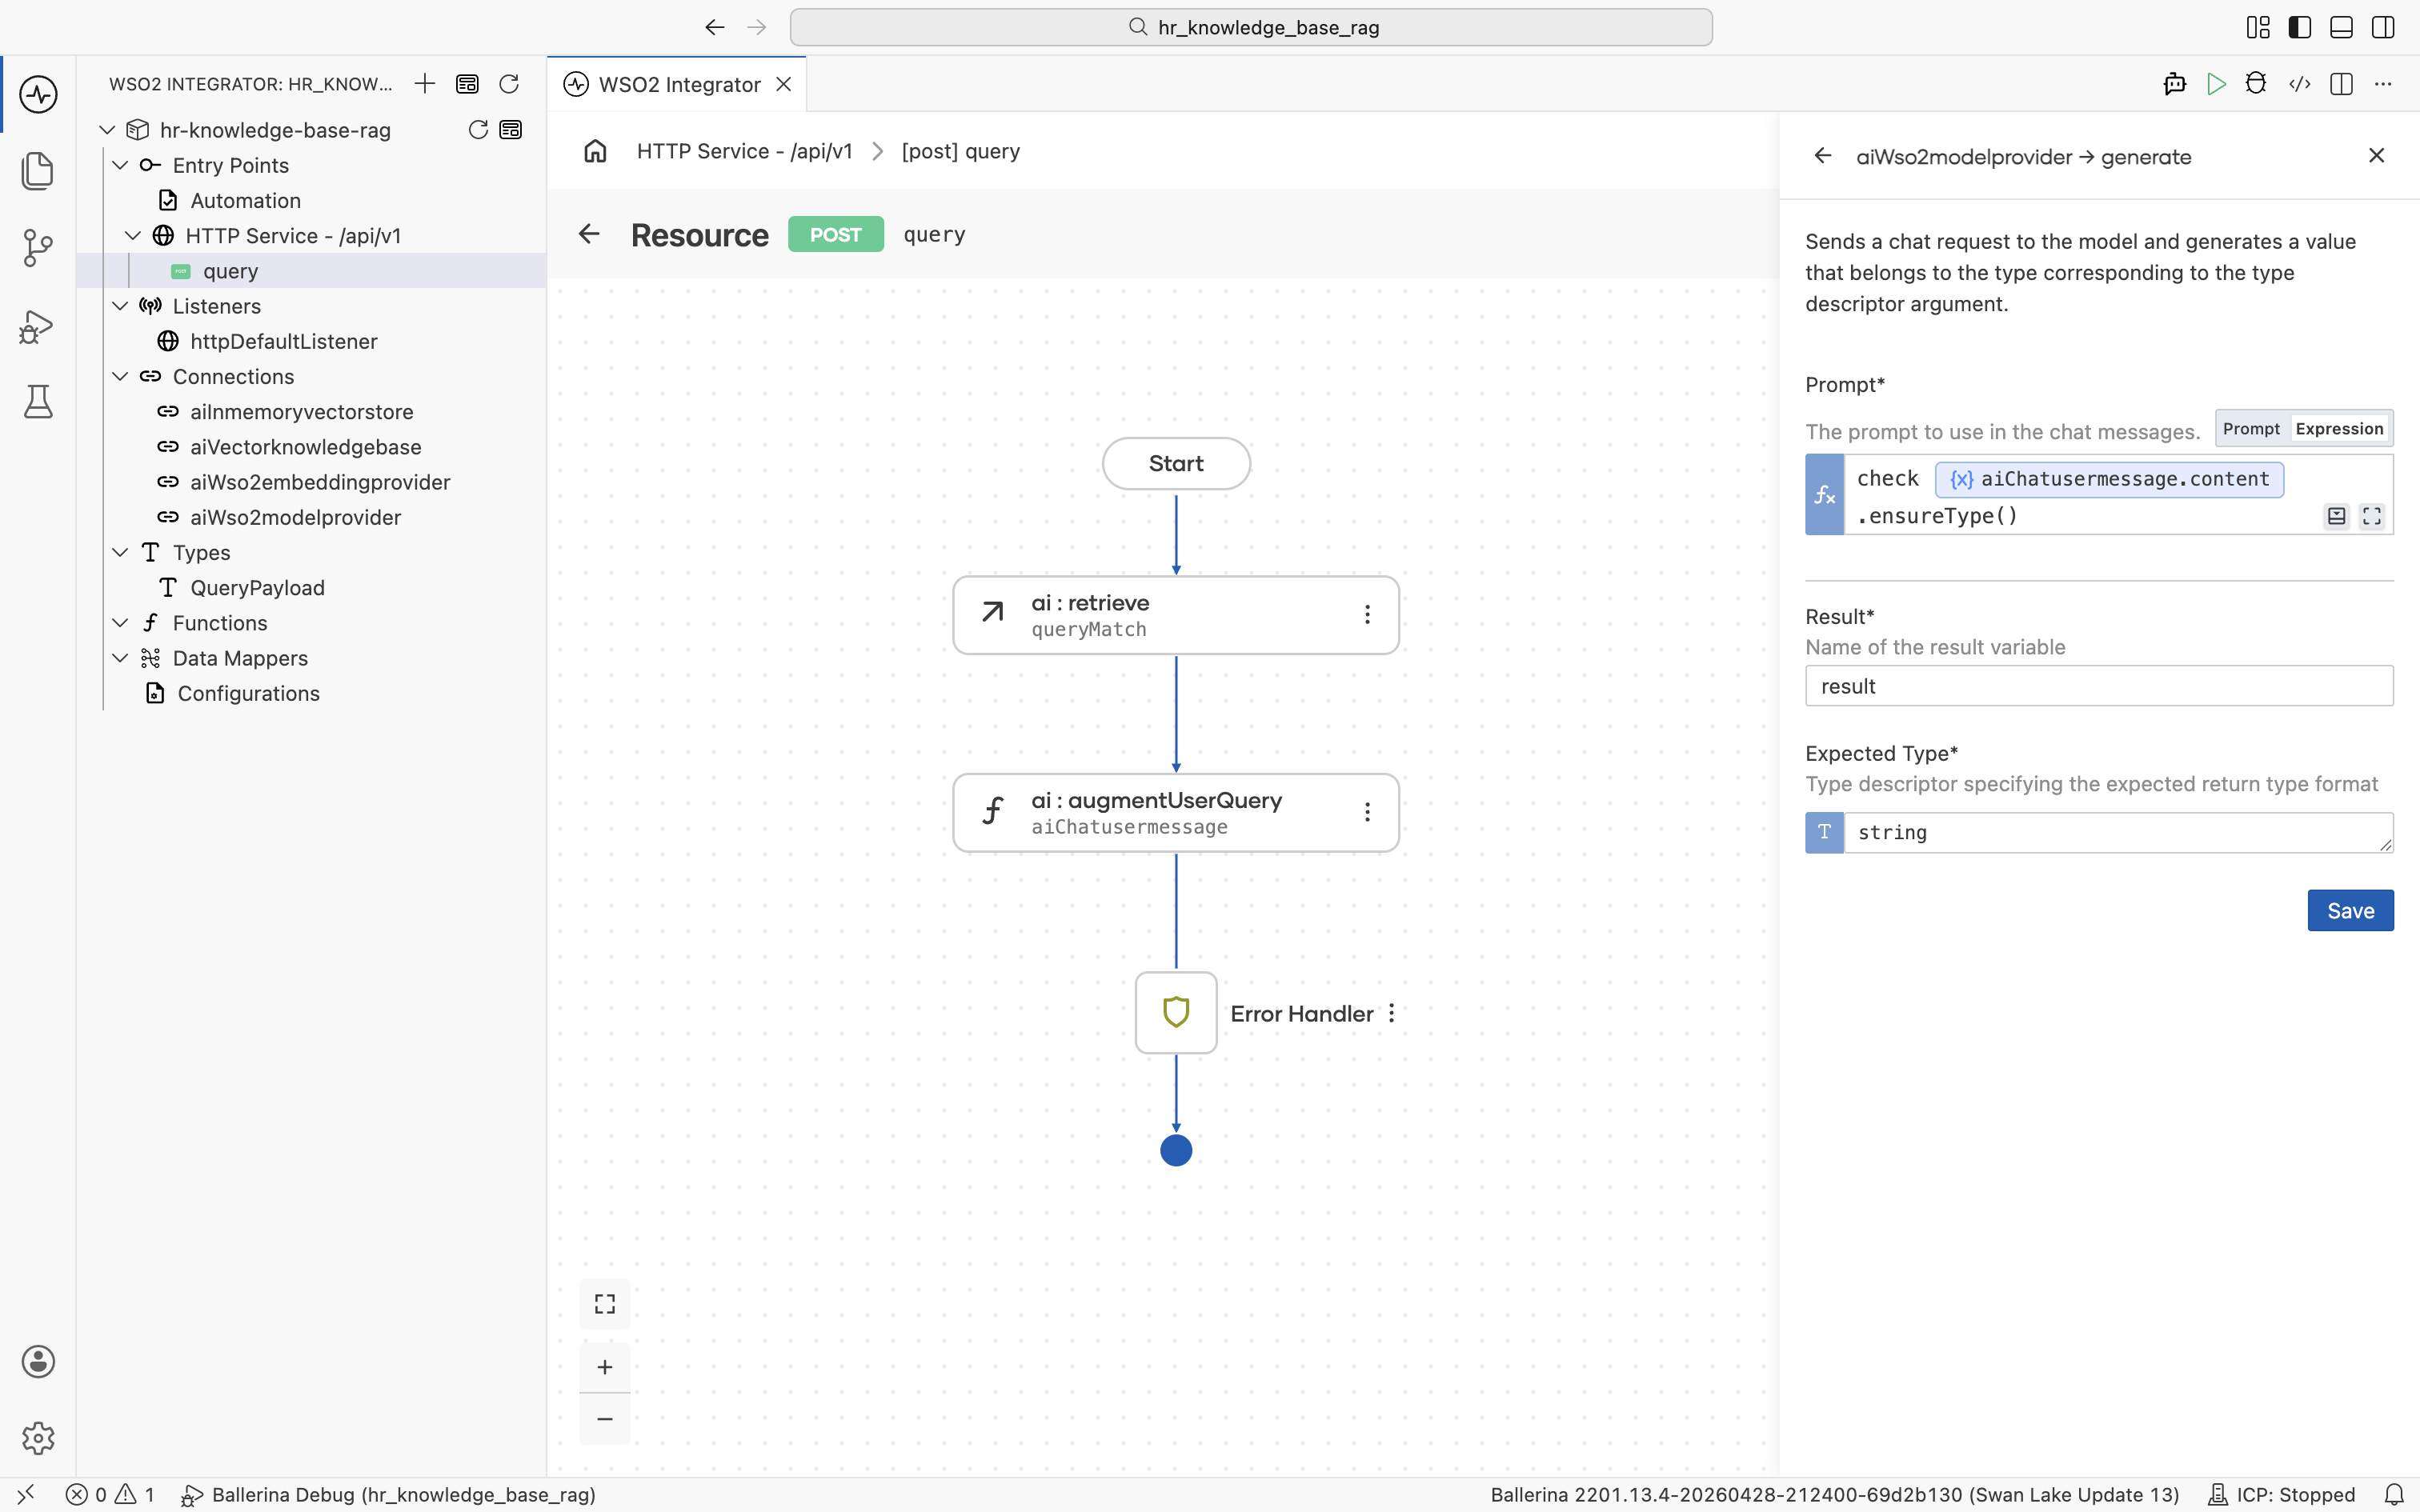
Click aiWso2modelprovider to expand it and reveal its actions: Chat and Generate. Click Generate: "Sends a chat request to the model and generates a value that belongs to the type corresponding to the type descriptor argument."
The generate form opens. Fill in:
- Prompt (Expression mode):
The
check aiChatusermessage.content.ensureType()contentfield onai:ChatUserMessageis typed asstring|ai:Prompt.ai:augmentUserQuerypopulates it with one or the other depending on the augmentation strategy. Thegeneratenode's Prompt expects a Ballerina template literal (string-compatible), so useensureType()to assert thestringbranch at runtime.checkpropagates any conversion error to the resource's error handler. - Result:
result - Expected Type:
string
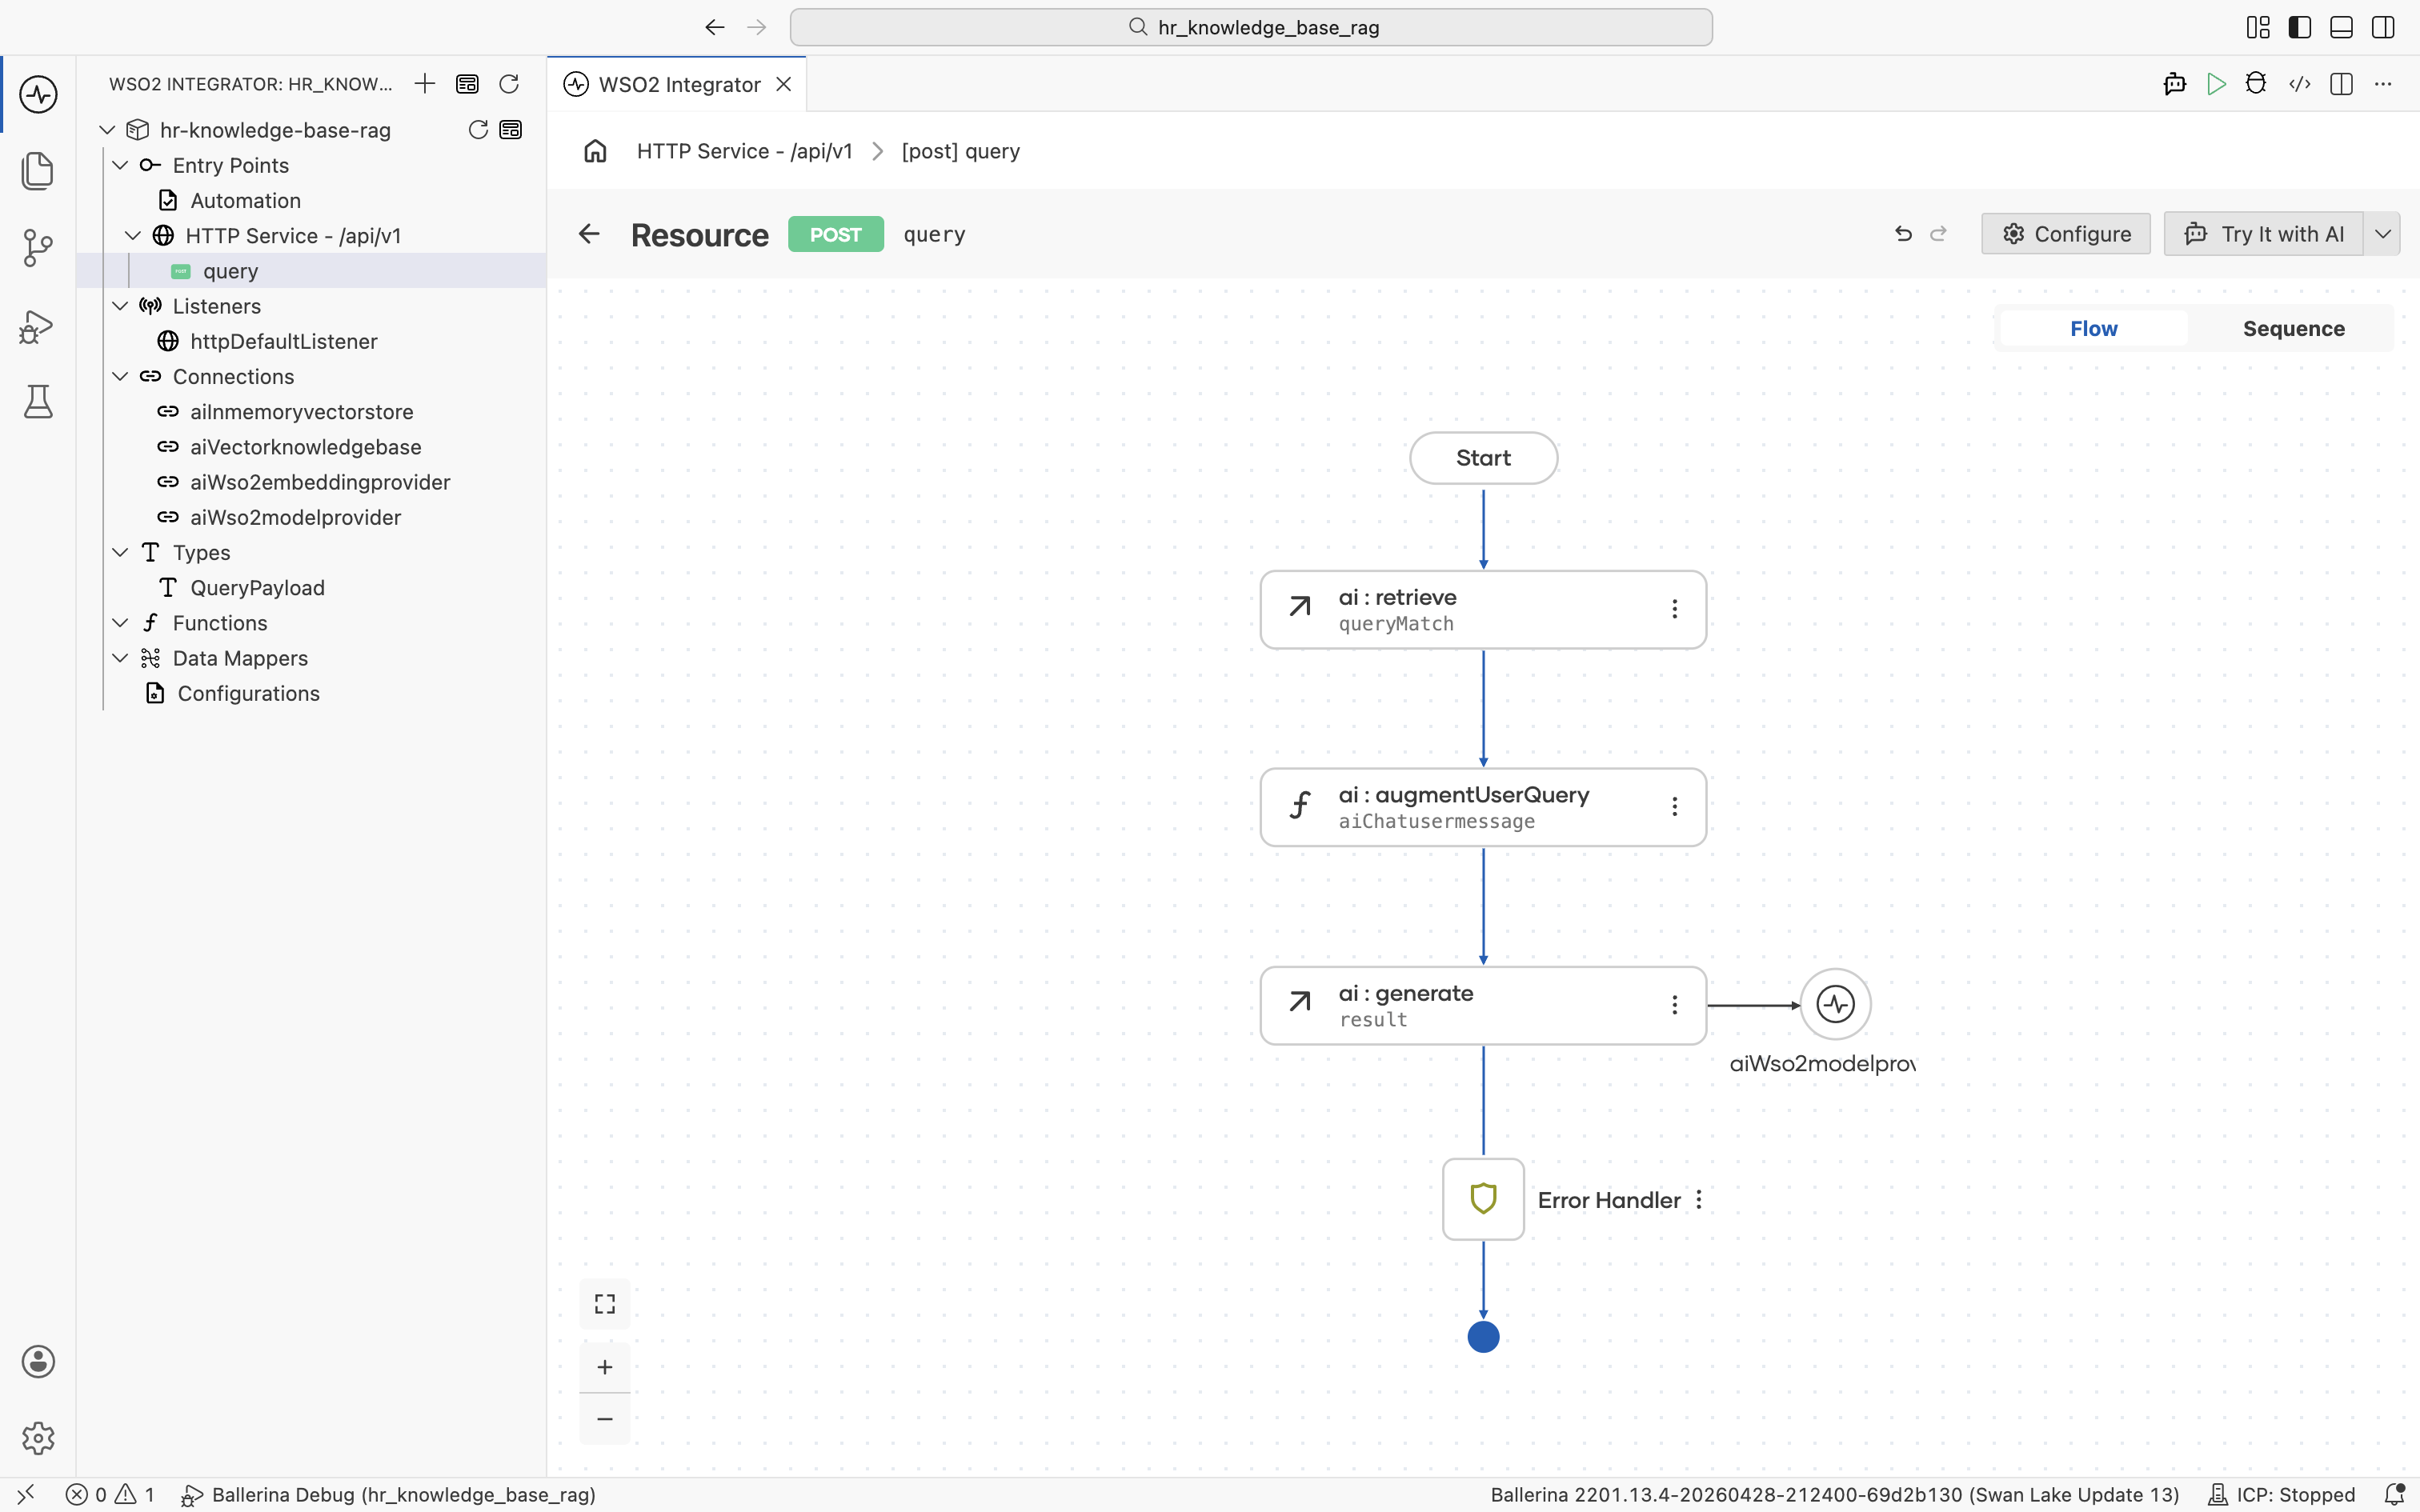
Click Save. The ai:generate node is added to the flow, with the aiWso2modelprovider connection shown alongside it.
3.7 Return the answer
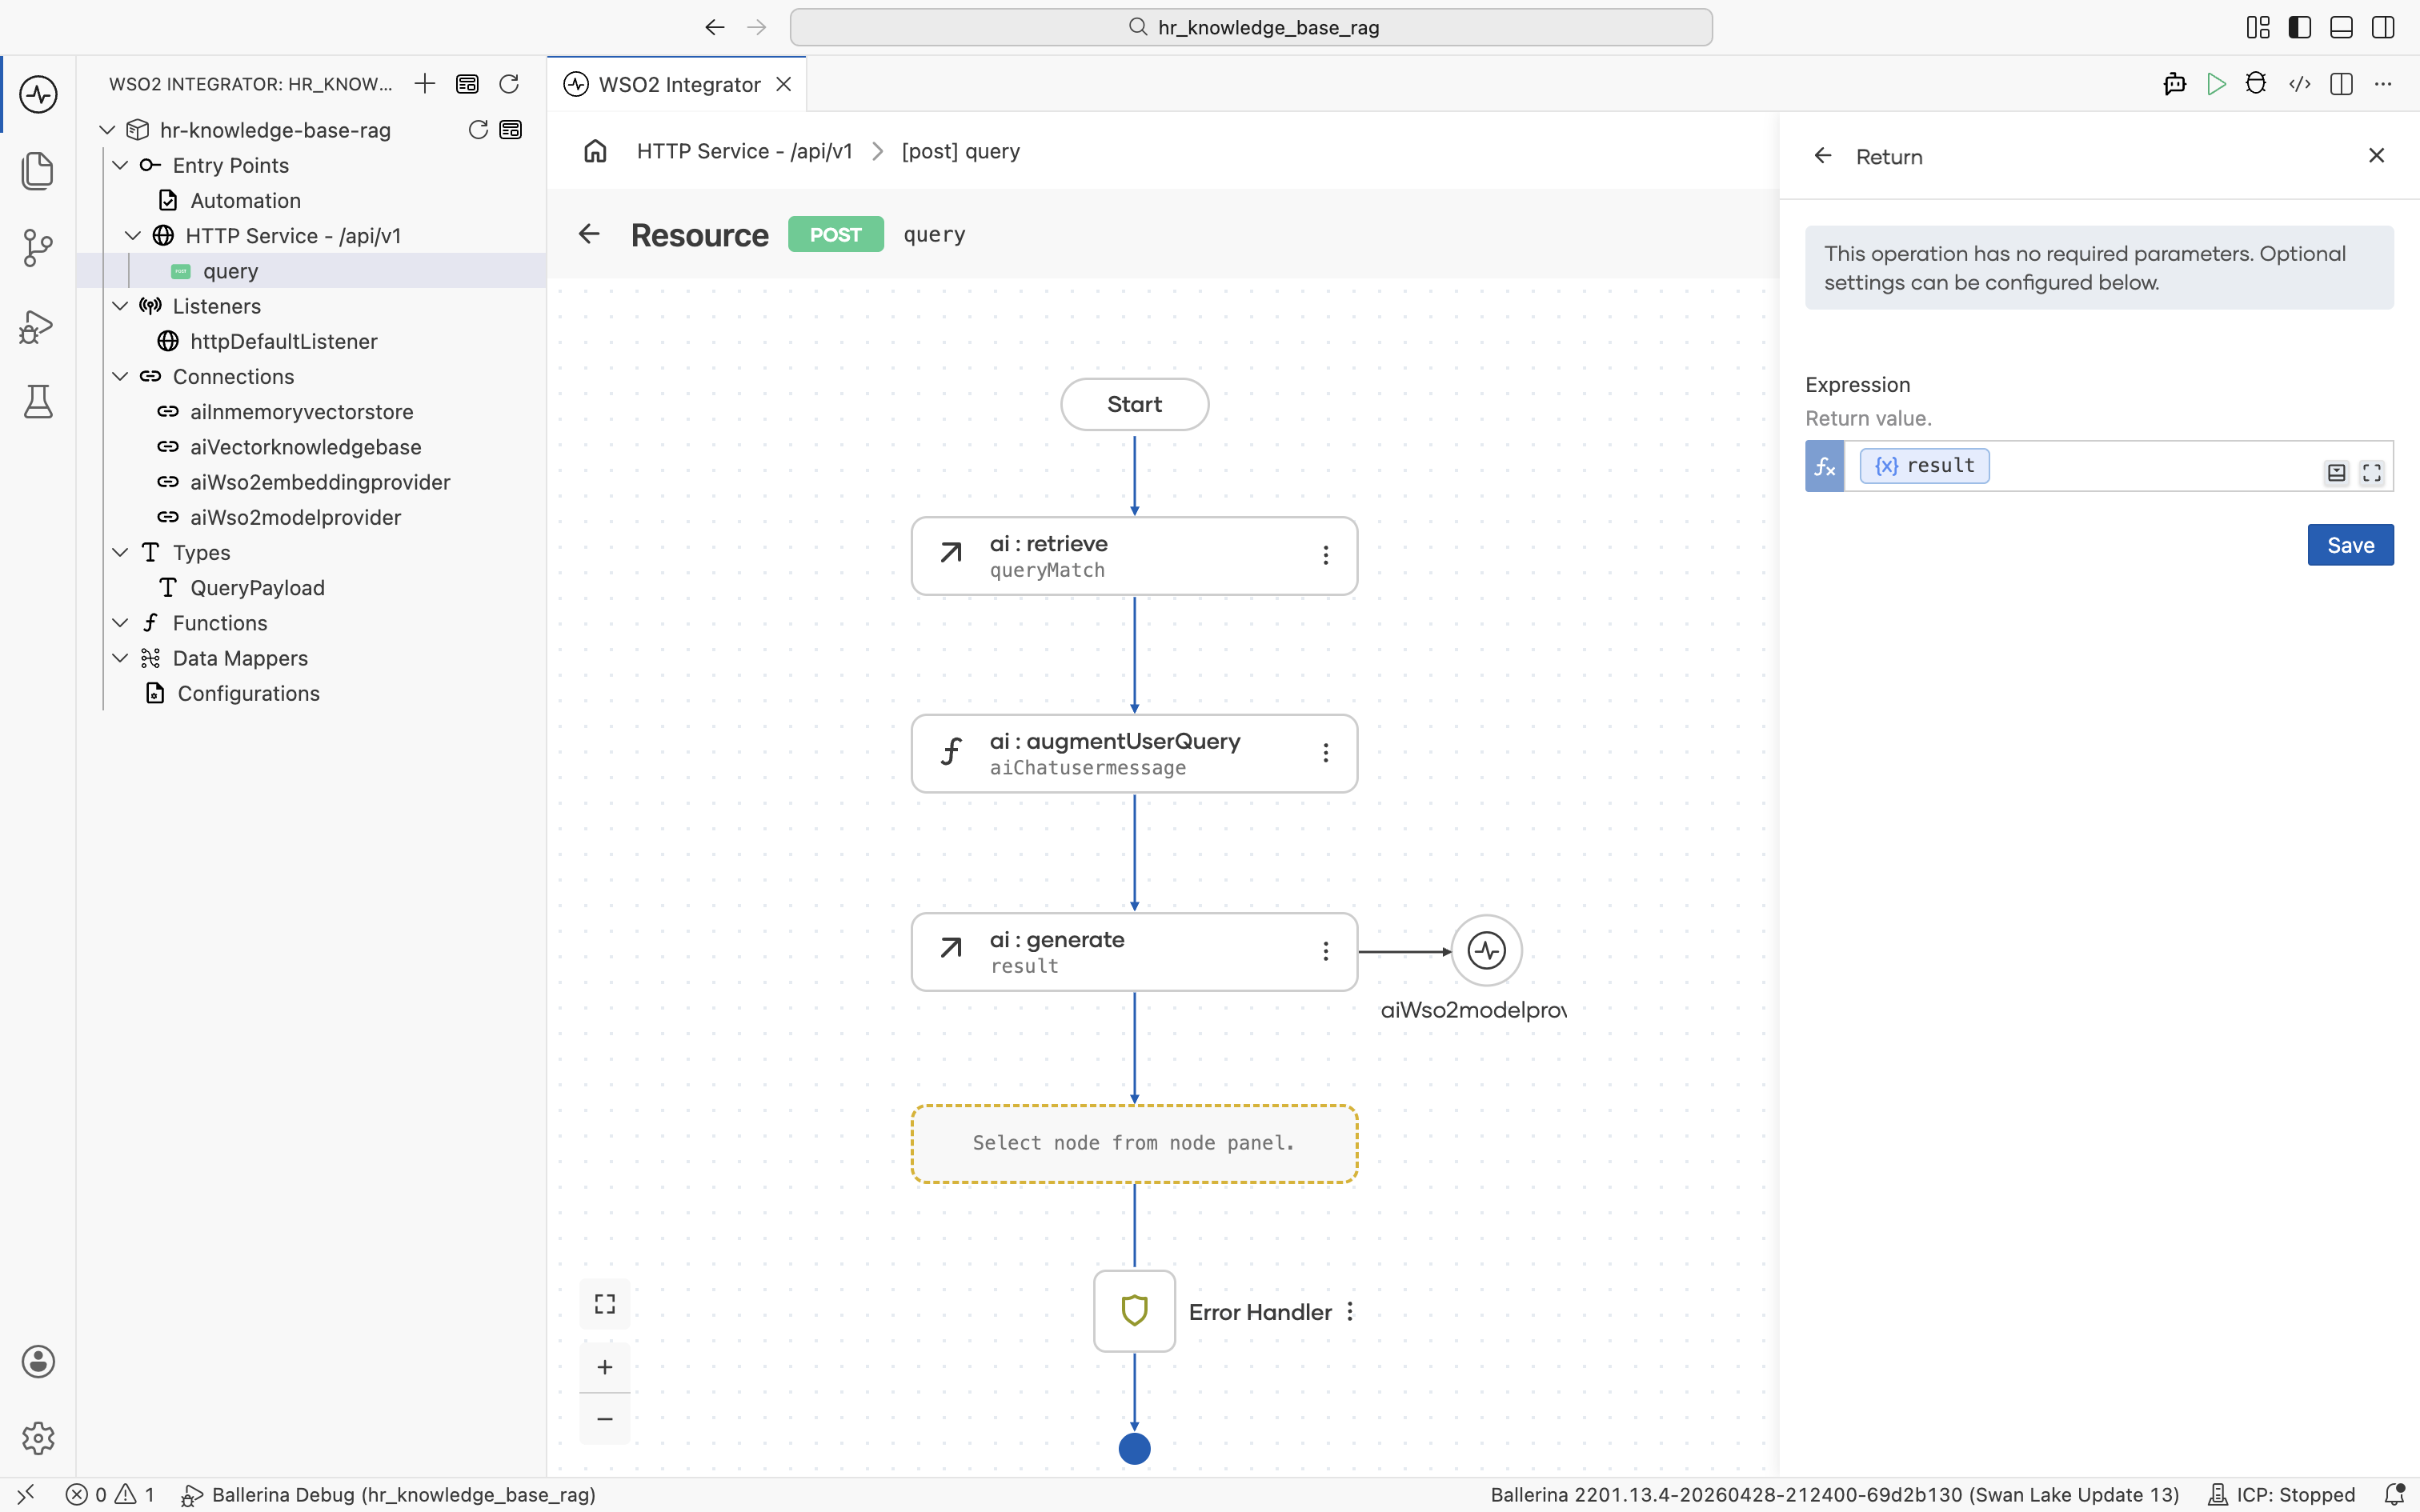
Click the + below the ai:generate node. The node palette opens. Under Control, click Return.

The Return form opens. Click into the Expression field and pick Variables > result from the helper pane.
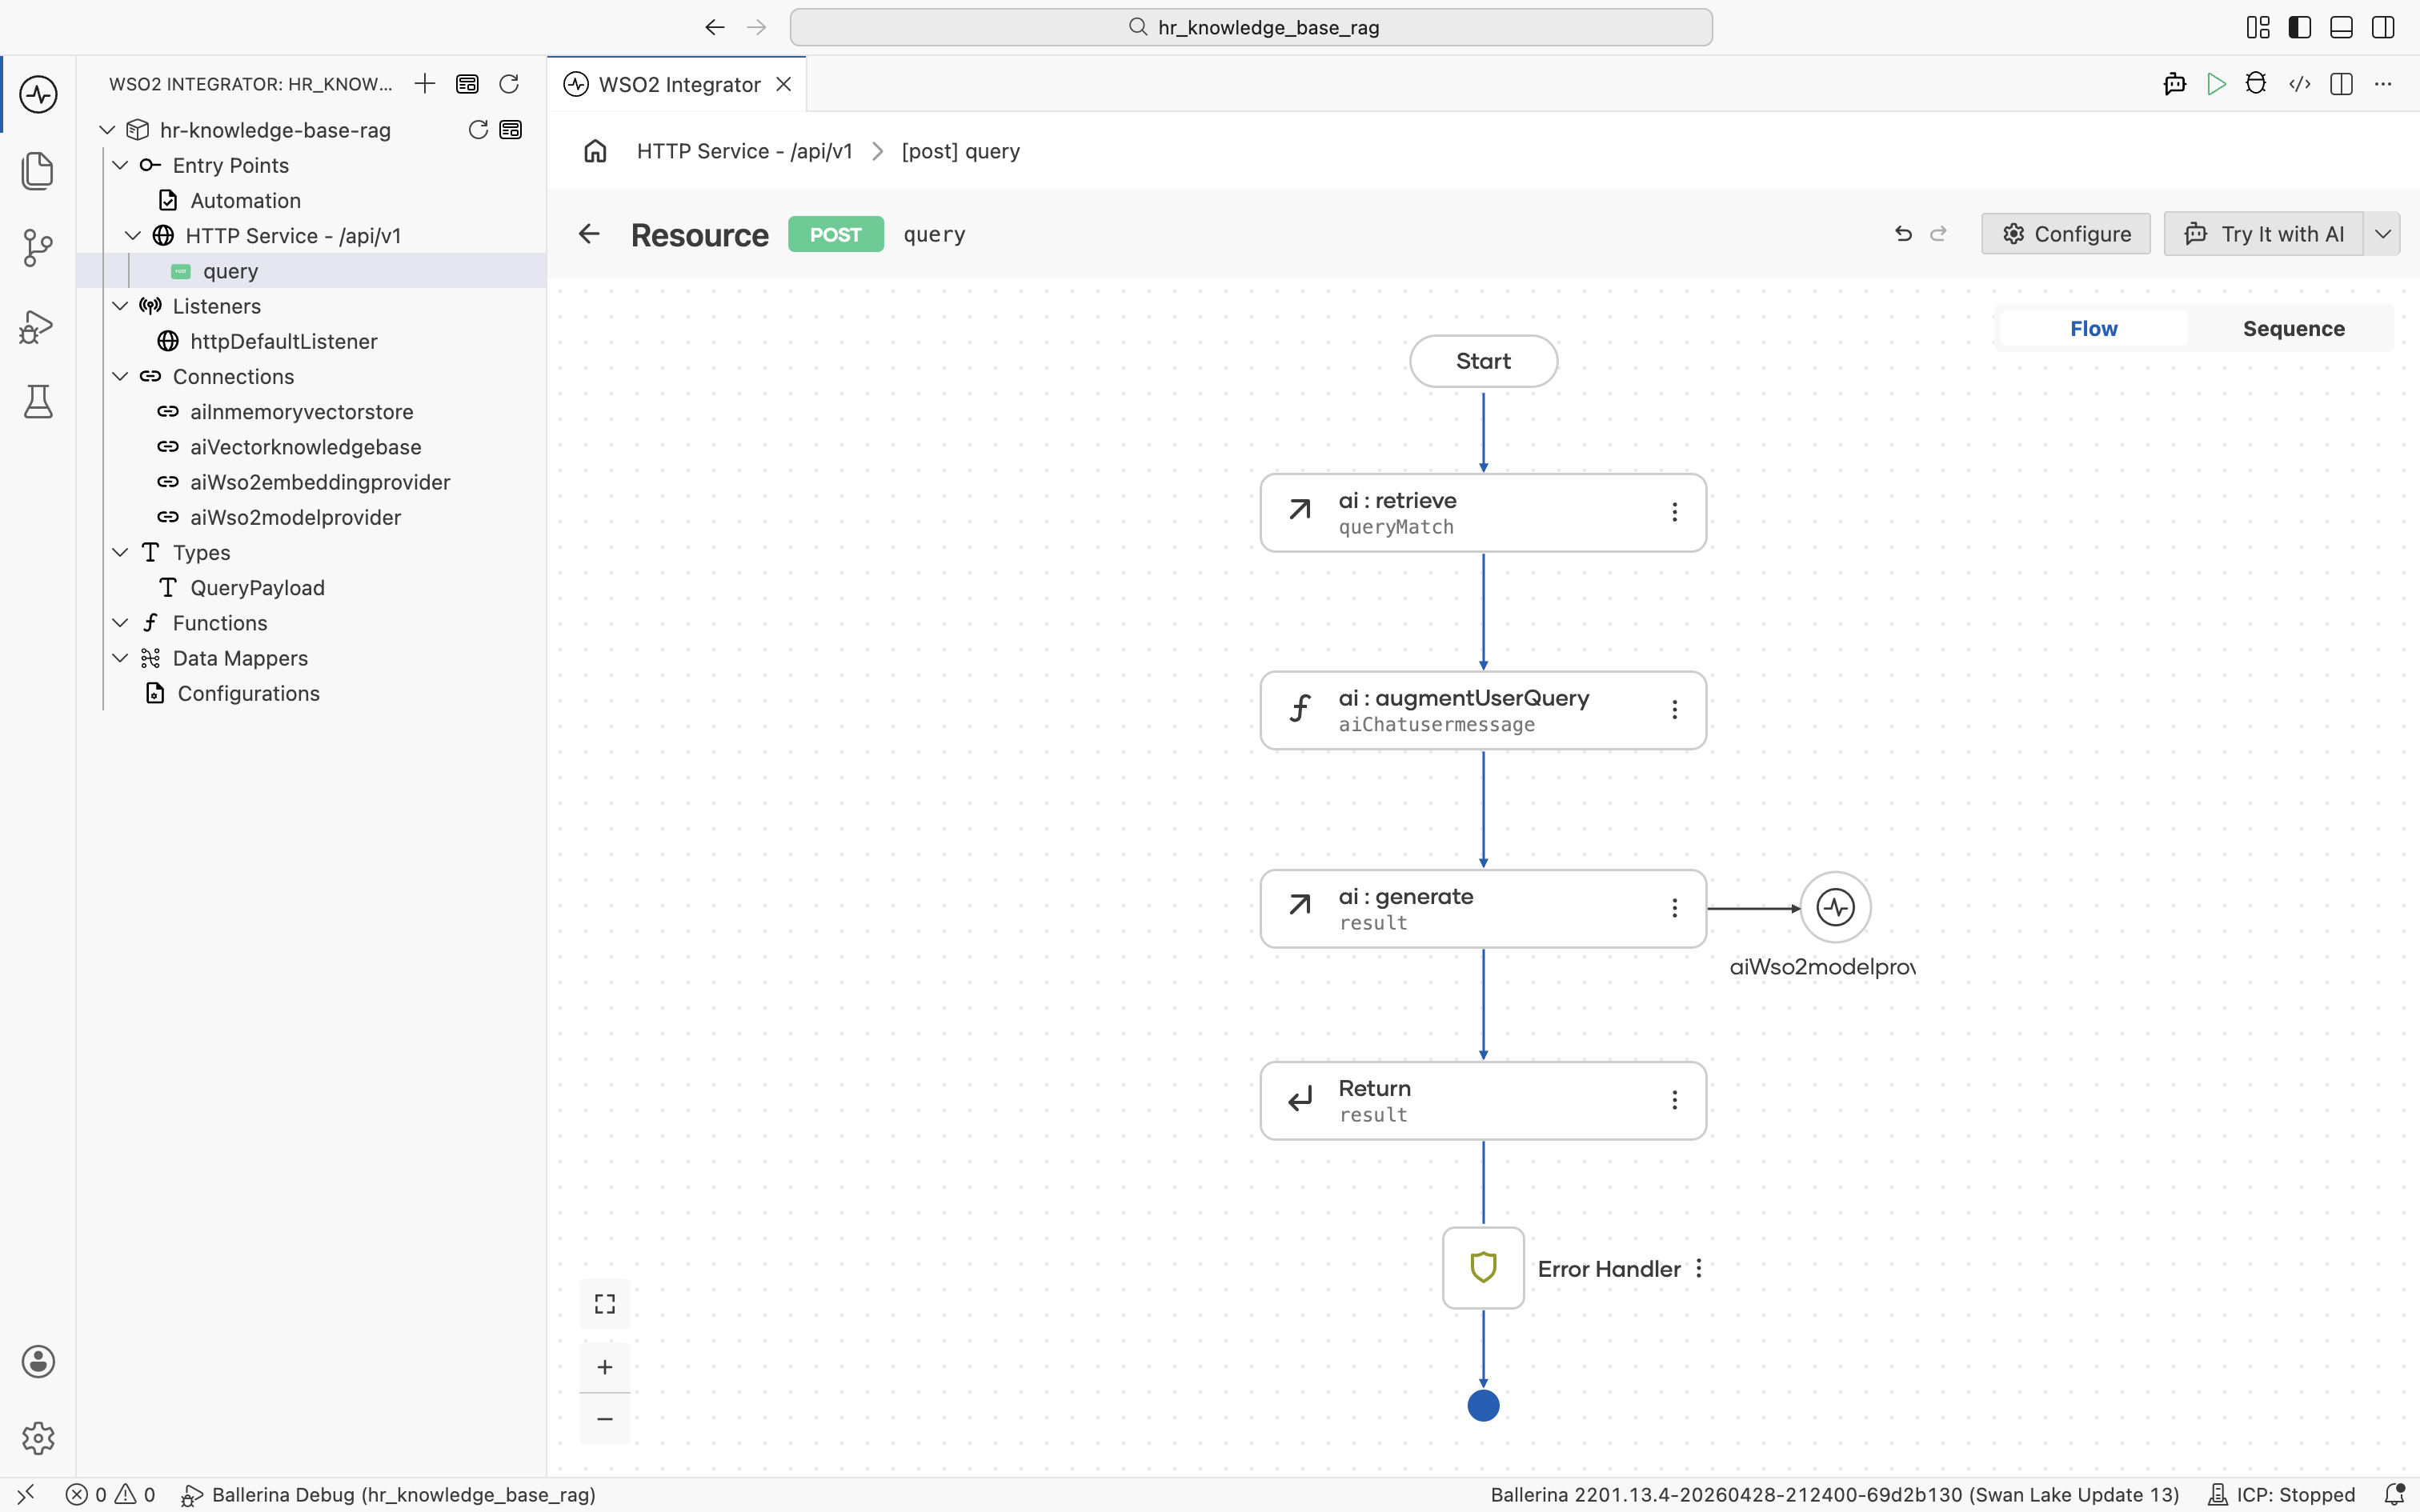
Click Save. The completed query flow walks the request through ai:retrieve, ai:augmentUserQuery, ai:generate, and finally returns result.
Step 4: Run and try it
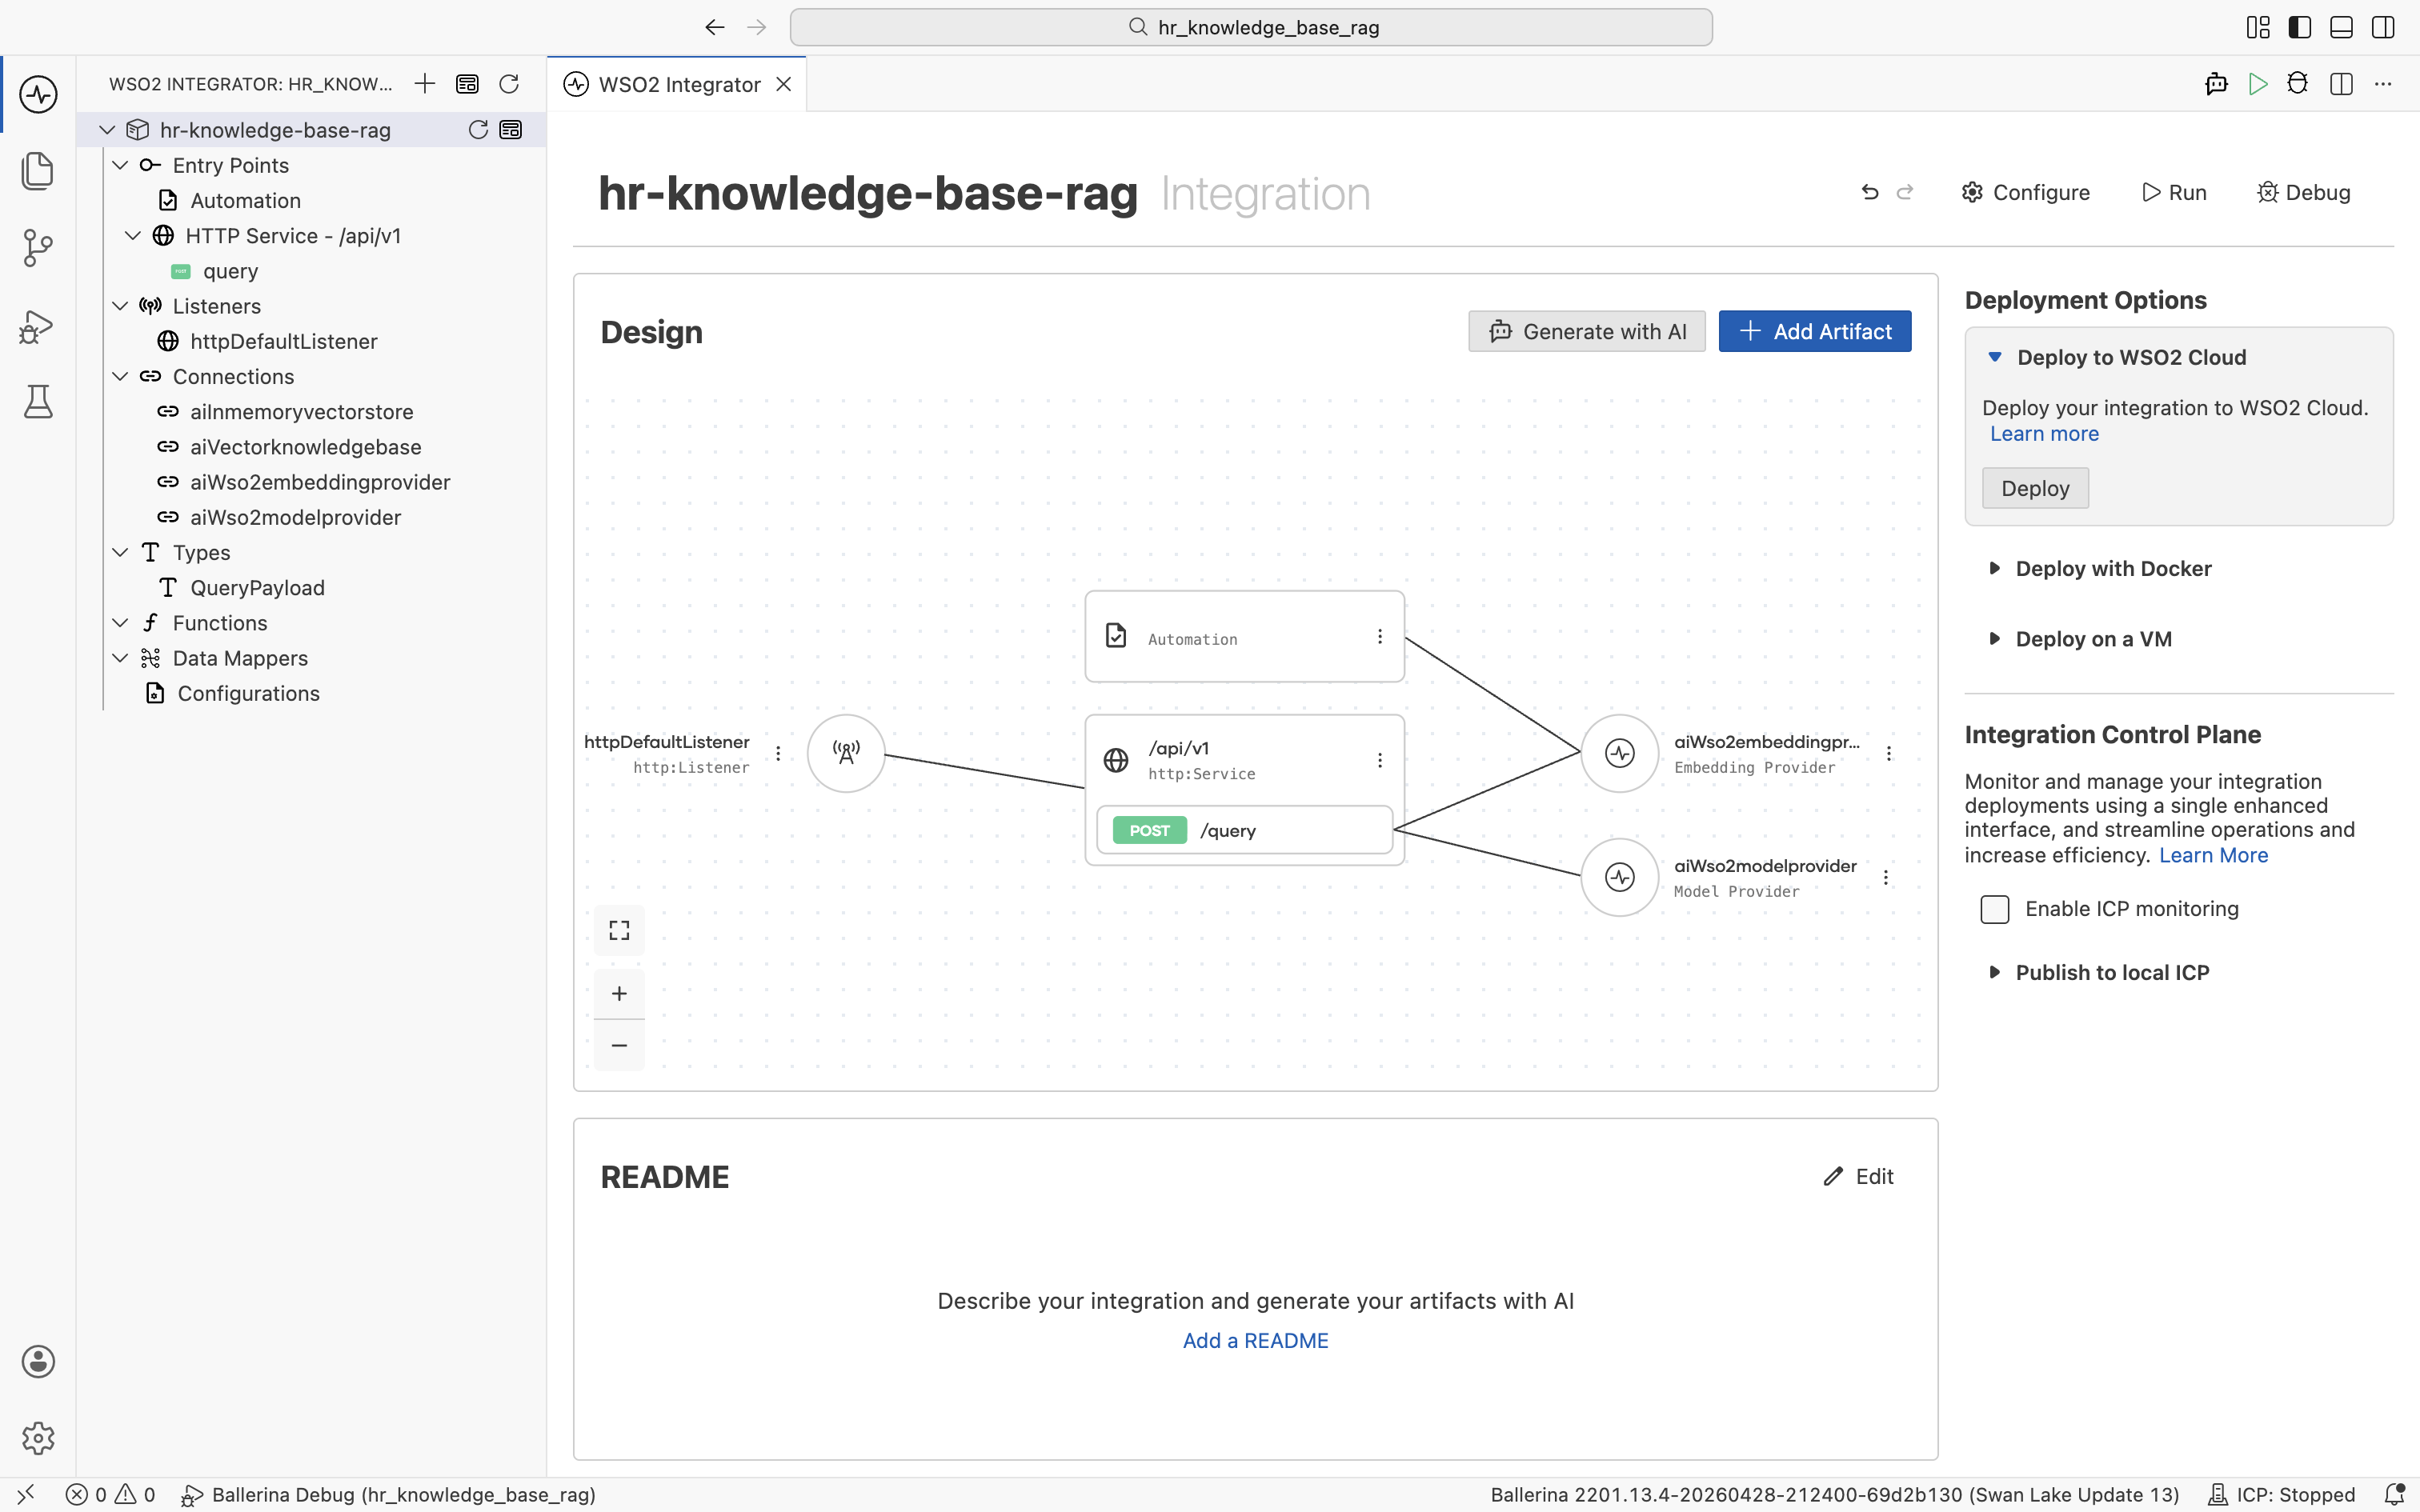
Open the project overview. The integration shows the HTTP Service with the [POST] /query resource, the Automation, and all the connections wired together. Click Run in the top-right.
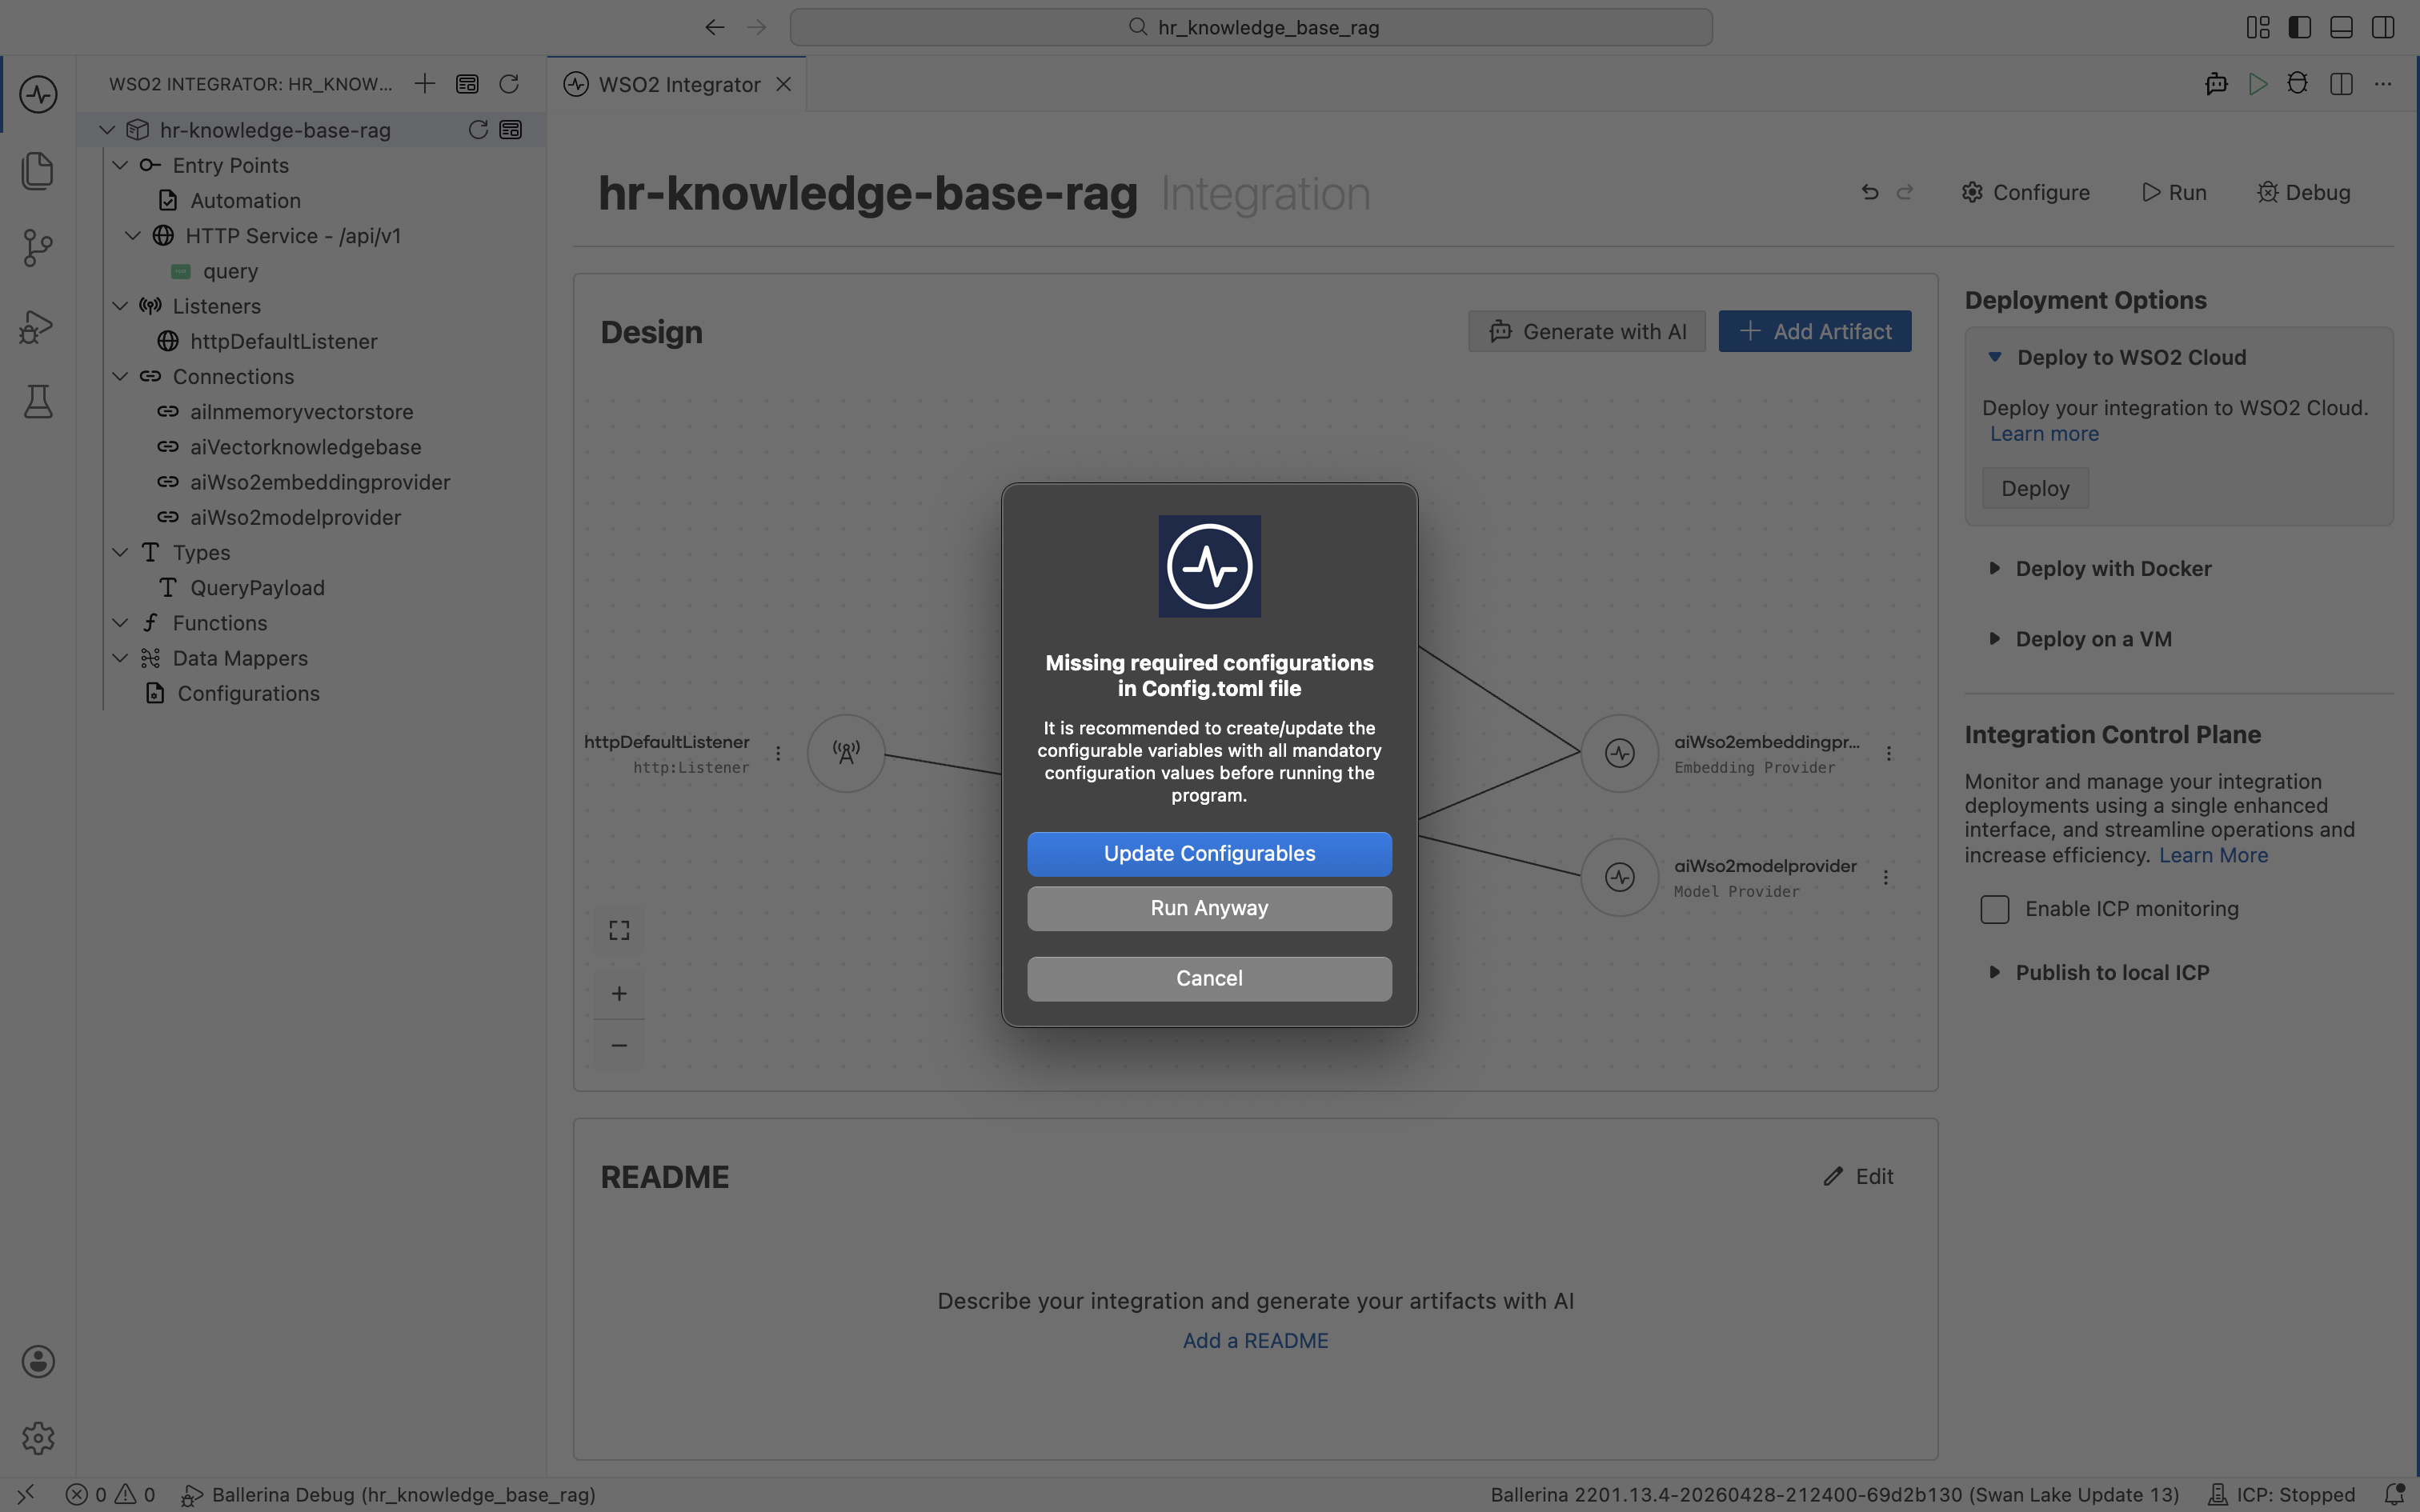
WSO2 Integrator detects that the path configurable has no value yet and prompts you for the missing configuration. Click Update Configurations.
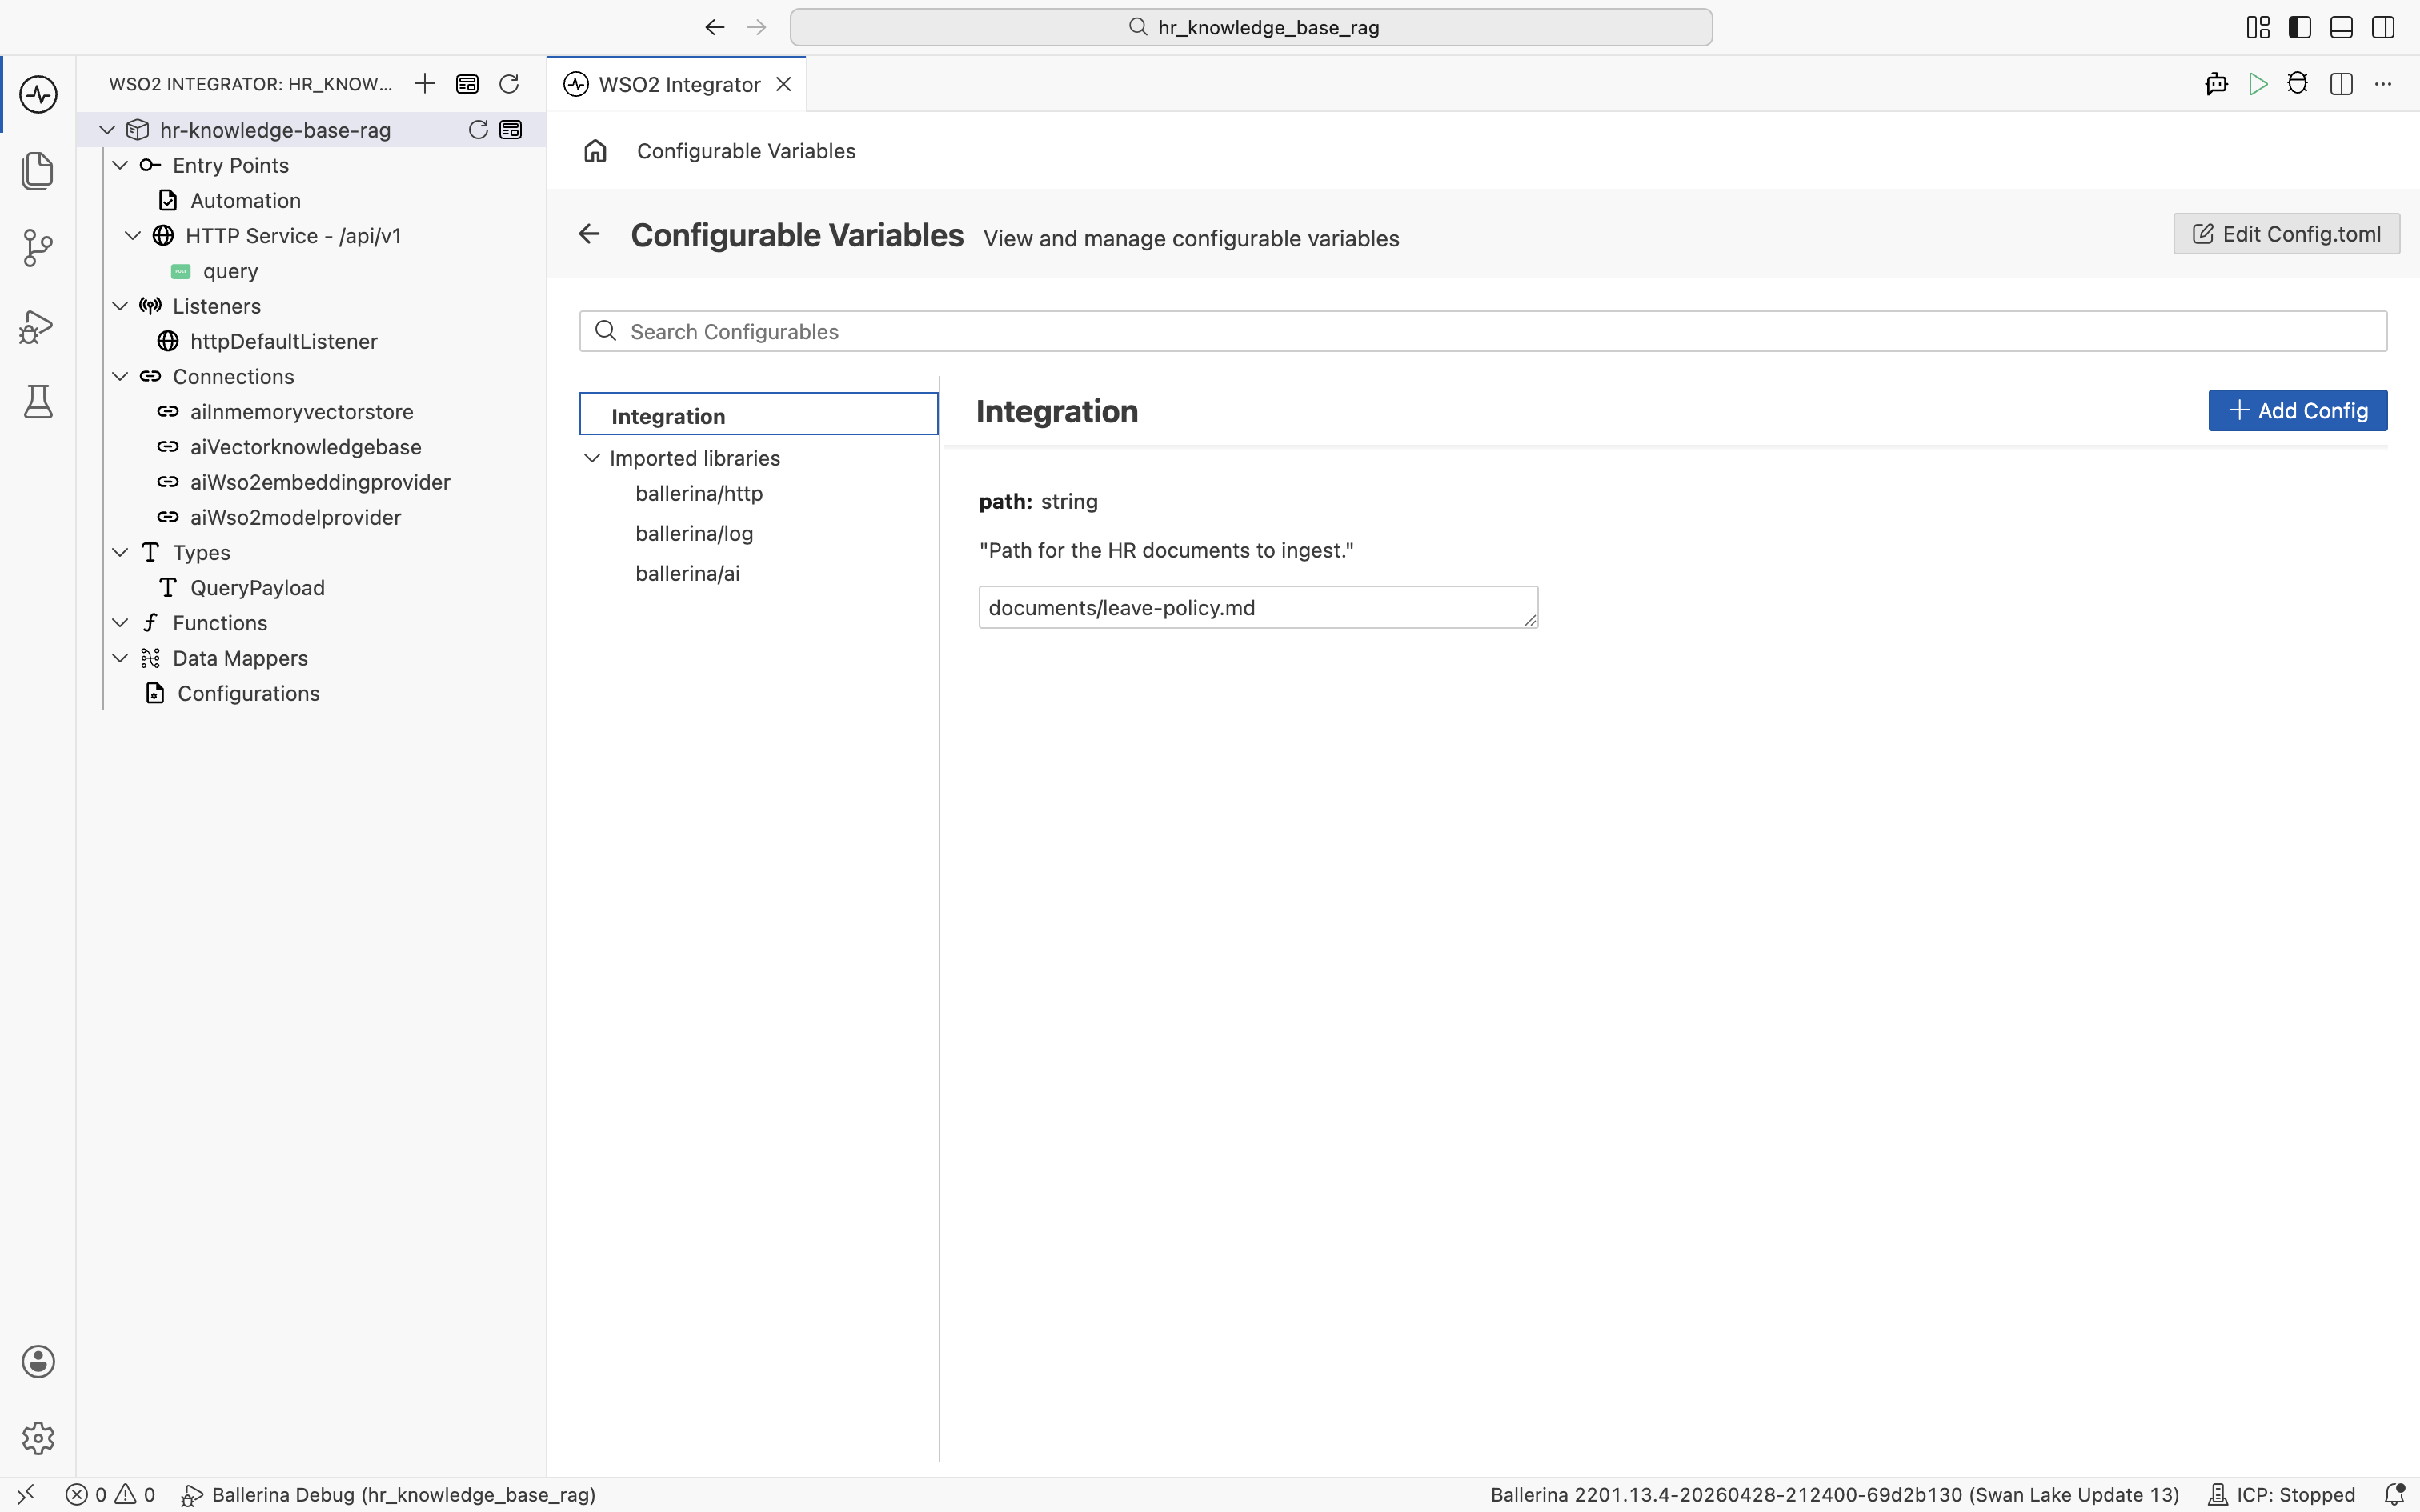
The Configurable Variables view opens. Set path to your HR policy document file, for example documents/leave-policy.md.
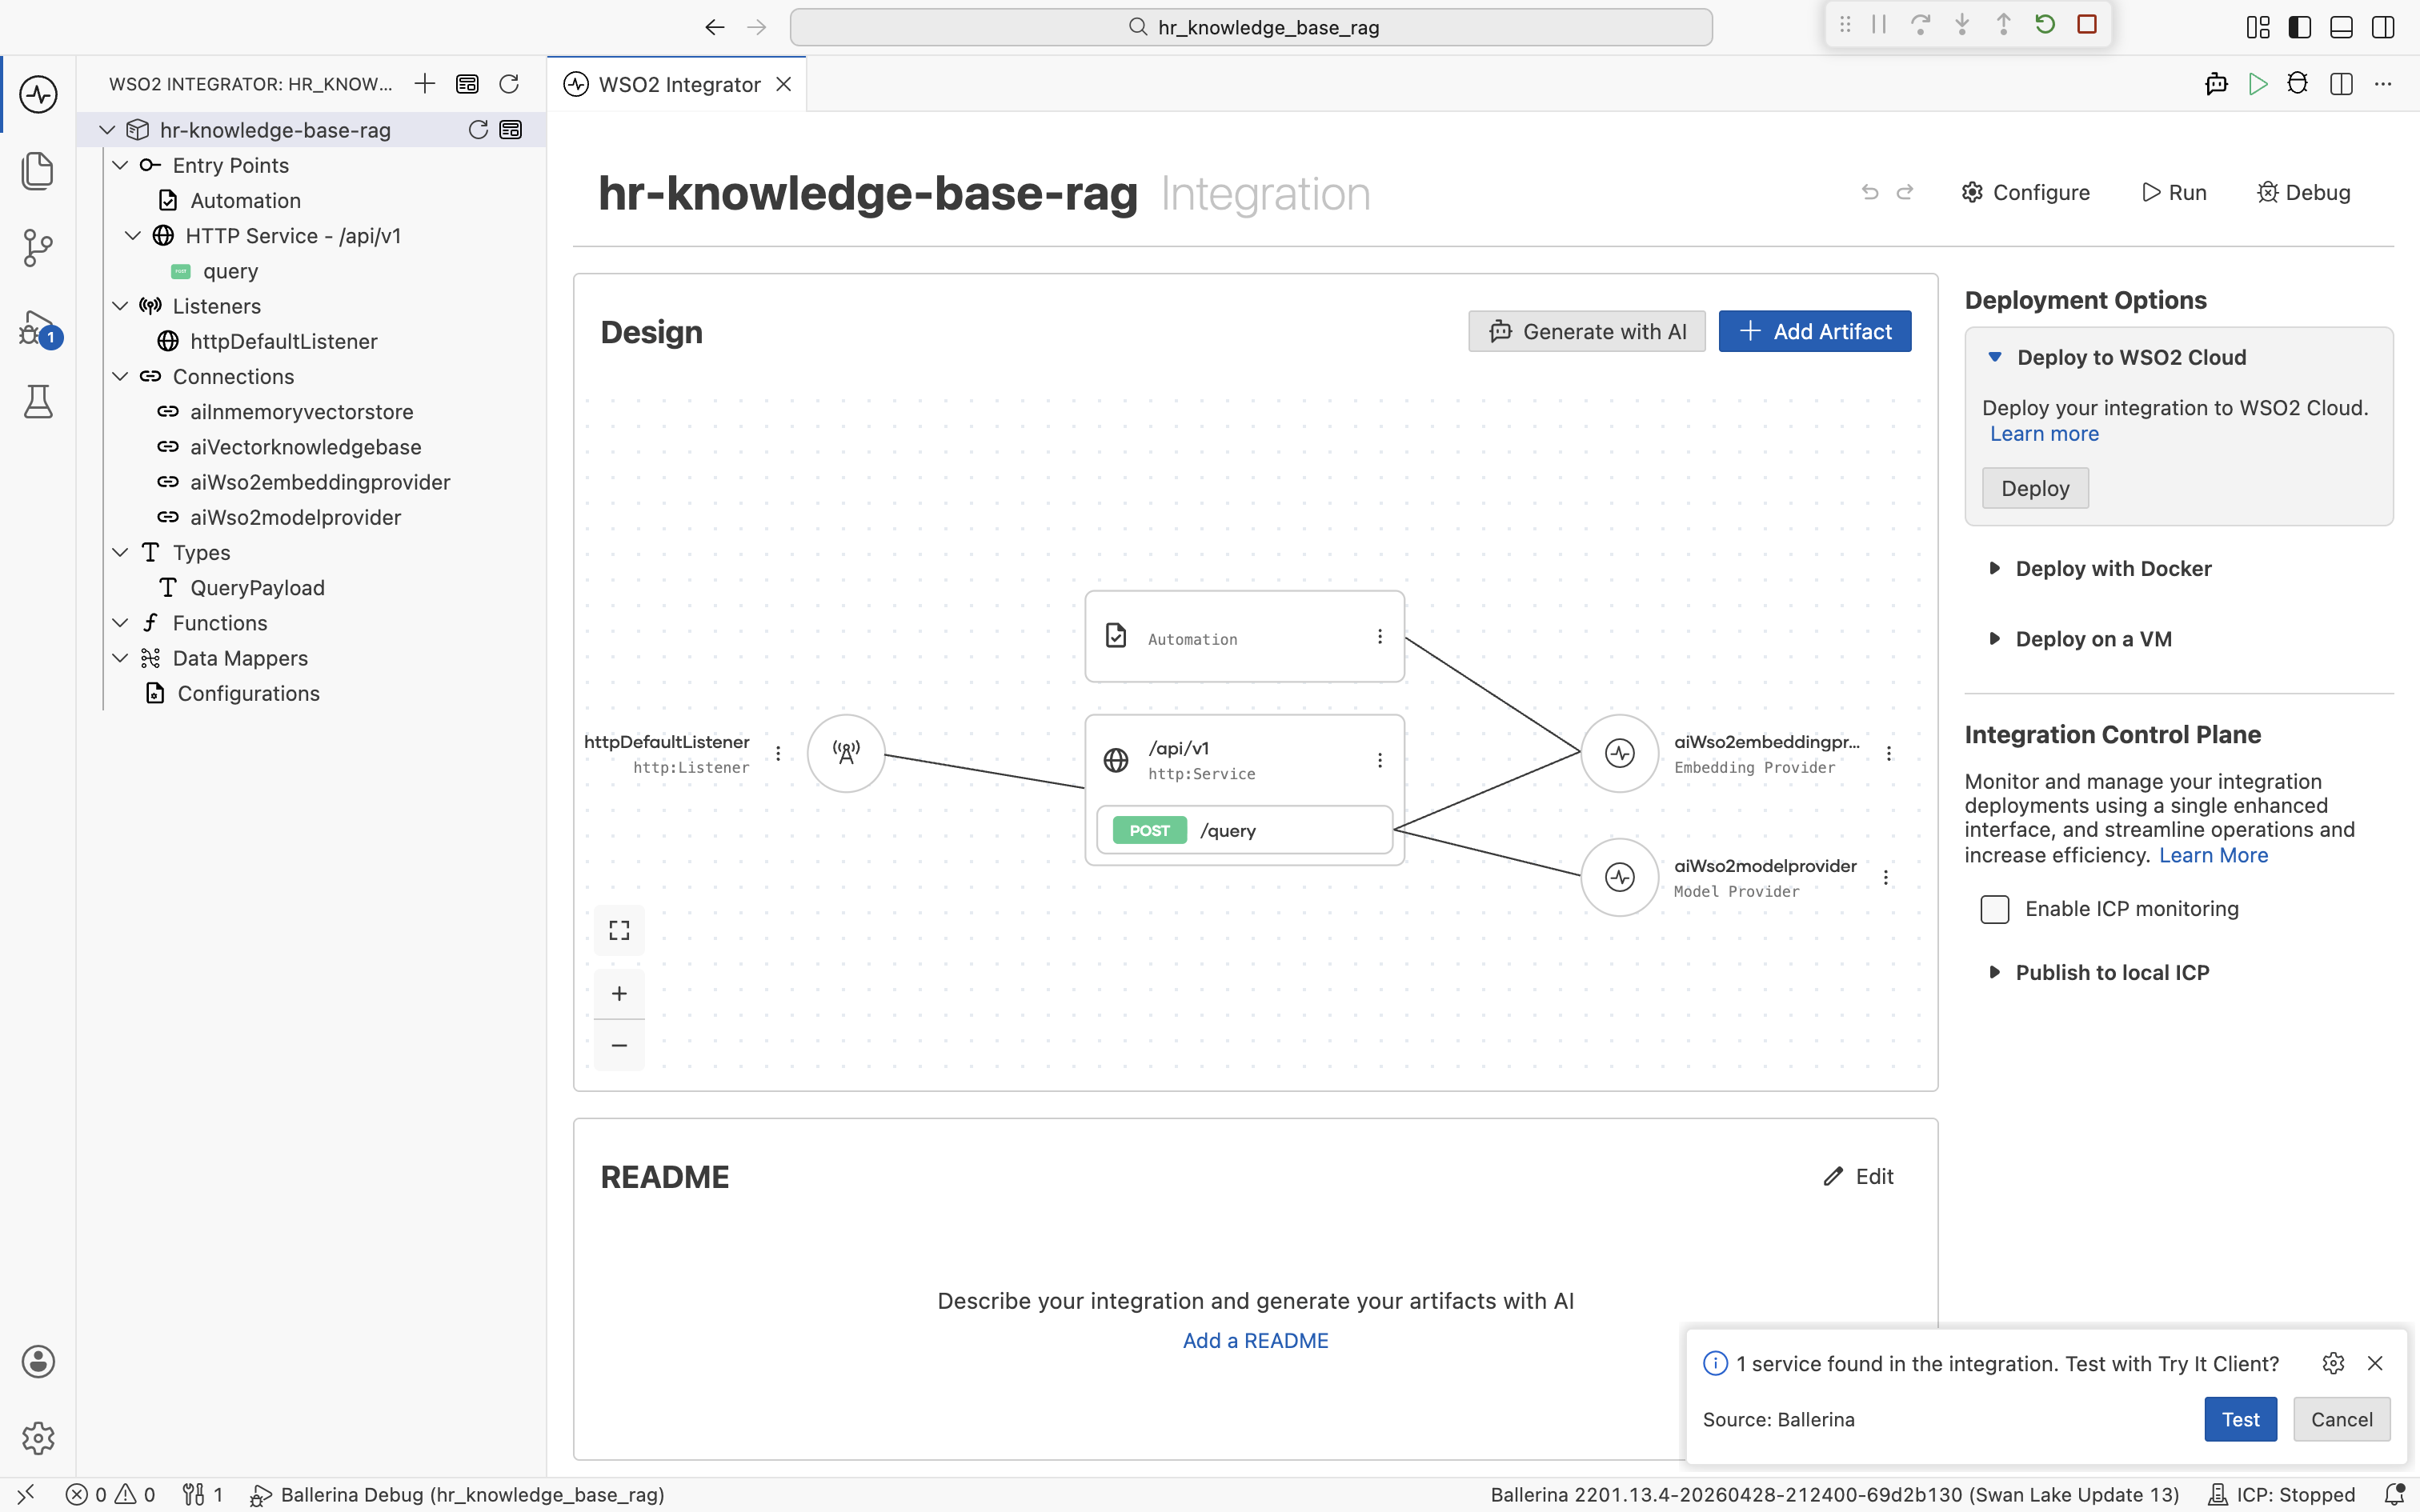
Save the configuration and click Run again. The Automation runs first and populates the in-memory vector store. Wait for the Ingestion Completed! log line before continuing. The HTTP Service then starts on httpDefaultListener (port 9090 by default).
A prompt appears at the bottom right: "1 service found in the integration. Test with Try It Client?" Click Test.
The Try Service panel opens at http://localhost:9090/api/v1 with a POST /query request template.
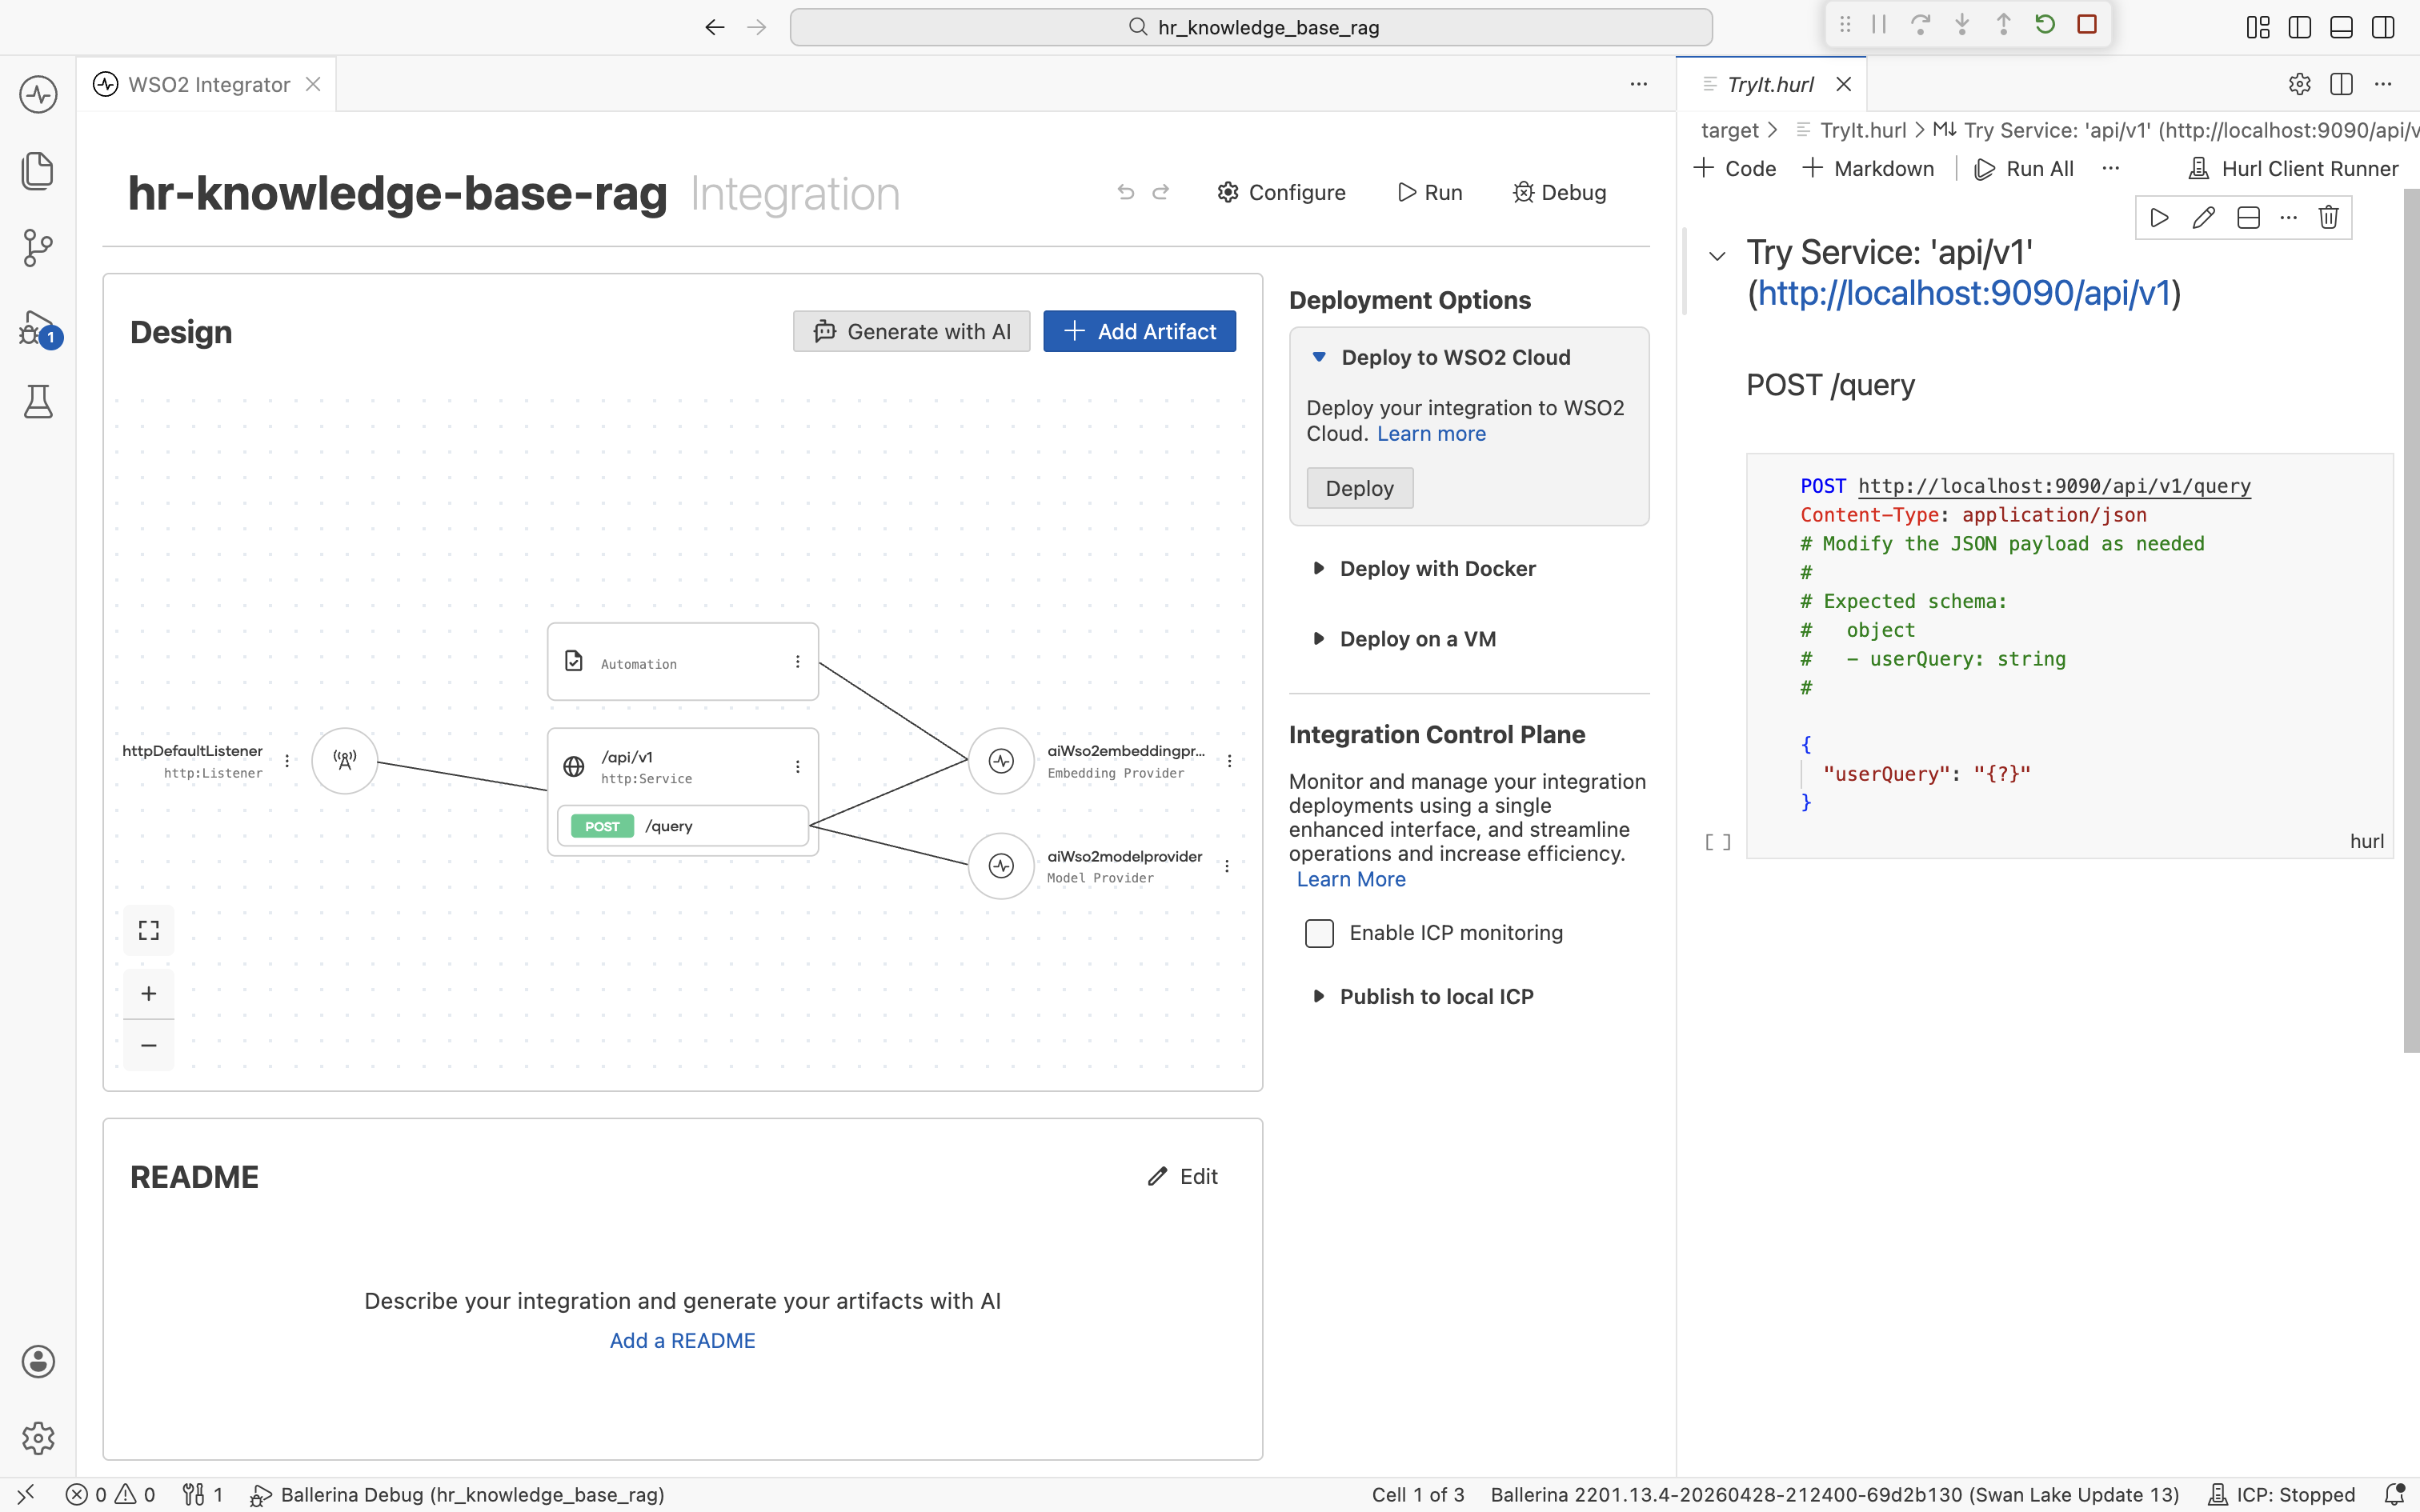
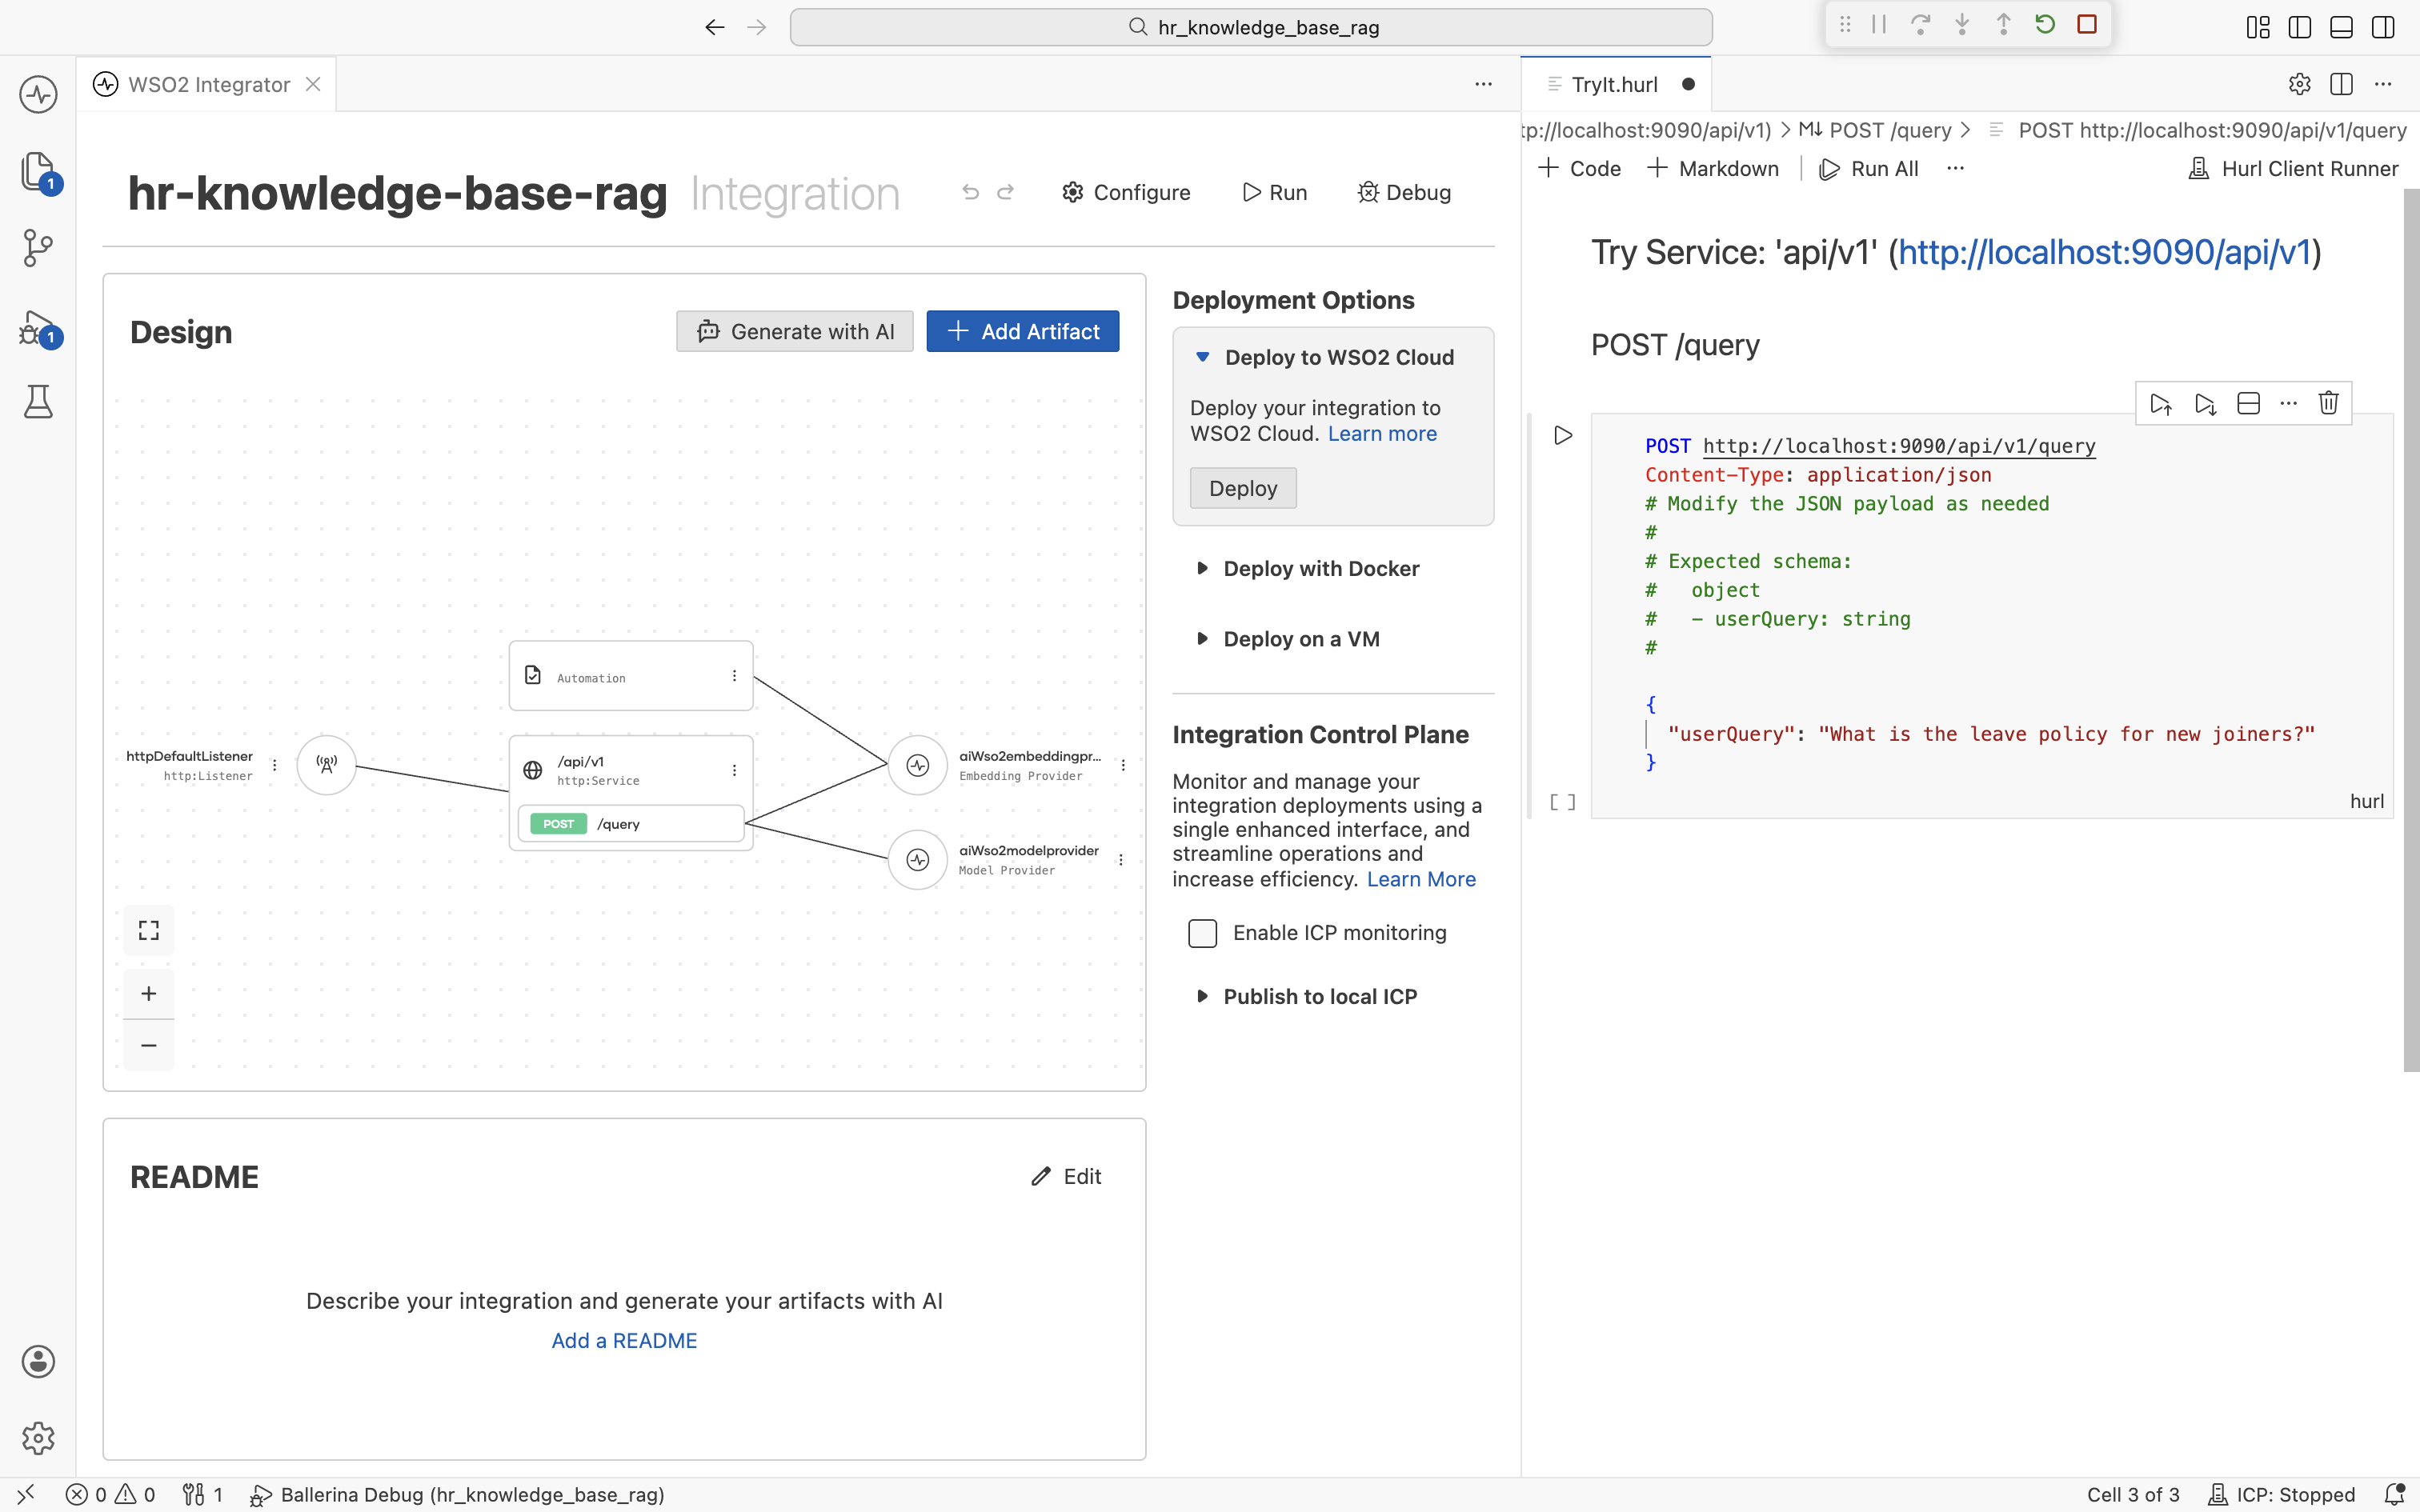
Edit the request body to ask a question about a topic in the documents you ingested:
{
  "userQuery": "What is the leave policy for new joiners?"
}
Send the request. The response is the LLM's answer grounded in the chunks retrieved from your HR knowledge base.
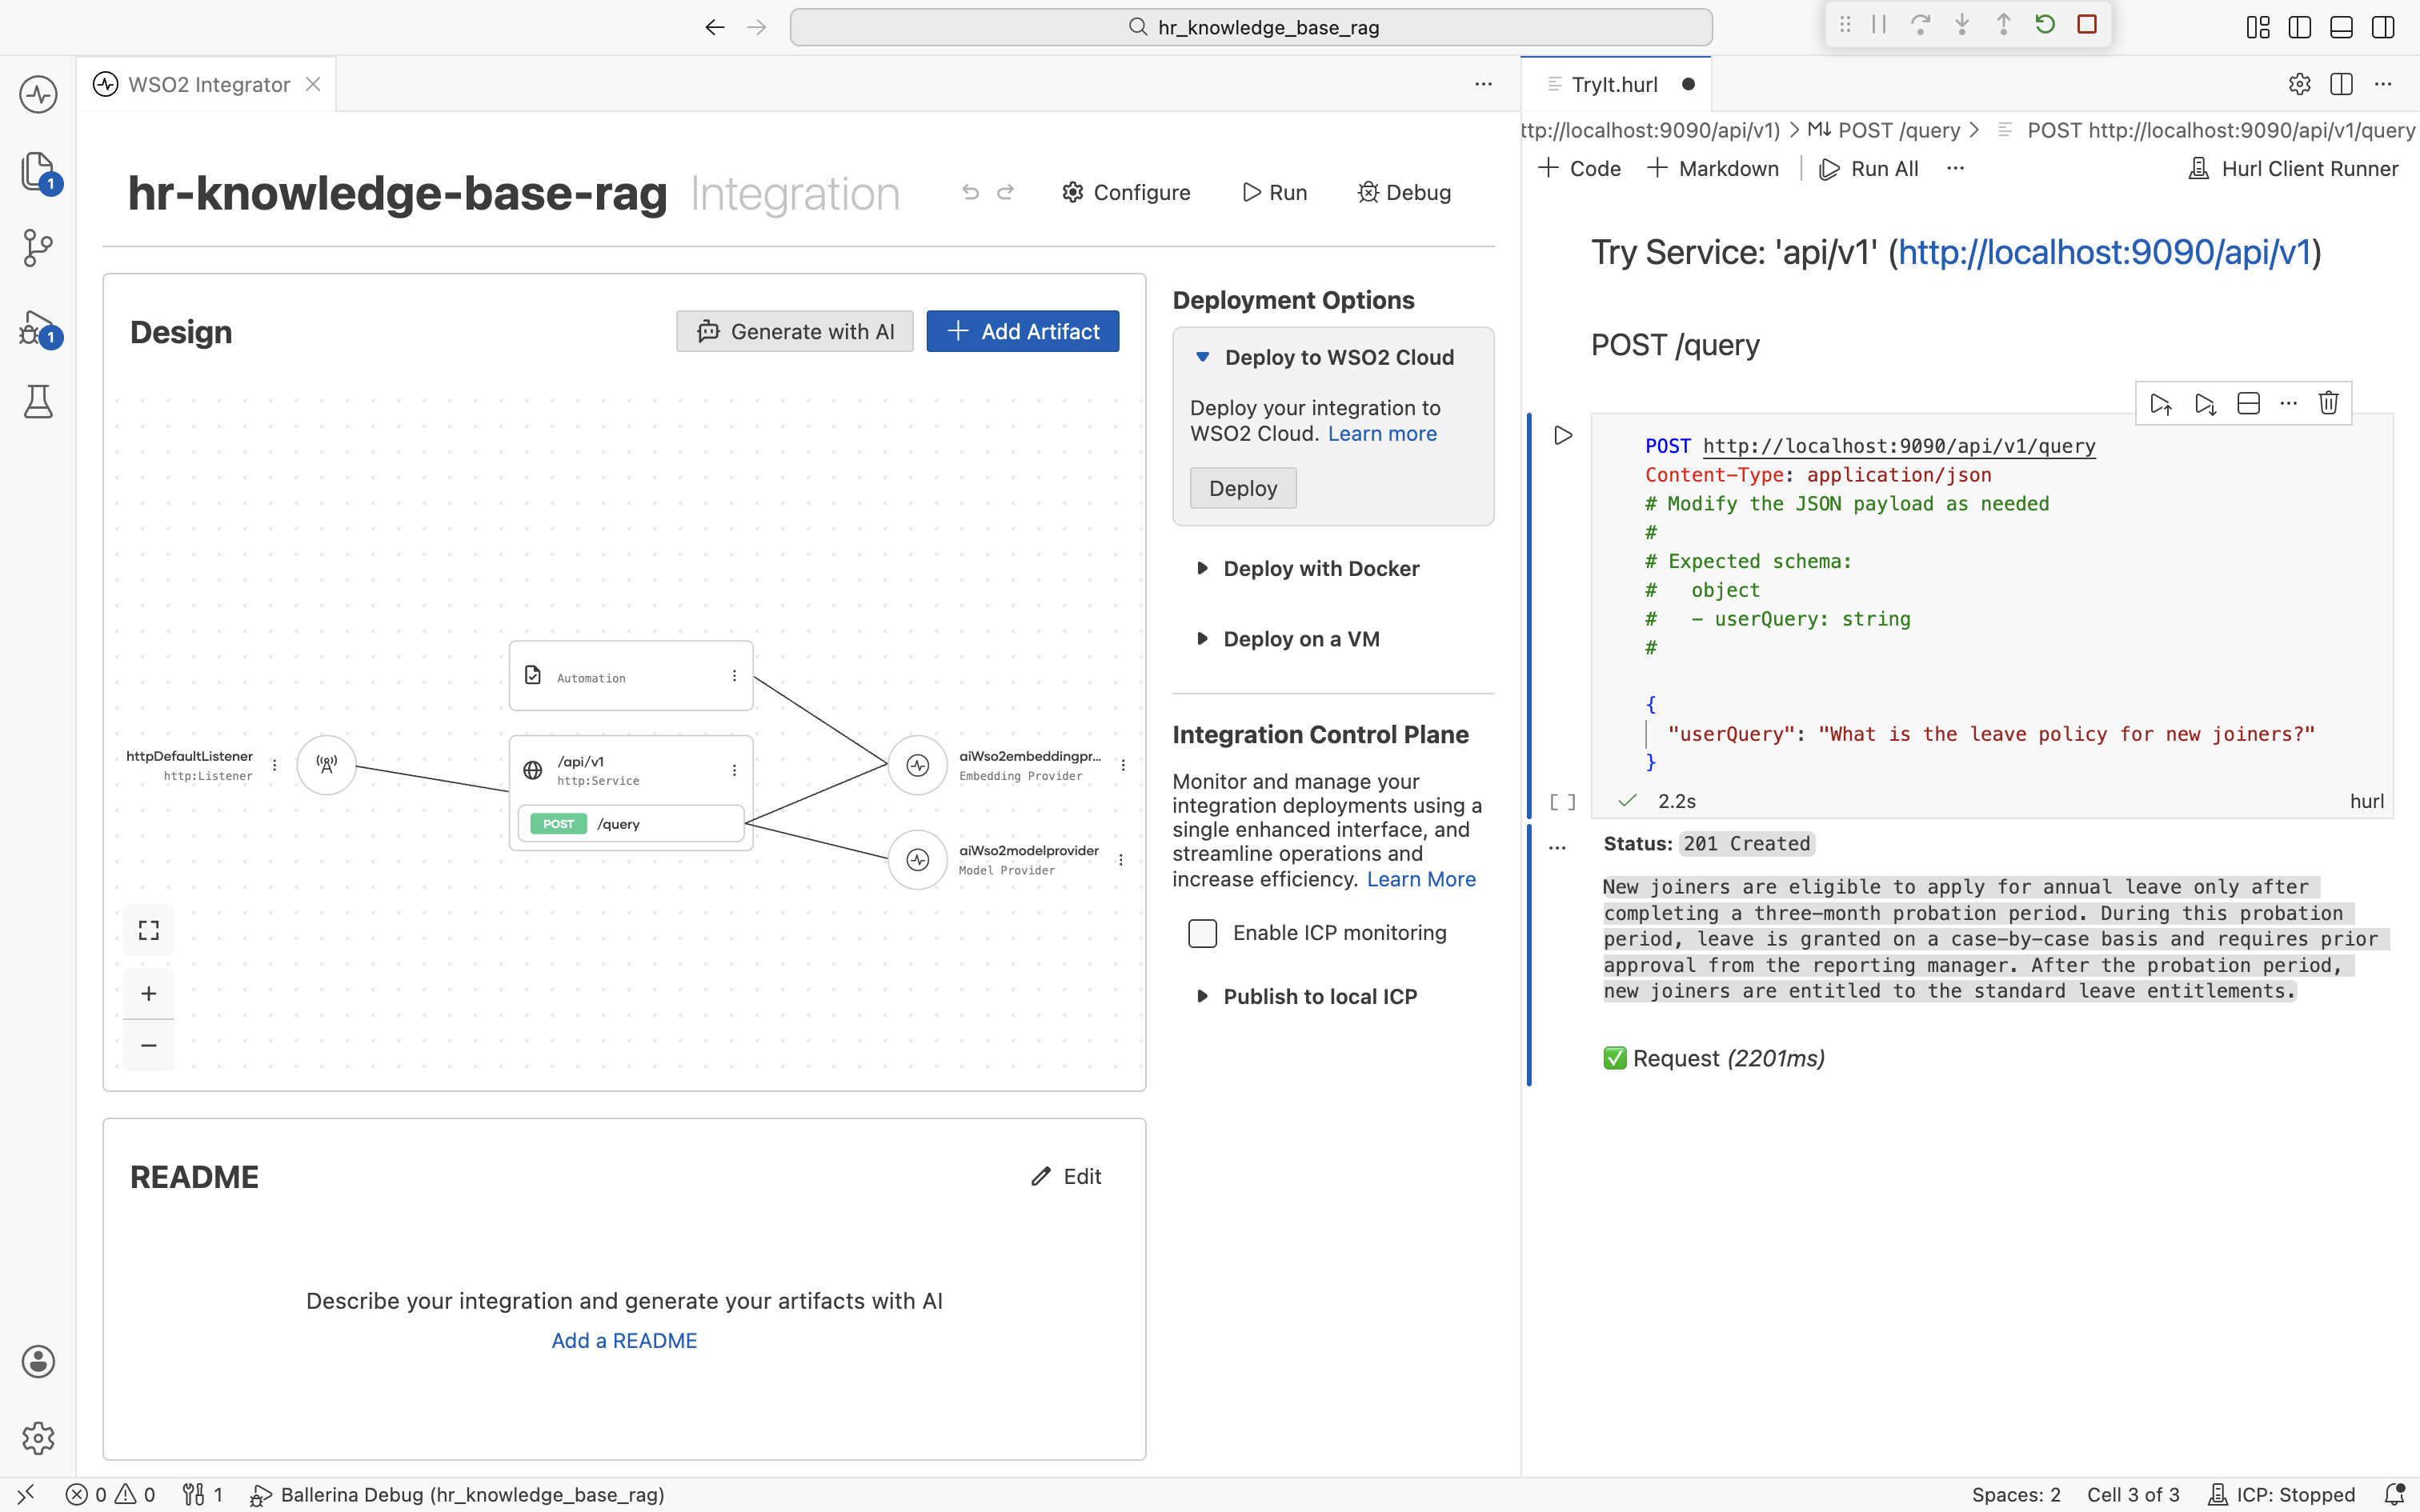
If the answer comes back as "I don't have that information", double-check that the Automation finished ingesting and that the question matches a topic actually present in the source documents.
You can also test from the command line with curl:
curl -X POST http://localhost:9090/api/v1/query \
  -H "Content-Type: application/json" \
  -d '{"userQuery": "What is the leave policy for new joiners?"}'
Summary
You now have a fully visual HR RAG pipeline that grounds an LLM in your actual policies, with no glue code. Every connection is reusable across other artifacts in the same project.
| Component | Where | Purpose |
|---|---|---|
path (Configurable) | Configurations | HR document file to ingest |
textDocumentLoader (Data Loader) | Automation | Reads the HR document at path |
aiInmemoryvectorstore (Vector Store) | Connections | Stores embeddings |
aiWso2embeddingprovider (Embedding Model) | Connections | Generates vector representations |
aiVectorknowledgebase (Vector Knowledge Base) | Connections | Combines store, embedder, and chunker |
aiWso2modelprovider (Model Provider) | Connections | Calls the LLM |
ai:load / ai:ingest | Automation | Loads, chunks, embeds, and writes documents |
ai:retrieve | HTTP Service | Top-K vector search |
ai:augmentUserQuery | HTTP Service | Builds the grounded chat message |
ai:generate | HTTP Service | Generates the typed answer |
What's next
- Vector stores — Swap the in-memory store for a persistent backend (Pinecone, Milvus, Pgvector, Weaviate).
- Chunkers — Tune chunk size and overlap, or plug in a custom chunker.
- How RAG works — Customize retrieval (top-K, filters, hybrid search).