Create a Knowledge Base
A Knowledge Base controls how your data is split into chunks, converted to embeddings, stored, and queried. You can attach a data source during creation or add one later.
Prerequisites
Before you begin, ensure you have the following:
- Platform access: A WSO2 Cloud organization with permission to create AI services.
- Vector storage: Connection details for a supported vector store or a compatible WSO2-managed PostgreSQL database.
- Model provider: A valid API key for OpenAI, Azure OpenAI, or Mistral AI.
- Data source (optional): Credentials and a specific Google Drive folder or Amazon S3 bucket if you plan to ingest content immediately.
Start the creation wizard
- Sign in to WSO2 Cloud and select the organization in which you want to create the Knowledge Base.
- In the left navigation, expand AI Services, and then select Knowledge Base.
- Click Add Knowledge Base.
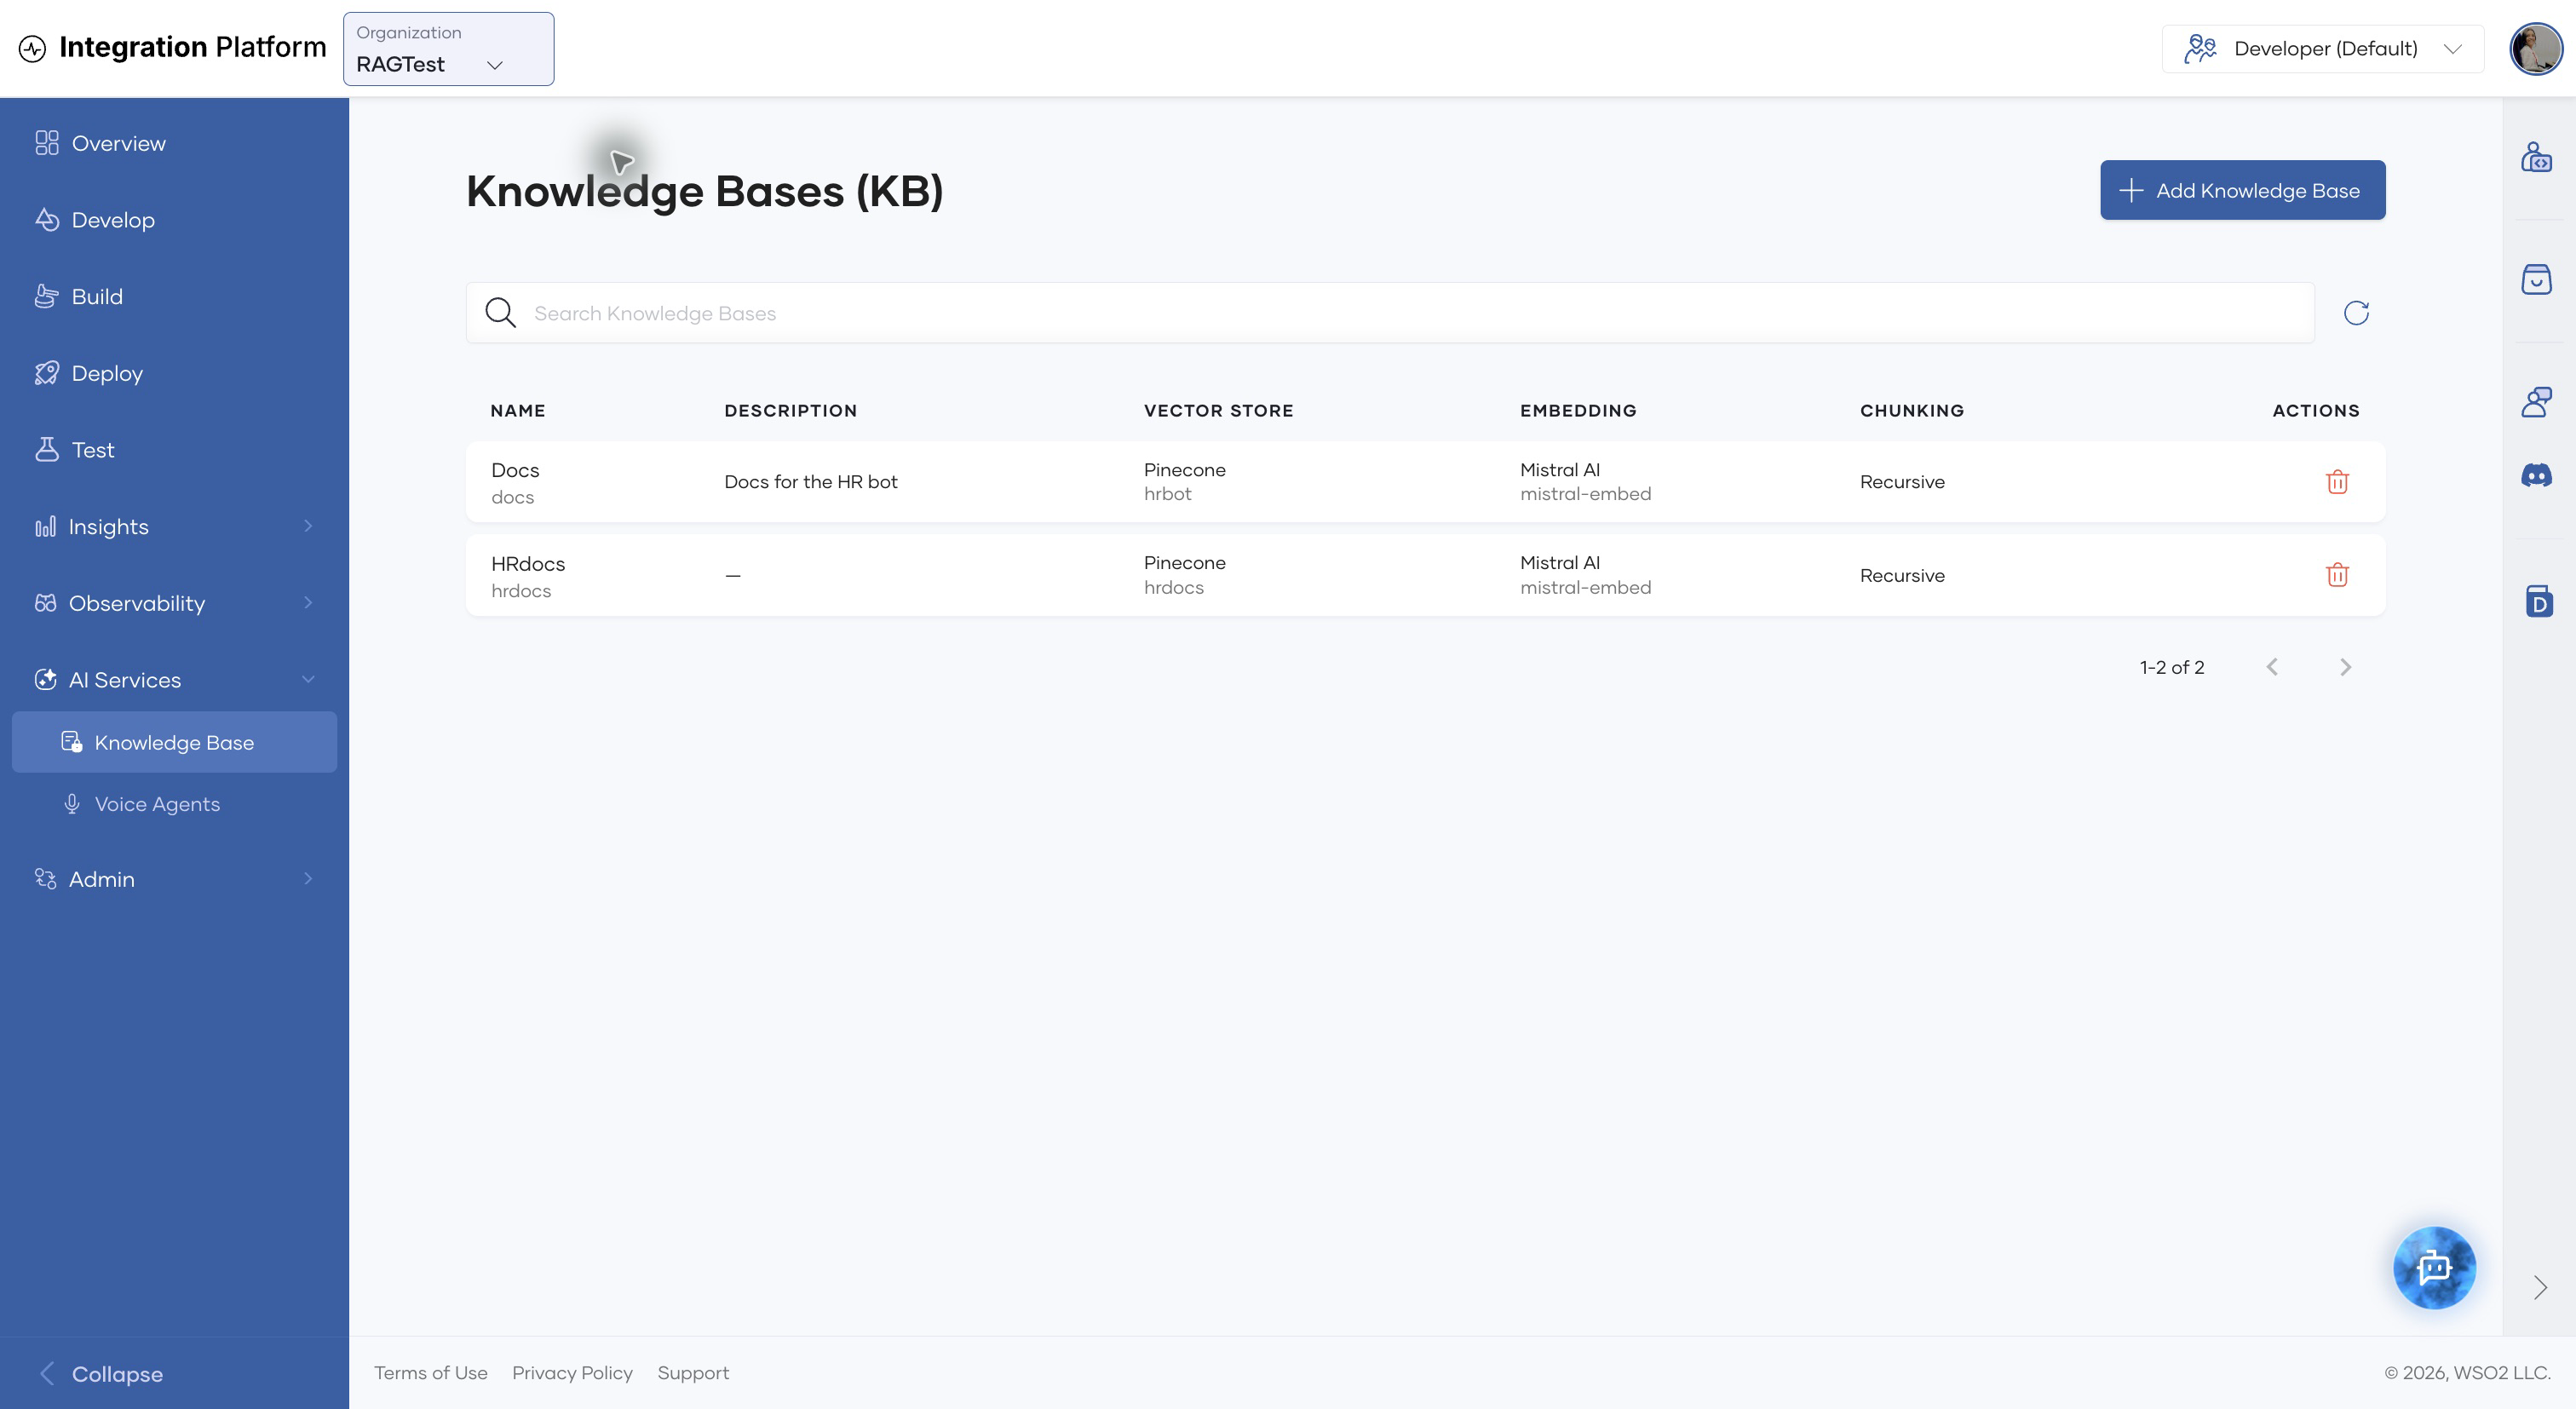
Step 1: Name the Knowledge Base
- Enter a descriptive name for the Knowledge Base. The platform derives an immutable key from this name.
- Optional: Enter a description that explains the content or intended consumers of the Knowledge Base.
- Click Next.
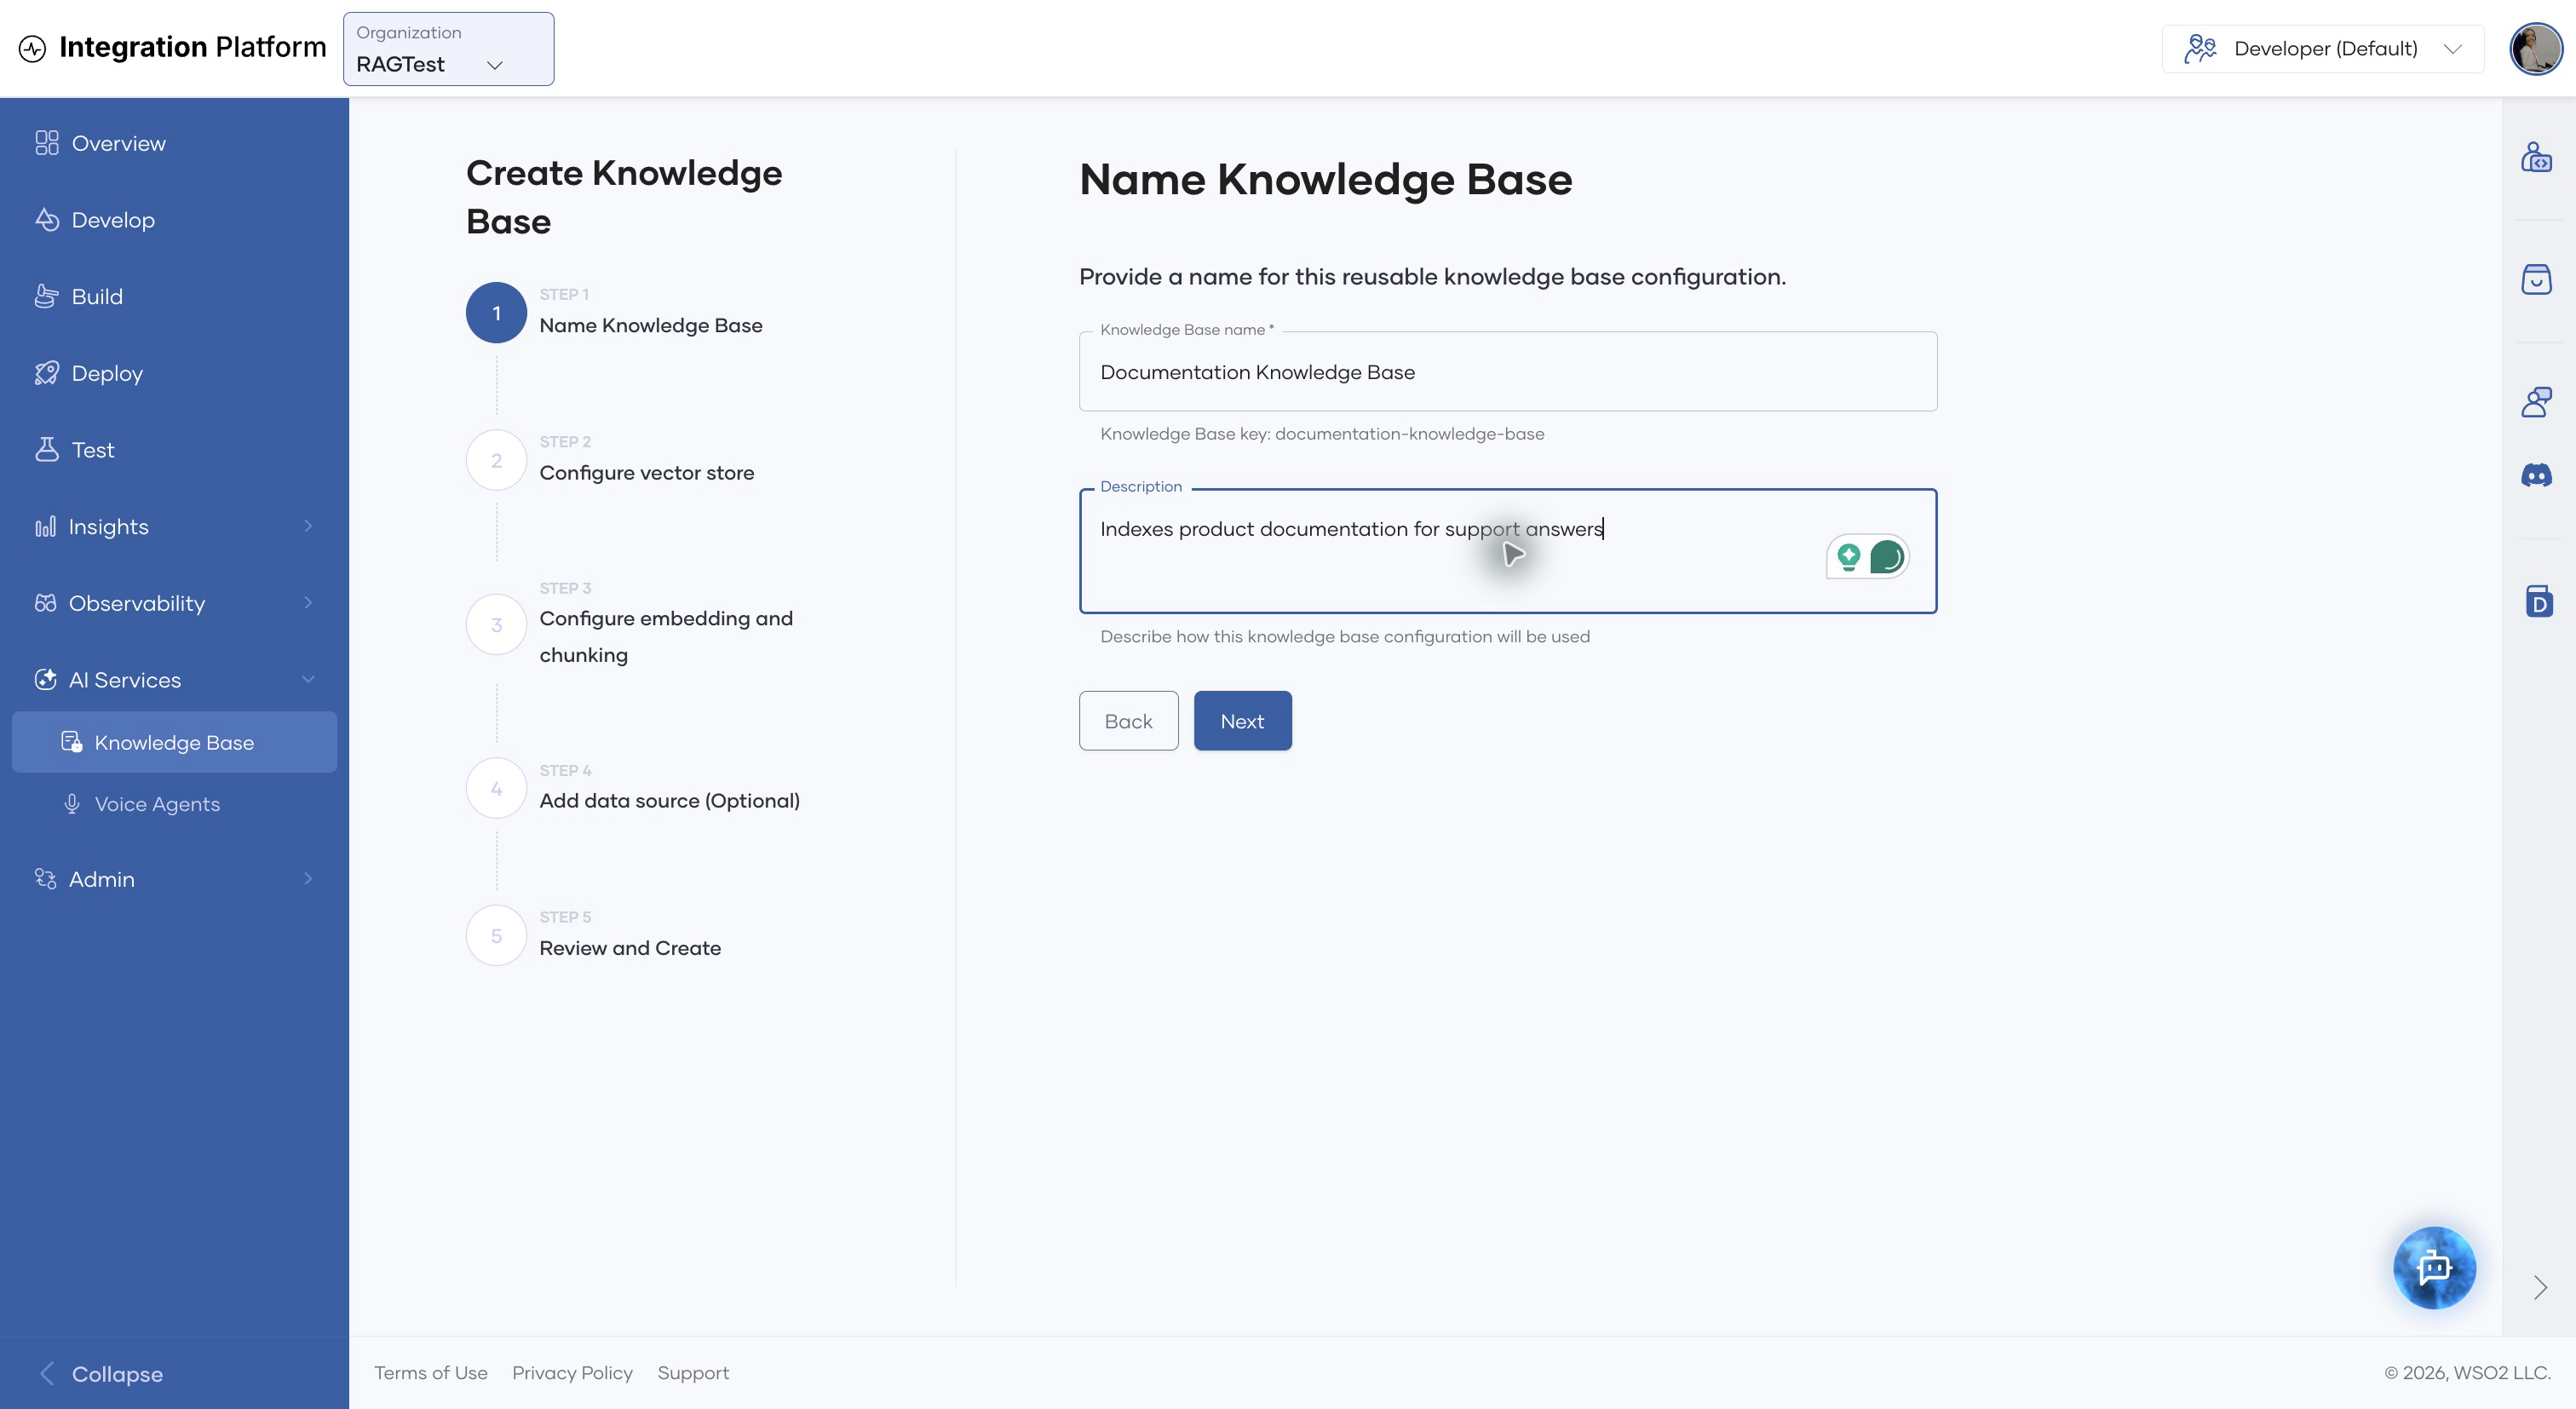
Choose a name that identifies the content rather than its storage provider, for example HR policies or Product documentation. This makes the Knowledge Base easier to reuse if its backing service changes.
Step 2: Configure the vector store
Select a provider and enter connection details:
| Provider | Fields |
|---|---|
| Pinecone | API key and index name |
| Chroma | Host, port (default 8000), and collection name |
| Weaviate | Cluster REST URL, API key, and collection name |
| PostgreSQL | Host, port (default 5432), user, password, database, and table name |
| WSO2 Integration Platform Managed | Select an available managed PostgreSQL database. The option is displayed only when a compatible database exists in the organization. |
- Click Next. The button becomes available after all required fields pass validation.
Use a separate collection, index, or table for content that has different ownership, access, retention, or embedding requirements.
Step 3: Configure embedding and chunking
- Select an embedding provider and model:
- OpenAI: Select
text-embedding-3-small,text-embedding-3-large, ortext-embedding-ada-002, and enter the API key. - Azure OpenAI: Enter the model ID, API key, base URL, and API version.
- Mistral AI: Select
mistral-embedand enter the API key.
- OpenAI: Select
- Select a chunking strategy:
- Recursive (default): Splits text using progressively smaller separators. This is a suitable starting point for most documents.
- Sentence: Keeps sentence boundaries when splitting content.
- Character: Splits content by character count.
- Set Max segment size and Max overlap size. The defaults are
1000and200respectively. - Click Next.
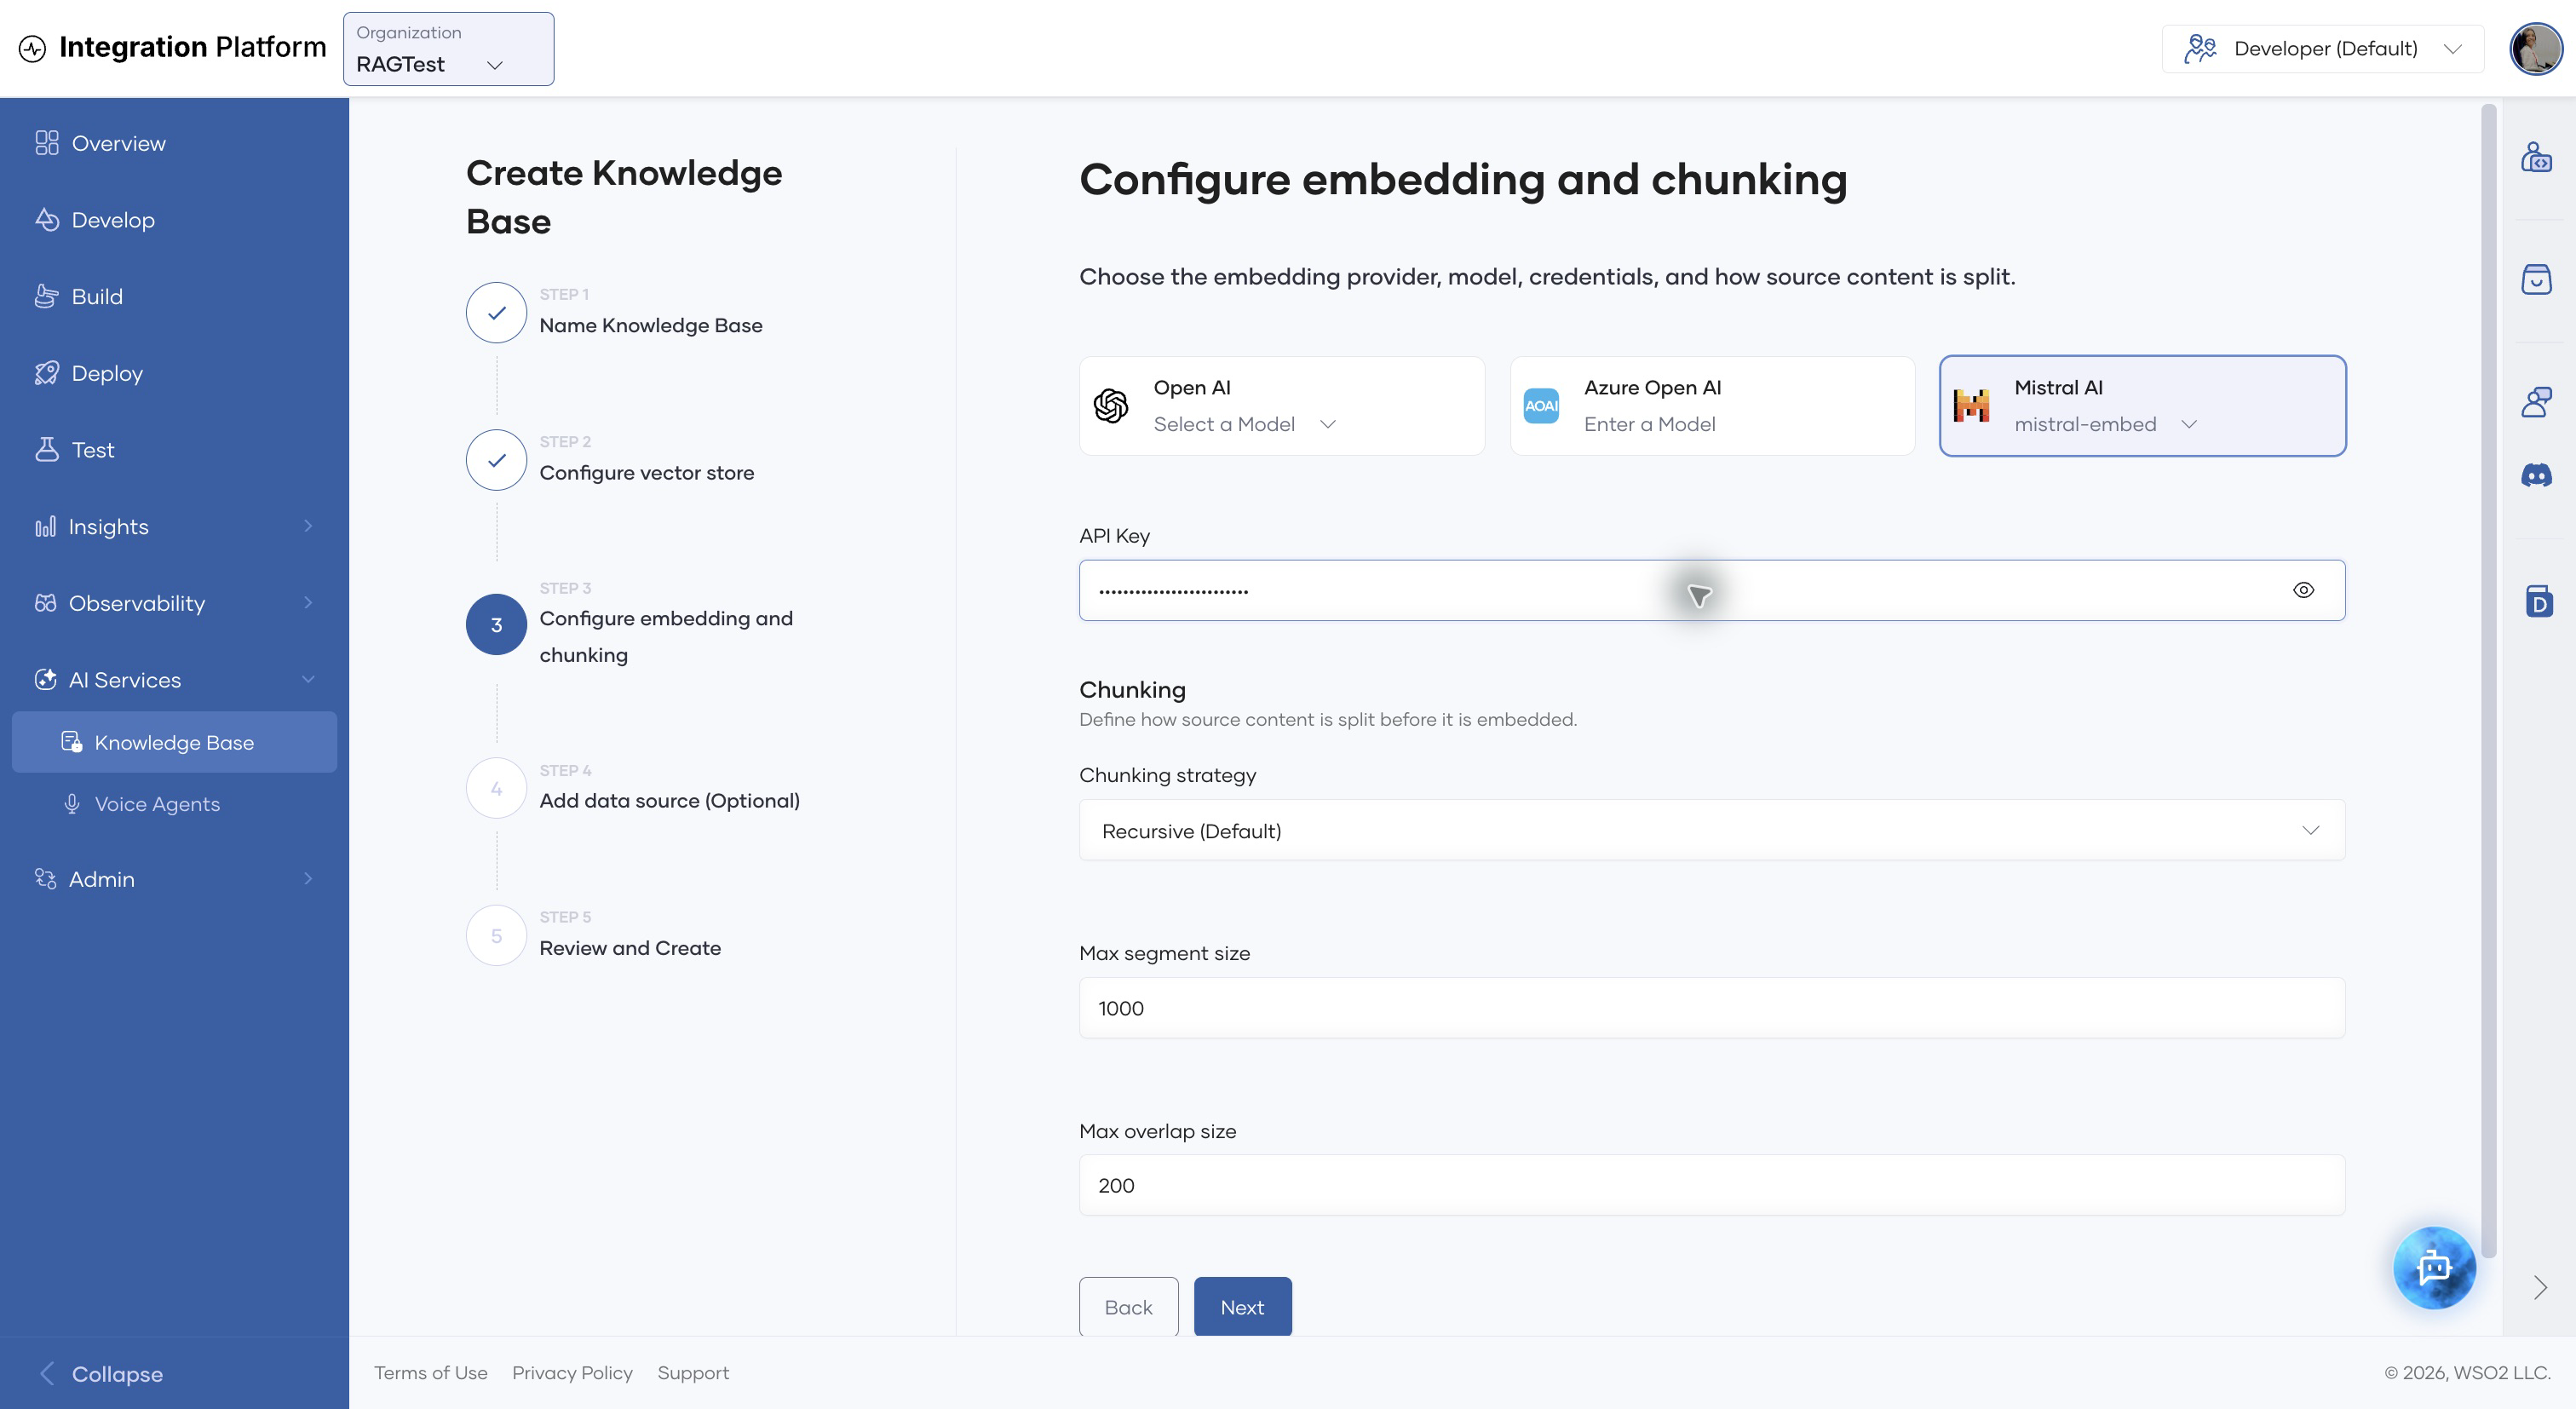
Larger segments preserve more context but can reduce retrieval precision. Overlap helps preserve context across boundaries but increases the number of stored tokens. Start with the defaults, test representative queries, and tune these values based on the results.
Step 4: Add a data source (optional)
Select a source, enter its credentials, and choose when ingestion runs:
| Source | Connection options | Content location |
|---|---|---|
| Google Drive | API key, or OAuth client ID, client secret, and refresh token | Folder ID |
| Amazon S3 | Access key ID and secret access key | Bucket name |
Select One-time to ingest once after deployment, or Scheduled to run repeatedly. A schedule can use a simple interval or a cron expression. Click Next when the source is configured, or click Skip to add a data source later.
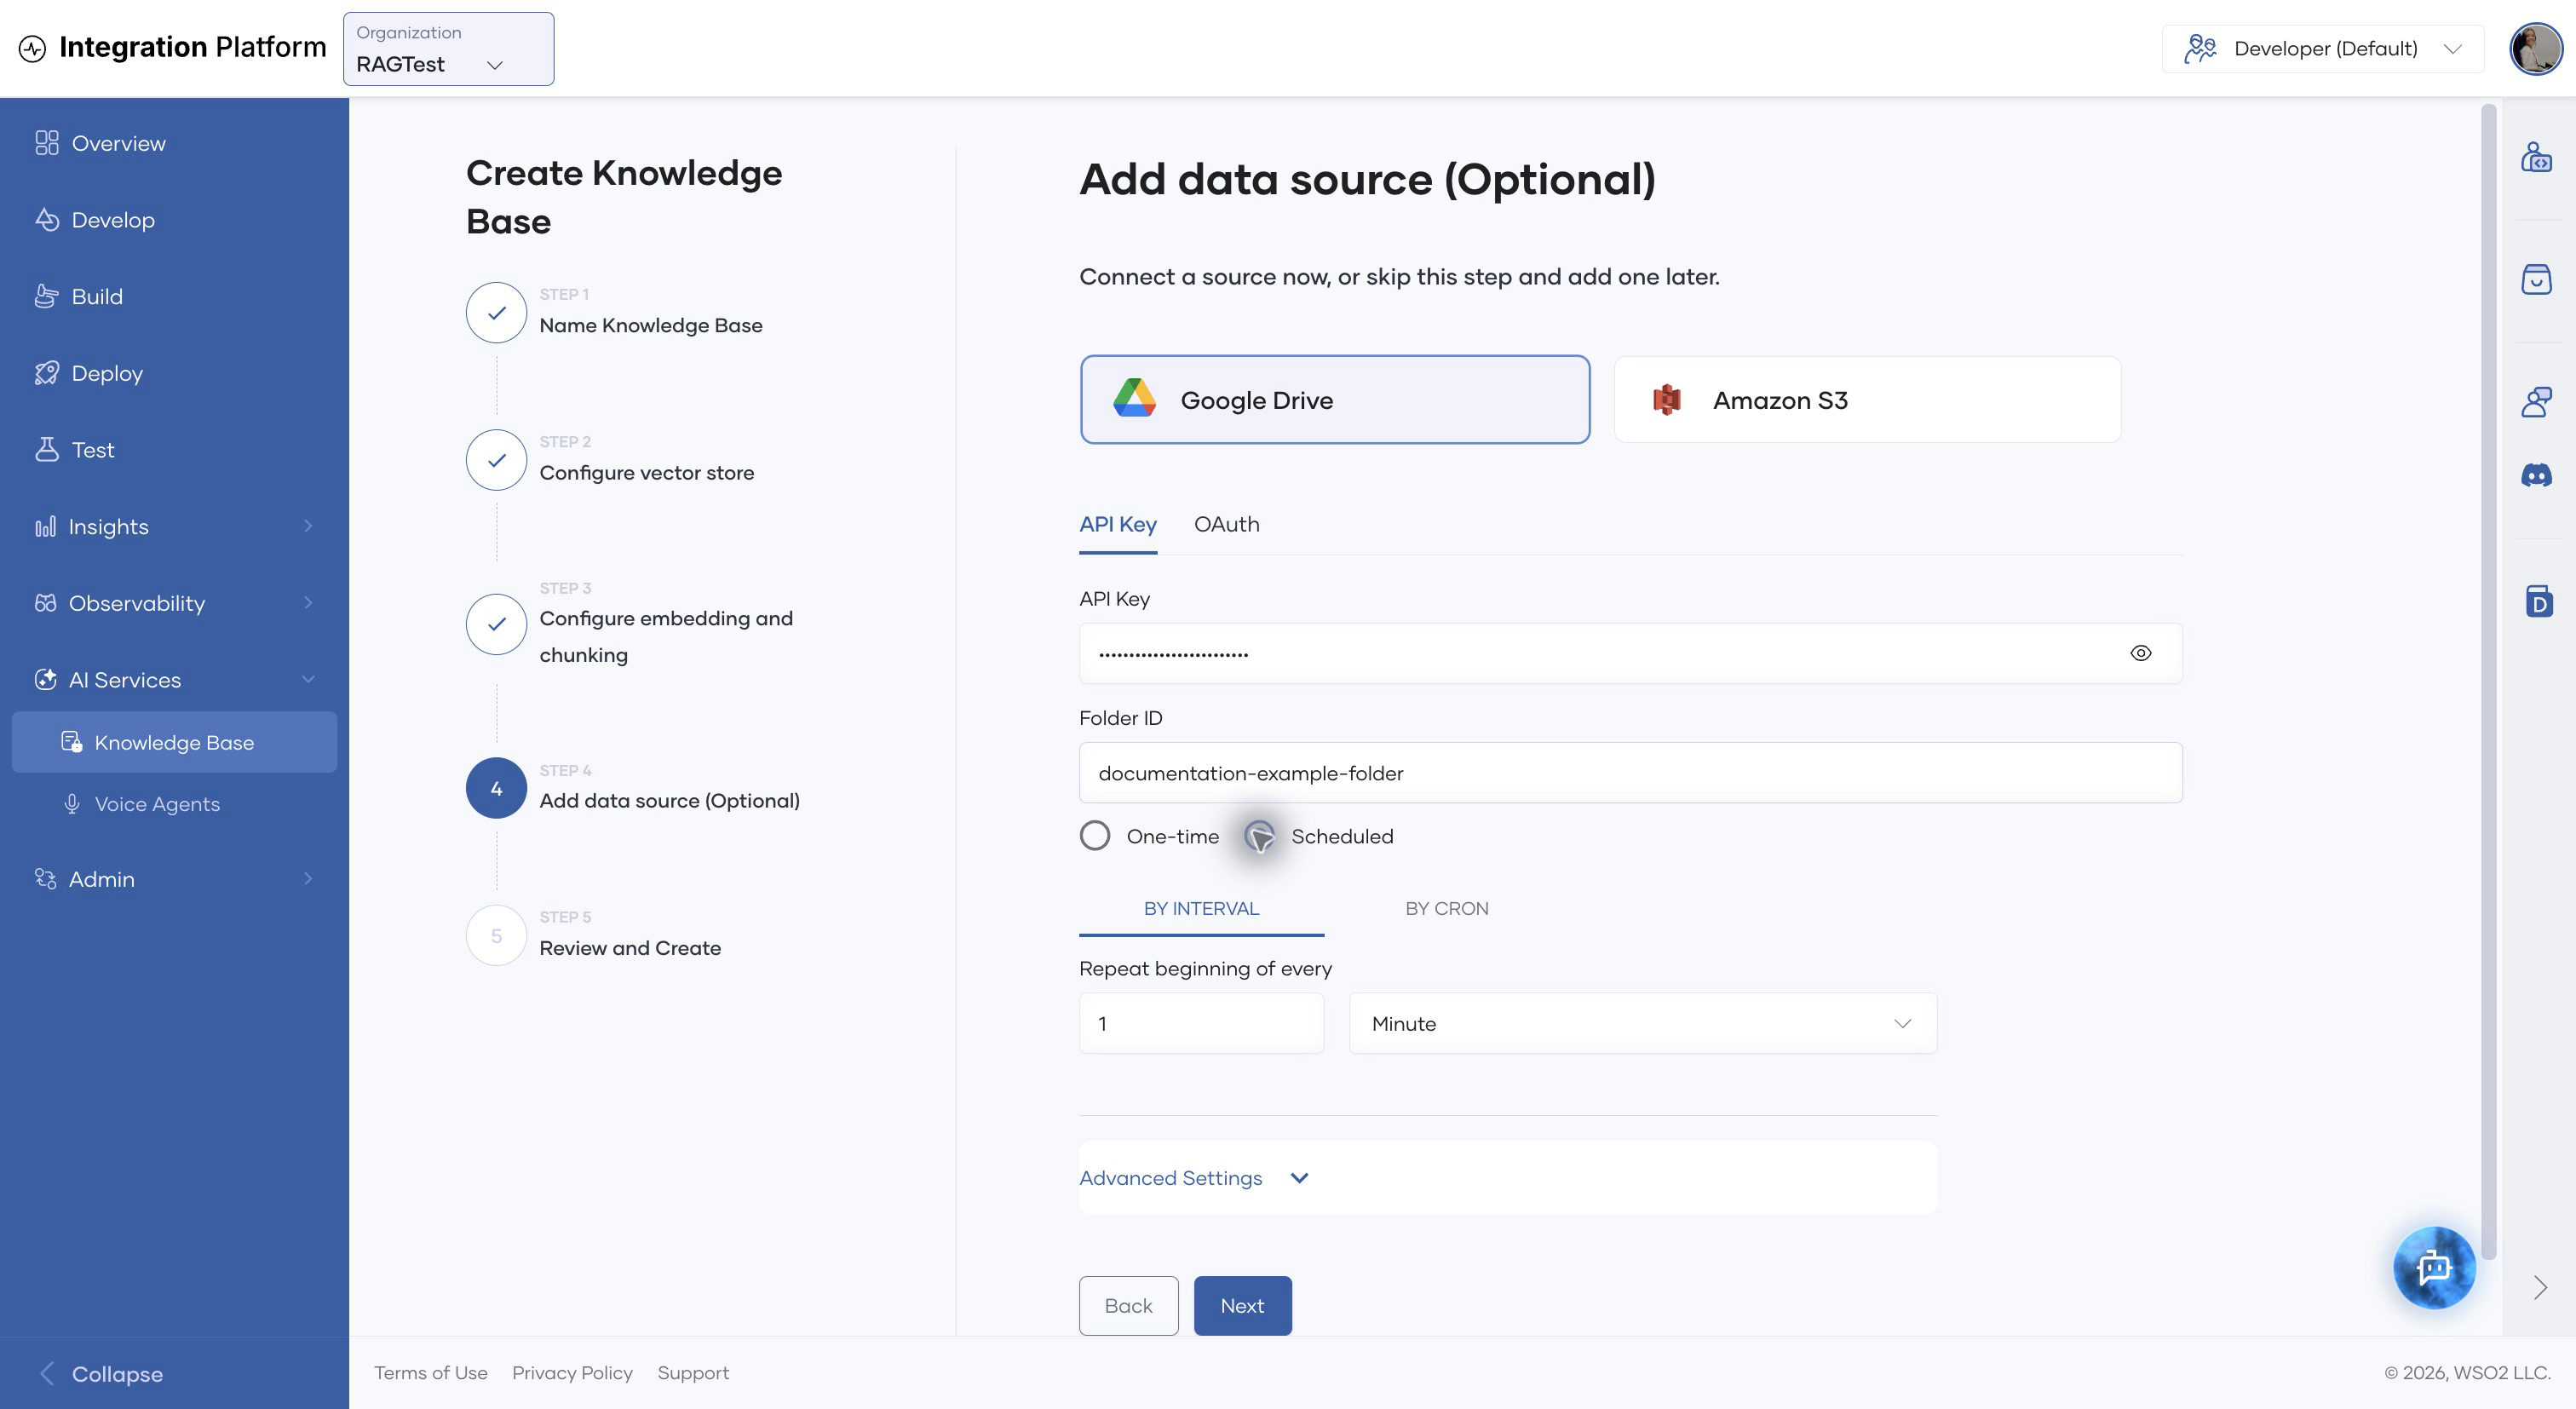
Creating a Knowledge Base without a data source is useful when another workflow will ingest content or when credentials are not yet available. You can attach multiple data sources later.
Step 5: Review and create
- Review the Knowledge Base name, vector store, collection or table, embedding provider and model, chunking settings, and optional data source.
- Click Back to correct any value.
- Click Create.
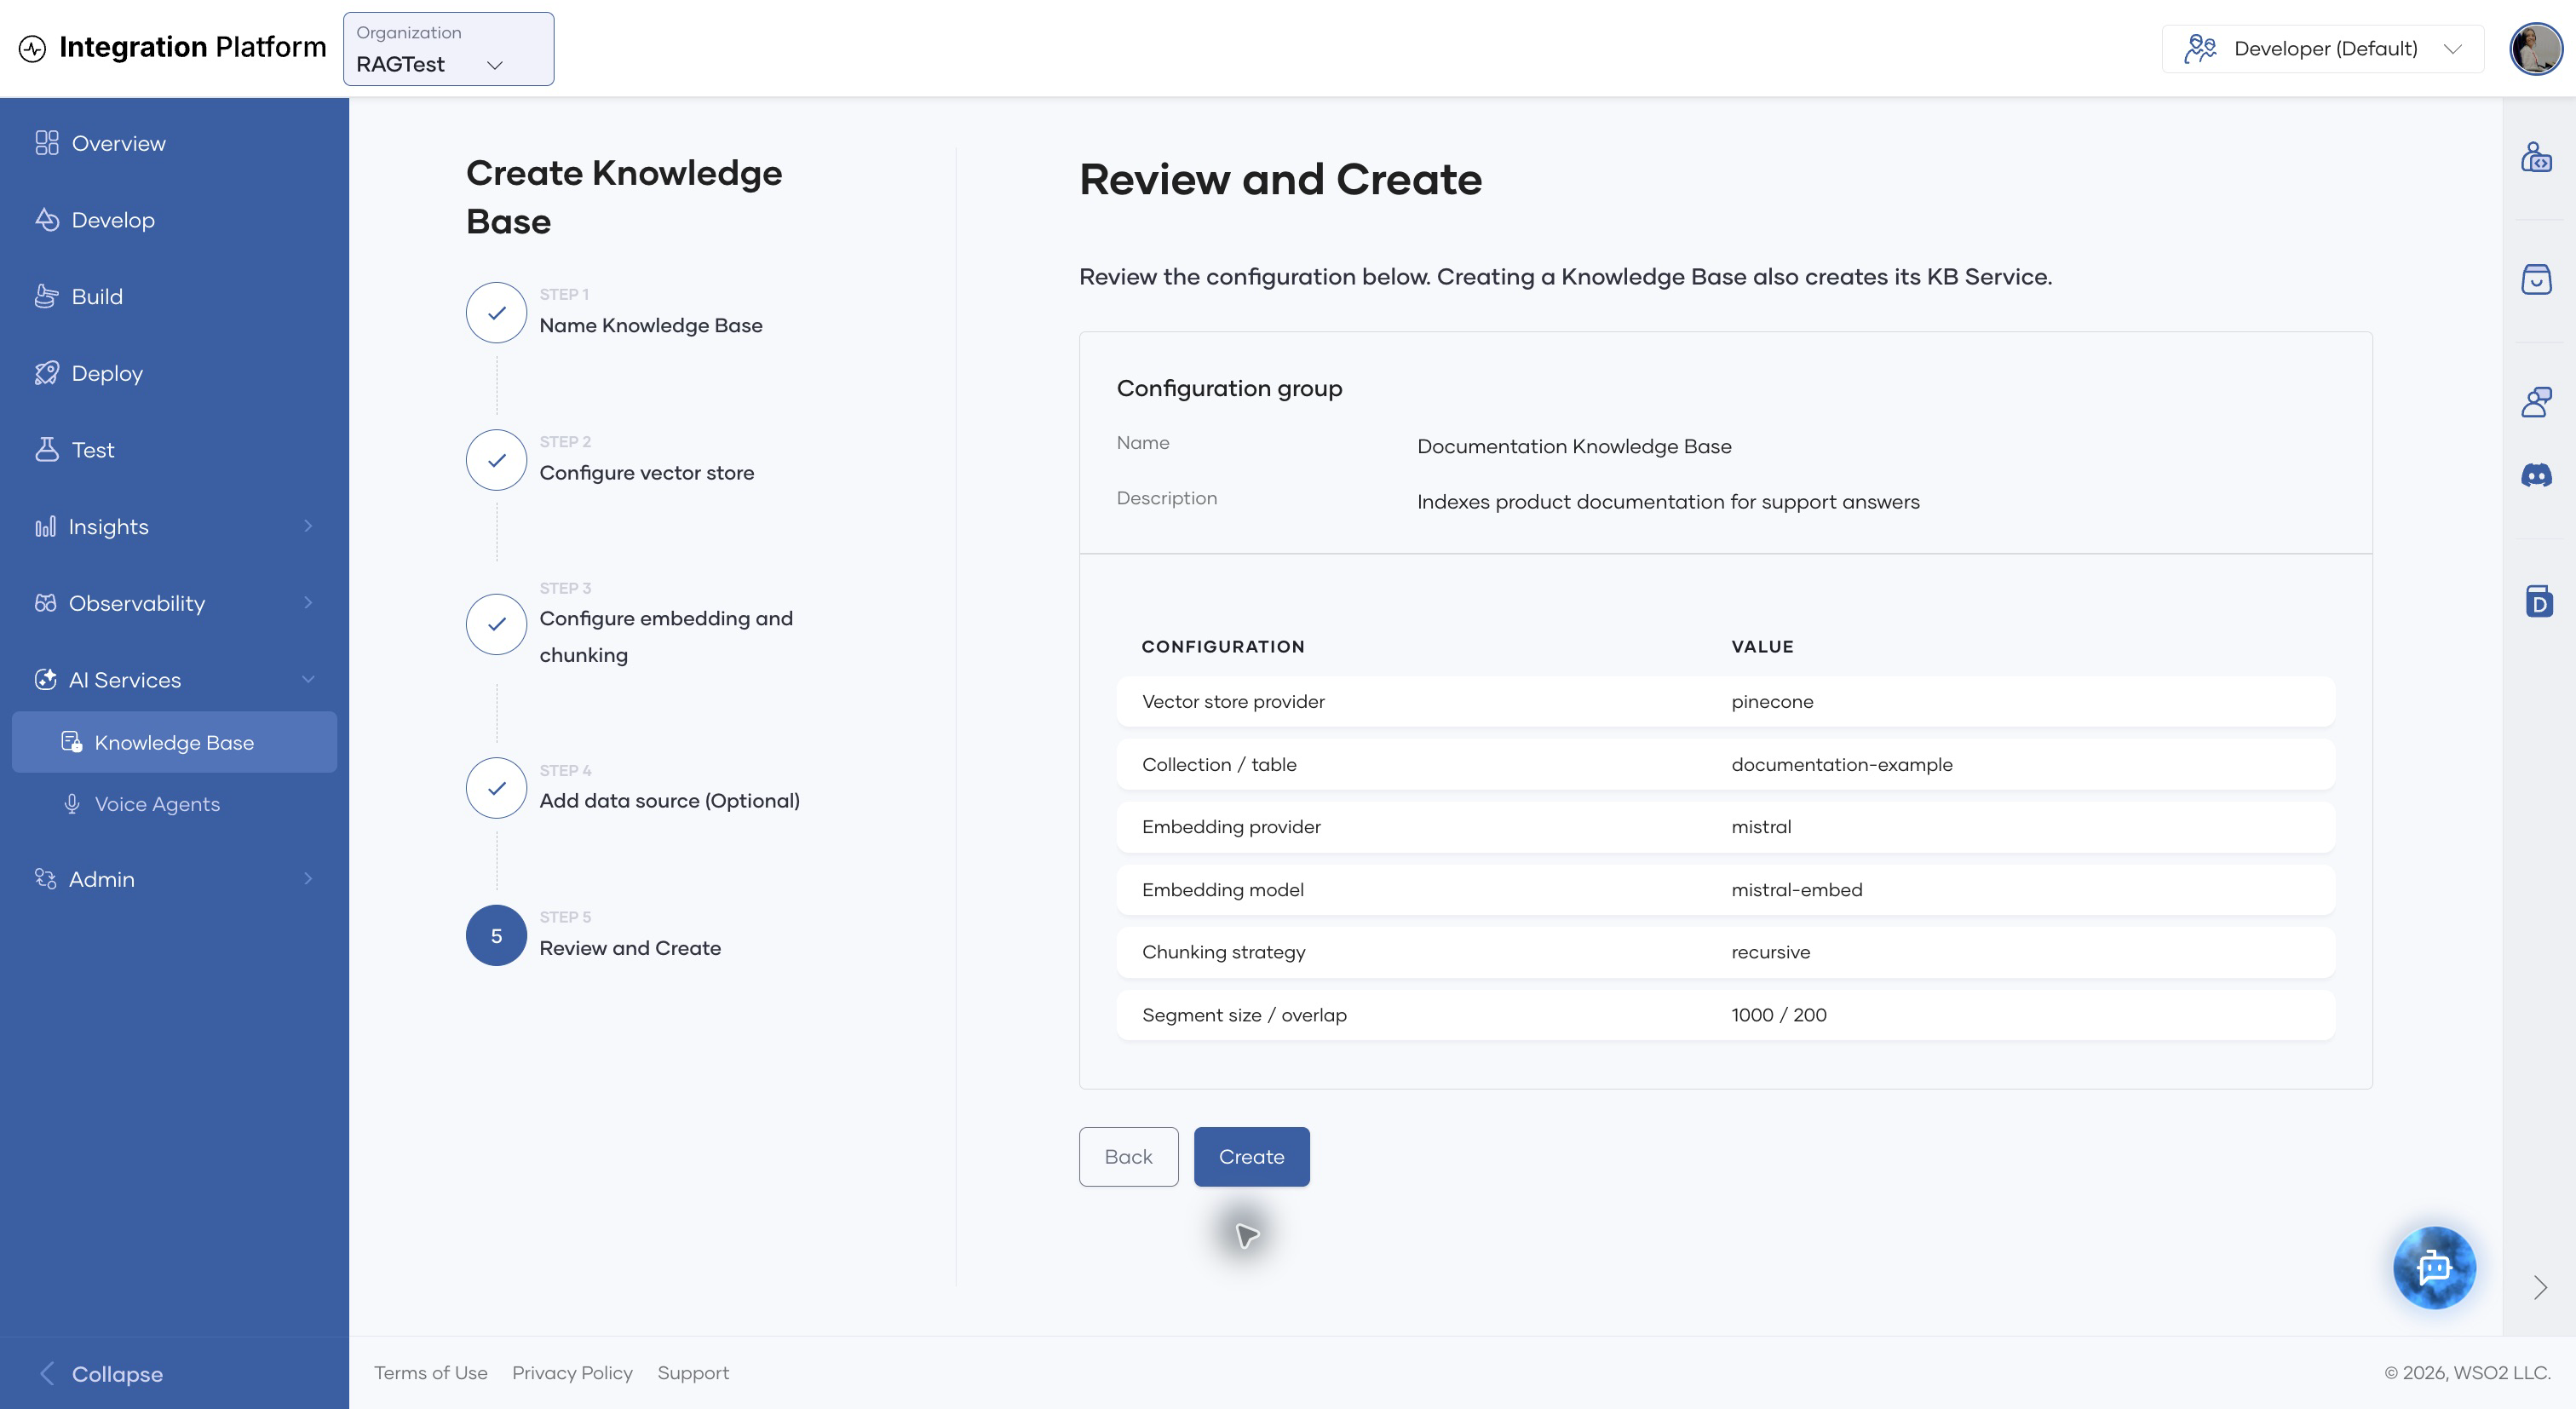
The platform saves the shared configuration and creates the initial KB service. If you added a data source, the platform creates and deploys it as well. A one-time source runs after deployment; a scheduled source runs according to its schedule.
Verify the Knowledge Base
- Open the Knowledge Base from the list.
- On Overview, confirm that the vector store, collection or table, embedding provider, and chunking strategy are correct.
- If you attached a data source, wait until its status is Deployed, run Ingest if necessary, and review Execution logs.
- Open Retrieval, enter a query based on the ingested content, and click Send.
For all management actions, see Manage a Knowledge Base.