Create a Project
A project is a workspace that organizes multiple integrations and libraries in a single repository with shared dependencies. Use projects when you need to manage related packages together.
Open the creation wizard
On the WSO2 Integrator home screen, click More Actions below the three primary cards to reveal additional options.
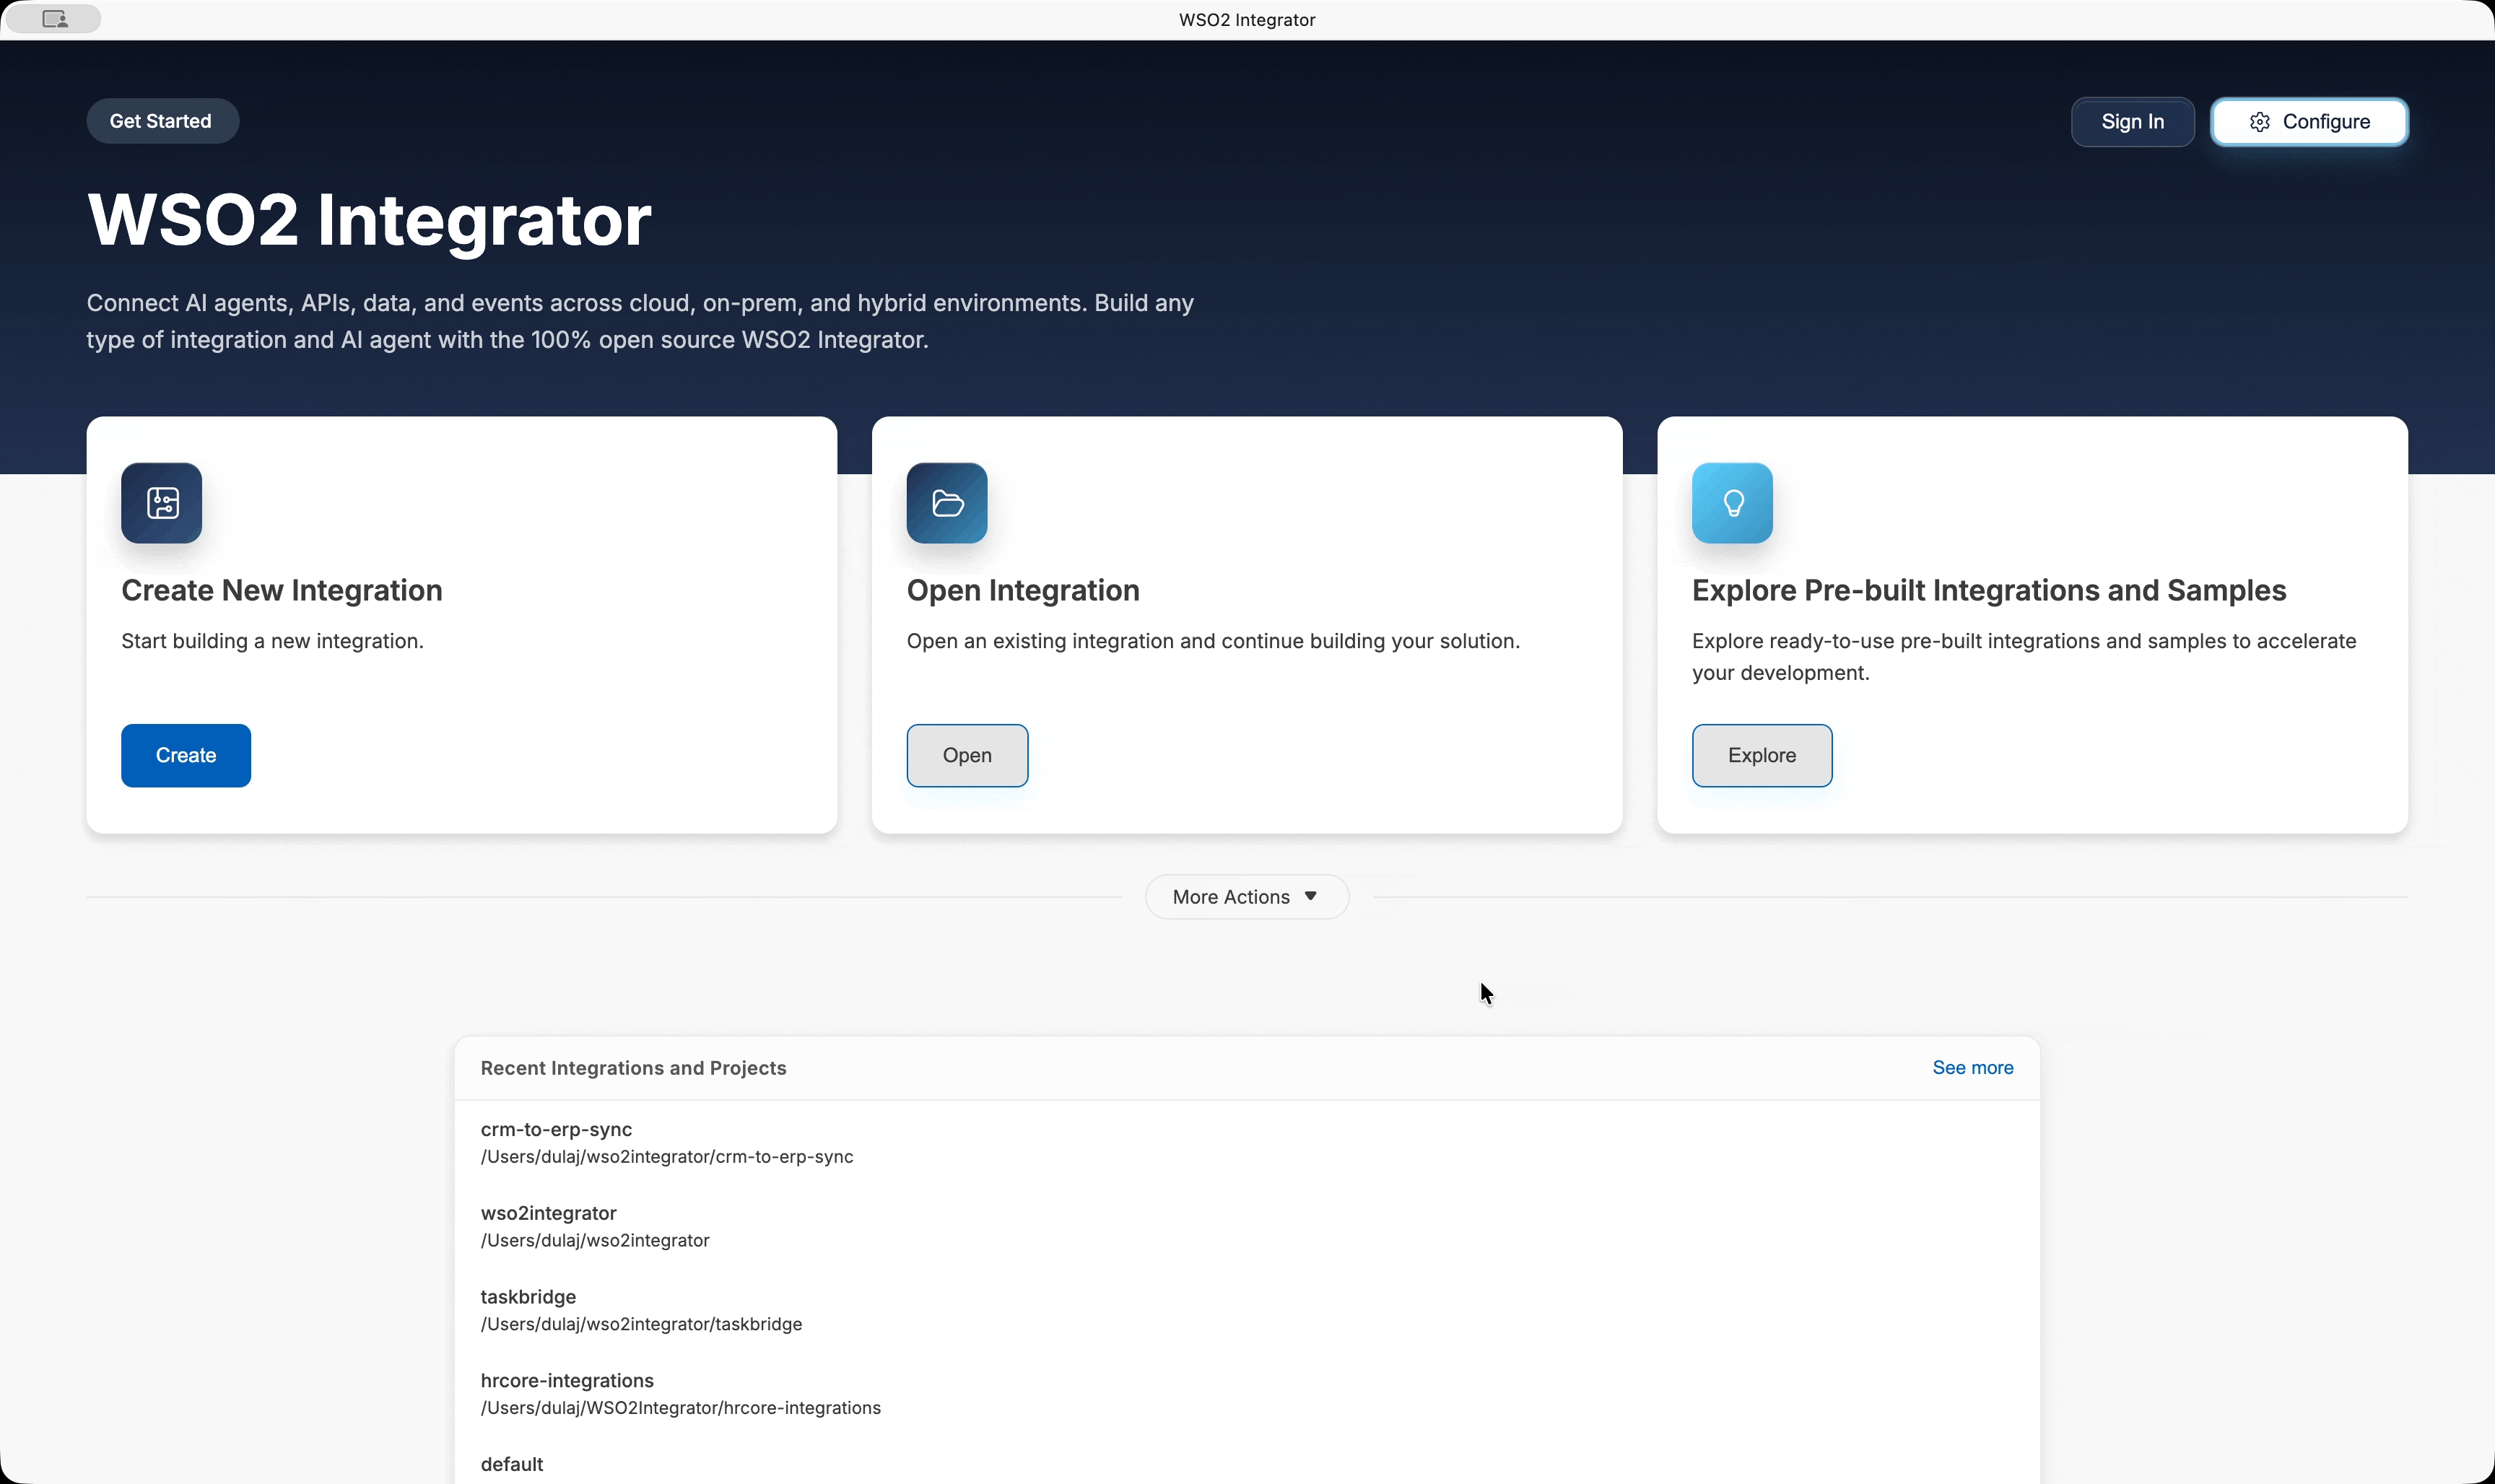
The expanded panel shows four entries (and the trigger relabels itself Show less):
- Create Library — Create reusable components and utilities to share across integrations and projects.
- Create Project — Create a project to organize and manage multiple integrations.
- Open Project — Open an existing project to view and manage its integrations.
- Migrate Integrations from Other Vendors — Import integrations from other vendors and convert them to WSO2 Integrator format.
Click Create Project to open the project creation wizard.
Configure the project
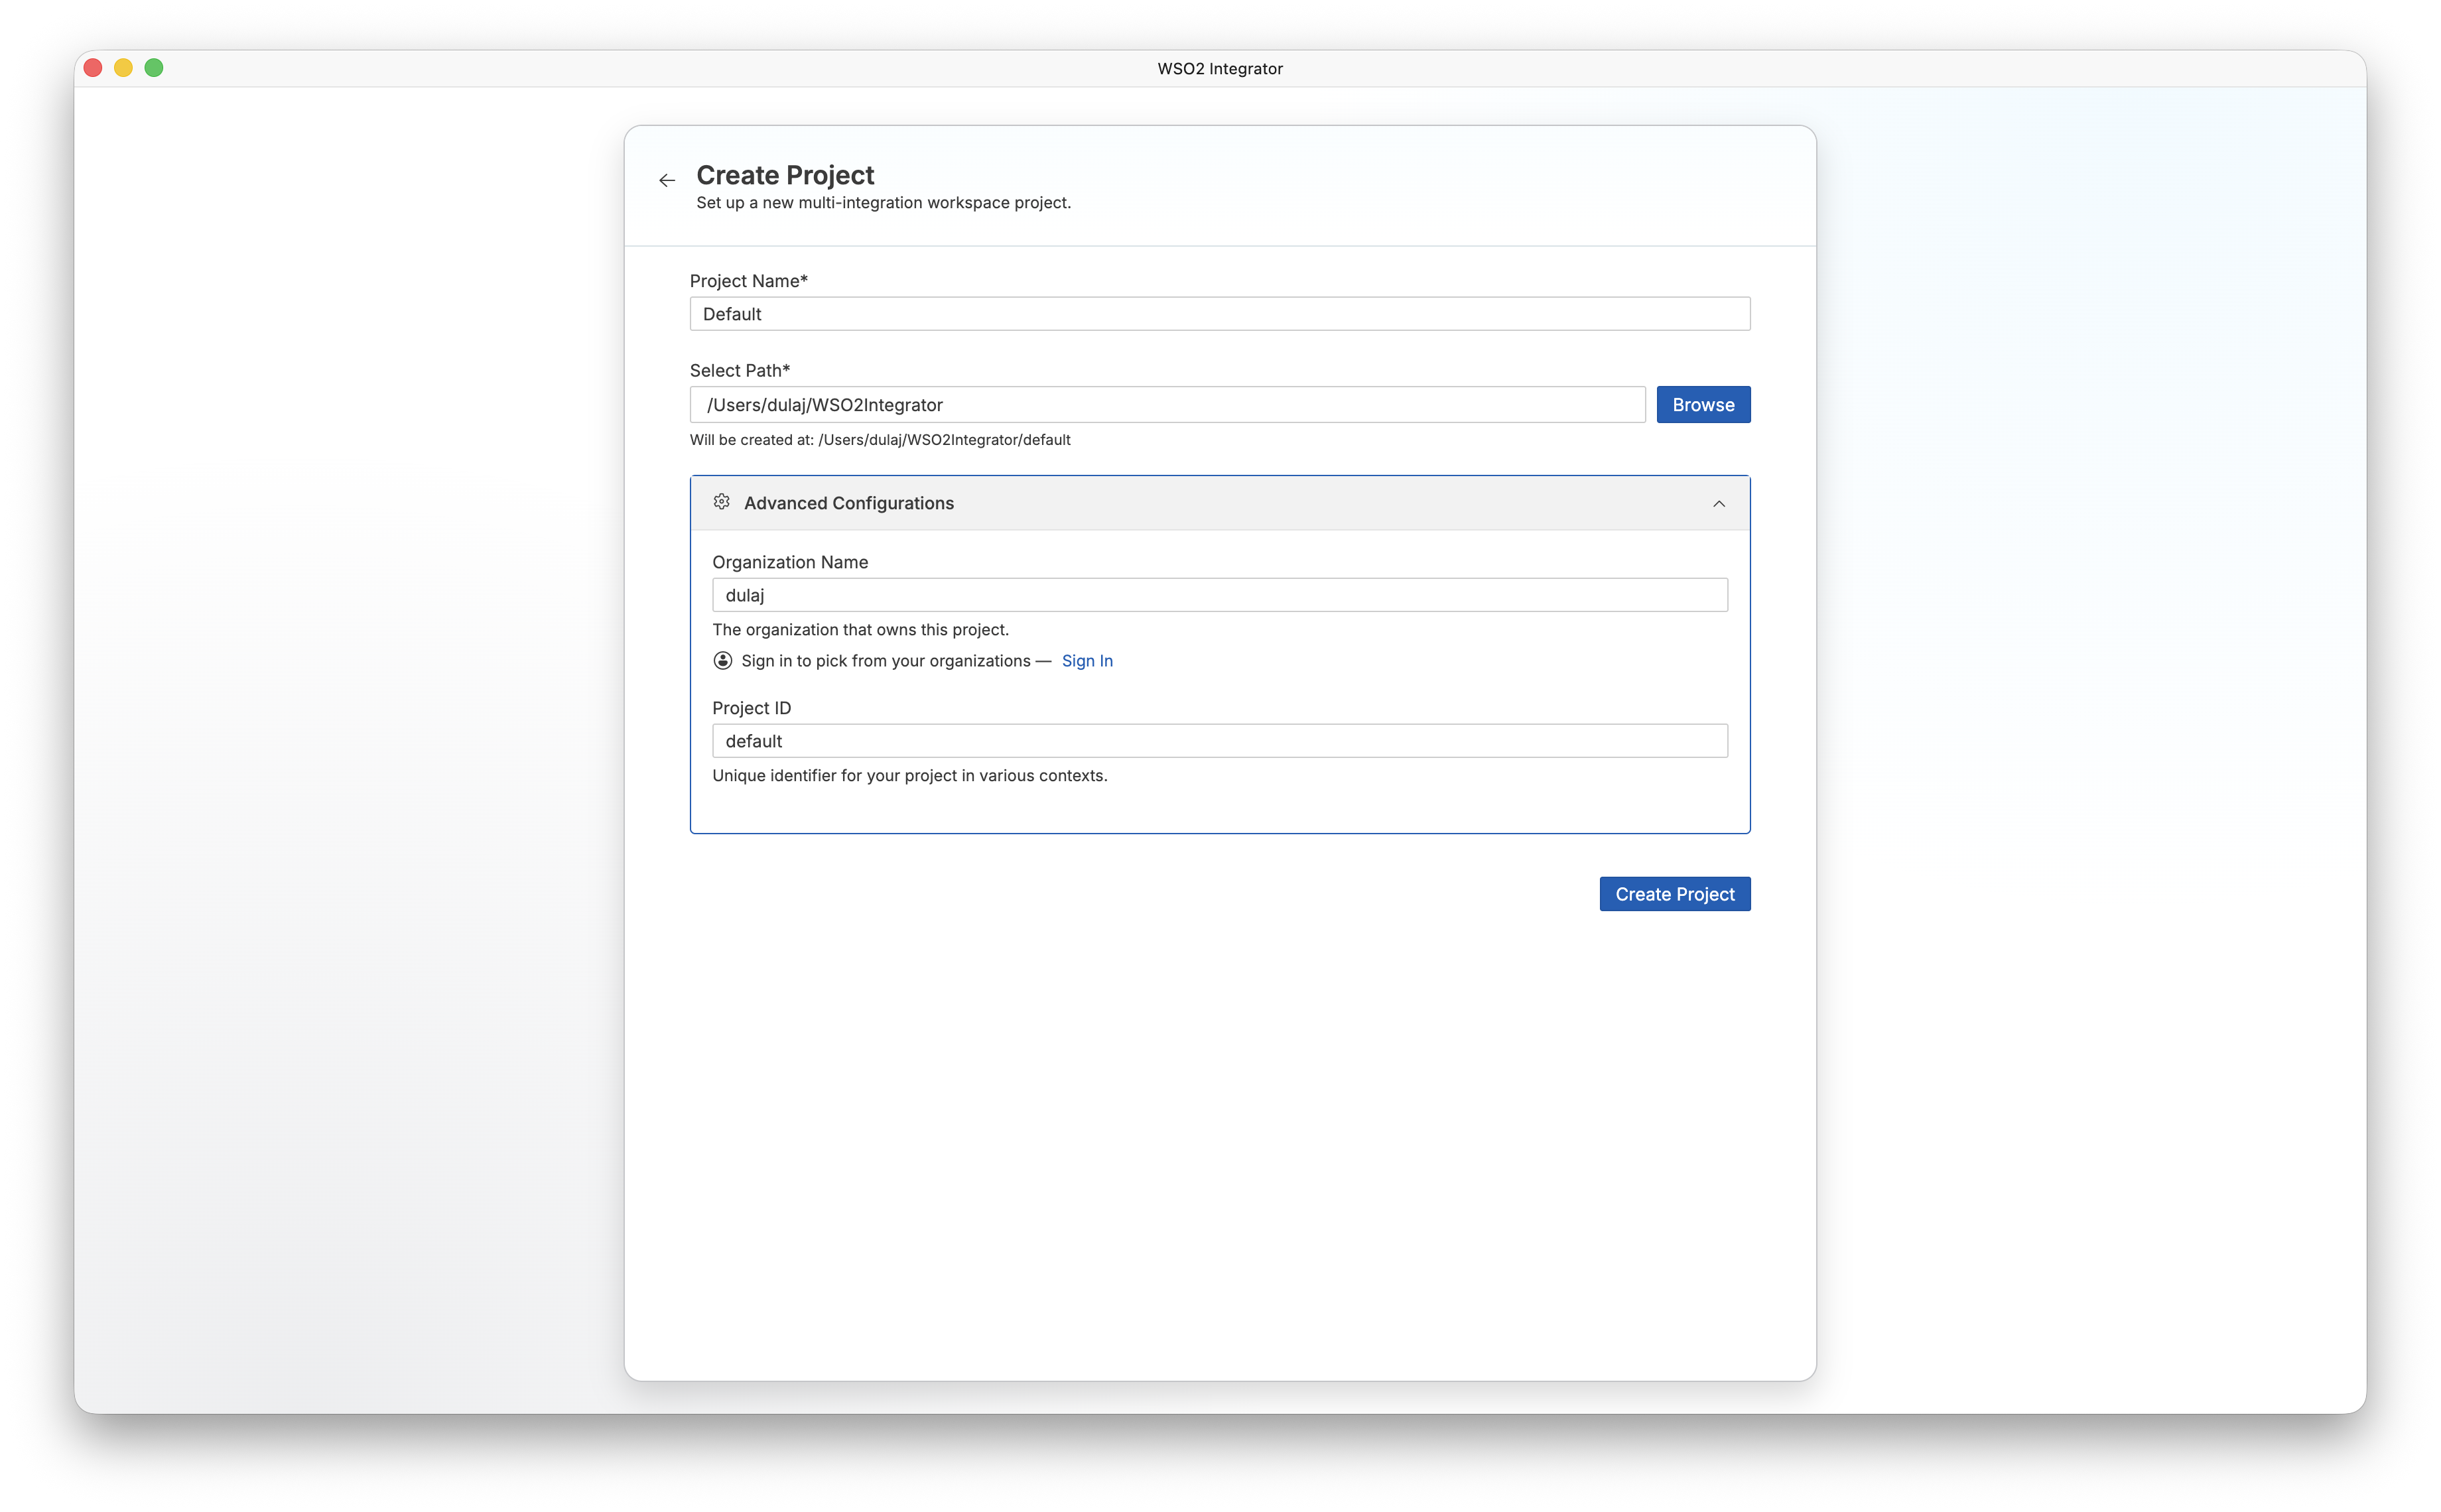
The creation wizard opens with the prompt Set up a new multi-integration workspace project.
| Field | Description |
|---|---|
| Project Name | A name for your project. Defaults to Default. |
| Select Path | The directory where the project is created. Click Browse to choose a folder. The full path preview appears below the field as Will be created at: <path>. |
Fill in the required fields and click Create Project.
Advanced configurations
The Advanced Configurations section is expanded by default and contains the project ownership details.
| Field | Description |
|---|---|
| Organization Name | The organization that owns this project. Click Sign In to pick from your registered Ballerina Central organizations. |
| Project ID | A unique identifier for your project used in various contexts. Defaults to default. |
Add integrations and libraries
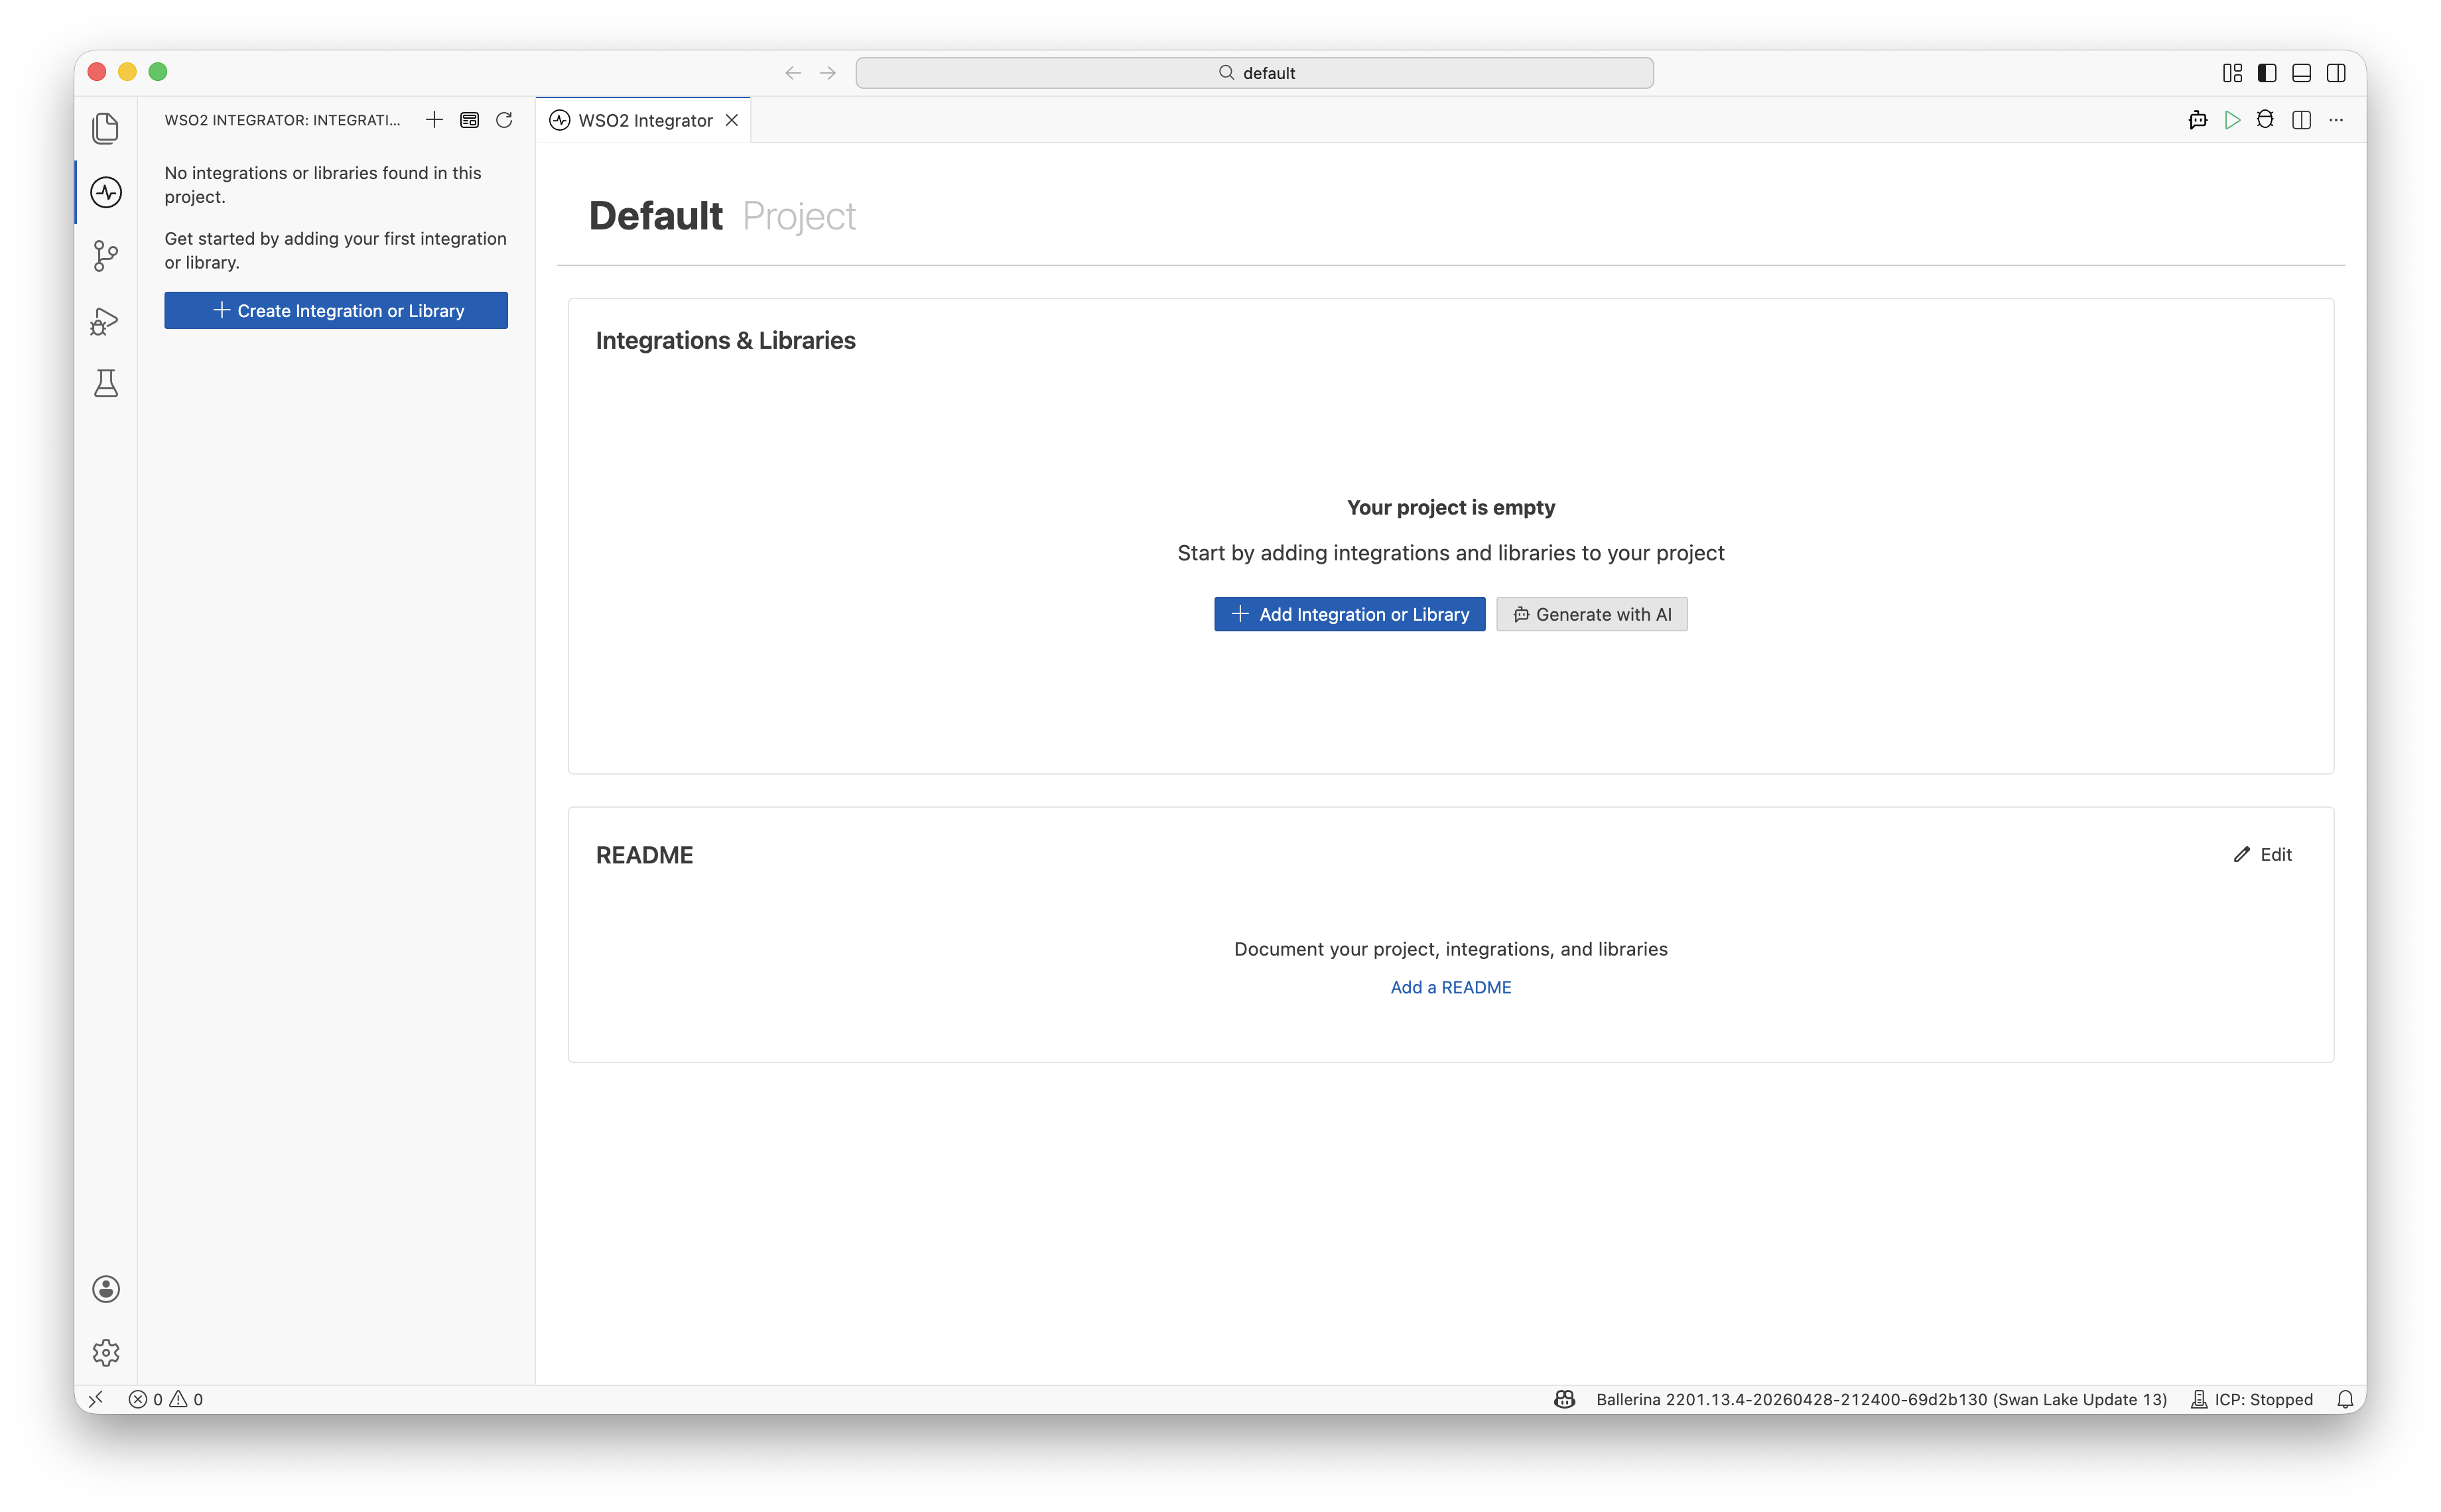
After creation, WSO2 Integrator opens the project view. The project starts empty with the message Your project is empty. Start by adding integrations and libraries to your project.
You have several entry points into the Add New Integration or Add New Library dialog:
- Add Integration or Library in the Integrations & Libraries card.
- Generate with AI in the same card to scaffold an integration from a natural-language prompt using WSO2 Integrator Copilot.
- Create Integration or Library in the sidebar.
The empty project also includes a README card that links to Add a README so you can document the project, integrations, and libraries.
Add an integration
-
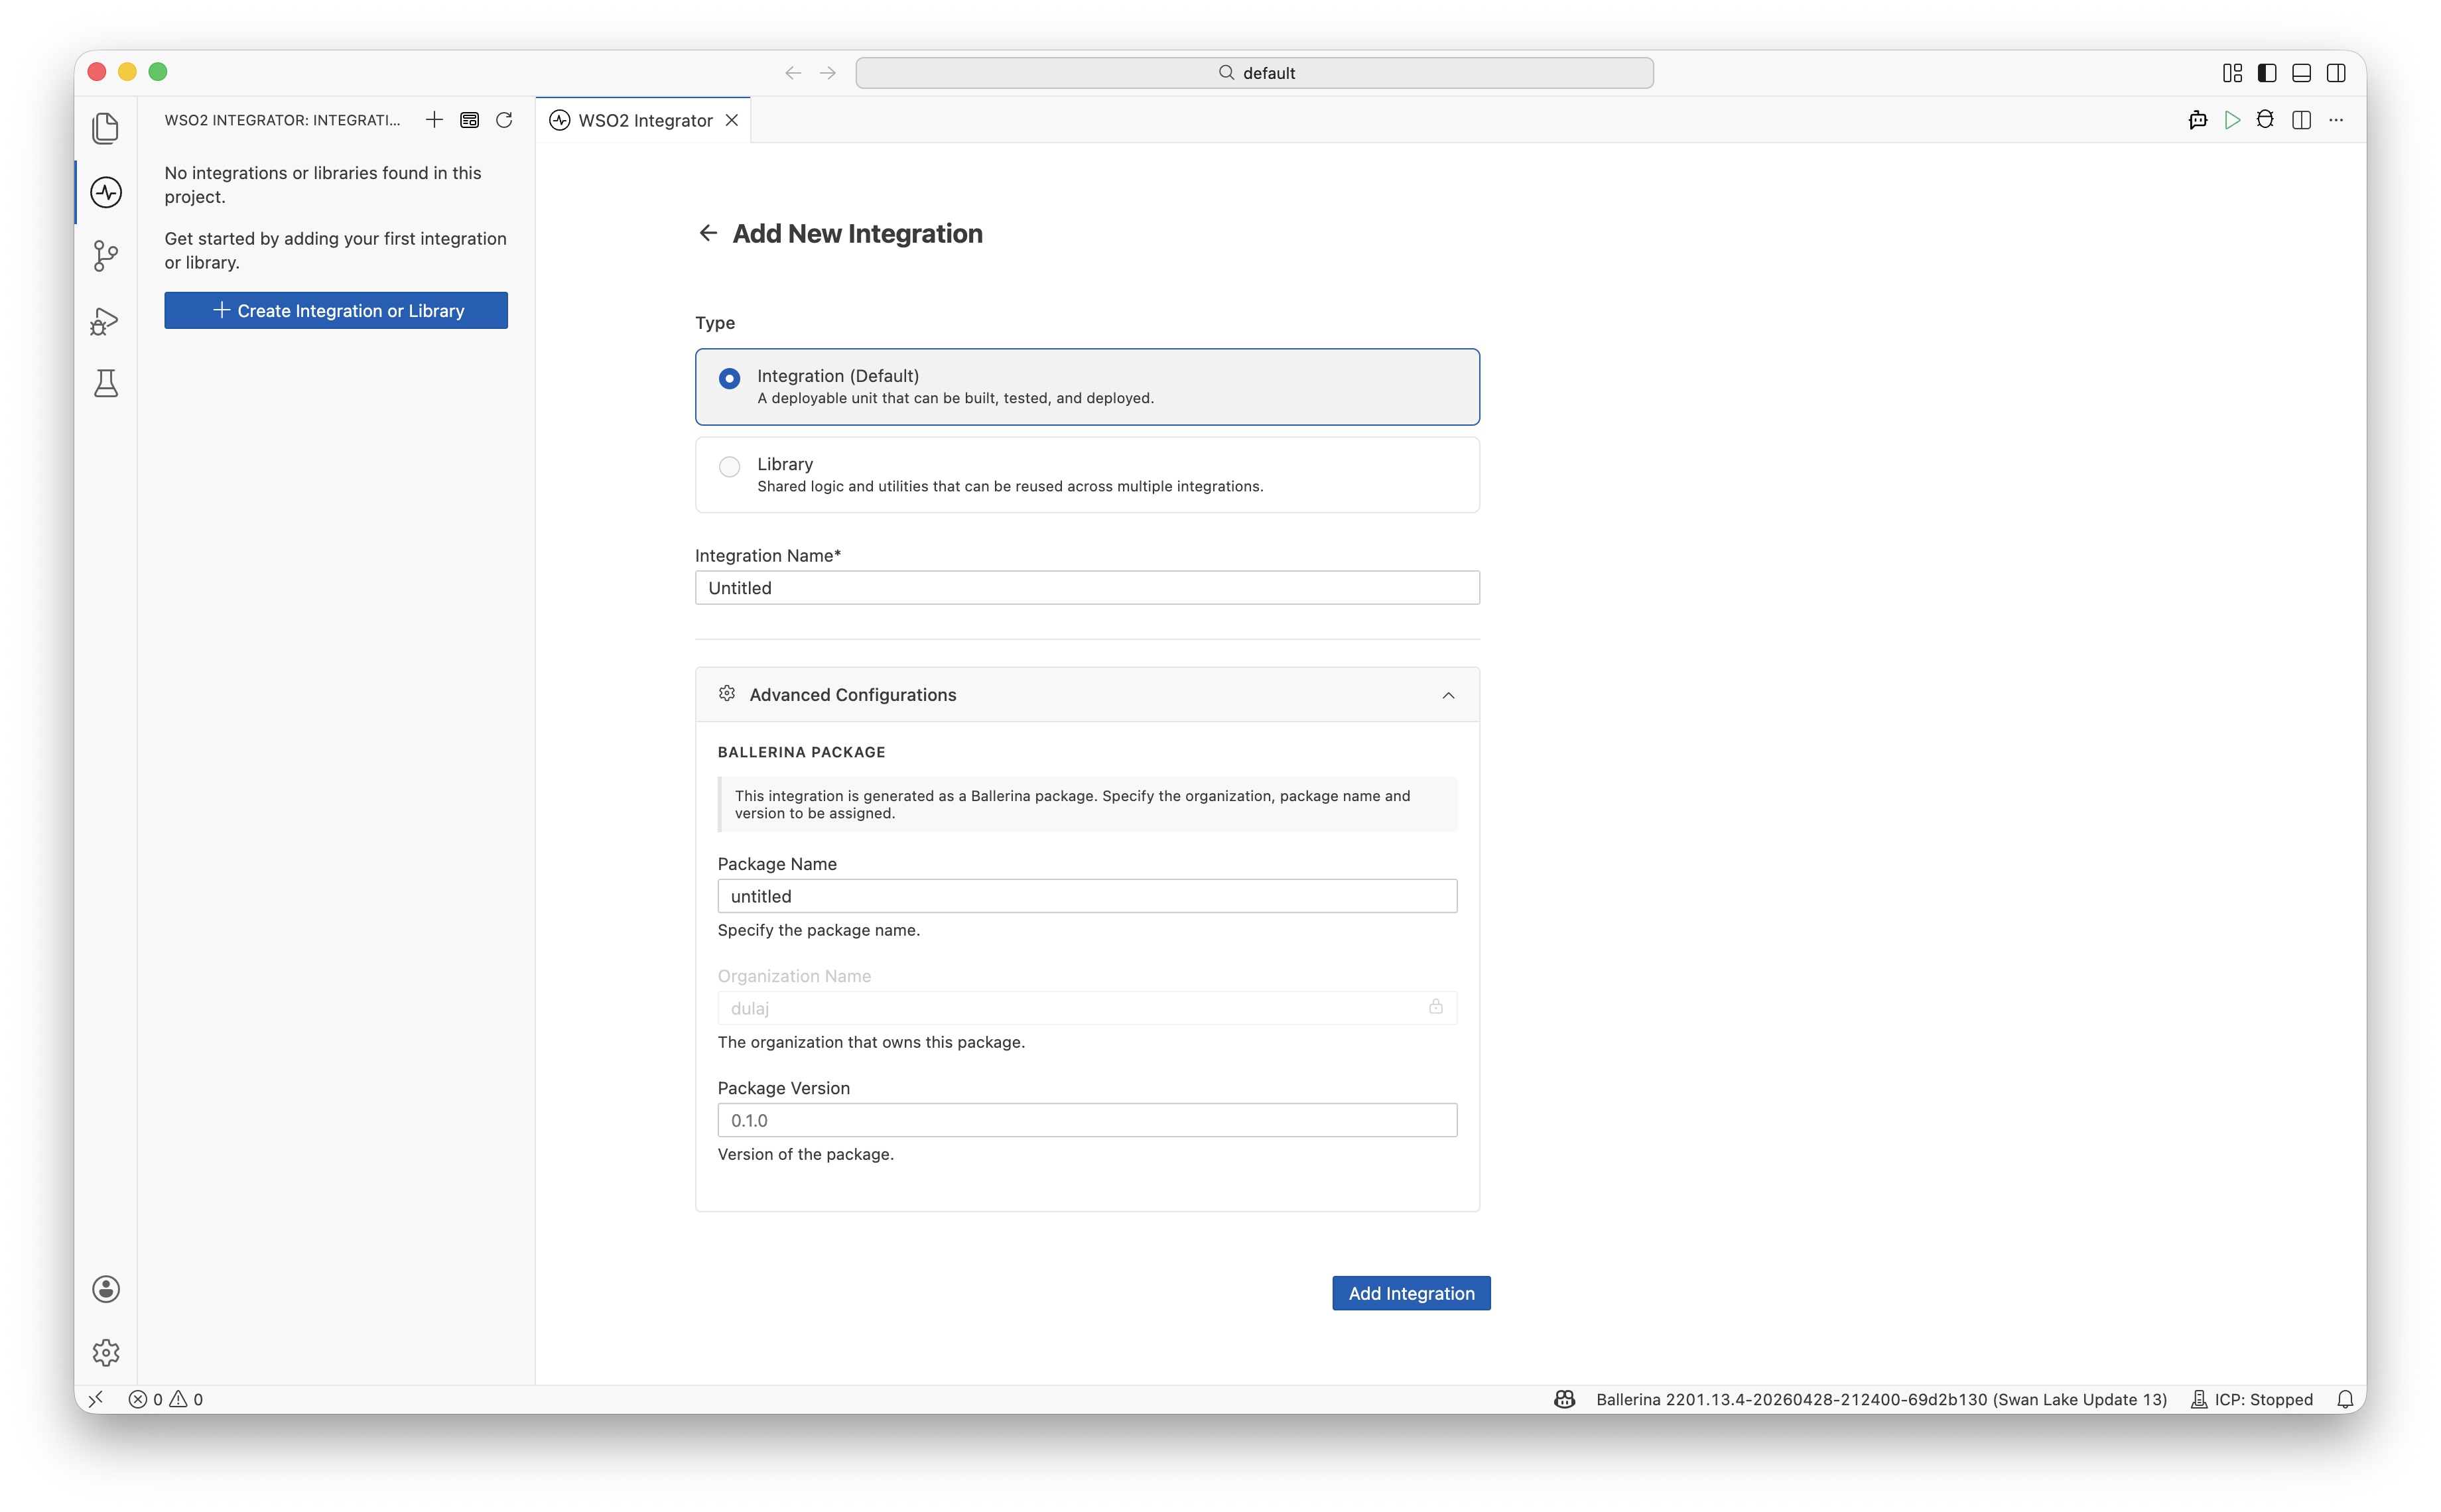
Select Integration (Default) as the Type — A deployable unit that can be built, tested, and deployed.
-
Enter an Integration Name (defaults to
Untitled). -
Optionally expand Advanced Configurations to set Ballerina package details:
Field Description Package Name The Ballerina package name. Defaults to the integration name (for example, untitled).Organization Name Inherited from the parent project and shown as read-only. Package Version The initial version of the package. Defaults to 0.1.0. -
Click Add Integration.
Add a library
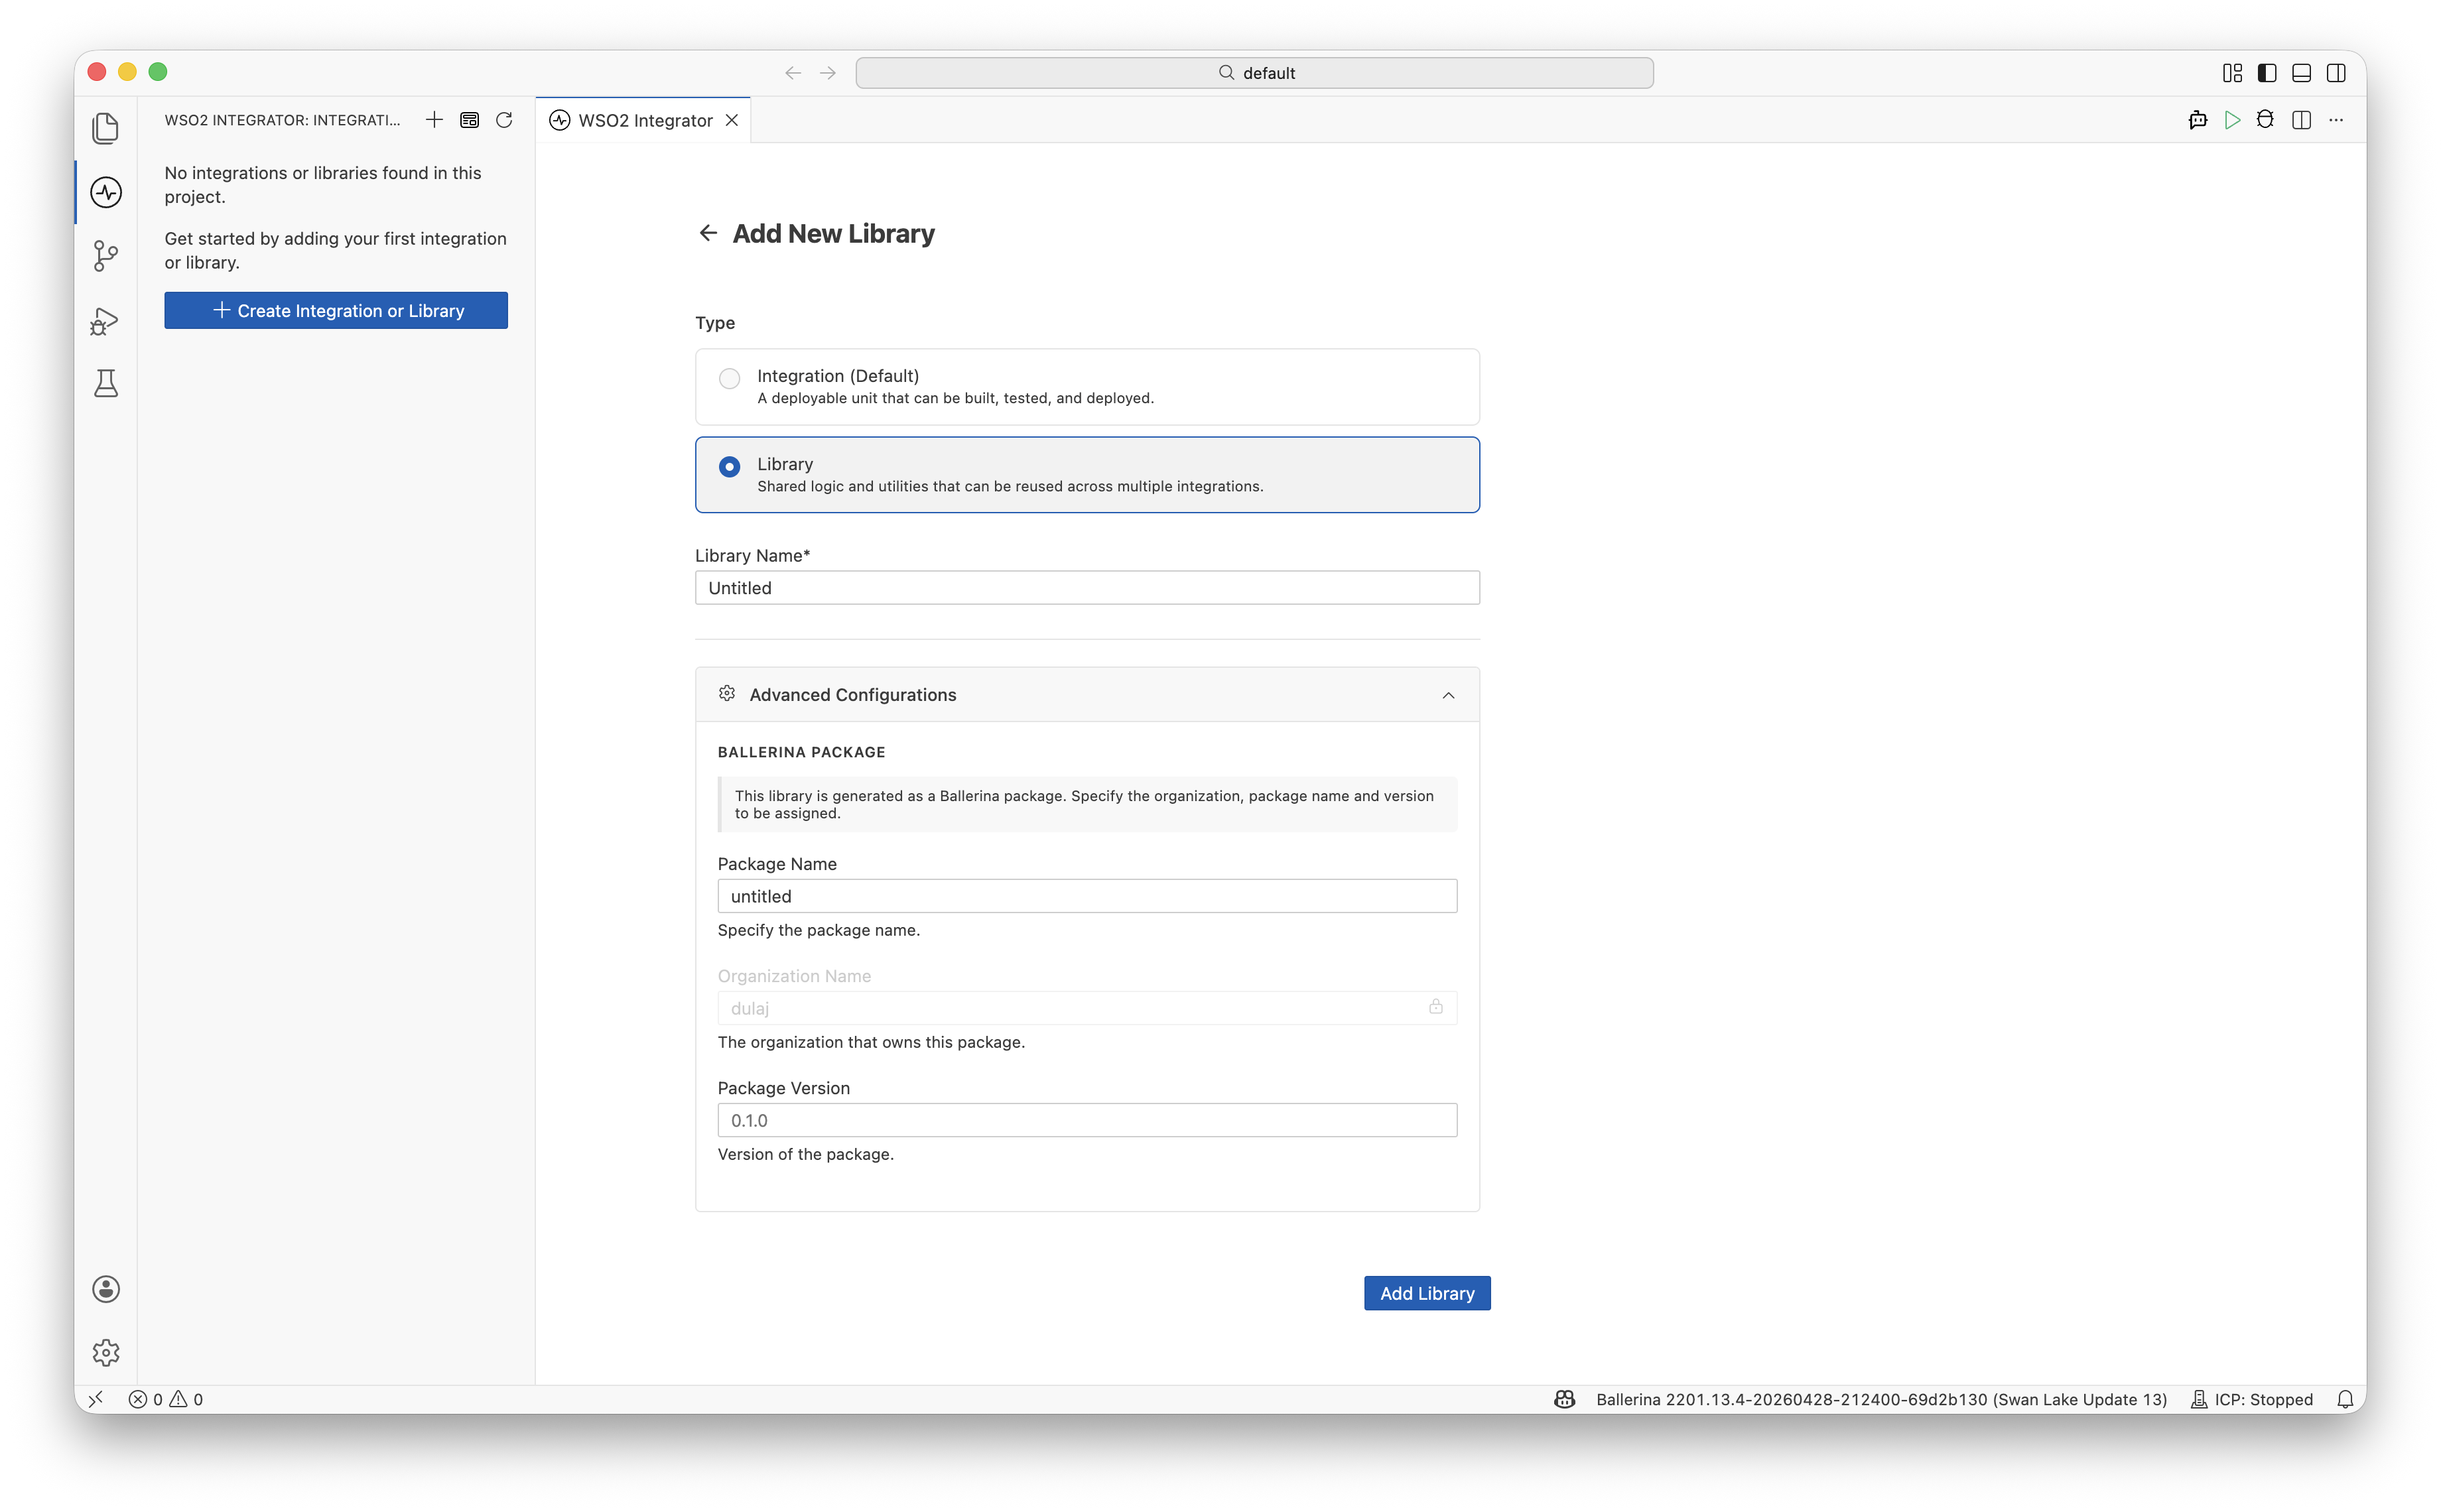
- Select Library as the Type — Shared logic and utilities that can be reused across multiple integrations.
- Enter a Library Name (defaults to
Untitled). - Optionally expand Advanced Configurations to set the same Ballerina package fields as above. Organization Name is inherited from the parent project.
- Click Add Library.
What's next
- Project view — Manage, run, and debug your project
- Create a new integration — Create a standalone integration
- Create a library — Create a standalone library