Set up an AI Gateway
An AI Gateway is the runtime component that processes and routes requests between your applications and large language model (LLM) providers. Create and manage AI gateways in AI Workspace, then deploy your LLM providers and proxies to them.
WSO2 hosts AI Workspace, and you run the gateway runtime on infrastructure of your choice. Each gateway is associated with an environment in your organization, such as Development or Production, so you can promote the same artifacts across environments.
Prerequisites
- An organization member with the Admin role. To grant someone this role, see Inviting users.
- At least one environment in your organization. See Manage environments.
View AI gateways
Navigate to AI Gateways in the left navigation menu. The page lists every configured gateway with the following details:
| Column | Description |
|---|---|
| Name | The gateway name |
| Description | A brief description of the gateway |
| Status | The gateway status, either Active or Inactive |
| Last Updated | Timestamp of the most recent change |
| Actions | Edit and delete options |
Add an AI gateway
To add a gateway, follow these steps:
- Navigate to AI Gateways in the left navigation menu.
- Click Add AI Gateway.
-
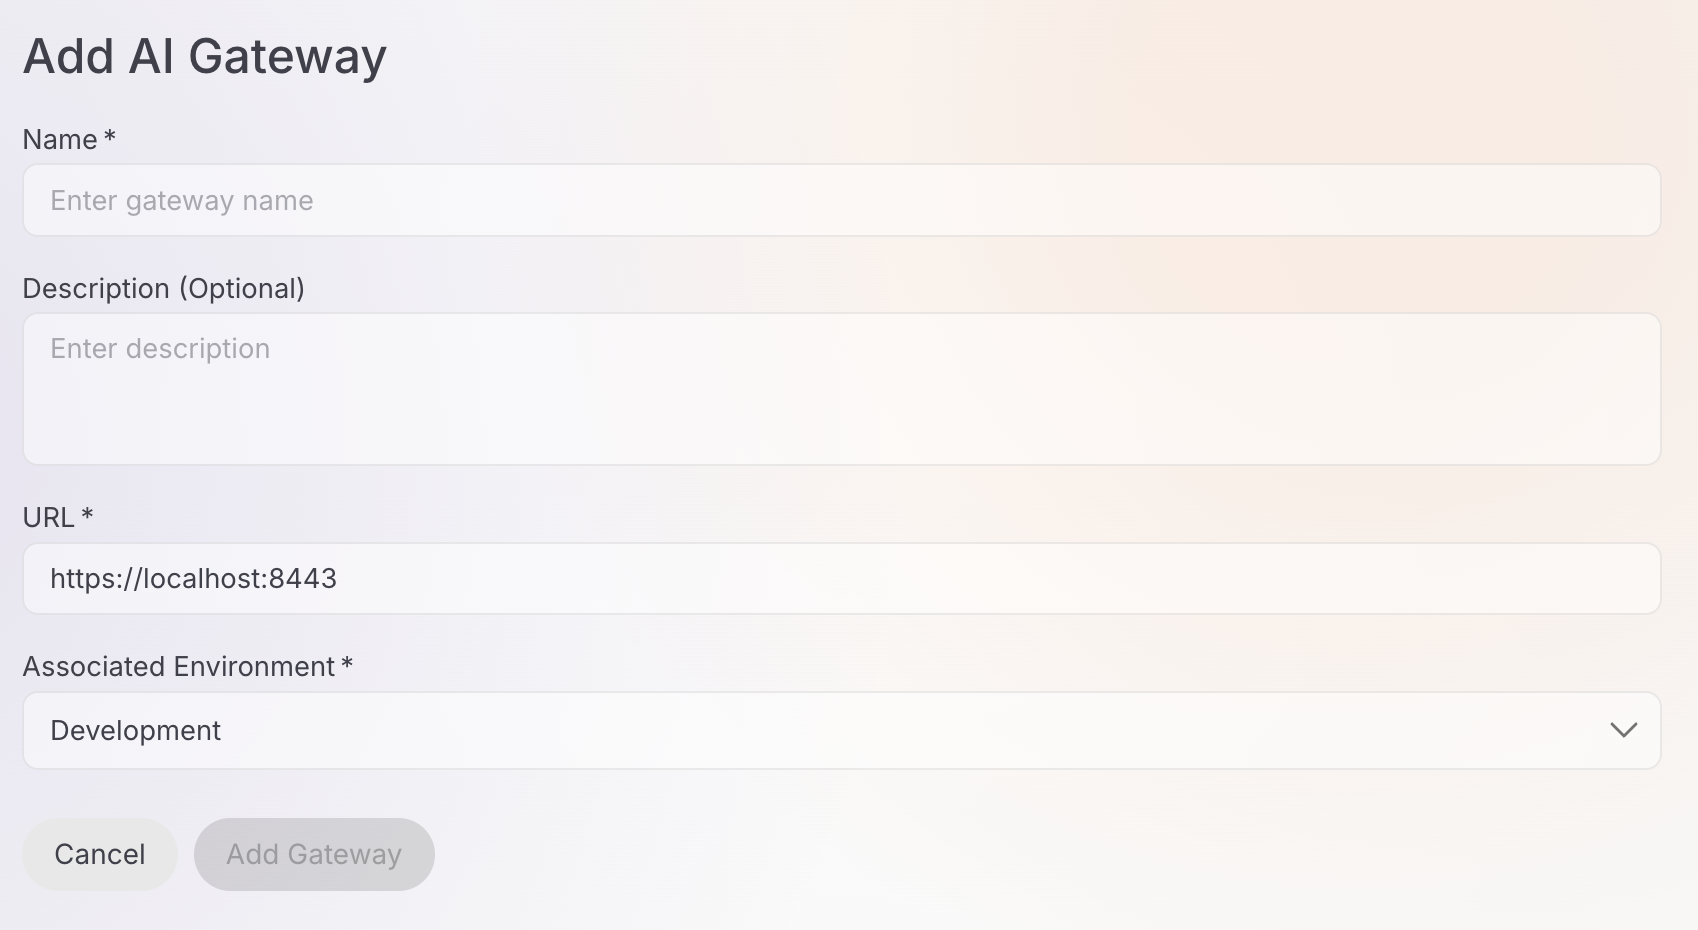
Fill in the gateway details:
- Name (required): a unique name for the gateway, for example
production-gatewayordev-gateway. - Description (optional): a brief description that identifies the gateway's purpose.
- URL (required): the gateway URL, for example
https://localhost:8443. This is the endpoint where the gateway runtime is accessible. AI Workspace uses it to build the Invoke URL and MCP Proxy URL you call from your applications, so use an address those applications can reach. - Associated Environment (required): the environment this gateway belongs to, for example
DevelopmentorProduction.
The Add AI Gateway form collects the name, description, URL, and environment:
- Name (required): a unique name for the gateway, for example
-
Click Add Gateway.
The gateway detail page opens showing the gateway name, status (Inactive initially), vhost, and creation timestamp.
Environment dropdown empty?
Your organization has no environments yet. Create one in the Console, then return to this step. See Manage environments.
Set up the gateway runtime
After you create a gateway in AI Workspace, start its runtime and register it. The detail page provides a Get Started section with the setup instructions.
Gateway registration token
A Gateway Registration Token appears at the top of the Get Started section. The gateway runtime uses this token to connect to the control plane.
The registration token is issued once
The token is shown only once. Save it securely before you leave this page.
Lost your token?
The registration token is single-use. If you need to reconfigure the gateway, click Reconfigure to generate a new token. The new token revokes the old one and disconnects the gateway from the control plane.
Installation methods
The Get Started section provides setup instructions for several deployment options. Every method needs two values from that section: the control plane address, which is connect.bijira.dev for the hosted control plane, and this gateway's registration token.
Prerequisites:
curlinstalledunzipinstalled- Docker installed and running
Step 1: Download the gateway
Run this command in your terminal to download the gateway:
curl -sLO https://github.com/wso2/api-platform/releases/download/ai-gateway/v1.1.0/wso2apip-ai-gateway-1.1.0.zip && \
unzip wso2apip-ai-gateway-1.1.0.zip
Step 2: Configure the gateway
Run this command to create the environment file with the required variables:
cat > wso2apip-ai-gateway-1.1.0/configs/keys.env << 'ENVFILE'
MOESIF_KEY=<your-moesif-key>
GATEWAY_CONTROLPLANE_HOST=connect.bijira.dev
GATEWAY_REGISTRATION_TOKEN=<your-gateway-token>
ENVFILE
Replace <your-gateway-token> with the token from the Get Started section. MOESIF_KEY is optional and enables the Insights dashboard. On Windows, create this file in a text editor, or run the command from Git Bash or Windows Subsystem for Linux (WSL).
Step 3: Start the gateway
-
Navigate to the gateway folder:
-
Start the gateway with the environment file you created in Step 2:
Prerequisites:
curlinstalledunzipinstalled- A Docker-compatible container runtime, such as:
- Docker Desktop (Windows or macOS)
- Rancher Desktop (Windows or macOS)
- Colima (macOS)
- Docker Engine with the Compose plugin (Linux)
Confirm the docker and docker compose commands are available:
Step 1: Download the gateway
Run this command in your terminal to download the gateway:
curl -sLO https://github.com/wso2/api-platform/releases/download/ai-gateway/v1.1.0/wso2apip-ai-gateway-1.1.0.zip && \
unzip wso2apip-ai-gateway-1.1.0.zip
Step 2: Configure the gateway
Run this command to create the environment file with the required variables:
cat > wso2apip-ai-gateway-1.1.0/configs/keys.env << 'ENVFILE'
MOESIF_KEY=<your-moesif-key>
GATEWAY_CONTROLPLANE_HOST=connect.bijira.dev
GATEWAY_REGISTRATION_TOKEN=<your-gateway-token>
ENVFILE
Replace <your-gateway-token> with the token from the Get Started section.
Step 3: Start the gateway
-
Navigate to the gateway folder:
-
Start the gateway with the environment file you created in Step 2:
Prerequisites:
curlinstalledunzipinstalled- Docker installed and running
Step 1: Download the gateway
Run this command in your terminal to download the gateway:
curl -sLO https://github.com/wso2/api-platform/releases/download/ai-gateway/v1.1.0/wso2apip-ai-gateway-1.1.0.zip && \
unzip wso2apip-ai-gateway-1.1.0.zip
Step 2: Configure the gateway
Run this command to create the environment file with the required variables:
cat > wso2apip-ai-gateway-1.1.0/configs/keys.env << 'ENVFILE'
MOESIF_KEY=<your-moesif-key>
GATEWAY_CONTROLPLANE_HOST=connect.bijira.dev
GATEWAY_REGISTRATION_TOKEN=<your-gateway-token>
ENVFILE
Replace <your-gateway-token> with the token from the Get Started section.
Step 3: Start the gateway
-
Navigate to the gateway folder:
-
Start the gateway with the environment file you created in Step 2:
Prerequisites:
- Kubernetes 1.32 or later
- Helm 3.18 or later
The registration token is generated once for this gateway. If you need to install or update the gateway chart again, reconfigure the gateway first to generate a new registration token. Reconfiguring revokes the previous token.
Install the chart
Run this command to install the gateway chart with the control plane configuration:
helm install gateway oci://ghcr.io/wso2/api-platform/helm-charts/gateway --version 1.1.0 \
--set gateway.controller.controlPlane.host="connect.bijira.dev" \
--set gateway.controller.controlPlane.port=443 \
--set gateway.controller.controlPlane.token.value="<your-gateway-token>"
Replace <your-gateway-token> with the token from the Get Started section. Use the Helm chart version that matches the gateway version shown in the Get Started section.
Once the gateway runtime is running and connected, its status changes from Inactive to Active.
Manage AI gateways
Edit a gateway
To change a gateway's details, follow these steps:
- In the AI Gateways list, click the edit icon next to the gateway.
- Update the gateway details.
- Click Save.
Delete a gateway
To remove a gateway, follow these steps:
- In the AI Gateways list, click the delete icon next to the gateway.
- Confirm the deletion when prompted.
Irreversible action
Deleting a gateway is permanent, and it undeploys every provider and proxy on that gateway immediately.
Next steps
- Configure an LLM provider: set up an LLM provider and deploy it to your gateway
- Configure an App LLM proxy: create a specialized proxy for a GenAI application or agent and deploy it to your gateway