Getting Started with Self-Hosted Gateway
This guide walks you through setting up an API Platform Self-Hosted Gateway in your environment. Follow these quick steps to get your gateway running and connected to API Platform's control plane.
Note
This feature is currently available in the US region only.
Overview
The Self-Hosted Gateway enables you to run the API Platform API Gateway in your own infrastructure while maintaining centralized management through API Platform's control plane. This guide covers the fastest way to get started.
Prerequisites
Before you begin, ensure you have:
- cURL installed
- unzip installed
- Docker installed and running (for Quick Start)
- Docker Compose installed
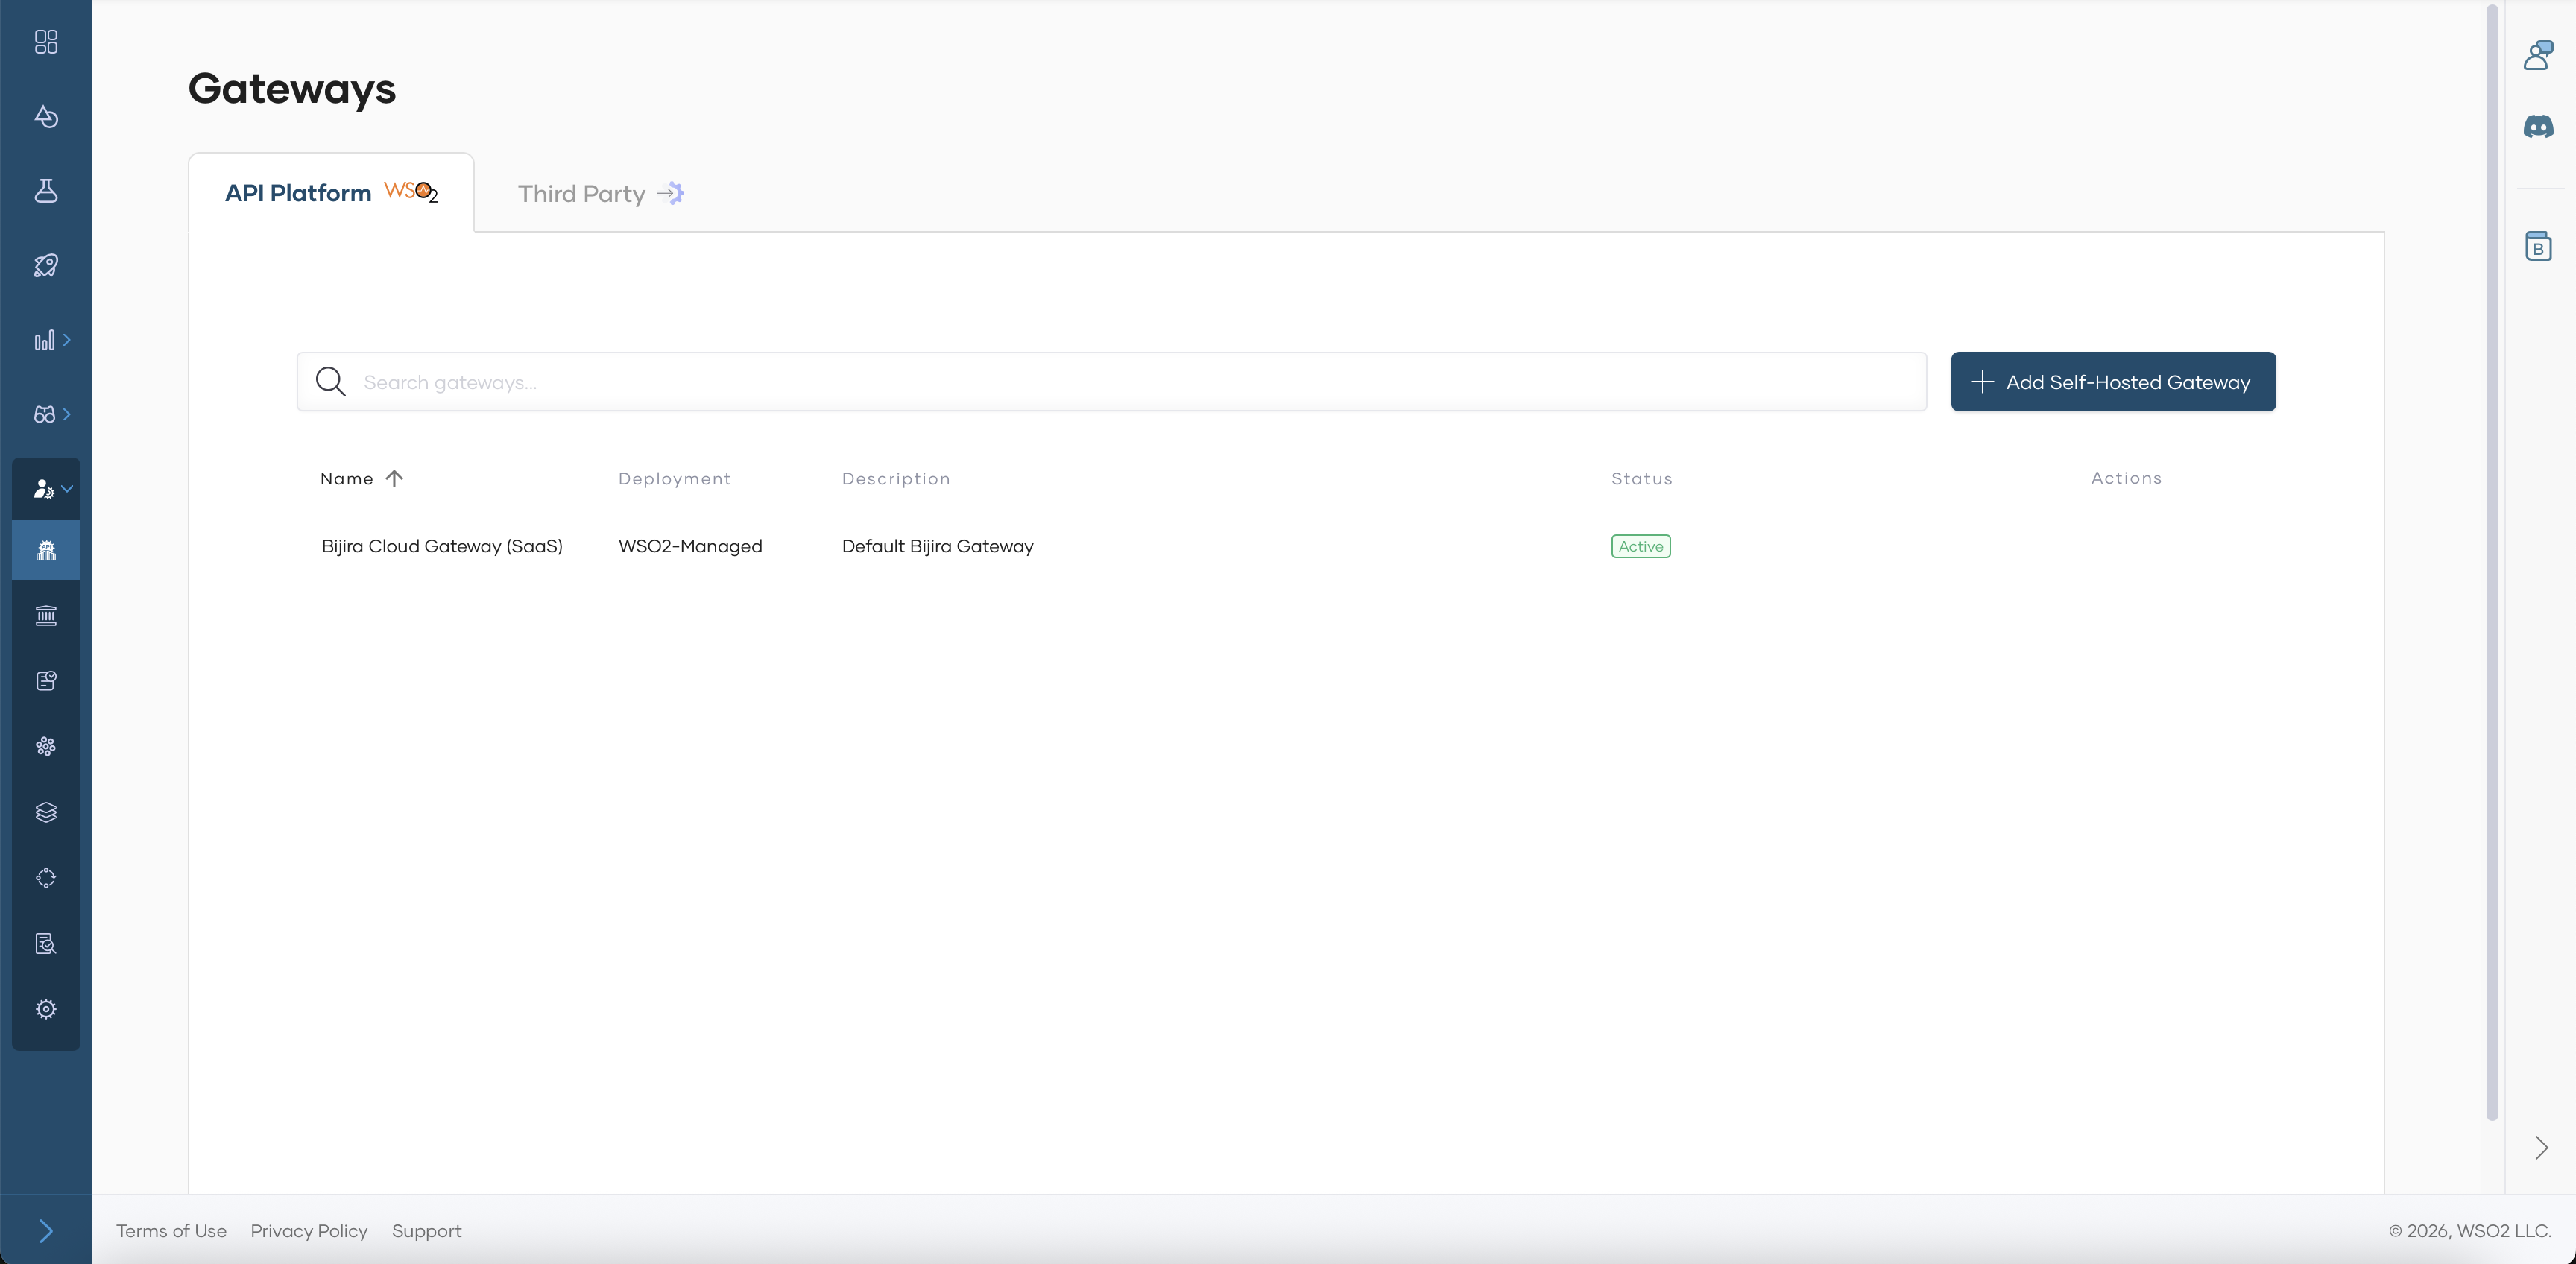
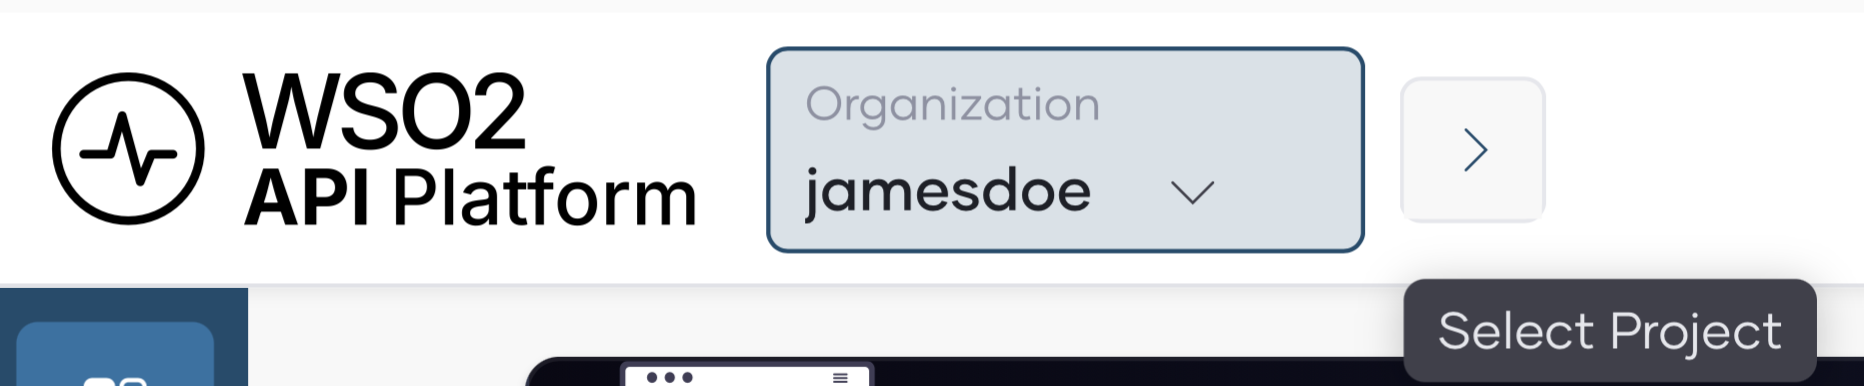
Create a Self-Hosted Gateway in API Platform Console
- Sign in to API Platform Console.
- Go to Organization Level in API Platform.
-
From the left navigation, select Admin → Gateways.
-
Select the API Platform tab.
- Click + Add Self-Hosted Gateway.
-
Provide the following details:
- Name: A unique name for your gateway
- Description: Optional description
- URL: The URL where your gateway will be accessible (e.g.,
https://localhost:8443) - Associated Environment: Select the environment for this gateway
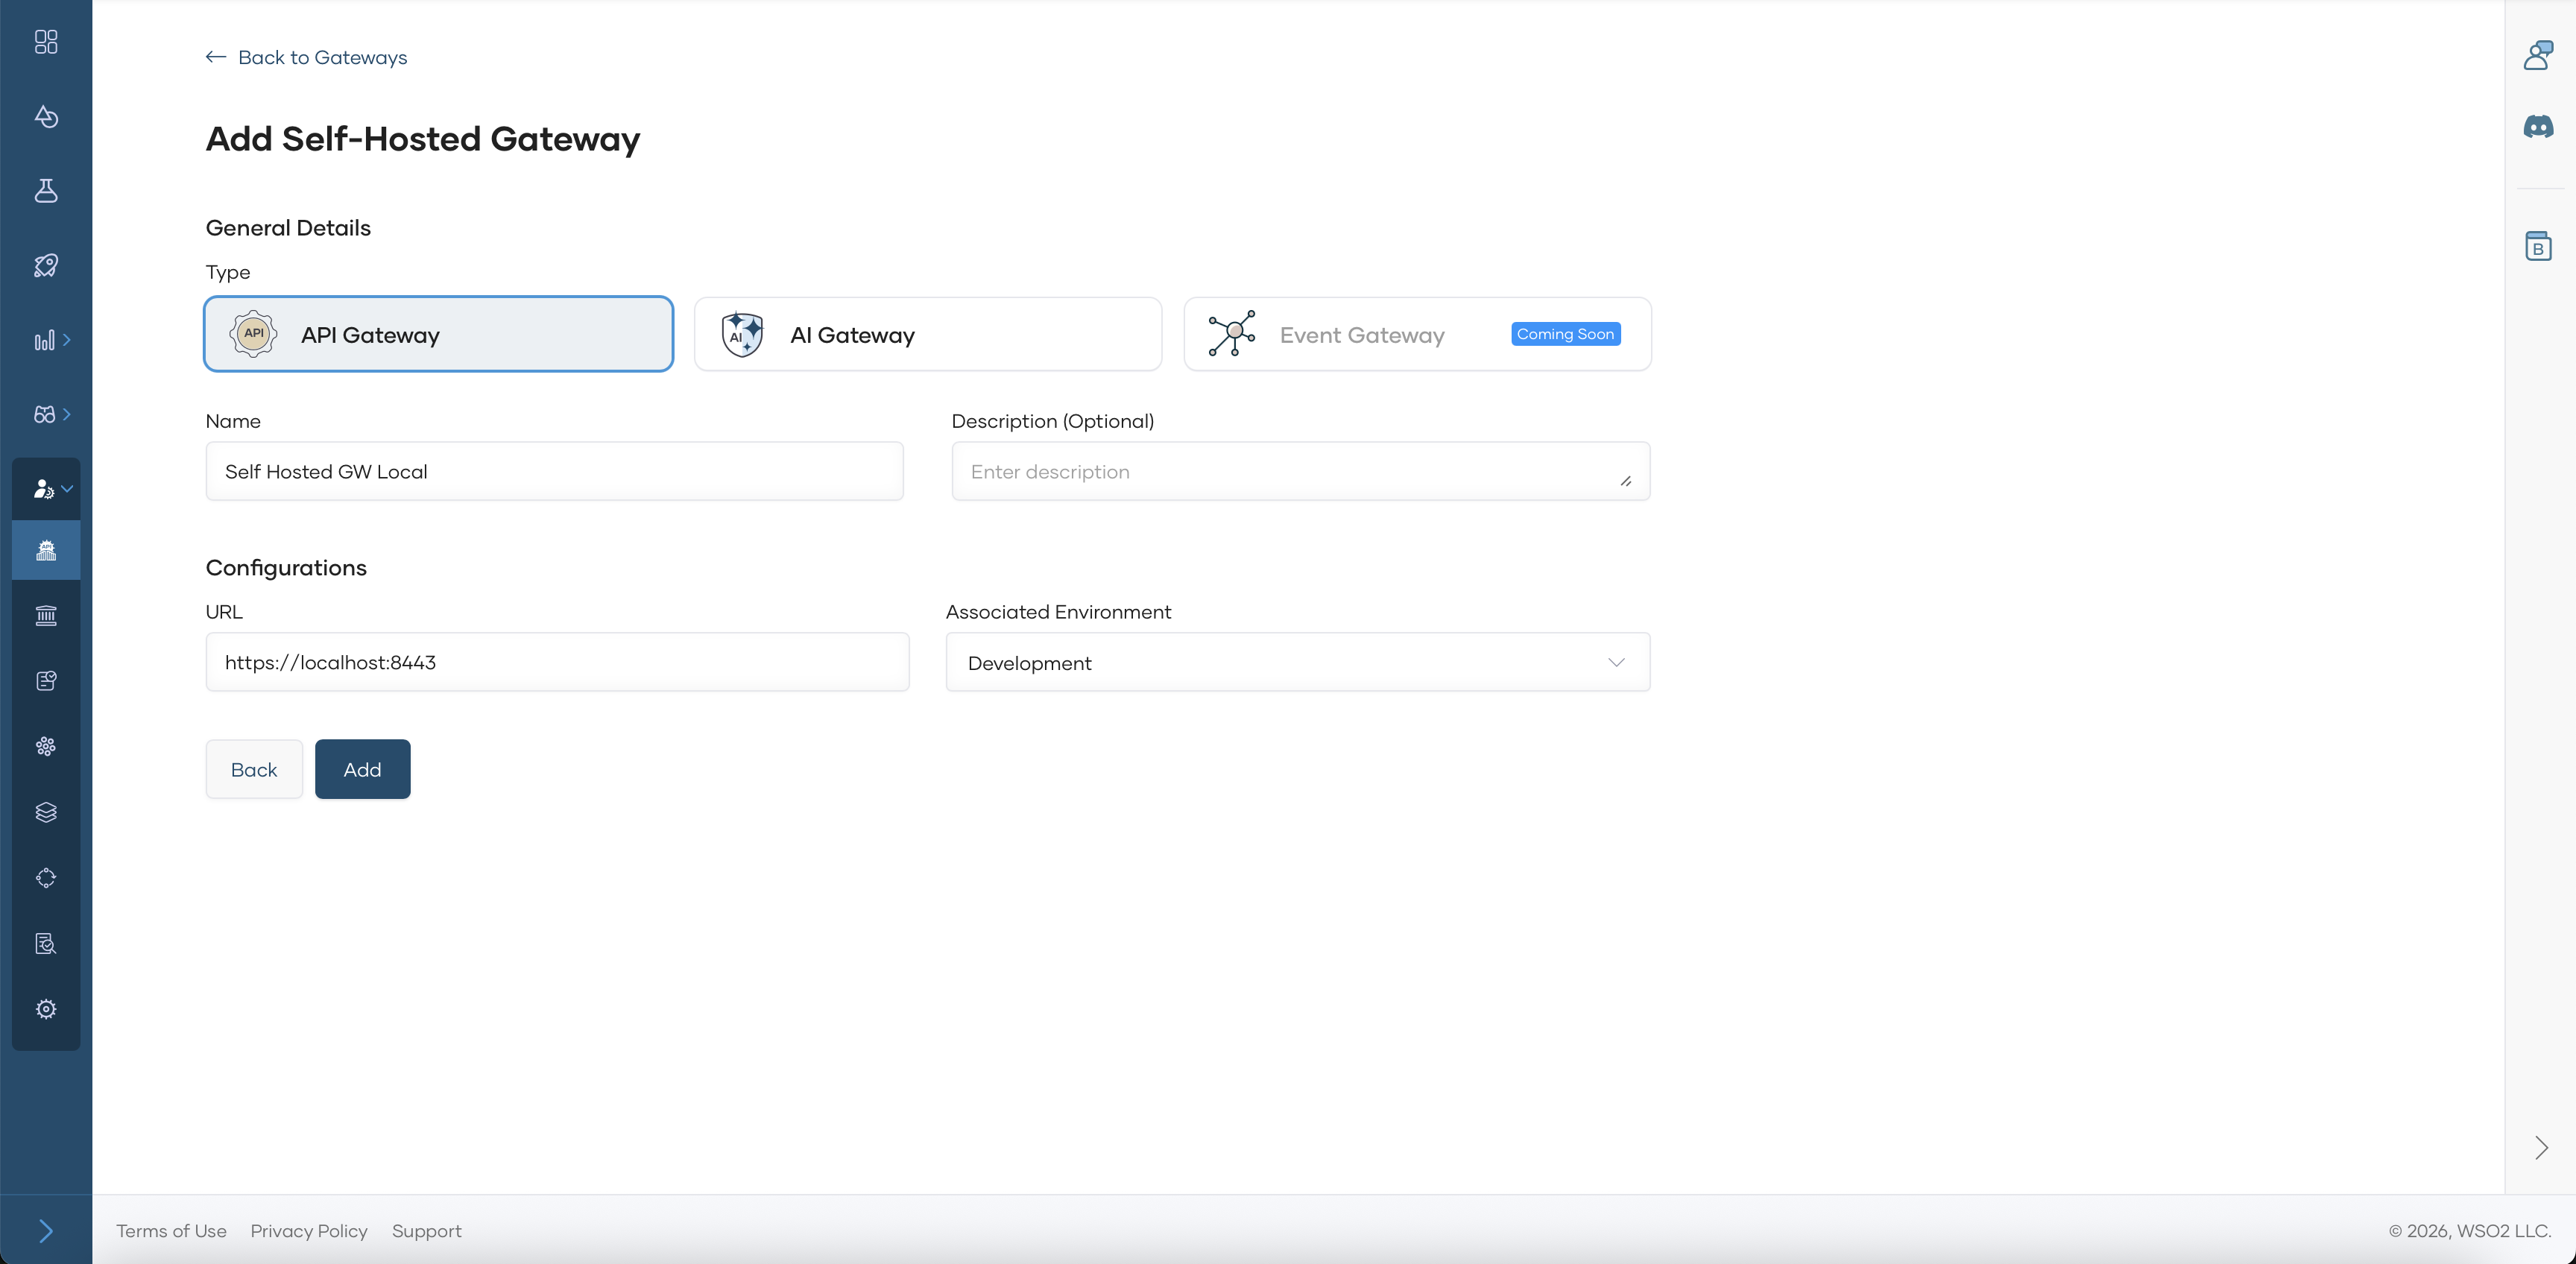
-
Click Add and you will be navigated to the Gateway View Page.
Setup Gateway
-
Next, download, set up, and start the gateway on your machine by following the steps in the Quick Start section or the detailed instructions below (Steps 1–4).
Note
Be sure to copy the commands from the Quick Start section, since the keys are auto-generated for you.
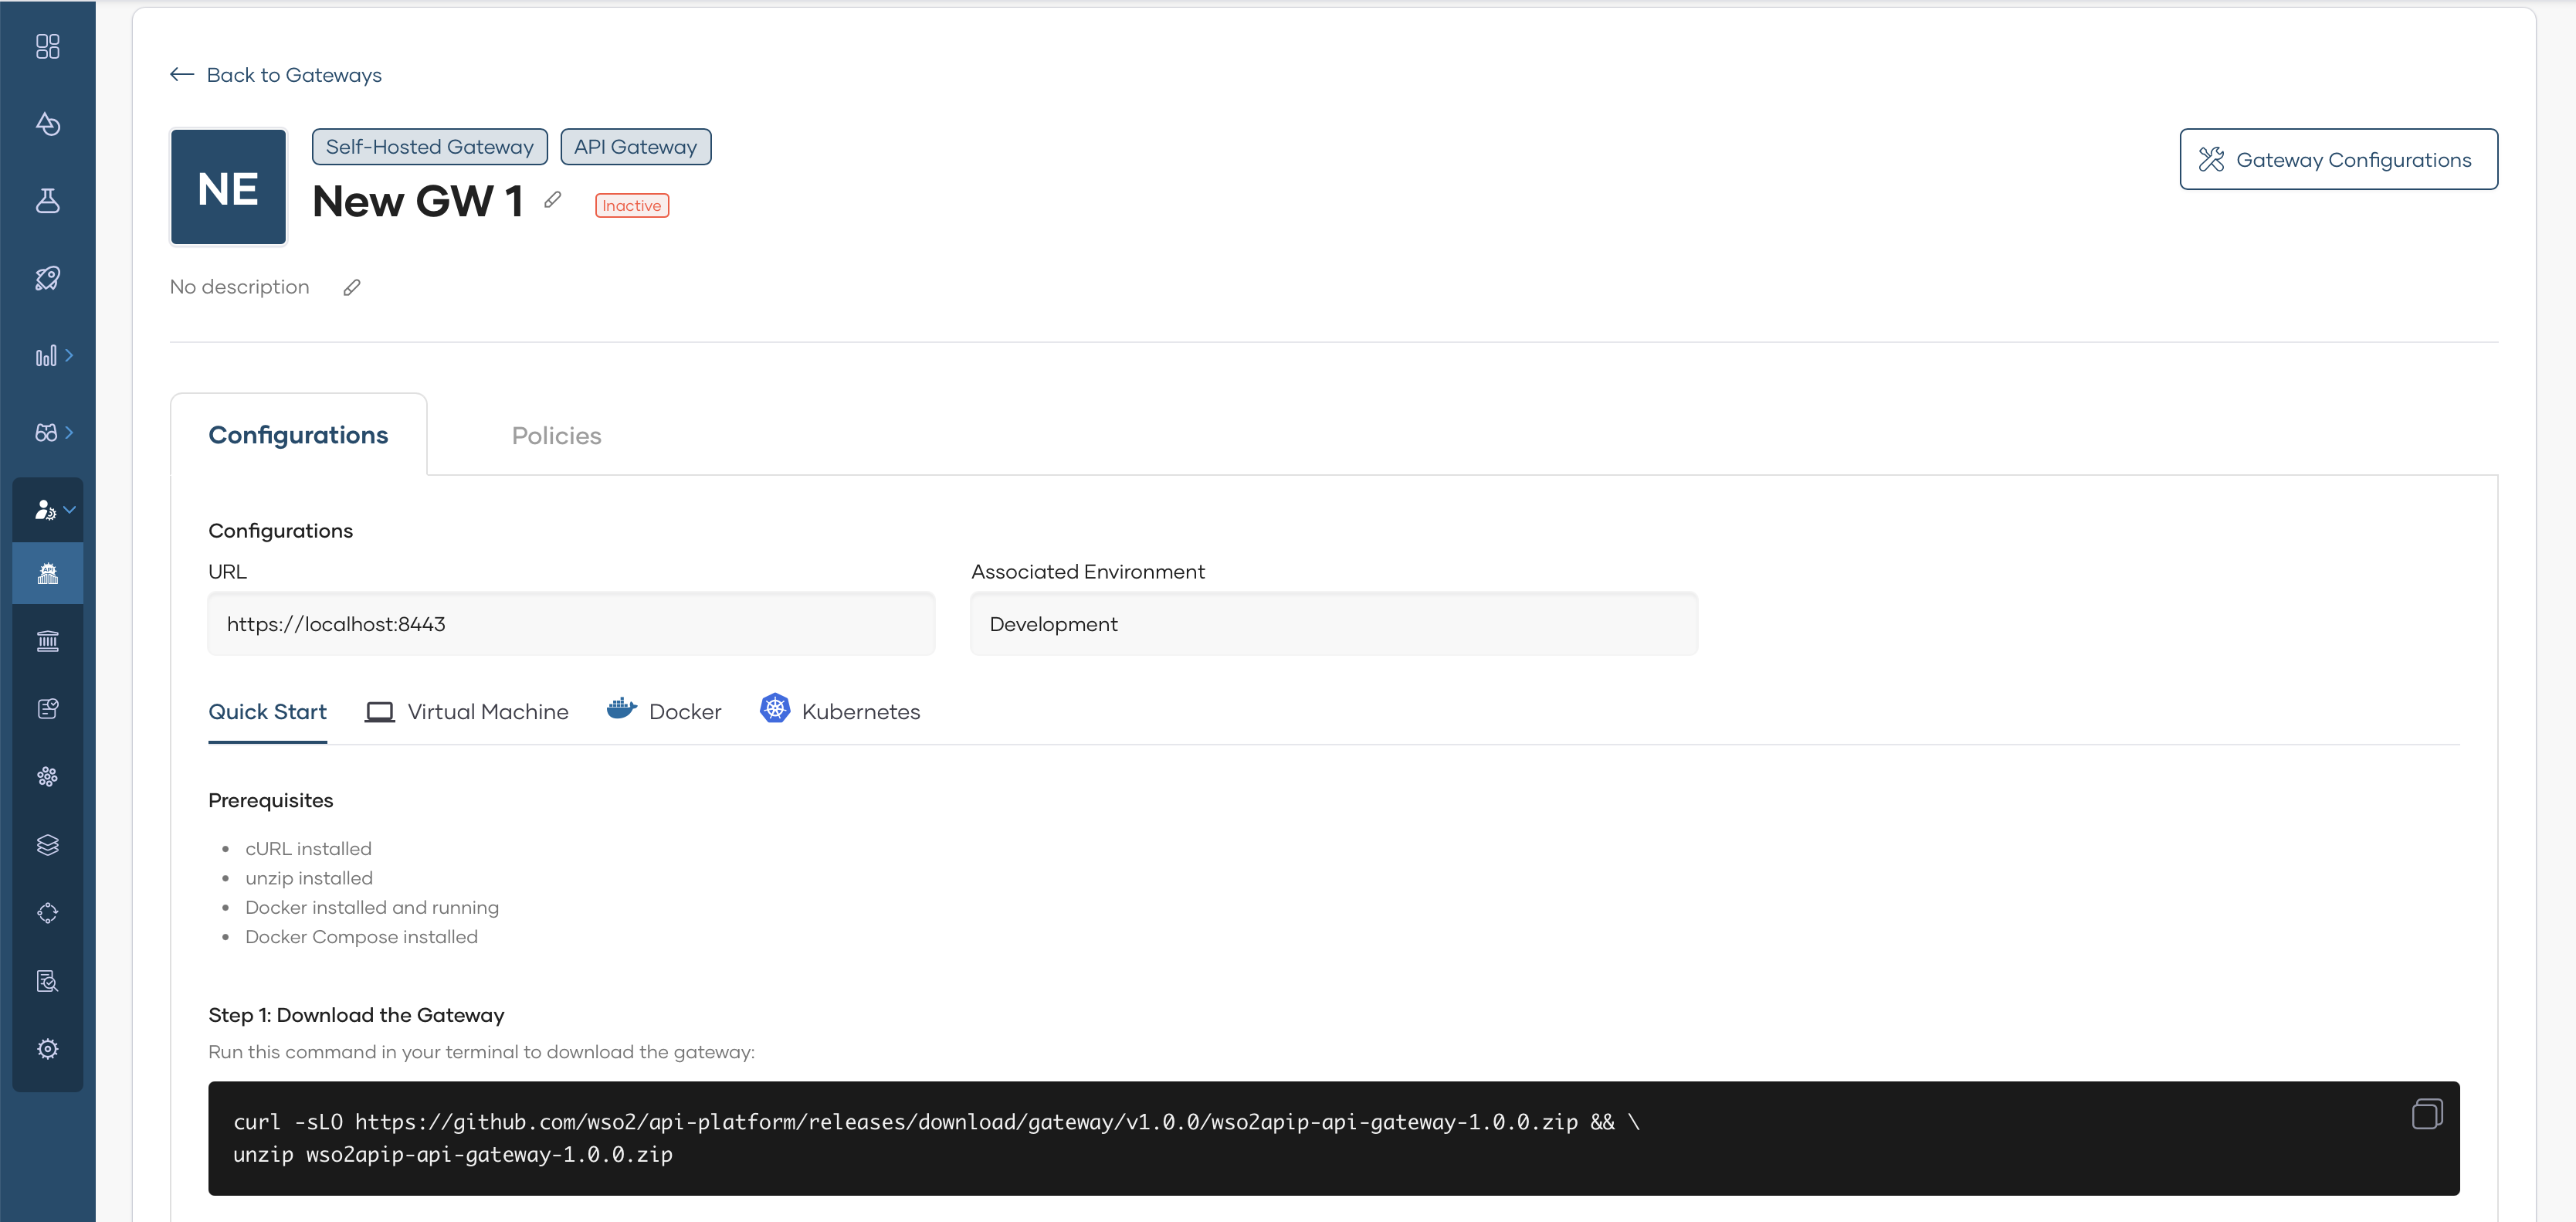
Step 1: Download the Gateway
Run this command in your terminal to download the gateway:
curl -sLO https://github.com/wso2/api-platform/releases/download/gateway/v1.0.0/wso2apip-api-gateway-1.0.0.zip && \
unzip wso2apip-api-gateway-1.0.0.zip
Step 2: Configure the Gateway
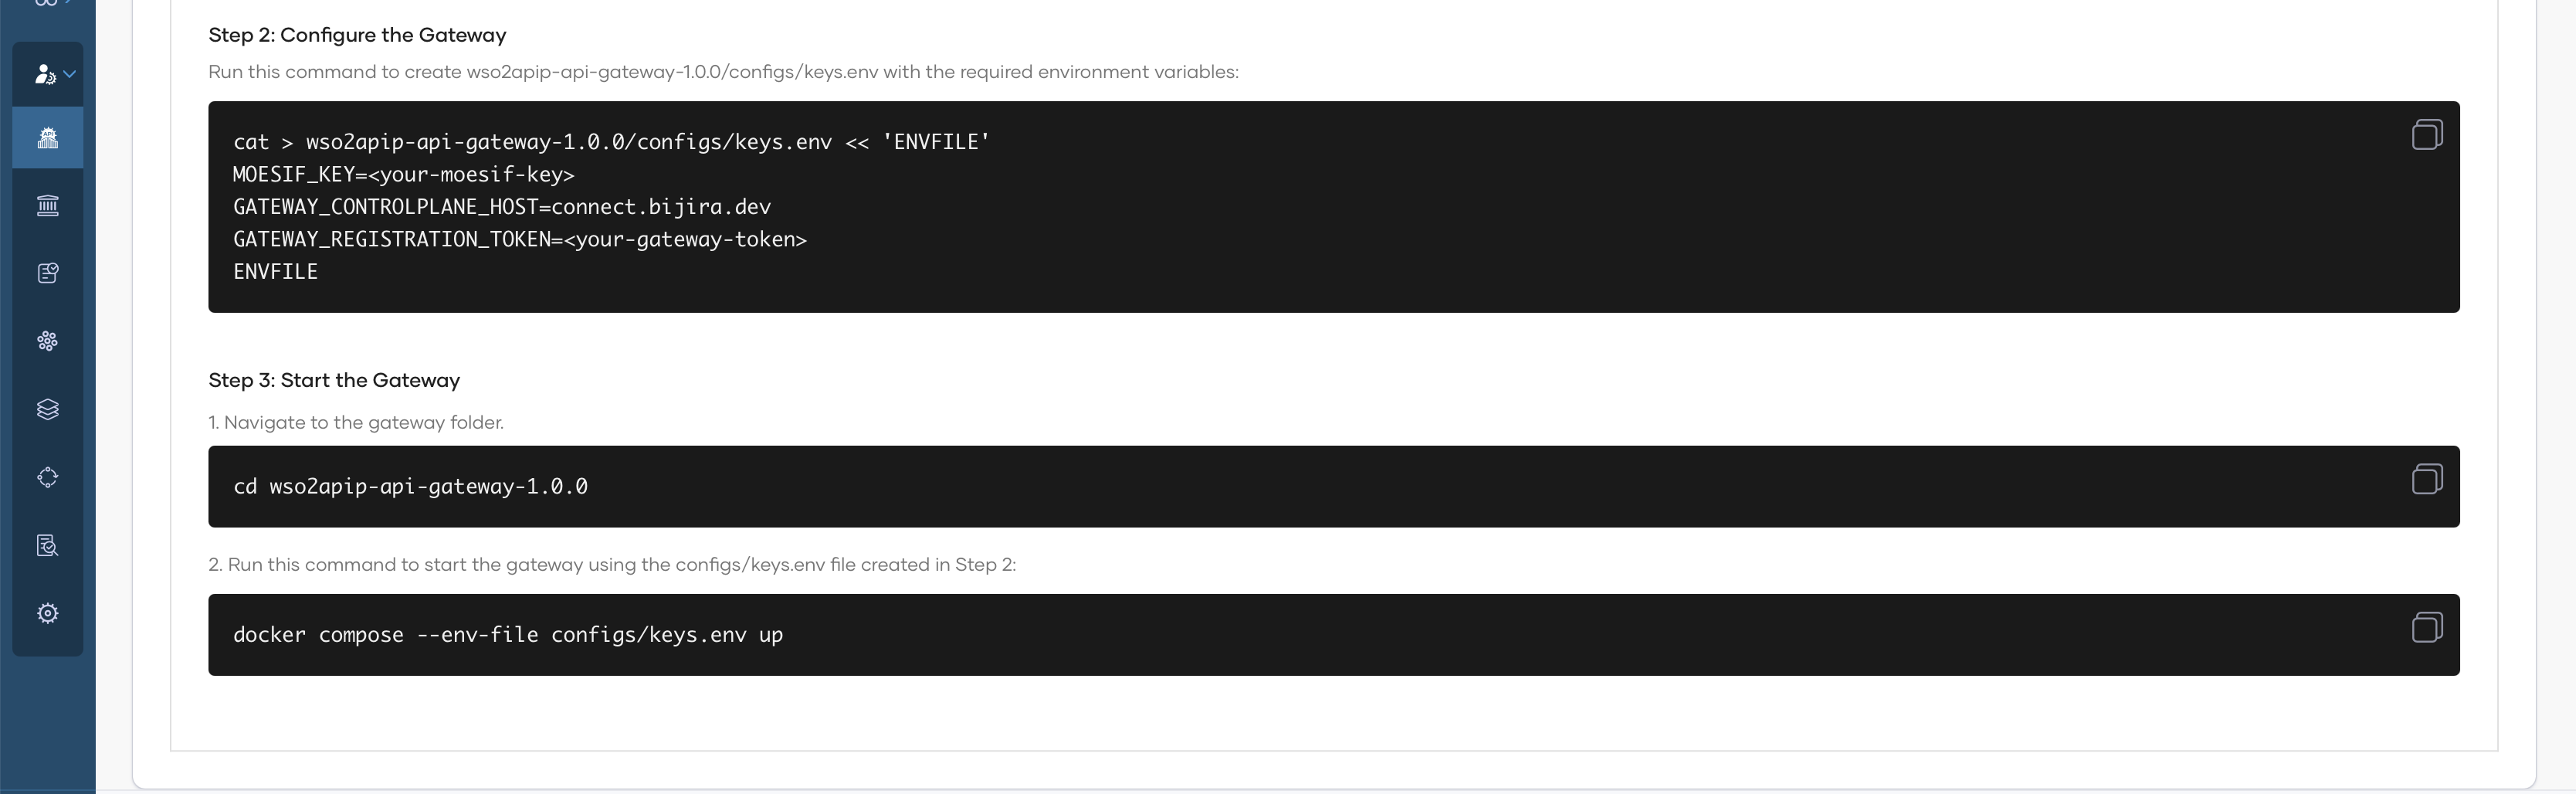
Run this command to create the gateway configuration with your environment variables:
cat > wso2apip-api-gateway-1.0.0/configs/keys.env << 'ENVFILE'
MOESIF_KEY=<your-moesif-key>
GATEWAY_CONTROLPLANE_HOST=connect.bijira.dev
GATEWAY_REGISTRATION_TOKEN=<your-gateway-token>
ENVFILE
Once you copy the above command from the screen, the
<your-moesif-key>and<your-gateway-token>placeholders will be populated and thewso2apip-api-gateway-1.0.0/configs/keys.envfile will be created with these environment variables.Step 3: Start the Gateway
Navigate to the gateway directory and start it using Docker Compose:
Step 4: Verify the Gateway
Check that the gateway is running and connected:
The gateway should show as Active in the API Platform Console under Gateways.
Add API and Invoke
Note
This feature is currently available only for REST API proxies that are created from scratch, by importing from OpenAPI, or by specifying an endpoint.
This feature is not currently available for REST API proxies created by importing an API contract from GitHub, or for WebSocket, GraphQL, MCP, or Egress APIs.
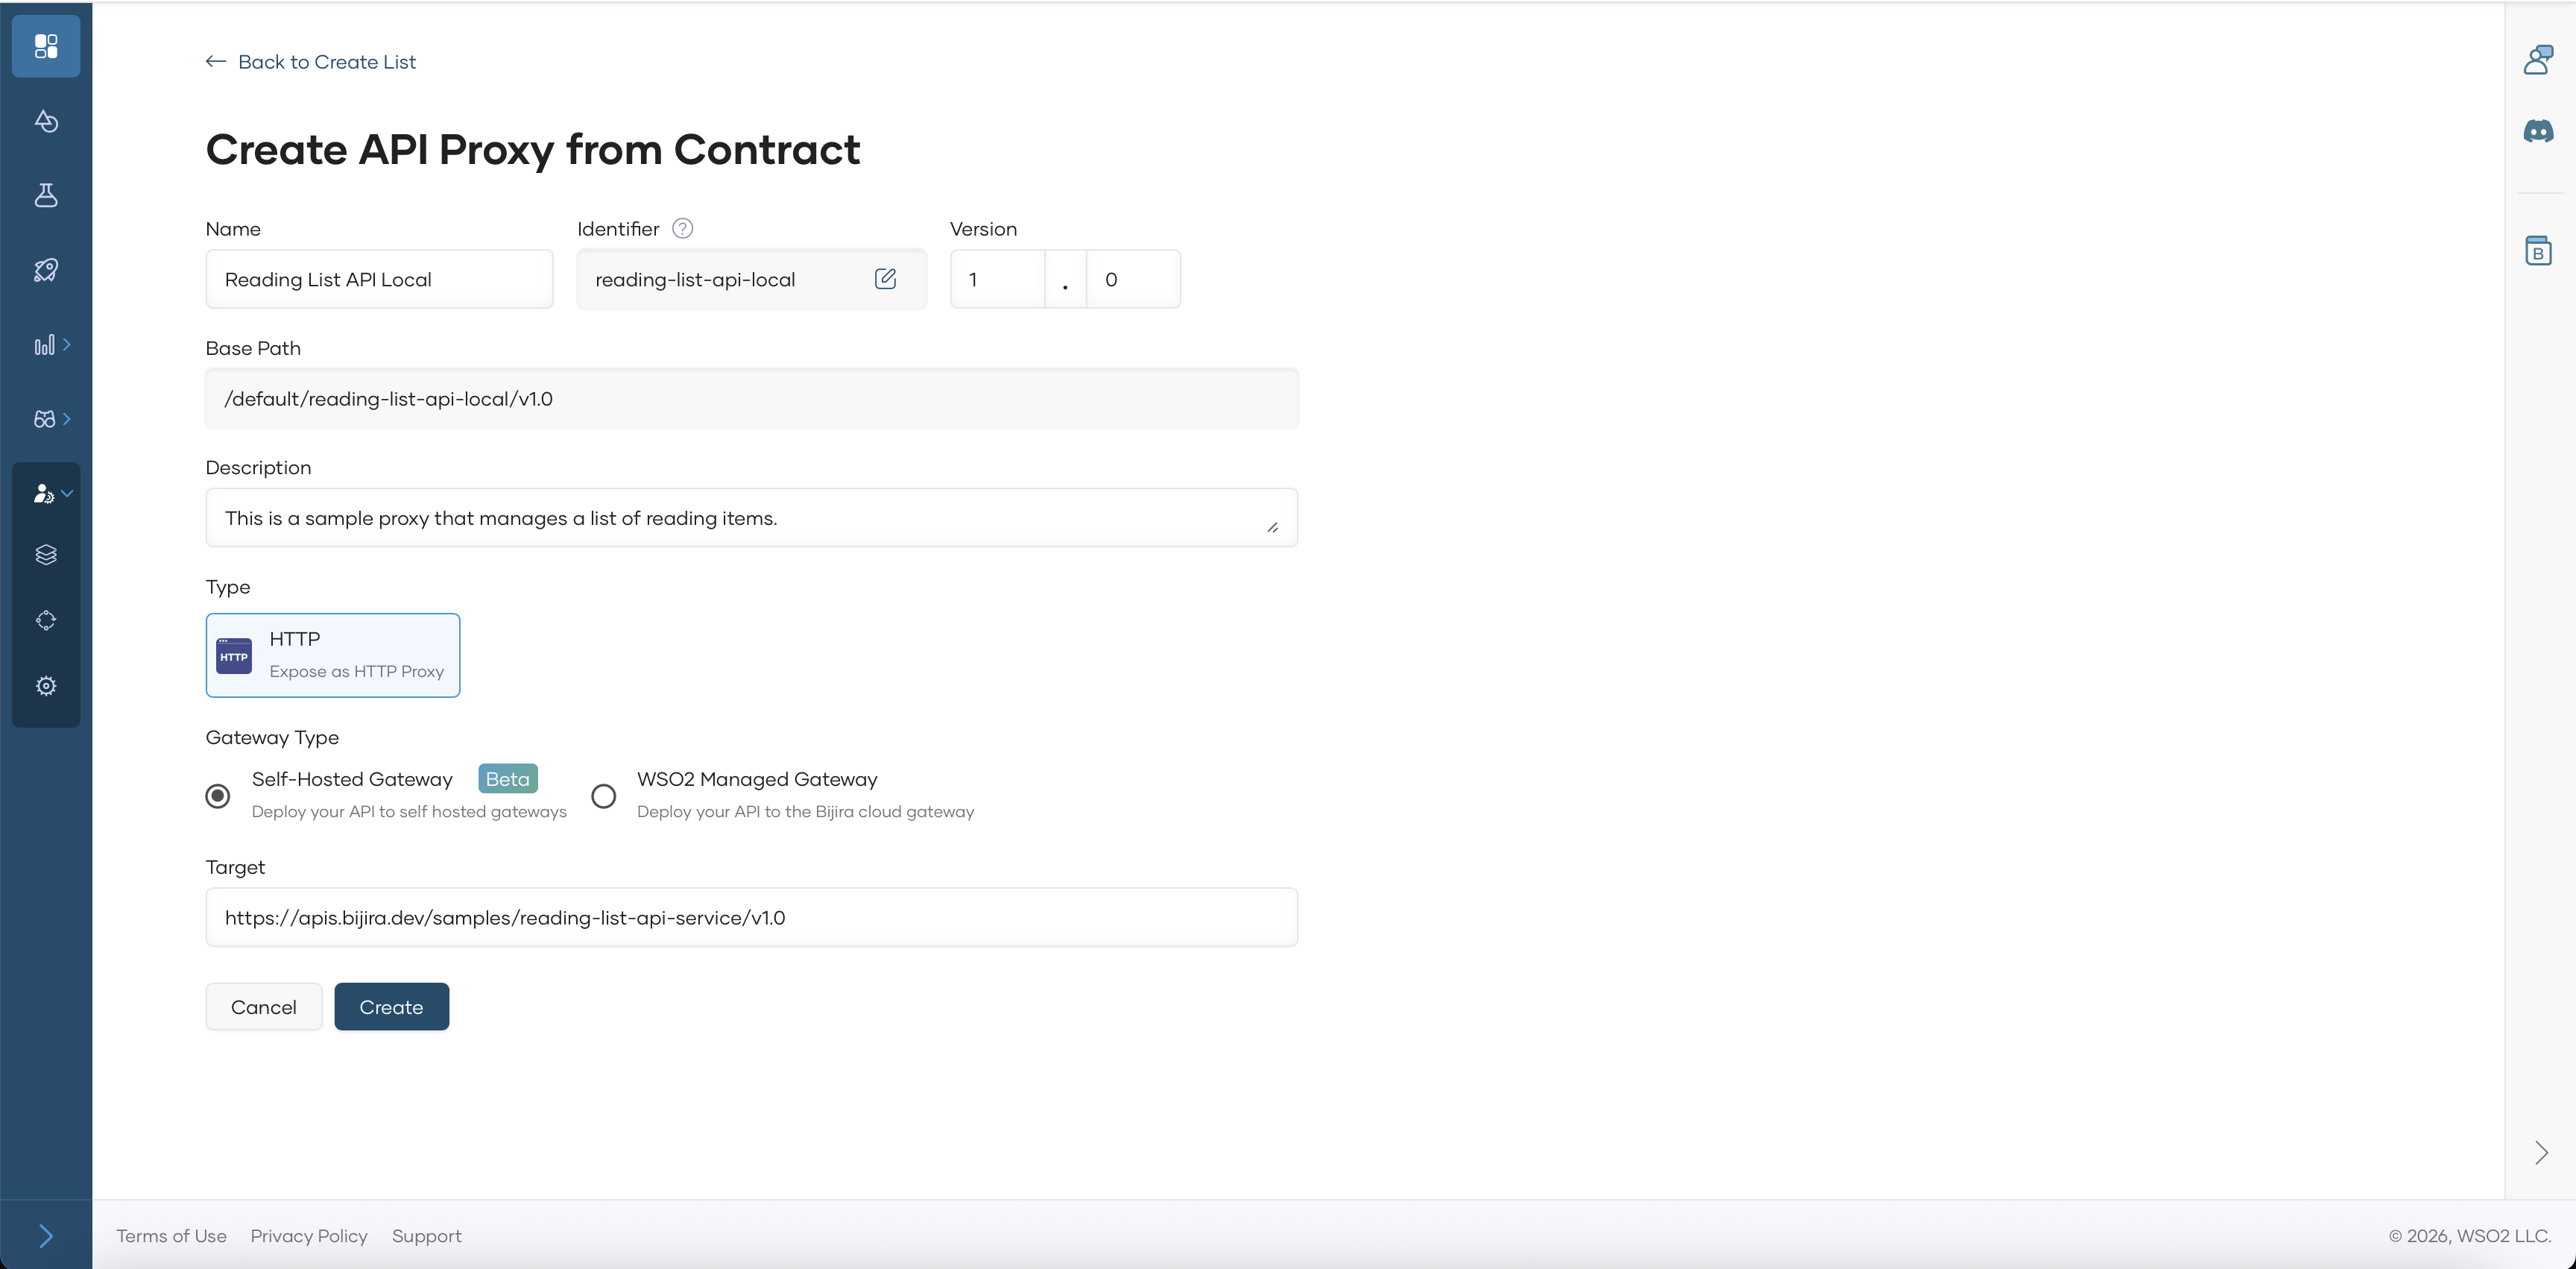
Step 1: Create an API Proxy.
In this guide, you will specify a URL to an OpenAPI definition of a sample API to create an API proxy.
-
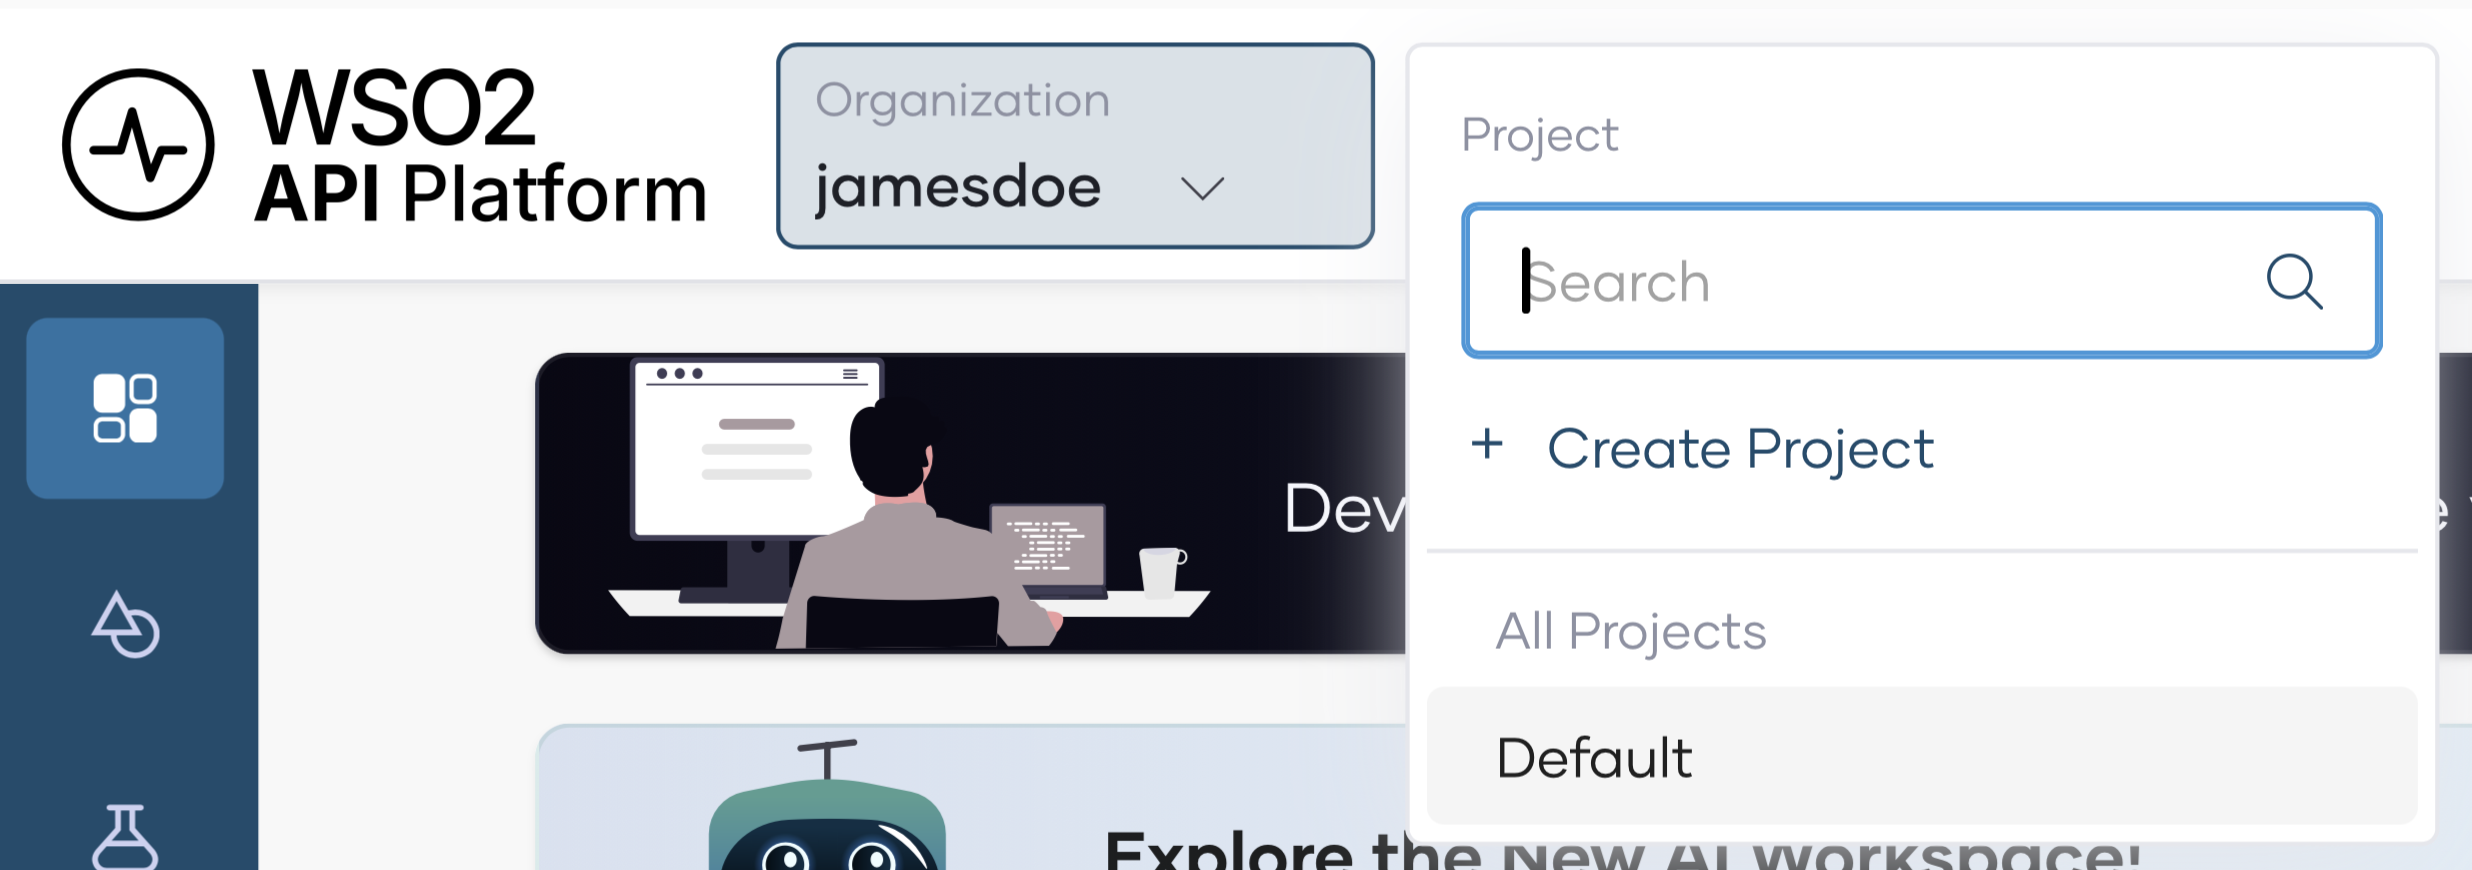
Navigate to projects.
-
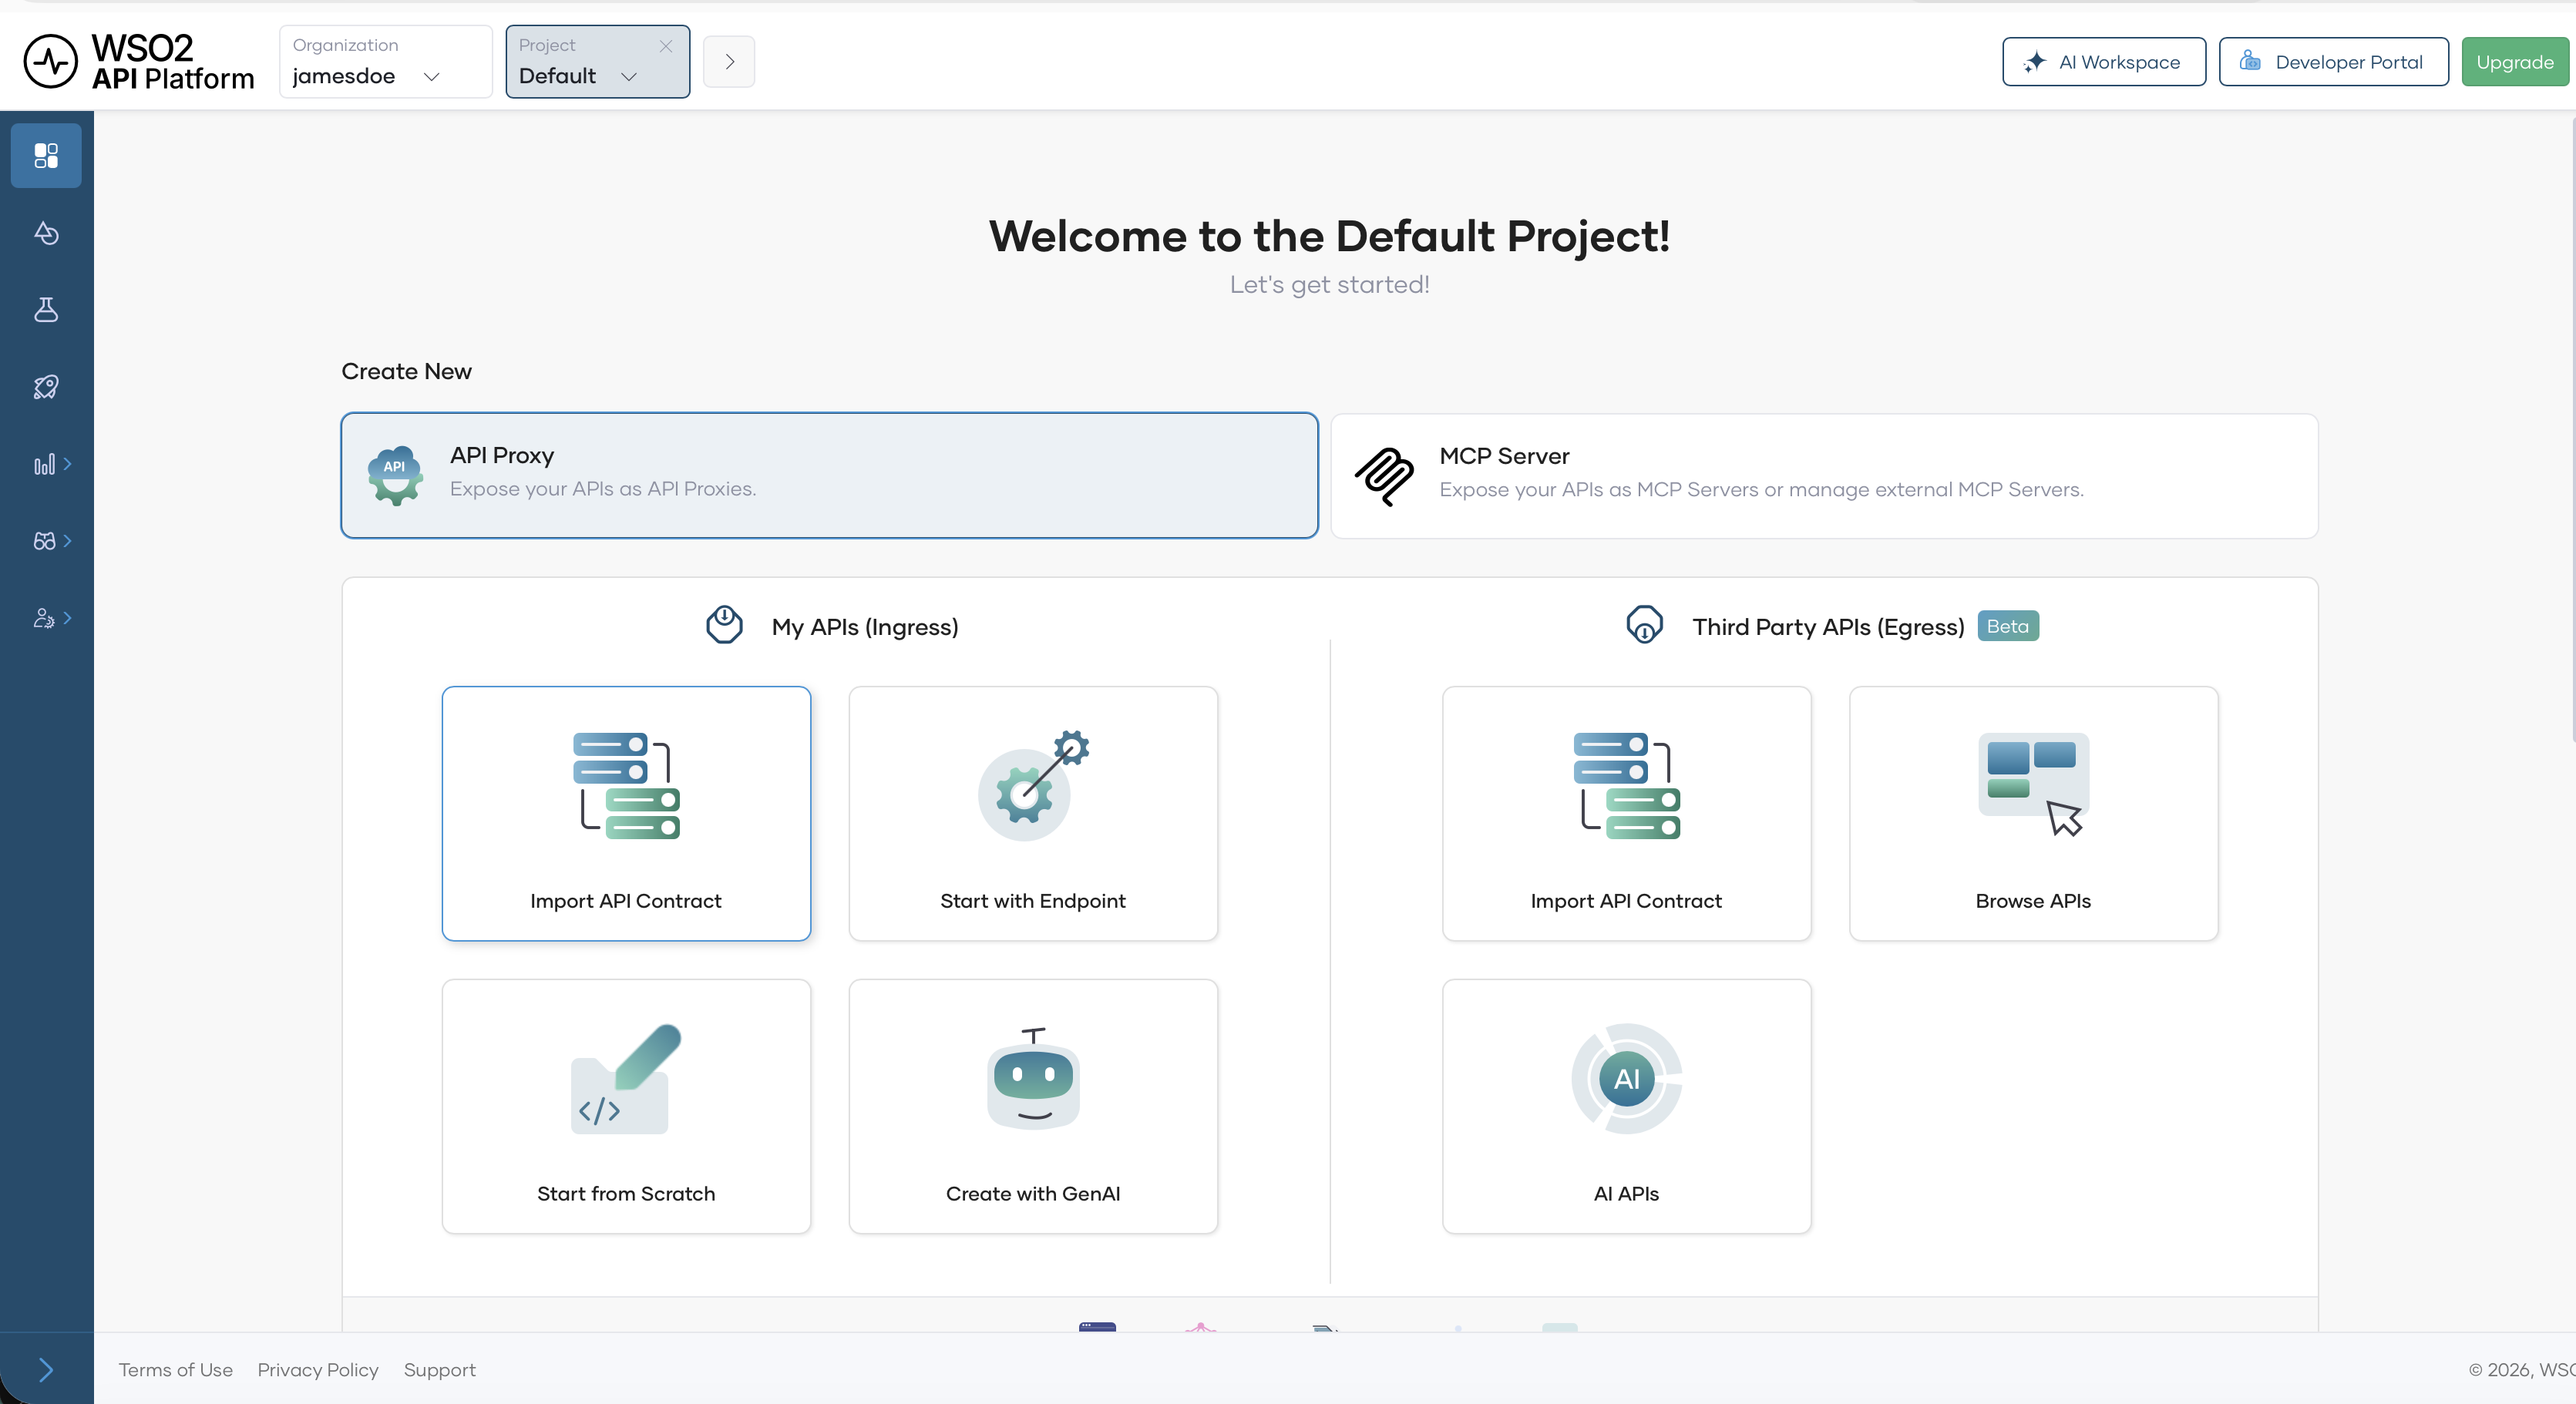
To create a new project for your APIs, click + Create Project and follow the setup steps. Otherwise, select Default to continue with the default project.
-
Select Import API Contract.
-
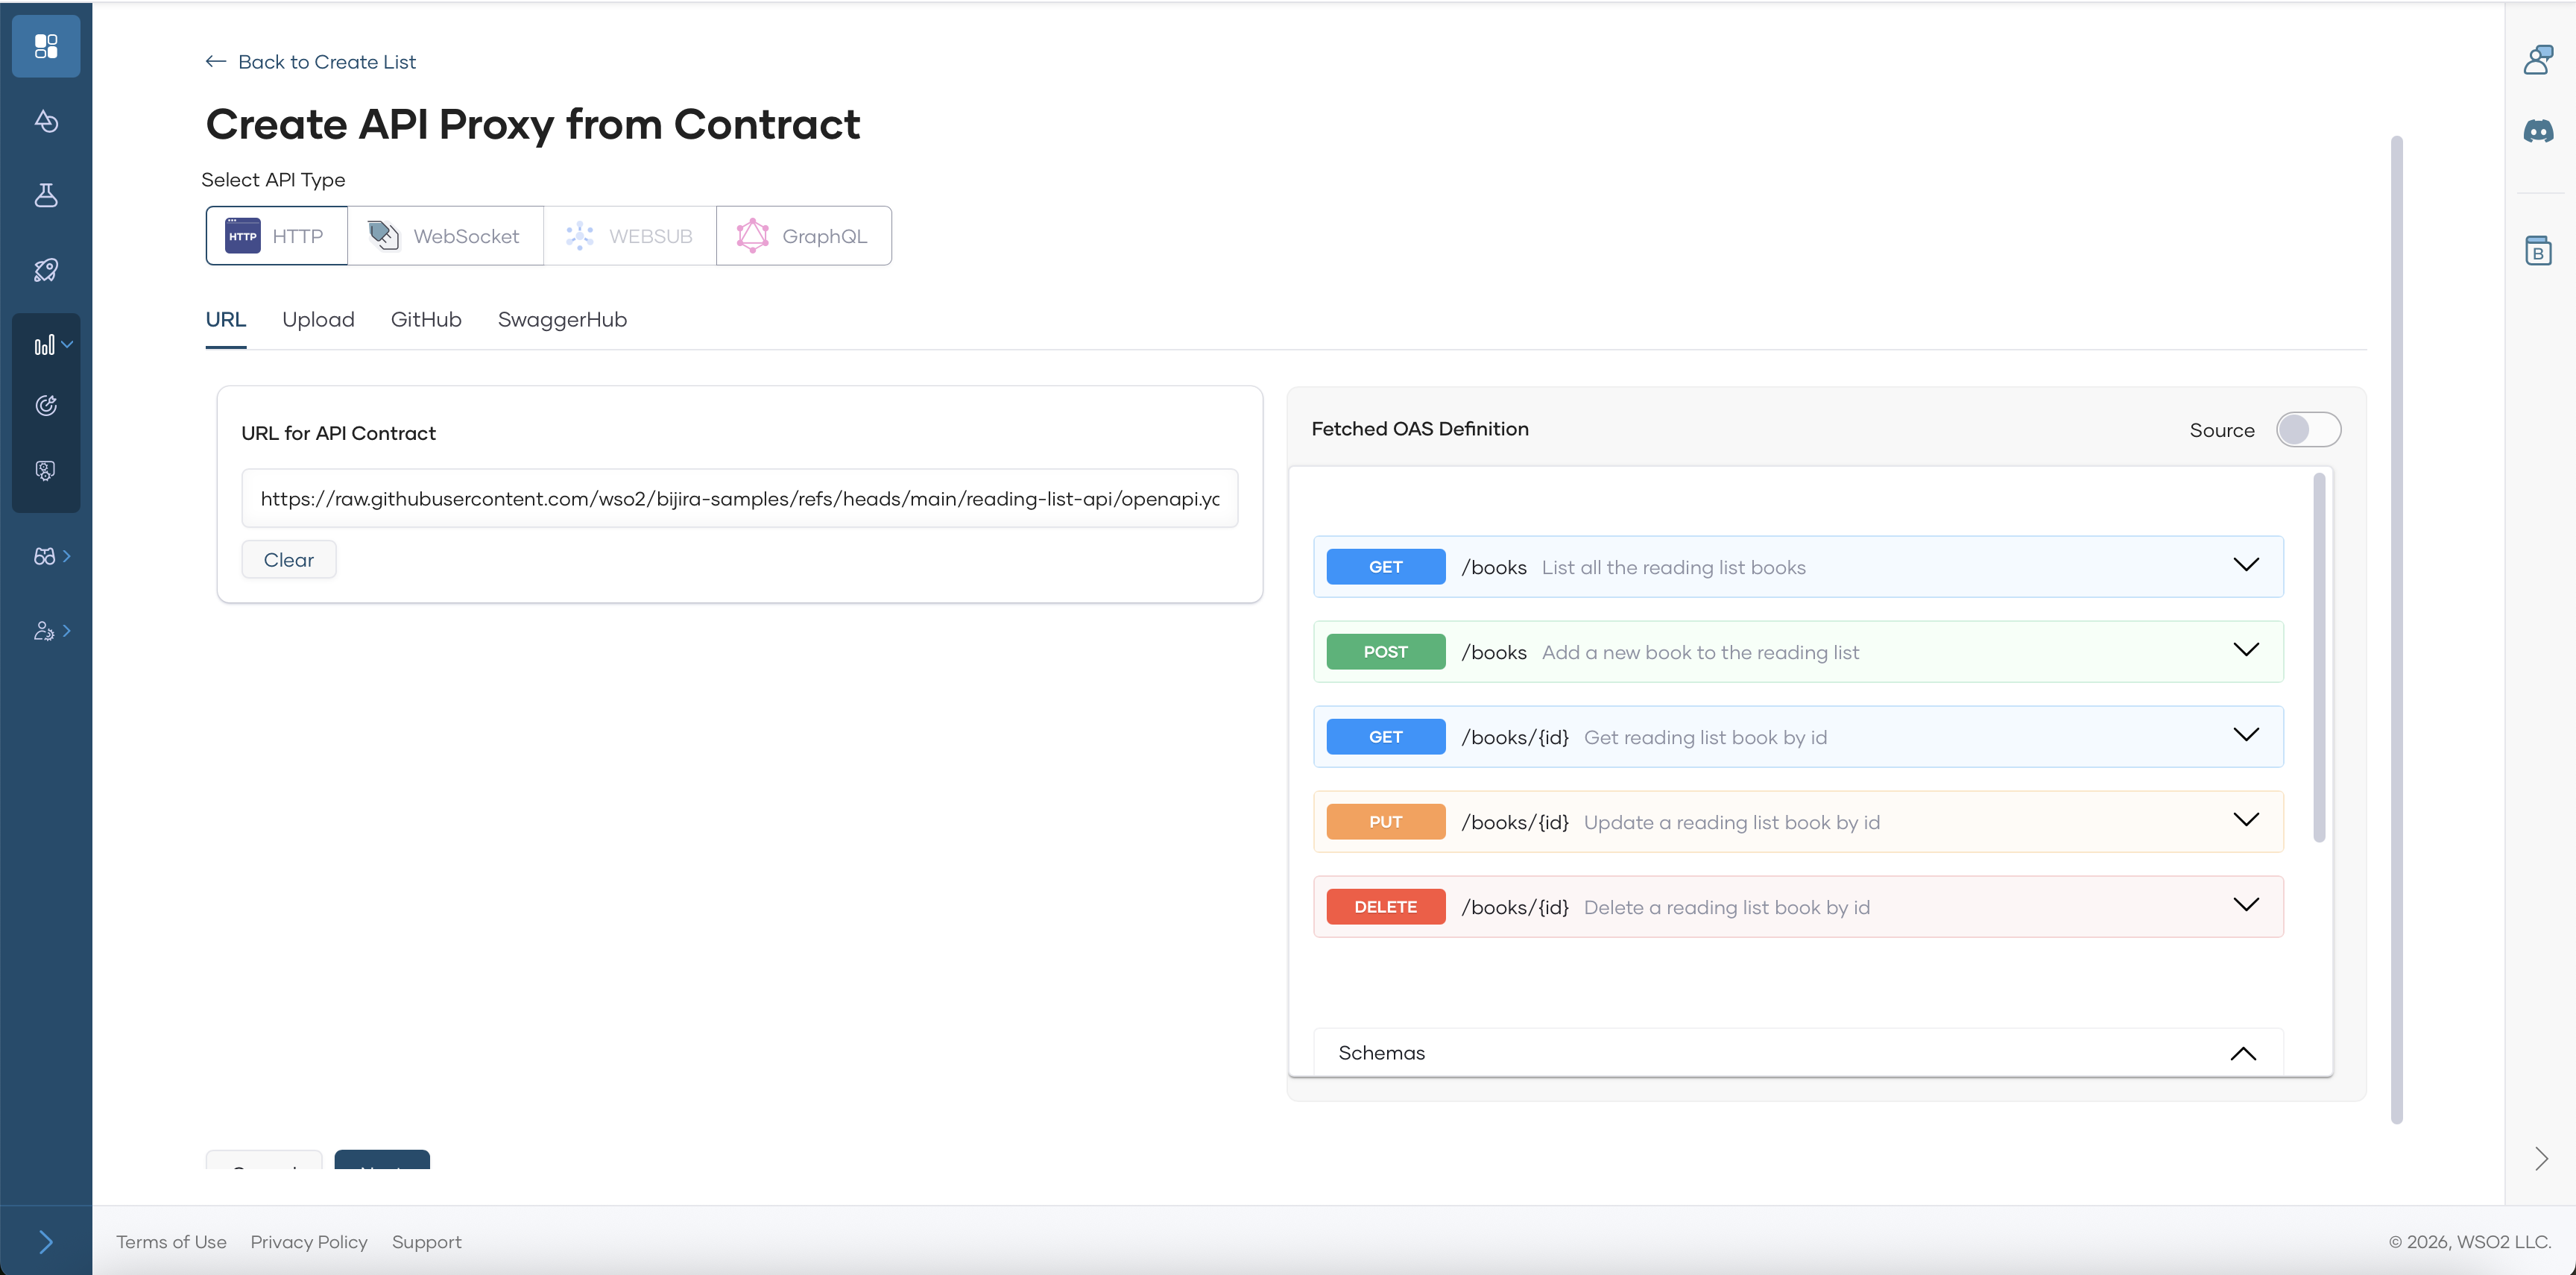
Select URL option and provide the following URL to import the API contract:
-
Click Next and edit pre-defined values as needed. You can keep the default values for this sample.
-
Select the Gateway Type as the Self-Hosted Gateway
-
Click Create to create the API Proxy. Wait for the setup to complete and you will be navigated to the API Overview Page.
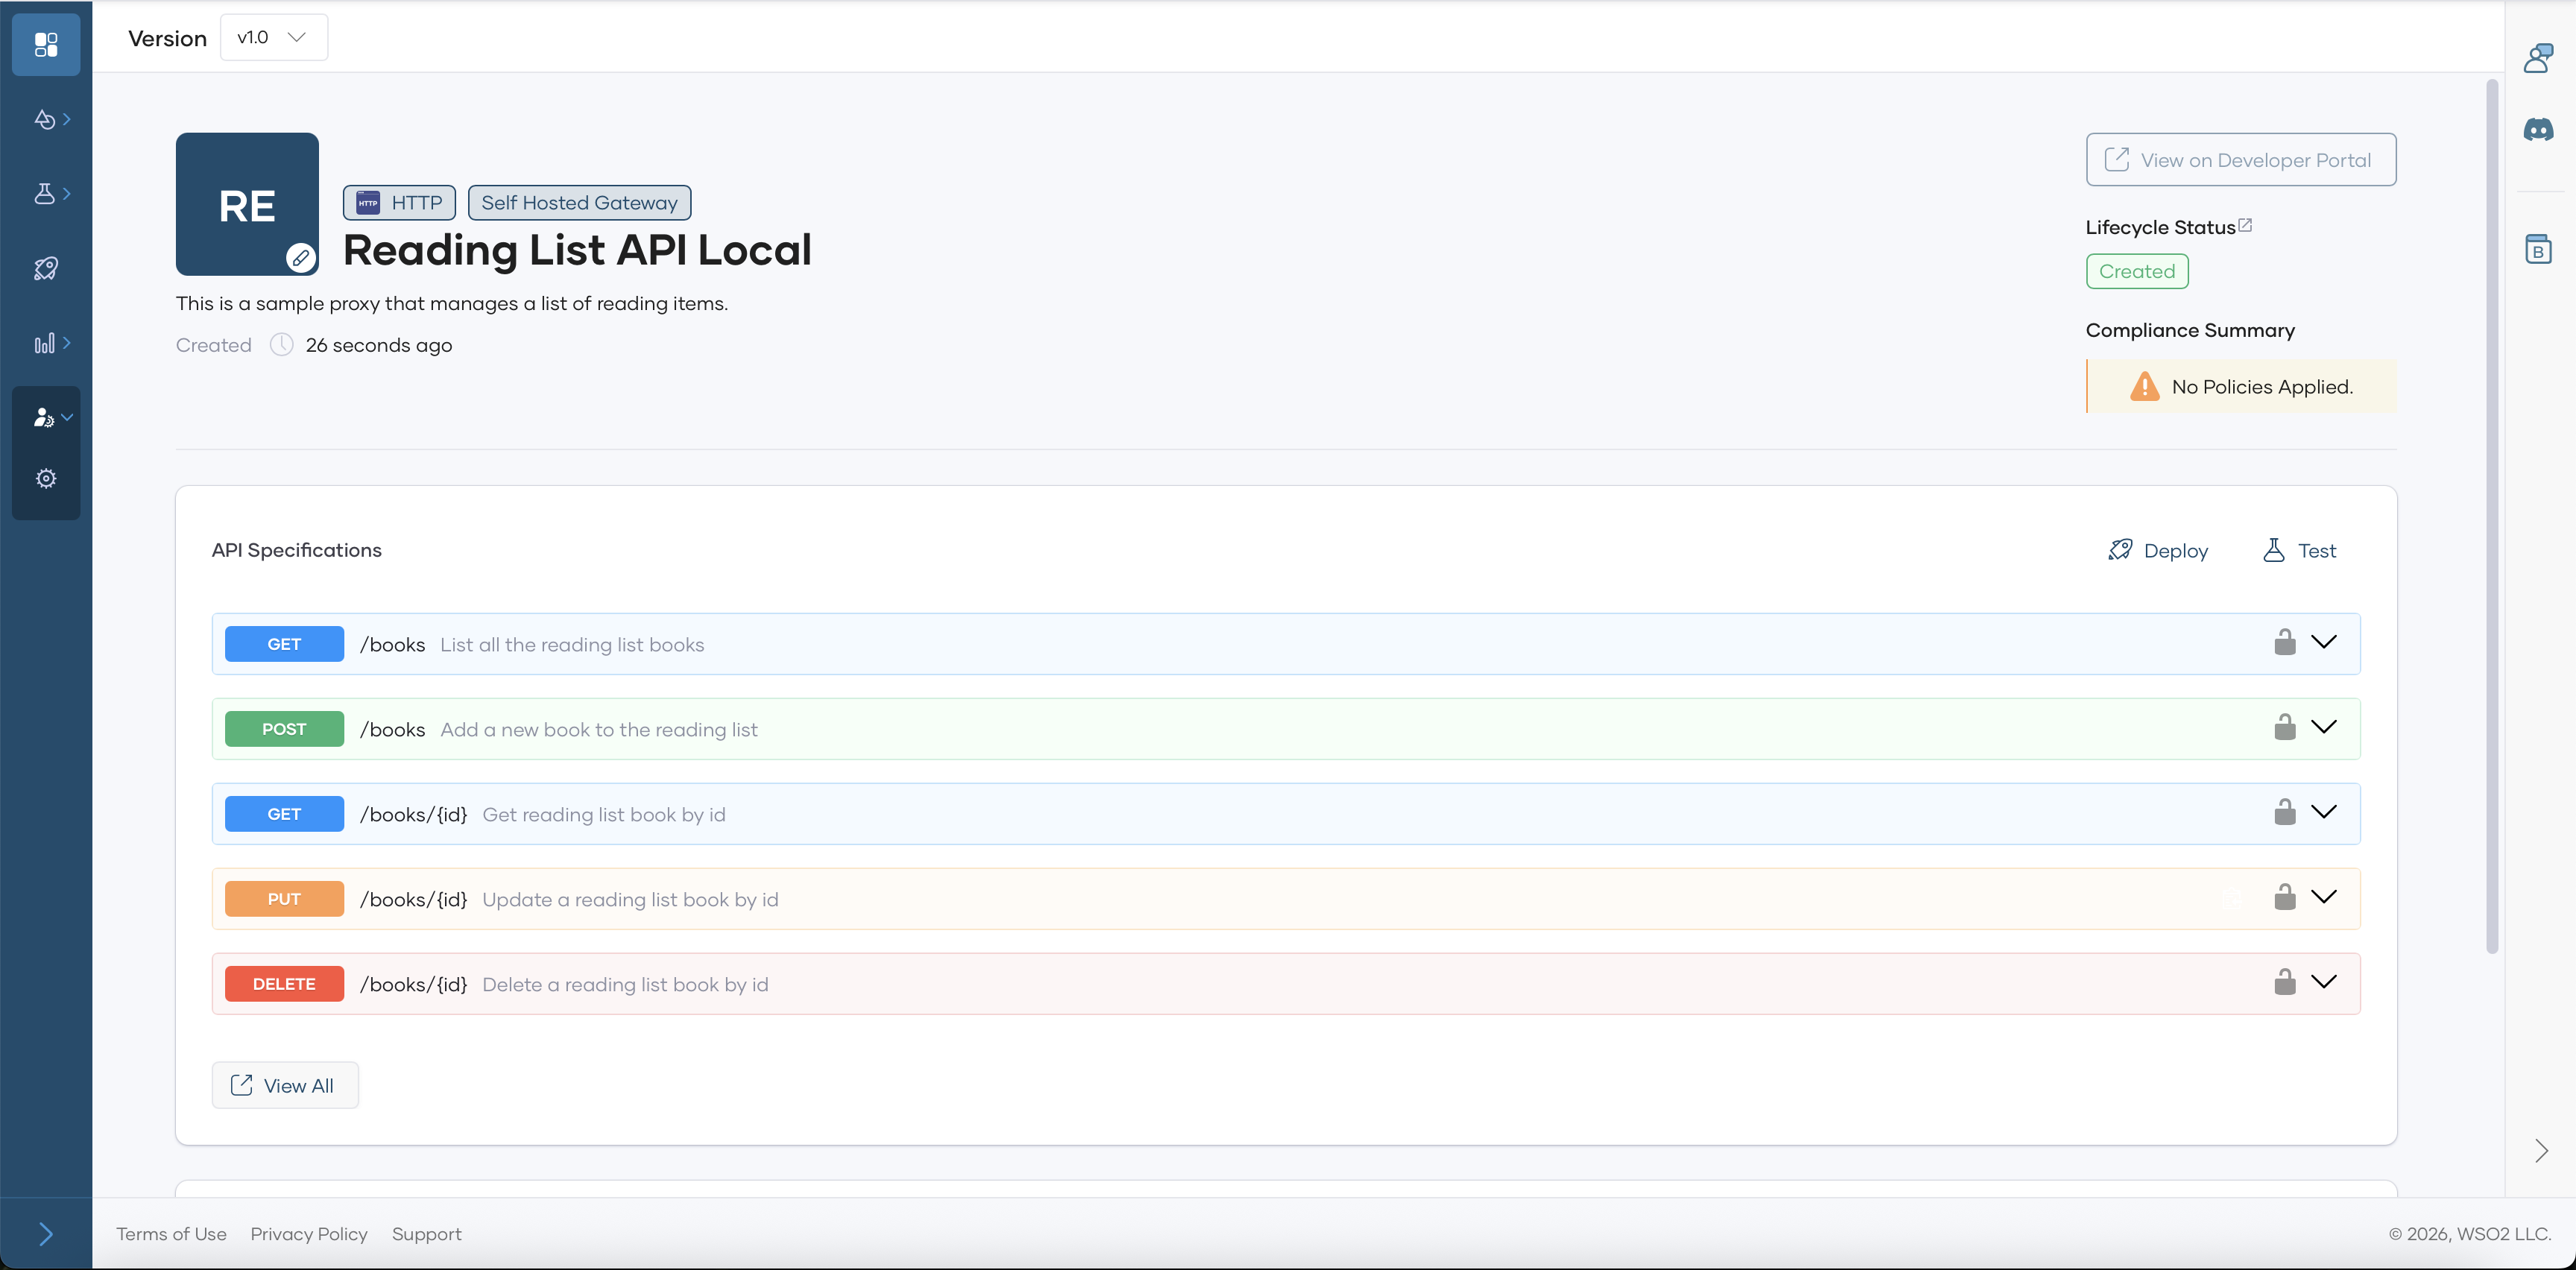
Step 2: Deploy the API Proxy (Optional)
Note
This step is optional at this stage, as the API is deployed to the gateway by default. However, if you make any changes to the API, you must redeploy it.
To redeploy, navigate to the Deploy page of the API Proxy and click Deploy.
-
Navigate to the Deploy page of the API Proxy.
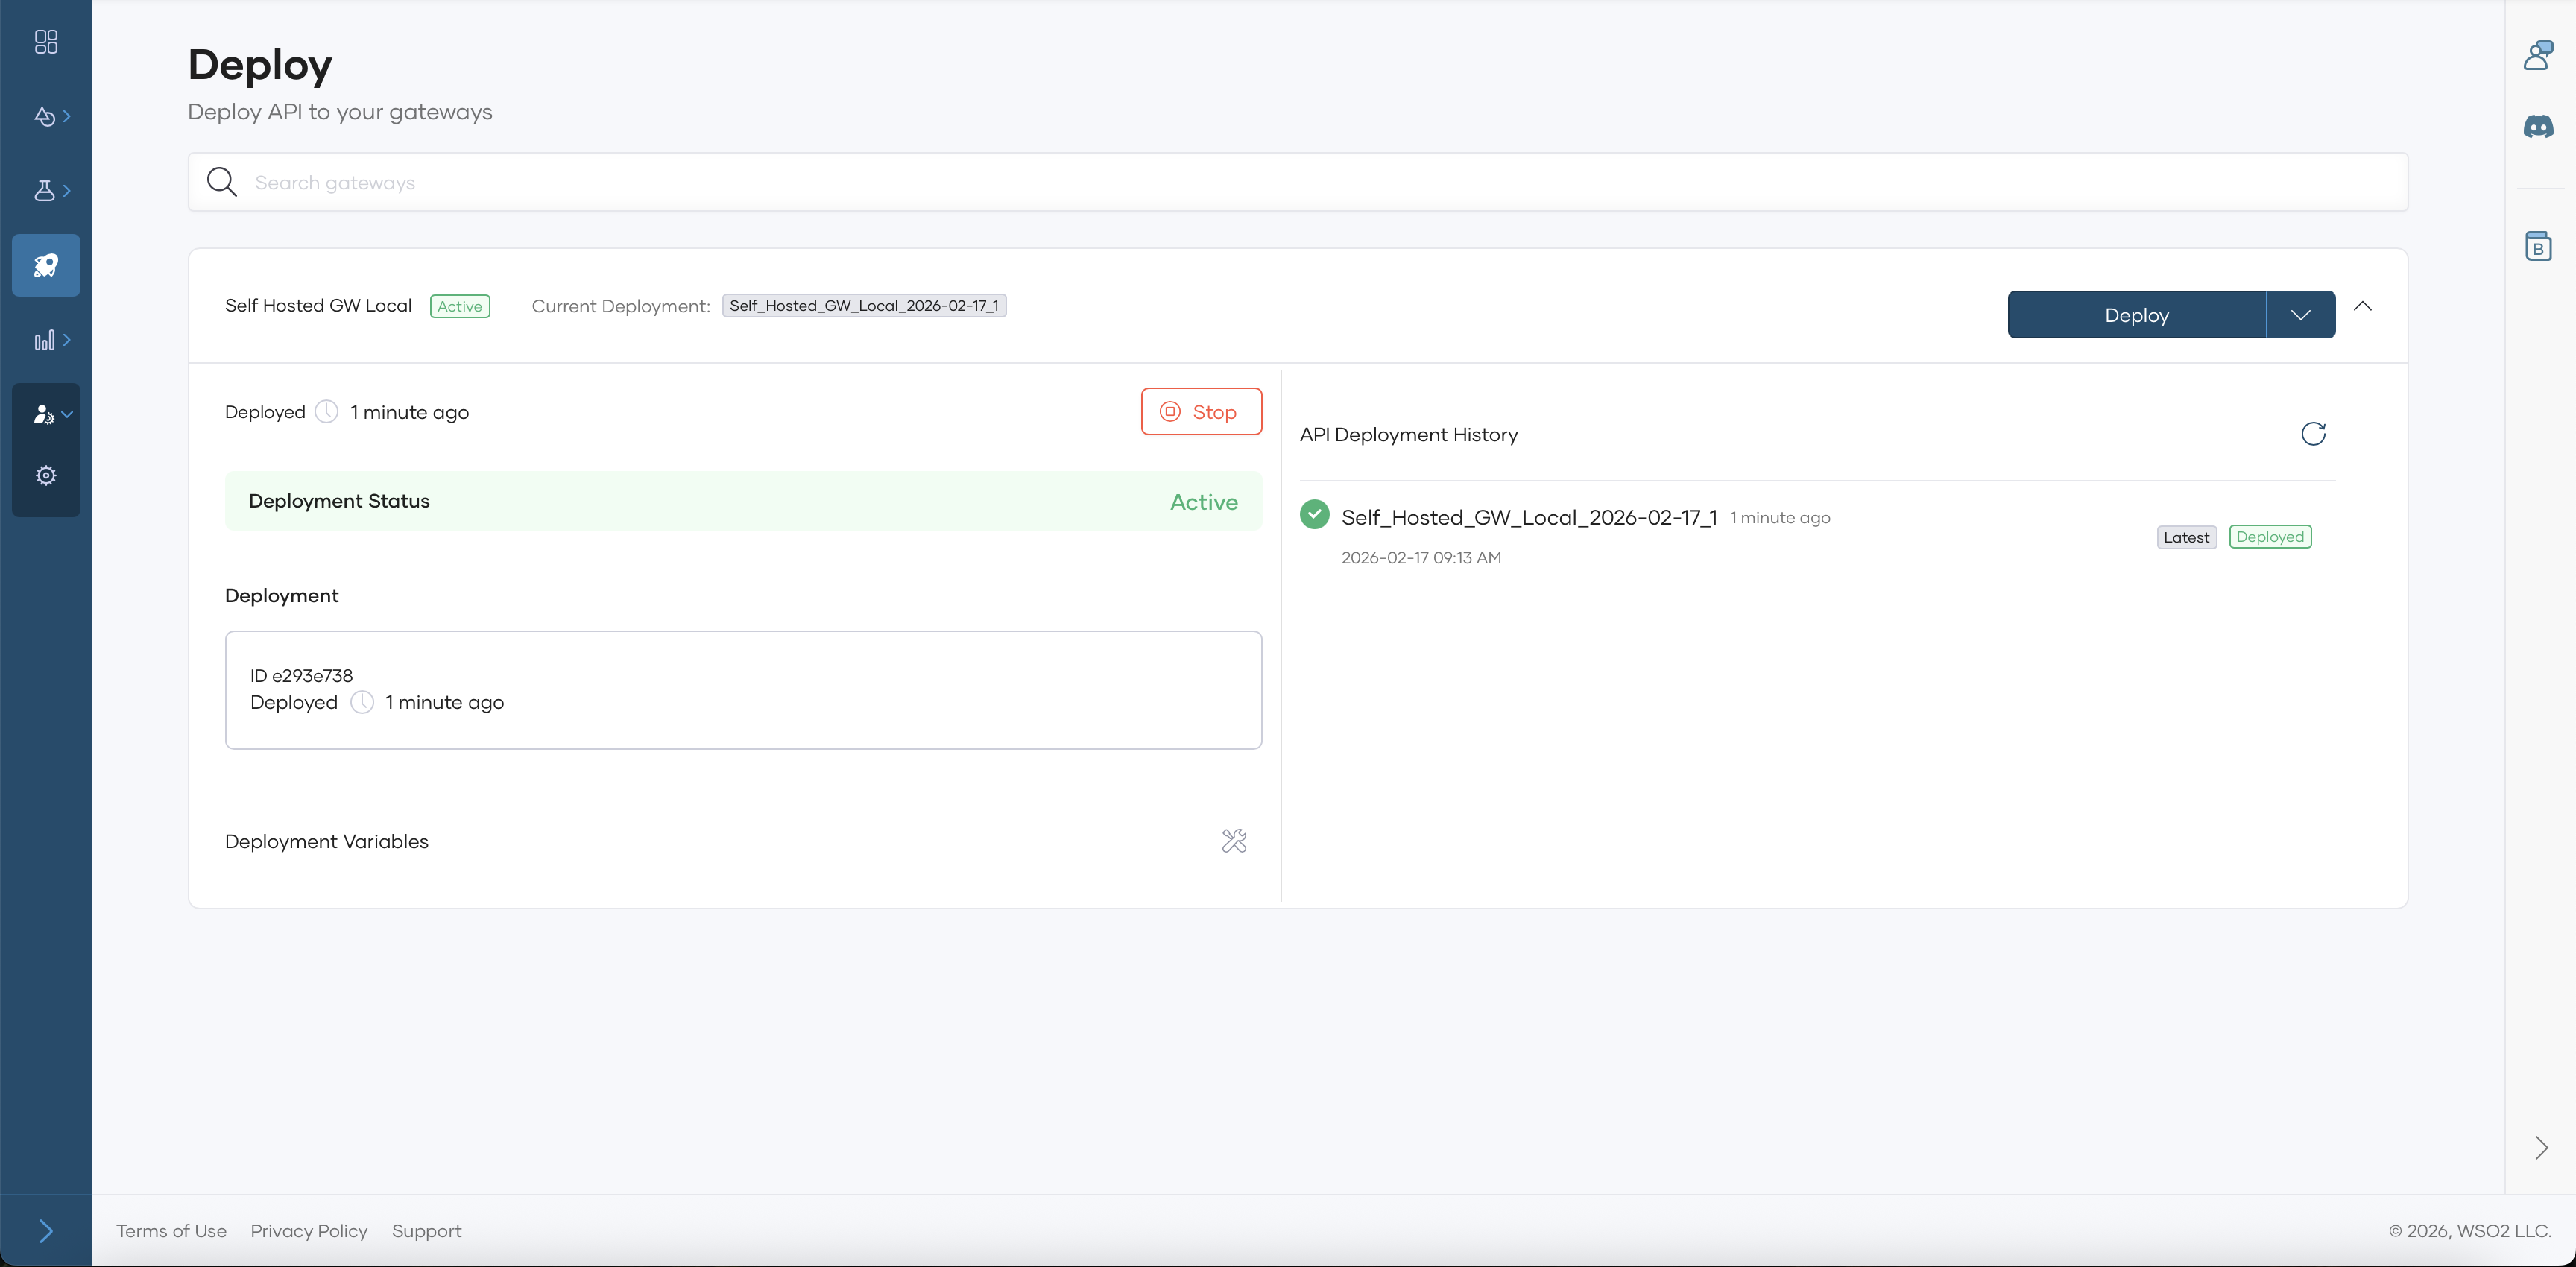
-
Click Deploy.
Test the API Proxy
-
Navigate to the Test → cURL page of the API Proxy.
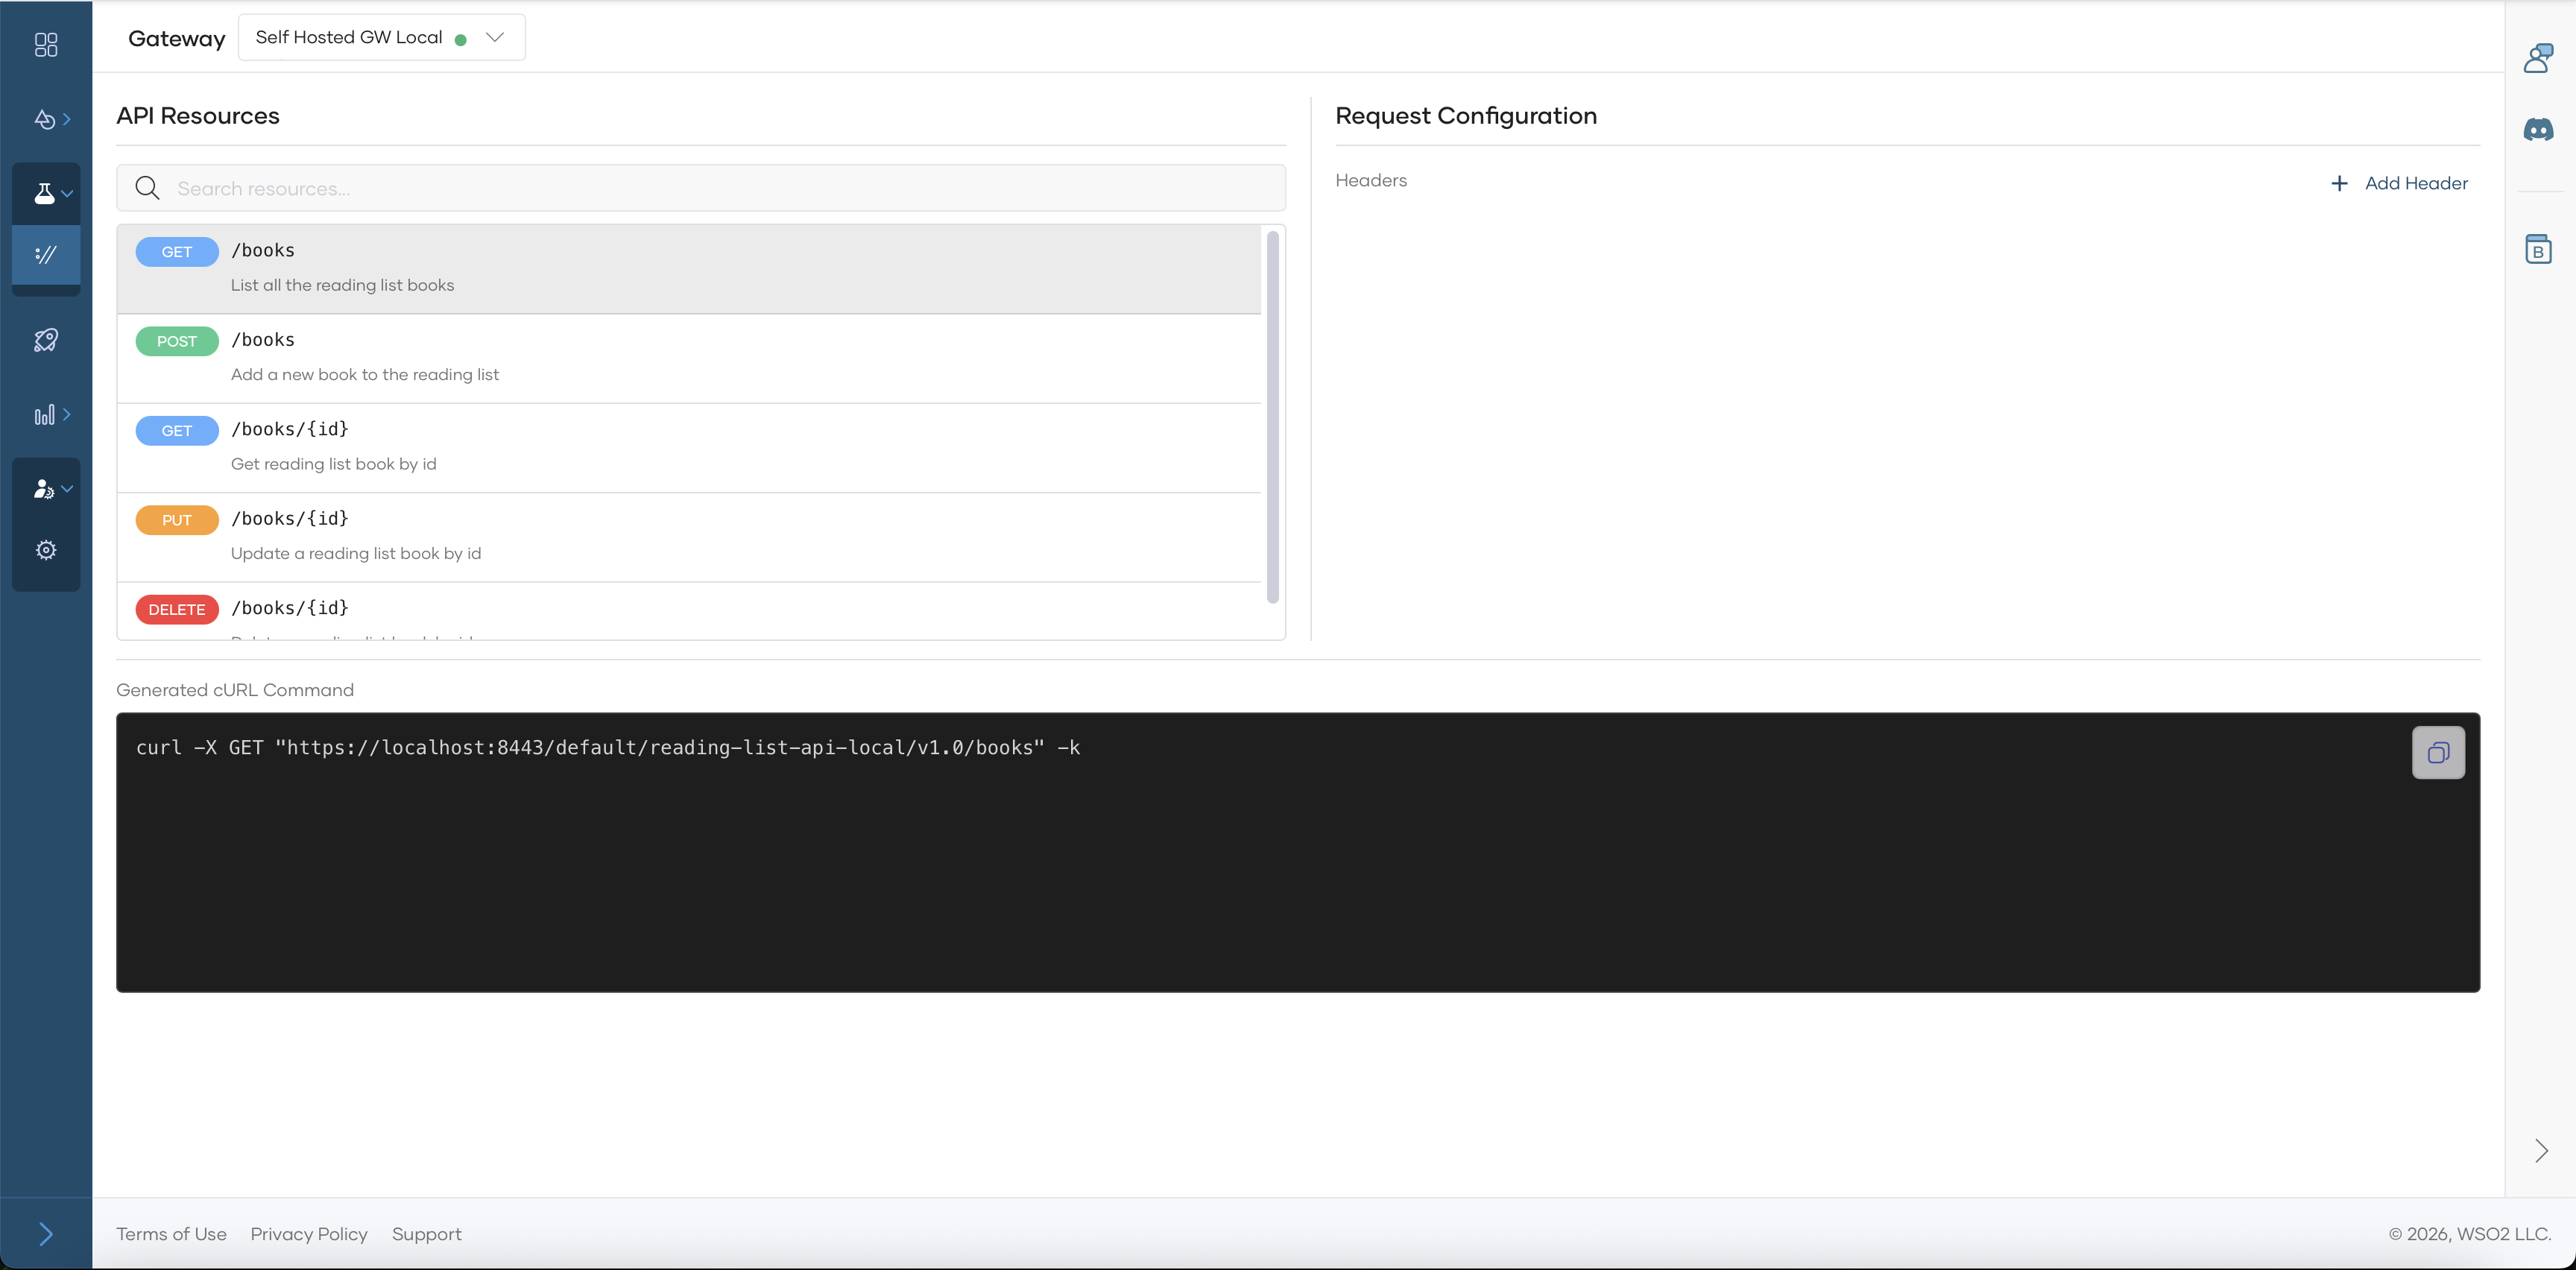
-
Use the cURL for relevant resource to test the API Proxy.
Next Steps
Your Self-Hosted Gateway is now running! Here's what to do next:
- Configure Policies: Apply policies through the Adding and Managing Policies guide
- Monitor: View gateway health and metrics using Analytics
Alternative Deployment Options
For production environments or specific infrastructure requirements, see the detailed configuration guide:
- Setting Up: Configure on Virtual Machine, Docker, or Kubernetes with tabs for each infrastructure option
Troubleshooting
If the gateway doesn't connect:
- Verify the token: Ensure the gateway token is correctly set in
keys.env - Check network connectivity: The gateway needs outbound HTTPS access to
*.bijira.dev - View logs: Run
docker compose logs -fto see gateway logs - Check firewall: Ensure port 8443 is accessible
For more troubleshooting help, see Troubleshooting.