Schedule RAG Automation
Introduction
Devant provides a platform to automate document ingestion on a schedule and manage unstructured data for Retrieval-Augmented Generation (RAG) workflows.
This guide outlines the steps to set up scheduled RAG ingestion automation in Devant.
Note
- Schedule RAG ingestion option is available only for paid Devant users.
- This guide assumes you have completed steps 1 to 4 in the RAG ingestion guide.
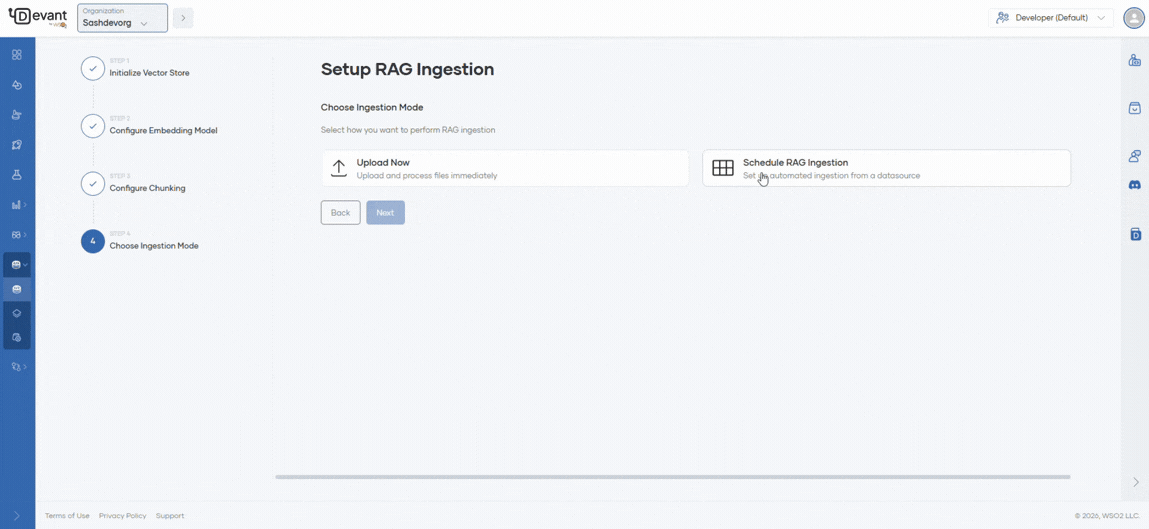
After selecting Schedule RAG Ingestion as the ingestion mode, follow these steps:
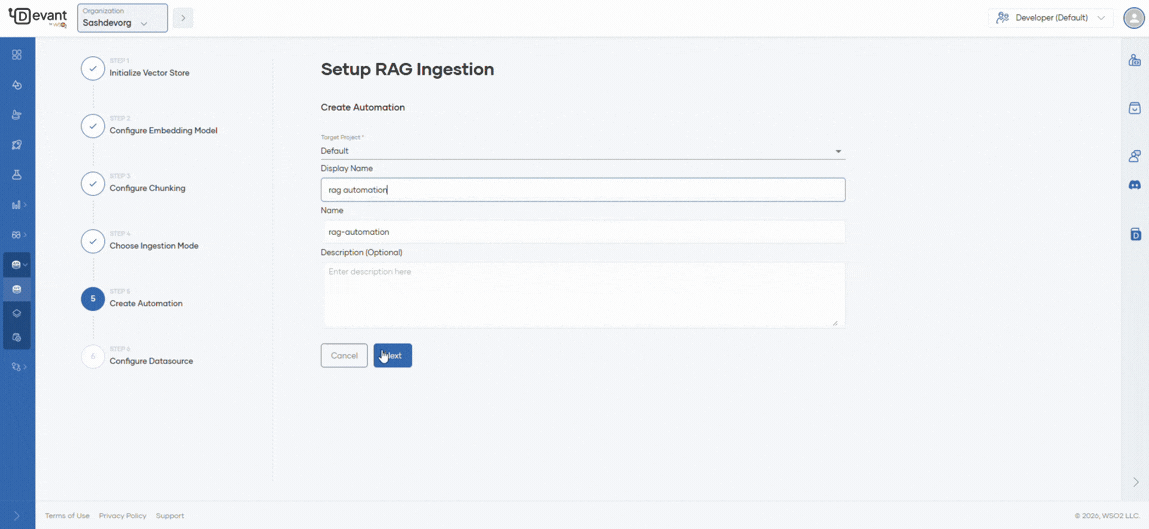
Step 1: Create automation
Fill in the required fields in the details form to create an automation in Devant for scheduled RAG ingestion.
| Field | Value |
|---|---|
| Project | Select the target project from dropdown which lists the available projects in your organization |
| Display Name | Sample Automation |
| Name | sample-automation |
| Description (Optional) | My sample automation description |
Step 2: Configure datasource
The datasource specifies the location from which files will be ingested. Devant supports both Google Drive folders and Amazon S3 buckets as datasources.
-
Select
Google Driveas the datasource. -
Enter the API Key in the API key field.
Info
To obtain a key, use the Google Cloud Console to create a project and generate a key as described in the Google Documentation and restrict it to the Google Drive API.
Note: The target folder must be public ("Anyone with the link"), as API keys cannot access private files.
-
Provide the Folder ID of the Google Drive folder containing the files to be ingested.
Info
The Google Drive folder ID can be found in the URL when viewing the folder in Google Drive. It is the string that appears after
/folders/in the URL. -
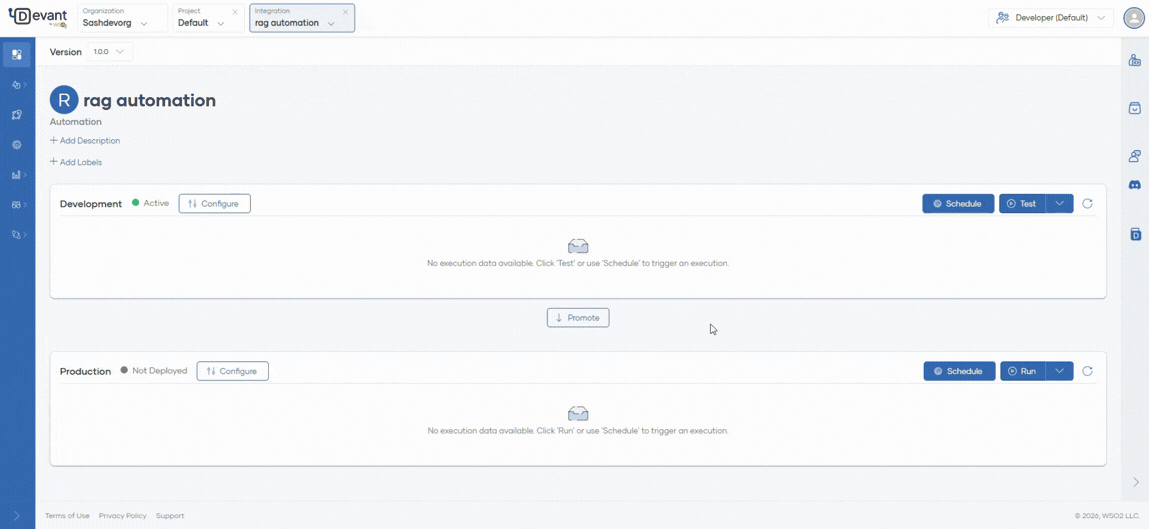
Click Create Automation to complete the setup. You will be redirected to the automation overview page.
Note
-
When a scheduled RAG ingestion automation is created, Devant automatically increases the container resources (CPU and memory) for the automation to ensure reliable operation.
-
If you need to process very large files or expect high ingestion volumes, you can further scale your container resources in Containers tab from the Admin dropdown at the bottom of the left navigation.
-
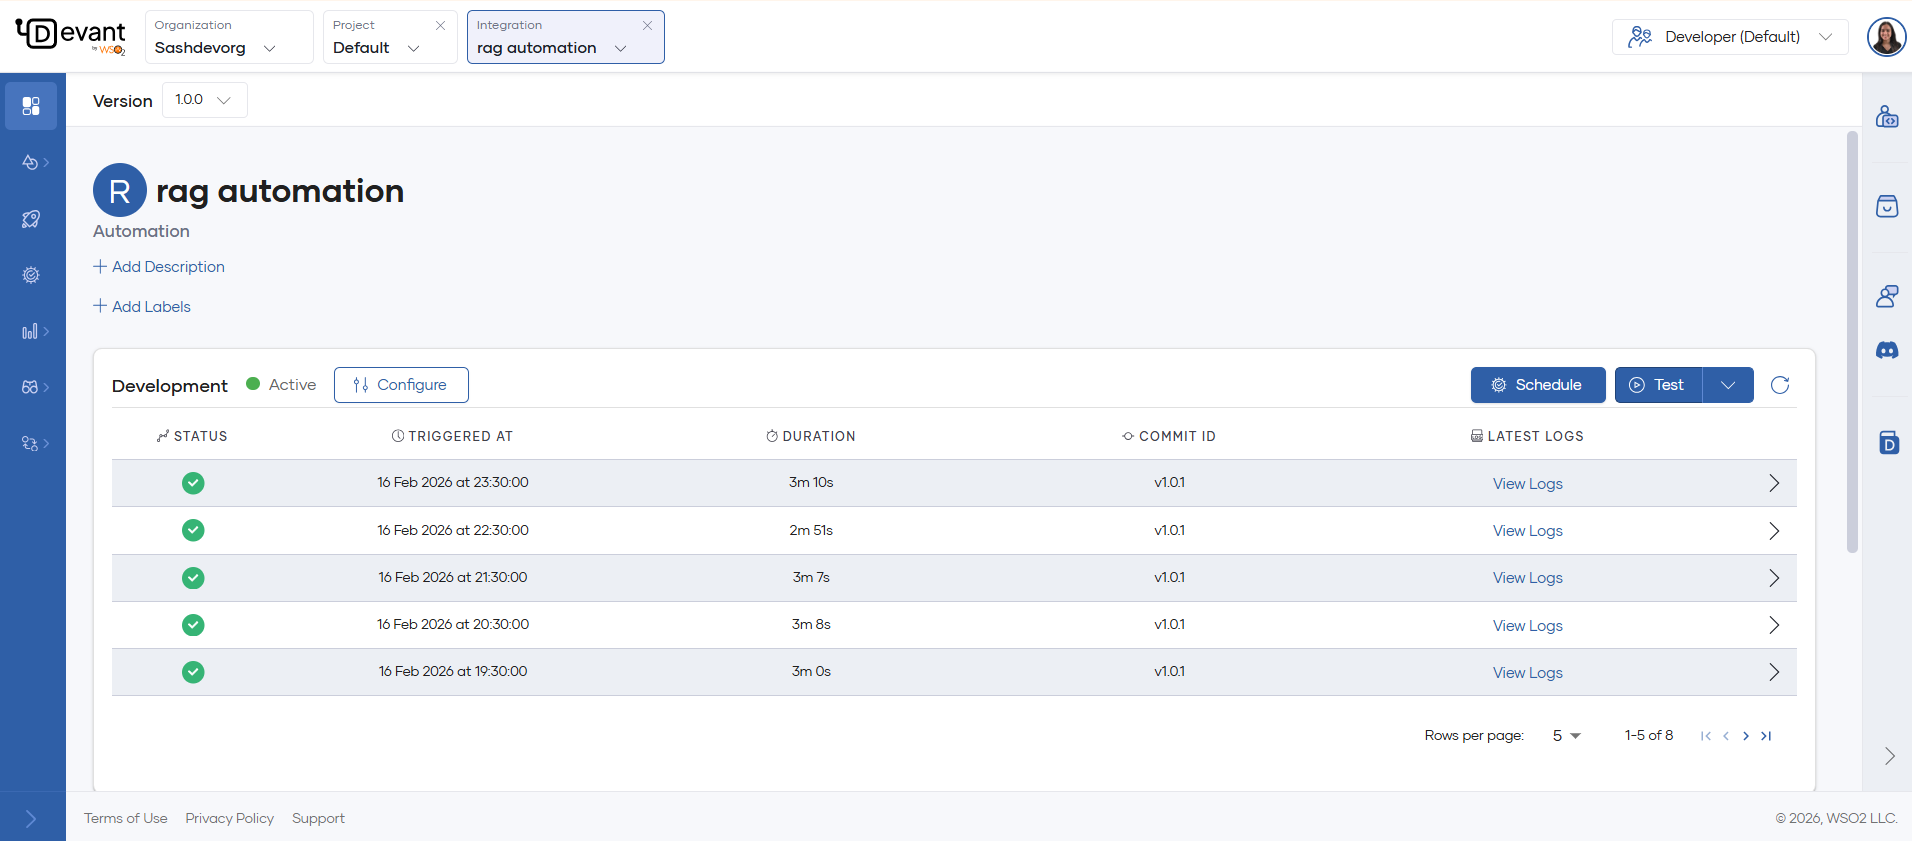
Step 3: Schedule Ingestion
Once created, the automation is automatically deployed in the development environment with all previously entered configurations prefilled.
- To trigger an immediate ingestion, click the Test button.
- To schedule ingestion for a specific time interval, click the Schedule button and select your desired time.
You can verify successful ingestion by reviewing the automation logs.
As shown below, you can automate your ingestion workflow at specified intervals (e.g., minutely, hourly, daily, monthly). During each scheduled run, the system detects new files in the data source and ingests them into the vector store.