Schedule Your First Automation
Overview
In this guide, you will:
- Create a simple automation that prints
"Hello World"every day. - Use WSO2 Integrator: BI to develop the automation.
- Push the automation to Devant from the WSO2 Integrator: BI, which automatically builds the automation.
- Schedule the automation to run every day.
Prerequisites
- GitHub account: Create a GitHub account if you don't have one already.
- If signing in to Devant for the first time, create an organization to begin with.
- VS Code: Install VS Code if you don't have it installed already.
Step 1: Create the new integration
- Import a new repository to begin your integration. Refer Import a Repository for more details.
- Select the Technology as
WSO2 Integrator: BI. - Choose the Integration Type as
Automationand click Create.
This redirects you to the Create New Integration in VS Code page.
Step 2: Install the WSO2 Integrator: BI extension and open the integration
- Install WSO2 Integrator: BI extension. Refer Install and Set Up WSO2 Integrator: BI for more details.
- Click Develop in WSO2 Integrator: BI. This will clone your integration project and open it in BI.
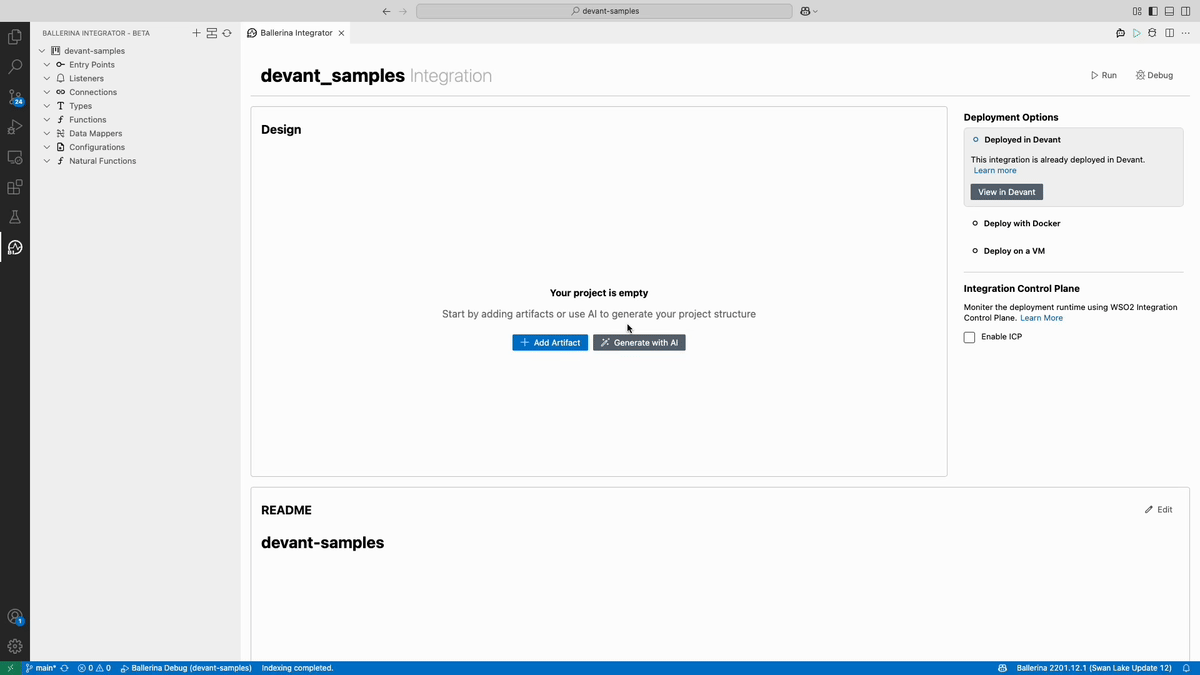
Step 3: Develop automation in WSO2 Integrator: BI
- In WSO2 Integrator: BI design view, click Add Artifact.
- Select Automation from the Constructs menu. Since Automation is chosen from the Devant console, other options are disabled.
- Click Create to create an automation. This directs you to the automation diagram view.
- Click + after the Start node to open the node panel.
- Select Call Function and select println.
- Click + Add Another Value, type
"Hello World"and click Save. -
Click Run in the top right corner to run the automation. This compiles the automation and runs it in the embedded Ballerina runtime.
Step 4: Push to Devant
- Click the Source Control icon on the sidebar.
- Click + to stage all changes.
- Add an appropriate commit message and commit.
- Click Sync Changes to push the changes to remote.
Step 5: Schedule Automation
-
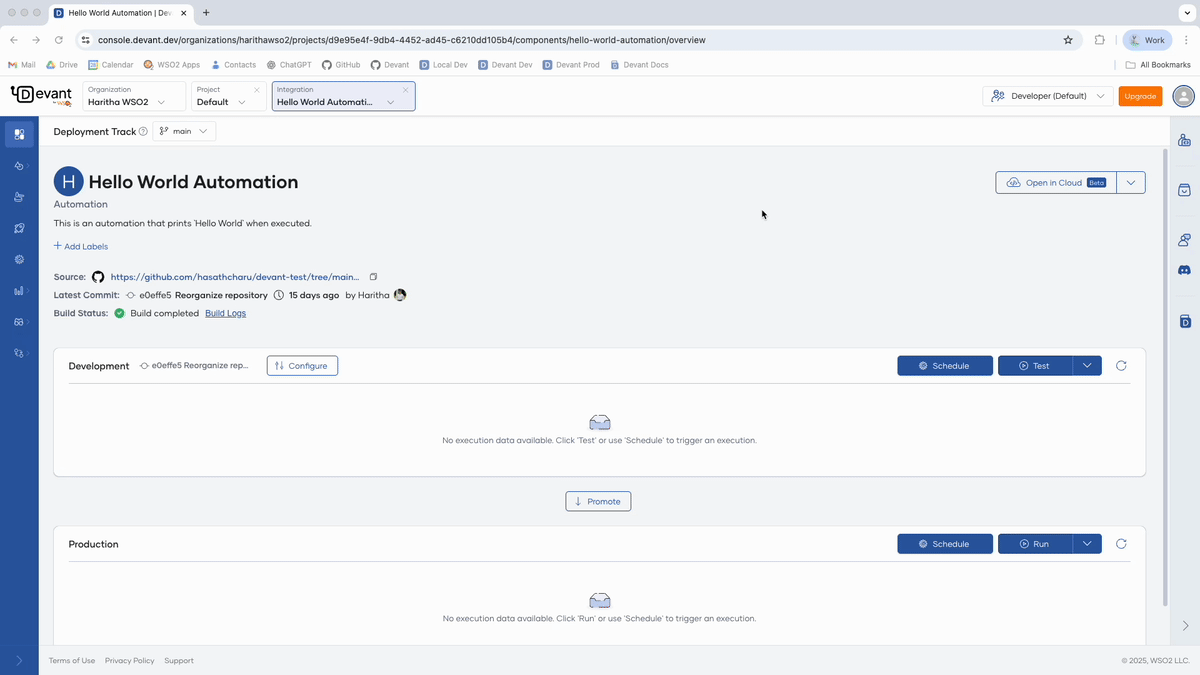
Once you push the changes, the overview page of the Devant automation will automatically refresh and show you the Latest Commit and automatically build your automation showing the Build Status.
Note
The build process may take some time. Once complete, the build status changes to Success. You can see the Build History by clicking Build in the left navigation.
-
Once the Build Status shows
Build completed, click Test to run your automation once. - The development card automatically updates with execution details. Click the refresh button in the top right corner if it is not automatically updated.
- Click View Logs on an execution. You will see the
Hello Worldlog printed along with the execution time. - Click Schedule to schedule the automation.
- In the BY INTERVAL tab, select Day from the dropdown.
- Enter
1in the Repeat every text box. - Enter
01:00 AMin the At text box and click Update. -
Your automation will now run every day at 01:00 AM. You can see the next execution time as Next run in in the Development card.
-
After successfully testing, you can promote your automation to production by clicking the Promote button.
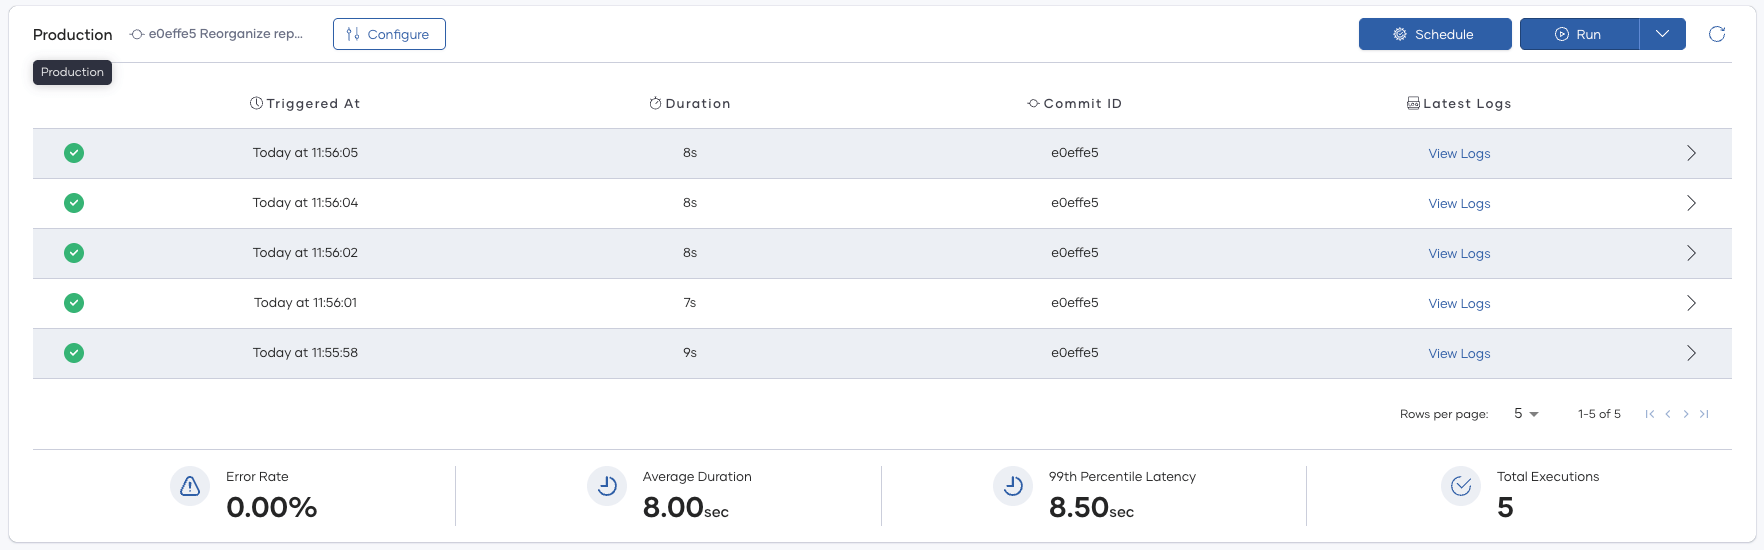
-
In critical environments (Production), you will be able to see automation metrics such as:
- Error Rate: Percentage of failed executions
- Average Duration: Average time taken for executions
- 99th Percentile Latency: Latency at the 99th percentile for executions
- Total Executions: Total number of times the automation has been executed