Create a Durable Agent
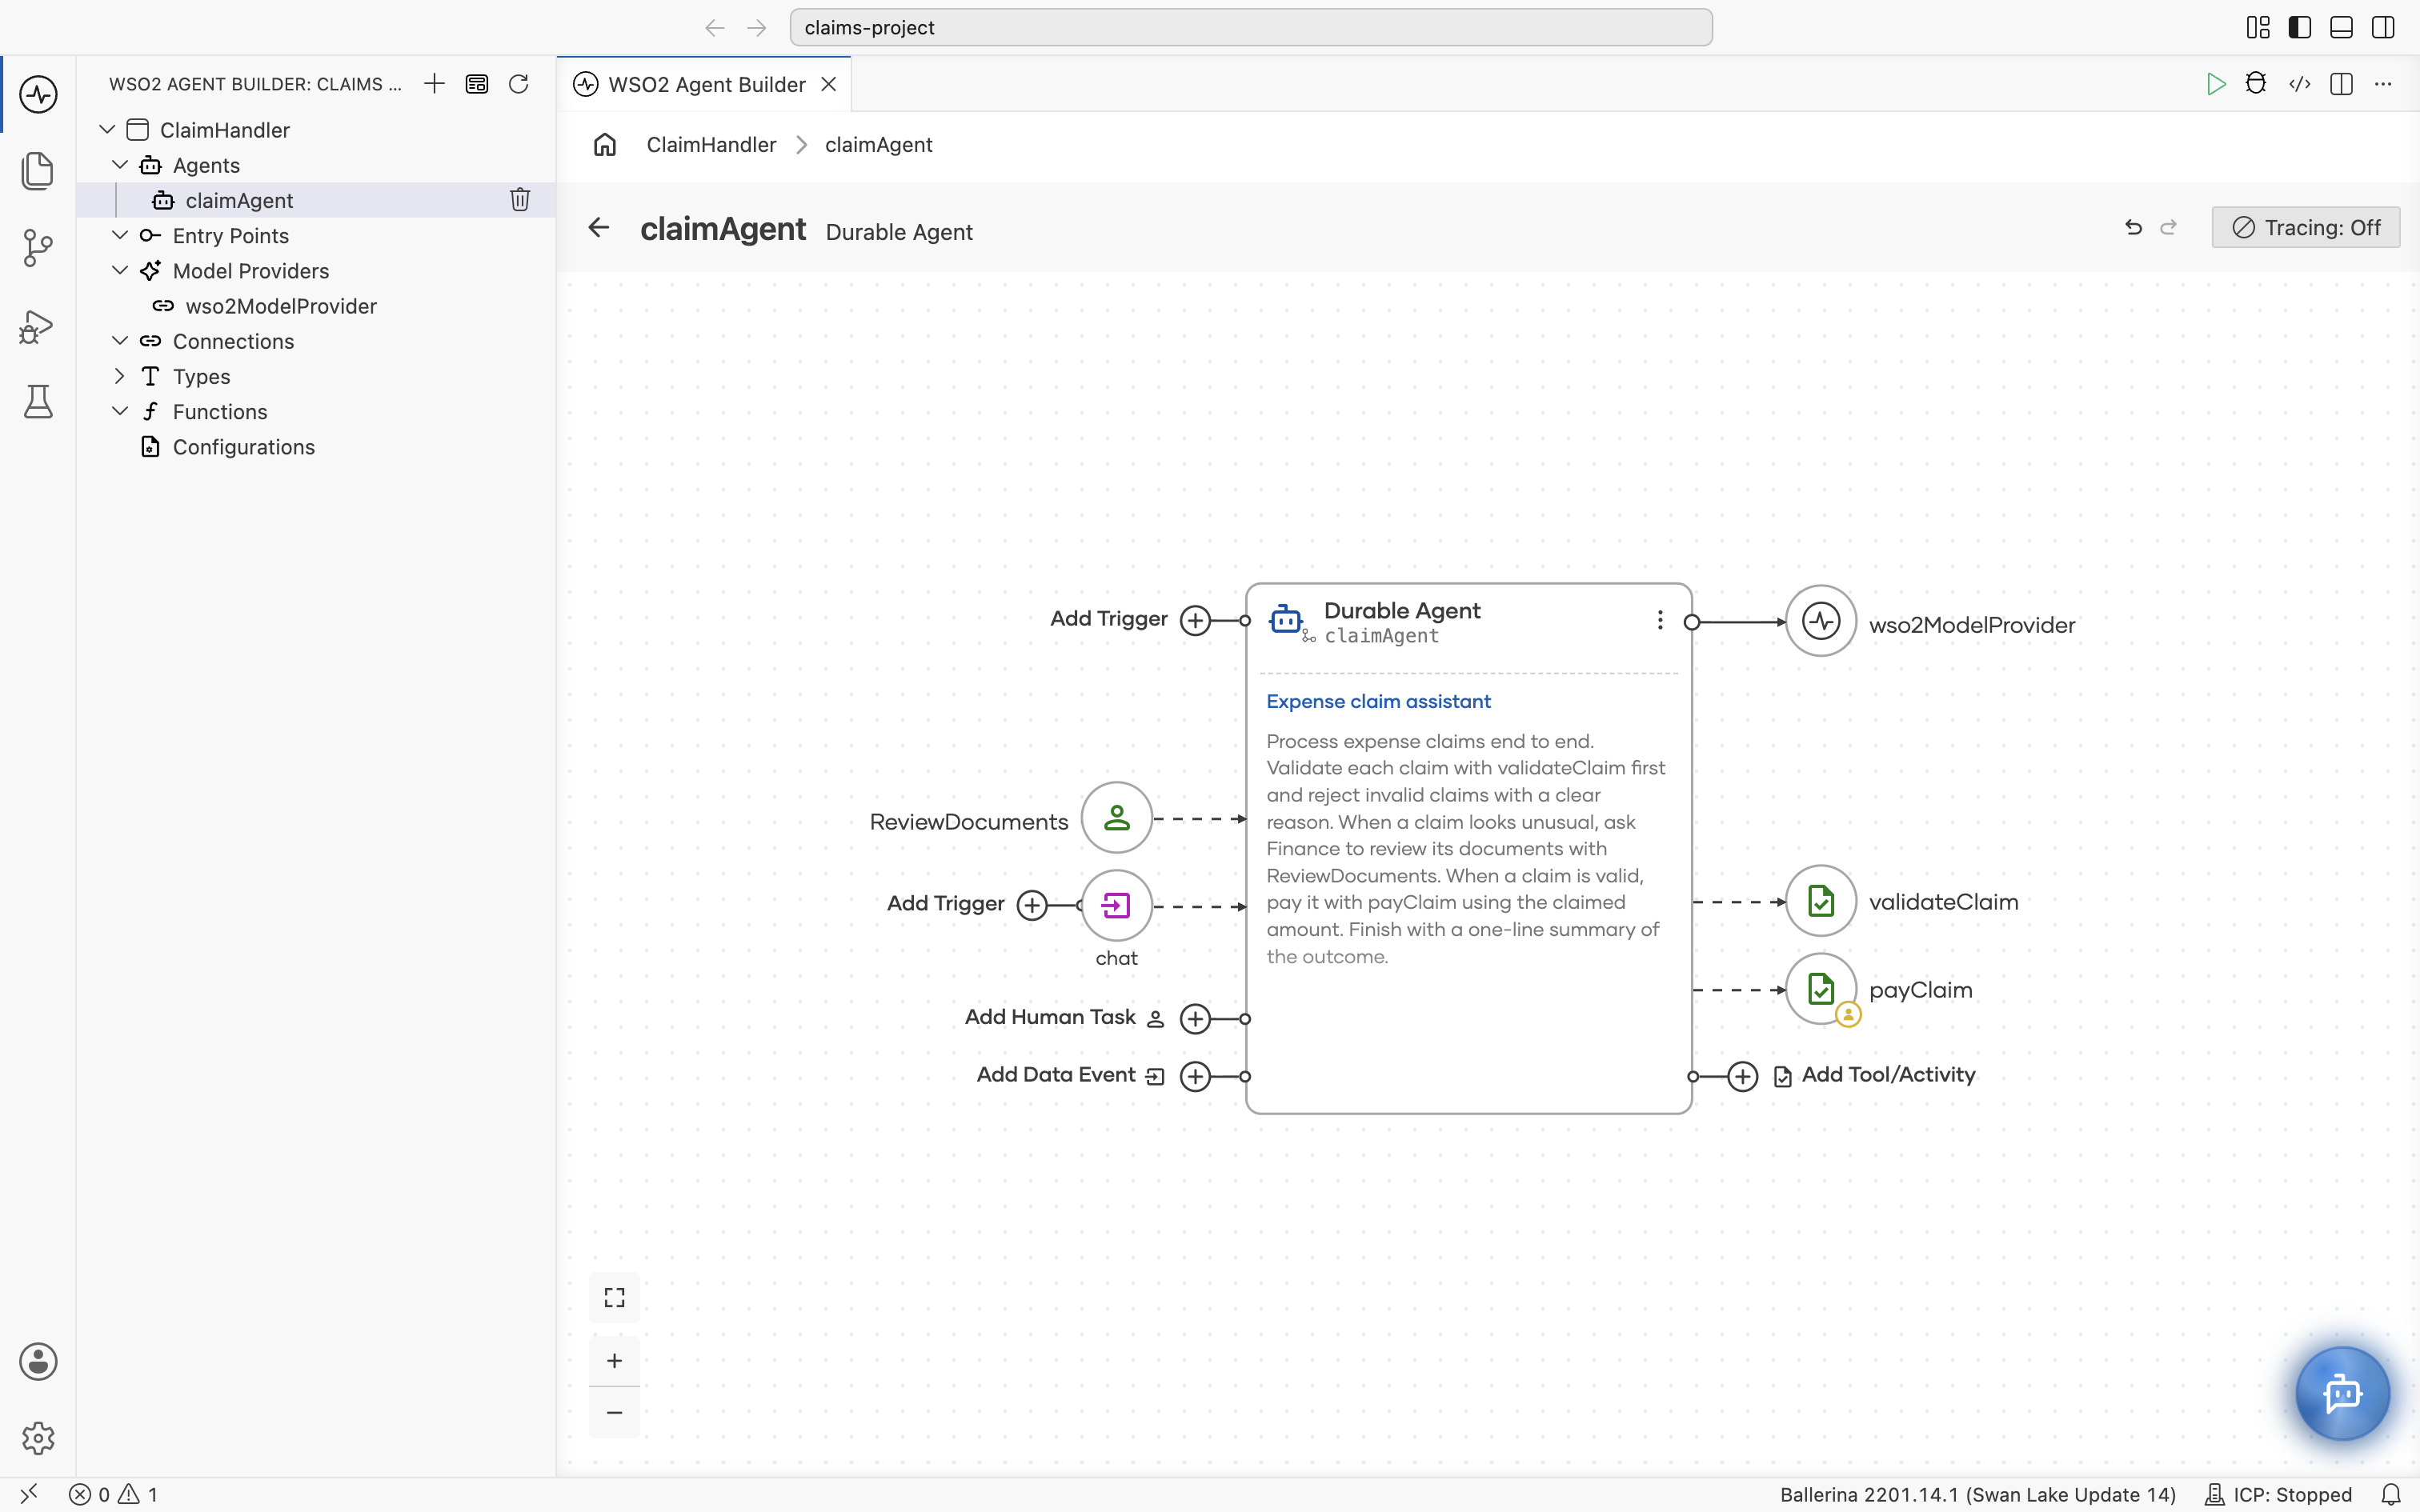
A durable agent flips the authoring model of a durable workflow: instead of wiring steps together, you describe the goal in natural language and give the agent capabilities: activities, data events, and human tasks. The model plans the path at runtime, and because the agent runs as a durable workflow, every reasoning step, activity call, and wait survives crashes and restarts.
Why durable agents are different
| Standard AI agent | Durable agent |
|---|---|
| A crash loses the conversation and in-flight tool calls | Every turn and activity call is recorded, so a restart resumes mid-plan |
| Waiting for external input holds a process | Waits are suspended with zero resources, for days if needed |
| Retry logic lives in every tool | Each activity has a declarative retry policy |
Add a durable agent
The steps below follow one example: a claimAgent that validates expense claims and pays them out.
-
On the agentic integration's overview, select Add Agent.
-
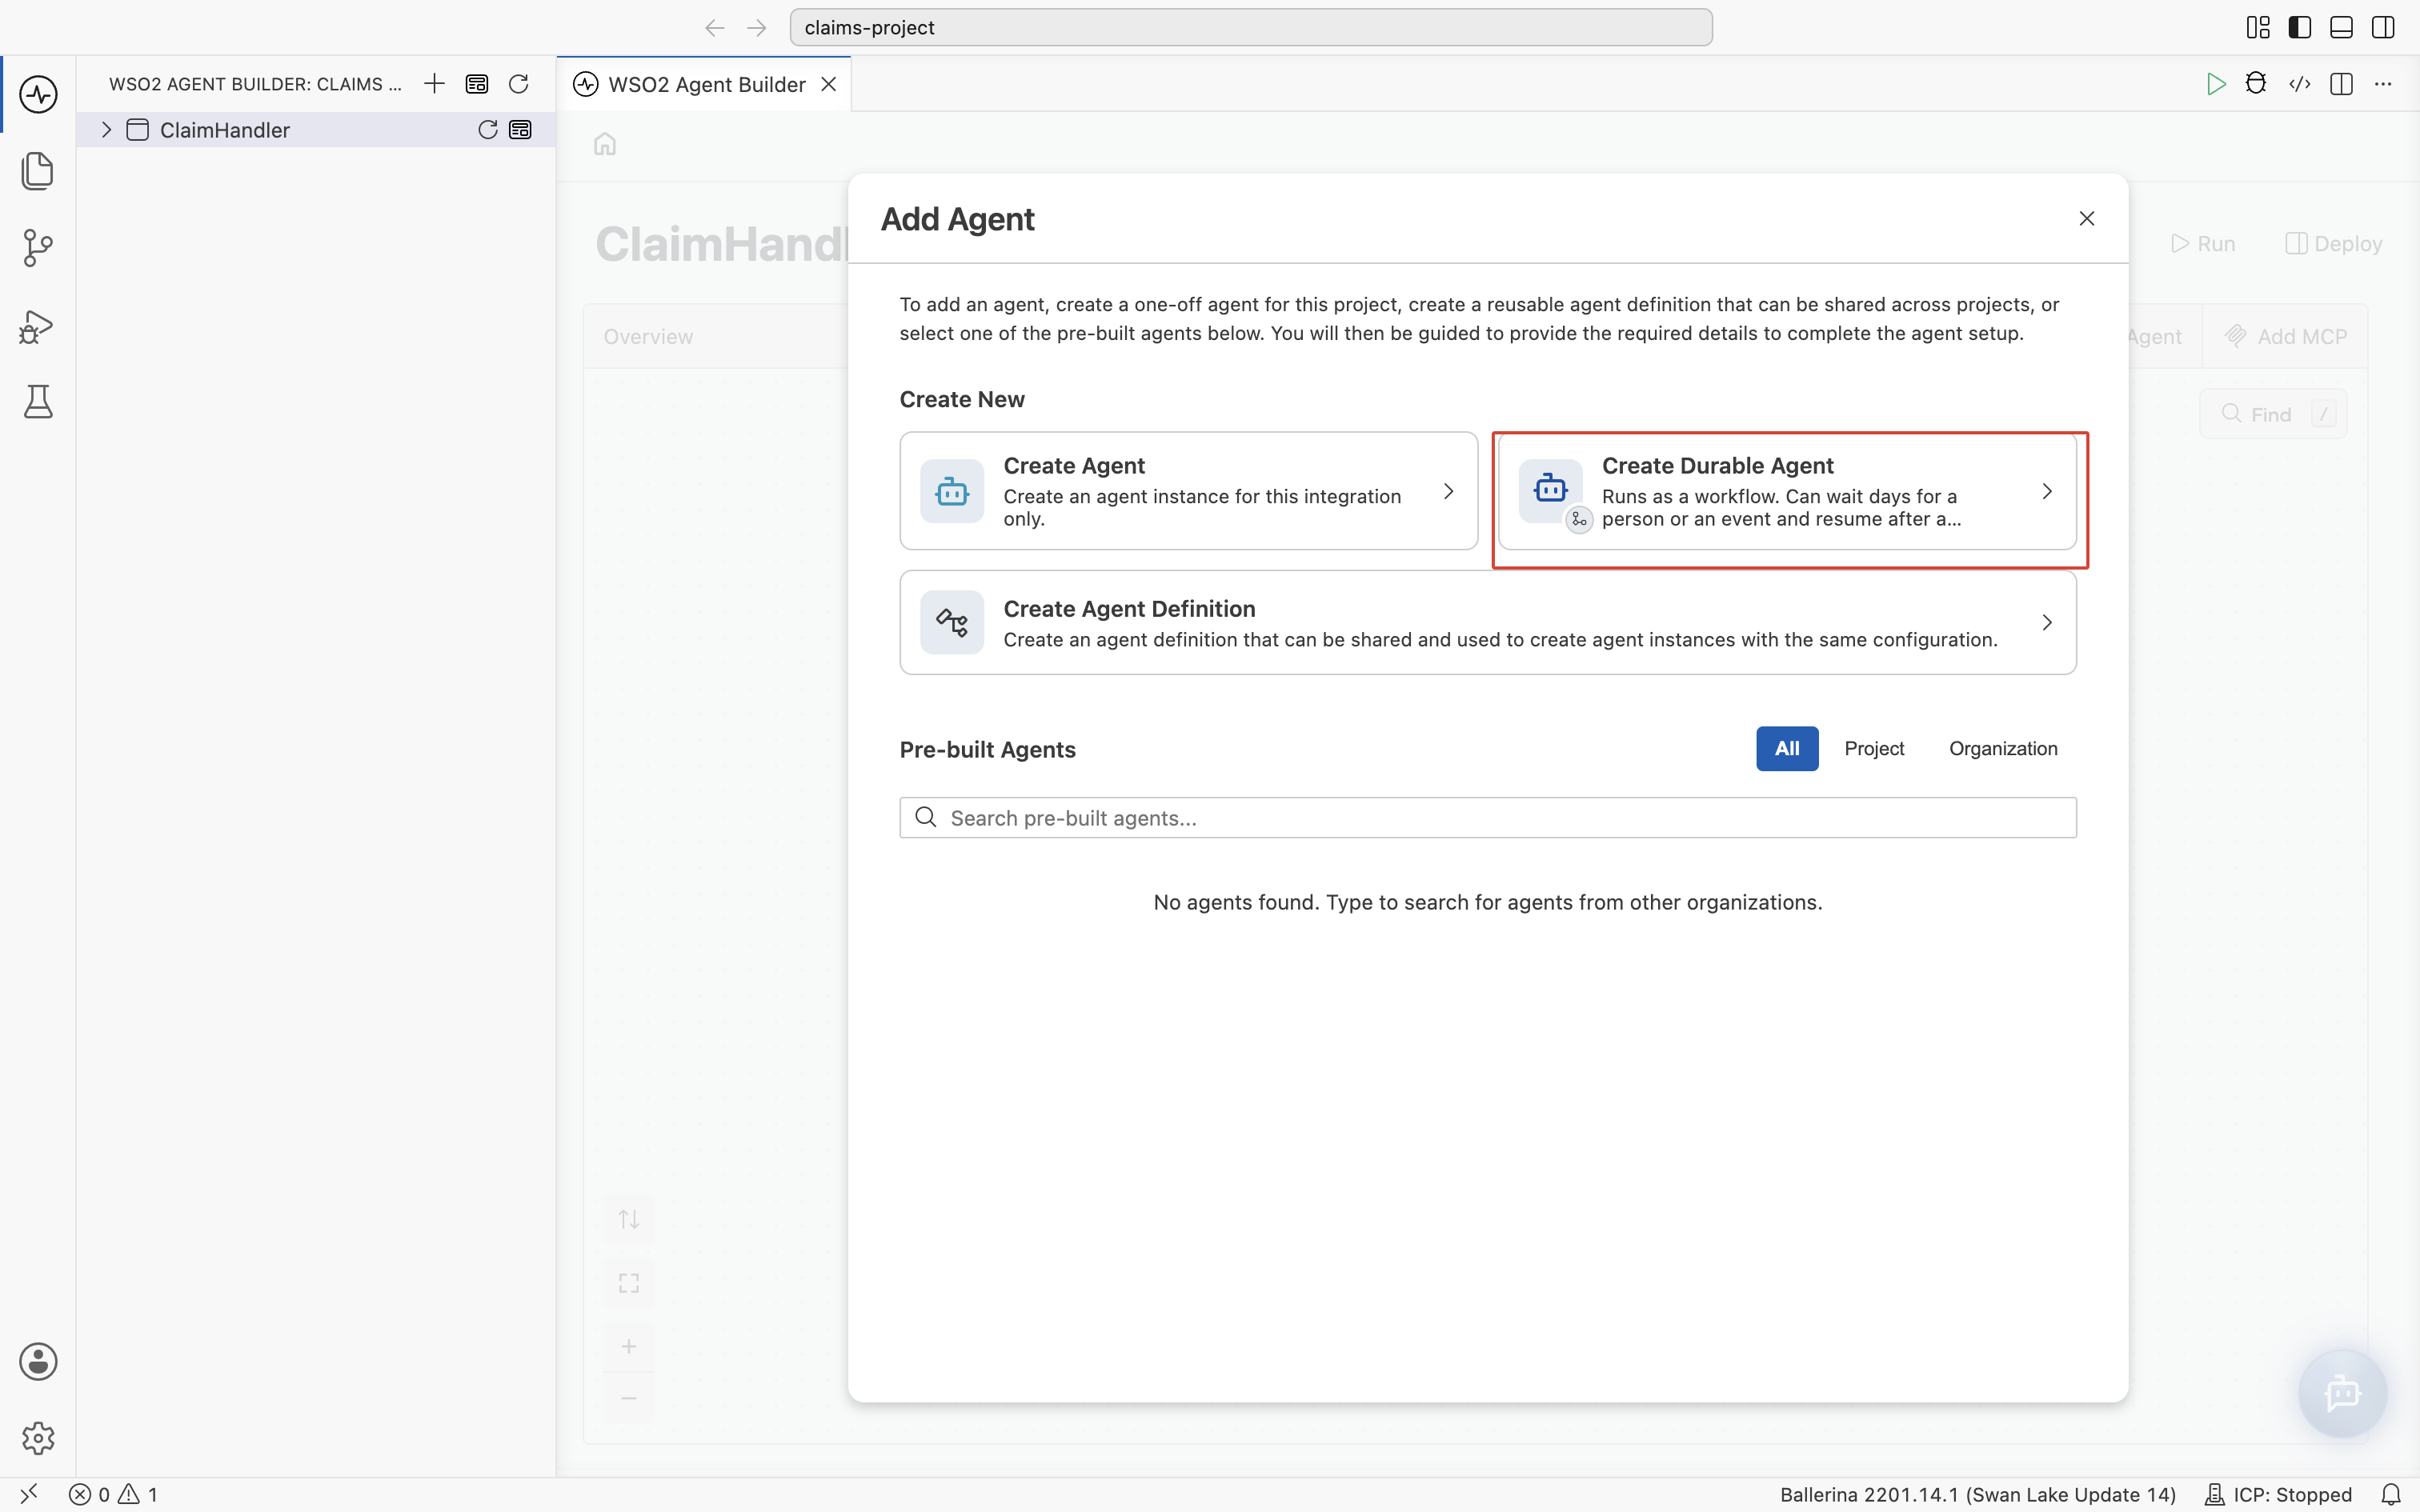
In the Add Agent dialog, under Create New, select Create Durable Agent.
-
Fill in the Create Durable Agent form:
Field Required Description Name Yes The name the agent is referenced by, for example claimAgent.Model Yes The model provider the agent uses for its LLM calls. Defaults to Default WSO2 Model Provider. Select Create New Model Provider to use another one. Role Yes The agent's primary function, for example Expense claim assistant.Instructions Yes What the agent should do. See Configure the agent. Input Data Type No The structured payload a run starts with, for example an ExpenseClaimrecord. Leave it empty to start the agent with the query text alone. -
Select Create Agent.
The agent's canvas opens. It shows the durable agent with its role and instructions, the model provider it uses, and Add Trigger, Add Human Task, Add Data Event, and Add Tool/Activity for extending it.
Configure the agent
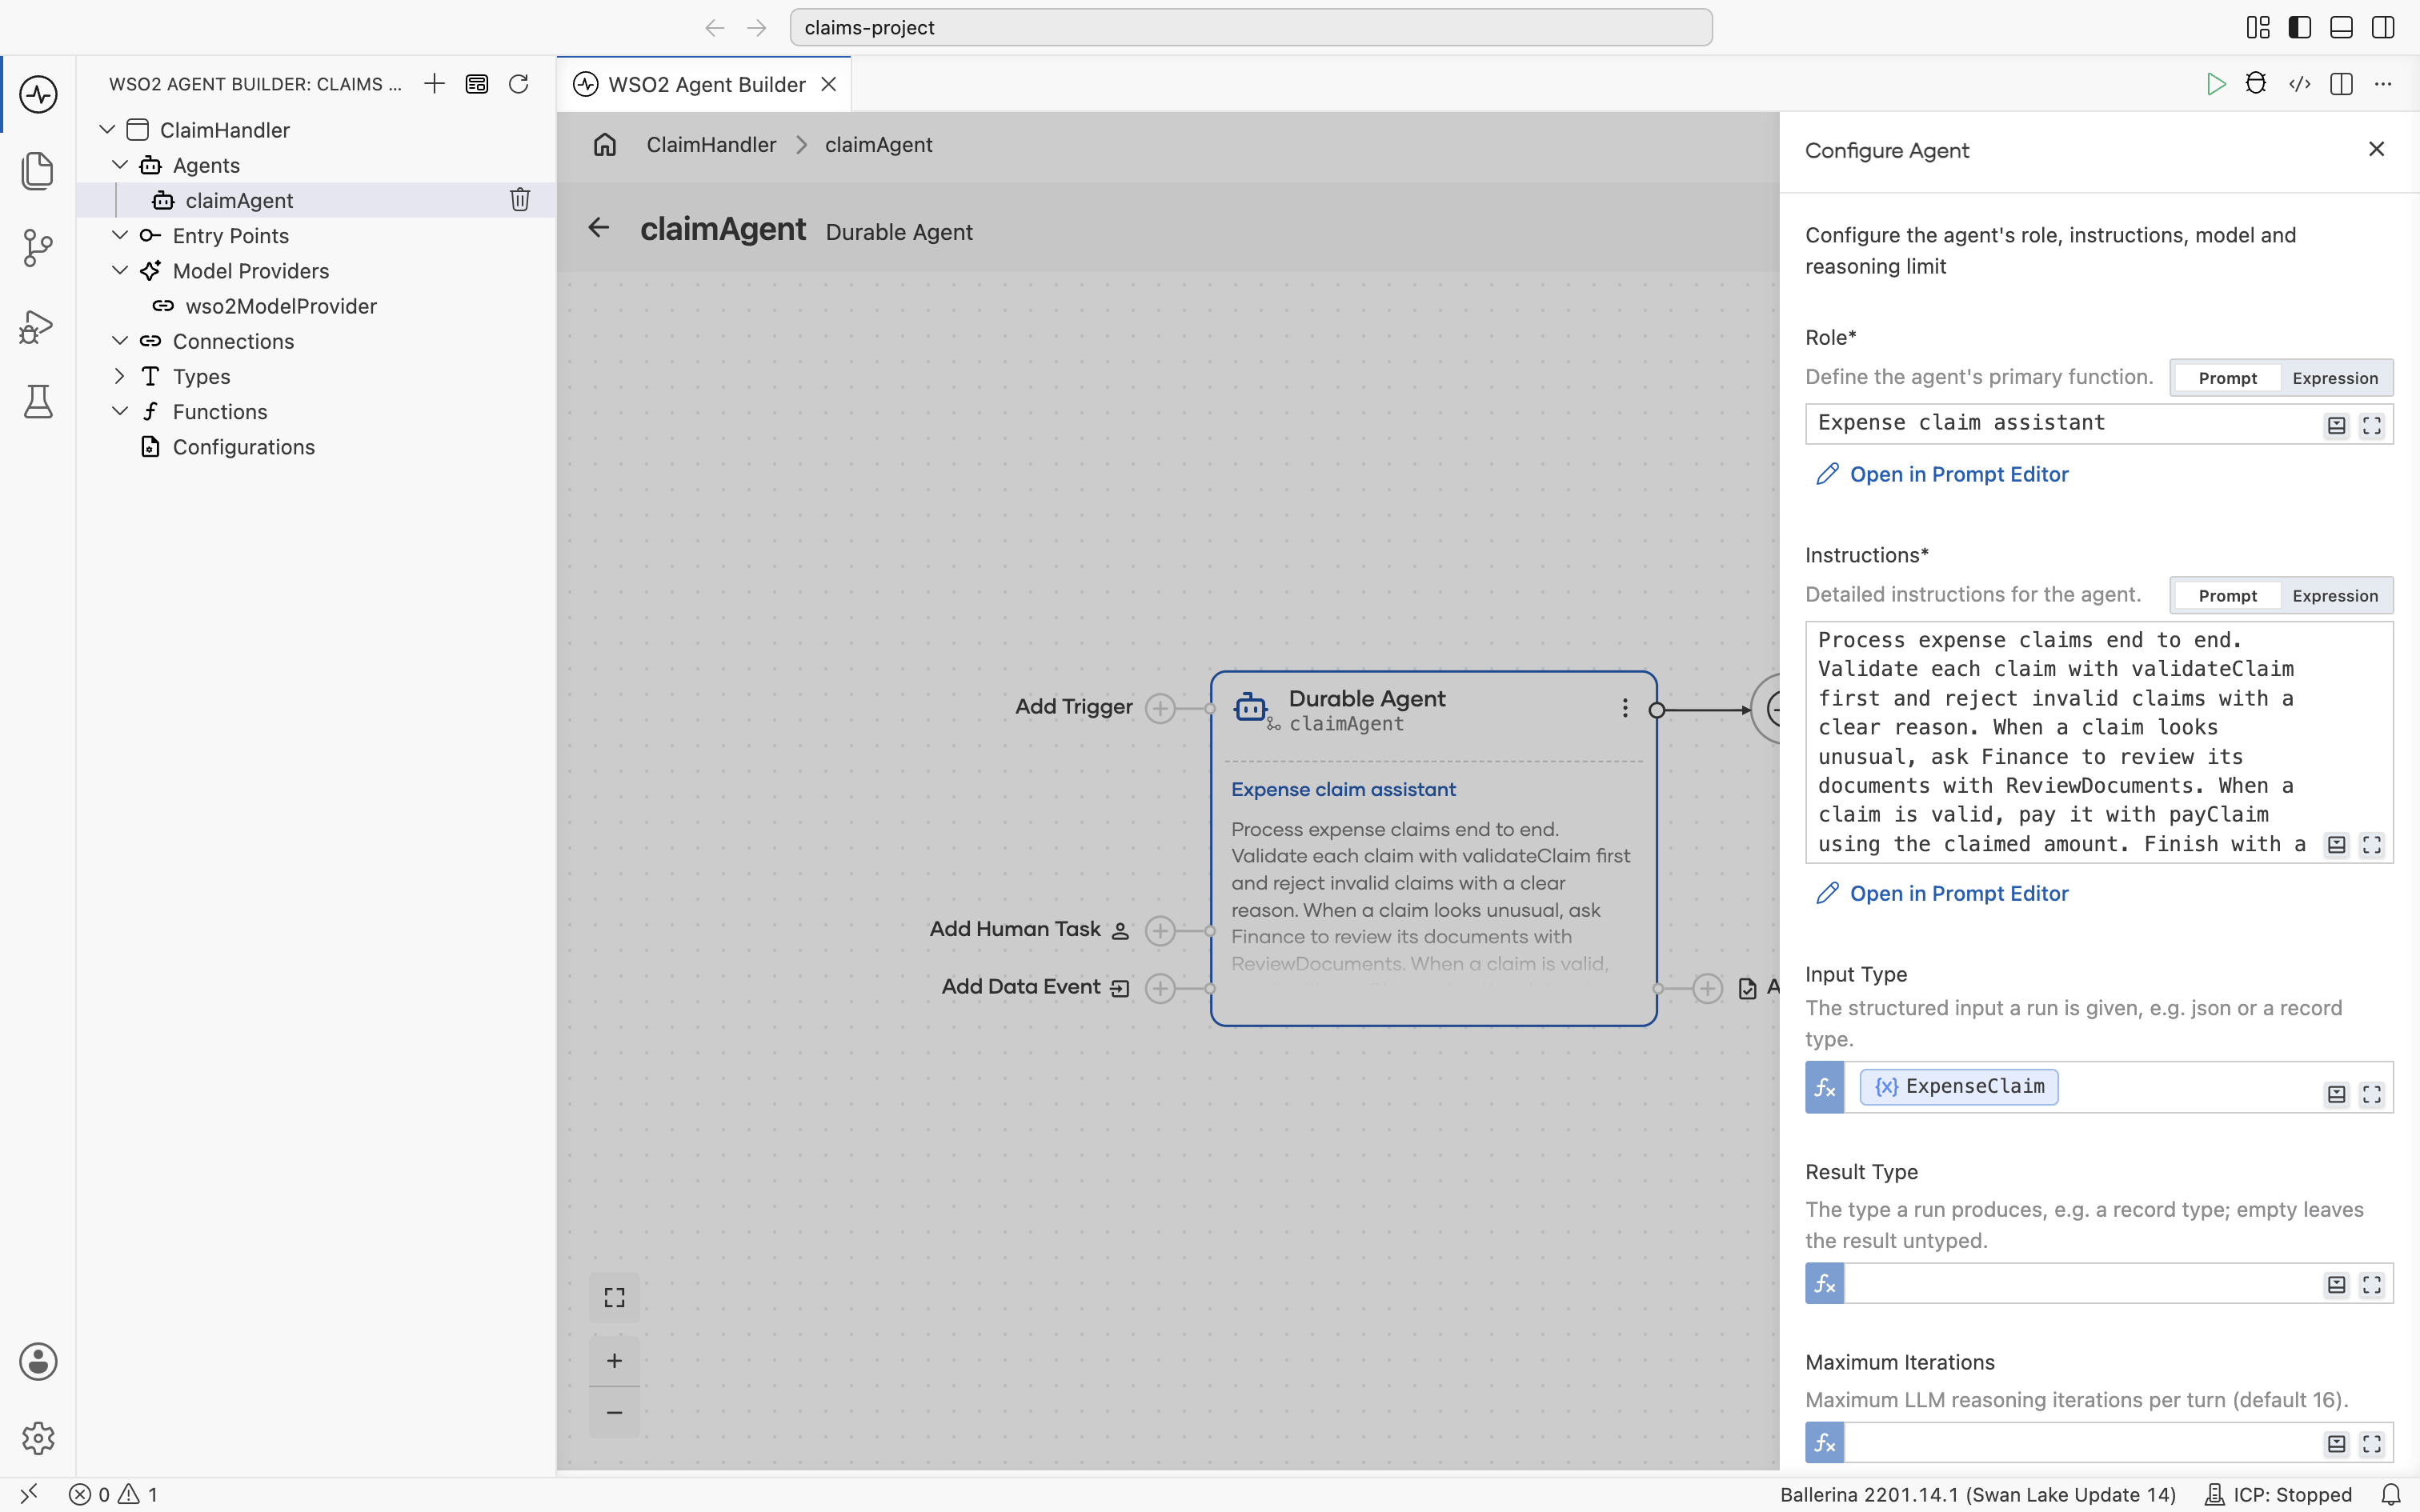
To change the agent after you create it, select the menu (⋮) on the Durable Agent node, then select Edit. The Configure Agent panel holds the agent's role, its instructions, and its run limits. The model is the model provider node connected to the right of the agent.
| Field | Required | Description |
|---|---|---|
| Role | Yes | The agent's primary function. It appears under the agent's name on the node. |
| Instructions | Yes | What the agent should do, in natural language. The model plans from this text, so name the capabilities it should use and the outcome you expect. |
| Input Type | No | The structured input a run is given, for example json or a record type. |
| Result Type | No | The type a run produces, for example a record type. Left empty, the result is untyped. |
| Maximum Iterations | No | The most reasoning iterations the model may take in one turn. Defaults to 16. |
| Event Timeout | No | How long the agent waits for each data event, as a duration such as {days: 1, hours: 2, minutes: 30}. Left empty, it waits indefinitely. |
| Maximum Event Waits | No | How many data events a run may wait for before it fails. Defaults to 50. |
Role and Instructions each take either a prompt or an expression. Keep the field on Prompt to write the text directly, or switch it to Expression to build the value in code, for example from a configurable.
Capabilities
Activities
An activity is a function marked as a workflow activity (@workflow:Activity). The model chooses which activity to call and when, and each call is recorded, so completed work is never lost or repeated across restarts. To create an activity from the agent canvas, see Build a Durable Agent.
You can also set an approval policy on a sensitive activity, so a person approves each call before the agent runs it. The approval requests appear on the Human Tasks page of the Integration Control Plane.
To register an activity with the agent:
-
On the agent canvas, select Add Tool/Activity.
-
Under Current Integration, select the activity you want the agent to have,
payClaimhere. Its register form opens. -
Choose the Approval Policy:
- No Approval, the default, lets the agent call the activity directly.
- Human Approval gates it. Before every call, the agent suspends durably and raises a review that carries the arguments it proposes. A reviewer proceeds with the call, optionally editing the arguments, or rejects it. Set Reviewer Roles to the roles permitted to decide, for example
Finance, or name Reviewers instead. The same section also has Excluded Reviewers, Excluded Roles, Administrator Roles, Administrator Users, and the Title, Description, and Timeout of the review. - From Expression sets the policy in code.
-
Choose the Retry Policy the engine applies when the activity fails:
- No Retry, the default. The agent may still call the activity again.
- Auto Retry retries with backoff.
- Human Review asks a person to fix the failure.
- Retry, then Review retries first, then asks a person.
- From Expression sets the policy in code.
For how each policy behaves, see Retry policies.
-
Select Save.
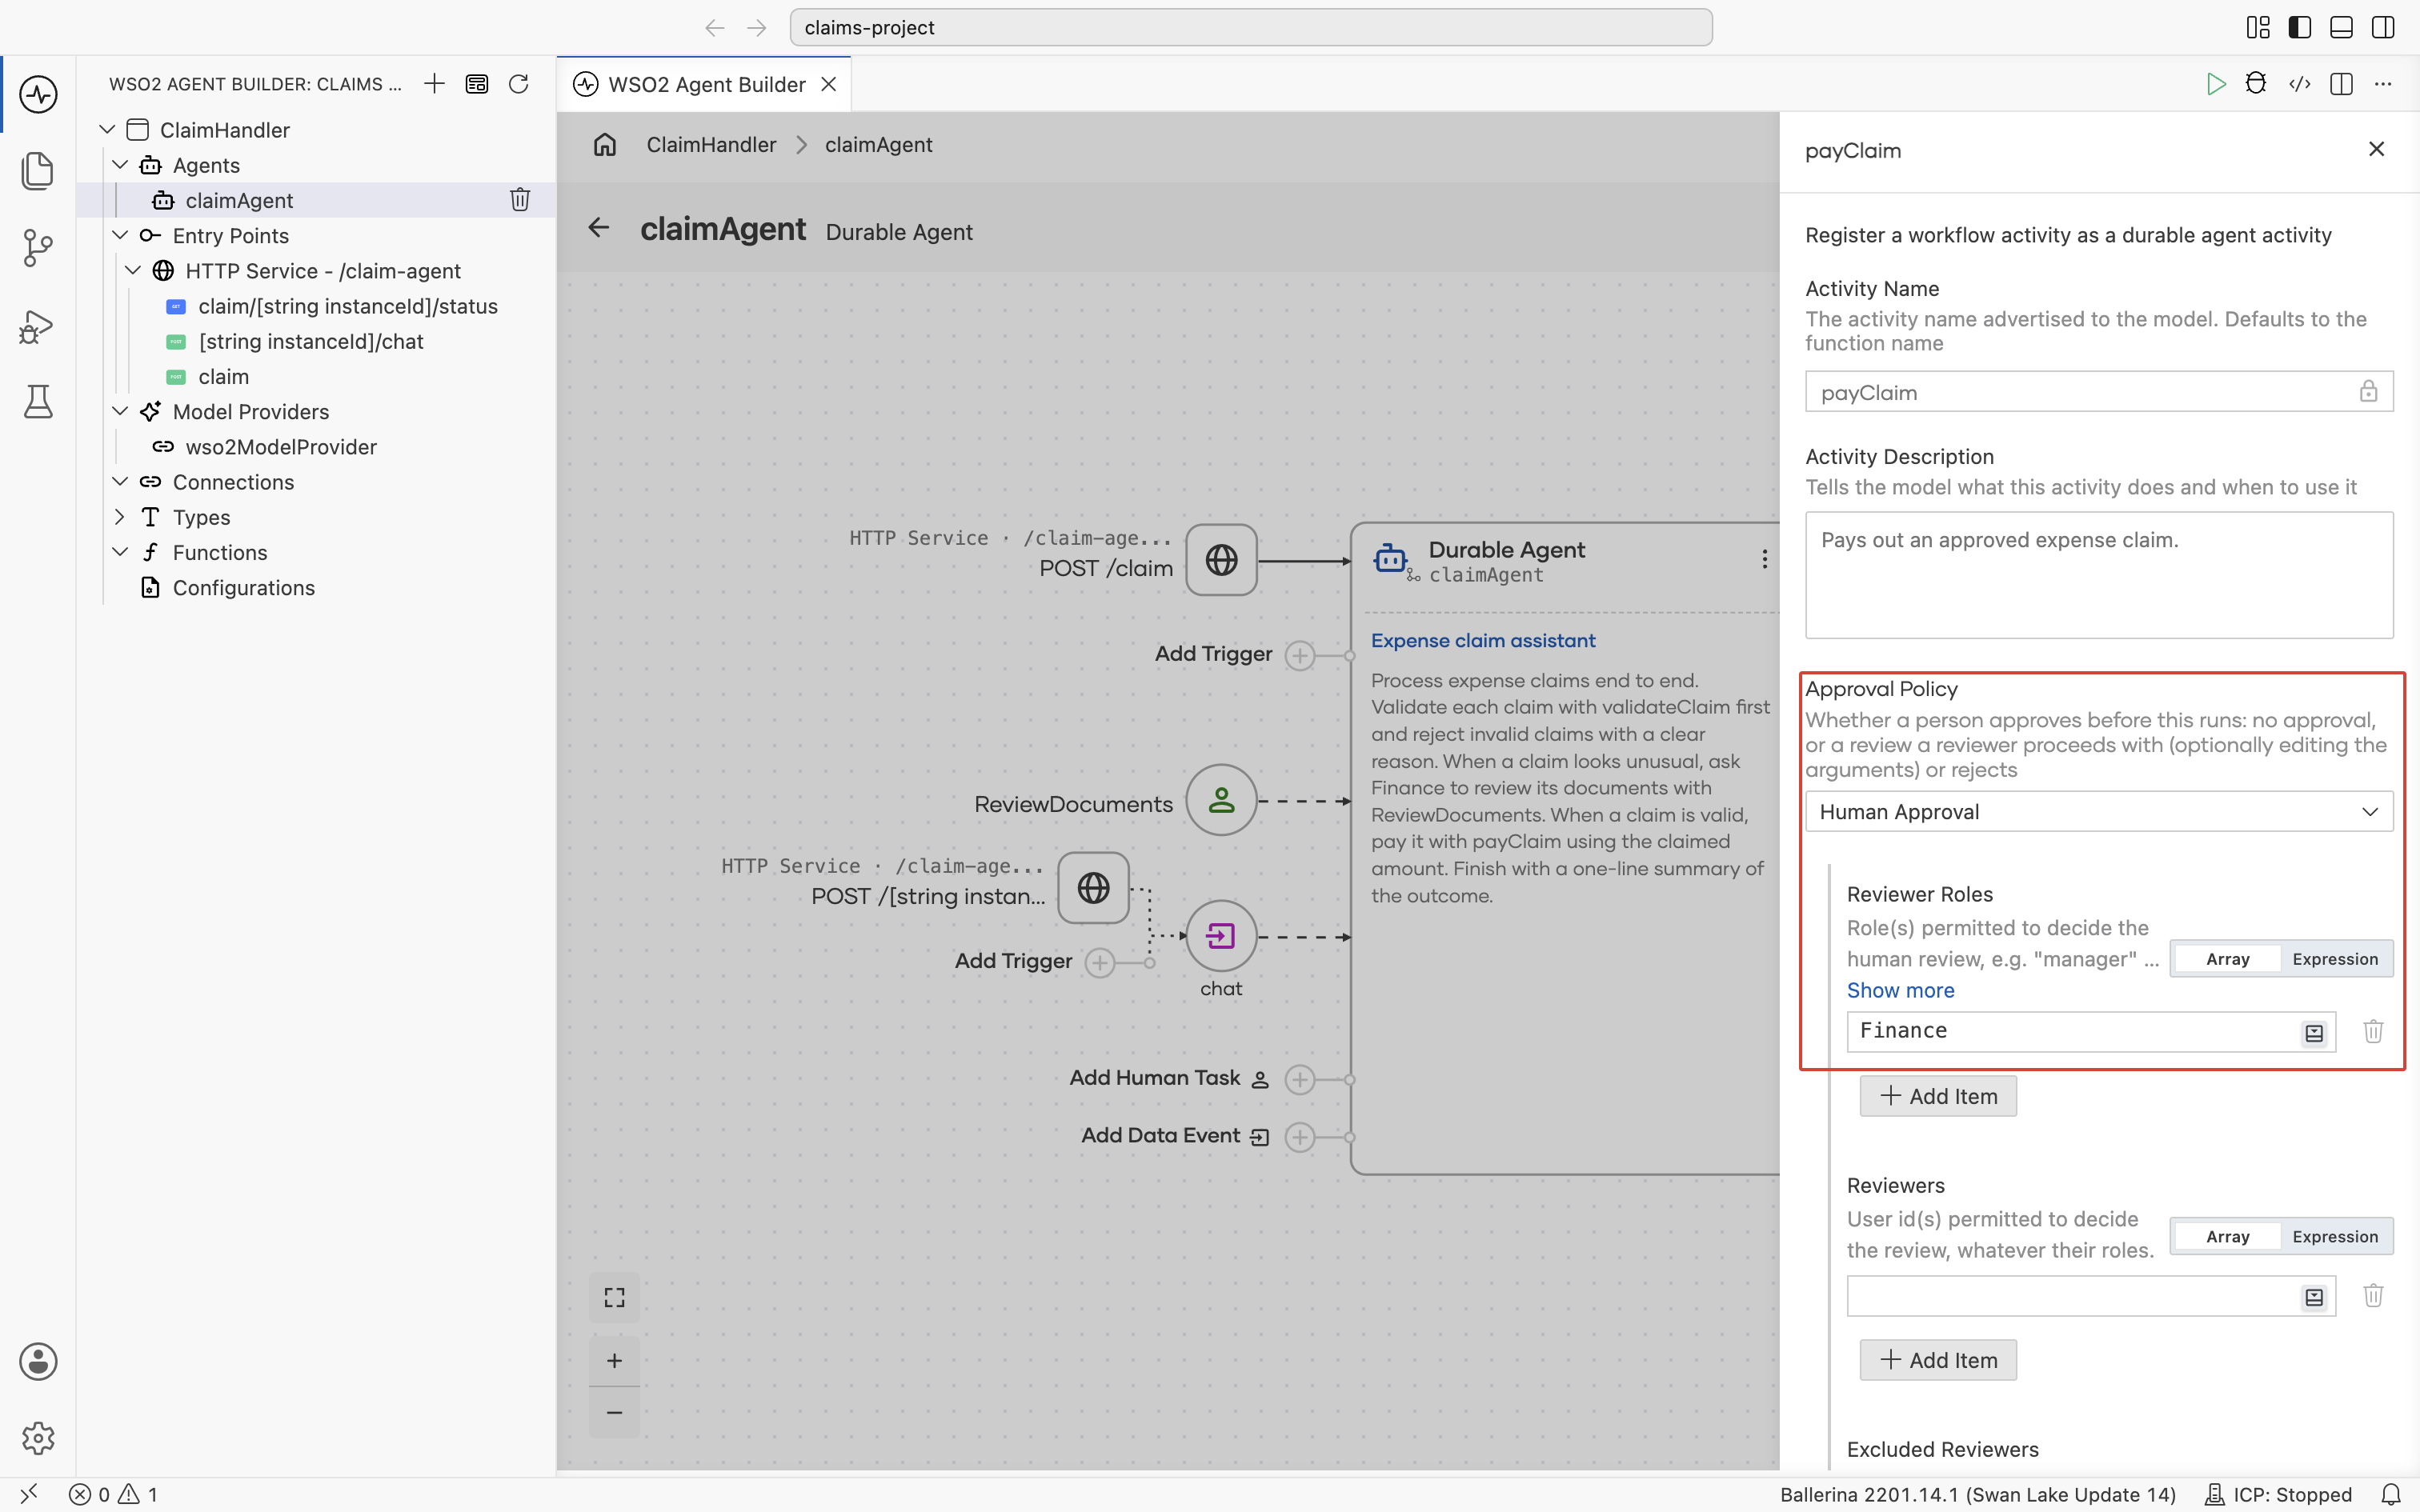
The activity joins the agent node as a capability, drawn with a person badge while it is gated. Registering it is what makes it available to the model, so leave off any activity the agent never needs. To change the registration later, select the activity on the canvas. The form then also shows the Activity Name and the Activity Description.
Unlike a Call Activity step in a hand-wired durable workflow, the register form asks for no activity arguments. The agent maps them at runtime from what it has gathered. The model reads the activity's Activity Description, which defaults to the function's doc comment, so write the description and the parameter names clearly.
Data events
A data event is a named channel that an external sender delivers a typed payload into. The agent suspends durably until the data arrives, just as a hand-wired durable workflow does with Await Data Events.
An event can also declare a response type: the value the agent returns to the sender after it has received and acted on that event. This makes the channel request-response. Leave the response type empty for a one-way channel that only delivers data.
To register a data event:
-
On the agent canvas, select Add Data Event. The Register Data Event form opens.
-
Fill in the form:
Field Required Description Event Name Yes The channel name senders use. A channel named chatcarries the conversation itself.Request Type Yes The type of the payload sent to the agent on this channel. Defaults to string.Response Type No The type of the agent's reply on this channel. Declaring one makes the channel request-response, read back with Get Data Event Result. Left empty, the channel is one-way. Cardinality No How the channel consumes its events. Multiple Events, the default, re-arms after every turn, so events can arrive repeatedly and from multiple senders. Single Event is consumed once per run. -
Select Save.
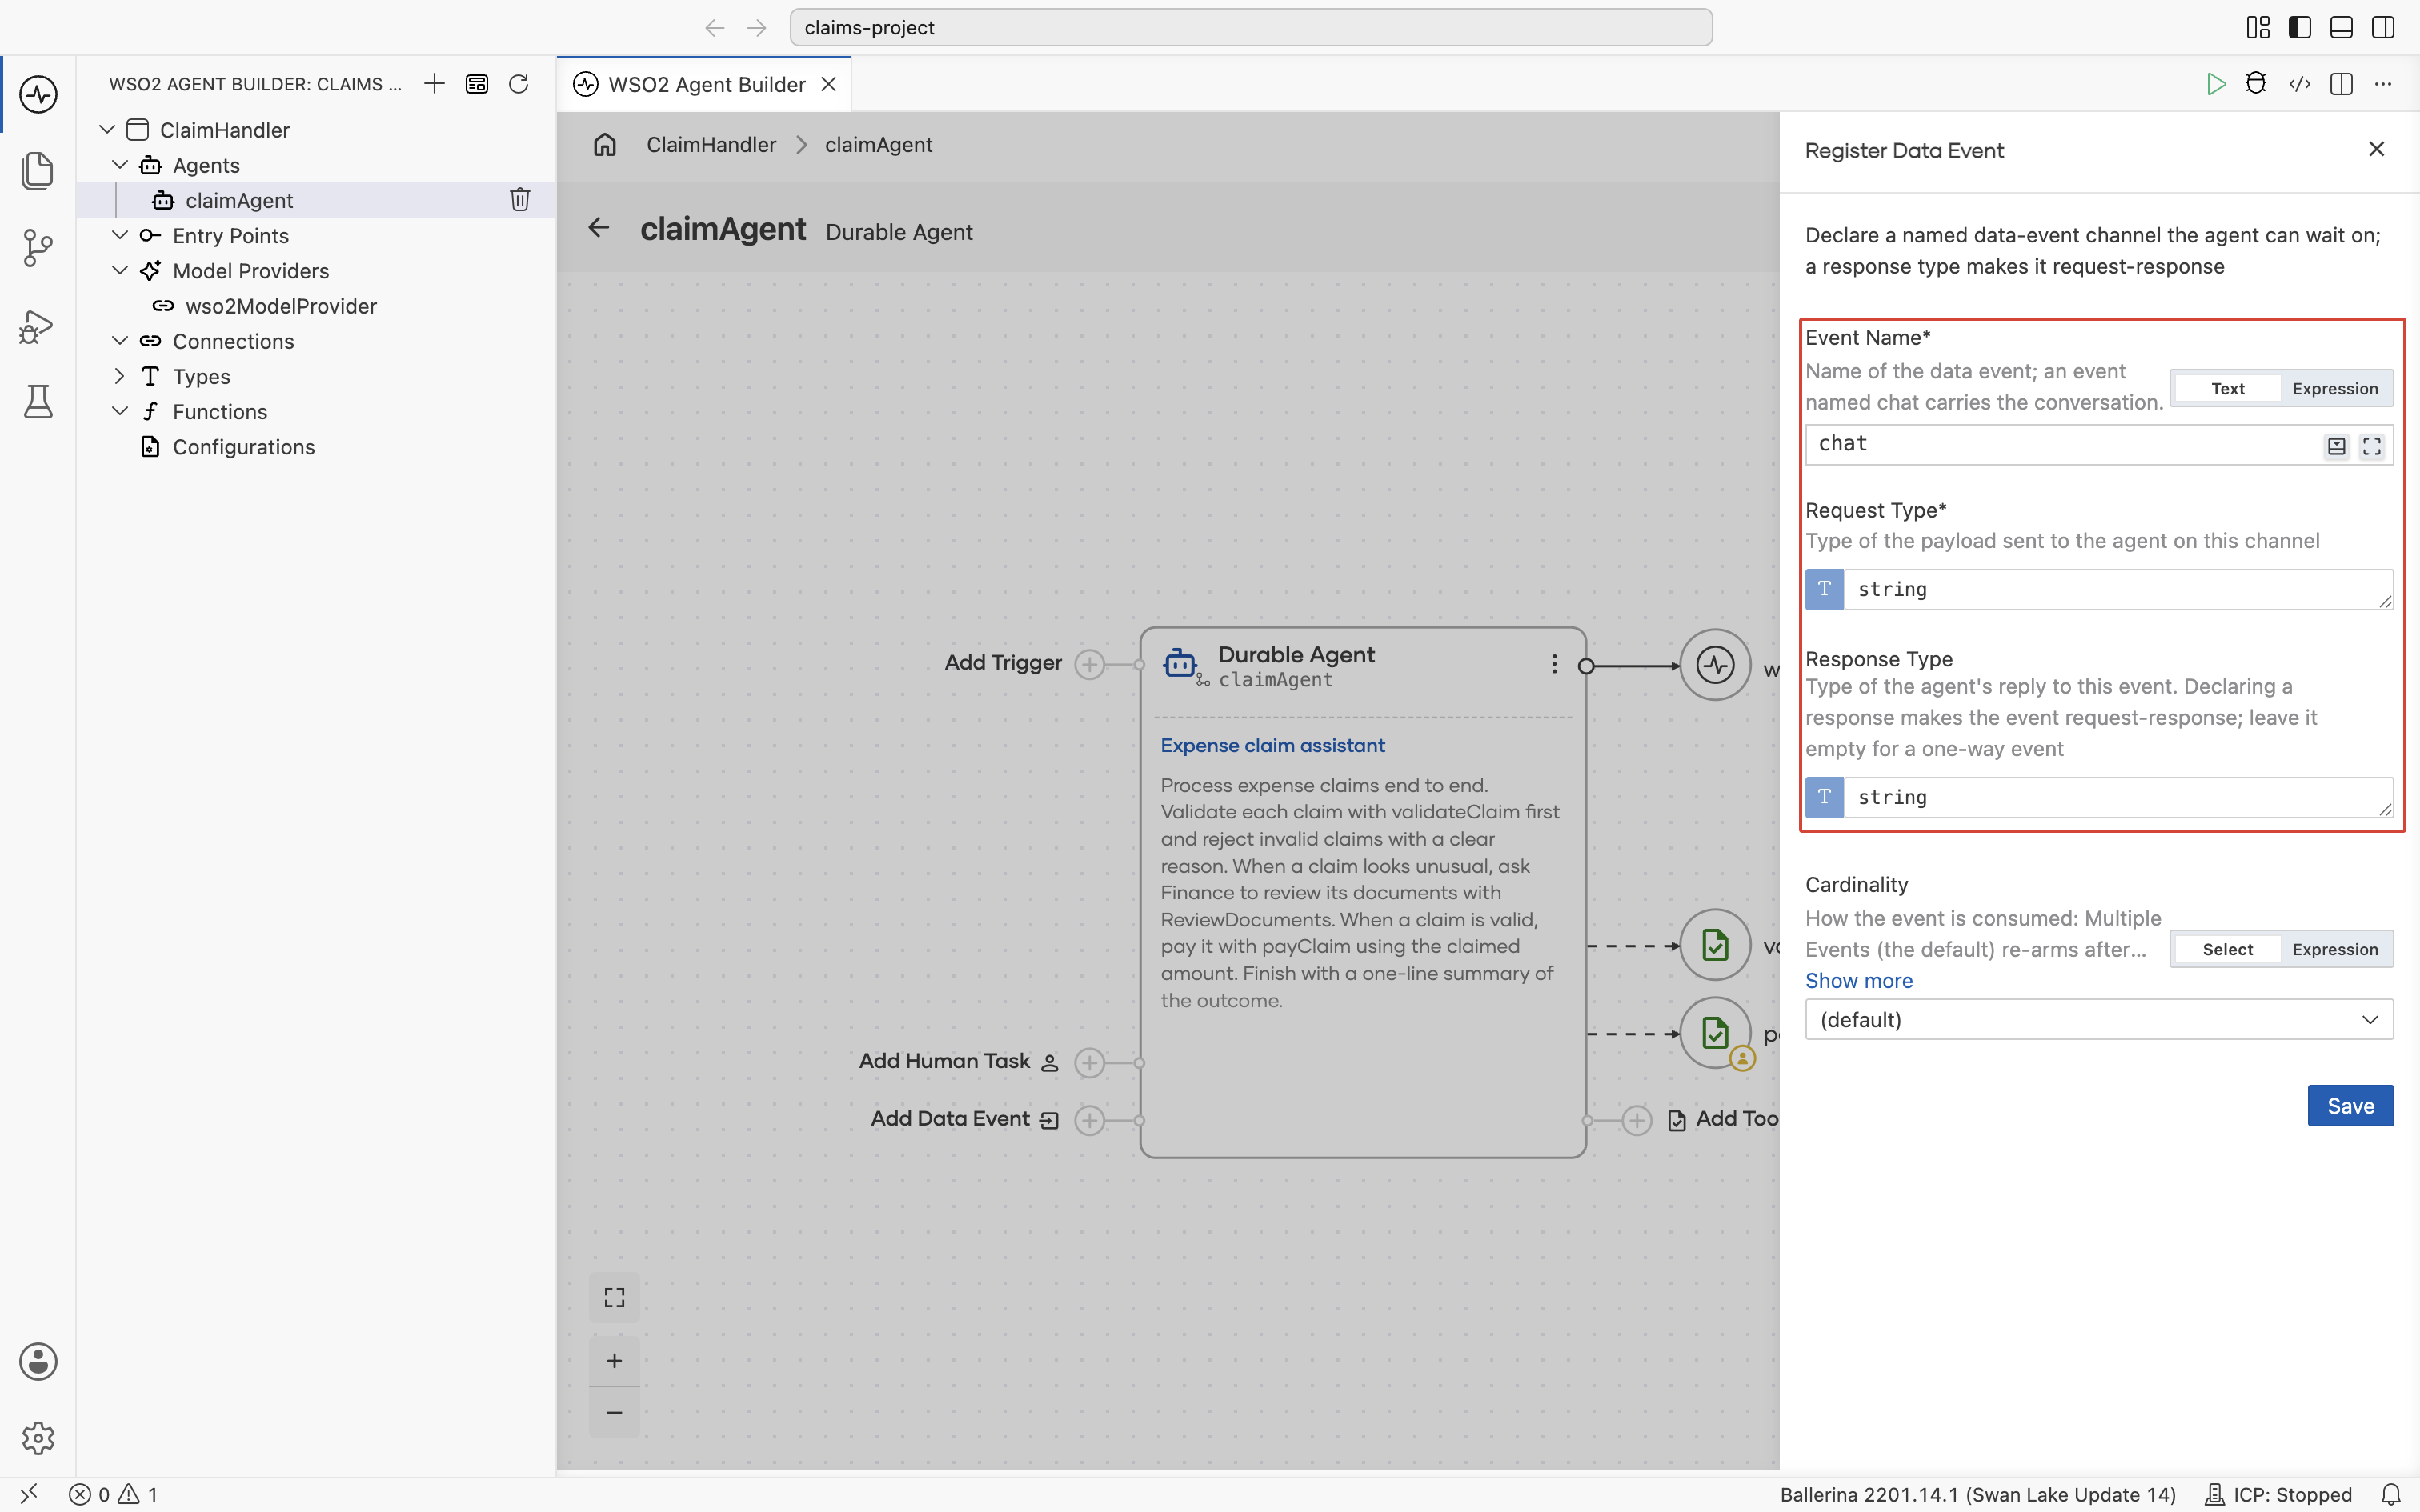
The event joins the canvas to the left of the agent, with its own Add Trigger for exposing the channel to senders. See Send an Agent Data Event.
Human tasks
A human task is an escalation point the agent raises on its own judgment, for example when a claim looks unusual or its documents need a second pair of eyes. The task lands in the Integration Control Plane inbox of the roles you name, and the agent suspends durably until someone submits a decision, exactly like an Await Human Task step in a hand-wired durable workflow.
To register a human task:
-
On the agent canvas, select Add Human Task. The Register HumanTask form opens.
-
Fill in the form:
Field Required Description Task Name Yes Identifies the task type, ReviewDocumentshere. It is also the tool name advertised to the model, so name it for the decision it asks for.User Roles Yes, unless users are named The roles permitted to complete this task, for example Finance. Only users holding a matching role see the task.Title No Short summary shown in the task inbox. Description No Context shown to the person completing the task, for example Check that the claim documents are legitimate.Timeout No Maximum time to wait for completion, as a duration such as {days: 1, hours: 2, minutes: 30}. On expiry, the agent is told the task timed out, so it can react. Leave it empty to wait indefinitely.Completion Type No The type of the result the person submits, which drives the completion form in the task inbox. A plain approve or reject is a boolean, while anything richer is a record. Defaults toanydata, a free-form completion form. See Type the decision.Advanced Configurations holds Users, Excluded Users, Excluded Roles, Administrator Roles, Administrator Users, and Task Input Type, the shape of the input the agent supplies when it creates the task.
-
Select Save.
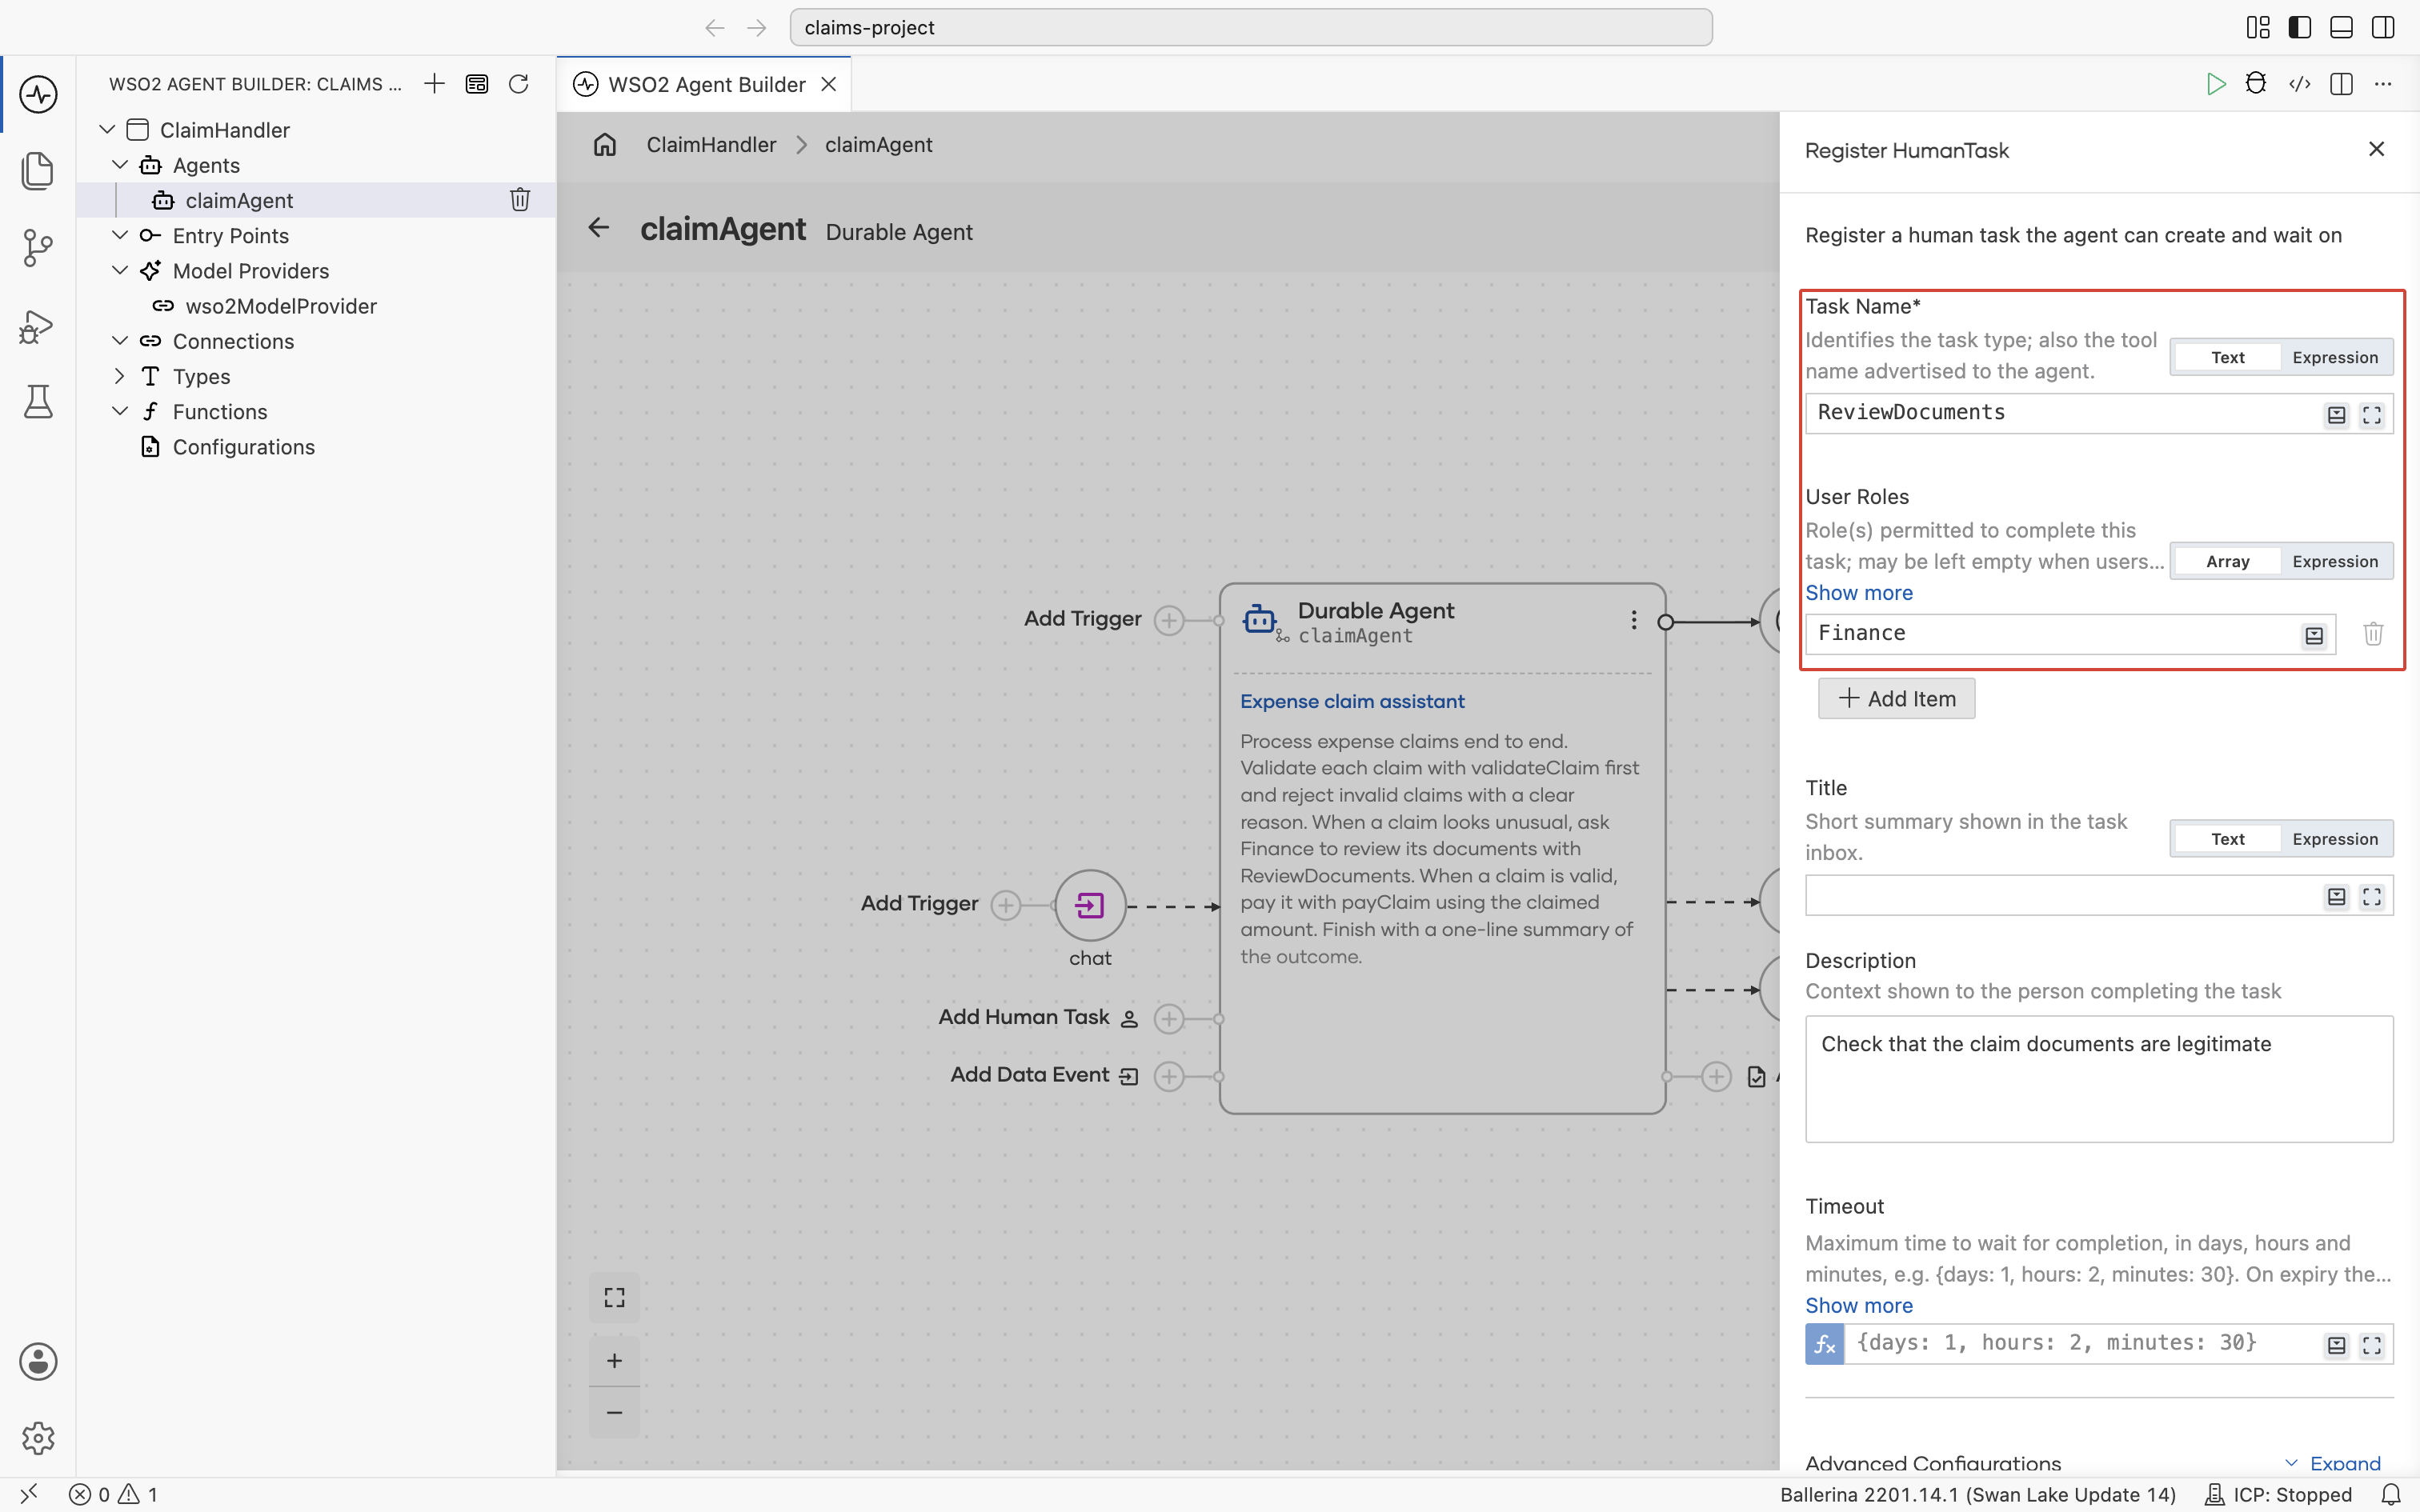
The task joins the canvas to the left of the agent, under its task name. Task Name, User Roles, and Title each take either text or an expression, so any of them can be built in code, for example from a configurable.
Unlike an Await Human Task step, the register form asks for neither a payload nor a result variable. The agent decides when to raise the task and what context to attach, and it reads the decision straight back into its reasoning. That's why Task Name and Description are what steer it.
What's next
- Run a Durable Agent: Start an instance of the agent from a flow.
- Build a Durable Agent: The end-to-end quickstart, from creating the agent to approving a payment.
- Complete human tasks: Approve the agent's gated steps and answer its human tasks in the Integration Control Plane.