Creating an Agent
WSO2 Integrator provides a streamlined way to create AI-powered agents using the AI Chat Agent Wizard. The wizard scaffolds the required integration artifacts in a single step and opens the visual flow editor, allowing you to configure and customize agent behavior directly from the canvas.
The AI Agent node acts as the core execution component. It enables the agent to interact with external systems, invoke tools, maintain conversational context, and coordinate multi-step reasoning workflows.
Launching the wizard
- Open your integration project in WSO2 Integrator.
- Click + Add Artifact from the project view, or right-click the project tree.
- The Artifacts page opens.
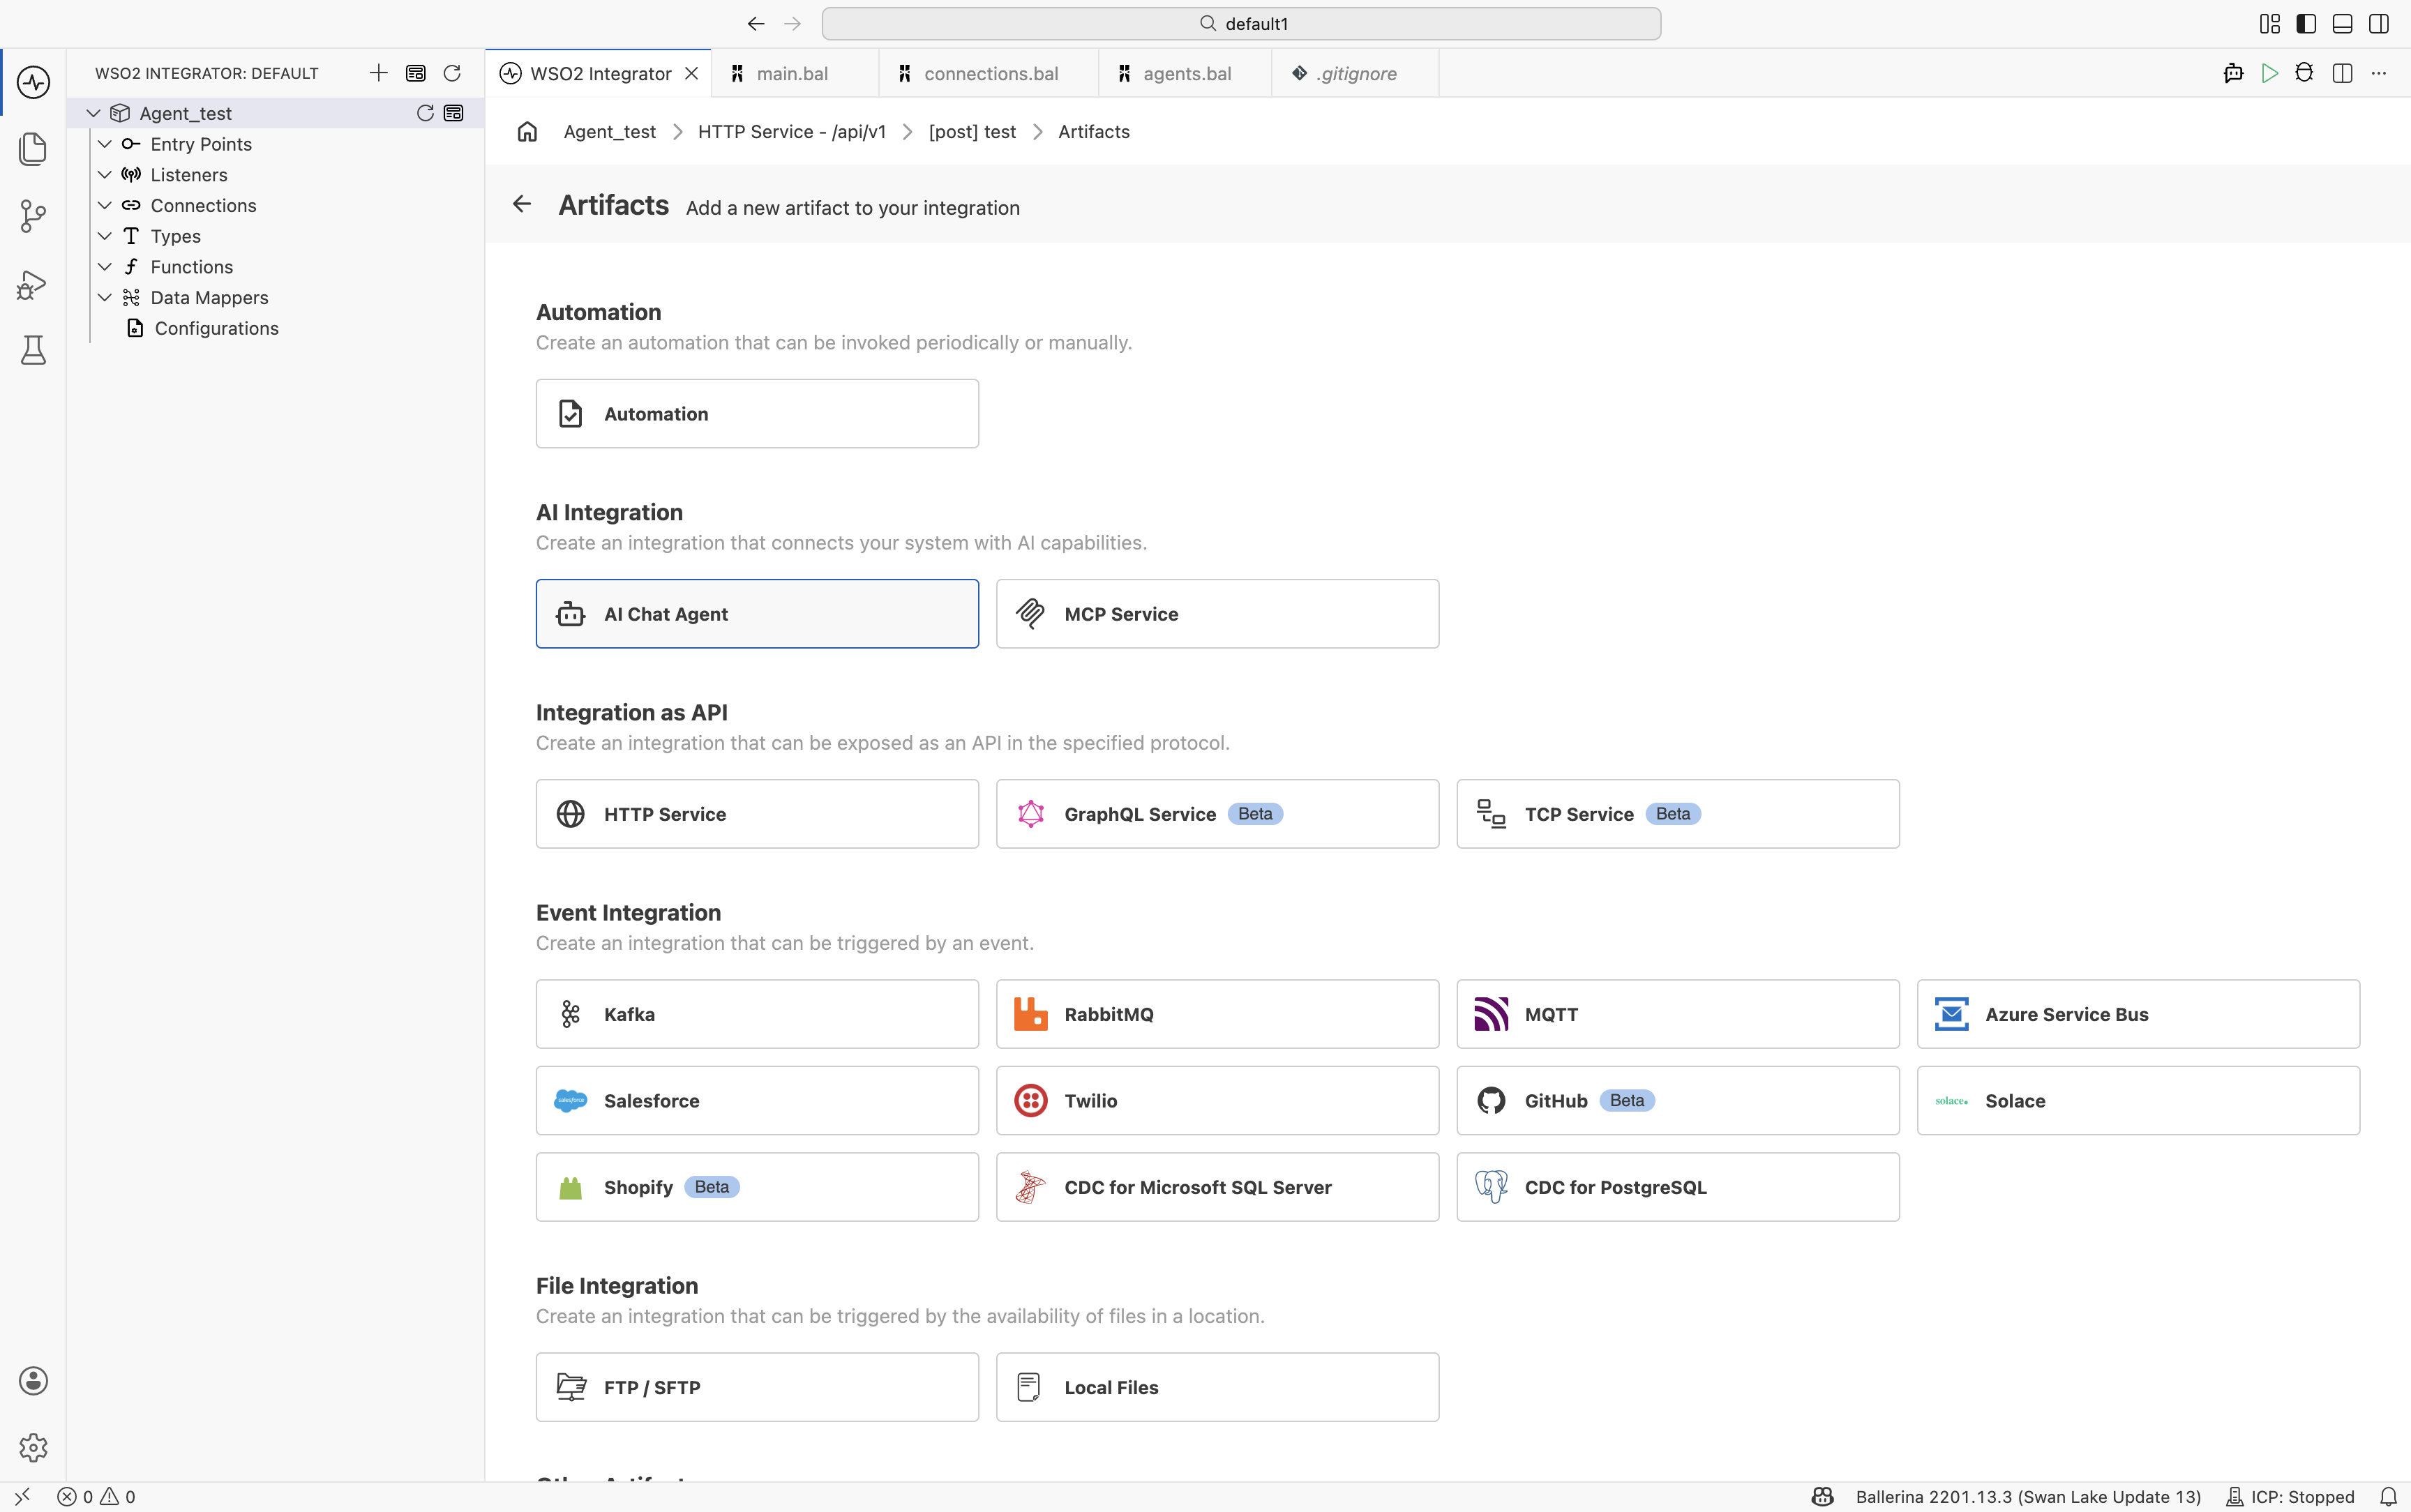
- Under AI Integration, select AI Chat Agent.
Create an agent
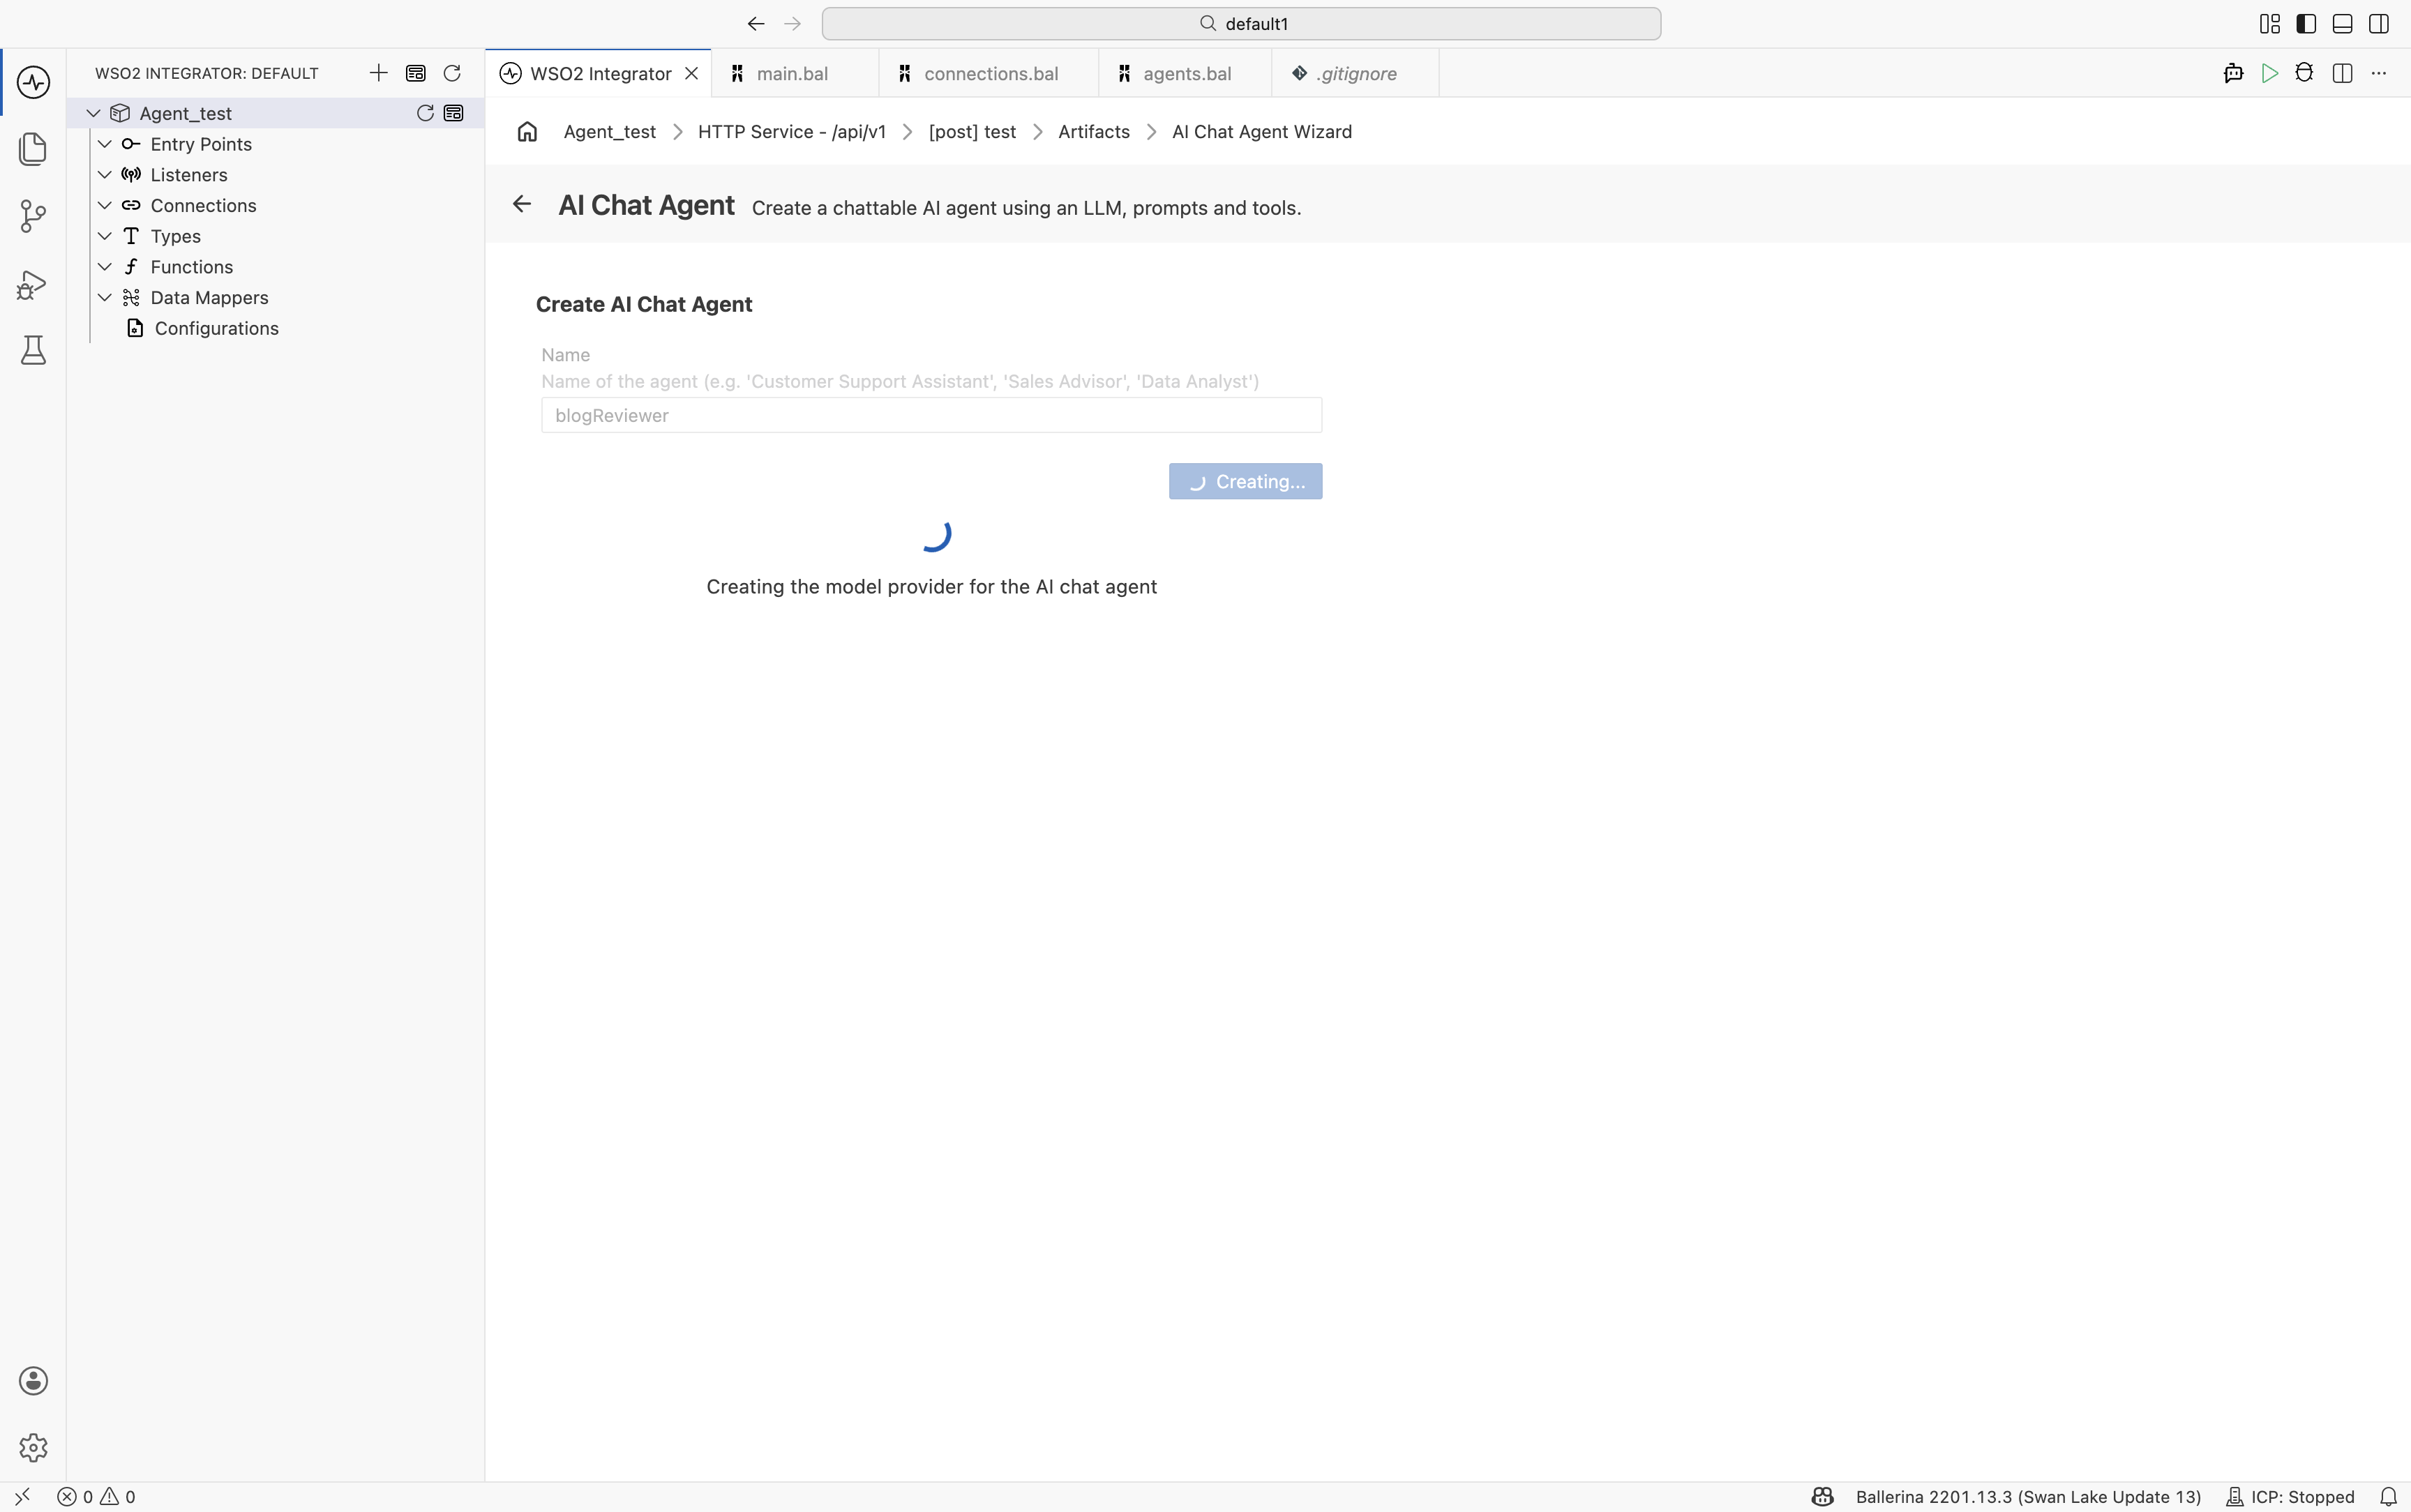
The wizard initially displays a single input field. The Create button remains disabled until a valid agent name is provided.
| Field | Required | Description |
|---|---|---|
| Name | Yes | Identifier for the agent, such as BlogReviewer, SupportAssistant, or SalesAdvisor. The name must start with a letter and contain only letters, numbers, and underscores. |
Enter a name (for example, blogReviewer) to enable the Create button.
After clicking Create, WSO2 Integrator generates the required integration artifacts and displays a progress indicator while configuring the service listener and related components.
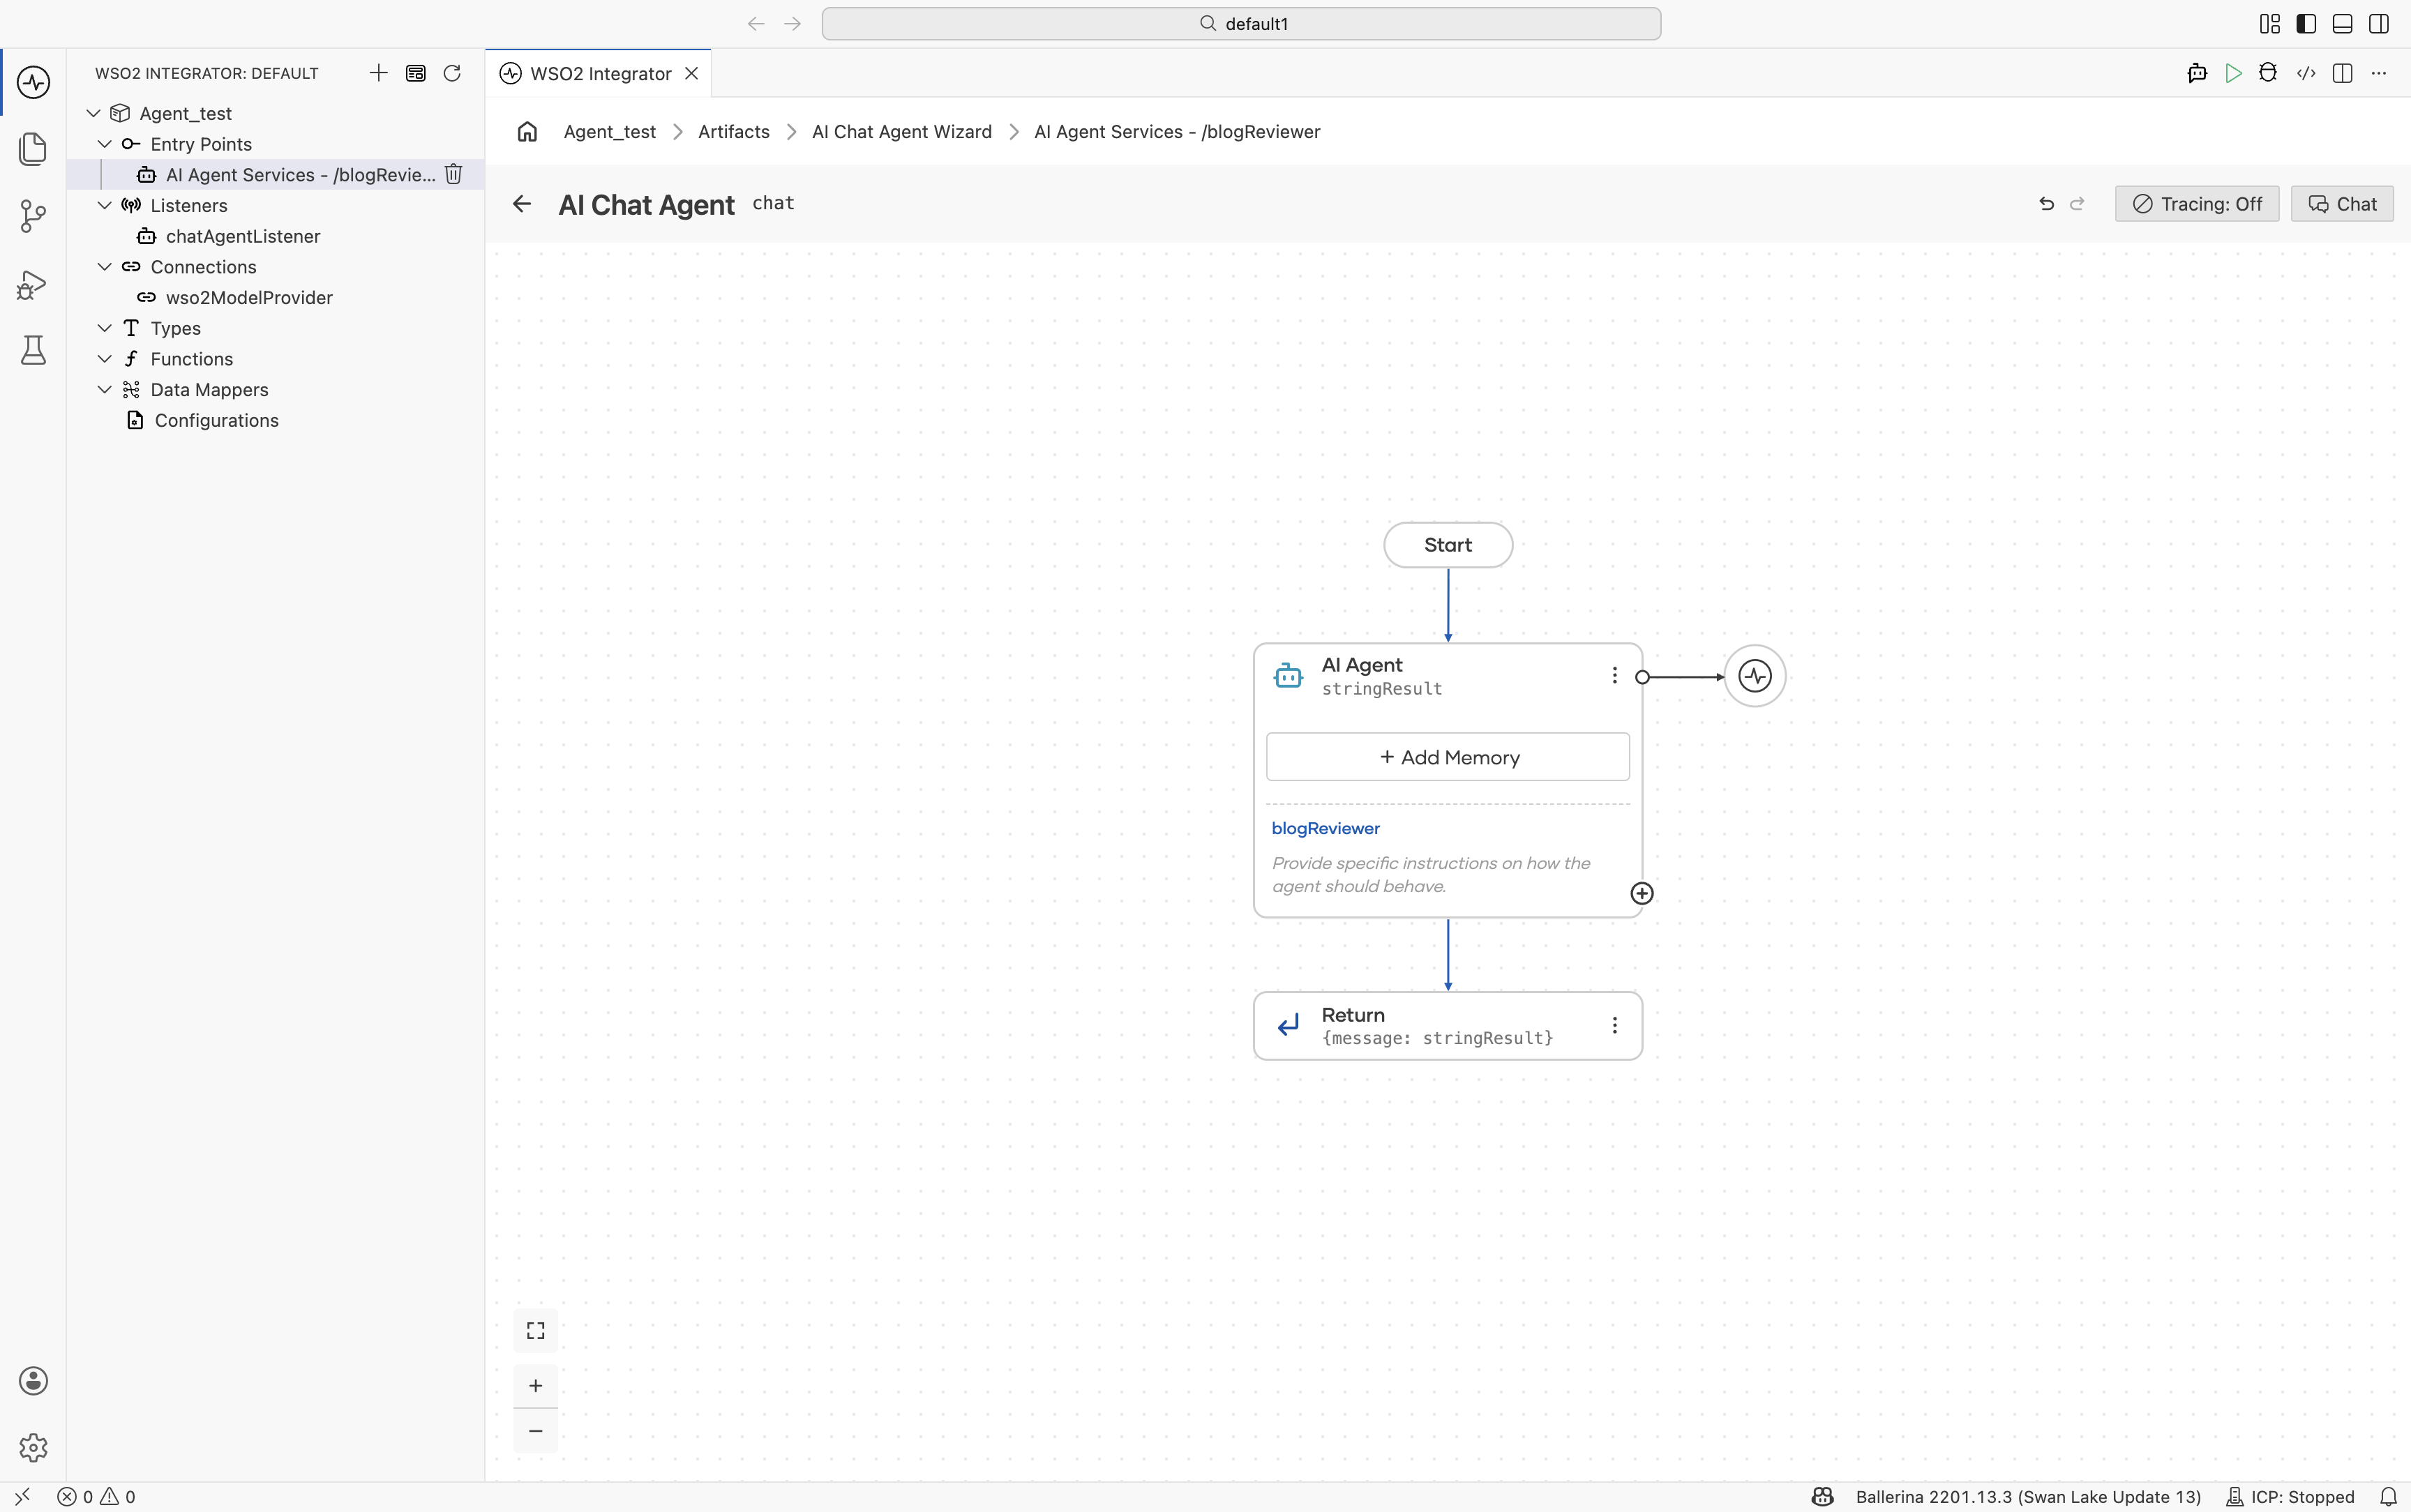
When the wizard completes, WSO2 Integrator automatically generates the following:
- An AI agent service
- A listener endpoint
- An AI Agent node
- An integration flow that handles incoming requests and generates responses
- Visual Designer
- Ballerina Code
The generated Ballerina source for an agent named blogReviewer is similar to the following:
import ballerina/ai;
import ballerina/http;

// Default model provider
final ai:Wso2ModelProvider wso2ModelProvider =
    check ai:getDefaultModelProvider();

// Agent declaration
final ai:Agent blogReviewerAgent = check new (
    systemPrompt = {
        role: string `BlogReviewer`,
        instructions: string ``
    },
    model = wso2ModelProvider,
    tools = []
);

// Listener
listener ai:Listener chatAgentListener =
    new (listenOn = check http:getDefaultListener());

// Service
service /blogReviewer on chatAgentListener {

    resource function post chat(
            @http:Payload ai:ChatReqMessage request)
            returns ai:ChatRespMessage|error {

        string stringResult =
            check blogReviewerAgent.run(
                request.message,
                request.sessionId
            );

        return {message: stringResult};
    }
}
After generation, you are directed to the integration canvas where you can configure the following aspects of the agent:
- Agent behavior, including role, instructions, query, and input/output bindings
- Model provider
- Tool integration
- Memory configuration
- Observability and tracing
Configure agent behavior
Use the AI Agent node configuration panel to customize how the agent behaves and responds to requests.
Click the AI Agent node to open the configuration panel and update the following configurations.
| Section | Description |
|---|---|
| Role | Defines the primary responsibility or persona of the agent. |
| Instructions | Specifies the behavior guidelines and operational instructions that the agent should follow while responding. |
| Advanced Configuration | Provides additional runtime and execution settings for the agent. |
| Result | Defines the output or response generated by the agent after execution. |
Advanced configuration
| Section | Description |
|---|---|
| Maximum Iterations | Defines the maximum number of reasoning or execution cycles the agent can perform before returning a response. |
| Verbose | Enables detailed execution logs and intermediate reasoning information for debugging and observability purposes. |
| Tool Loading Strategy | Determines how tools are discovered and loaded by the agent during execution. |
| Agent Credential | Configures the credentials or authentication details used by the agent when accessing external systems or tools. |
| Context | Defines contextual information that is passed to the agent during execution. |
| Type Descriptor | Specifies the expected structure or type information for agent inputs and outputs. |
What's next
- Tools - Add tools and integrations to the agent.
- Memory - Configure conversational and persistent memory.
- Observability - Monitor traces, logs, and execution details.
- Evaluations - Test and evaluate agent behavior and response quality.