Apply AI Policies to Proxies
After building the AI Gateway with your custom AI policy and starting it, the gateway automatically sends its policy manifest to the control plane on connection. You can then sync your custom AI policy to the organization and apply it to your LLM Providers, App LLM Proxies, and MCP Proxies.
Step 1: View the Gateway Policies
- Go to your AI Workspace.
- From the left navigation, select AI Gateways.
- Select your gateway to open the gateway detail view.
- Click the Policies tab.
Note
Each time the gateway connects to the control plane, it automatically sends an updated manifest with the latest policy details. The Policies tab always reflects the most recent manifest received.
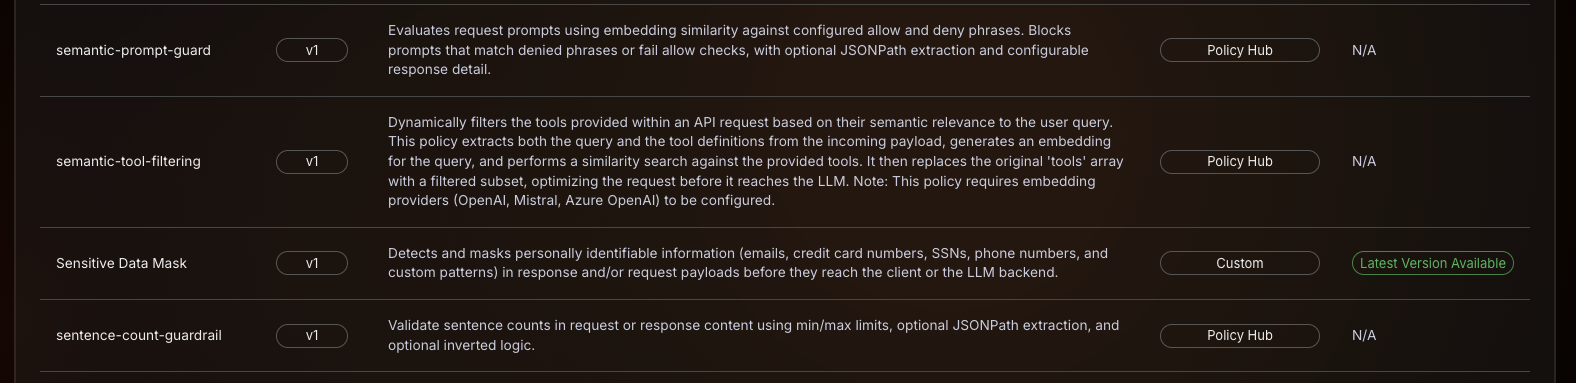
The console fetches the manifest from the gateway and displays a table of all policies installed on it, with the following columns:
| Column | Description |
|---|---|
| Name | Policy name |
| Version | Installed version |
| Description | Policy description |
| Policy Type | Policy Hub for policy hub managed policies, Custom for your own AI policies |
| Sync Status | Whether the policy is synced to the organization — shows a Sync button if not yet synced or a newer version is available, or Latest Version Available/N/A if already up to date |

Step 2: Sync the Custom AI Policy to the Organization
Custom AI policies must be synced to the organization before they can be applied to LLM Providers, App LLM Proxies, or MCP Proxies.
In the Sync Status column, each custom AI policy shows one of the following:
- Sync button — the policy has not been synced yet, or a newer version is available. Click Sync to register it in the organization.
- Latest Version Available — the policy is already synced and up to date. No action needed.
Note
Policy Hub policies (managed by WSO2) show N/A in the Sync Status column and cannot be synced manually.
Once synced, the custom AI policy is available organization-wide and can be applied to LLM Providers, App LLM Proxies, and MCP Proxies.
Note
- Each major version of a custom AI policy is maintained as a separate policy entry with the same name.
- A minor version update re-enables the Sync button, allowing the newer version to be synced to the organization.
- Patch version updates are not supported.
- Version downgrades are not allowed.
Step 3: View Organization-Level Custom Policies
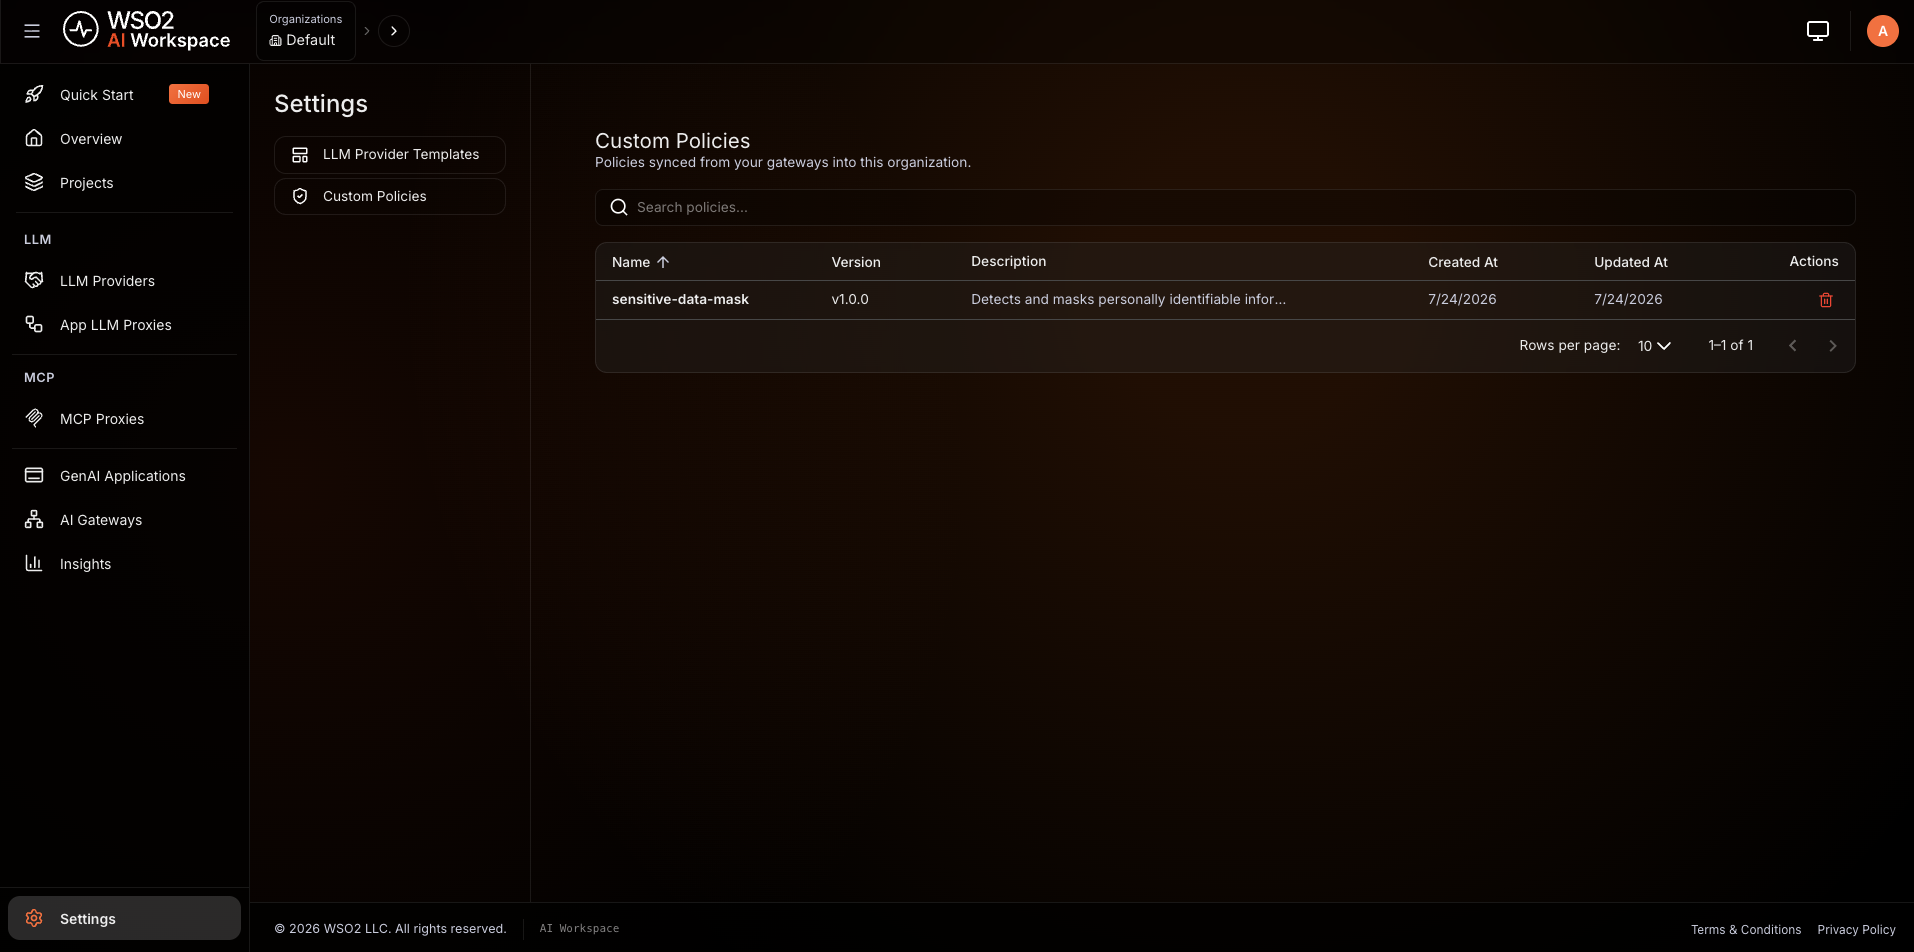
After syncing, the custom AI policy appears in Settings > Custom Policies. To view it:
- From the left navigation, select Settings.
- Select Custom Policies.
This section lists all custom AI policies available in the organization with the following details:
| Column | Description |
|---|---|
| Name | Policy name |
| Version | Synced version |
| Description | Policy description |
| Created At | Date and time the policy was first synced |
| Updated At | Date and time the policy was last updated |
Note
To delete a synced custom AI policy, none of the LLM Providers, App LLM Proxies, or MCP Proxies in the organization should be using it.
Step 4: Apply the Custom AI Policy
Once synced, a custom AI policy is attached the same way for LLM Providers, App LLM Proxies, and MCP Proxies — it appears alongside the built-in guardrails and policies wherever policies are configured for that resource:
- Navigate to AI Workspace and open the LLM Providers, App LLM Proxies, or MCP Proxies list, then click on the resource you want to configure.
- Go to the Guardrails & Policies tab (MCP Proxies use a Policies tab).
- Click + Add Guardrail / + Add Policy in the section for the scope you want:
- Global Guardrails/Global Policies — applies to every endpoint or capability of the resource.
- A specific endpoint or capability card (expand it first) — applies only there.
- Select your custom AI policy from the sidebar — it's listed alongside the built-in policies — and configure its parameters.
- Click Add/Submit to attach it, then deploy or redeploy the resource to the gateway to apply the changes.

For more detail on the global vs. per-resource scope referenced above, see Policy Scope: Global vs. Per Resource.
What's Next?
- LLM Providers Overview: Learn about configuring LLM Providers
- App LLM Proxies Overview: Learn about configuring App LLM Proxies for Gen AI applications and agents
- MCP Proxies Overview: Learn about configuring MCP Proxies
- Guardrails Overview: Explore the built-in guardrails available alongside your custom AI policies