[Article] Building Your Integration Scenario with the WSO2 Integration Platform

- Keerthika Mahendralingam
- Senior Software Engineer - WSO2
Introduction
Most enterprises consist of various systems that provide services that the company relies upon to conduct their day-to-day business. These systems may use different standards, which are implemented for different platforms, written in different languages, following different protocols to communicate with other systems or built by different vendors. They will most probably have to connect these applications with each other so that they can work together in a synchronous manner. At this point, integrating the systems becomes a key concern of the enterprise.
Integration solution with WSO2 ESB and its connectors
In order to integrate these systems, you can write a separate connection for each pair of applications and perform point-to-point integrations. This makes the applications tightly coupled to each other. If there are only two or three applications used in the enterprise, this model can work quite well and is easy to implement. But in reality, there will be many applications that need to be connected in the enterprises. In some cases, you may need to connect with applications that are outside the company such as customer, supplier or partner applications and even some publicly available applications. As the number of applications increases, this model becomes an unmanageable solution which is hard to maintain, scale and troubleshoot. To avoid these complexities, WSO2 ESB and its connectors provide a way to integrate the applications in service-oriented architecture (SOA) model.
WSO2 ESB is lightweight and comprehensive while having high performance. It acts as an integration bus between these applications. It enables interoperability among heterogeneous environments using a service-oriented model and enables integration between applications regardless of the underlying technologies, platforms, and languages they are built on and handles the mediation of the messages between these applications.
To fulfill the enterprise’s integration requirements, WSO2 ESB offers numerous connectors that provide a way of connecting with third party systems that can be on-premise (e.g. SAP, databases, legacy systems) or in the cloud (e.g. Salesforce, Google docs, JIRA). With its dynamic tooling support, connectors provide a fast, easy, reliable, and affordable solution that meets an enterprise’s integration requirements. Connectors also eliminate the need to learn complex APIs, thereby allowing enterprises to focus on their core businesses functionality. It can help perform cloud-to-cloud or cloud-to-on-premise integrations.
Introduction to the data mapper
Data transformation is the process of converting data from one format to another, usually from the format of a source system into the required format of a new destination system. In heterogeneous application integration, each application has its own data format. When you integrate these applications across the enterprise, data transformation is necessary to ensure data from one application is understood by the other application. For example, if application A returns data in JSON format and application B understand the data which is in XML format, then you need to transform the data in application A from JSON to XML format so that the data from application A can be understood by application B.
WSO2 ESB provides a data mapper mediator which can be integrated into a mediation sequence to perform the data transformation. This eliminates the technical complexity of data transformation and helps you perform the data mapping and transformation easily by visually dragging and dropping operations and mapping elements by linking them.
Use case
Company ABC uses PagerDuty as their incident management system and JIRA as their issue tracking system. When there is a Pagerduty incident created, a related JIRA ticket needs to be created manually so that their development team gets on that incident as shown in figure 1.

Figure 1
This is a time-consuming process that needs someone with the domain knowledge and technical knowledge to integrate these systems. But with WSO2 ESB, its connectors and ESB tooling you can easily automate the process. It provides an easy way of configuring the integration solution through graphical representations.
Implementation
Prerequisites
- You need to install the WSO2 Developer Studio ESB Tool 5.0.0 to use the Data Mapper mediator. For instructions on installing this WSO2 ESB Tooling Plugin, see Installing WSO2 ESB Tooling.
- Create a new project in JIRA to create the JIRA tickets within it.
Steps
- Go to the developer studio dashboard and create a new ESB configuration project to hold all the ESB related artifacts such as proxy services, local entry, and Synapse configuration.
- Right click the created project and create a new custom proxy service.
- In order to work with connectors in ESB tooling, you first you need to import the required connectors into the workspace by adding the connector from WSO2 Store as shown in figure 2. As an alternative way, you can import already downloaded connectors from the local directory by selecting the Connector location option and browse to the connector file from the file system.

Figure 2
- Once you import the connector into the workspace its operations will be available in the tool palette, allowing you to drag its operations into your sequences and proxy services.
- Then you need to invoke the respective API to create the Pagerduty incident. For this, navigate to the Pagerduty connector operations and select the createIncident operation and drag and drop it to the working palette.
- After that, you need to configure the Pagerduty specific generic initialization configuration as shown in figure 3.

Figure 3
- Since it takes some time to set up the new incident in Pagerduty, you need to add a thread sleep before invoking the listIncidents method to retrieve the created incident details. For this, add a script mediator into the sequence and select the script type as “INLINE” and add the following script body in the properties palette to make the thread sleep for 5 seconds.
java.lang.Thread.sleep(5000);
Figure 4
- Add the data mapper mediator into the sequence to map the incident key fetched from createIncident response to the incident key for the listIncidents method and double click the mediator to configure the data mapping mediator. Give a name for the configuration and create a registry project to save the configurations in the prompted dialog box.

Figure 5
- The editor shown in figure 6 will appear with input and output boxes loaded on both sides. We can load schemas for each of these to do the mapping. Mapping can be either done using operators or by creating direct links.
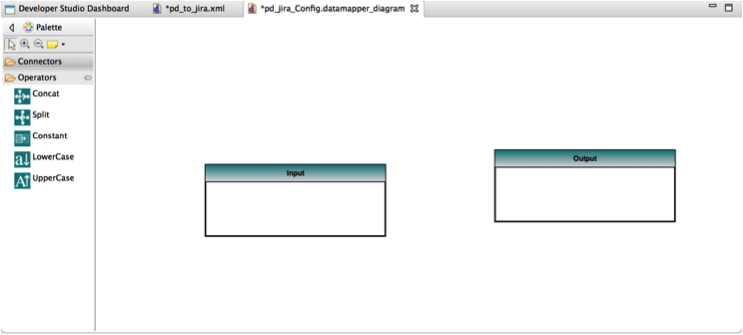
Figure 6
- You need to provide the input and output message formats to begin the mapping. Therefore, right click on the input box and select the Load Input command. There are several options like XML, JSON, CSV, XSD, JSONSCHEMA and CONNECTOR to load the input-output message formats to the data mapper. If you have the sample JSON response message from createIncident operation, select the resource type as JSON and load the message from the file system.
- To configure the output schema select the CONNECTOR type as the resource type and it will list down available connectors and then select the listIncidents operation from Pagerduty connector.
- After loading the input and output messages you can map the data using different operations and/or direct mappings as shown in figure 7.
- After finishing the data mapping configuration click on the data mapper mediator in the sequence and set the input type and output type as application/json in the properties window.
- Now add the listIncidents operation from the Pageduty connector in the sequence. Right-click the connector operation and select the Load Parameters From Schema option to fill in the default values for connector operation as per the input schema of the listIncidents operation.
- Configure the data mapper mediator to transform the fetched incident details from Pagerduty into the format that is required by the createIssue operation of the JIRA connector.
- Now add the createIssue operation from the JIRA connector into the sequence to create the JIRA issue for the particular Pagerduty incident and configure the init configuration for JIRA connector. Right-click the connector operation and select Load Parameters From Schema option to fill in the default values for connector operation as per the input schema of the createIssue operation.

Figure 7

Figure 8
Figure 9 shows the complete configuration diagram from the ESB tooling.

Figure 9
Once you create the respective logic via ESB tooling, the source view can be seen as shown in [source -1].
<?xml version="1.0" encoding="UTF-8"?>
<proxy name="createIssue" startOnLoad="true" transports="http https" xmlns="https://ws.apache.org/ns/synapse">
    <target>
        <inSequence>
            <pagerduty.createIncident configKey="pdConfig">
                <serviceKey>08e3c7cbe6894a19ade5b5261d322157</serviceKey>
                <eventType>trigger</eventType>
                <description>Test issue1</description>
            </pagerduty.createIncident>
            <script description="" language="js"><![CDATA[java.lang.Thread.sleep(5000);]]></script>
            <datamapper config="gov:datamapper/incidentConfig.dmc" inputSchema="gov:datamapper/incidentConfig_inputSchema.json" inputType="JSON" outputSchema="gov:datamapper/incidentConfig_outputSchema.json" outputType="JSON"/>
            <pagerduty.listIncidents configKey="pdConfig">
                <since>{json-eval($.since)}</since>
                <until>{json-eval($.until)}</until>
                <dateRange>{json-eval($.dateRange)}</dateRange>
                <fields>{json-eval($.fields)}</fields>
                <status>{json-eval($.status)}</status>
                <incidentKey>{json-eval($.incidentKey)}</incidentKey>
                <service>{json-eval($.service)}</service>
                <assignedToUser>{json-eval($.assignedToUser)}</assignedToUser>
                <timeZone>{json-eval($.timeZone)}</timeZone>
                <sortBy>{json-eval($.sortBy)}</sortBy>
                <limit>{json-eval($.limit)}</limit>
                <offset>{json-eval($.offset)}</offset>
            </pagerduty.listIncidents>
            <datamapper config="gov:datamapper/createIssueConfig.dmc" inputSchema="gov:datamapper/createIssueConfig_inputSchema.json" inputType="JSON" outputSchema="gov:datamapper/createIssueConfig_outputSchema.json" outputType="JSON"/>
            <jira.createIssue configKey="jiraConfig">
                <issueFields>{json-eval($.issueFields)}</issueFields>
            </jira.createIssue>
            <respond/>
        </inSequence>
        <outSequence/>
        <faultSequence/>
    </target>
</proxy>
Now we have finished configuring the artifacts and they are ready to be deployed.
Once you create all the ESB components such as sequences, proxy services, and local entries, you need to create a composite application project to group them and create a Composite Application aRchive (CAR) file. Follow the steps below to create a Composite Application aRchive (CAR) file containing the connectors:
- Open the developer studio dashboard (click Developer Studio > Open Dashboard) and click Connector Exporter Project.
- Enter a project name and click Finish.
- Right click on the created connector exporter project, point to New and then click Add/Remove Connectors.
- Click Add Connector and add the Jira and Pagerduty connectors from workspace.
- Create a Composite Application (C-App) project including the required artifacts.

Figure 10
- Right-click on the C-App project and click Export Composite Application Project to create a CAR file out of that project.
Deployment
After creating the C-Ap you can deploy them and test them as explained
.
Conclusion
This article explained the high-level aspects of building an integration scenario with WSO2 ESB and its connectors. It described how the tooling component and data mapper mediator can be used to implement the integration scenario and easily perform data transformation in a graphical way.
References
About Author
- Keerthika Mahendralingam
- Senior Software Engineer
- WSO2
Keerthika is a software engineer in the Platform Extension team at WSO2. She was awarded the Sabalingam Memorial Prize for the best performance in the Honors Degree Examination in Science (Computer Science) in 2011. Prior to joining WSO2, Keerthika worked at University of Jaffna as a temporary lecturer.