How to Write Effective Unit Testing using WSO2 Integration Studio

- Sajitha Liyanage
- Software Engineer, WSO2

When code executes smoothly, no one cares about testing it assuming their code is perfect and without any mistakes. So whenever the code breaks, they have to take a lot of effort to find out where it breaks and why it breaks. It is not an easy task but very time-consuming and costly. Unit testing is a great method that ensures the code is performing well as expected and it is an early bug-detection way that can be used for our development use cases in any kind of platform. With the release of WSO2 Integration Studio 7.0.0, we have introduced one of the brand new features - unit testing to the Integration Studio tooling to enhance the developer experience by letting them test the integration solutions within minutes. By using this feature, users will be able to create new unit test suites for the following ESB artifacts:
- REST APIs
- Proxy Services
- Sequences
This unit test suite includes multiple test cases that assert the actual payloads and properties with the expected values. Finally, a detailed summary of the unit test suites will be shown in the tooling console which can be useful when troubleshooting the integration flows. This blog is a step by step guide on how to write effective unit testing for your integration flows using WSO2 Integration Studio in minutes. I use the Content-Based Routing example to demonstrate the flow of the unit testing. You can find this template on the Getting Started welcome page in WSO2 Integration Studio.
1. Create an Integration Solution
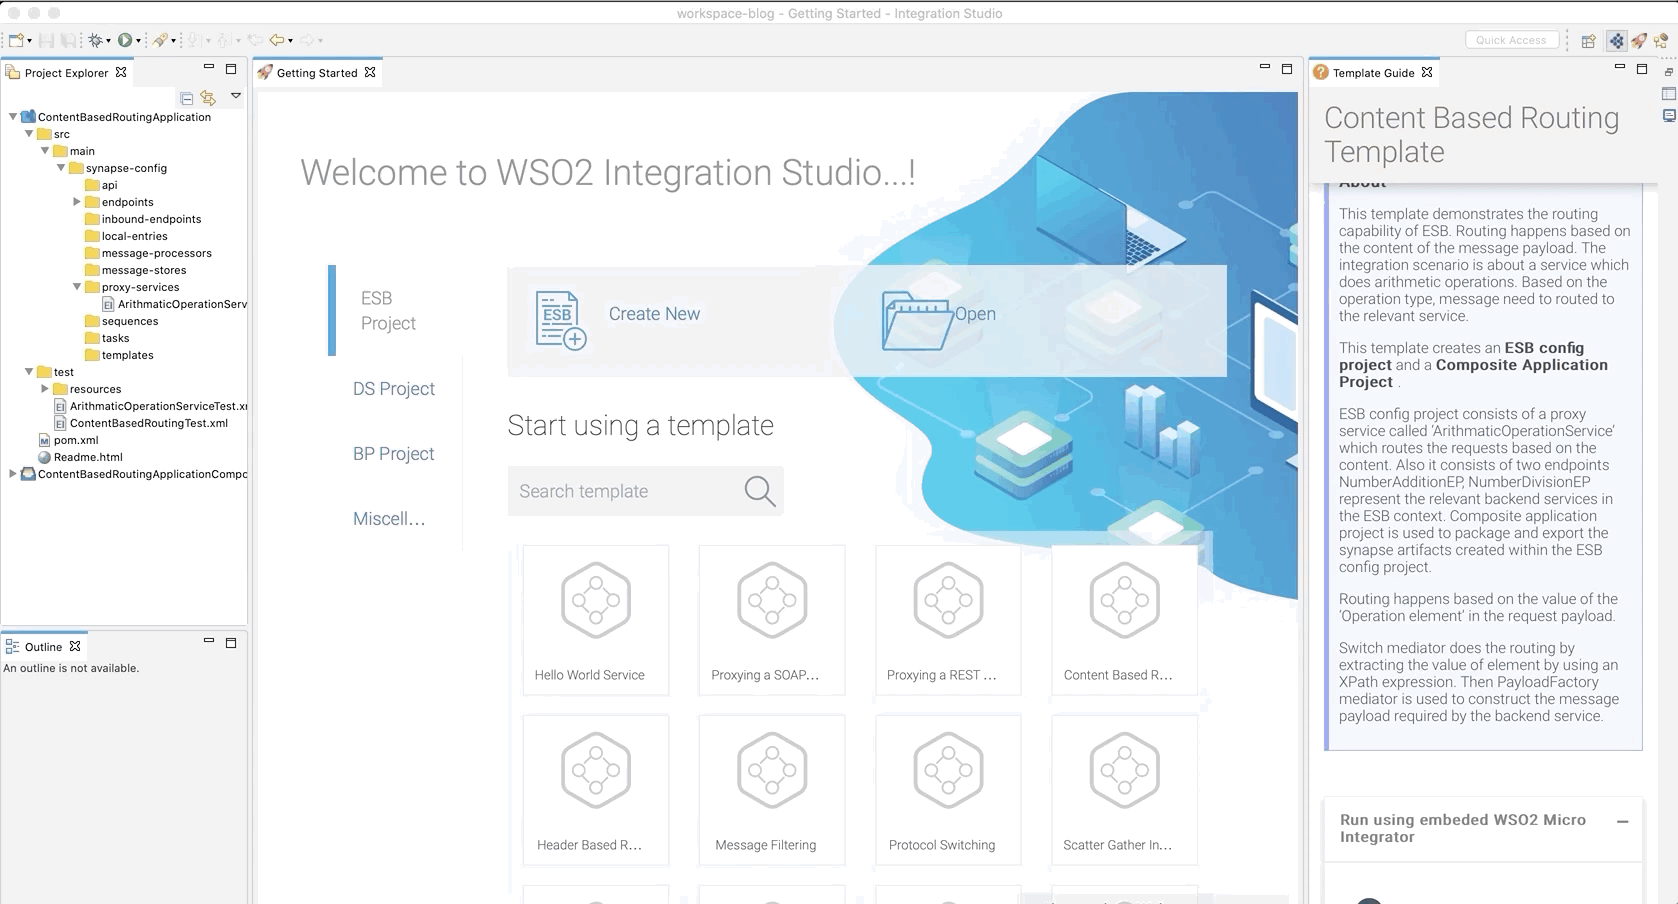
When you start WSO2 Integration Studio tooling, you will be first directed to the Getting Started welcome page. Then select the Content-Based Routing template from the set of templates on the welcome page and create a new project named “ContentBasedRoutingApplication”.
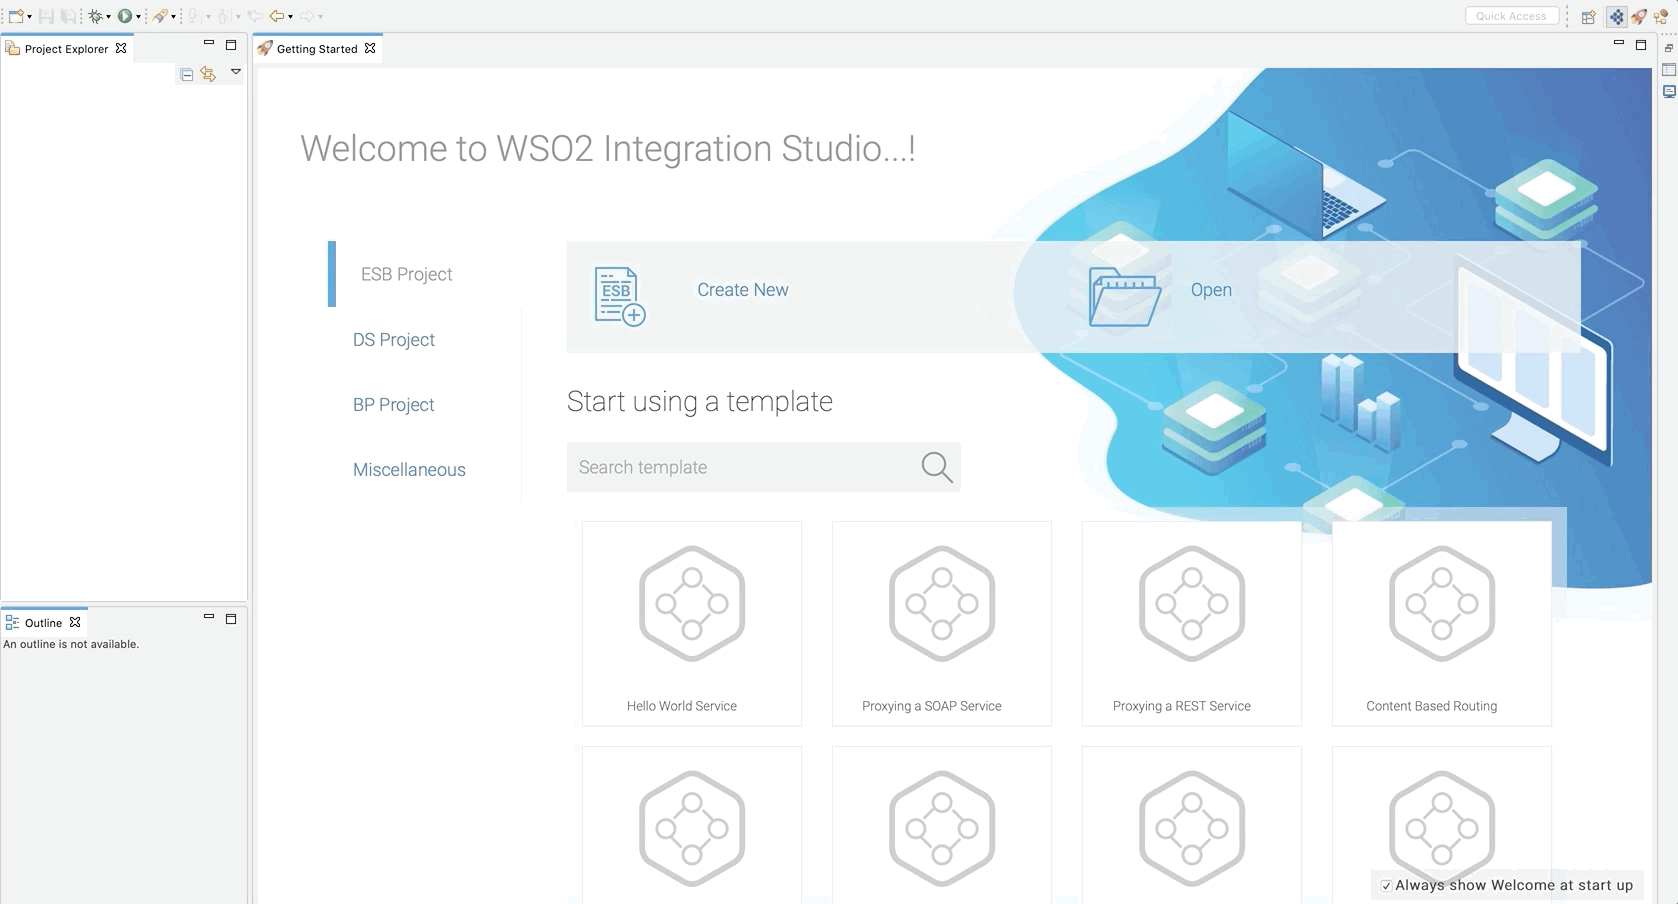
Create a new template project in WSO2 Integration Studio
Once the project is created, you can find the relevant proxy-service and endpoint artifacts inside the project src directory in the workspace of the Project Explorer. Now there is a new directory called test parallel to the src directory that holds the unit test suites of the project artifacts.
2. Create a New Unit Test Suite
You can simply right-click on the test directory and navigate to New and click on the Unit test suite option as shown below. It will fire up the unit test suite creation wizard for you. Alternatively, you can create a new unit test suite by Right click → New on the relevant API, proxy-service, or sequence file which is located inside the
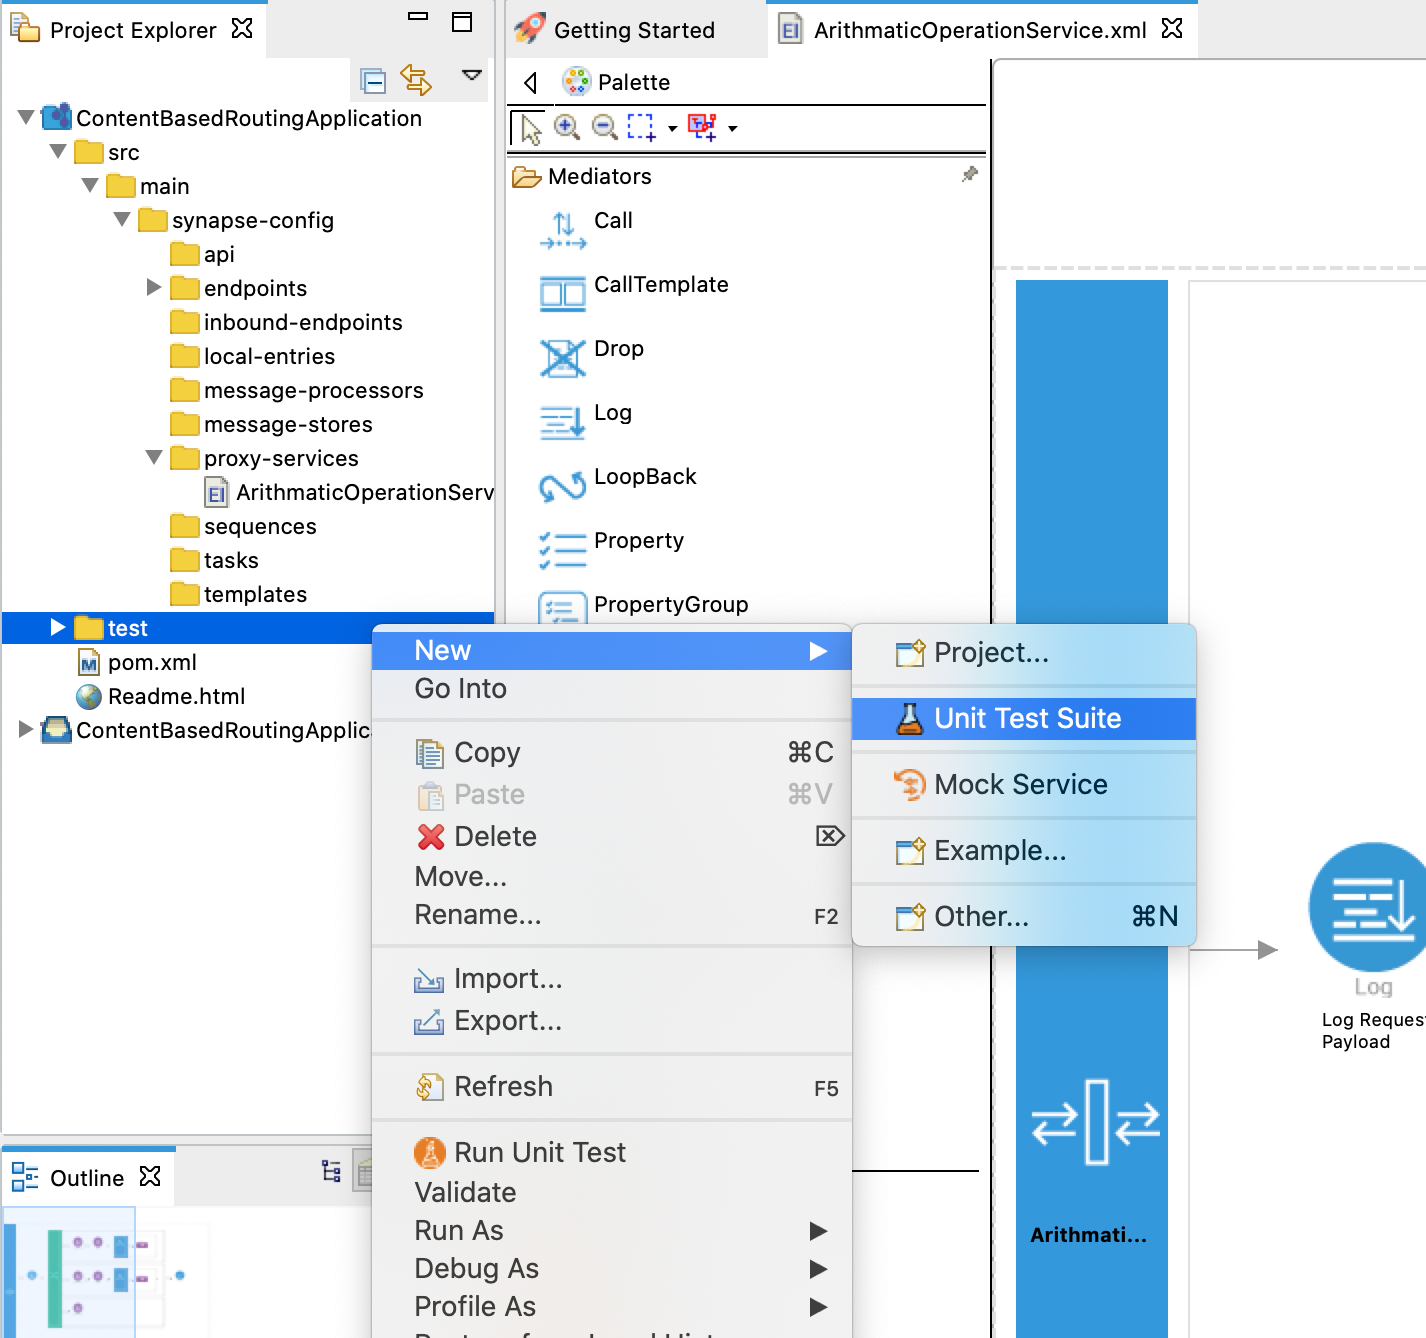
Create a new unit test suite
Step 1: Select a creation method for unit test suite
On this page, you can select which way you want to create a unit test suite either by importing or creating a new one. In this example, I’m going to select the Create a new unit test suite option to proceed.
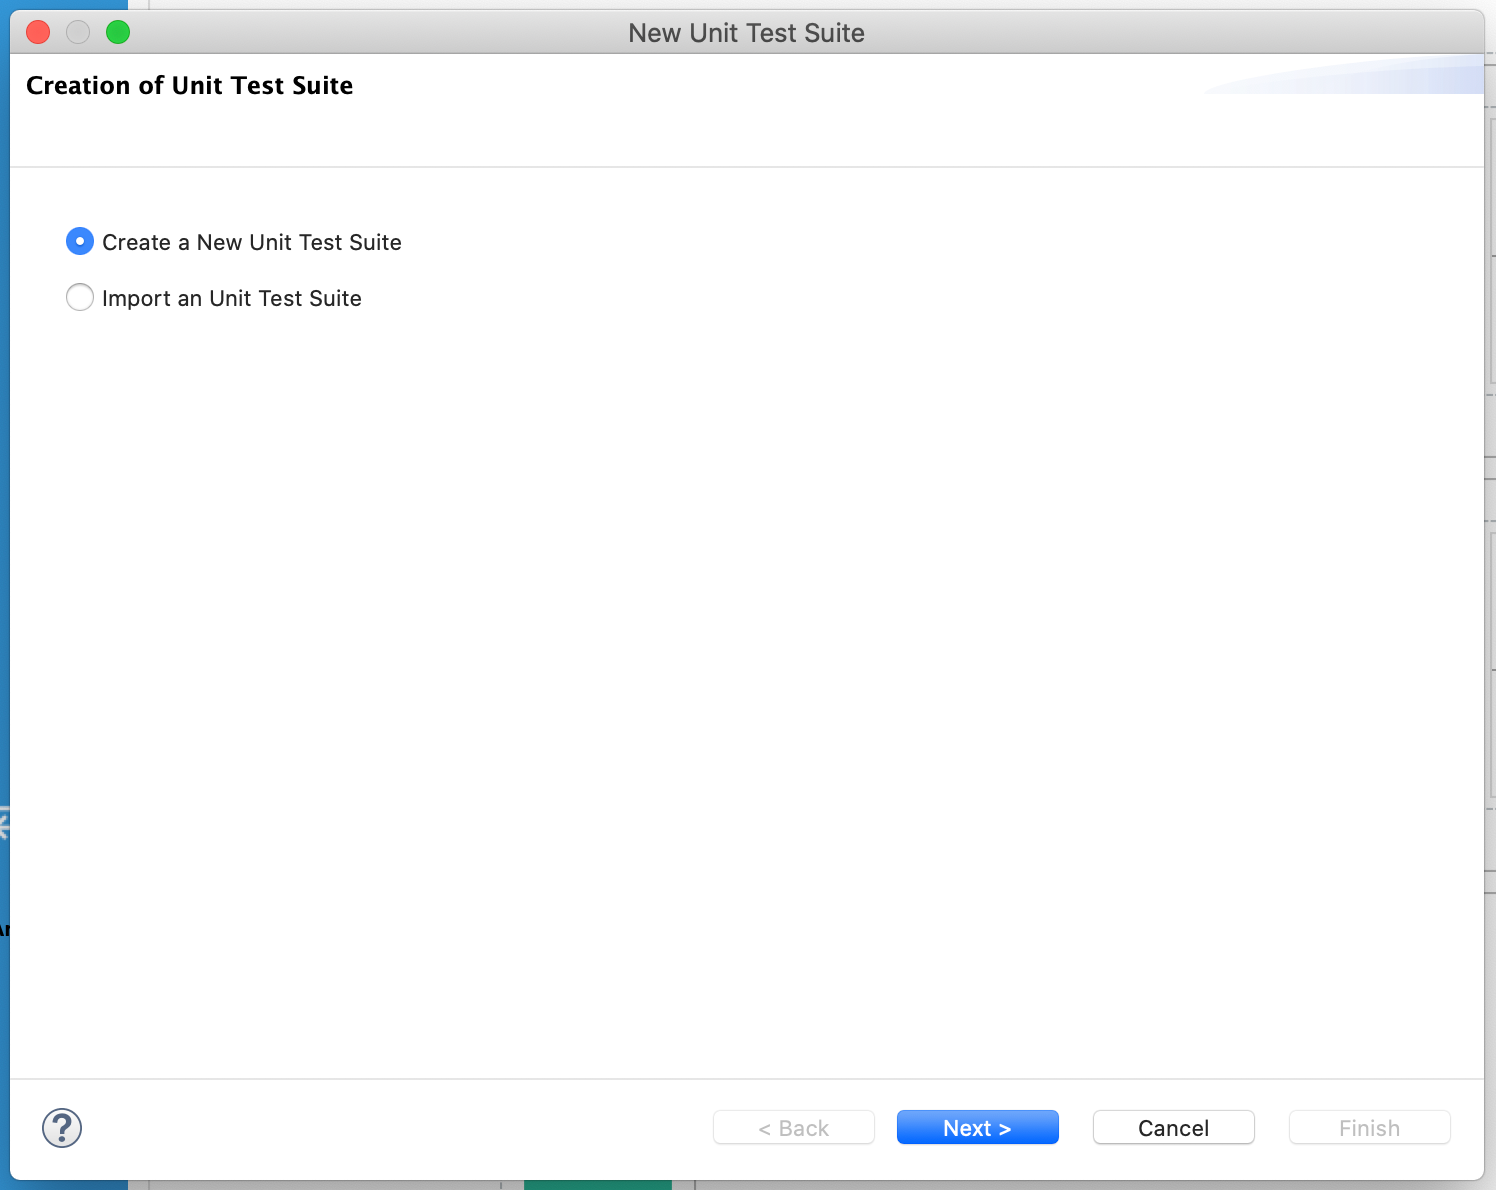
Creation method of unit test suite
Step 2: Select the main artifact file to test
On this page, you can provide a name for the unit test suite and select the main configuration artifact file from the tree-based file list. This list will show you all the API, Proxy-service, and Sequence artifact file which are available in the tooling workspace. Once you are done, click Next.

Select the test artifact that you want to test
Step 3: Select supportive artifact files
This page will let you select the supportive artifacts which are used in the main artifact file selected in the previous step. Here, you can select multiple artifacts/resources such as configuration files, registry resources, connectors, etc. from this view. In this example, I have selected two endpoints that are using inside the content-based routing proxy-service. Once you are done, click Next.
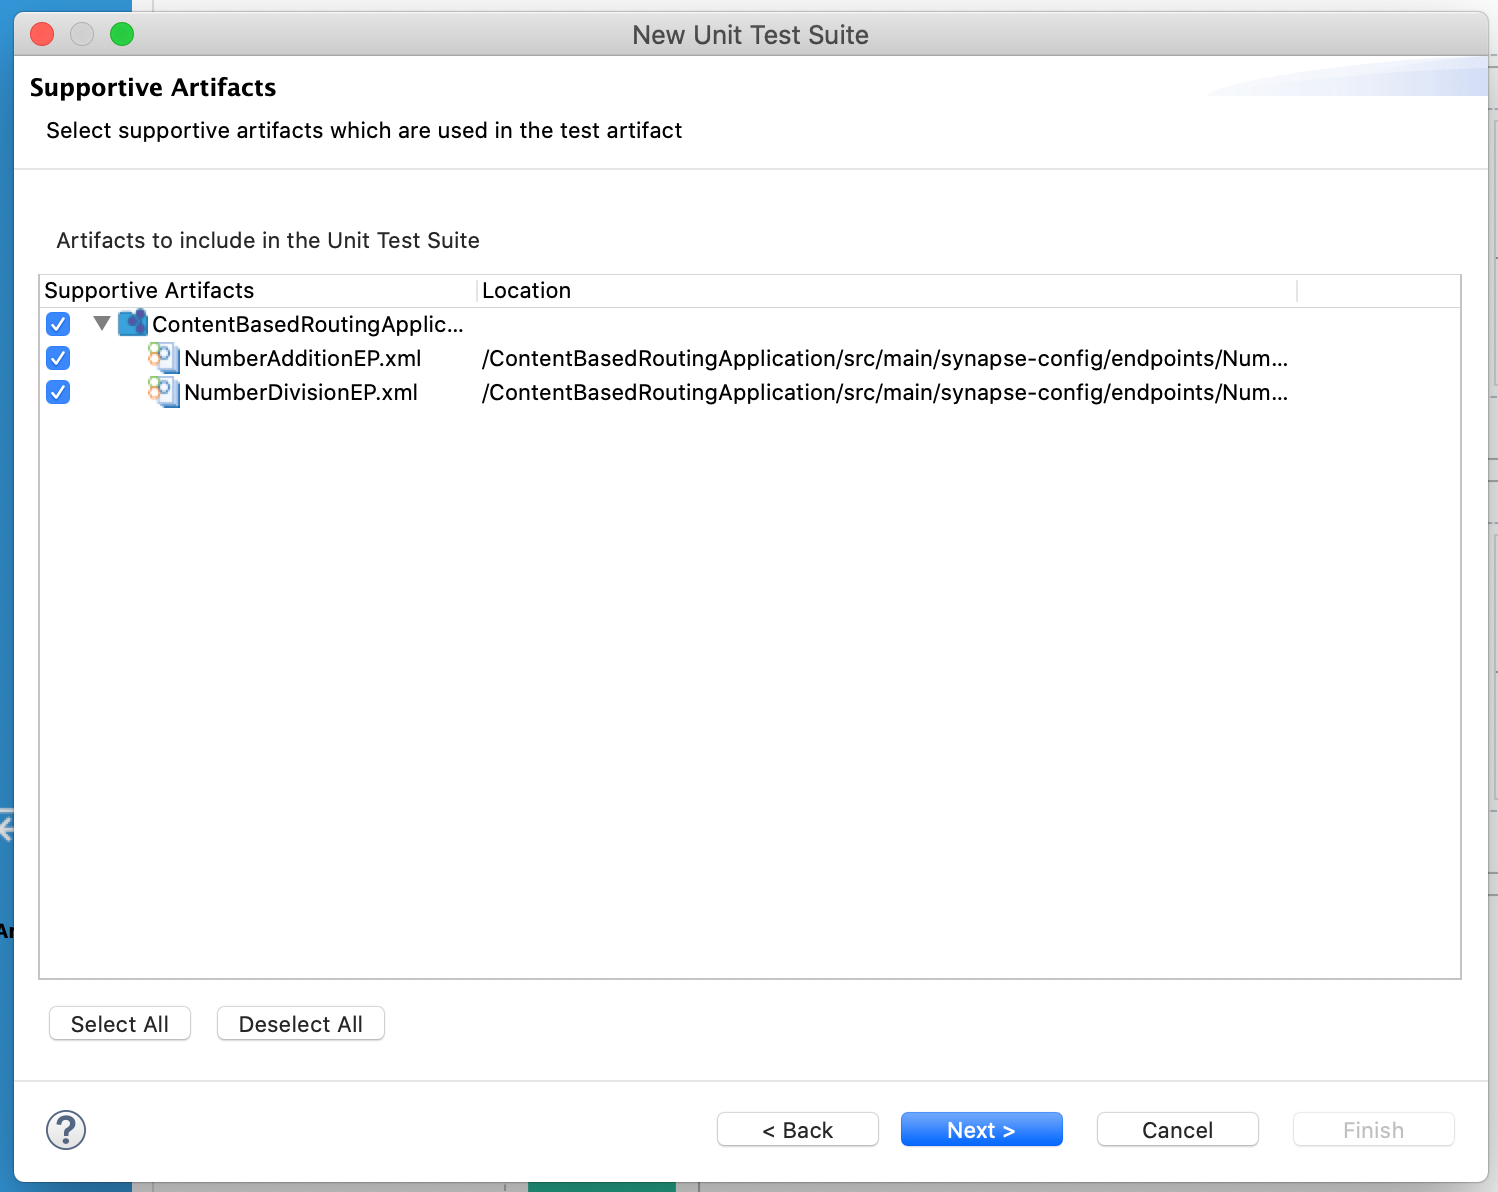
Select supportive artifacts for the test artifact
Step 4: Select mock services
In order to mock the actual endpoints, you can select multiple mock service files that can be created using the following method.
Right-click on the Test folder → New → Mock Service
If you haven’t created any mock services yet, you can click the Create a new mock service link on this page and create a new mock service for you (For this example, I’m not using any mock services). After that click Finish.

Select mock services or create a new mock service for an endpoint
You can find out the created unit test suite under the test directory of the selected project.
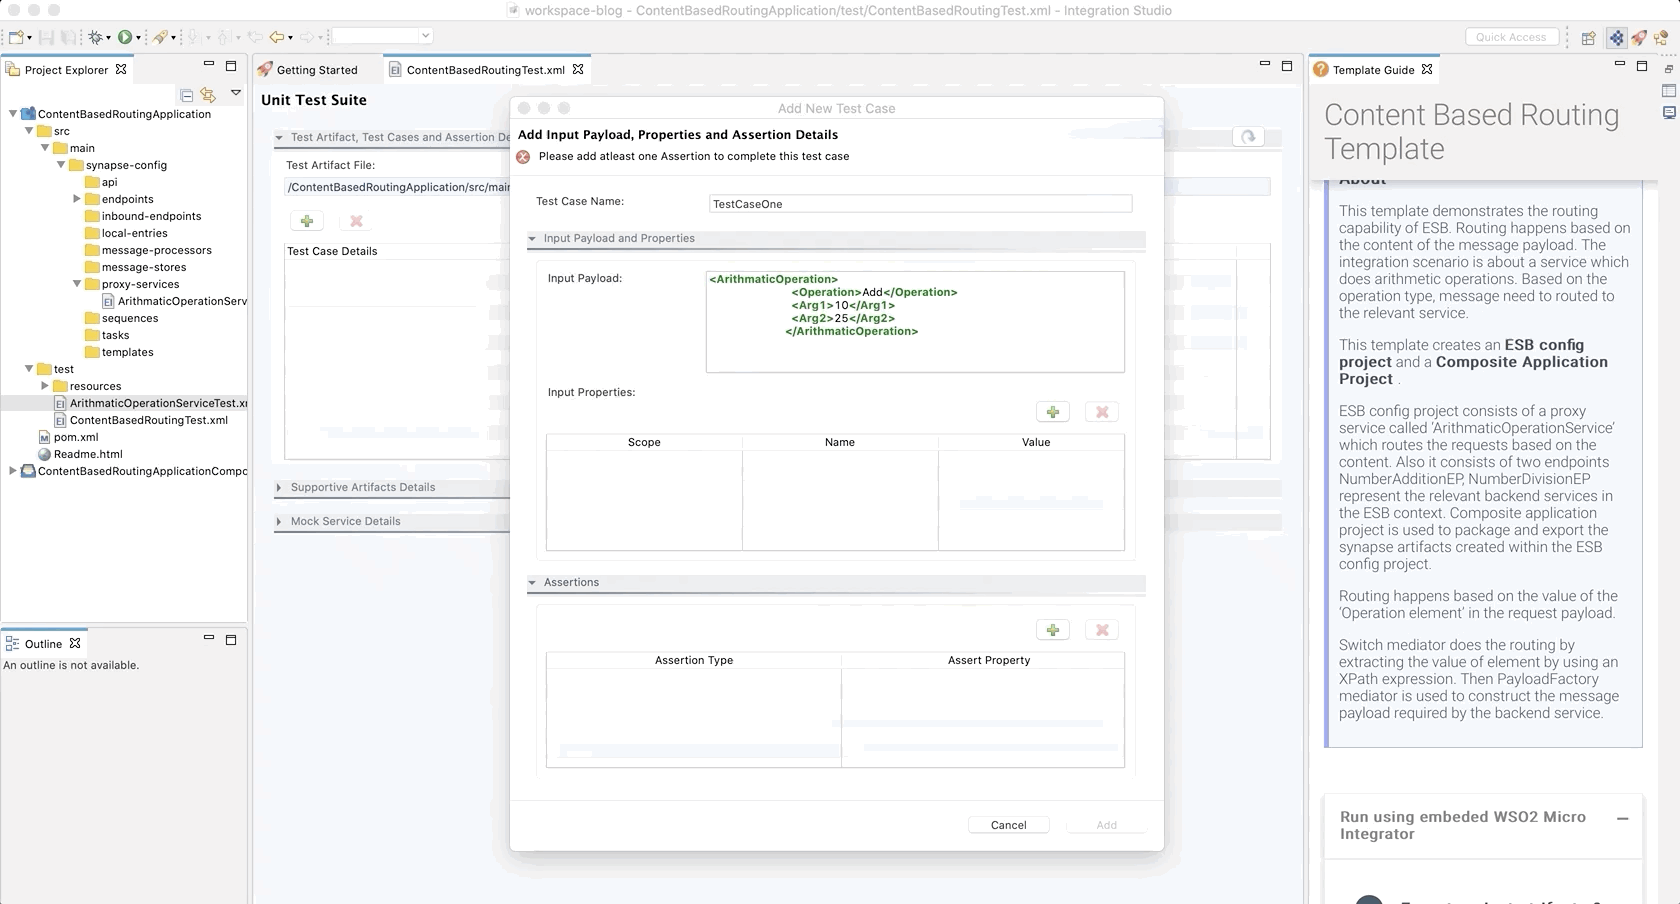
3. Add Test Cases to the Created Unit Test Suite
The unit test suite is designed with three main sections - test artifact, test cases and assertion details section, supportive artifacts section, and mock services section. Also, we can switch between the design and source views to view and modify the unit test suite. In the design view, press ➕ button under the Test artifact, test cases and assertion details section to add a new test case to the unit test suite. It will fire up the Add Test Cases wizard page for you. First, a valid enter a name for the test case for the ease of identification.
Add a new test case for the unit test suite
Step 1: Insert input payload and properties
In this section, you can insert the Input Payload and Input Properties (these two fields are optional) which will be used as inputs in the mediation flow. Here, Input Payload can be a type of JSON, XML, or plain text. In this example, I have inserted the following XML payload as the input payload.

Considering the Input Properties, there are three types of properties allowed in the unit test suites to be tested. They are Synapse($ctx), Axis2($axis2), and Transport($trp) properties. For the sequences, the test suite allows you to add all the above types of properties with the values. For the APIs and Proxy-services, it only allows you to add transport properties. Press ➕ button to add a new input property to the test case. It will popup a new wizard page as shown below to collect the data about the Input Property. In this example, it needs an input transport property as follows.
- Property Scope → Transport
- Property Name → Content-Type
- Property Value → application/xml
Add input properties to the test case
(Note: If you are creating a test case for the APIs, you can see extra two compulsory fields as Request Path and Request Method in the above section. Request Path indicates the URL-mapping of the API resource and Request Method indicates the REST method type of the resource).
Step 2: Add assertion details
In this section, you can add multiple assertions to the test case. To the ease of differentiation, we have defined two assertion types for a test case - AssertEquals and AssertNotNull. AssertEquals checks whether the equality of the mediated result and the expected value whereas AssertNotNull checks whether the mediated result is not null. Press ➕button to add a new assertion data to the test case. It will popup a new wizard page as follows.
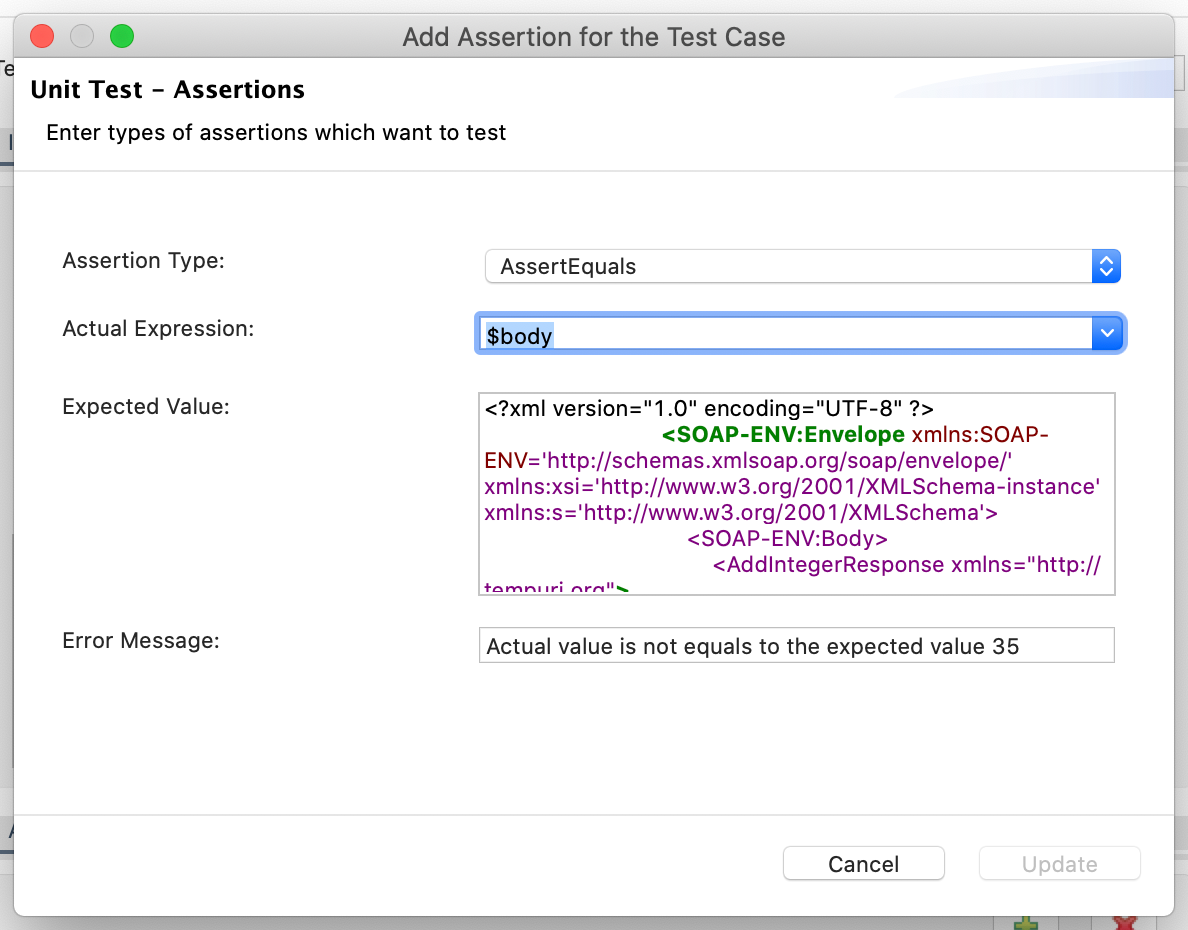
Add an assertion to the test case

Assertion expected value
Click Add, once you have added at least one assertion required details and then save the unit test suite. Additionally, you can refer to the source view to get more ideas about how the unit test suite syntaxes generated through the above steps.
4. Run Unit Test Suites
You can run the created unit test suites using embedded Unit Testing Server in the Micro Integrator runtime packed inside WSO2 Integration Studio. Simply, you can right-click on the test directory and click on Run Unit Test to run all the unit test suites at once. Or else, right-click on the particular unit test suite and click on Run unit test to run only that unit test suite alone. Once you click Run unit test, you will get a Run Configuration popup as follows. Here, you can decide whether to run the unit test suites in the Local Server mode or Remote Server mode. By default, Local Server mode is chosen here to run with the embedded server in WSO2 Integration Studio. Then click Run, once you have filled the required field such as Unit Test Port, Server Execution Path, etc.

Running the created unit test suite
After that, you will see the testing server starting logs in the tooling console and it will print the summary for the given unit test suite using the response from the testing server.
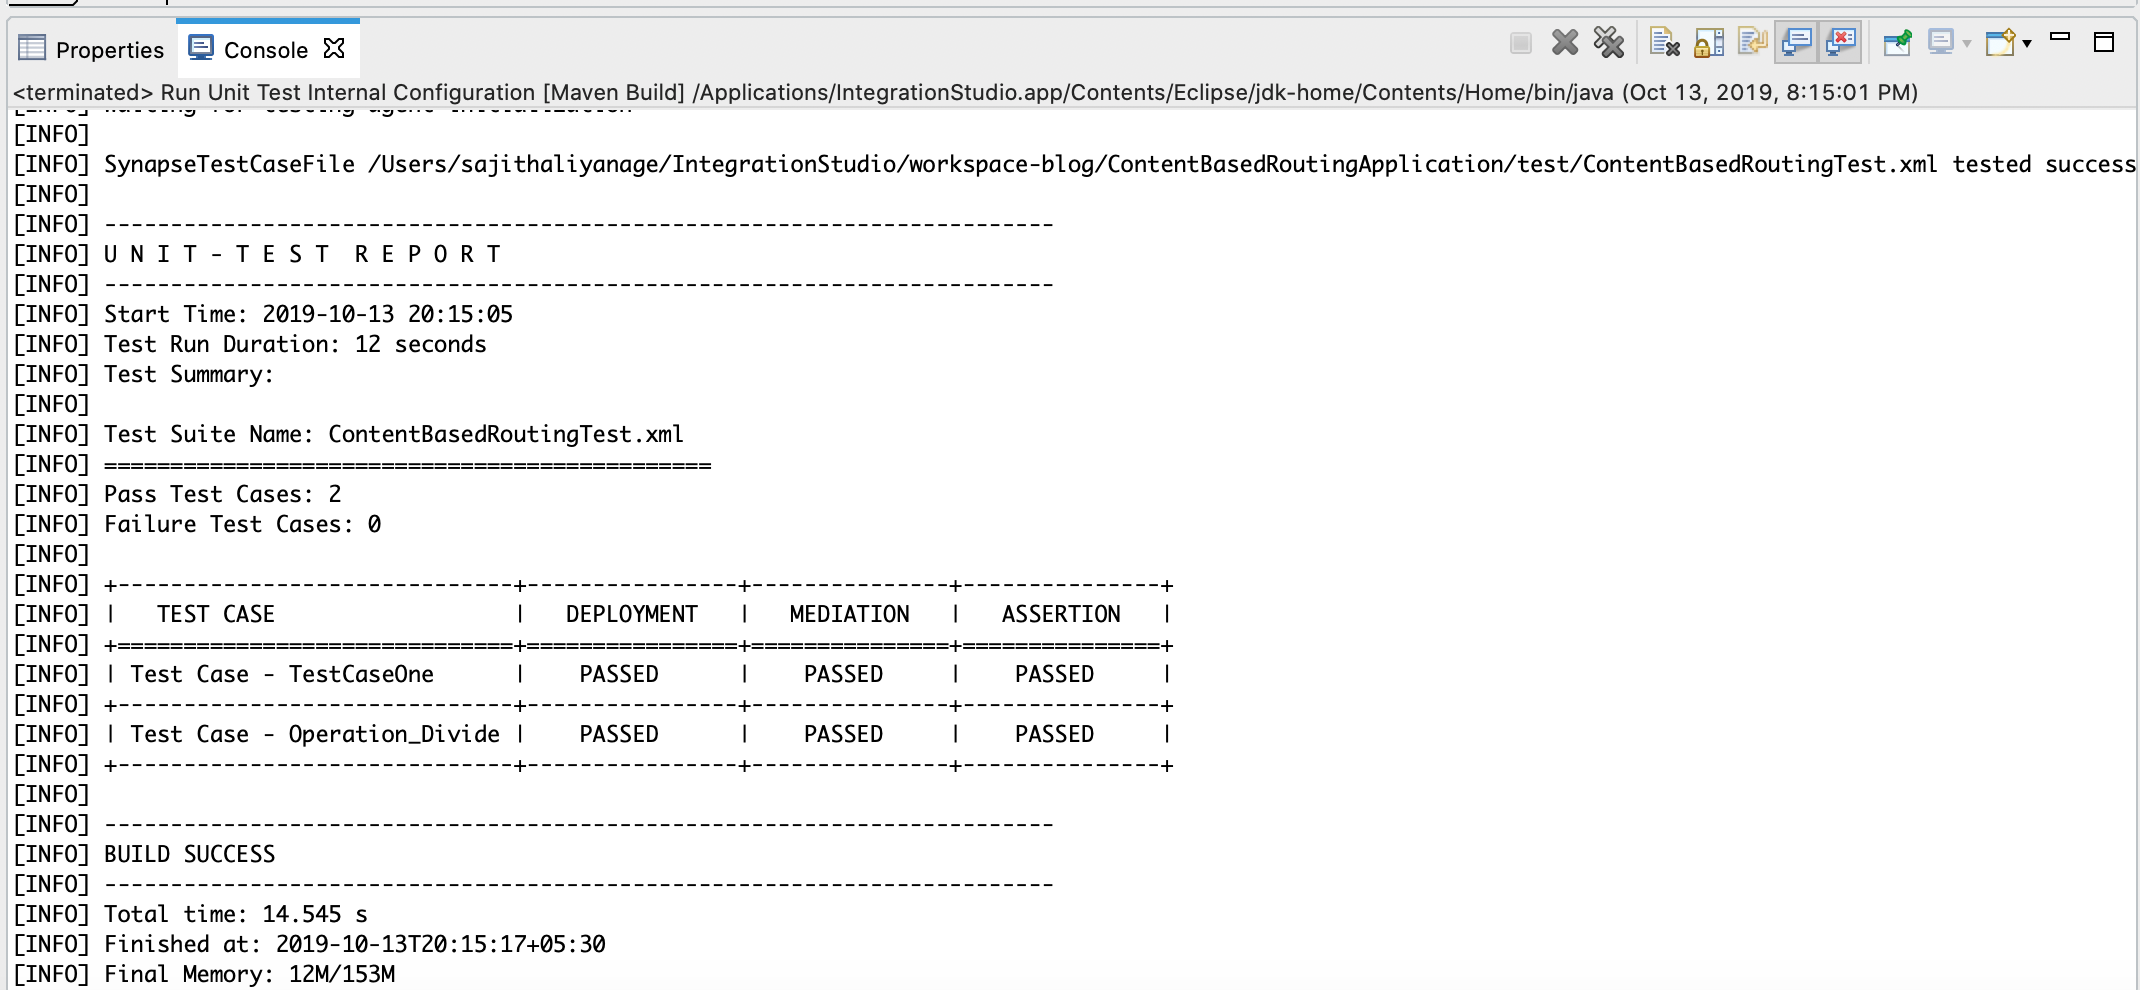
Console output of the run unit test suite (Successful)
Now you have successfully tested an integration solution in WSO2 Integration Studio. Now let’s try this unit test with false data that would cause the assertion phase to fail and see how the unit test server responds. In the previous test case, I have set 35 as the expected value for the addition of 15 and 25. Let’s change it to 40 and see.

Console output of the run unit test suite (Failure)
See how smart it is. Here the Unit Test Report shows the phase that failed and the reason for this failure. From WSO2 Enterprise Integrator 7.0.0 onwards, you can use this feature to test your integration solutions faster and easier way using WSO2 Integration Studio. I hope this blog helped you to discover how unit testing works in WSO2 Integration Studio. Get in touch with us if you have any questions.