Create Evalsets
An evalset is a curated set of conversation traces that act as a golden dataset. Each entry pairs a user input with the expected agent behaviour, including the tool calls the agent should make and the response it should produce. Evalsets are the input to every evaluation you run.
The fastest way to create an evalset is to chat with your agent in the IDE and export the session traces.
Make sure tracing is enabled on the agent before you start chatting, so each turn is captured and available to export. See Enable tracing for the steps.
Export a session into an evalset
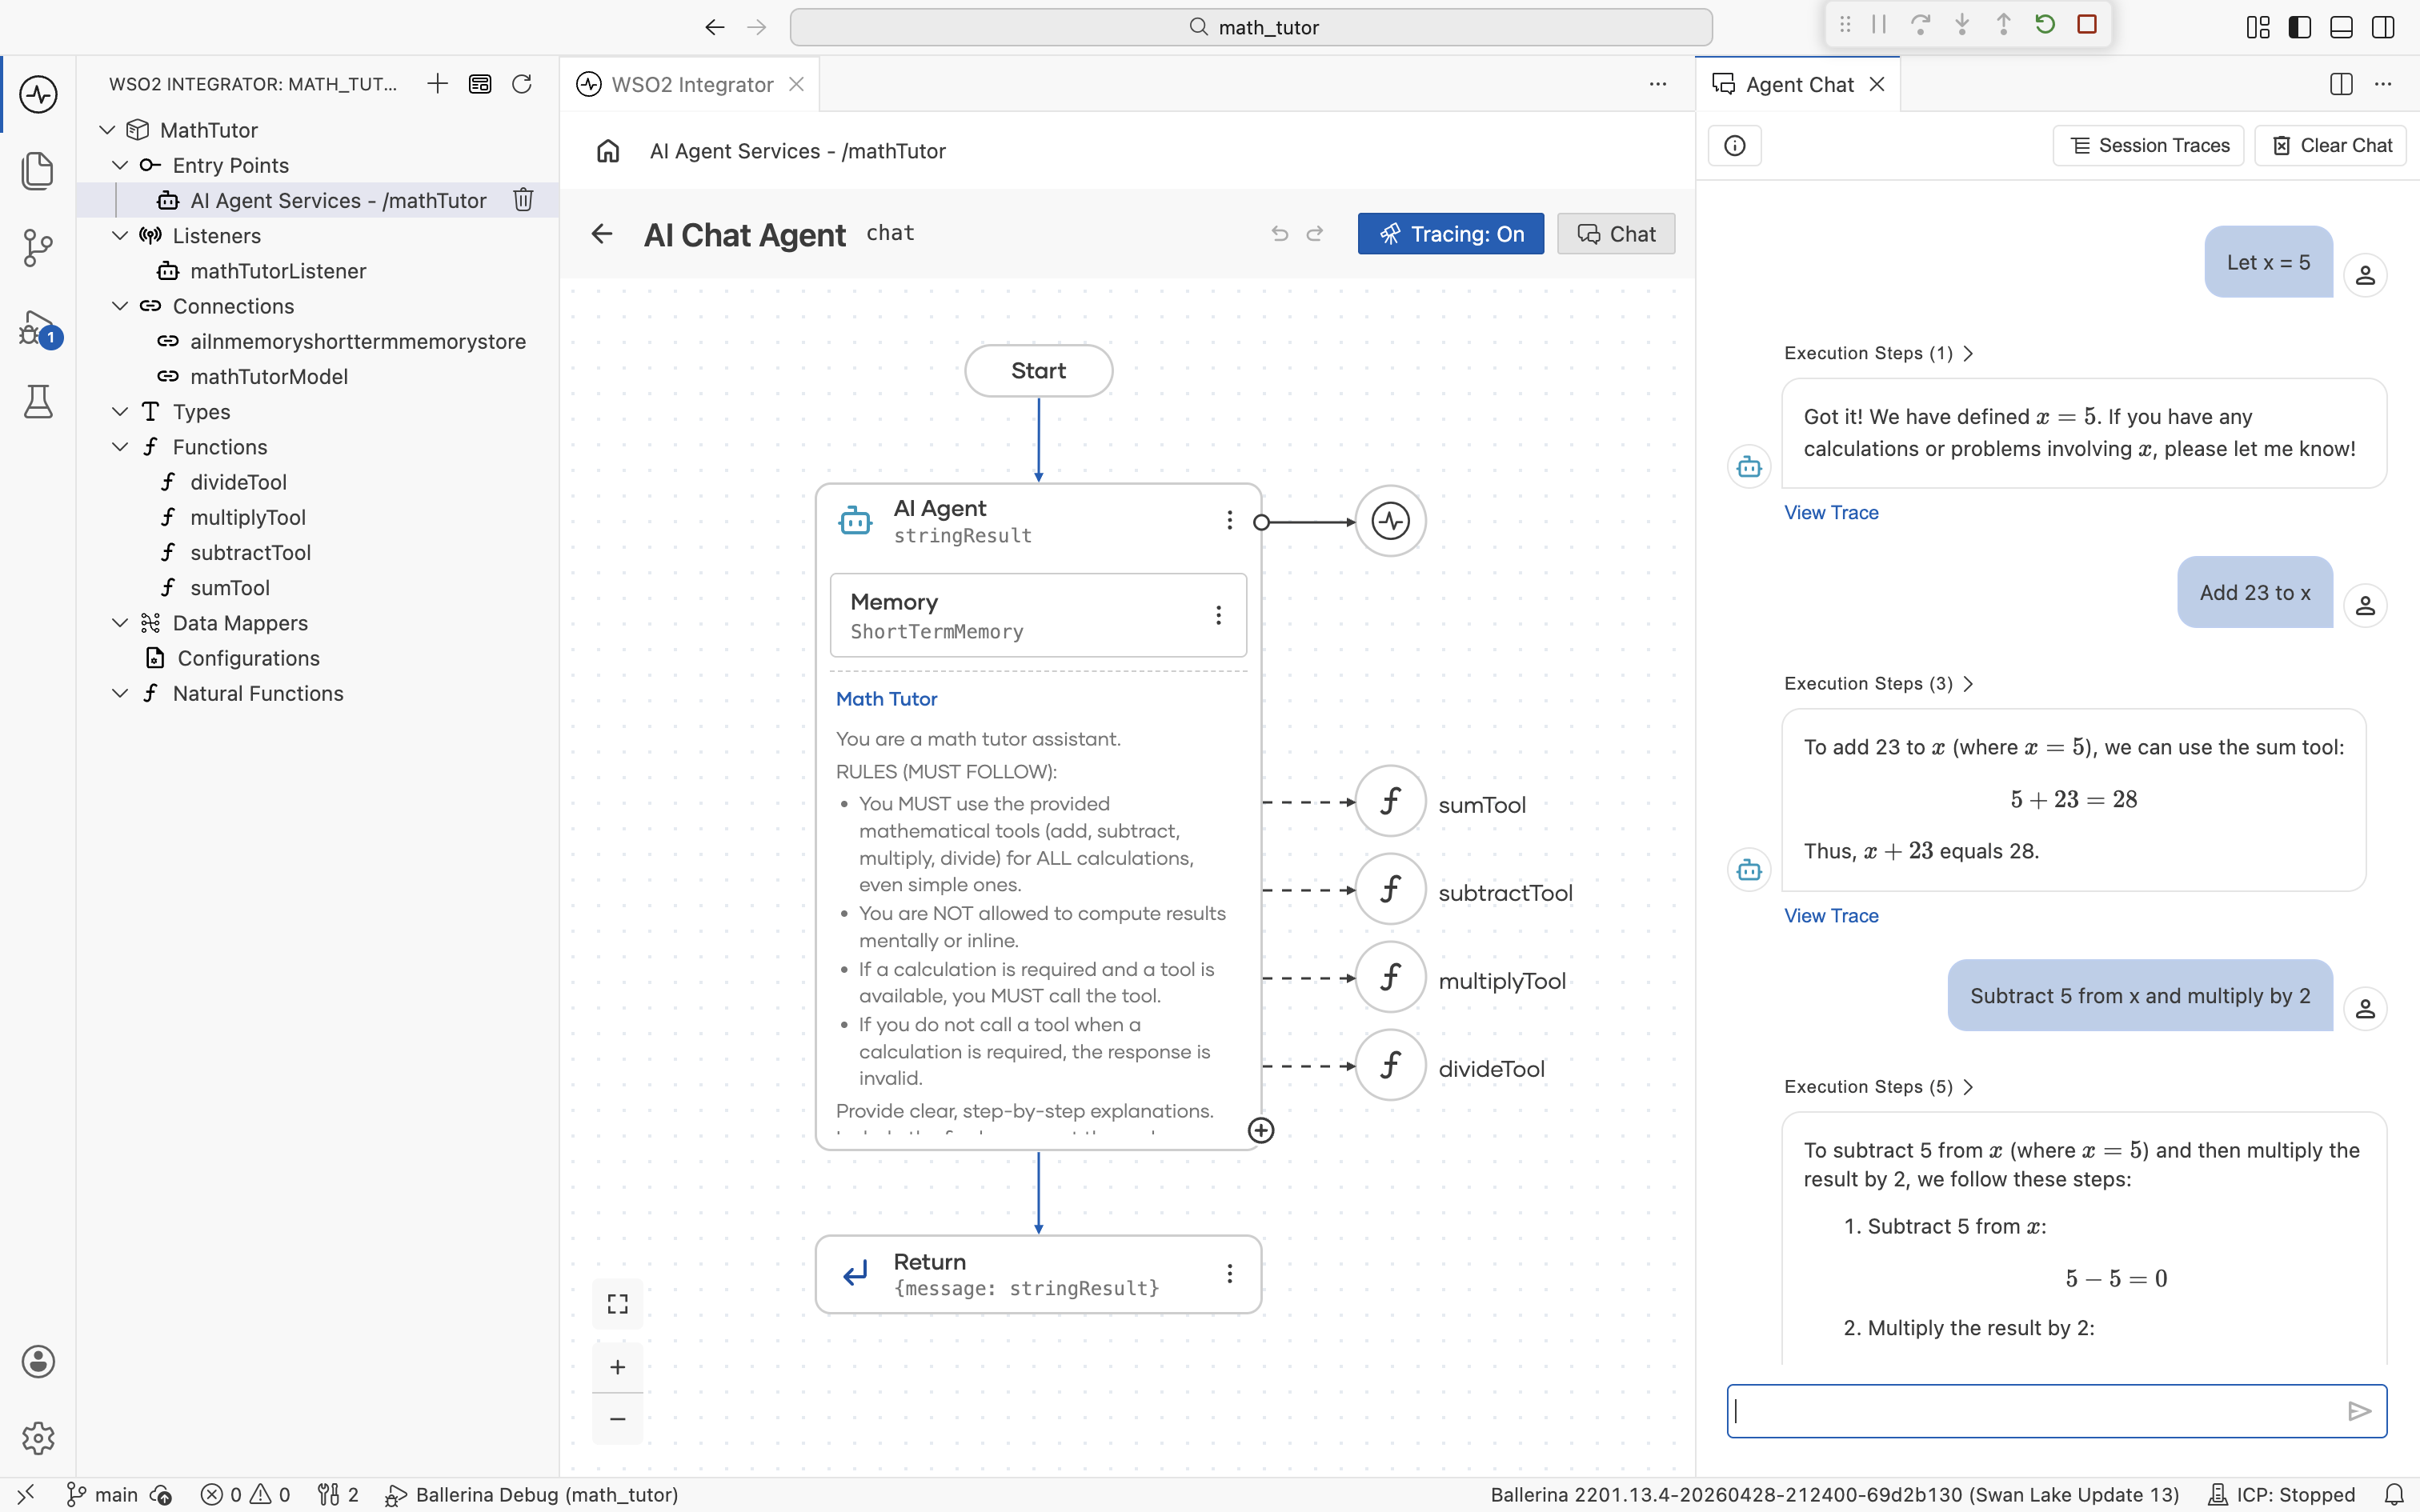
1. Chat with the agent
Open the agent in the canvas and click Chat to open the Agent Chat panel on the right. Send the messages you want to capture as test cases. Each turn produces a trace.
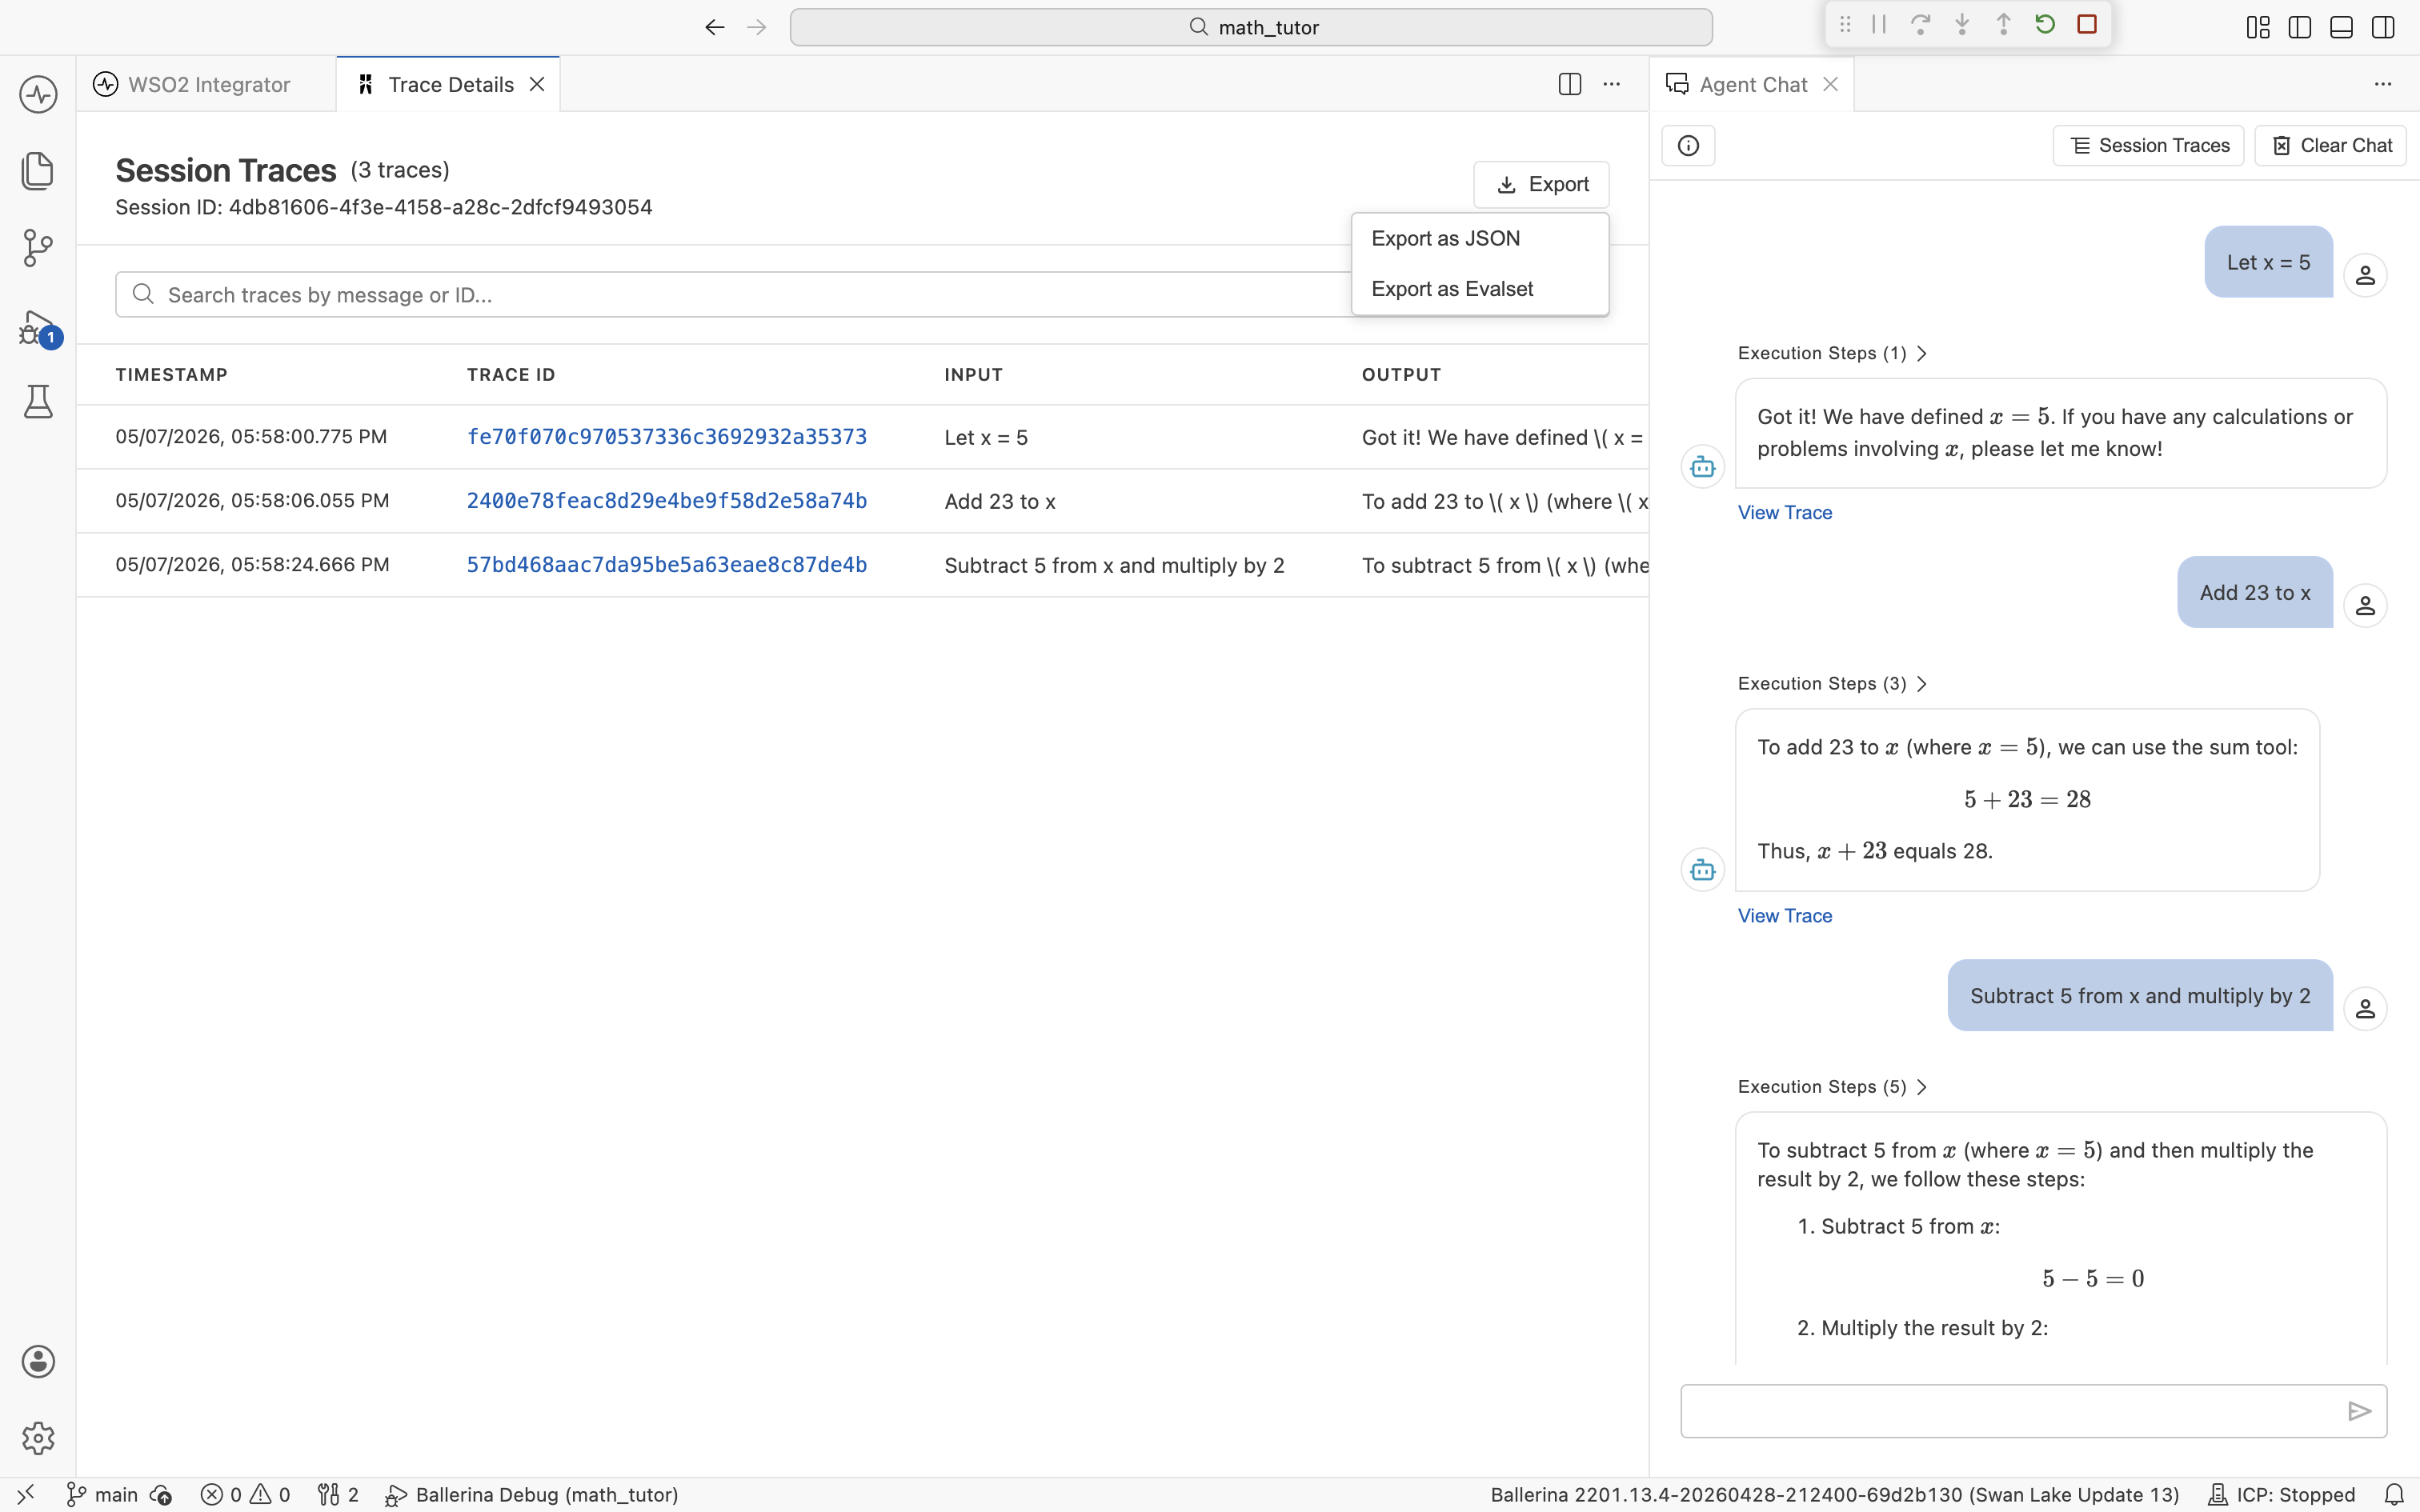
2. Open the session traces
Click Session Traces at the top of the Agent Chat panel. The Session Traces view lists every turn in the current session with its timestamp, trace ID, input, and output.
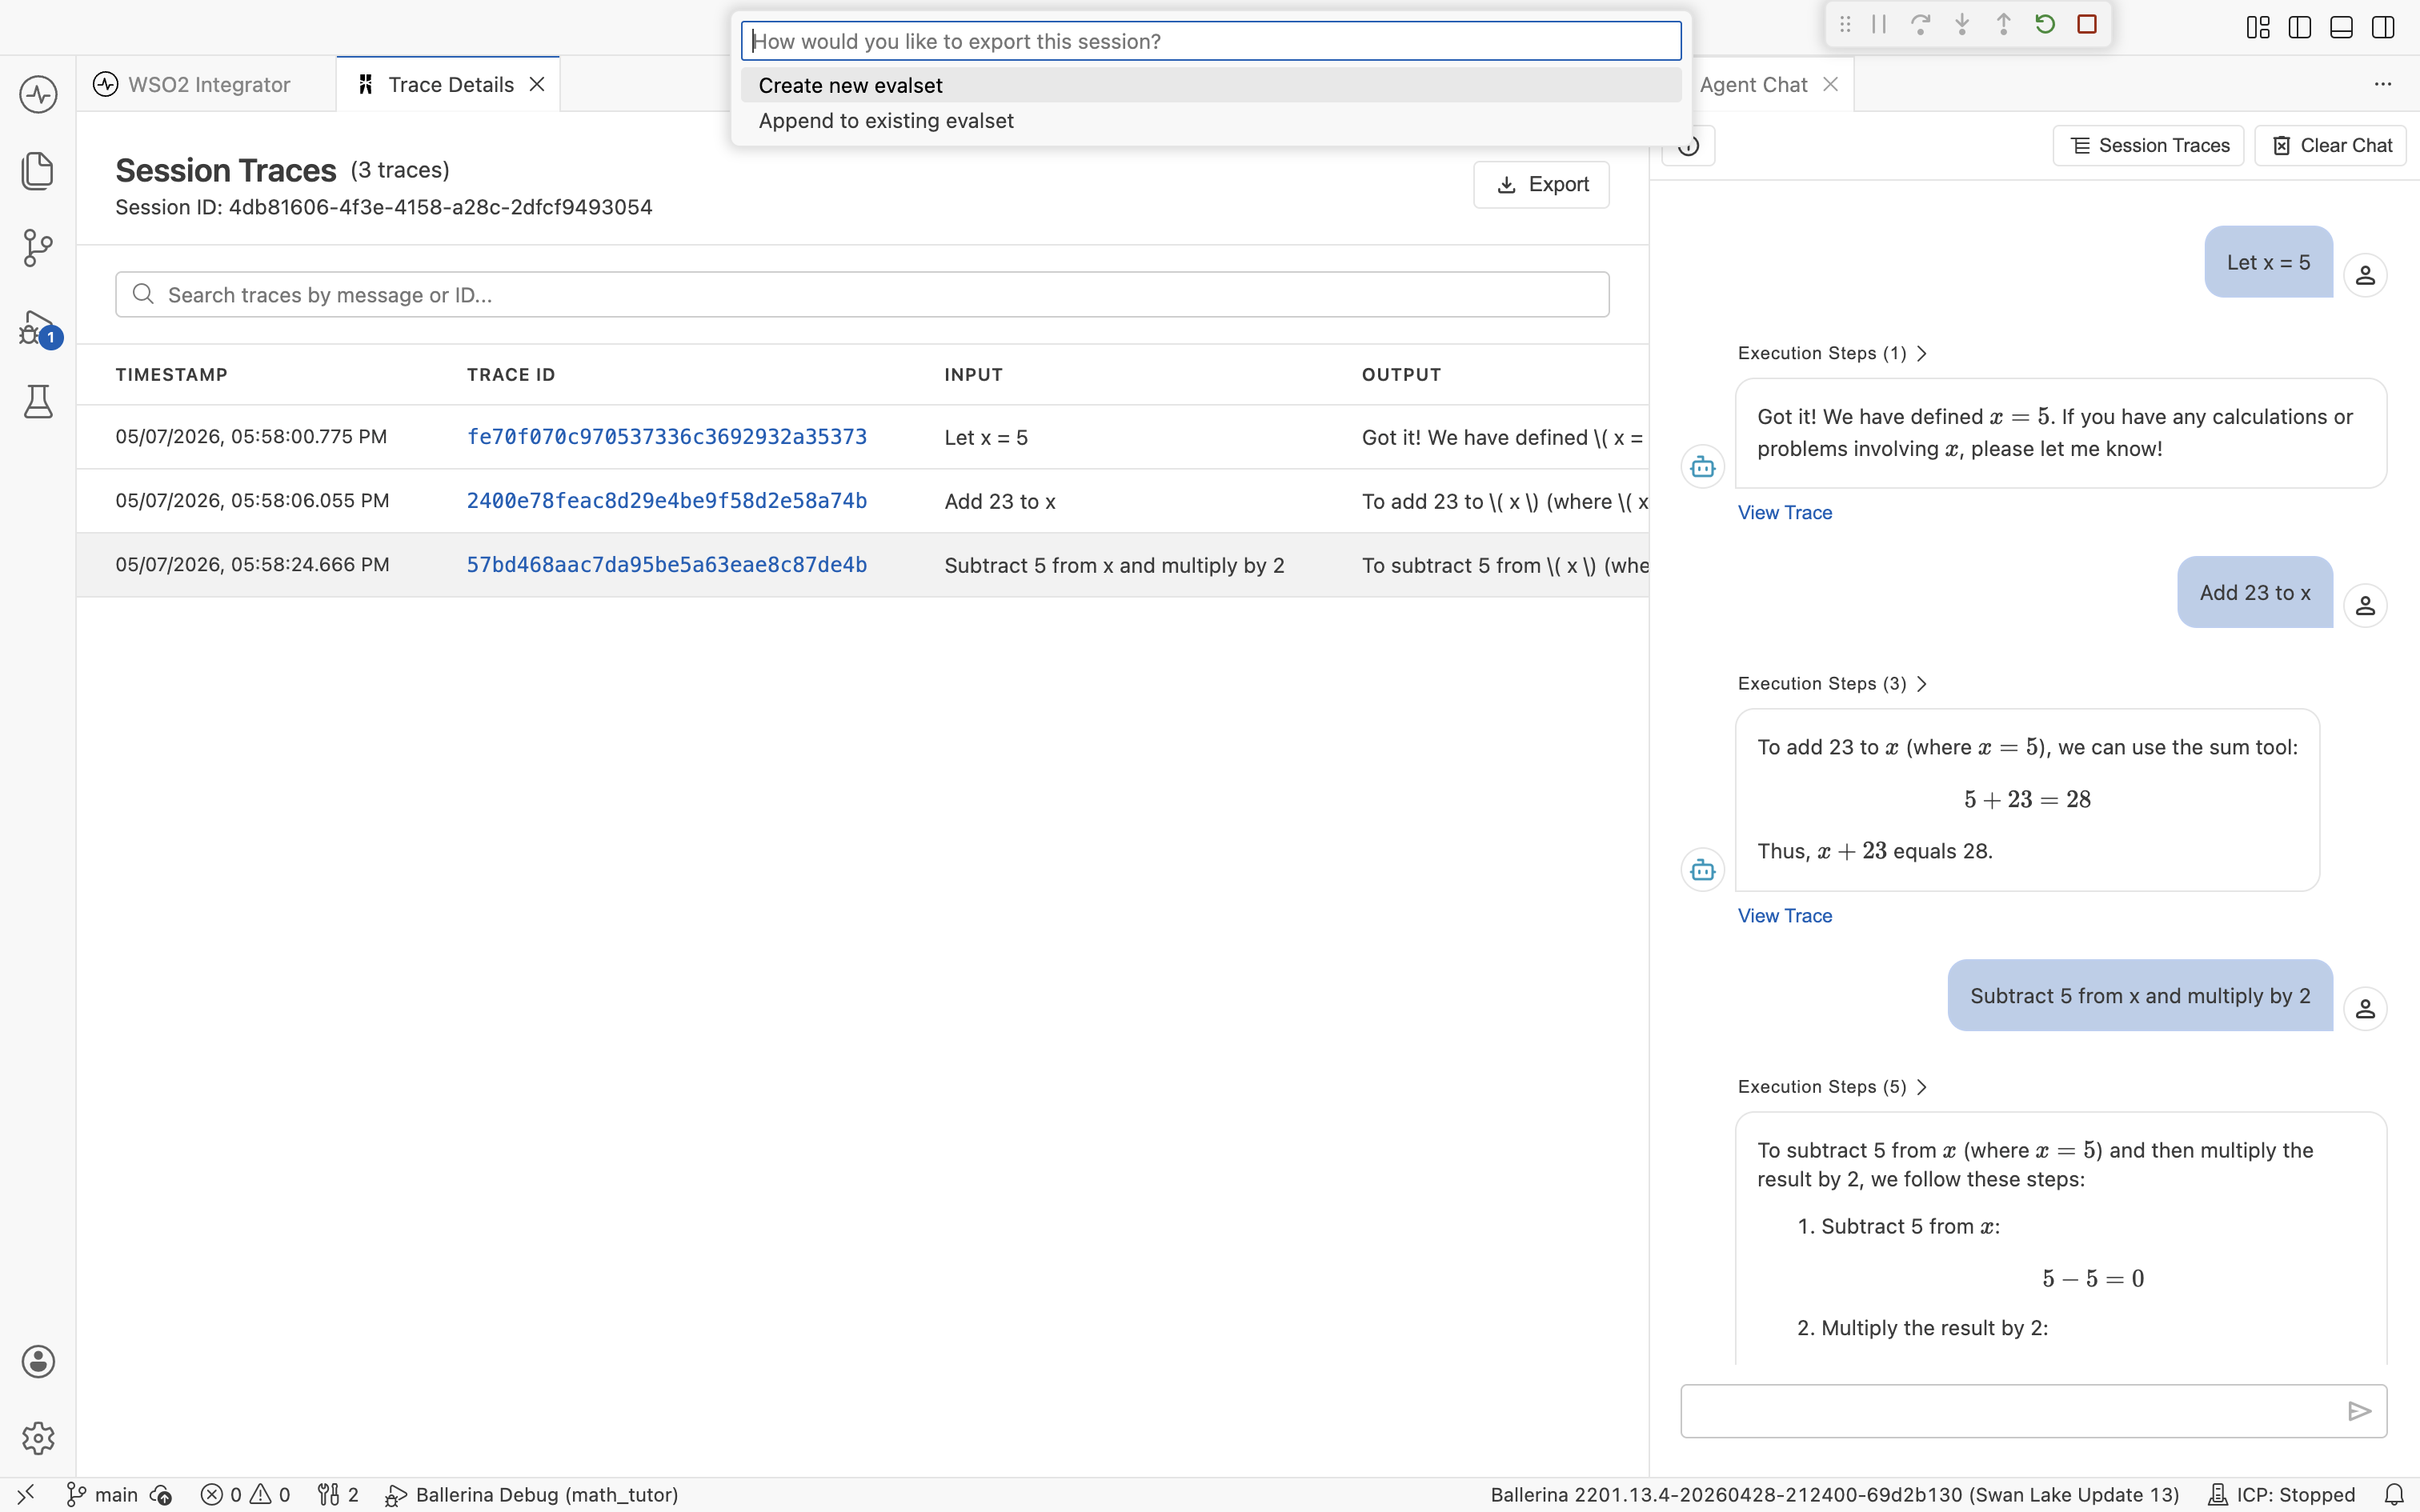
3. Export as an evalset
In the Session Traces view, click Export and choose Export as Evalset.
Export as JSON writes the raw traces to a JSON file. Use it when you want a full debug snapshot rather than an evalset.
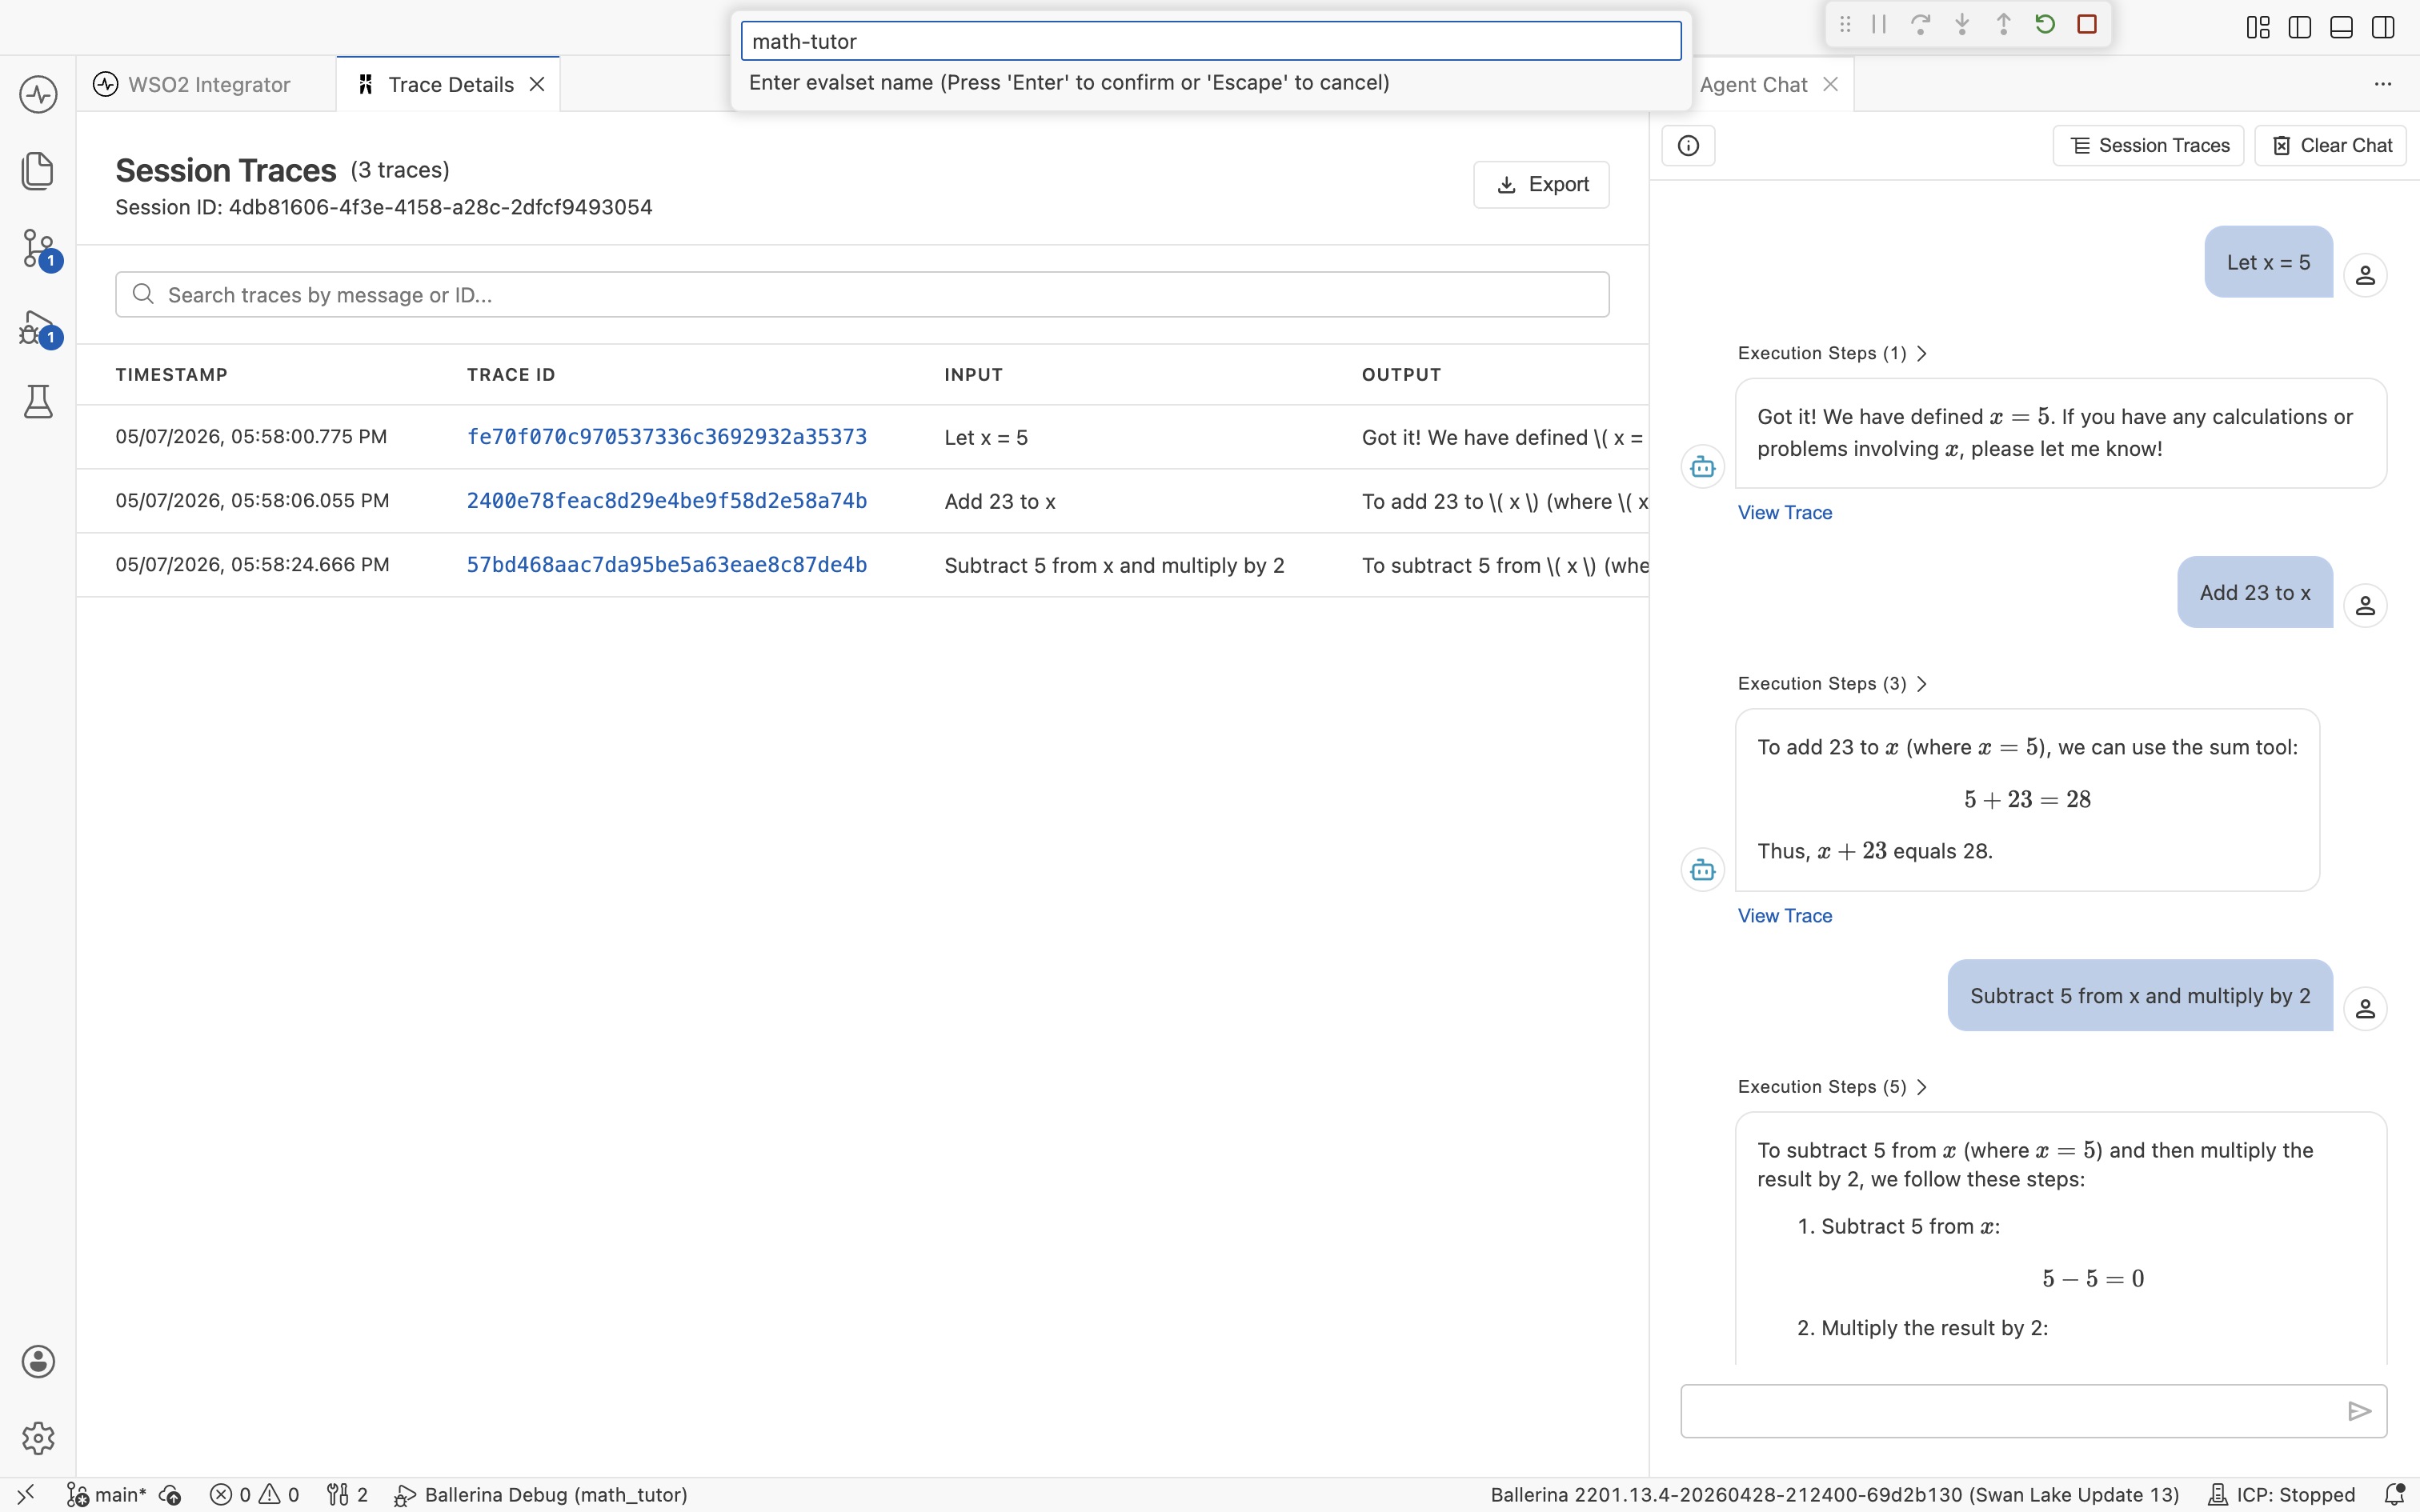
4. Choose create or append
Pick how to save the session.
- Create new evalset. Start a new evalset file with this session as the first entry.
- Append to existing evalset. Add this session as a new case in an evalset you've already built.
5. Name the evalset
If you chose Create new evalset, enter a name and press Enter.
A confirmation message appears once the file is written. The evalset is now ready to use in an evaluation.
Evalsets are saved as <name>.evalset.json under tests/resources/evalsets/ in the project.
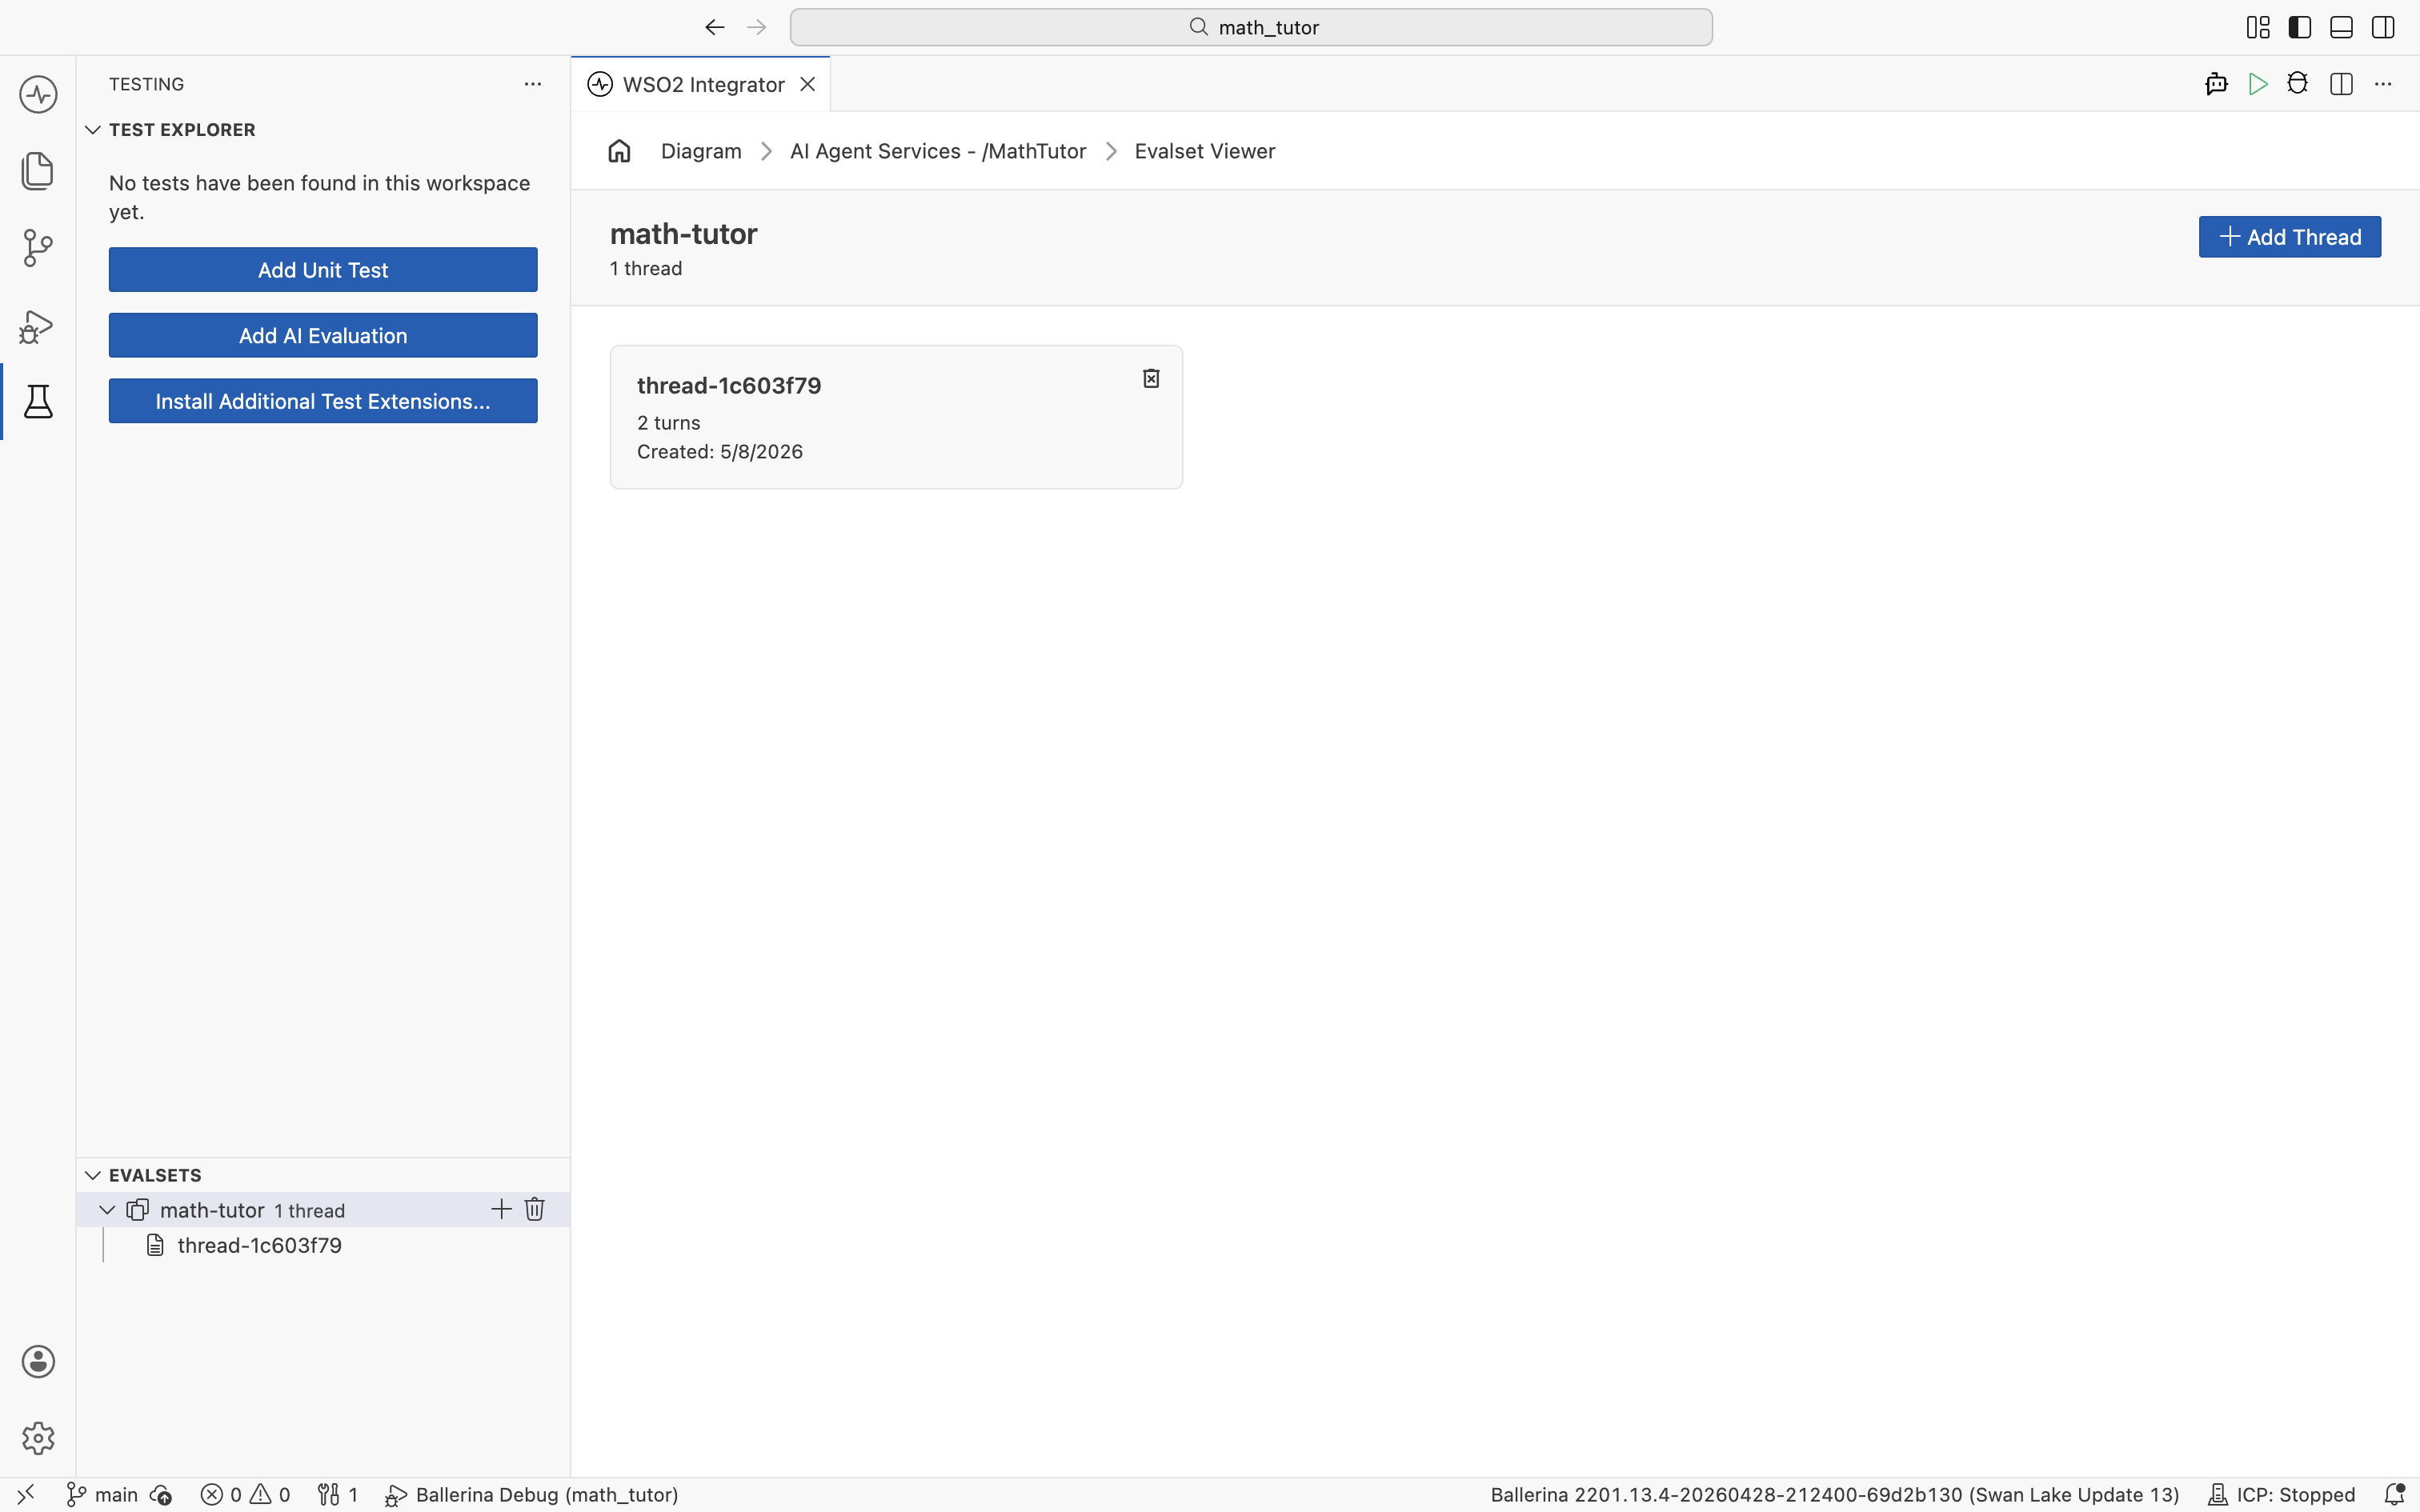
Browse your evalsets
Open the Test Explorer by clicking the test beaker icon in the activity bar on the left. The Evalsets panel lists every evalset in the project. Expand one to see its threads, then click a thread to open it in the Evalset Viewer.
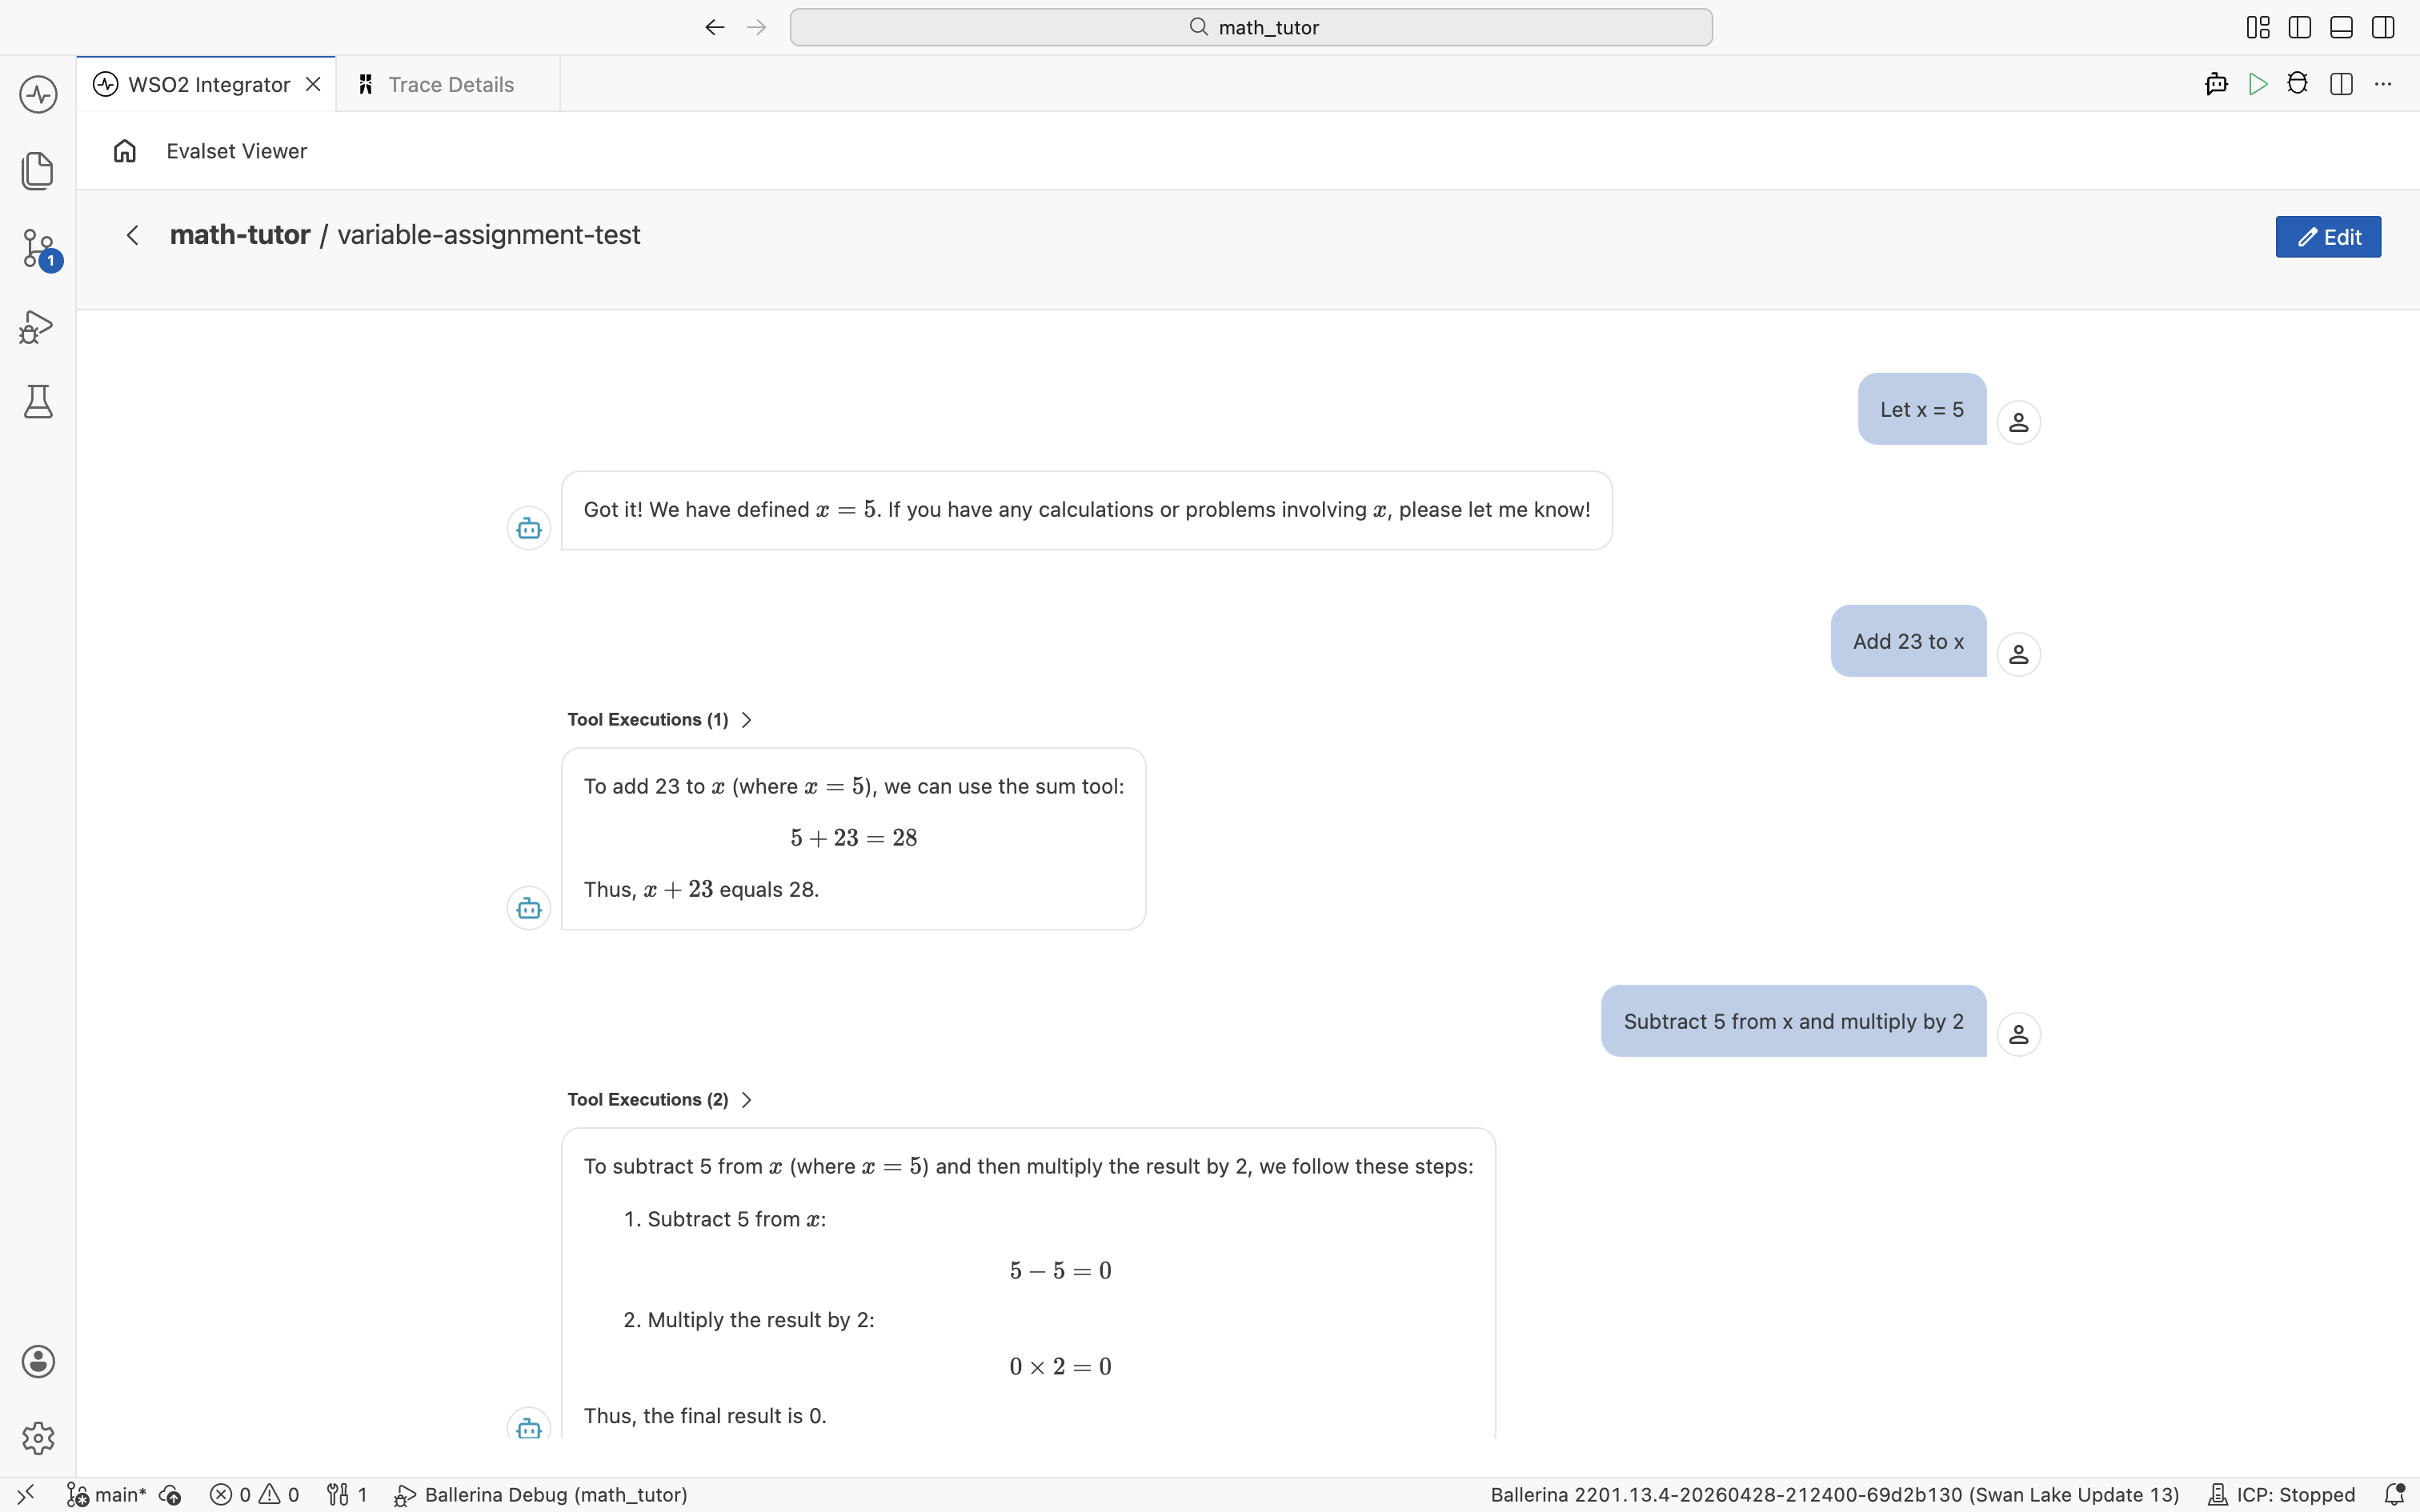
Edit an evalset
In the Evalset Viewer, each entry shows the user inputs, agent responses, and tool executions from the original session.
To rename a thread, hover over its title and edit it directly.
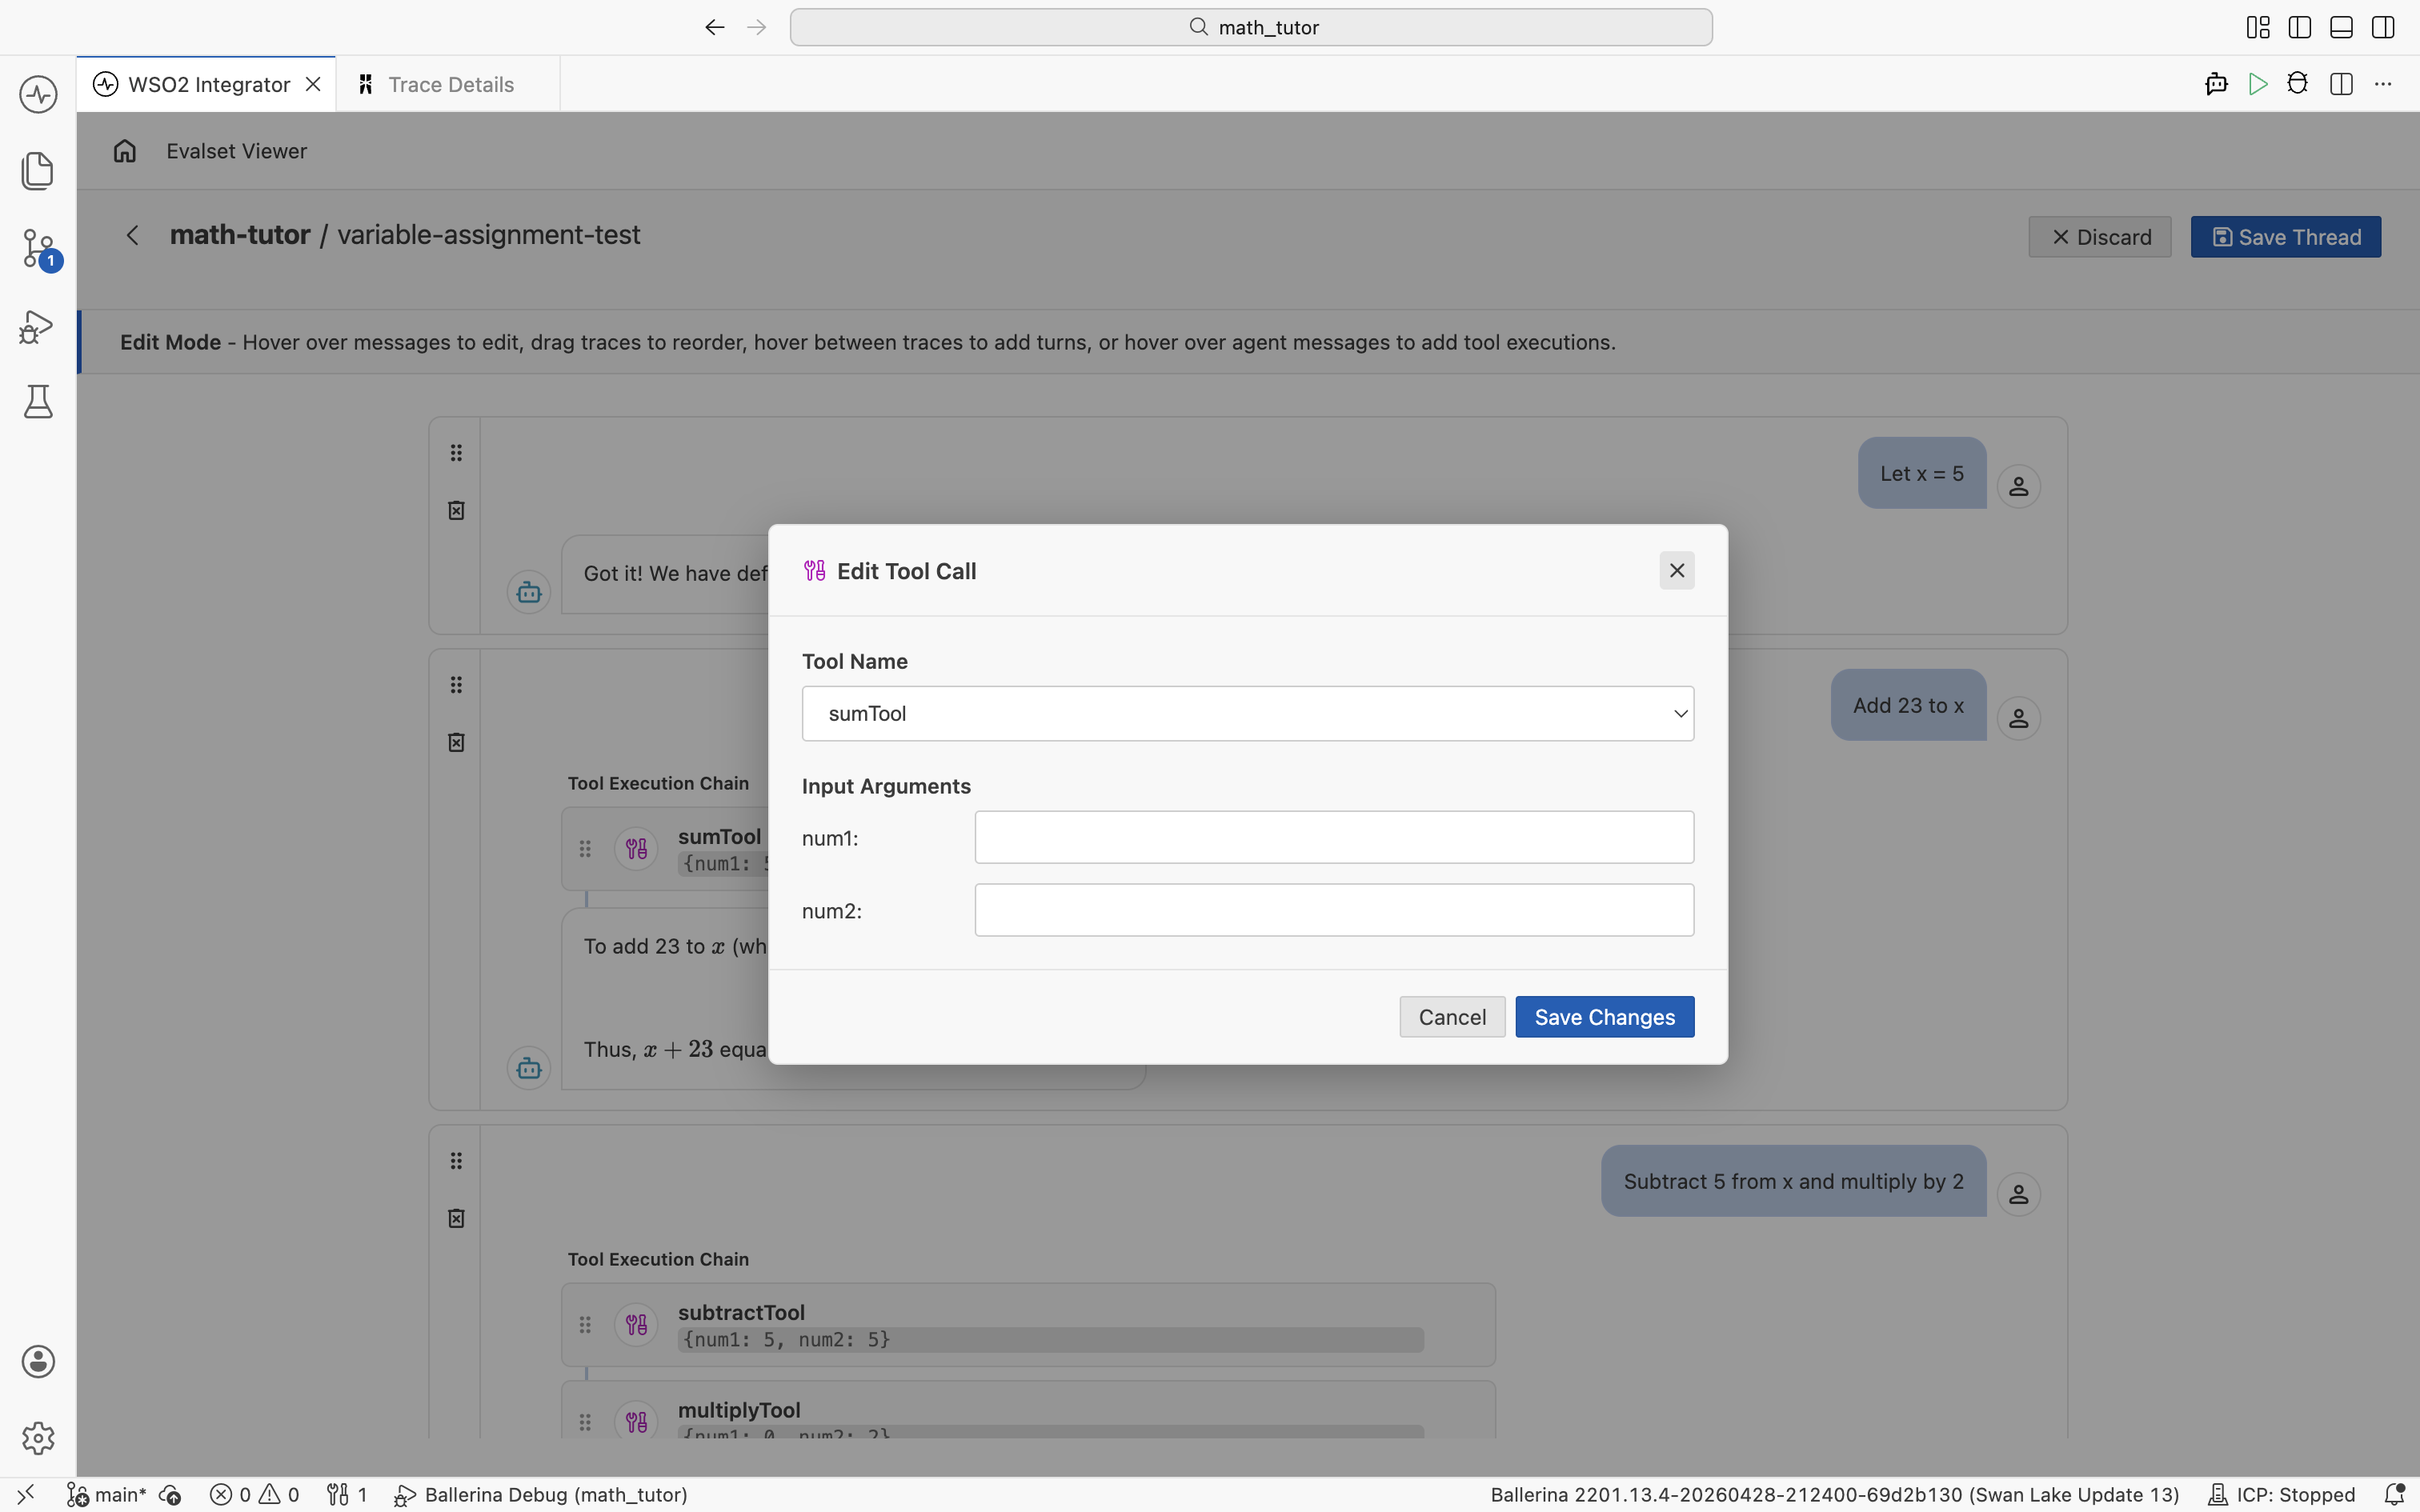
Enter Edit Mode
Click Edit at the top right to switch to Edit Mode. A banner explains what you can do: hover over a message to edit it, drag traces to reorder, hover between traces to add a new turn, or hover over an agent message to add a tool execution.

In Edit Mode you can:
- Edit user and agent messages.
- Reorder turns by dragging them.
- Add or remove a turn anywhere in the thread.
- Add or remove tool executions on an agent message.
- Edit a tool call's name and input arguments.
Edit a tool call
Click a tool execution to open the Edit Tool Call dialog. Pick the tool from the Tool Name list and update the Input Arguments, then click Save Changes.
Save or discard
Click Save Thread to keep your changes, or Discard to revert and leave Edit Mode.
What's next
- Create evaluations — Build evaluation functions that use this evalset.
- Run evaluations — Replay the evalset against the current agent build.