drupal_goto("https://wso2.com/solutions/healthcare/",array(), 301);
?>
Open Healthcare Sandbox
Overview
This step-by-step guide walks you through the WSO2 + Ping Open Healthcare sandbox.
Note: The sandbox environment provides a limited set of functions. If you want to experience the full solution, contact us.
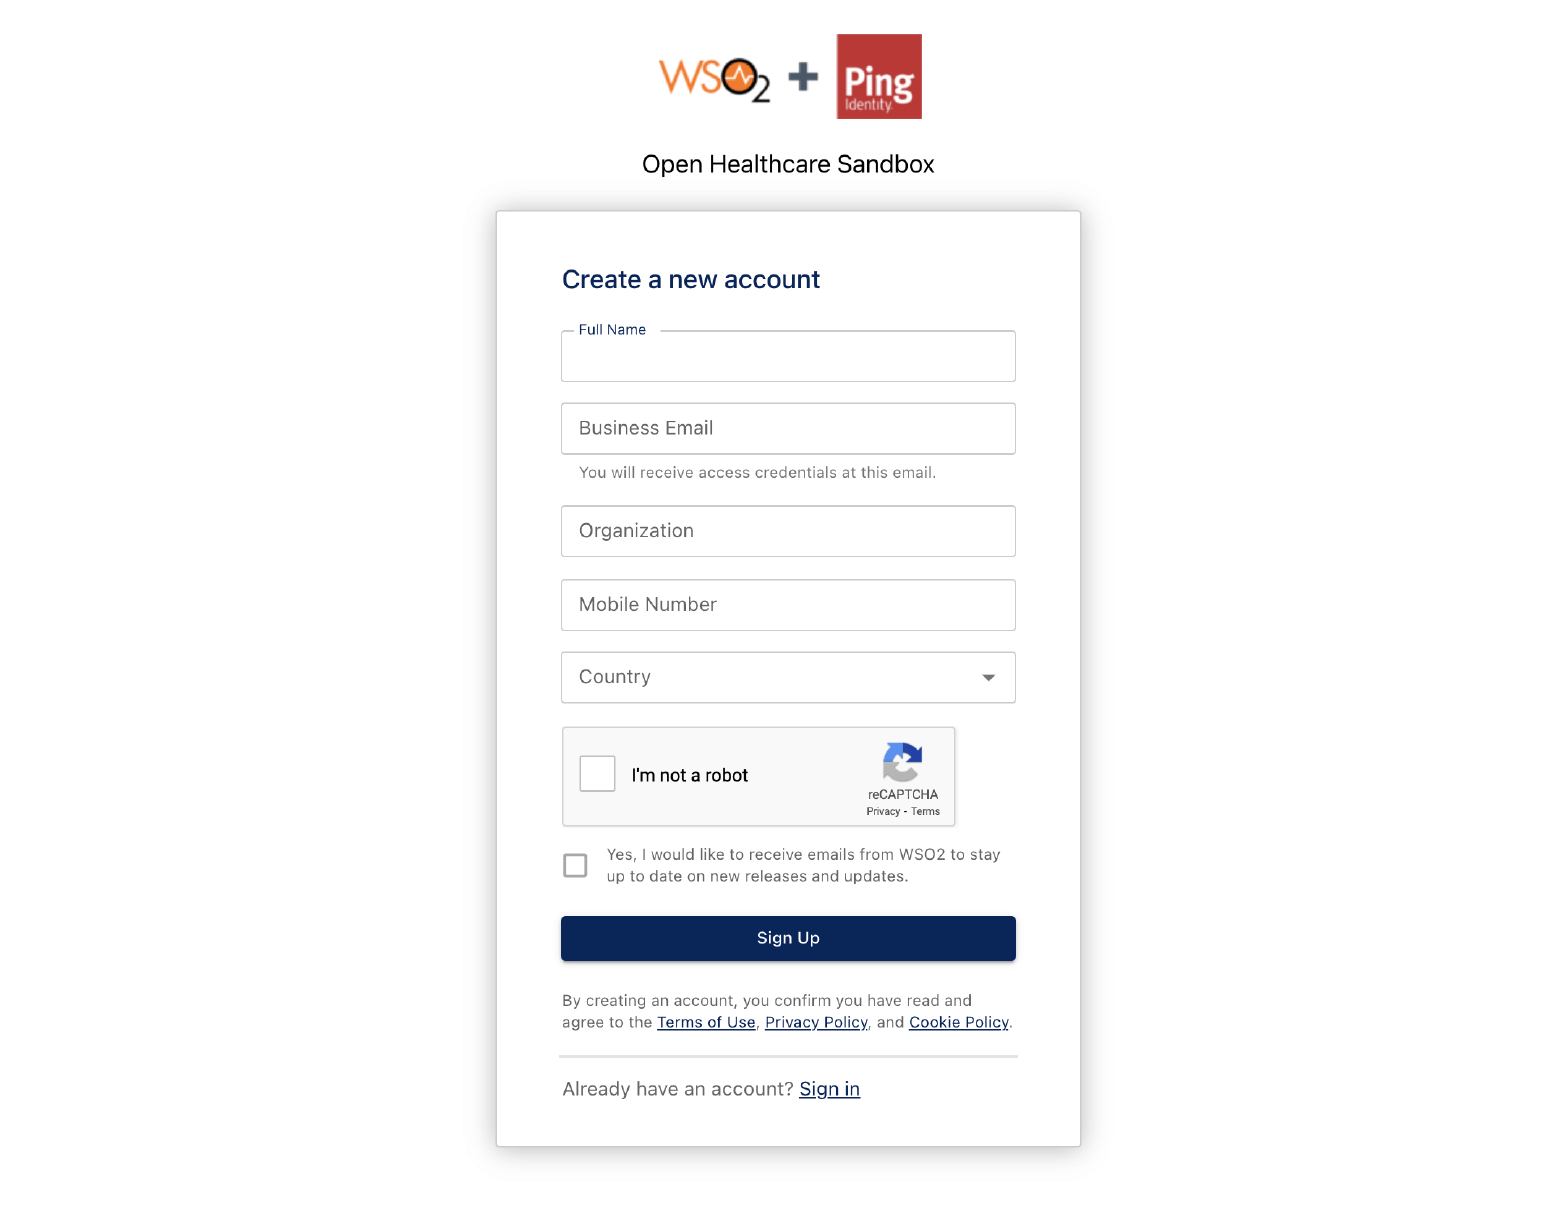
1. Signing Up
Sign up by creating a new account to access the sandbox.
1.1. Create a new account to access the sandbox developer environment.
- Provide the required information as shown below, and click Sign Up.
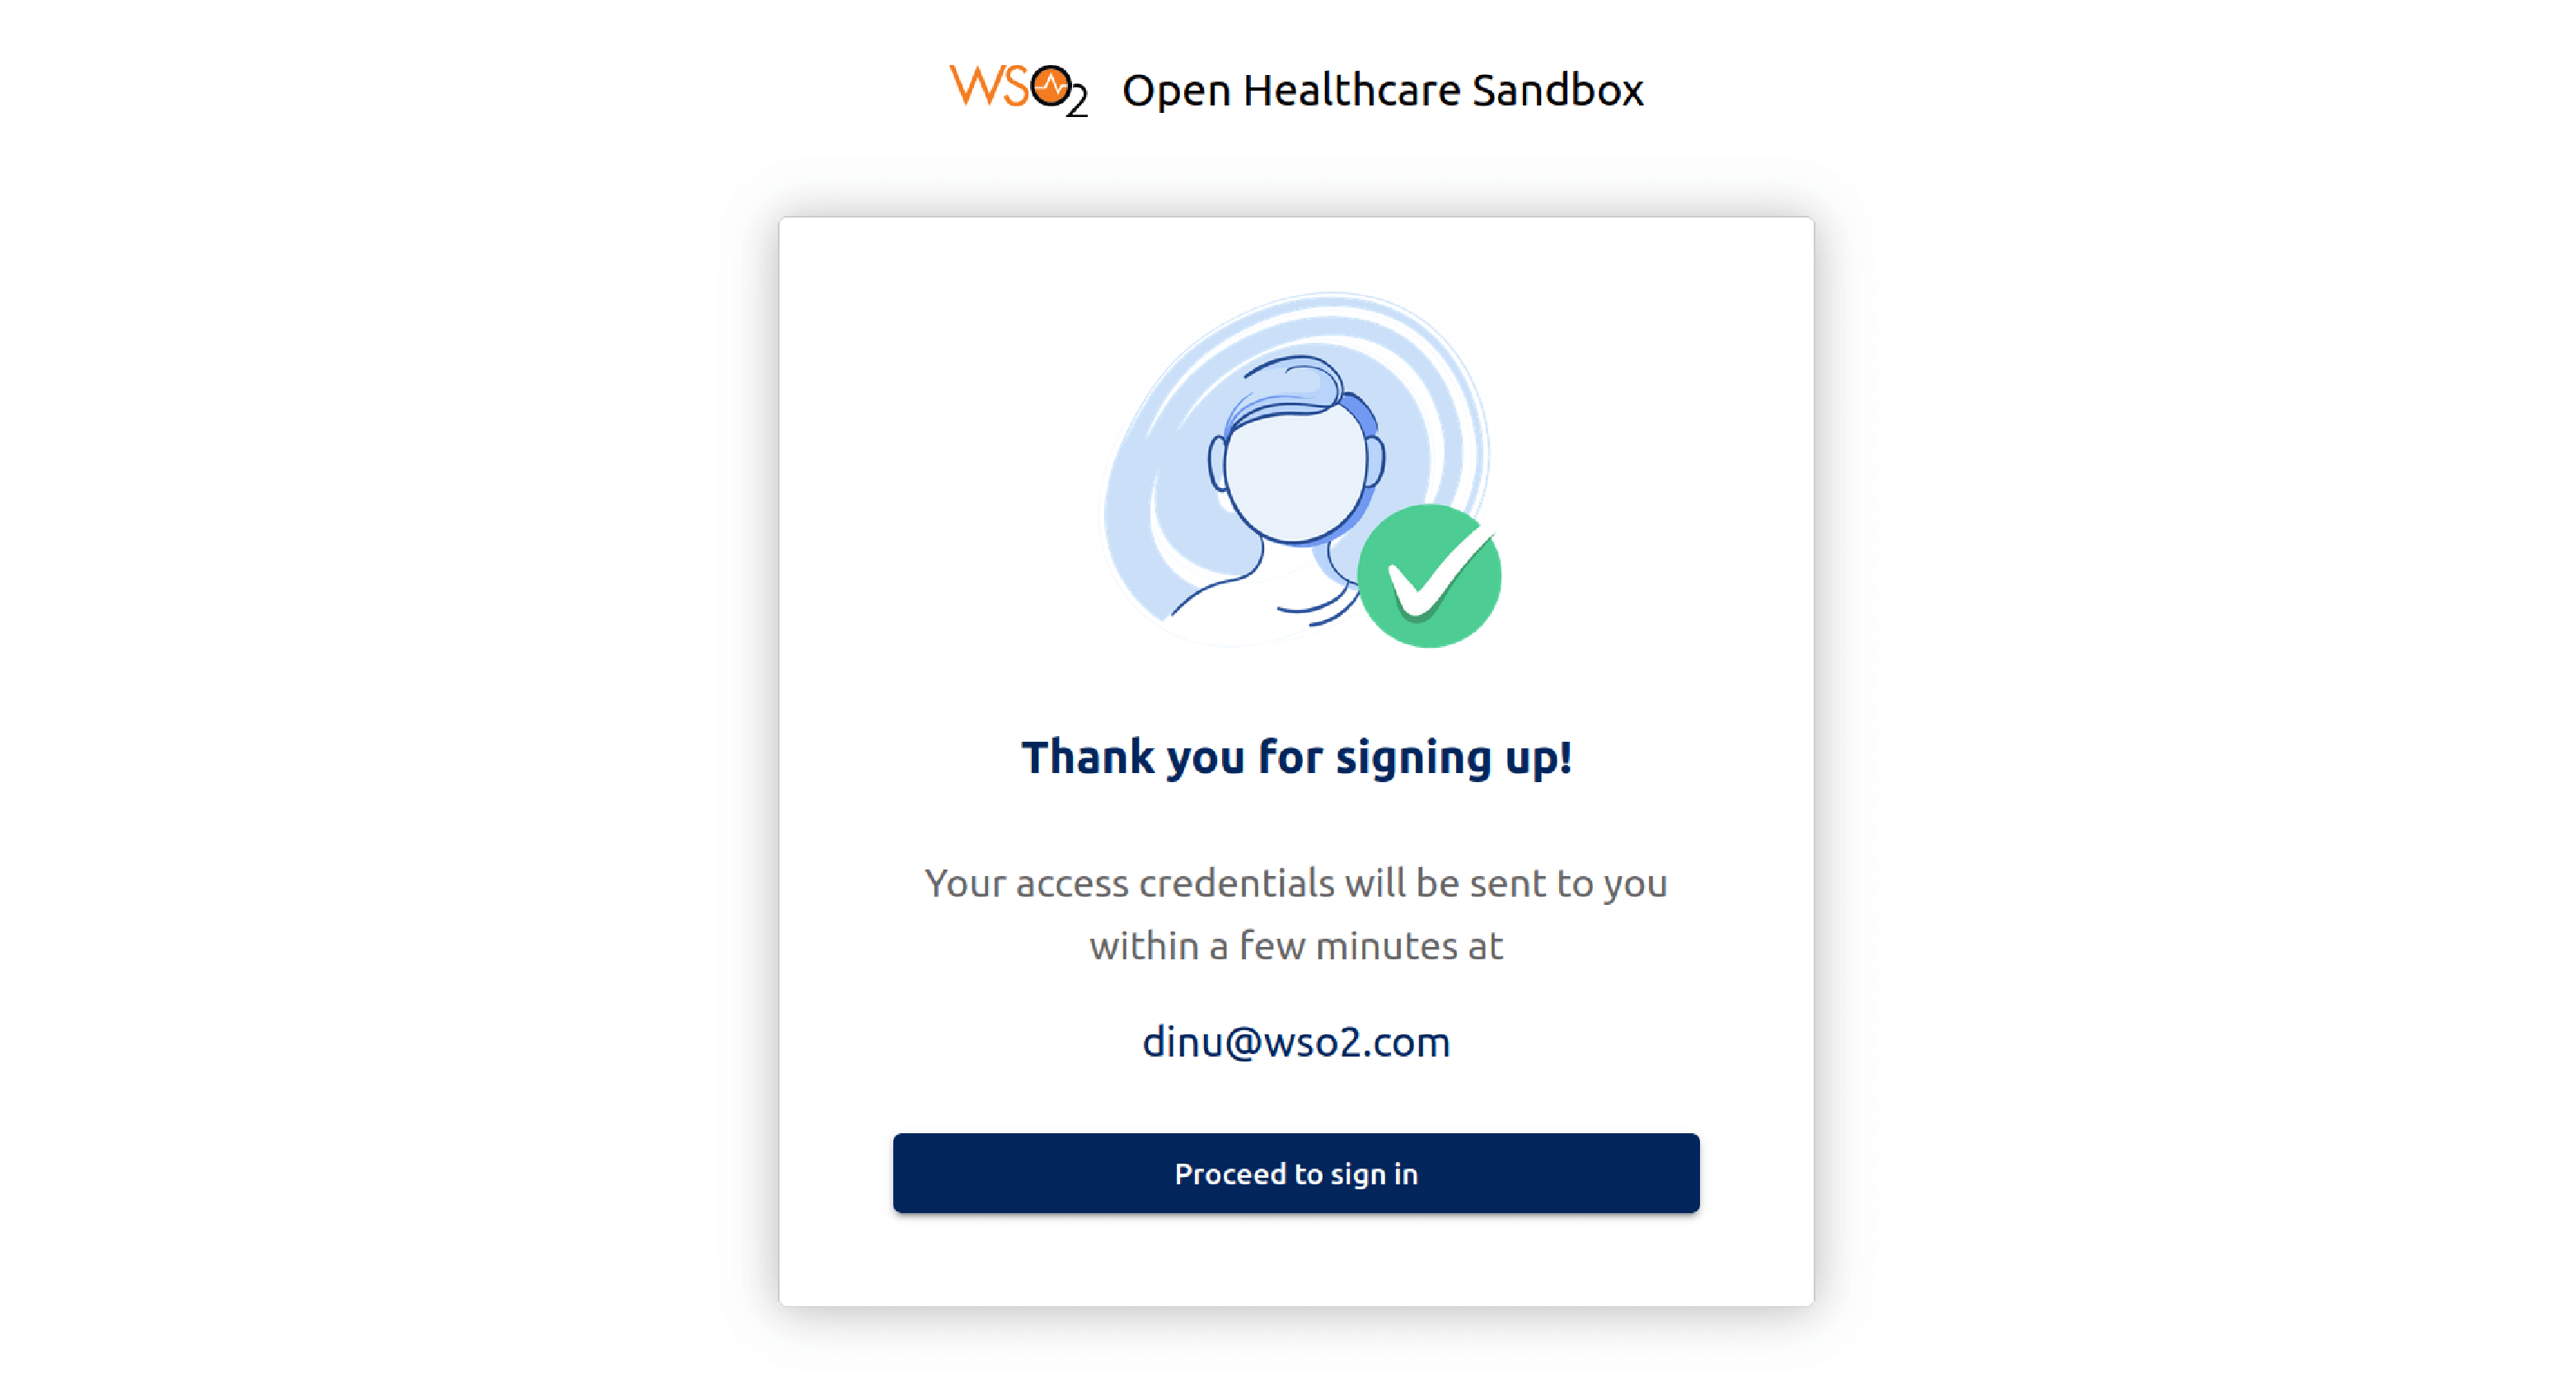
- Add a valid business email address to obtain an email with your credentials.
1.2. In the email you receive with the credentials that are required to sign in, click Proceed to sign in.
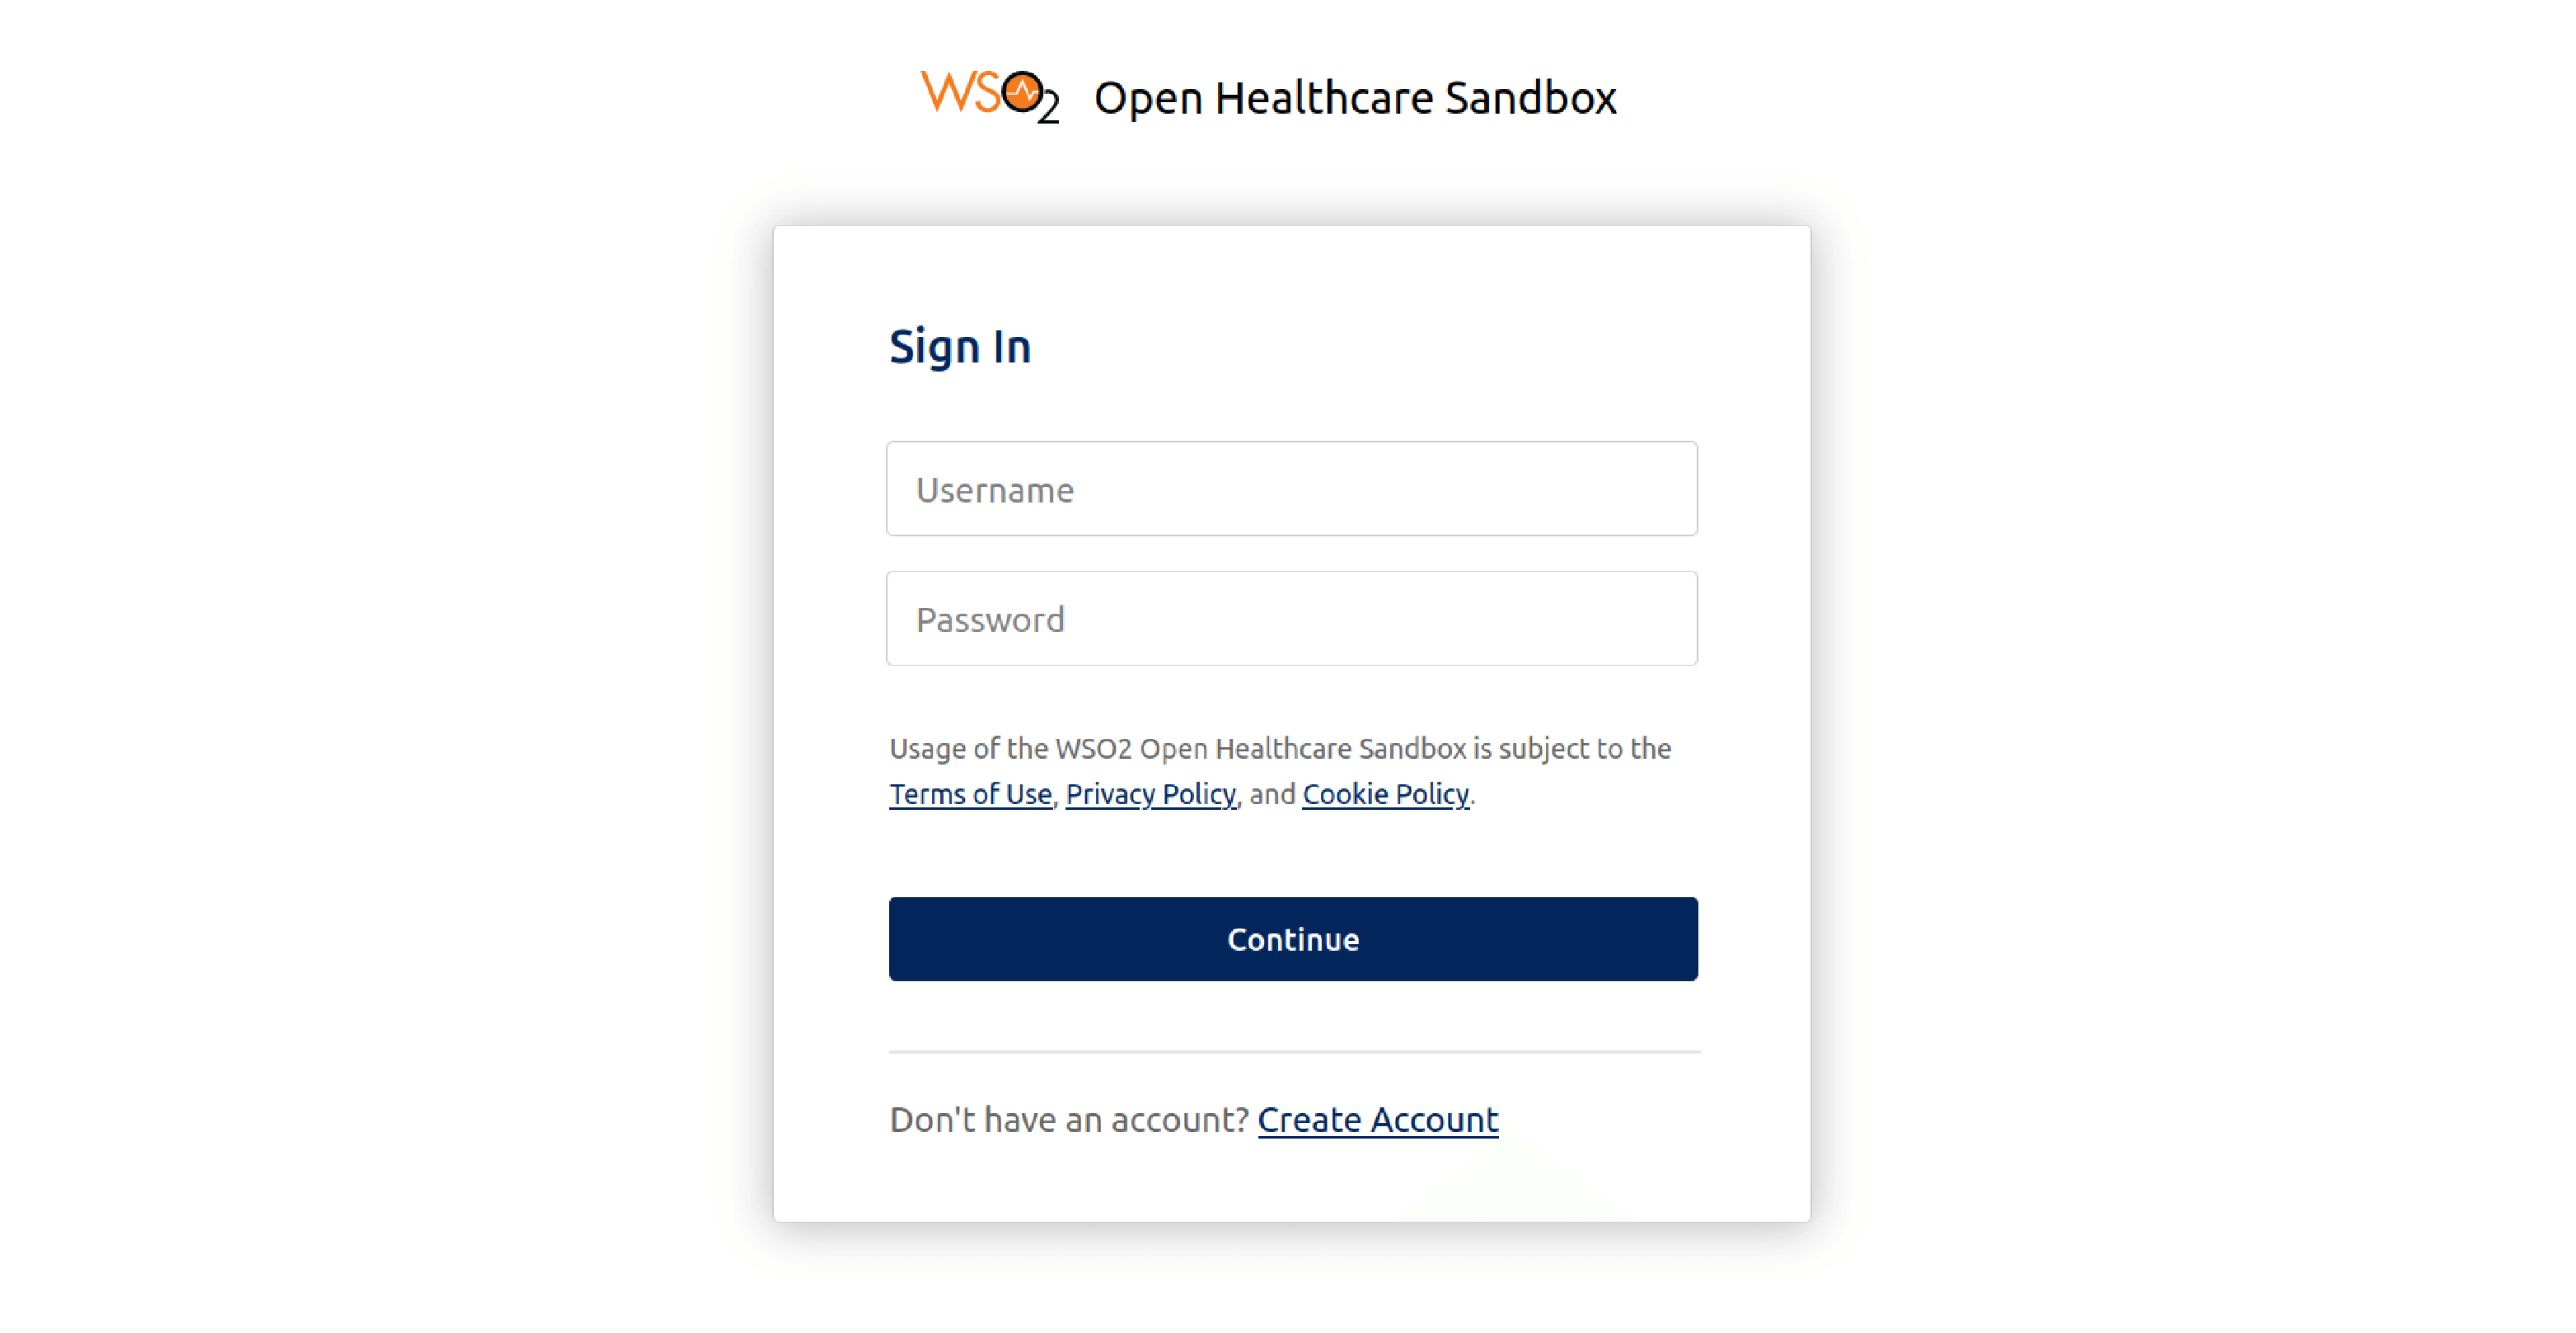
2. Signing In
2.1. Sign in with the received credentials.
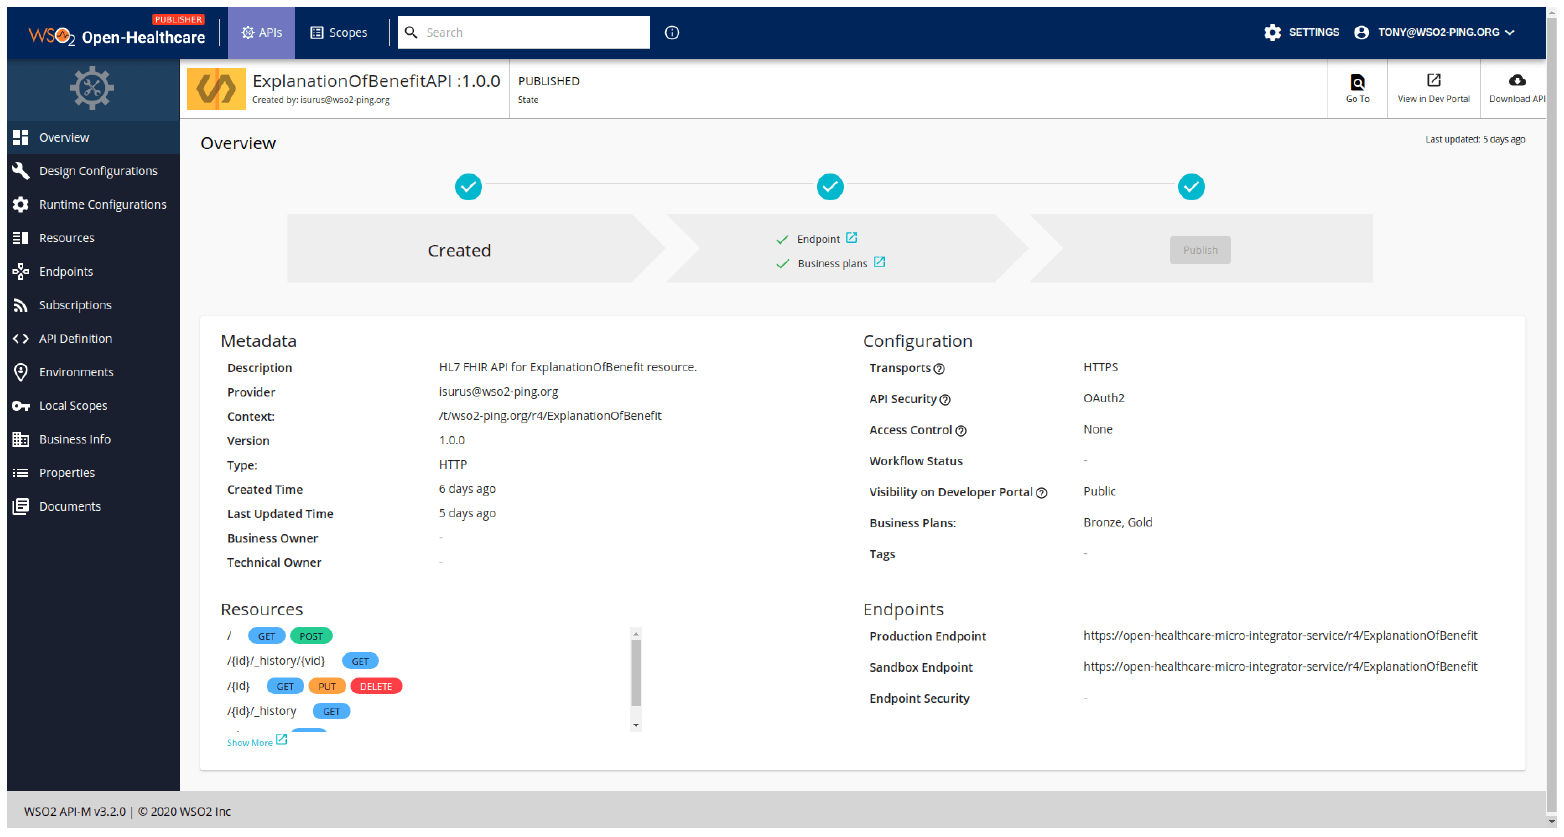
3. Open Healthcare Sandbox Environment
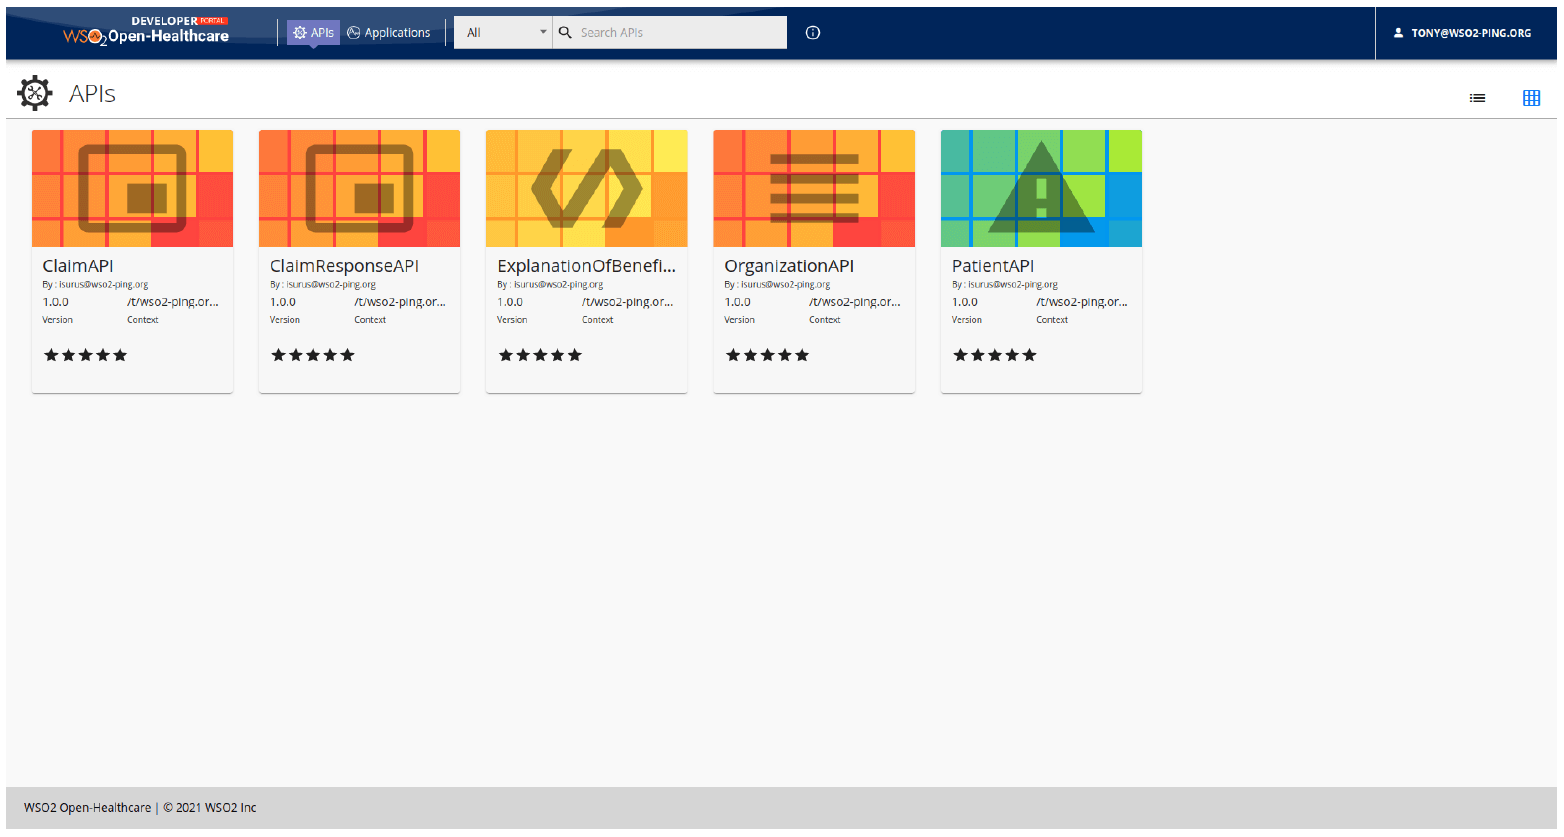
Once you have logged in, you view the homepage of the Publisher portal of Open Healthcare Sandbox Environment as shown below.

In the Sandbox Environment, you can view the API’s configurations and invoke pre-deployed FHIR® APIs.
3.1. Click on an API and you can see the overview page.
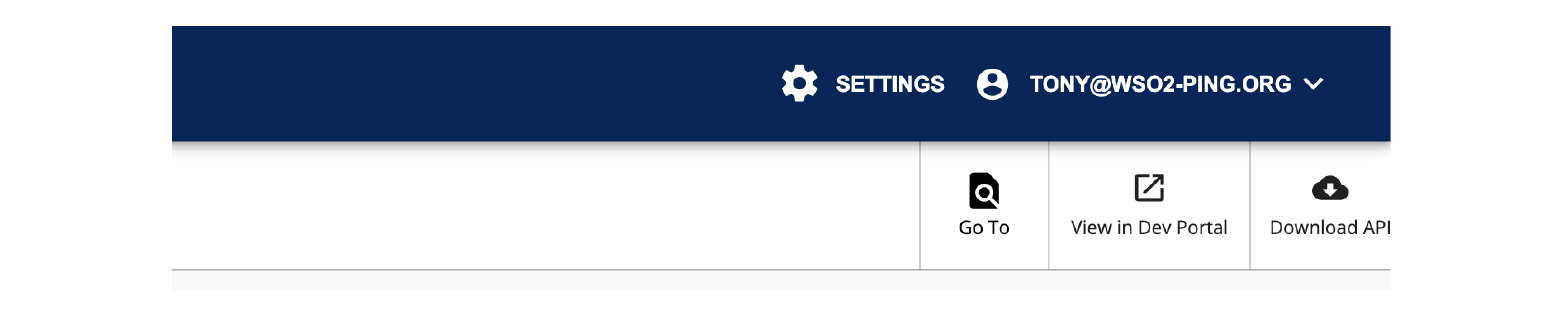
3.2. You can access the API Developer Portal from the top navigation bar.
4. Invoking APIs
When you sign in to the API Developer Portal as a user, you view the published APIs on the Developer Portal. It allows you to discover and invoke the required APIs.
4.1. Sign in to the Developer Portal and click on an API you wish to invoke.
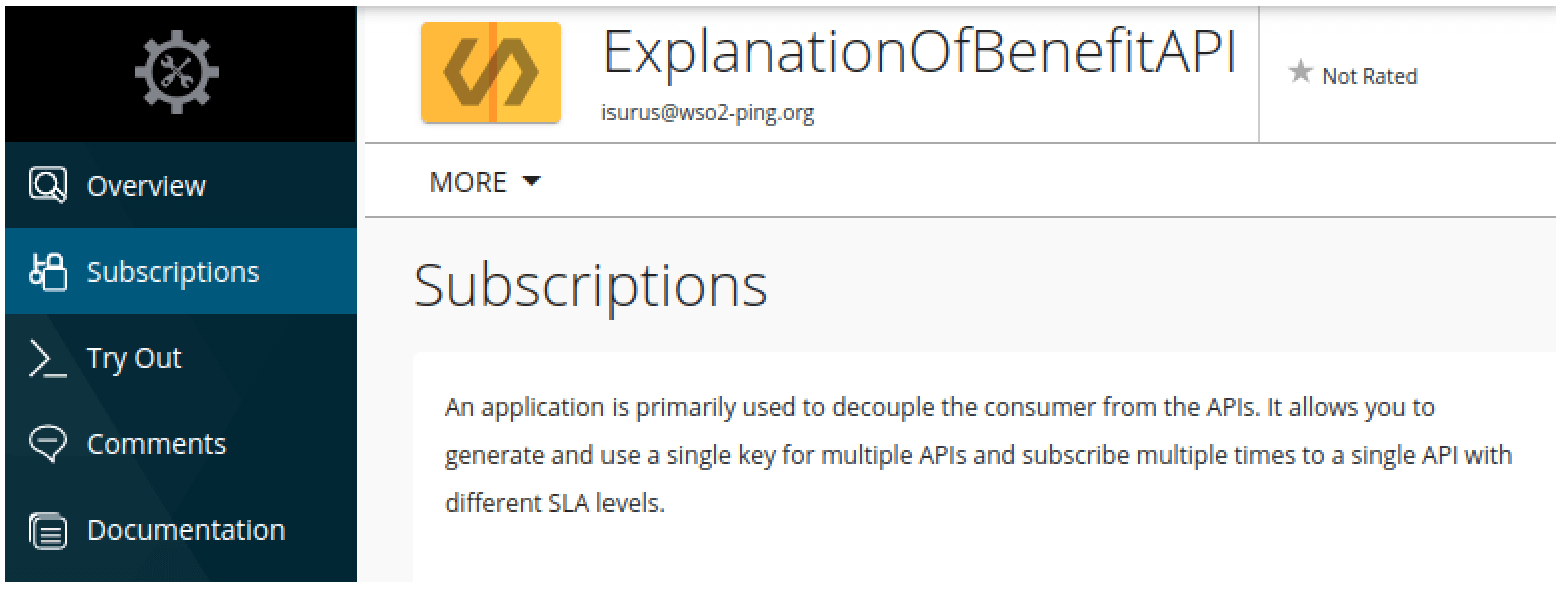
4.2. Scroll down the Overview page of the API and you can see that the User is already subscribed to an Application.
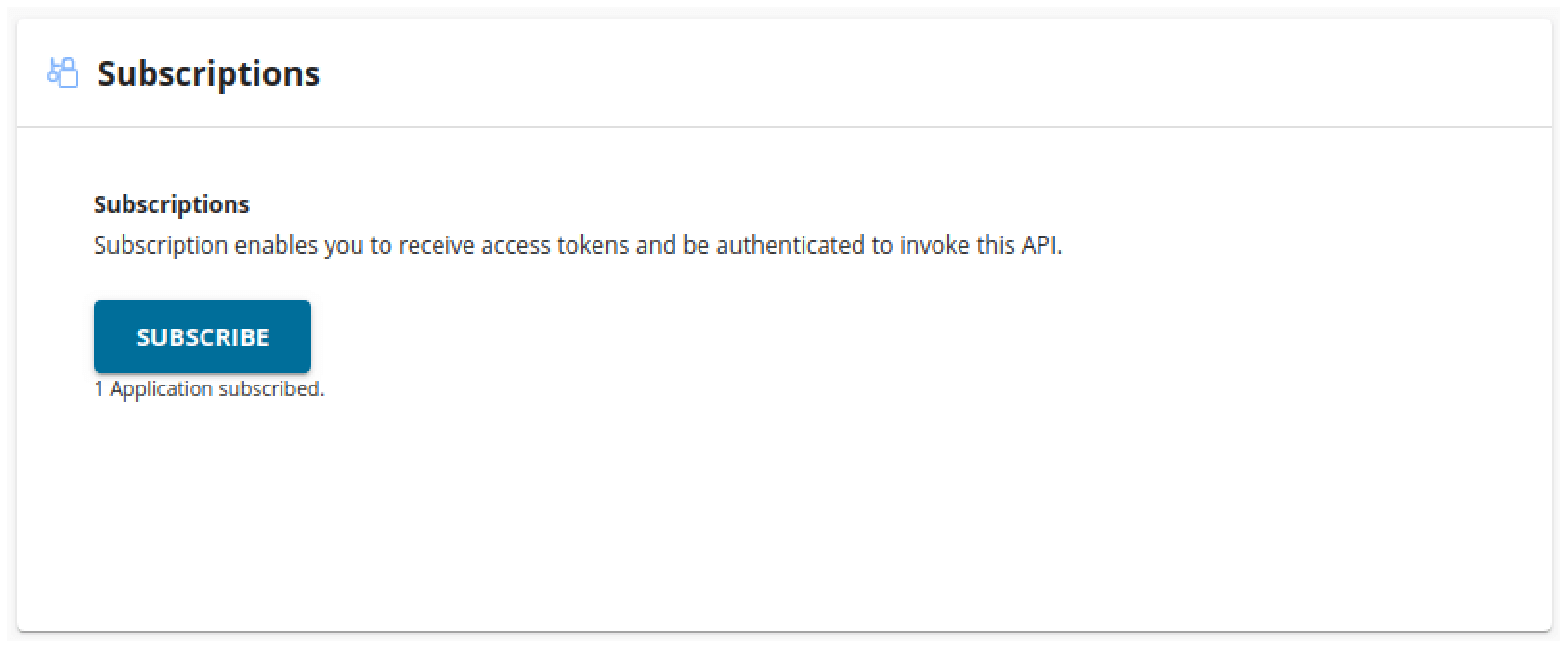
You can view all the subscriptions under the Subscriptions tab.
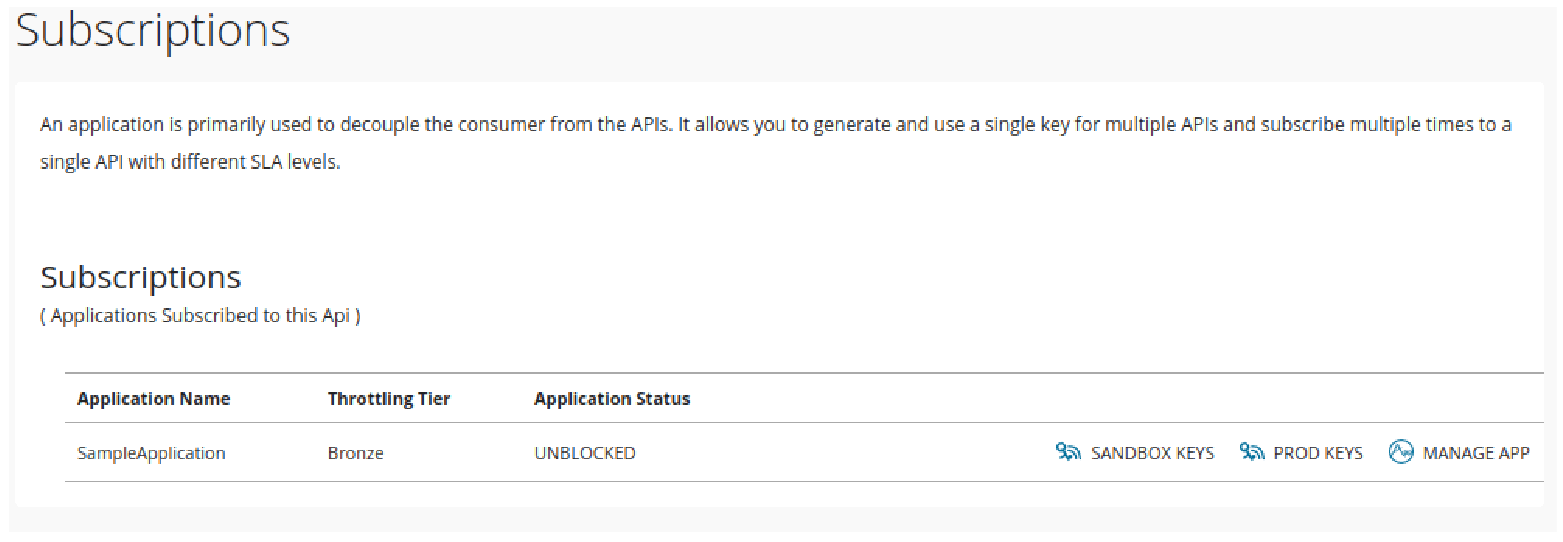
4.3. Click Applications
- Click the application that you used to subscribe to the API (SampleApplication).
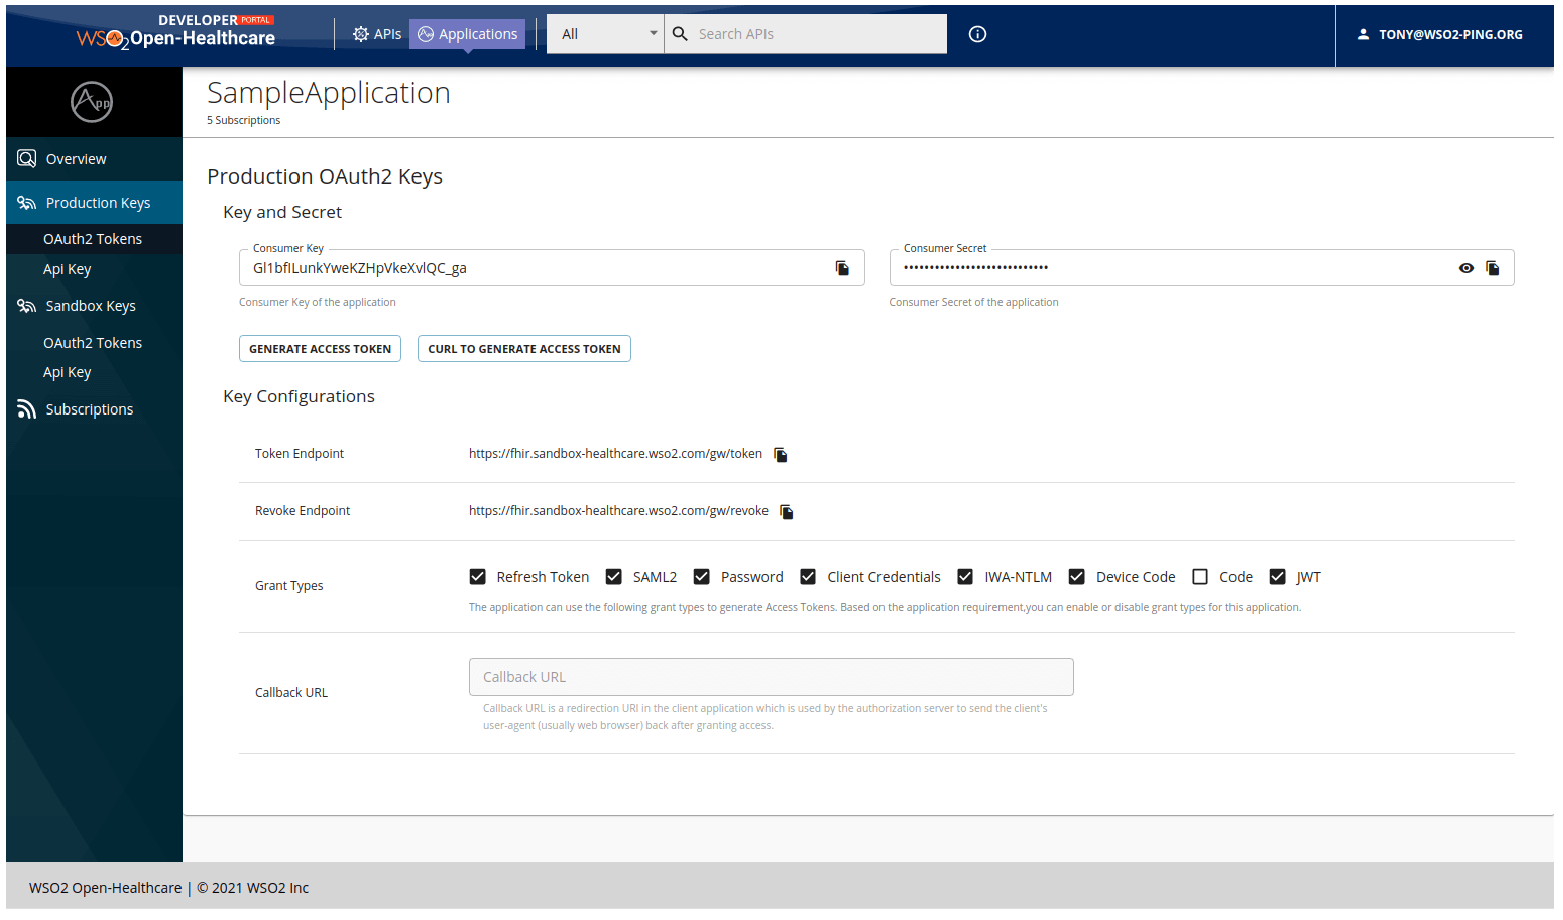
- Click Production Keys
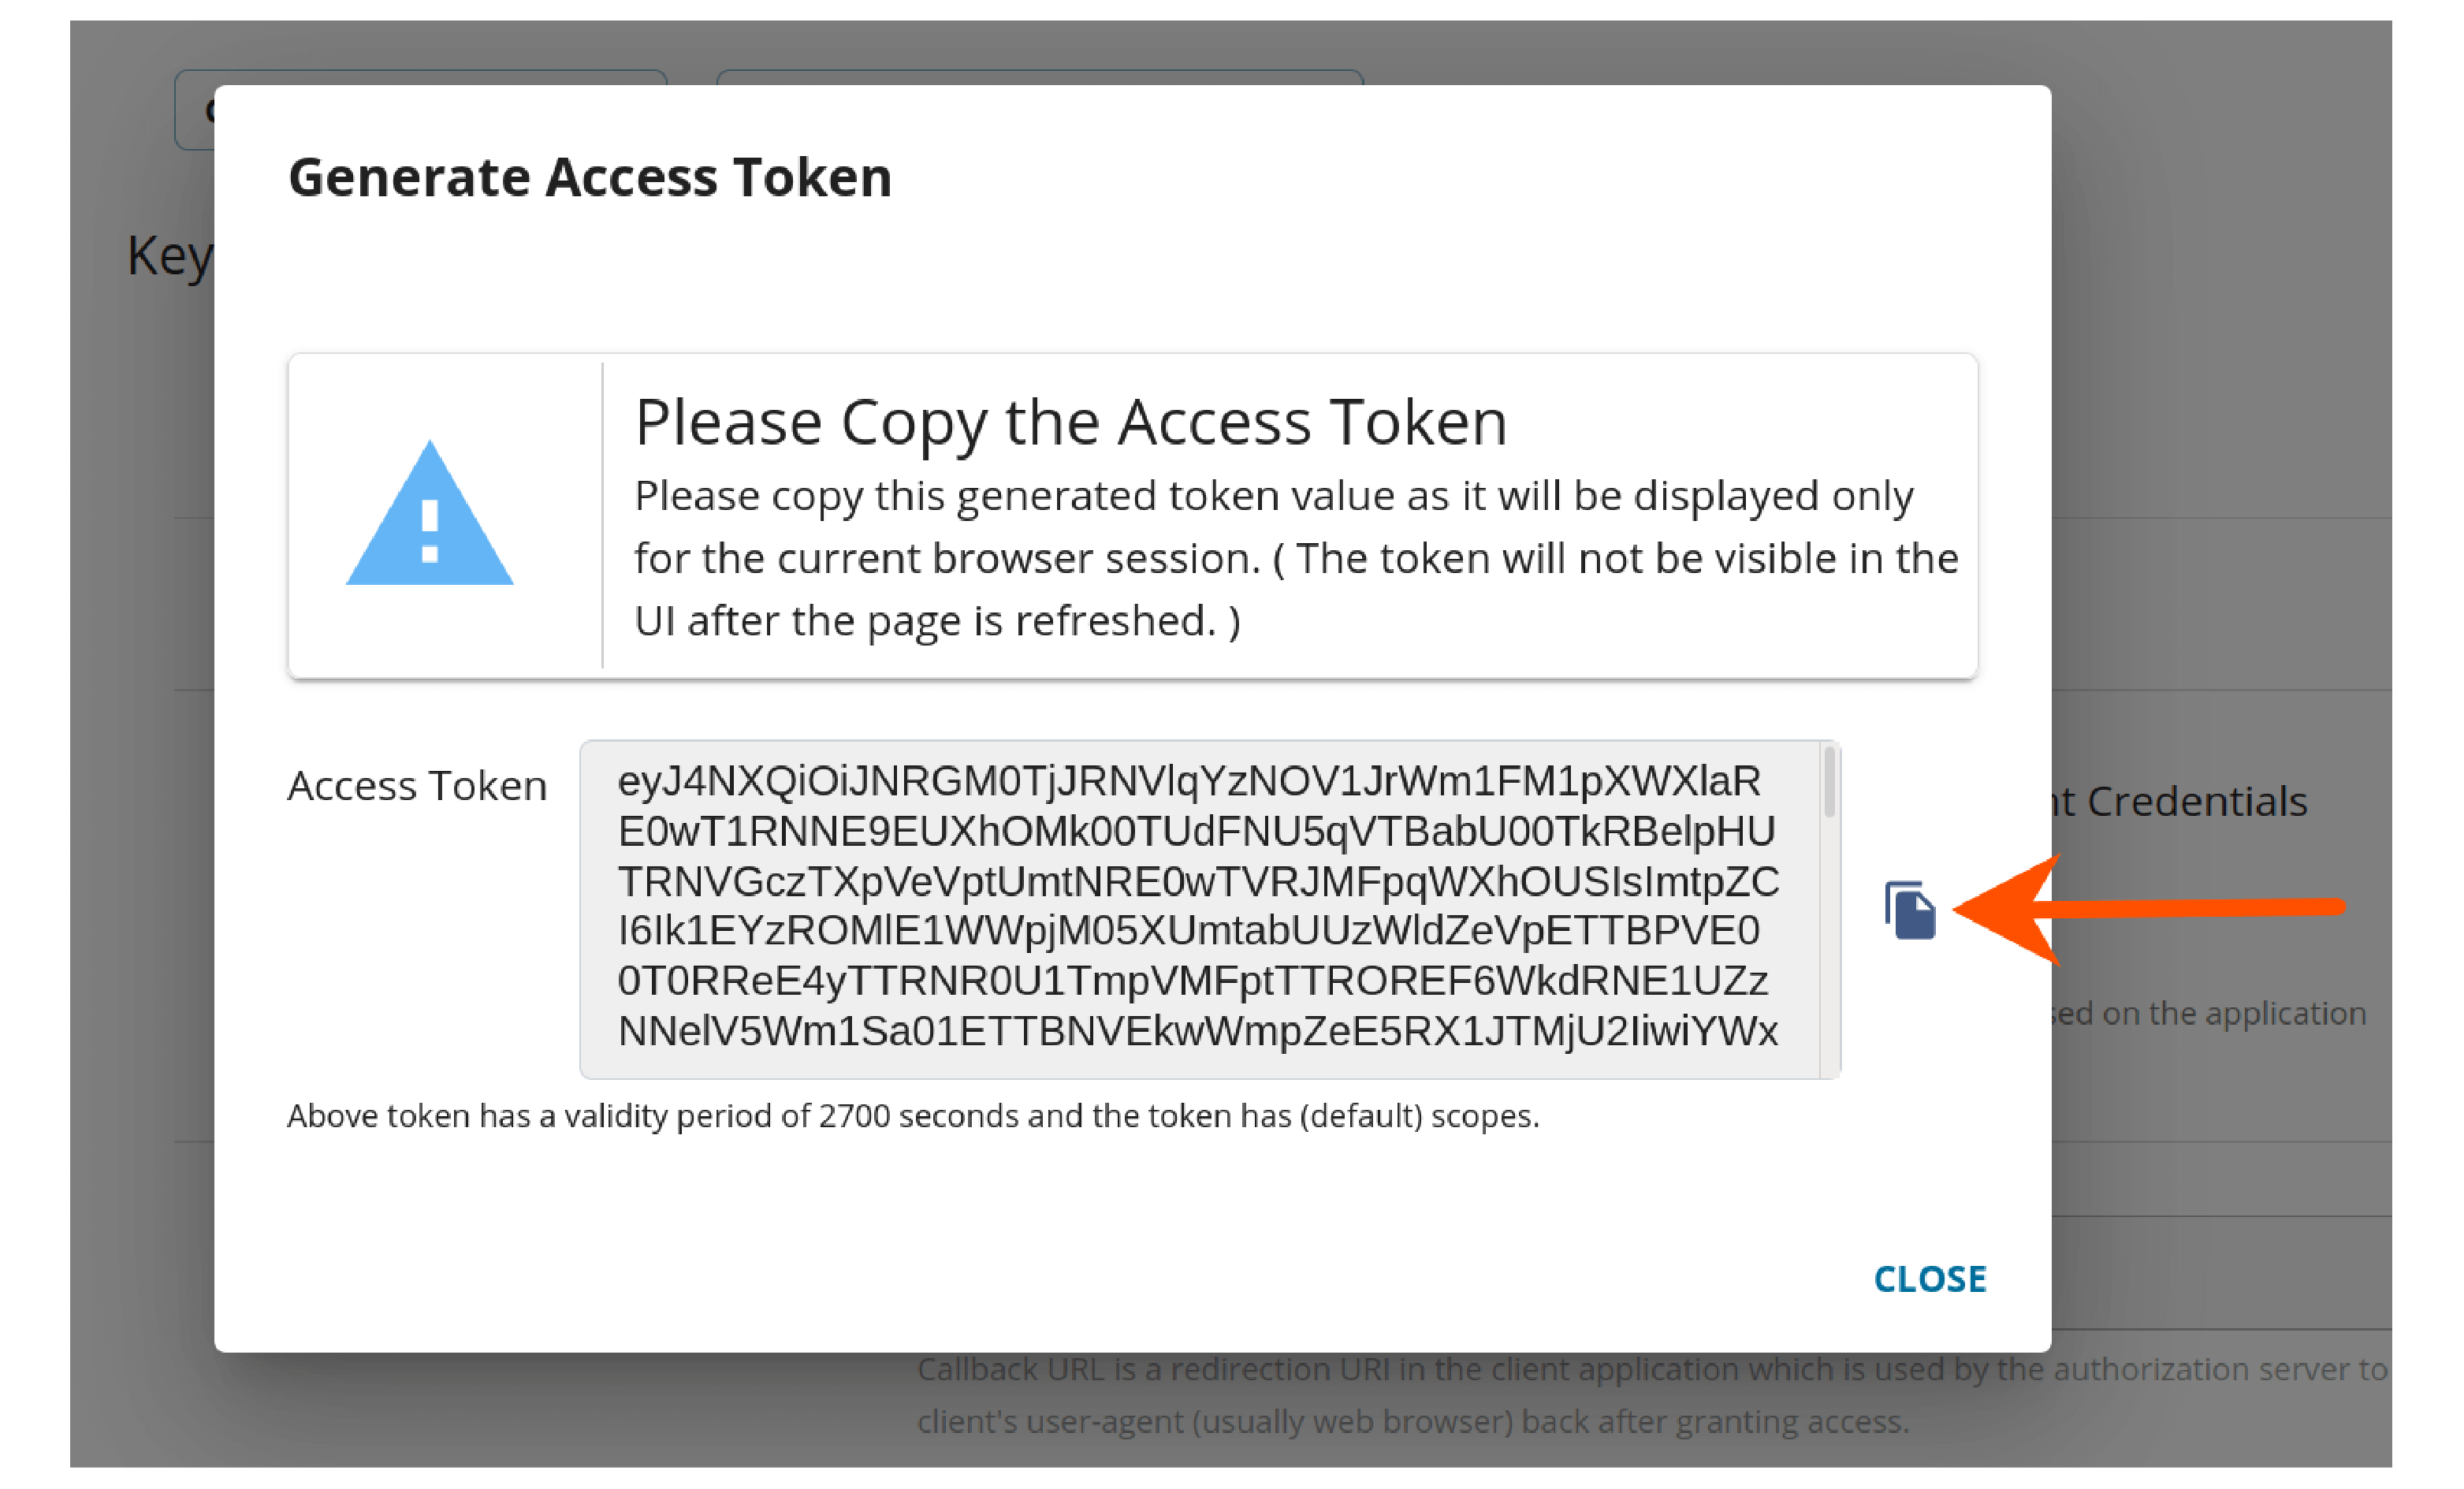
- Click Generate Access Token to generate an access token.
The sandbox supports the two options below to invoke APIs.
- Invoking an API using the Integrated API Console
- Invoking an API using an API Client
Option 1: Invoking an API Using the Integrated API Console
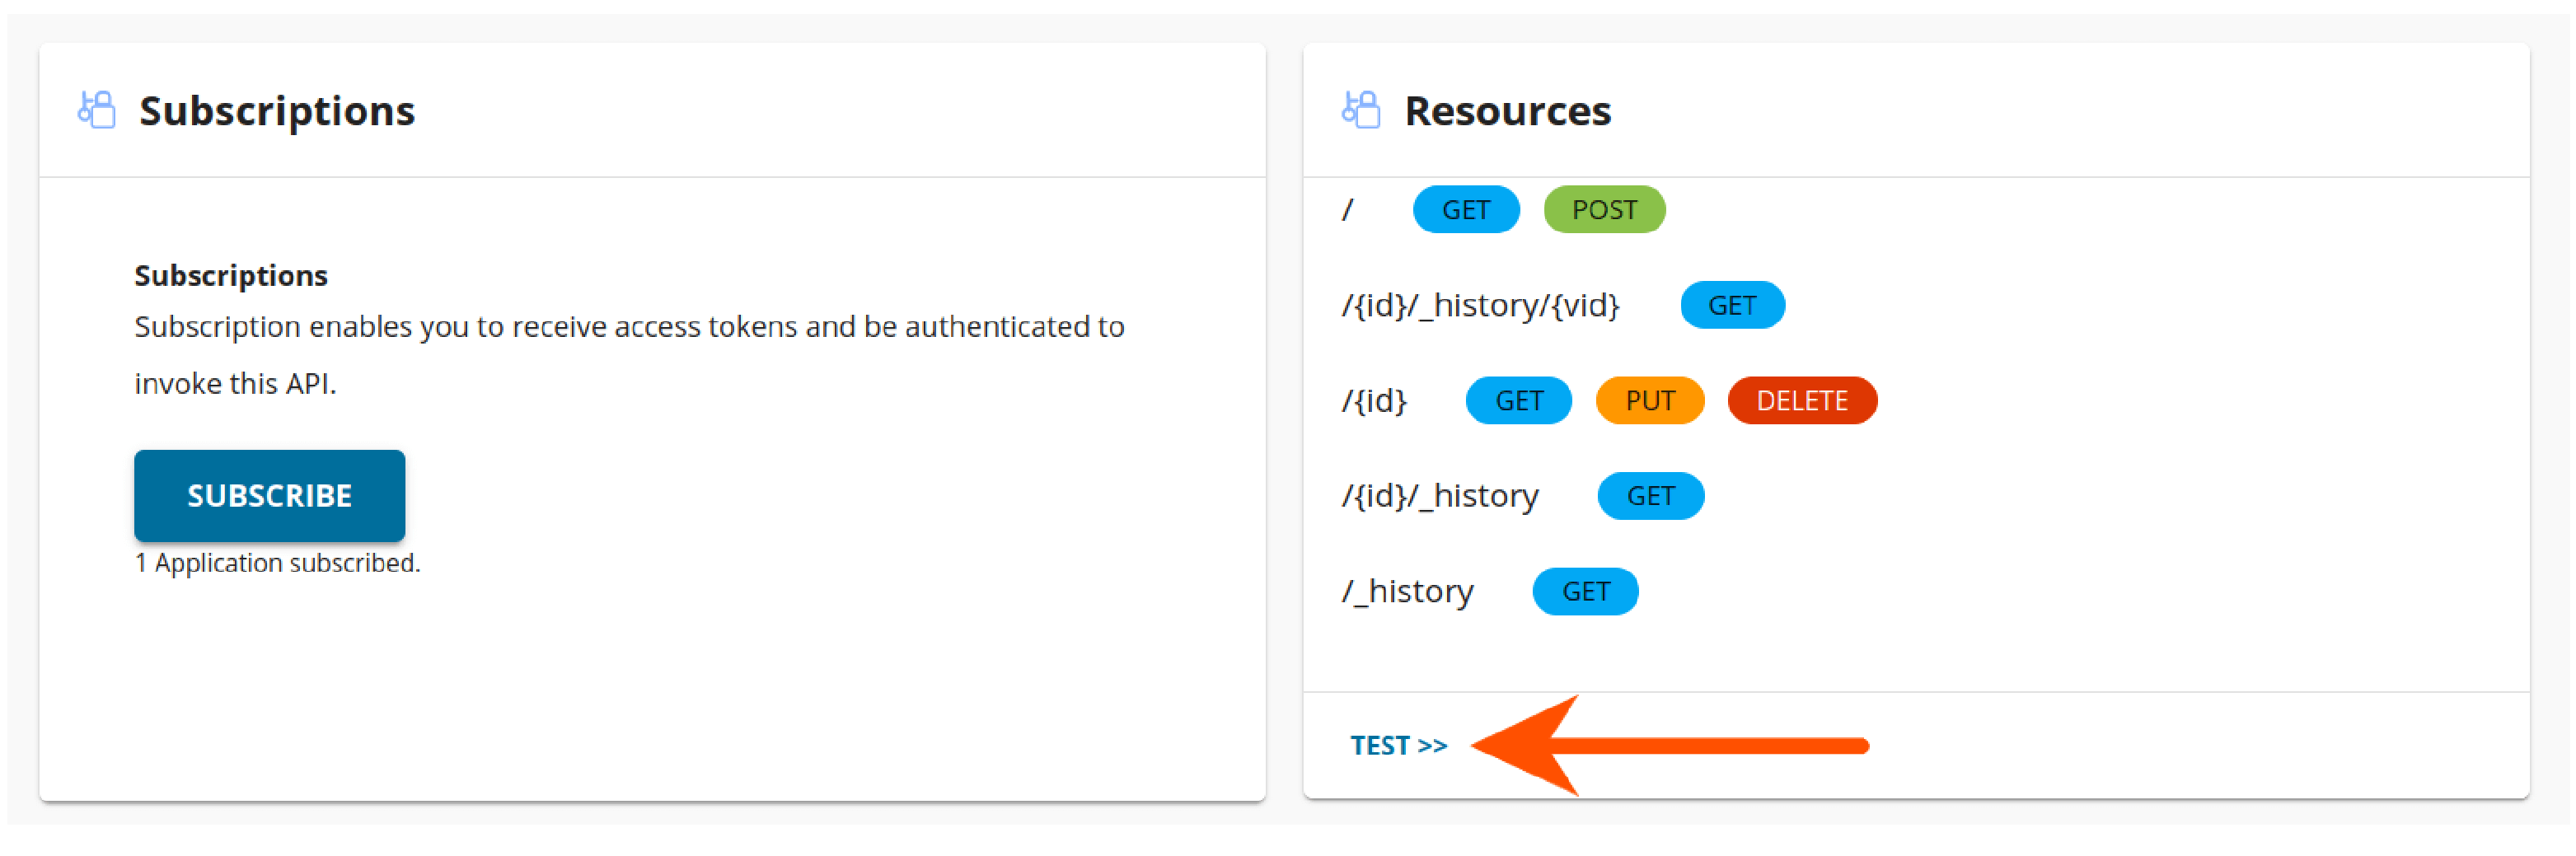
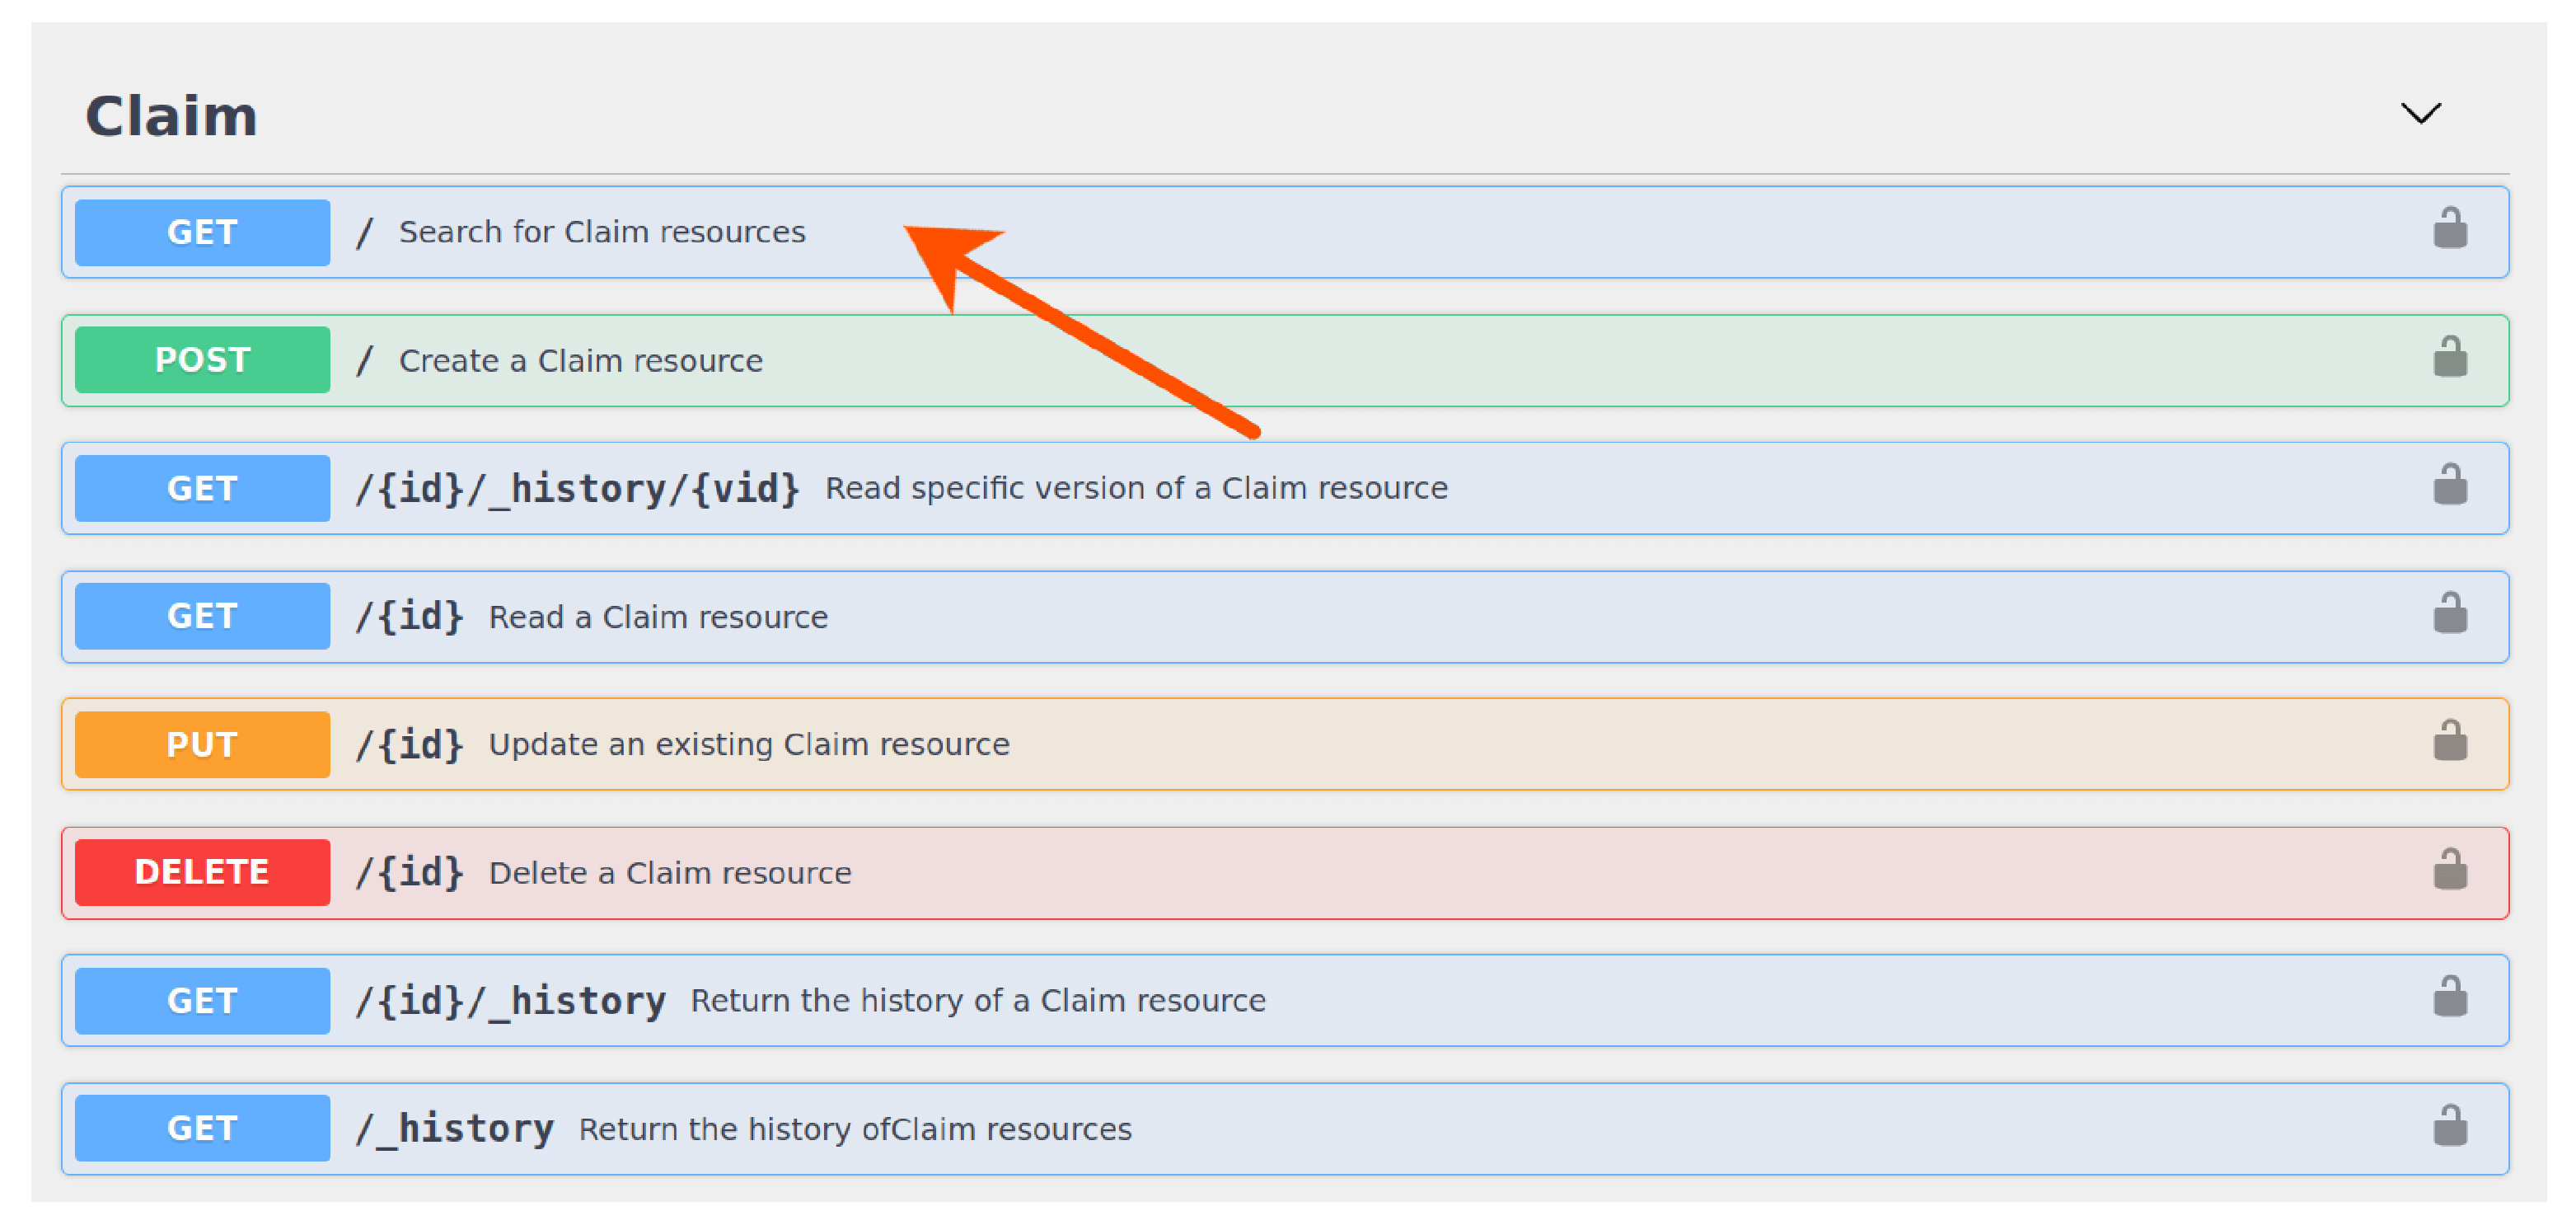
4.4. Click APIs, and click on the API that you need to invoke.
4.5. Click Test under the resources section of the API.
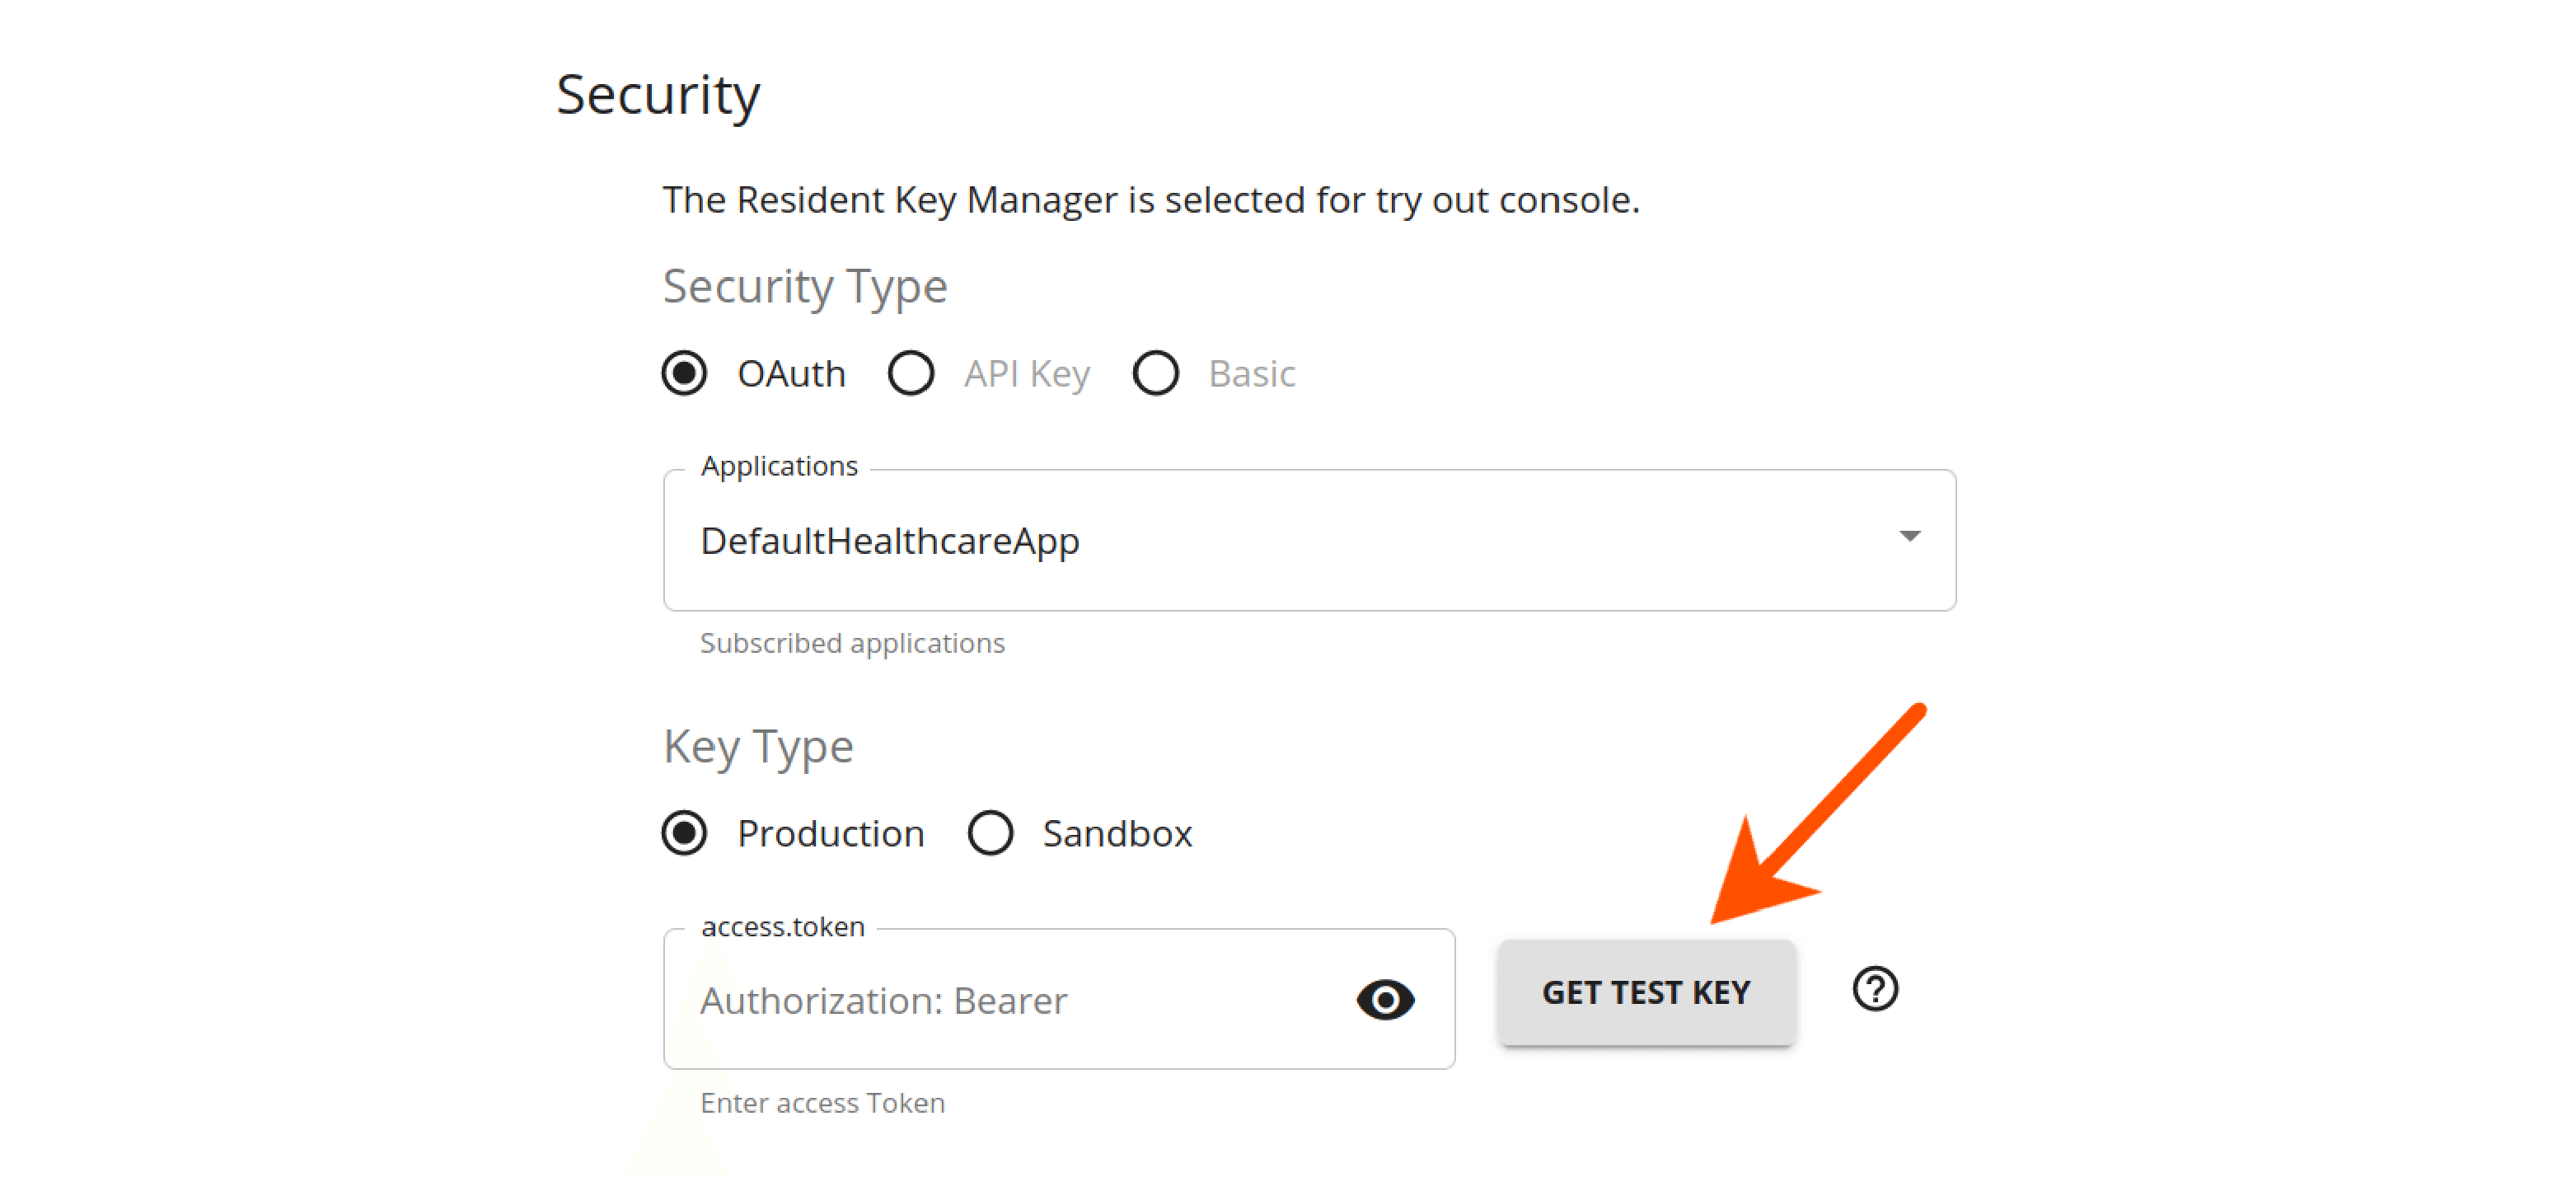
4.6. On the API Console, click Get Test Key to add the access token in the Authorization field to test your API.

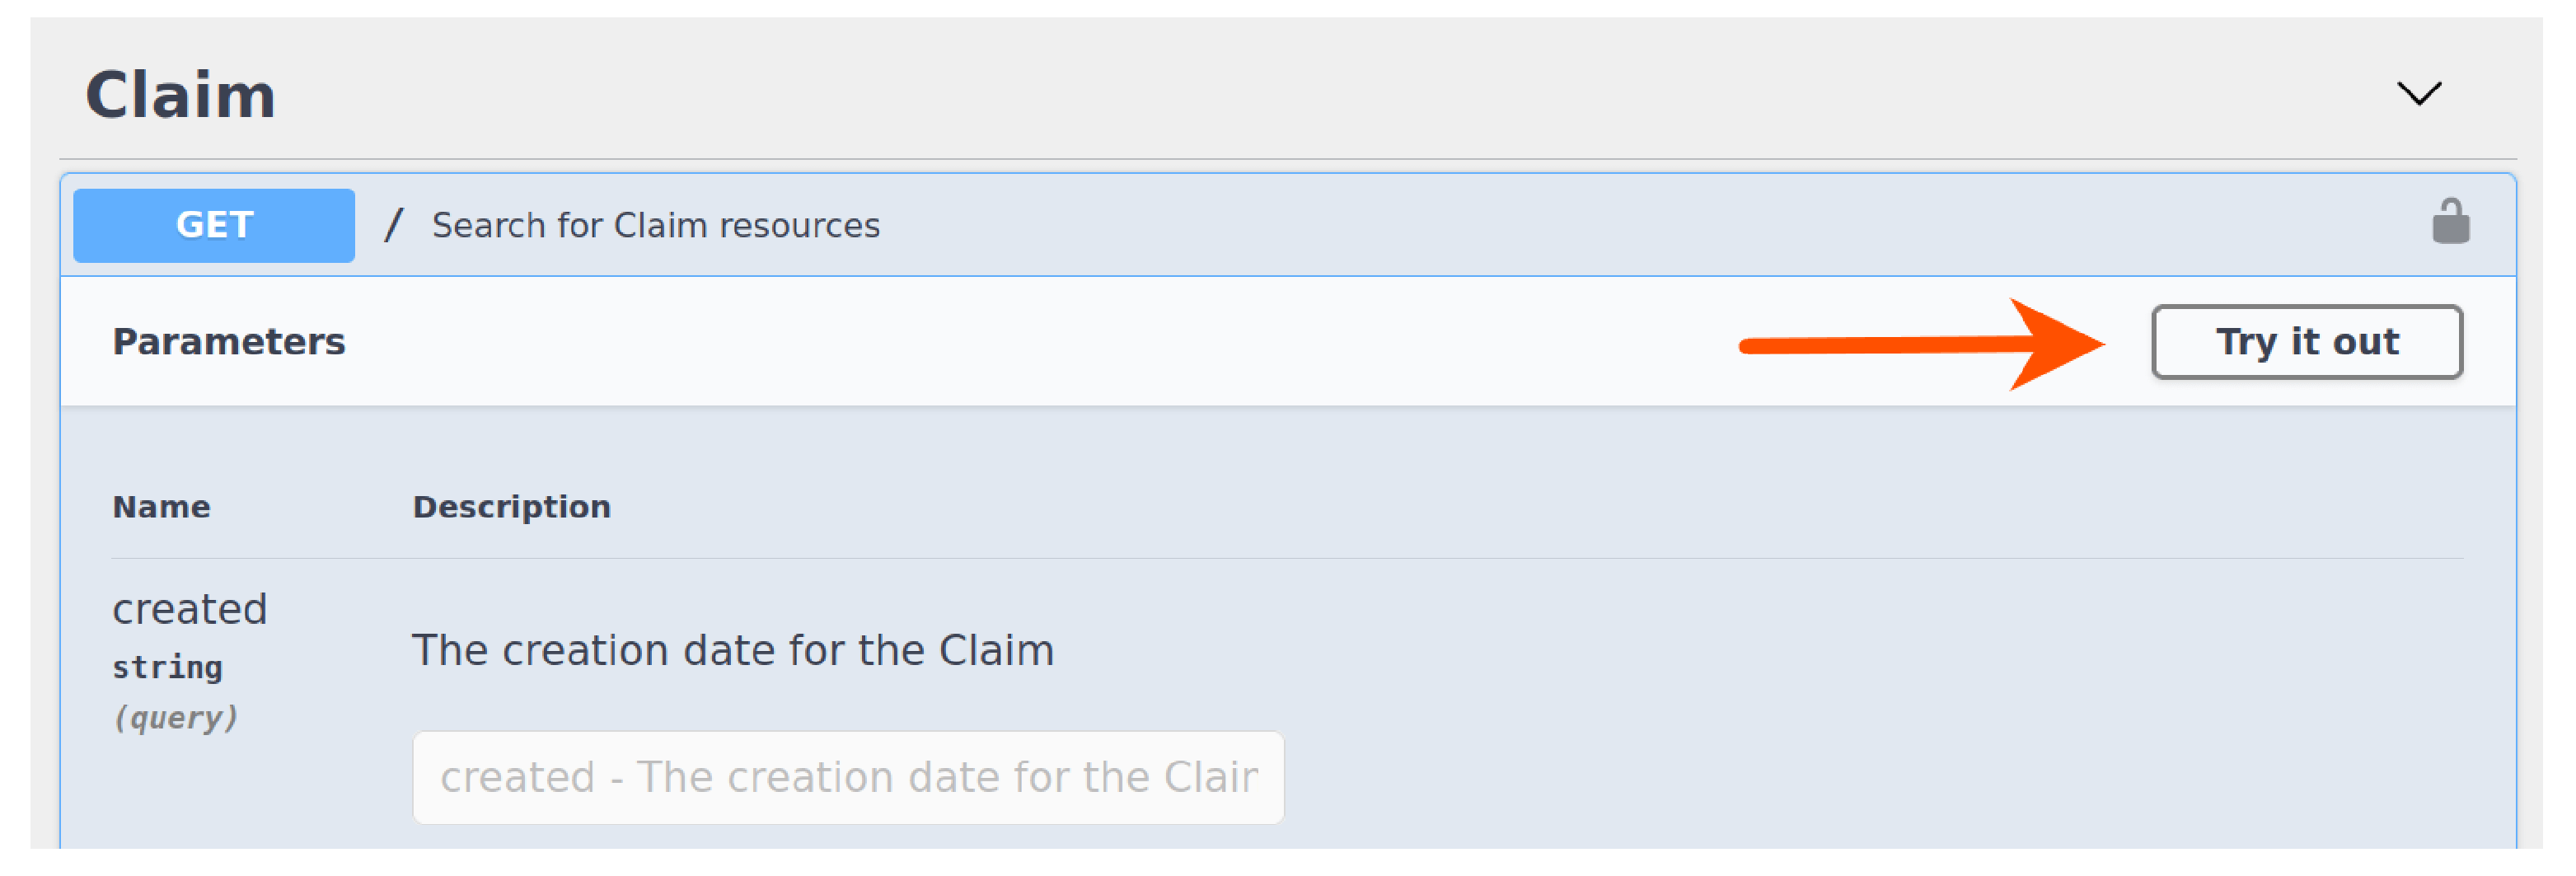
4.7. Expand the resource method (e.g., GET method), click Try it out, and then click Execute.
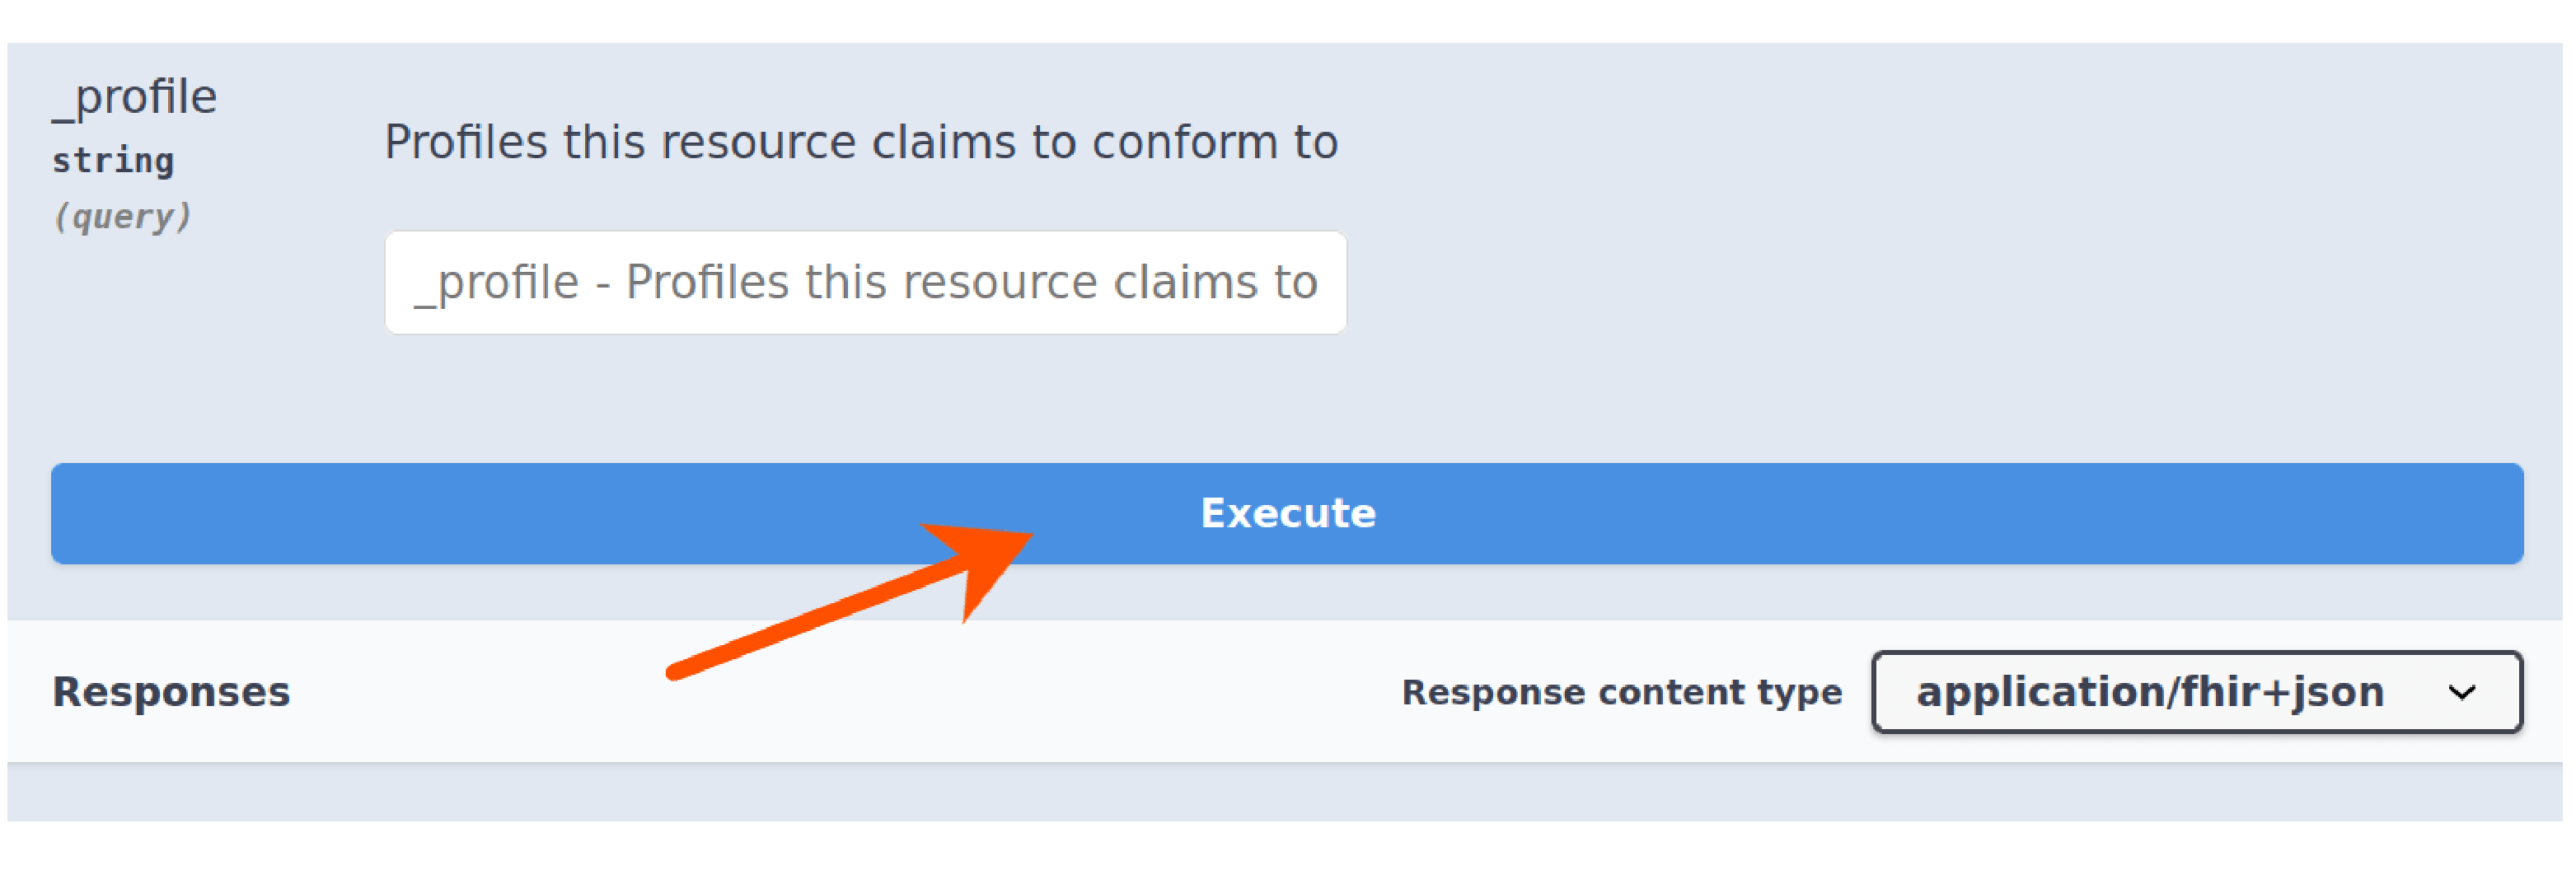
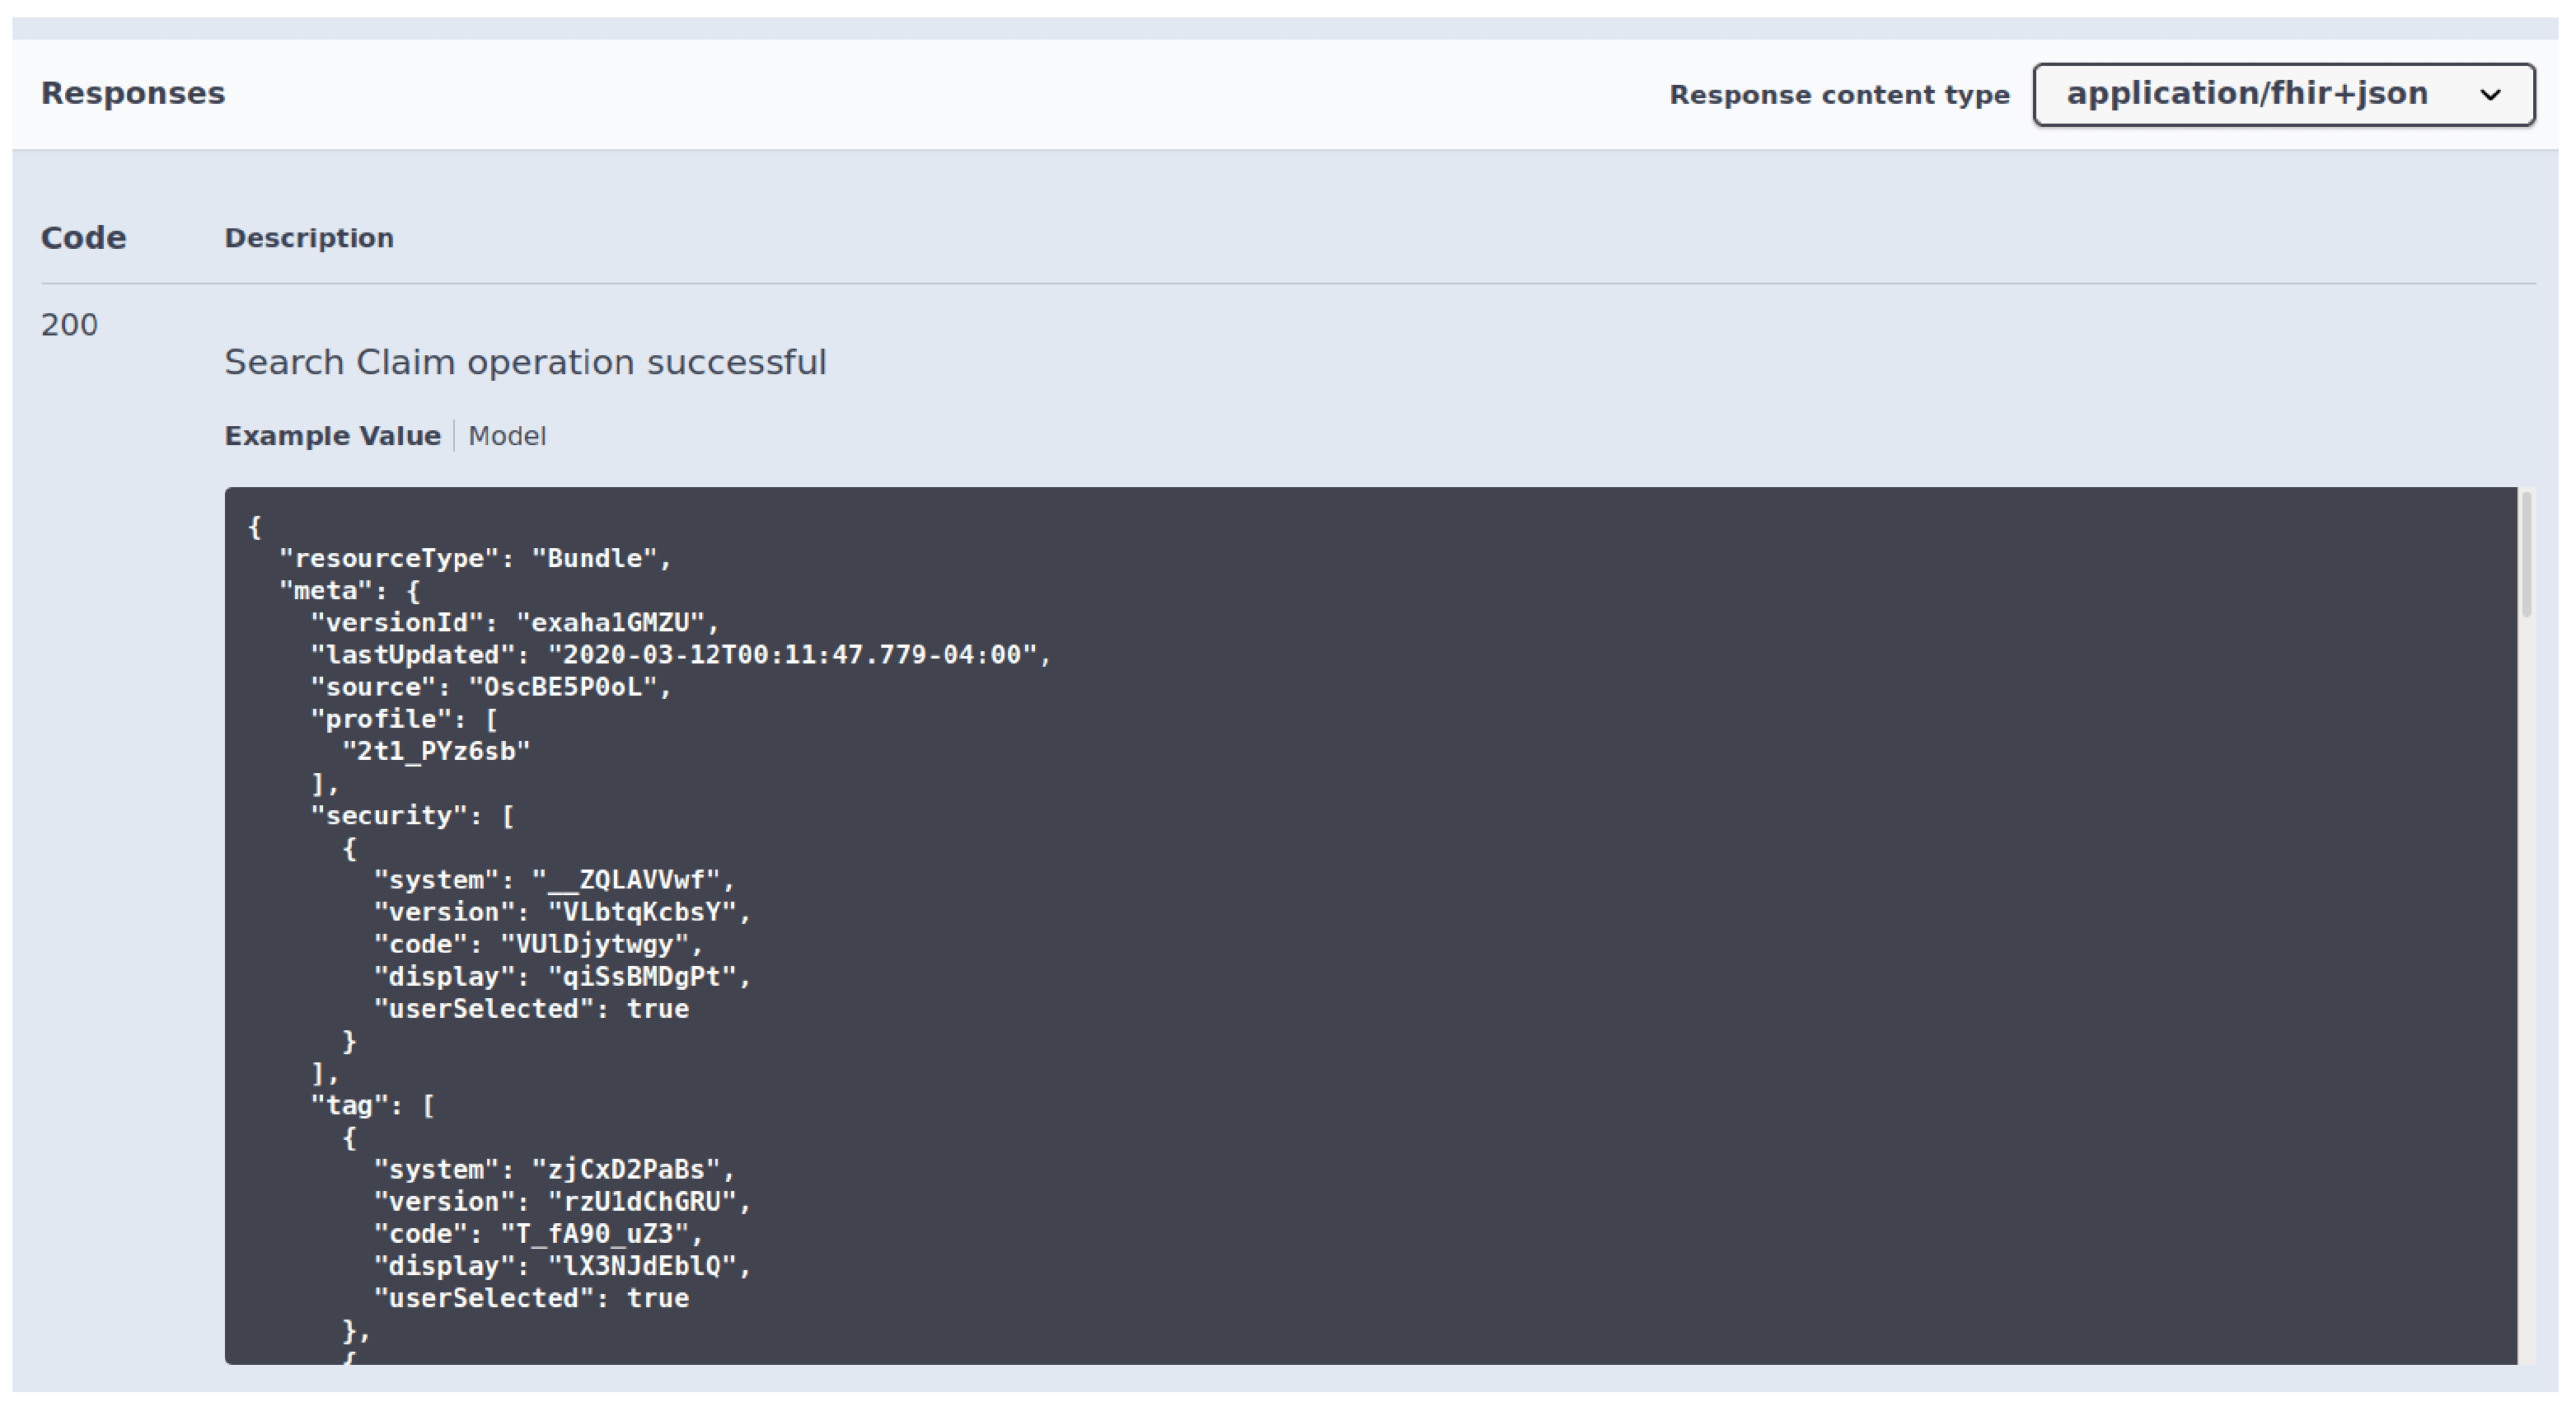
Now, you view the success response for the API invocation on the console.
Option 2: Invoking an API Using an API Client
Follow the [steps 4.1 - 4.3] to successfully subscribe to an application and generate production keys for the same.
4.8. Copy the access token to the [clipboard you generated].
4.9. Click APIs and then click the API you want to invoke.
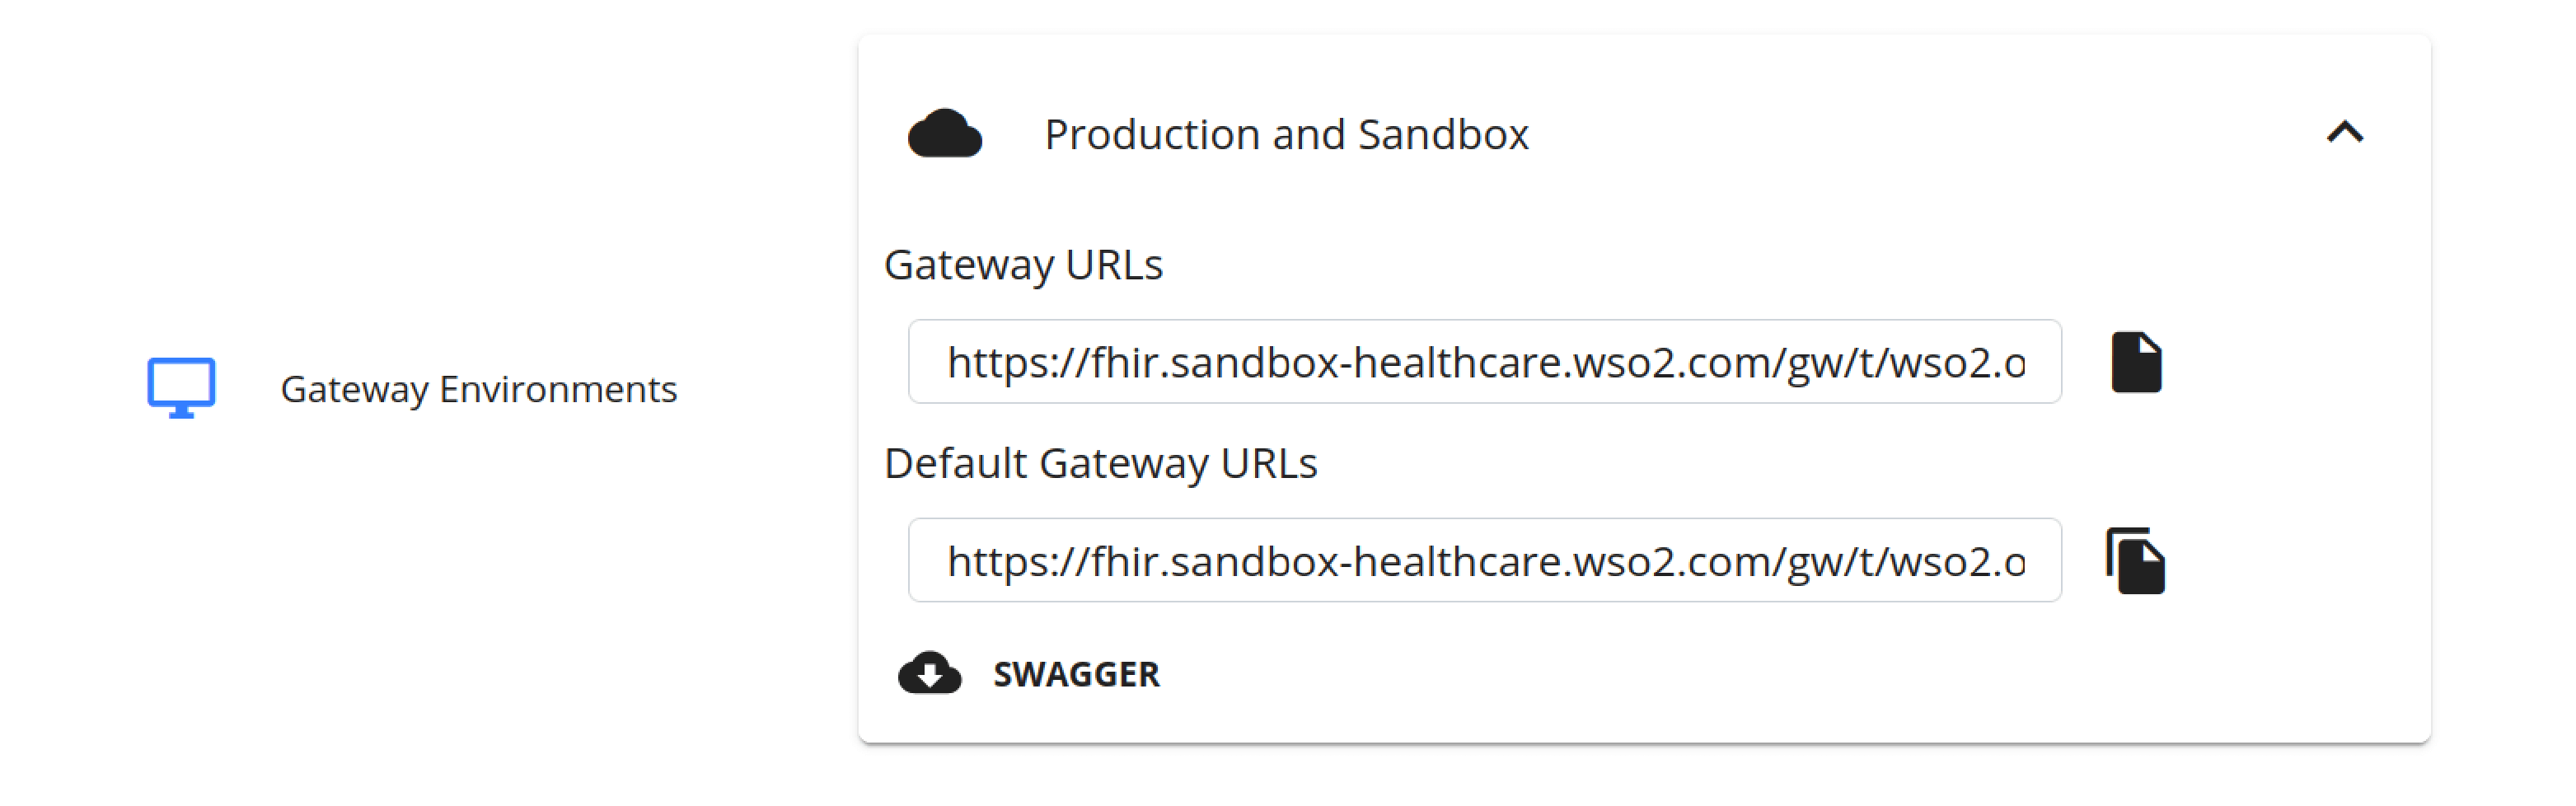
4.10. Click the “Overview tab and under the Gateway Environments section, and expand Production and Sandbox to retrieve the API’s base URL.
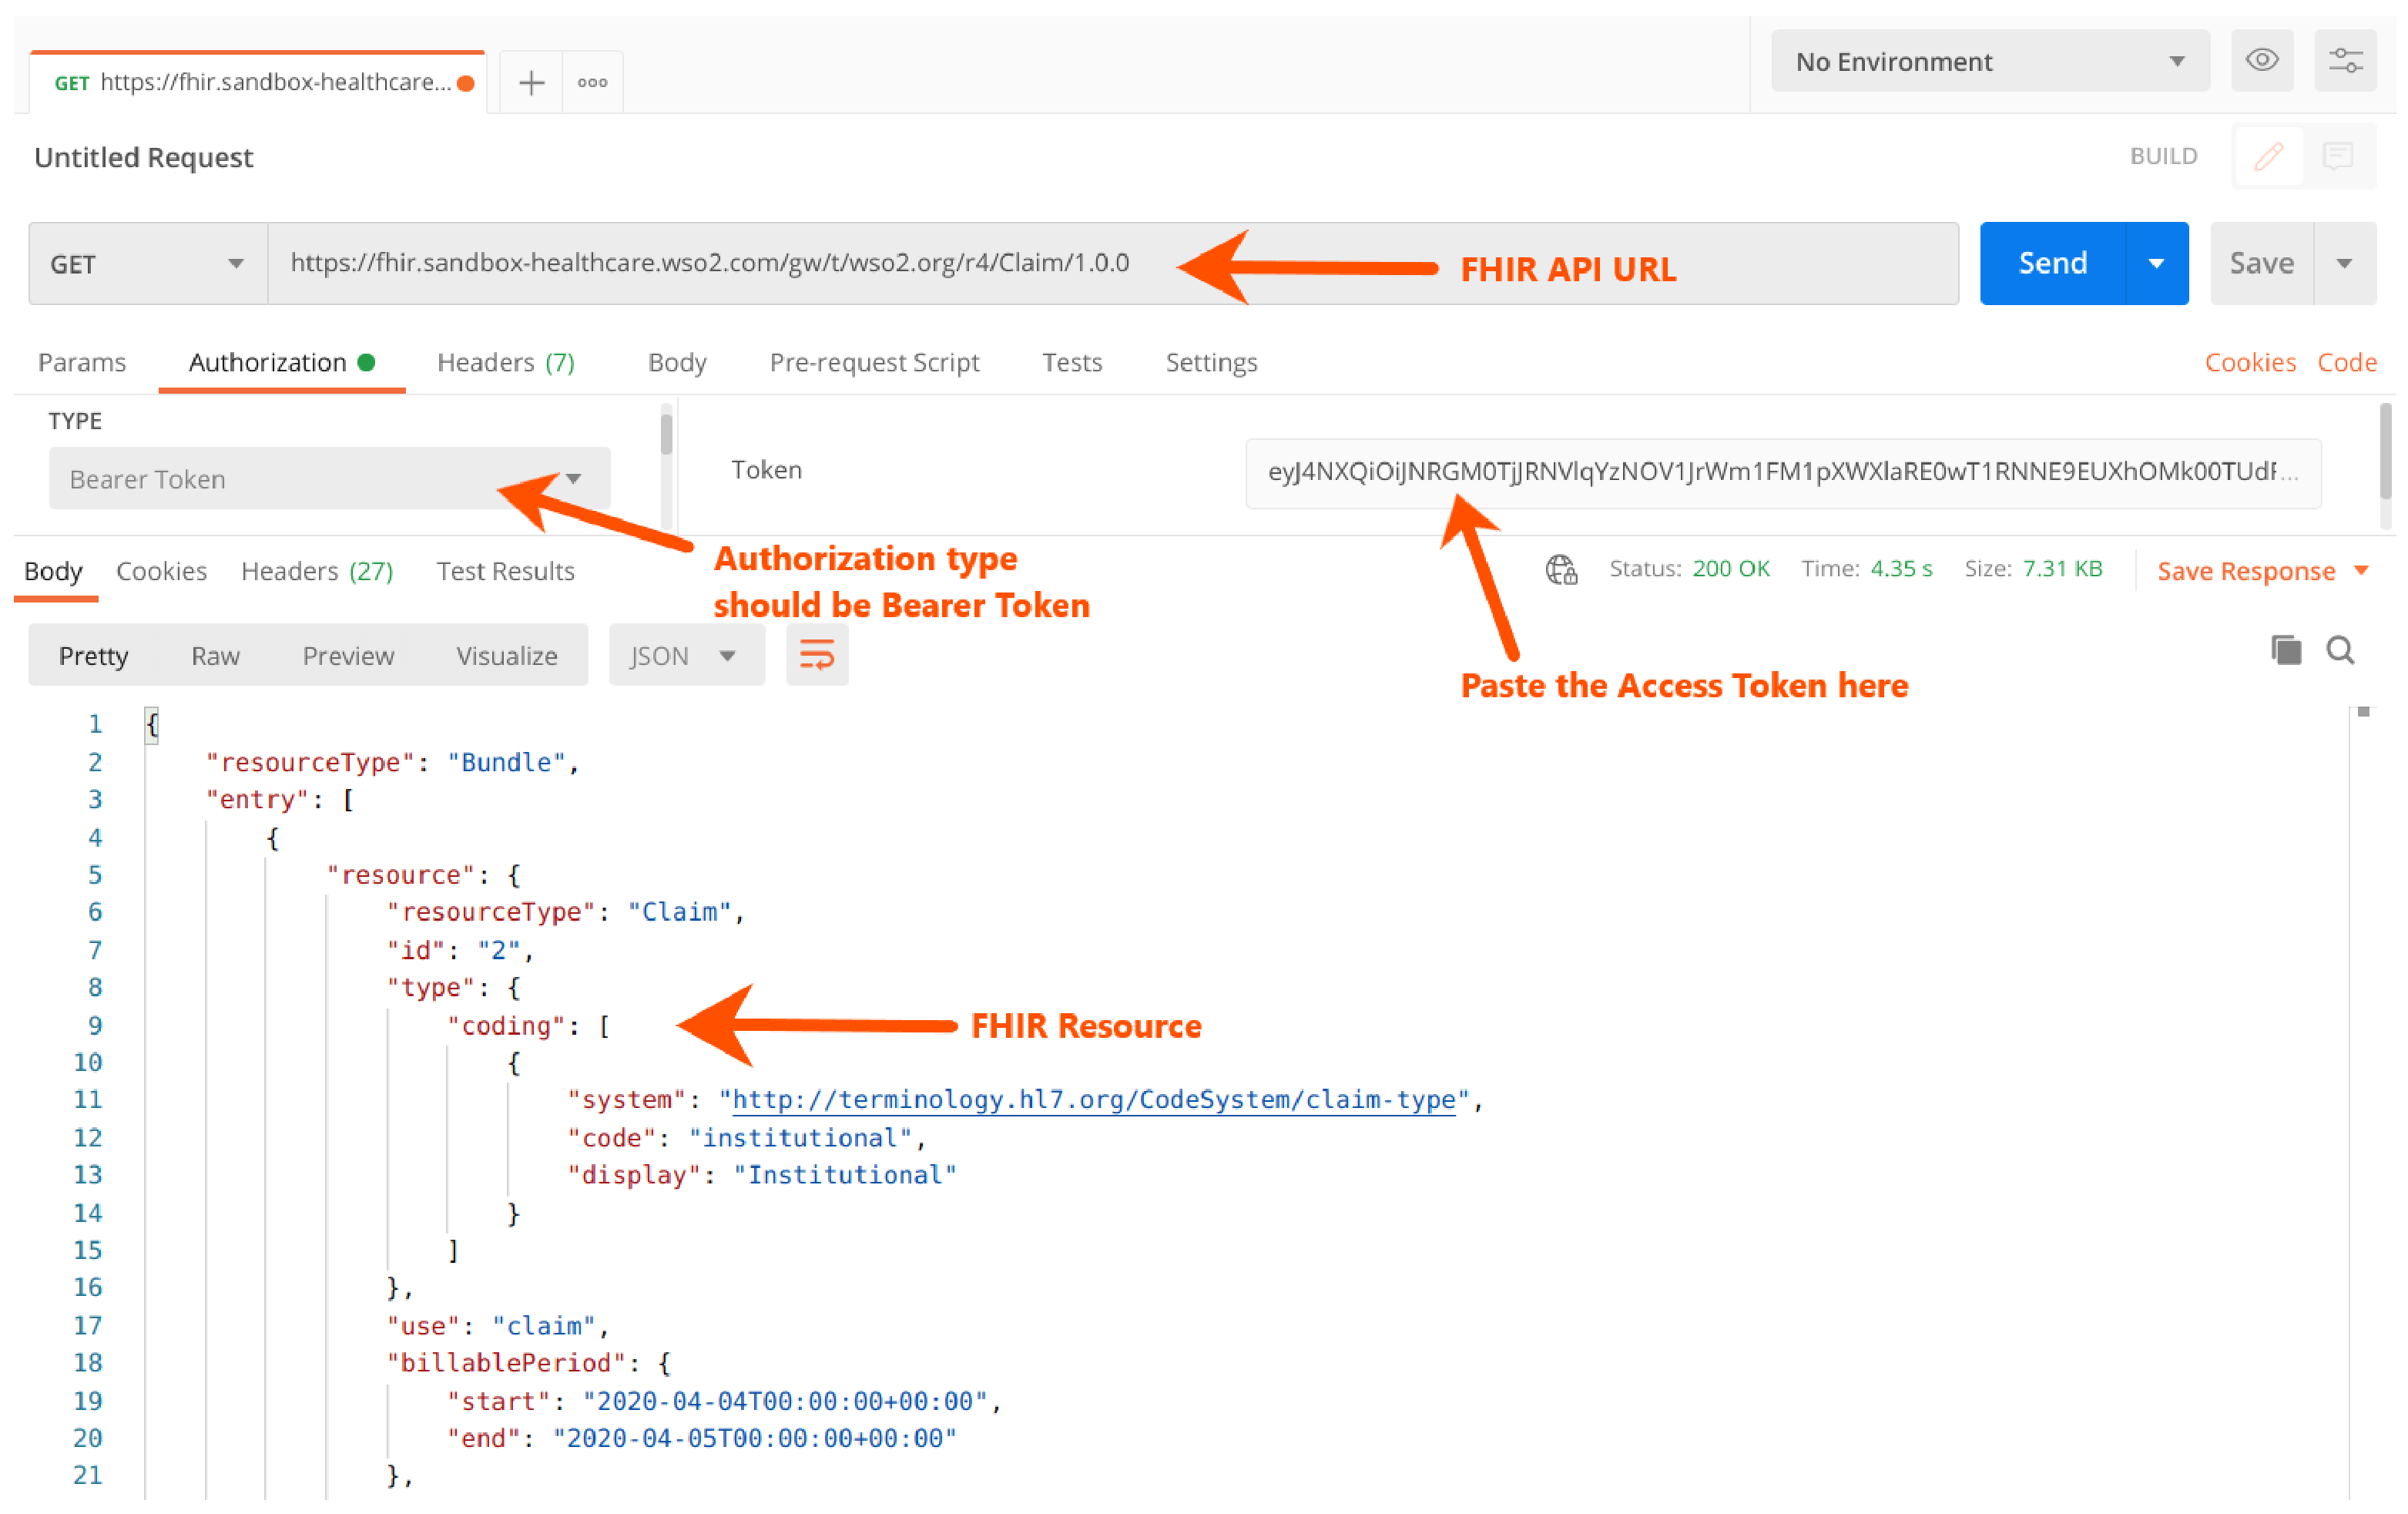
4.11. Use your preferred API client and invoke the API.
For example, if you use Postman, you can do it as shown below.
5. Invoking the Capability Statement and Well-Known Uniform Resource Identifiers
Capability statements are auto-generated based on the deployed FHIR® APIs.
The below are the open URLs (no authentication is required) for the statements. The following URL format has to be used to generate the capability statement.
- Well-Known Uniform Resource Identifiers - https://fhir.sandbox-healthcare.wso2.com/gw/t/wso2-ping.org/.well-known…
- Capability Statement - https://fhir.sandbox-healthcare.wso2.com/gw/t/wso2-ping.org/metadata
Example Statements:
https://fhir.sandbox-healthcare.wso2.com/gw/t/wso2-ping.org/.well-known/smart-configuration
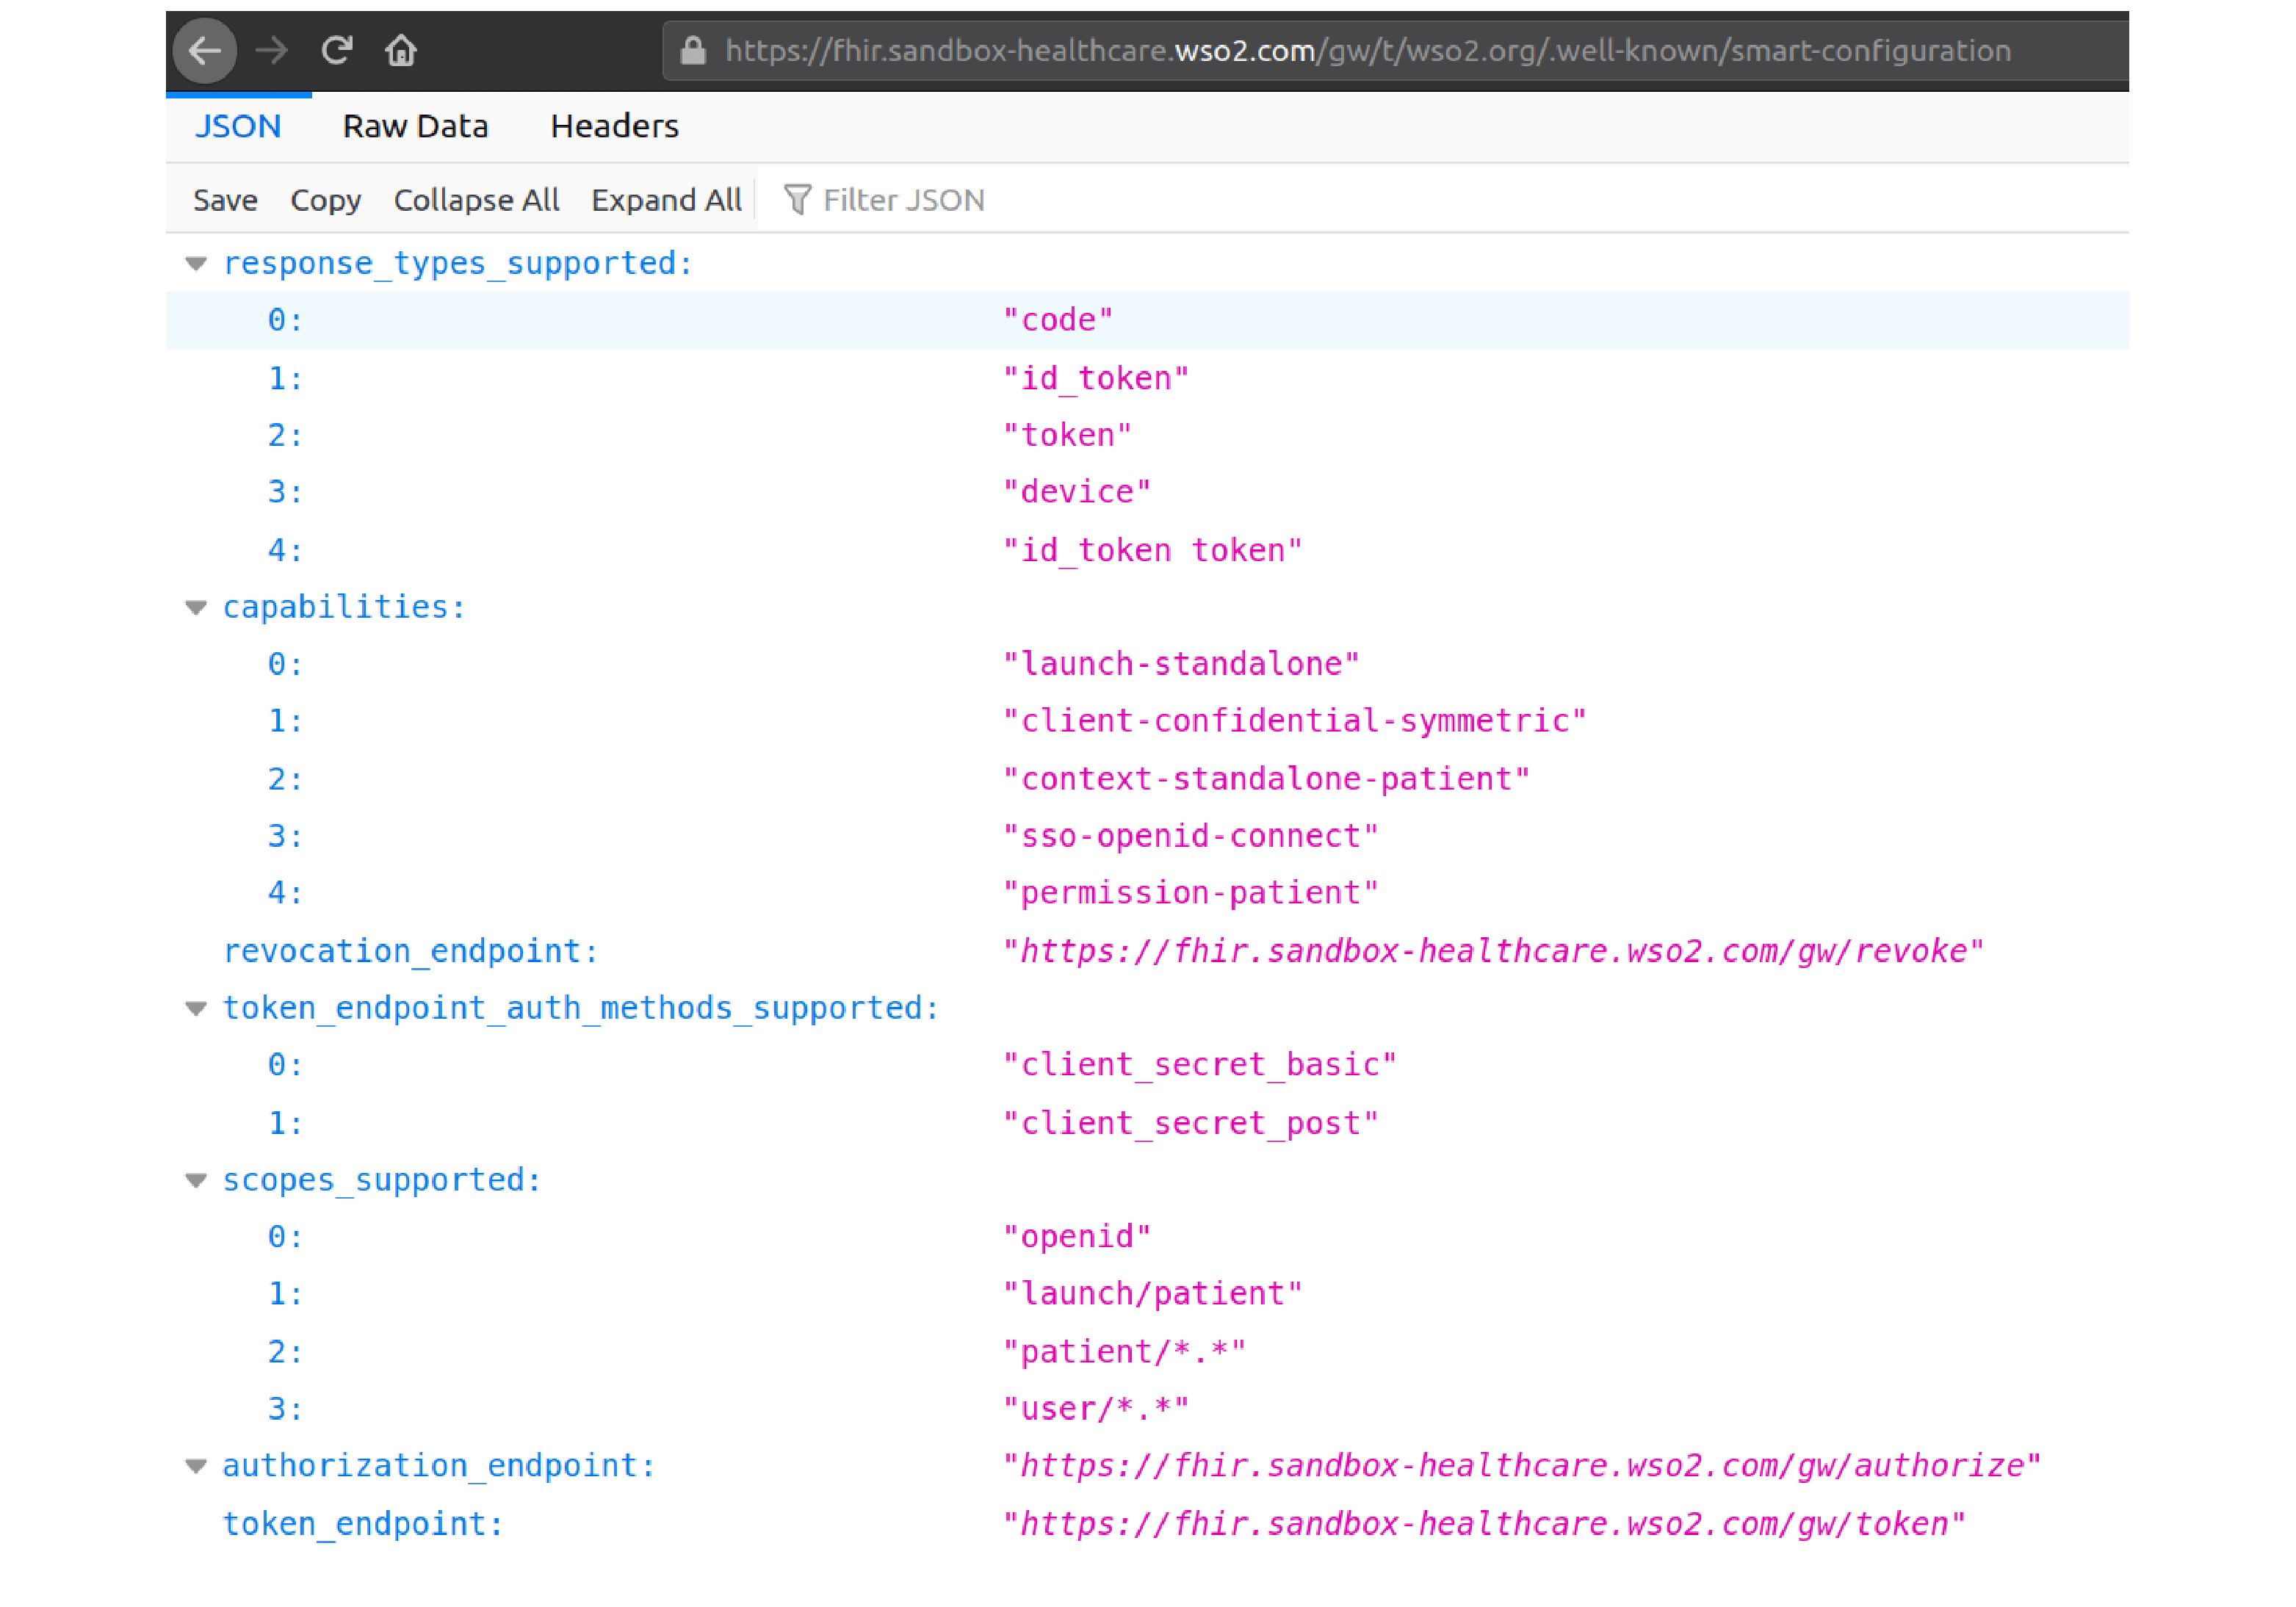
https://fhir.sandbox-healthcare.wso2.com/gw/t/wso2-ping.org/metadata
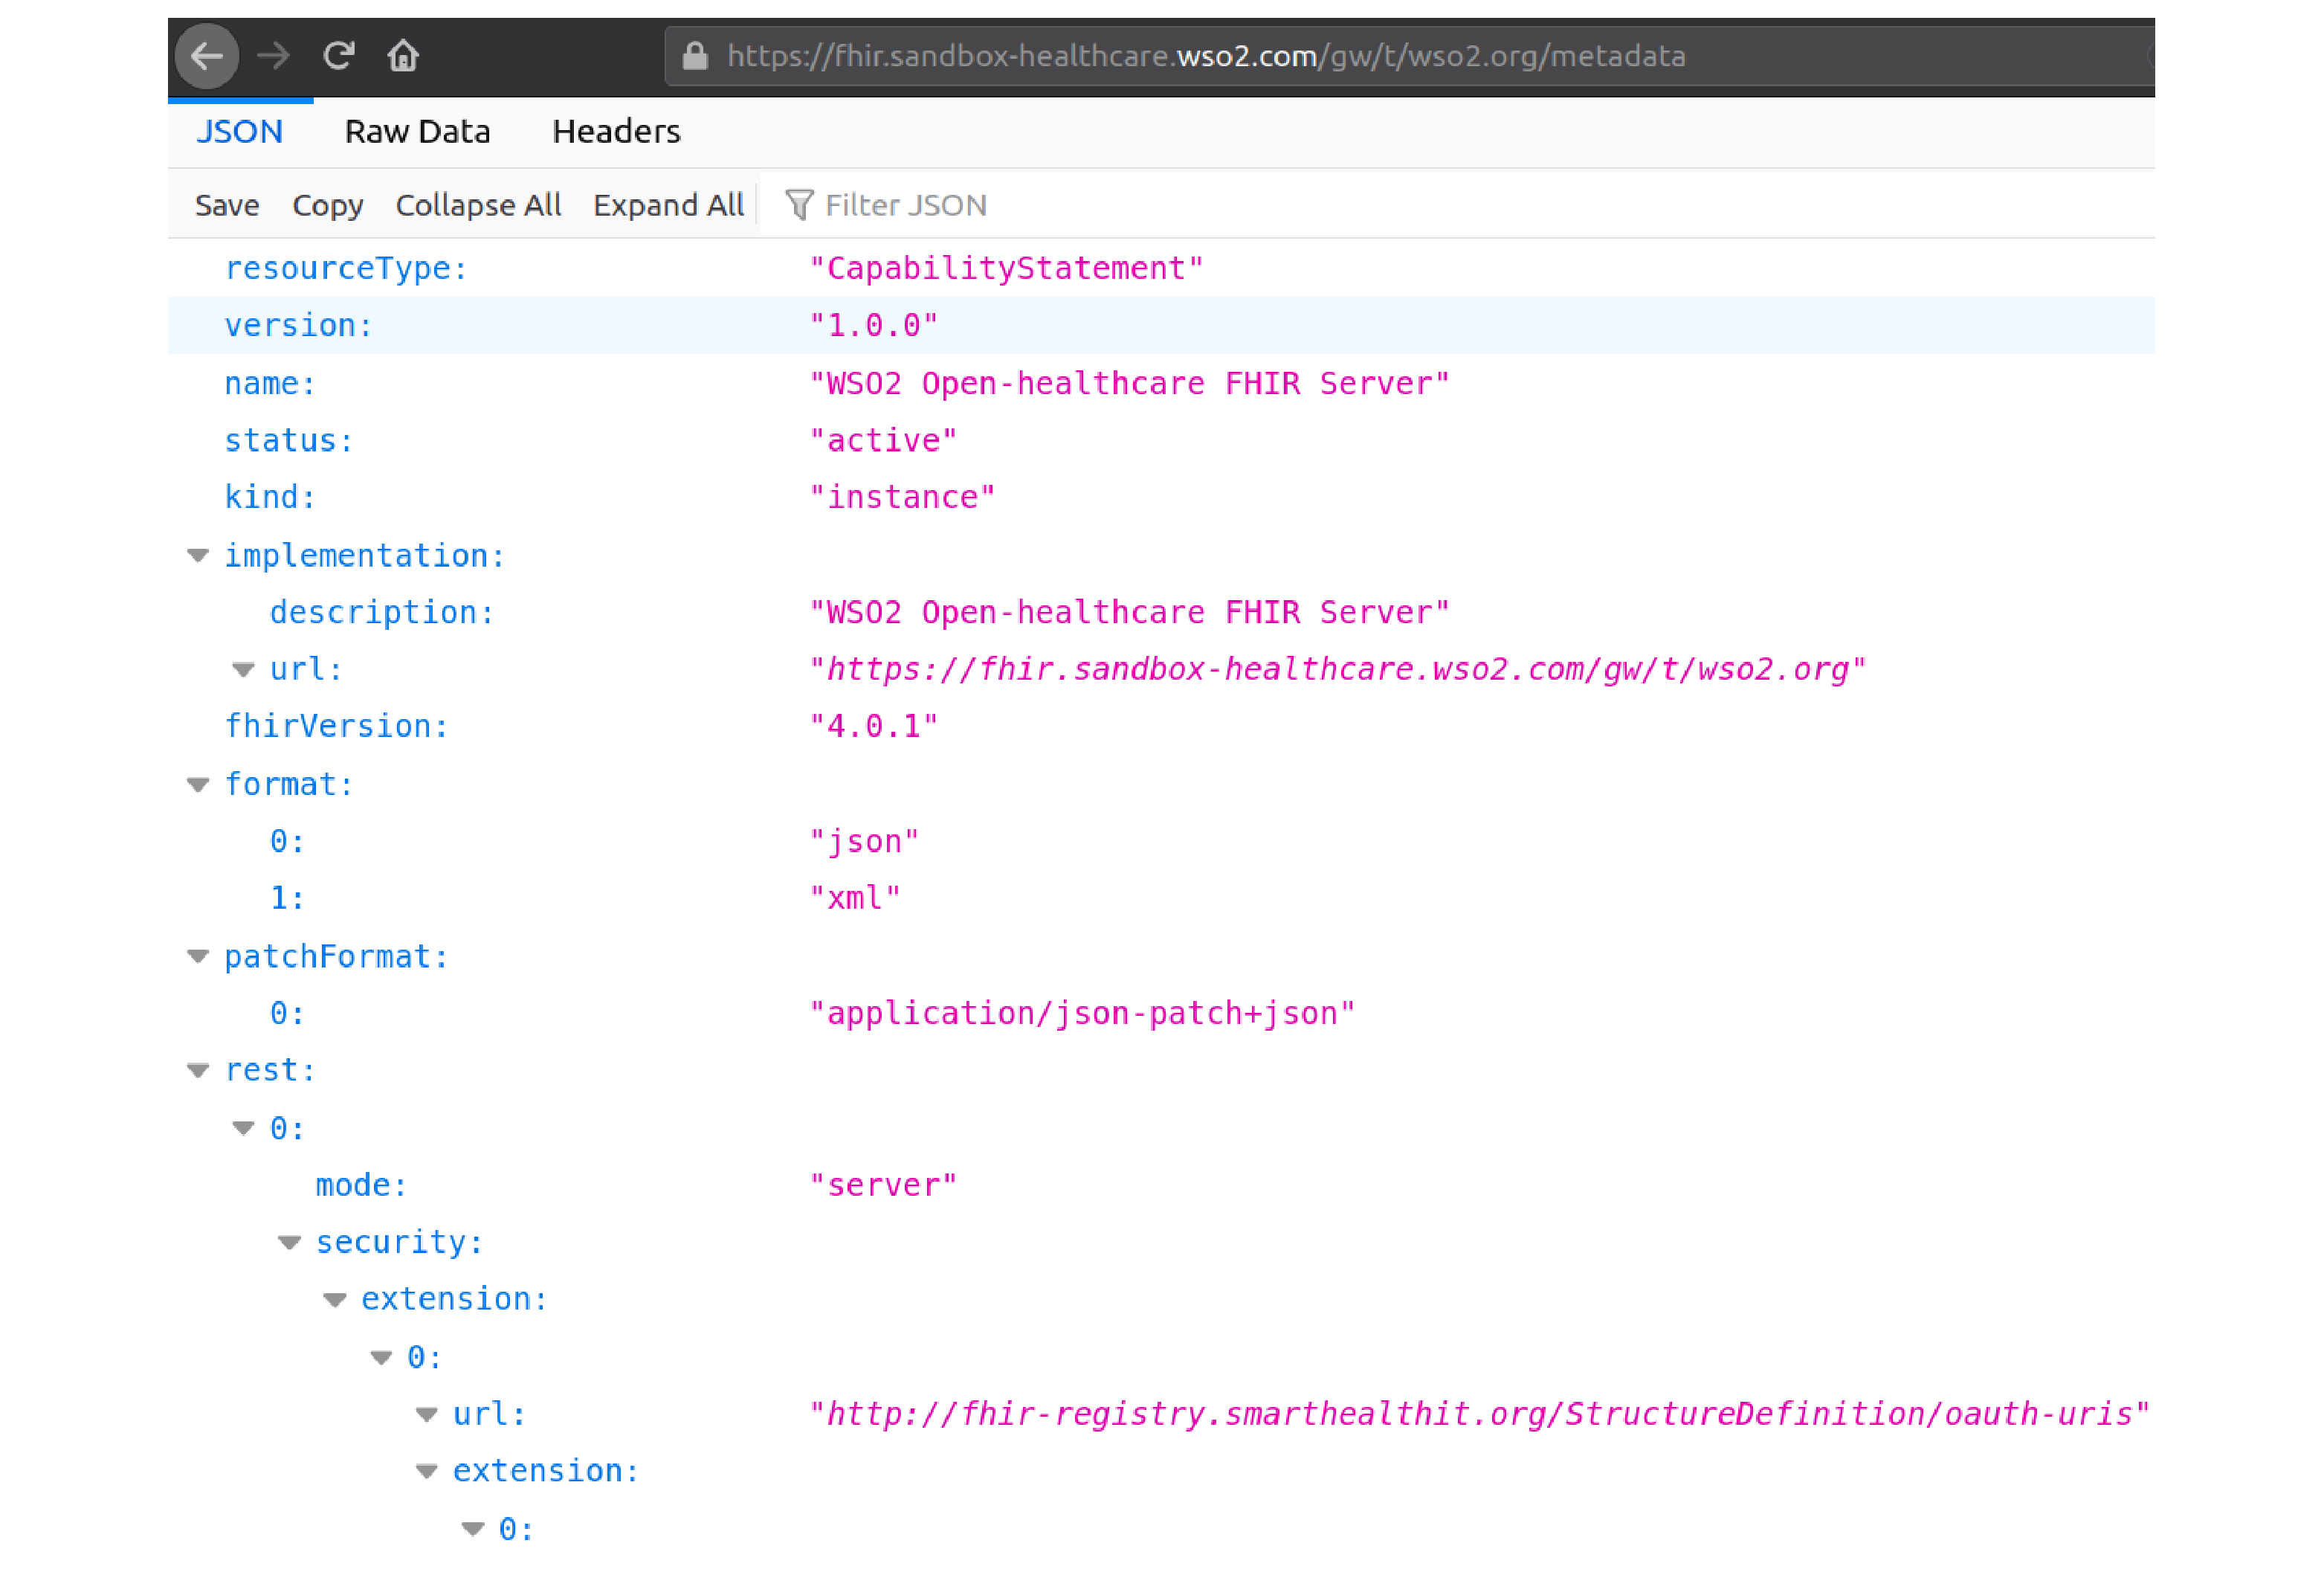
For learning more, see HL7 FHIR® Capability Statements.
6. PingIntelligence for APIs Dashboard
The PingIntelligence for APIs Dashboard delivers visibility into API activity and abnormal behavior from clients accessing FHIR® APIs.
Note: In the email you receive with the link and the credentials that are required to sign on the PingIntelligence for APIs Dashboard.
6.1. Click the given link to access the PingIntelligence for APIs Dashboard.
6.2. Enter the given username and password.
6.3. Click Sign On.
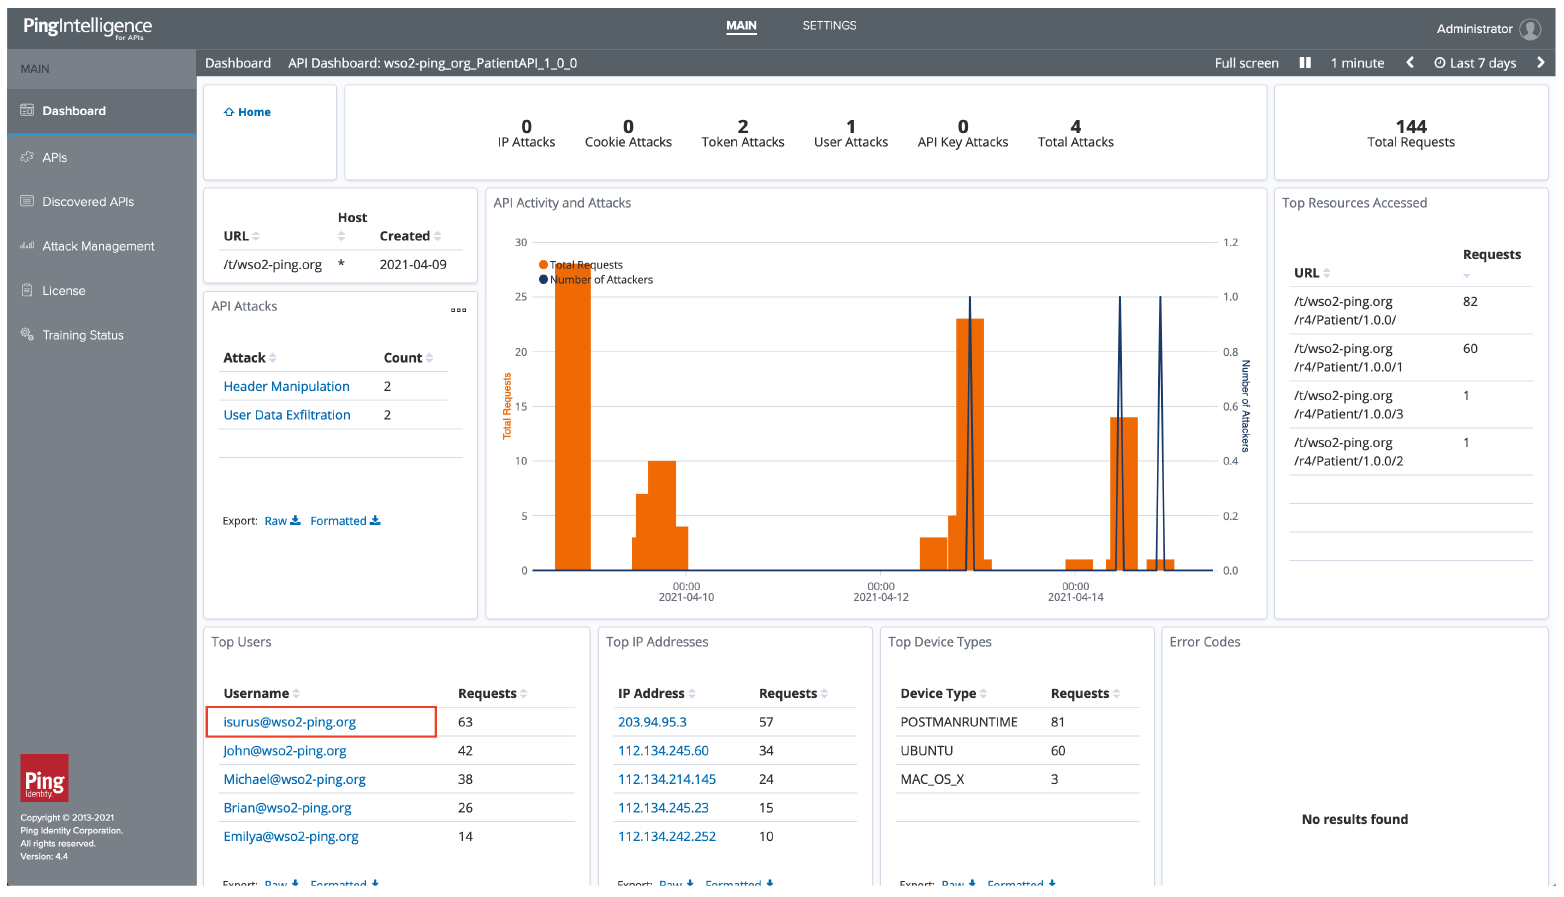
You will login to the main Dashboard which shows the aggregate API activity.
6.4. To get more detail on the Patient API, click on the link under per API activity to access the API details page

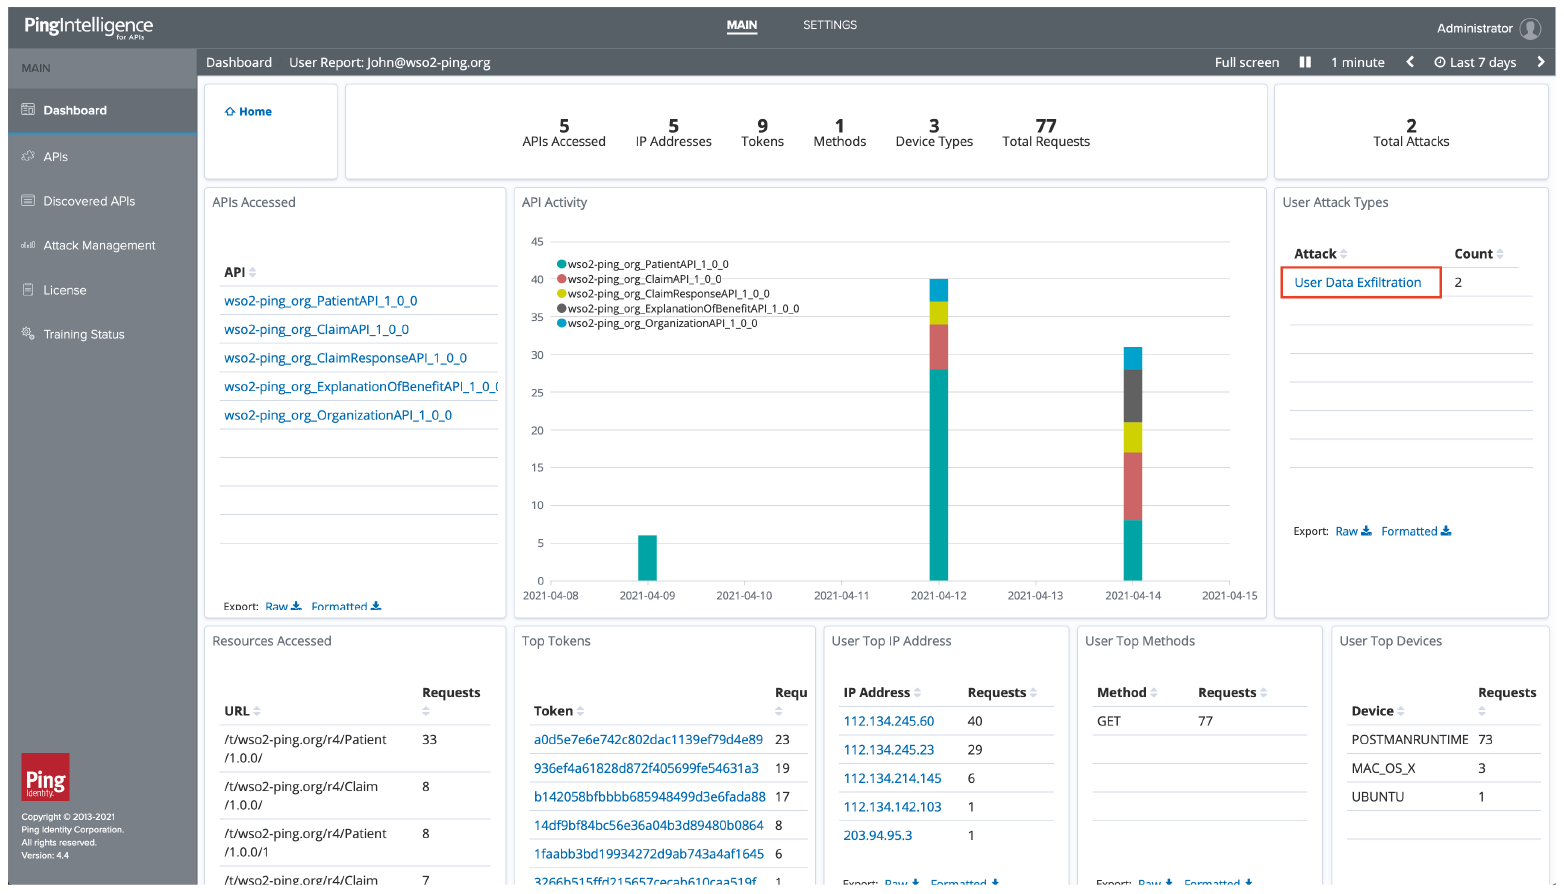
6.5. The API Dashboard shows activity and indicators of attack on the API. It also shows the most active users. Click on a user to get details on the user activity.
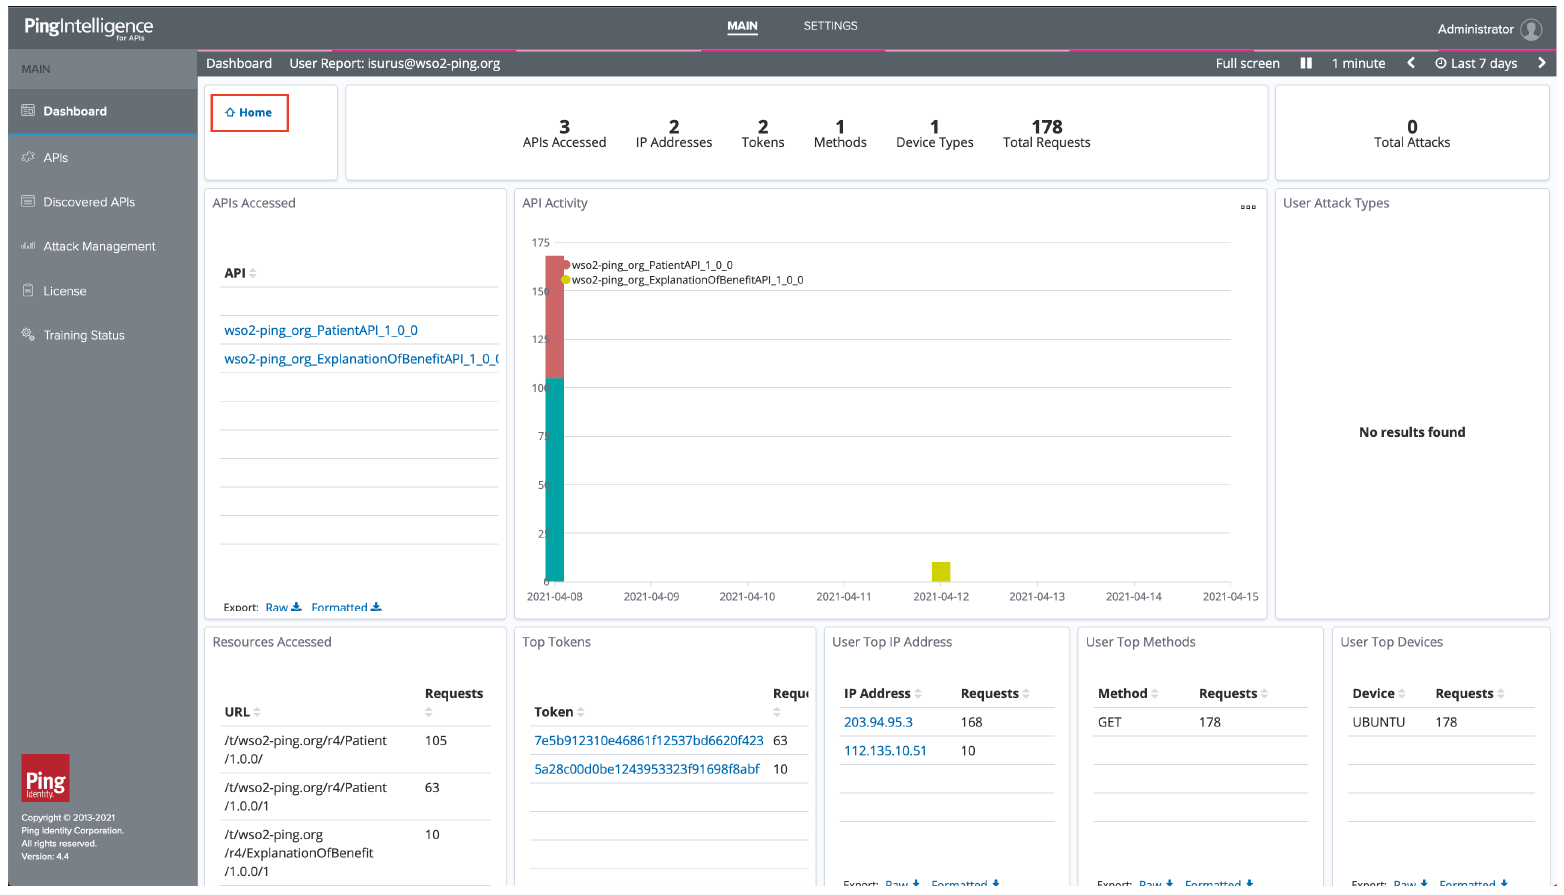
6.6. This screen shows the API activity, Indicators of Attack, and other information for this user. You can also look at the individual tokens or IP addresses used. When you are done exploring the activity, click on Home.
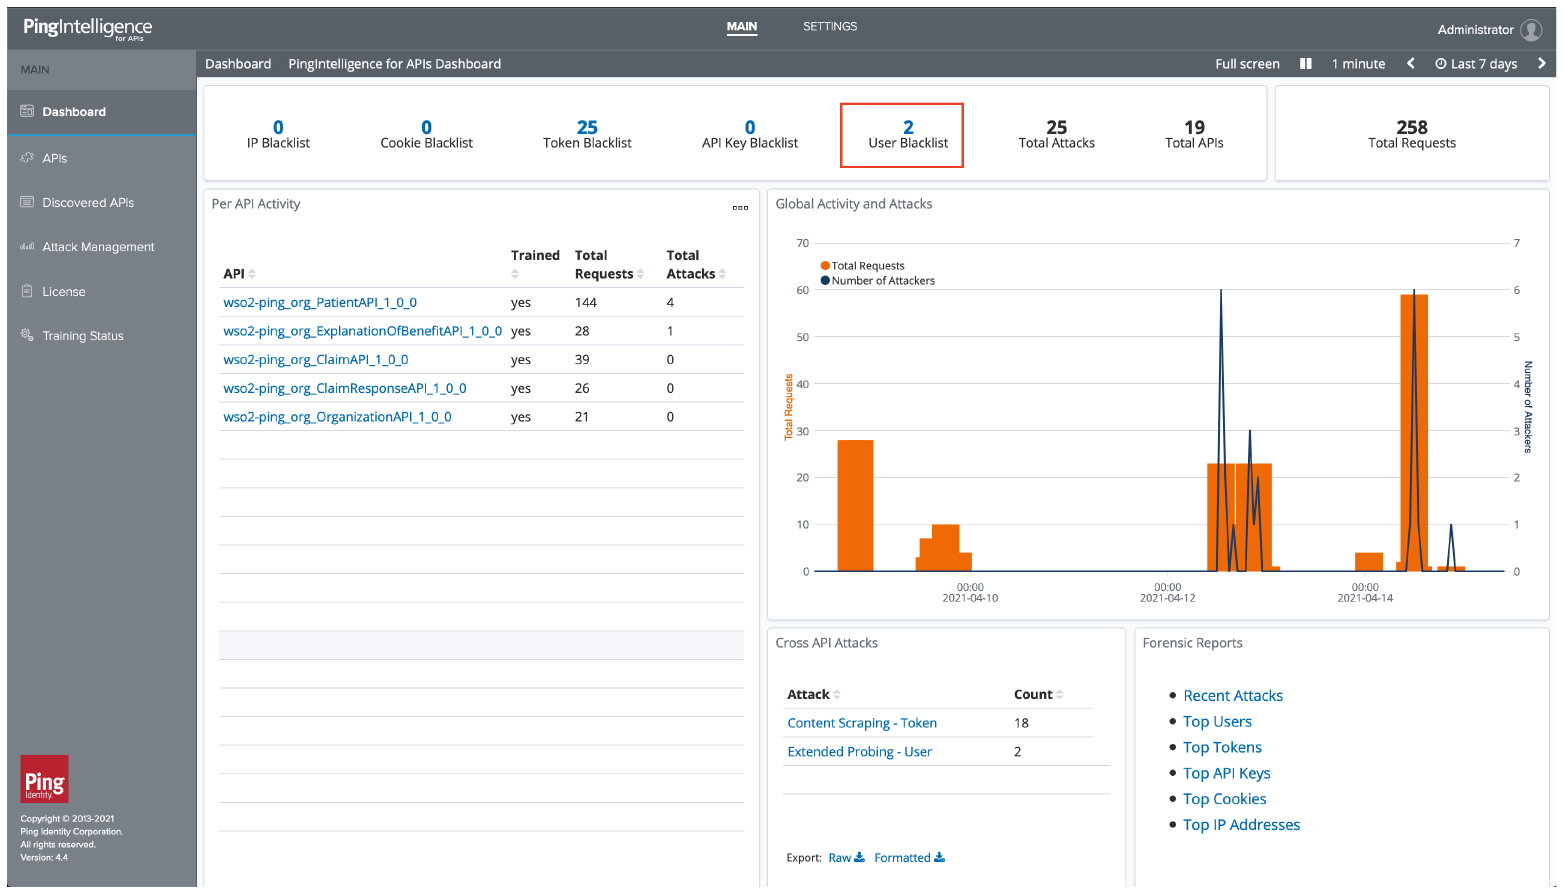
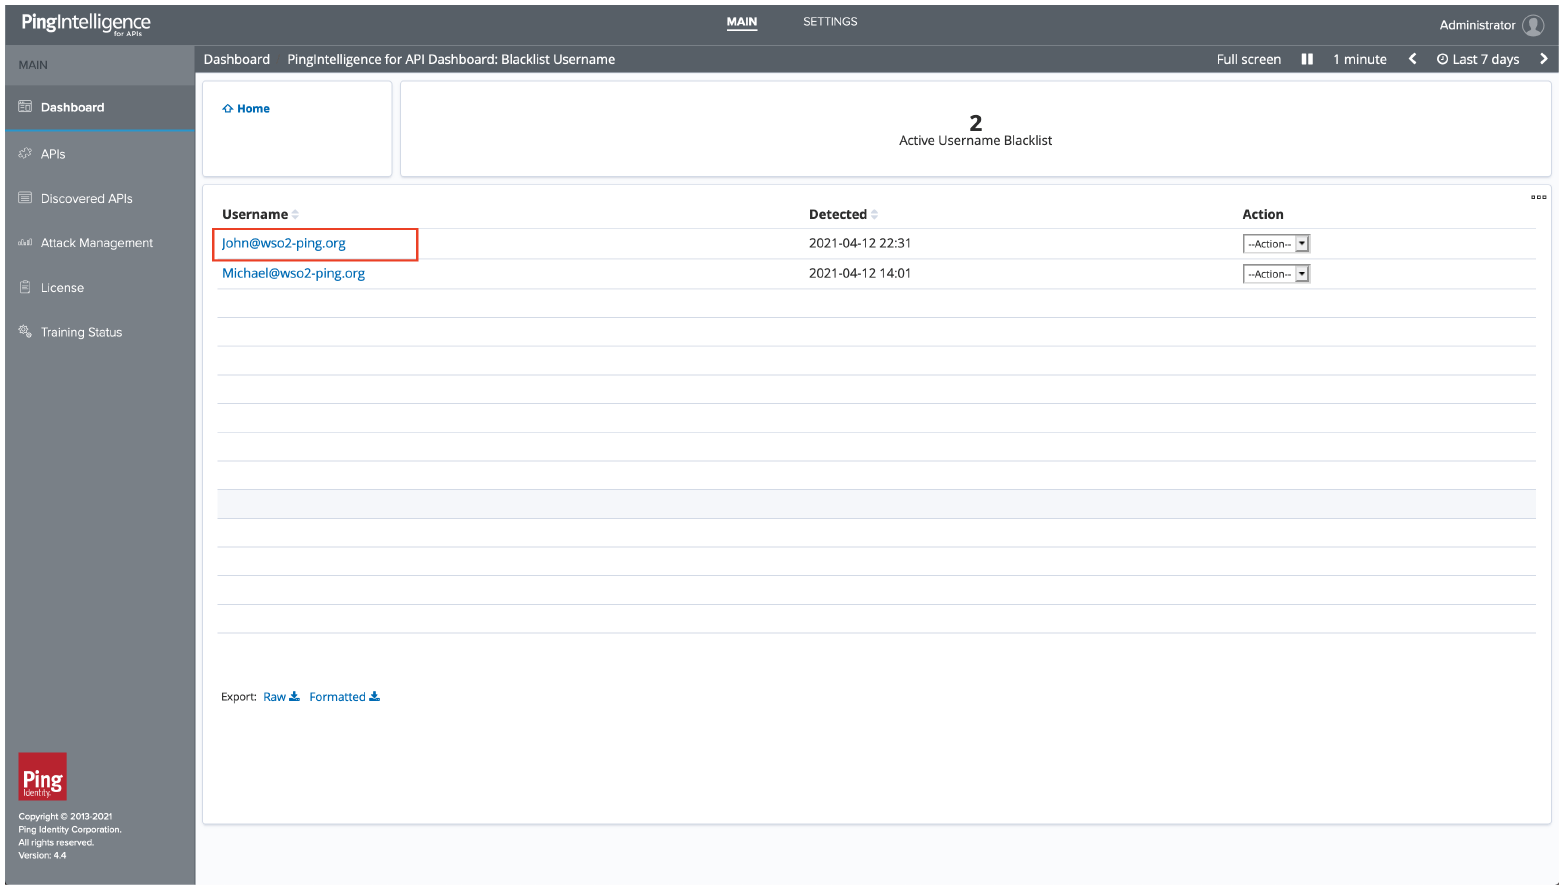
6.7. From the Home page, you can review indicators of attack on the APIs. Click on the user blacklist to see a list of users which were flagged for abnormal activity.
6.8. Select a user from the blacklist, such as [email protected]
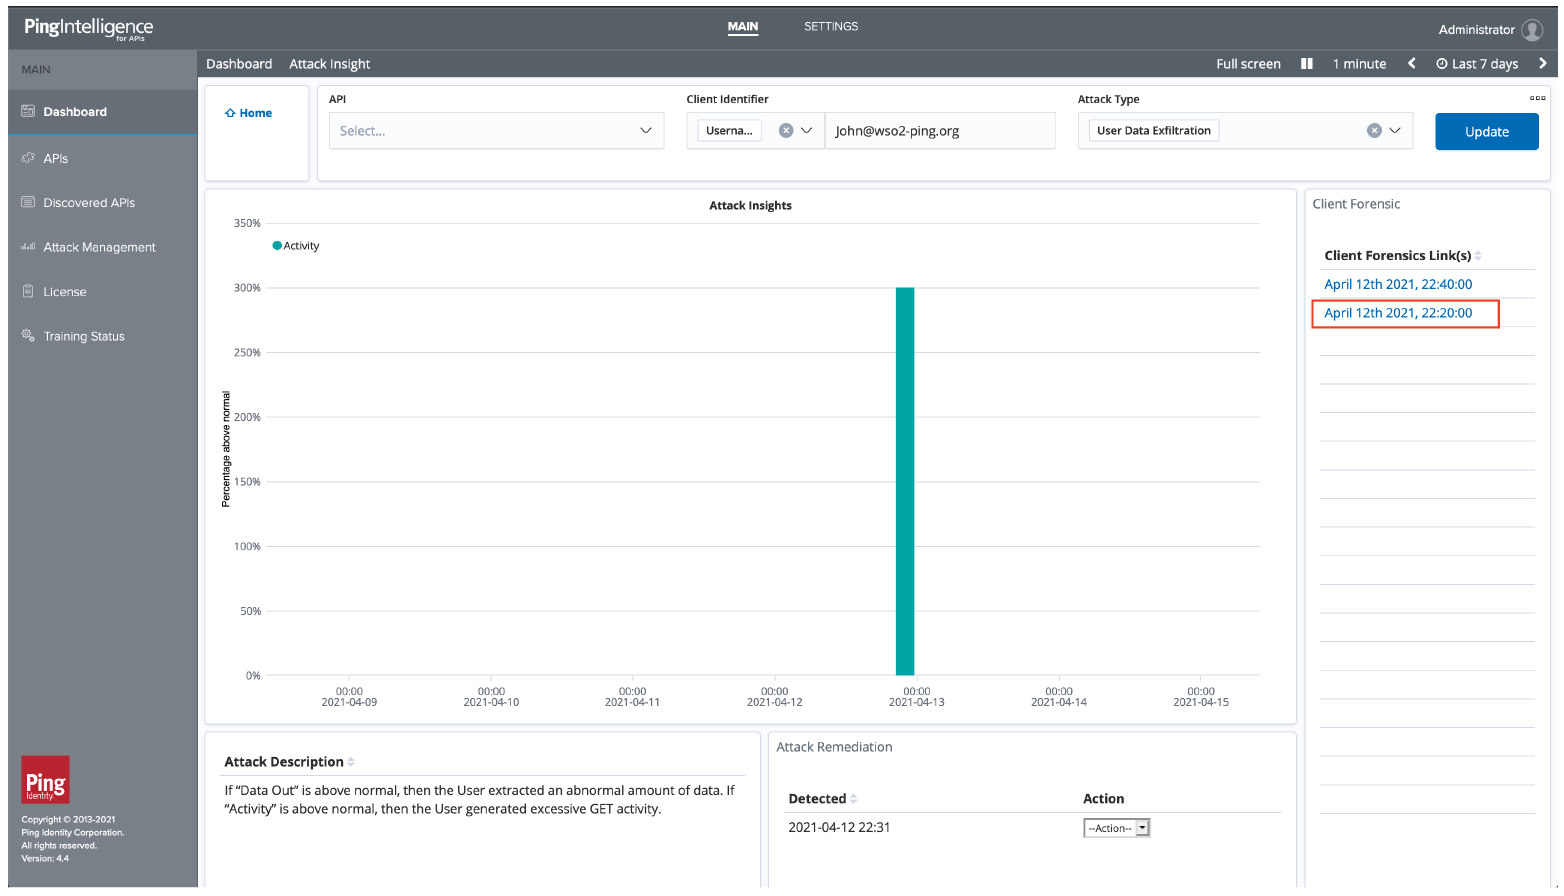
6.9. Select an indicator of attack to get more insight on the abnormal behavior
6.10. Review the attack description and click on forensics to see activity detail.
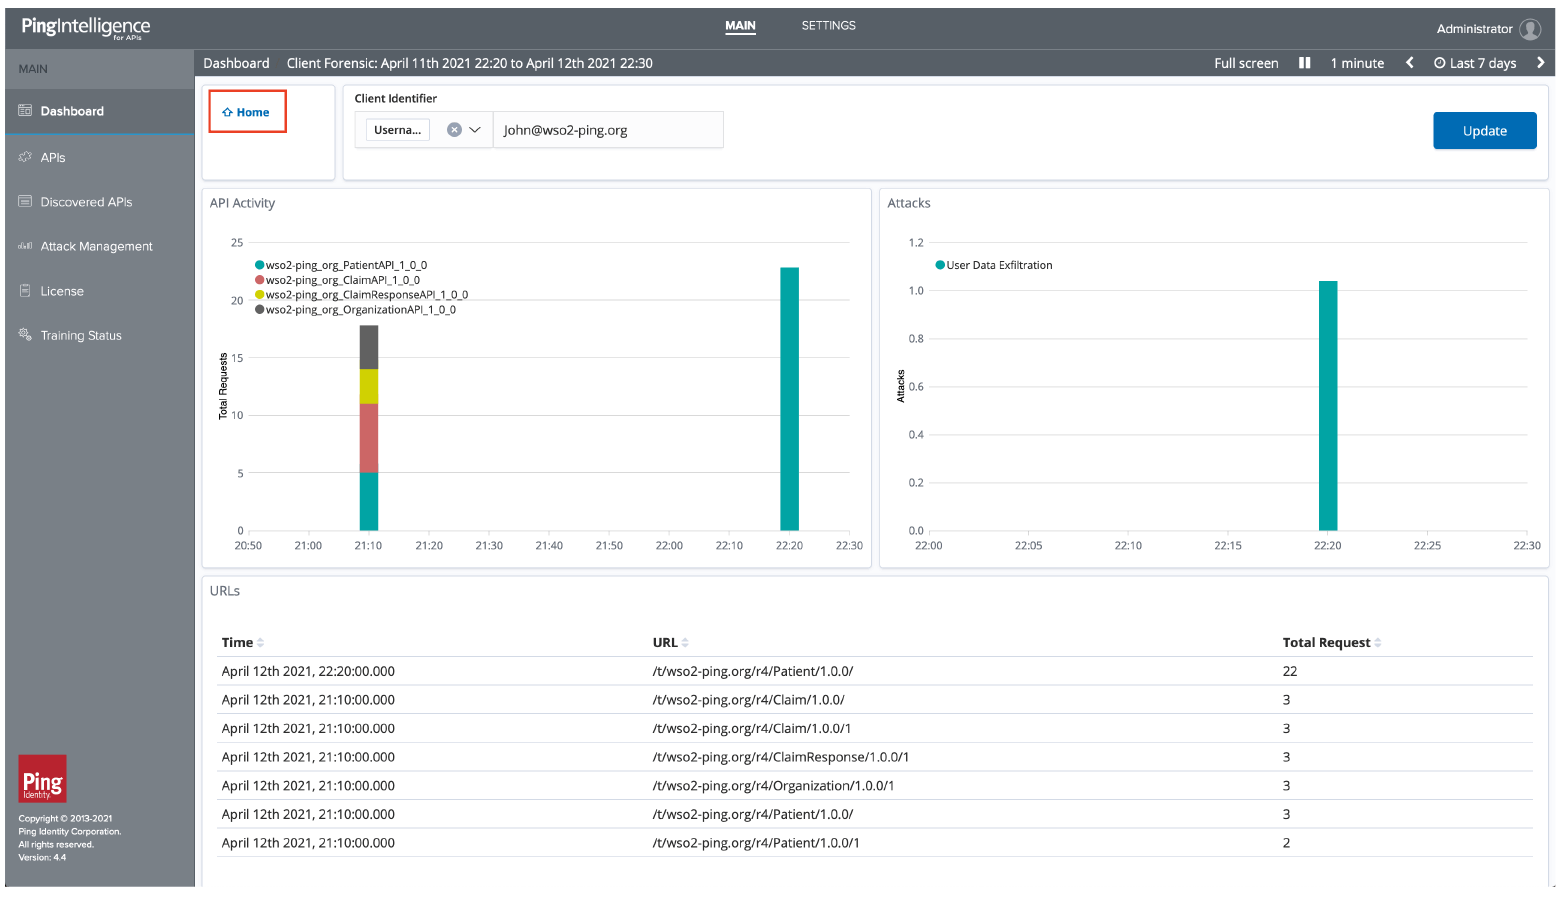
6.11. Review the API activity, URLs accessed, and Indicators of Attack. Click on Home to look at additional information
7. Sample Integration Project
7.1. Click here to download the sample integration project
Info: Sample Integration project includes an application which will connect to a back-end database, which contains the sample health data. It will transform that data from the database into FHIR® format and expose the same as FHIR® APIs accordingly.
Importing Projects into the WSO2 Integration Studio
You can import the downloaded project with the WSO2 integration Studio.
Configuring Integration Studio
7.2. Download WSO2 Integration Studio.
7.3. Navigate to the <microesb> folder.
7.4. For example, if you are using Linux, your <microesb> folder would be /IntegrationStudio/runtime/microesb.
7.5. Download the provided files and copy them into the required folder as shown below.
| Copy the FHIR® Base Bundle to <microesb>/dropins | https://dist.wso2.org/downloads/open-healthcare/sandbox/wso2-fhir-base-1.0.0.jar |
| Copy the Stax API JAR to <microesb>/wso2/lib/ | https://dist.wso2.org/downloads/open-healthcare/sandbox/stax2-api-3.1.4.jar |
Note: Make sure to copy these files before starting the Integration Studio.
Importing the Downloaded Integration Project to the Integration Studio
Now, you can run the Integration Studio and import the previously-downloaded project file into it.
7.6. Open the Integration Studio application.
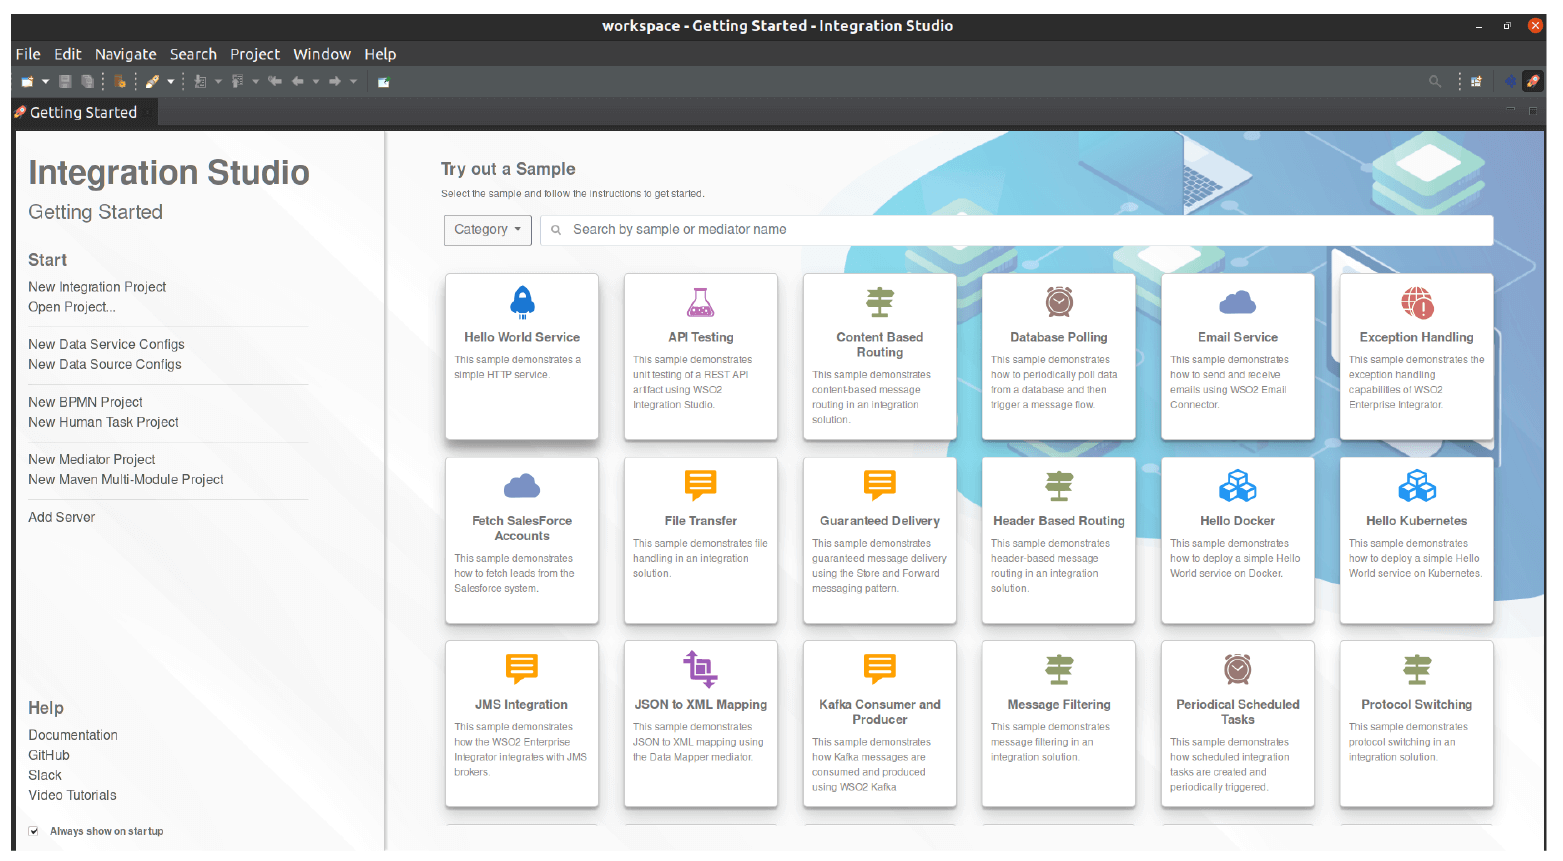
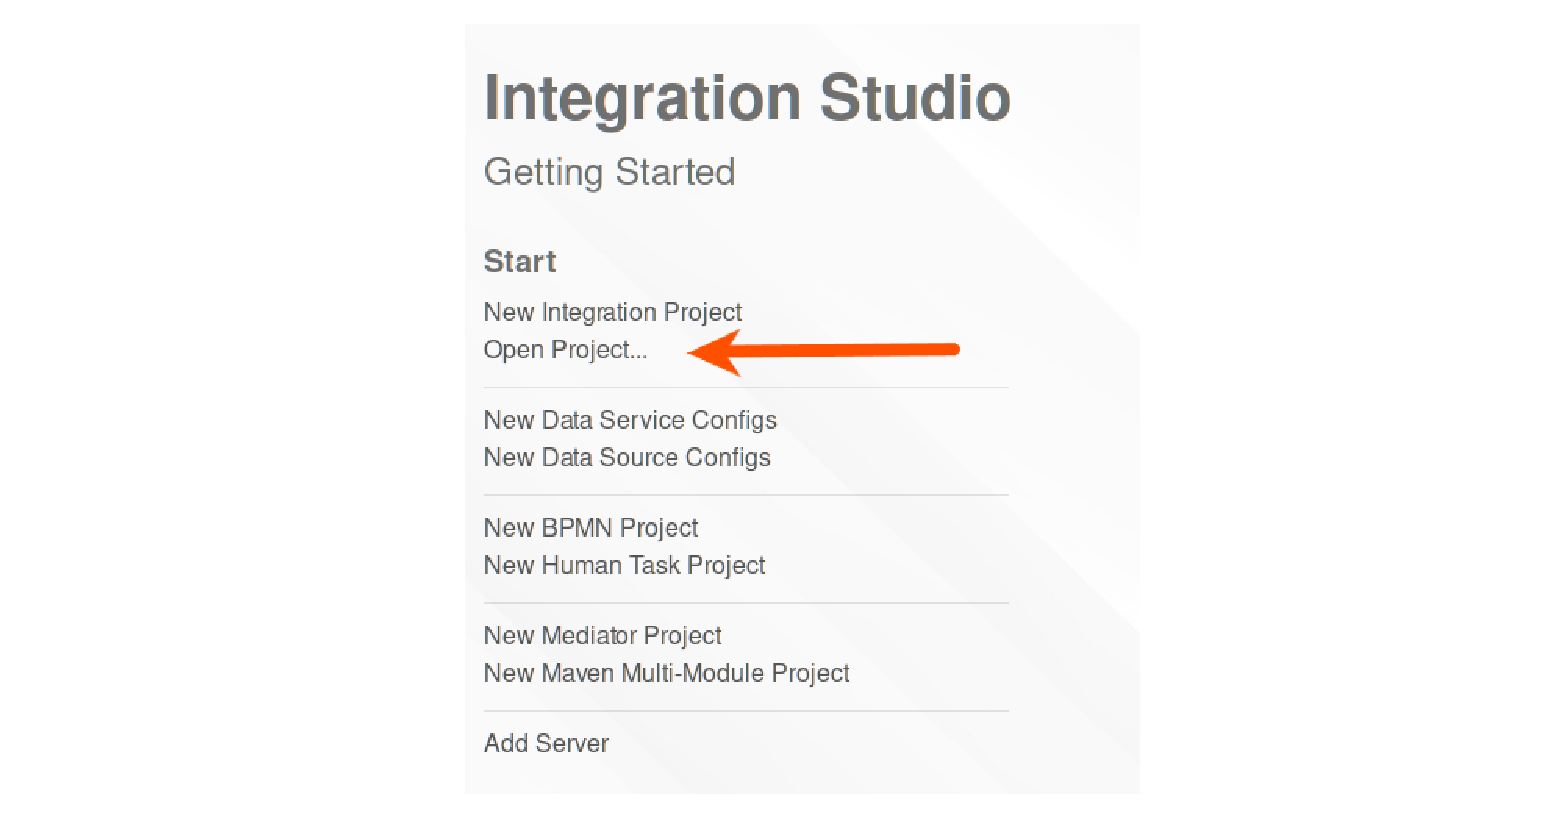
7.7. To import the project, click Open Project.
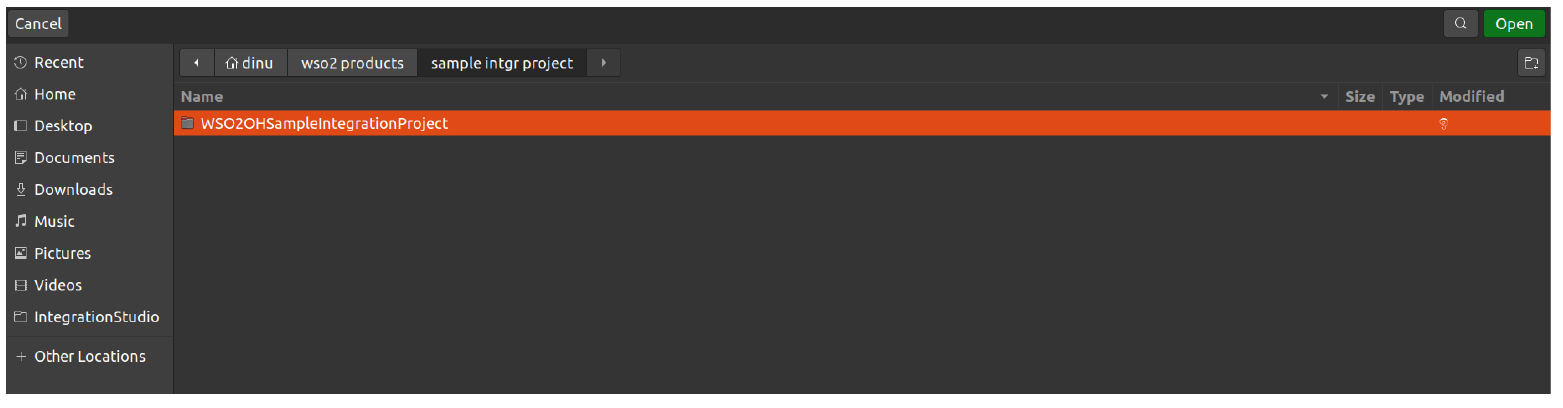
7.8. Select the root directory of the downloaded Integration Project file.
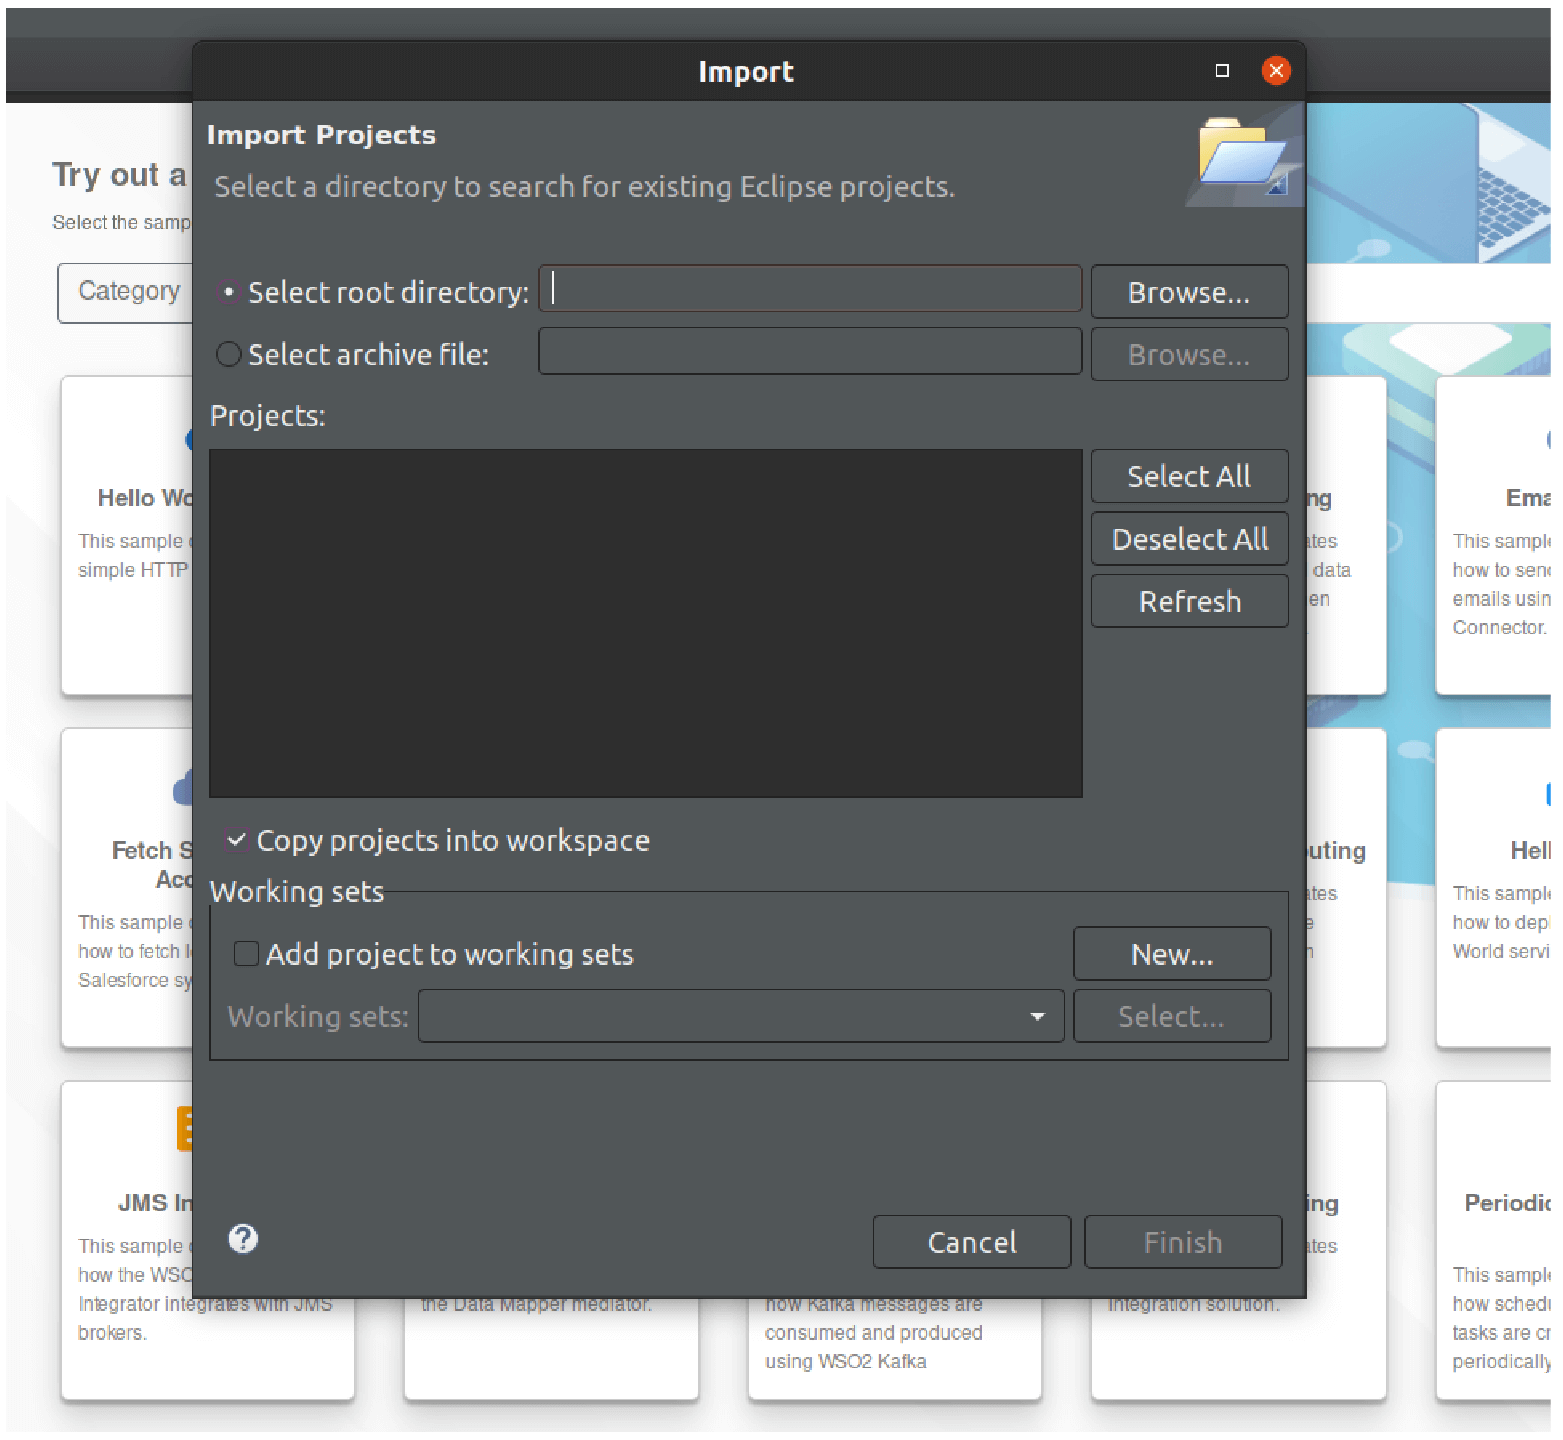
7.9. Click Finish to complete importing the project.

You have successfully imported the project into the Integration Studio.
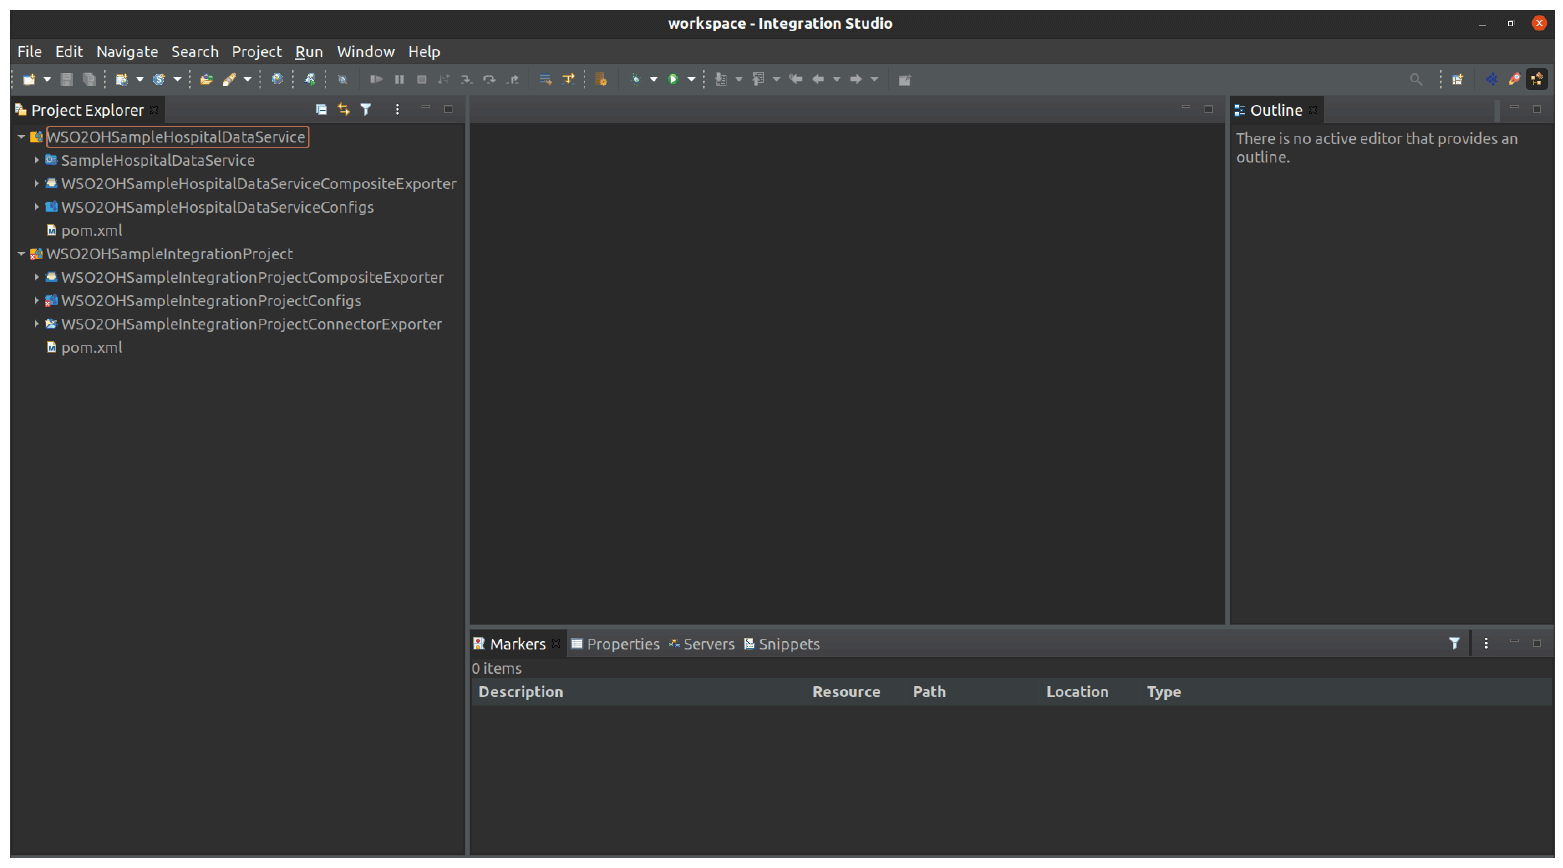
7.10. Double click the project files to view the visual integration flow.

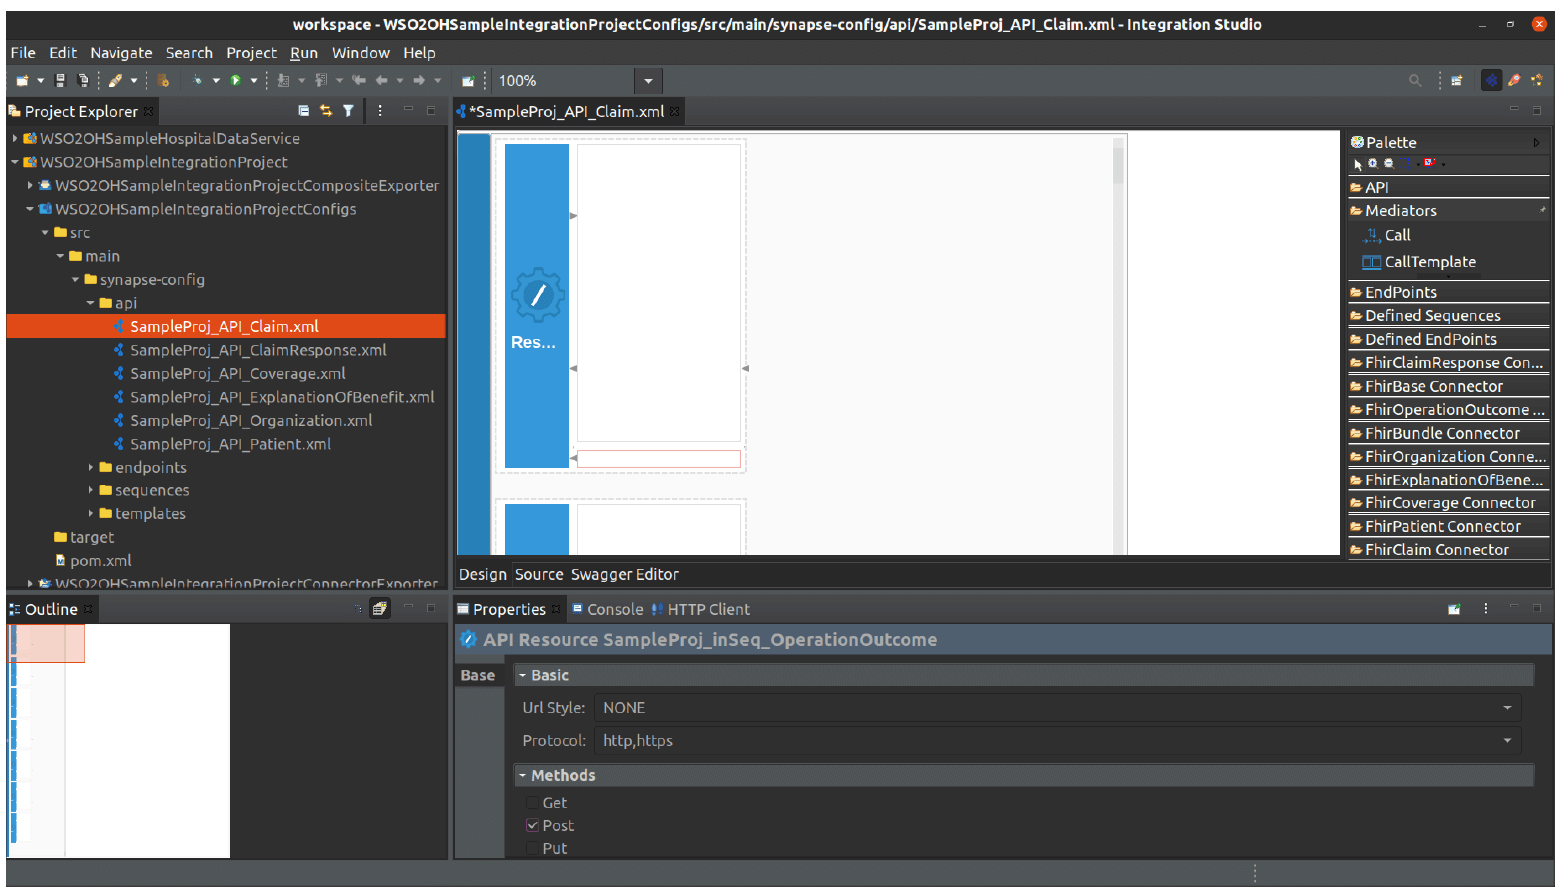
Info: The following advanced step-by-step instructions will explain how to export the APIs, invoke APIs and run the integration project.
Invoking APIS in Integration Studio
Executing the database scripts on MySQL
Note: You need to set up MySQL before going through the following steps.
7.11. Open a terminal
7.11.1. Start the MySQL service and log in as the root user. If you are using Linux, you can use the following commands.
sudo /etc/init.d/mysql start
mysql -u root -p
7.11.2. Execute the command below to create a database named ‘Insurance1DB’.
create database Insurance1DB;
7.11.3. Execute the command below to change the working database to the created database.
use Insurance1DB;
7.11.4. Execute the database script Insurance1DB_SelfContained.sql
This script is in the WSO2OHSampleIntegrationProjects/WSO2OHSampleHospitalDataService/dbscripts folder.
Use the below command to execute the script.
source
WSO2OHSampleIntegrationProjects/WSO2OHSampleHospitalDataService/
dbscripts/Insurance1DB_SelfContained.sql;
Setting up the MySQL configurations
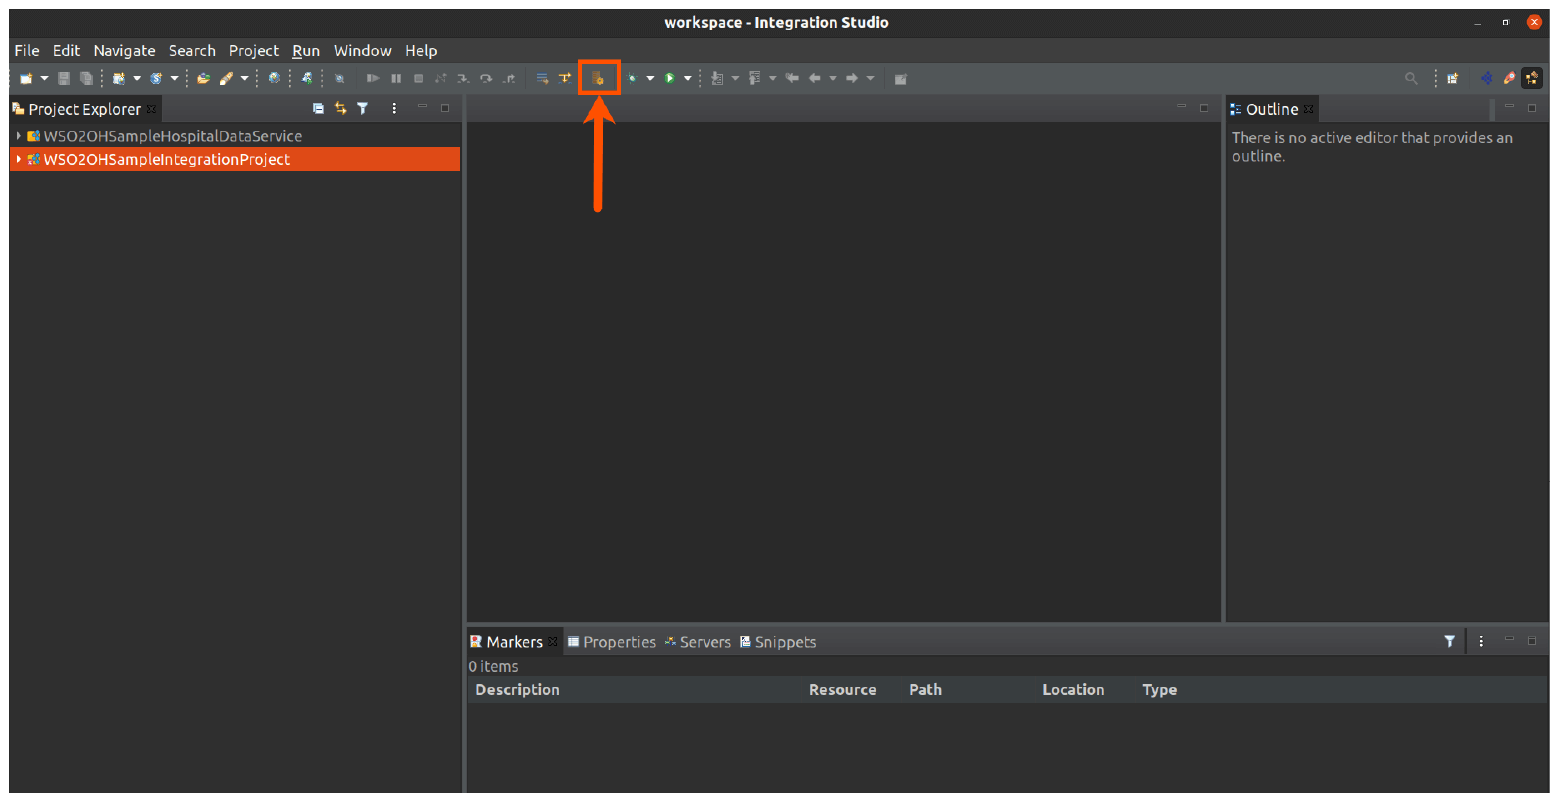
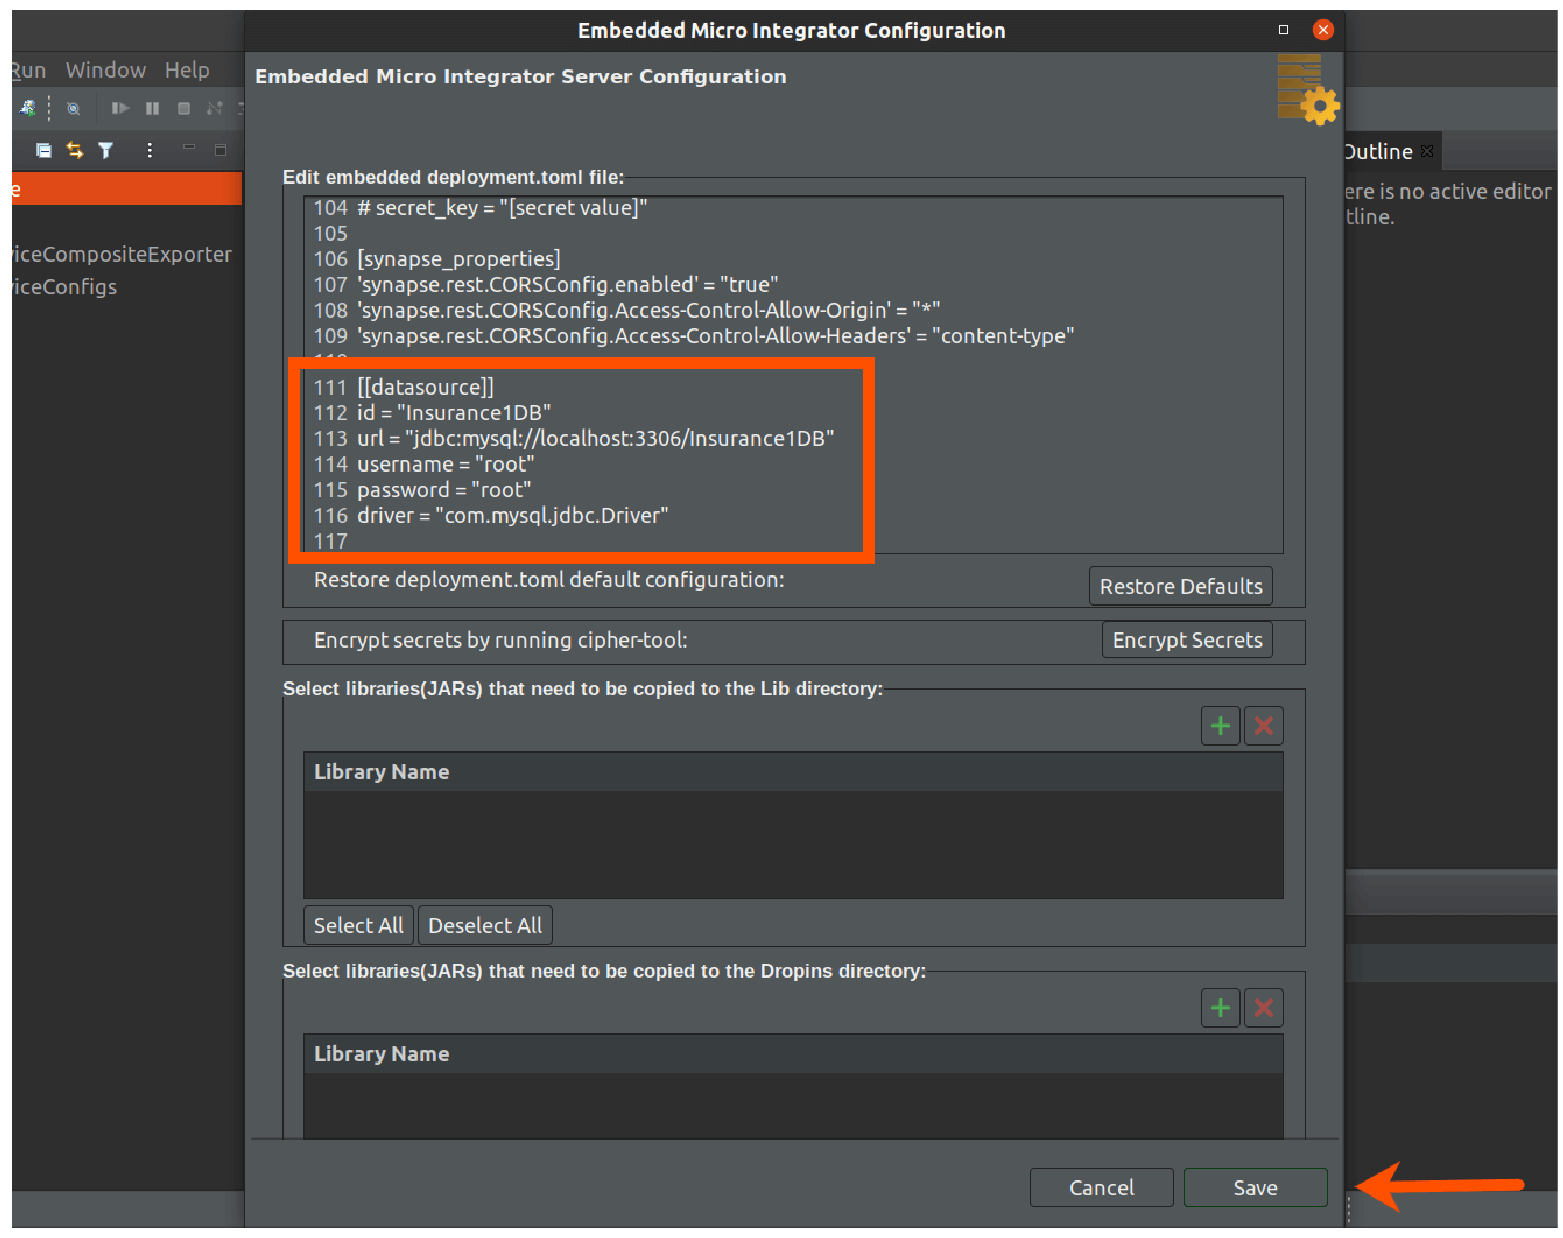
7.12. Click Server Configuration.
This is the deployment.toml file for the Micro Integrator.
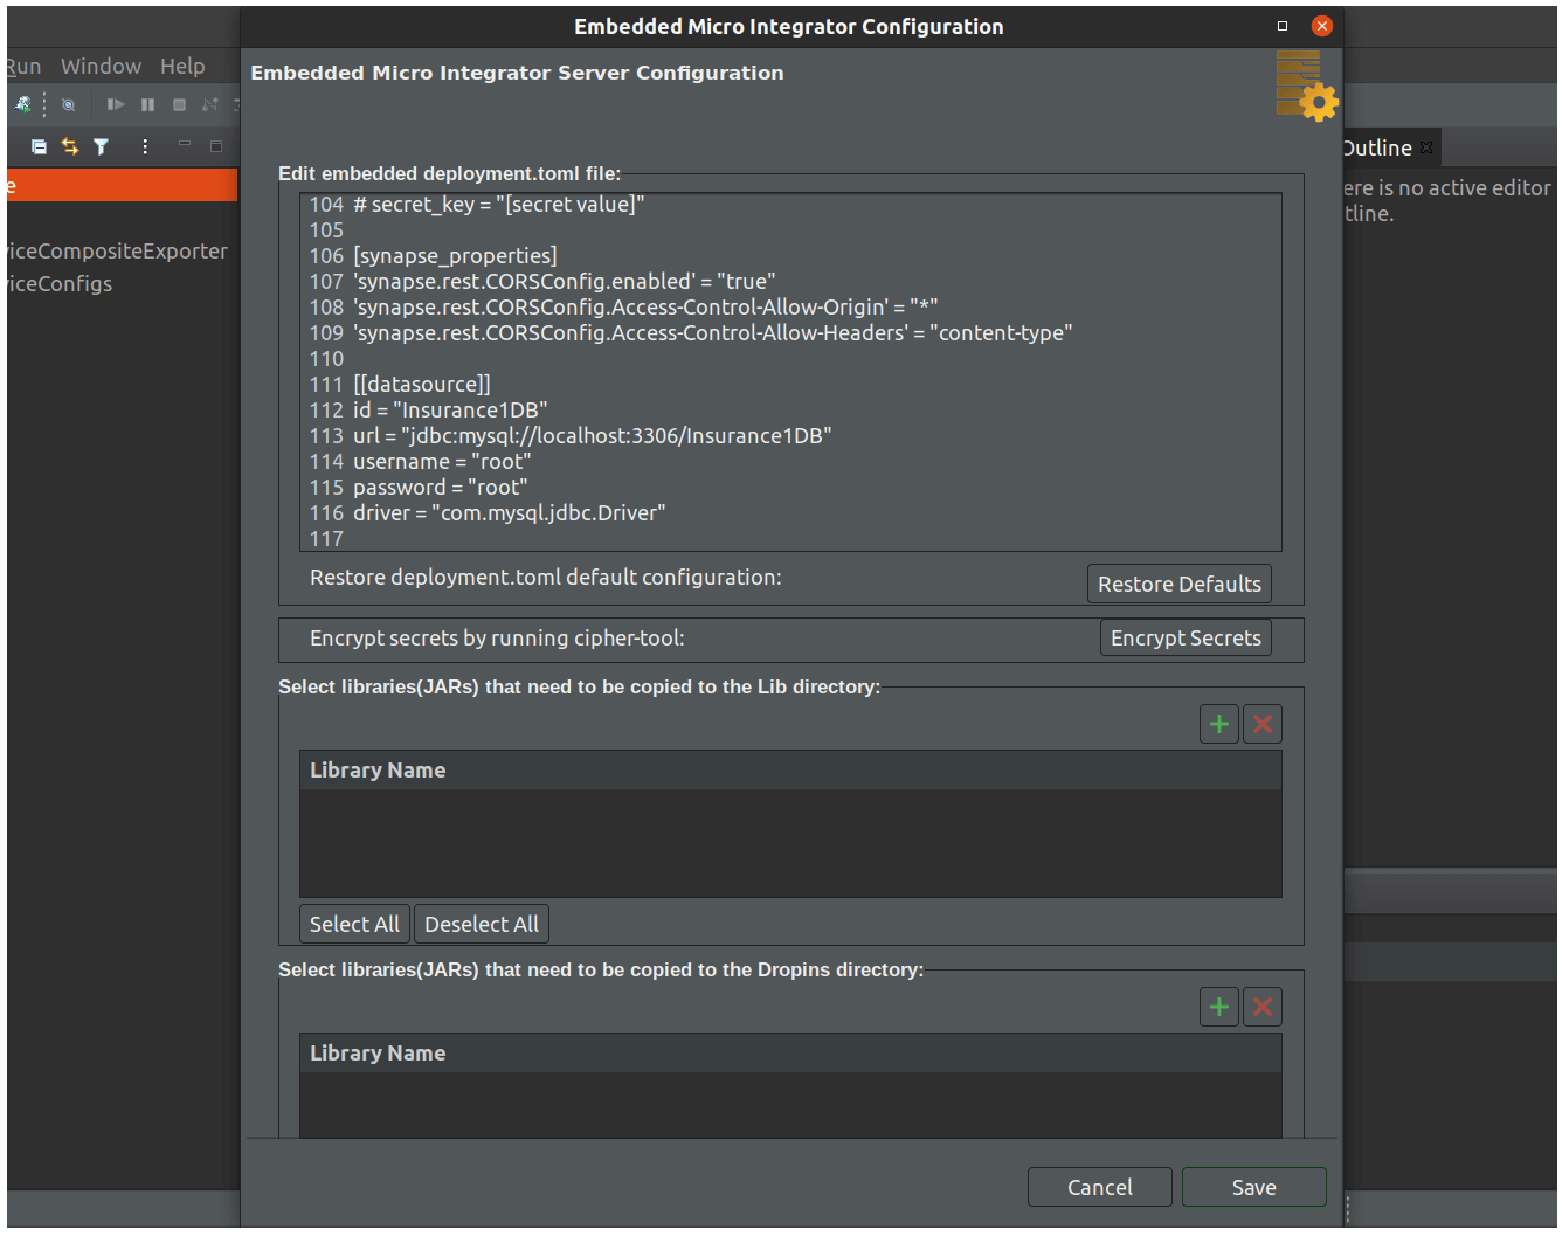
7.13. Add following configurations to the file.
[[datasource]]
id = "Insurance1DB"
url = "jdbc:mysql://localhost:3306/Insurance1DB"
username = "root"
password = "root"
driver = "com.mysql.jdbc.Driver"
Click Save.
Configuring Environment Variables in Micro Integrator
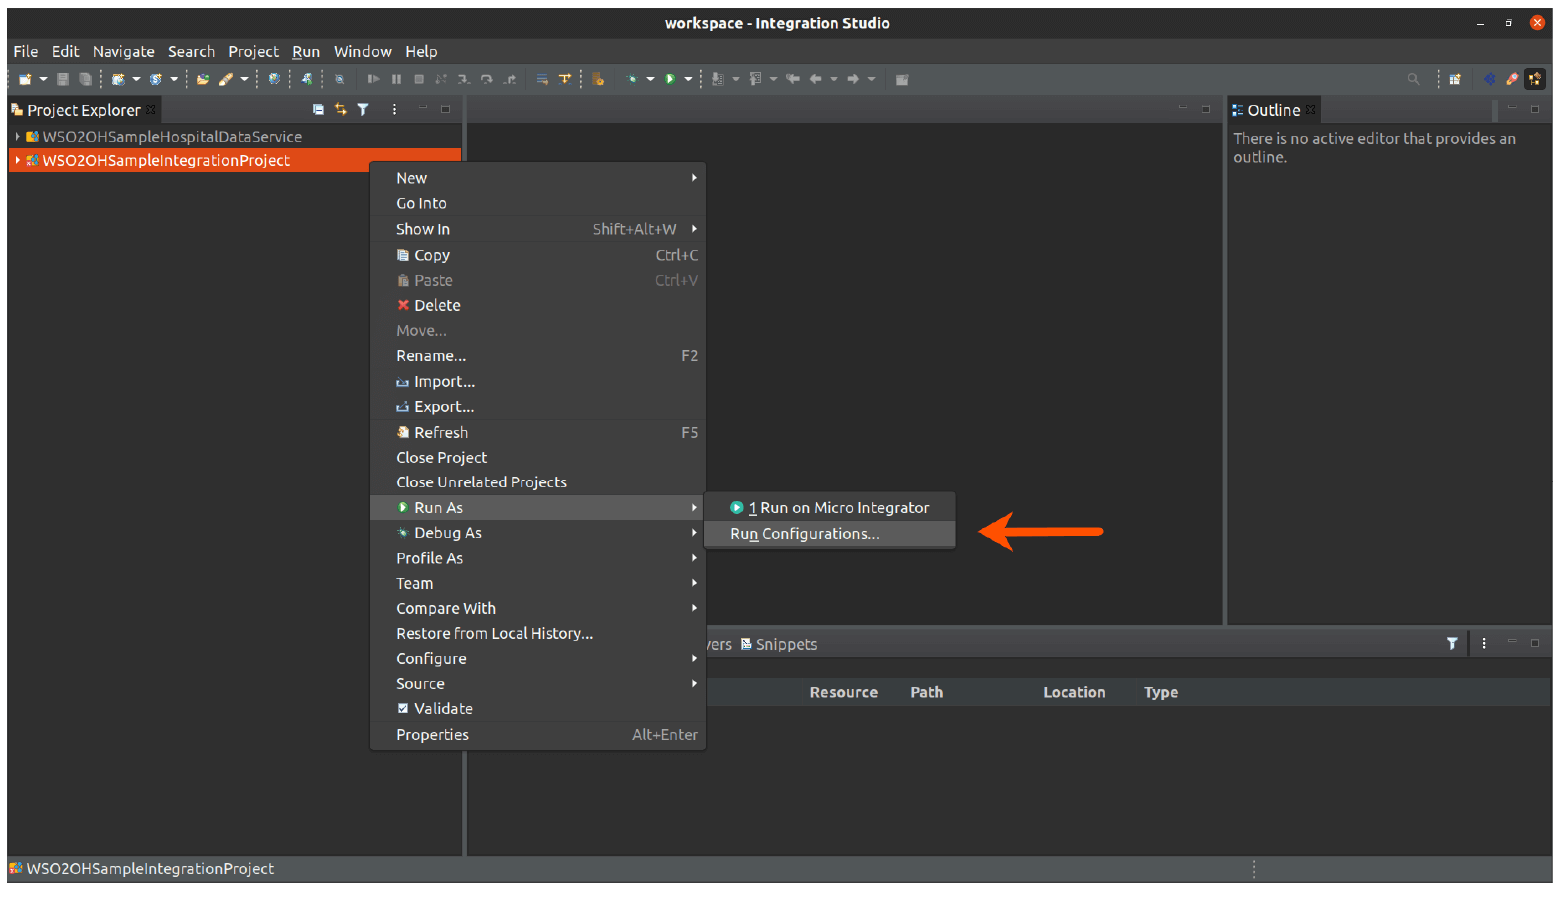
7.14. Right click on the WSO2OHSampleIntegrationProject and select Run As -> Run Configurations
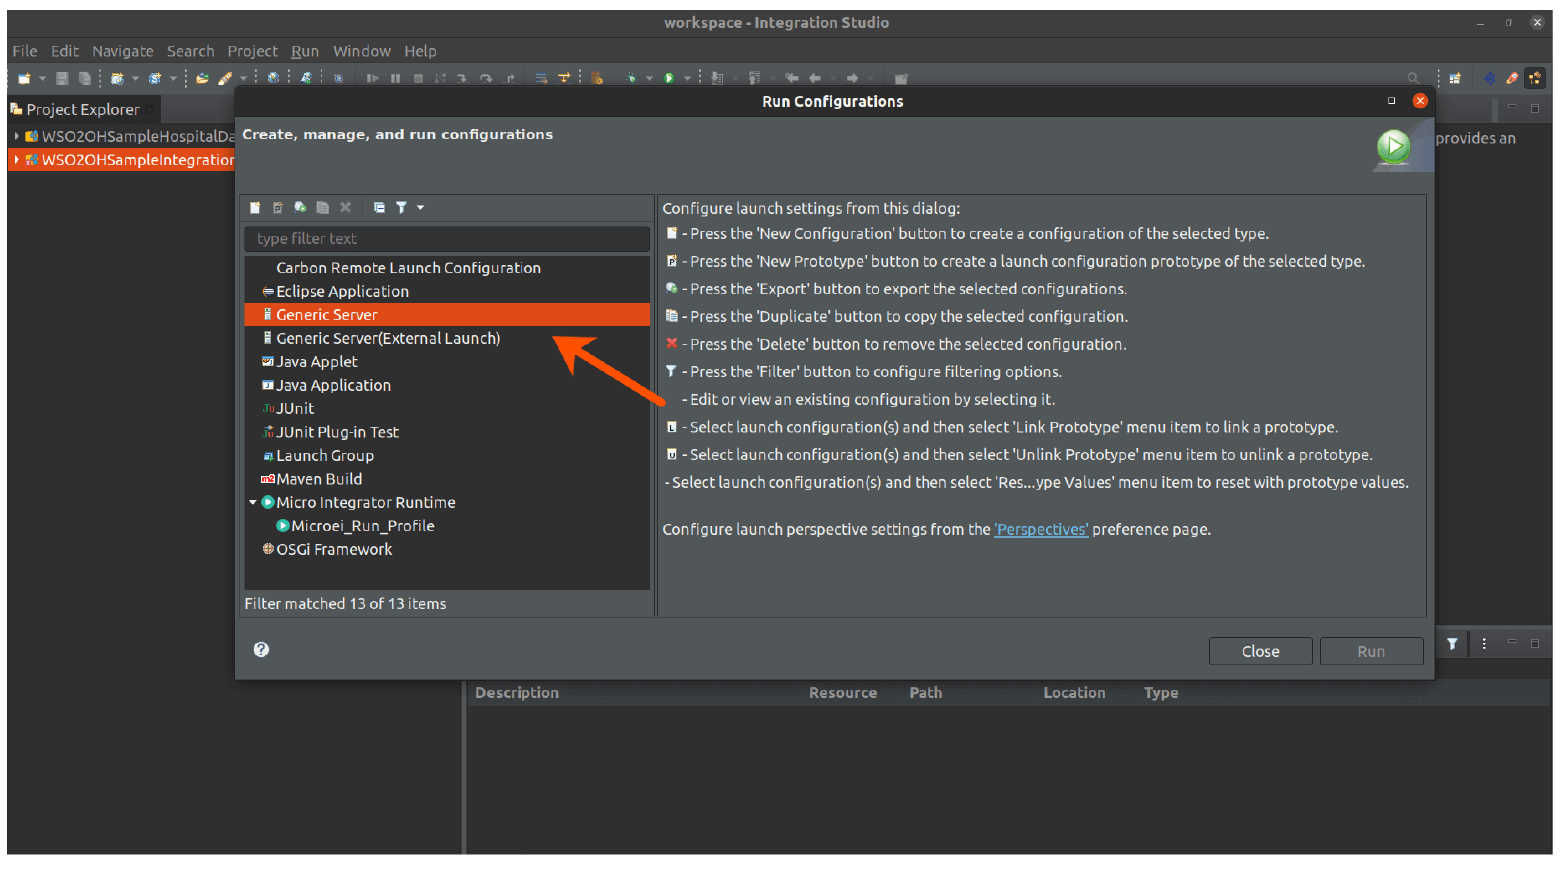
7.15. In the Run configurations window, Click Generic Server.
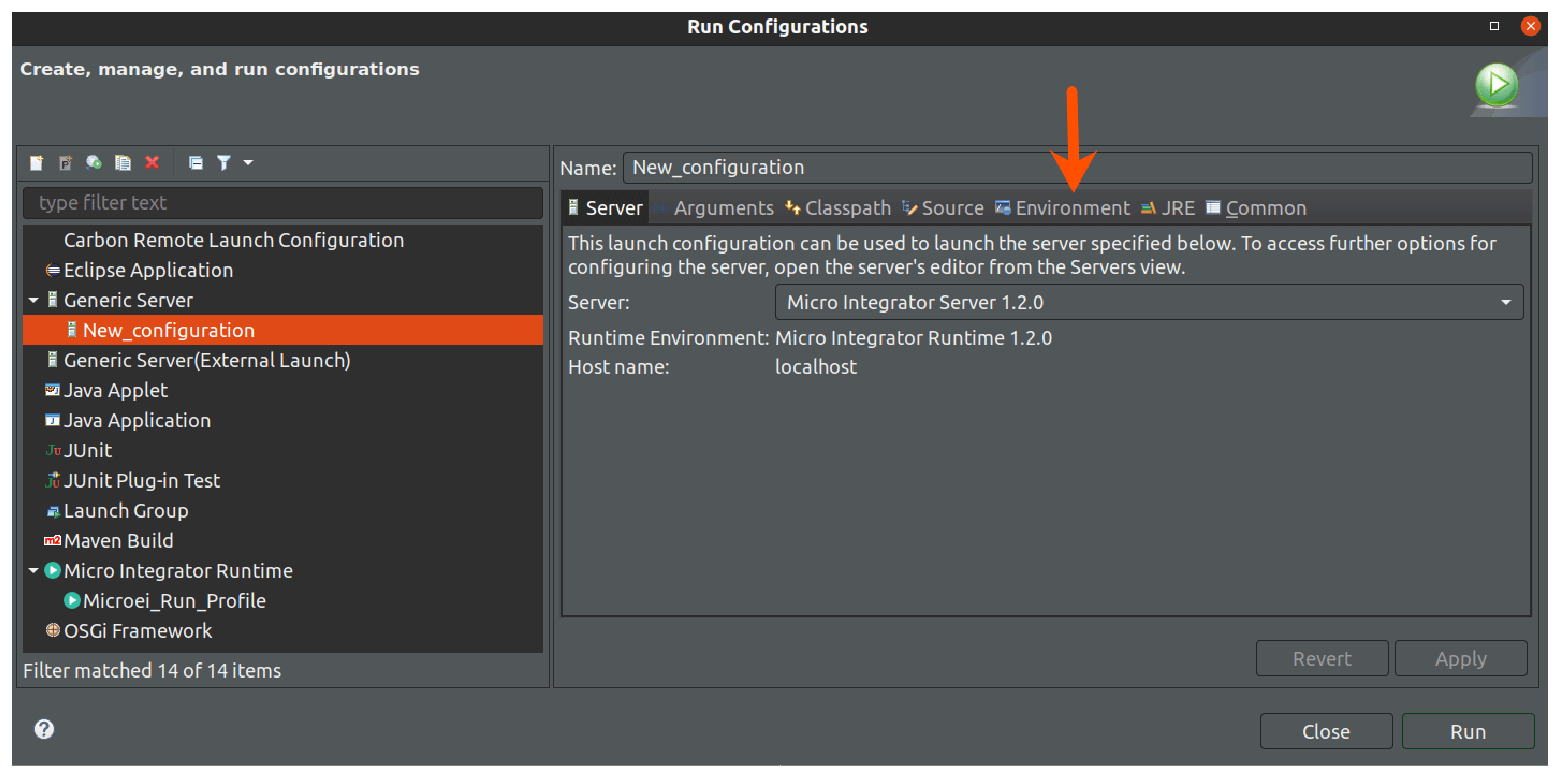
7.16. Click Environment tab.
7.17. Click Add to add a new environment variable.
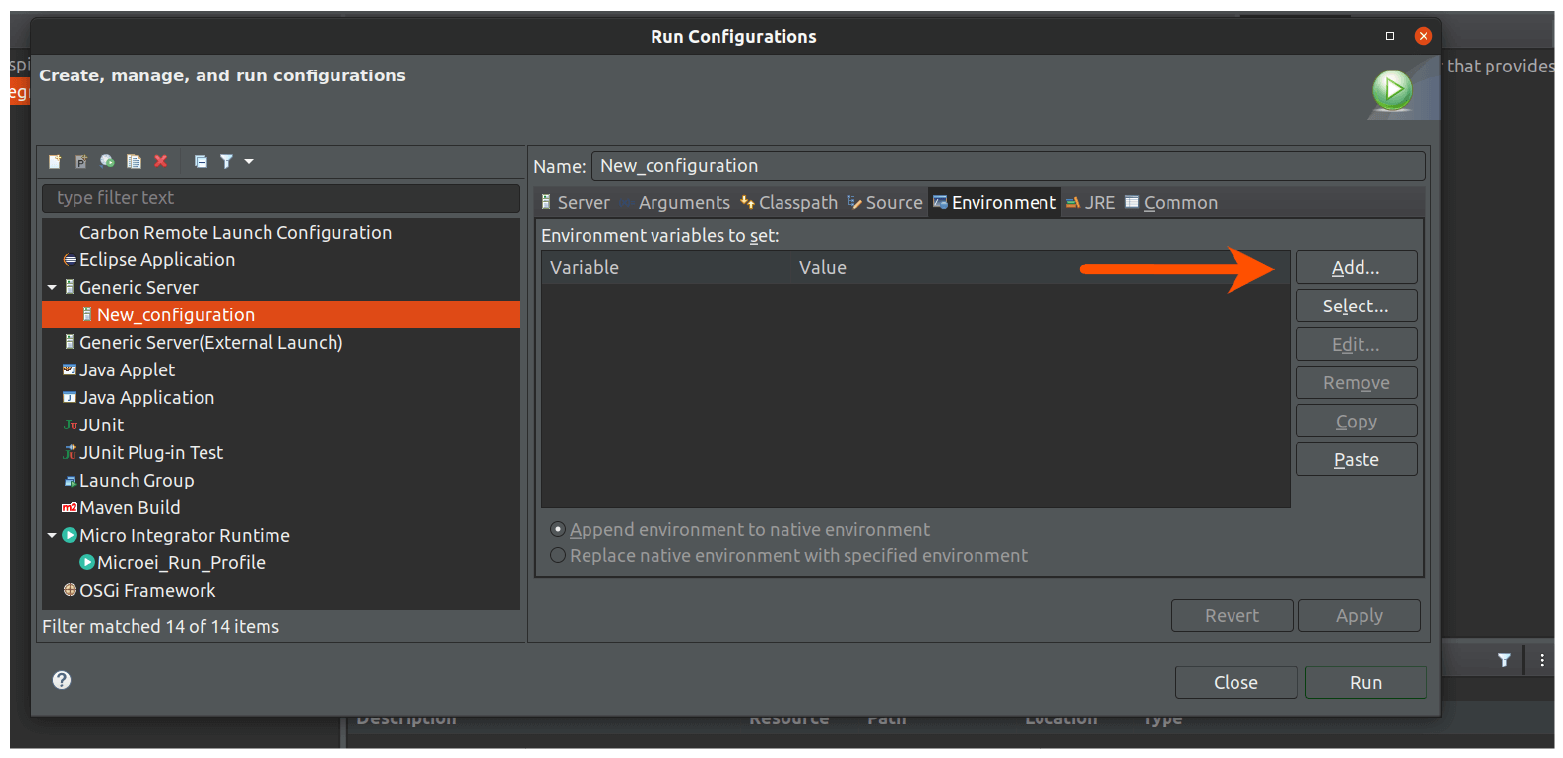
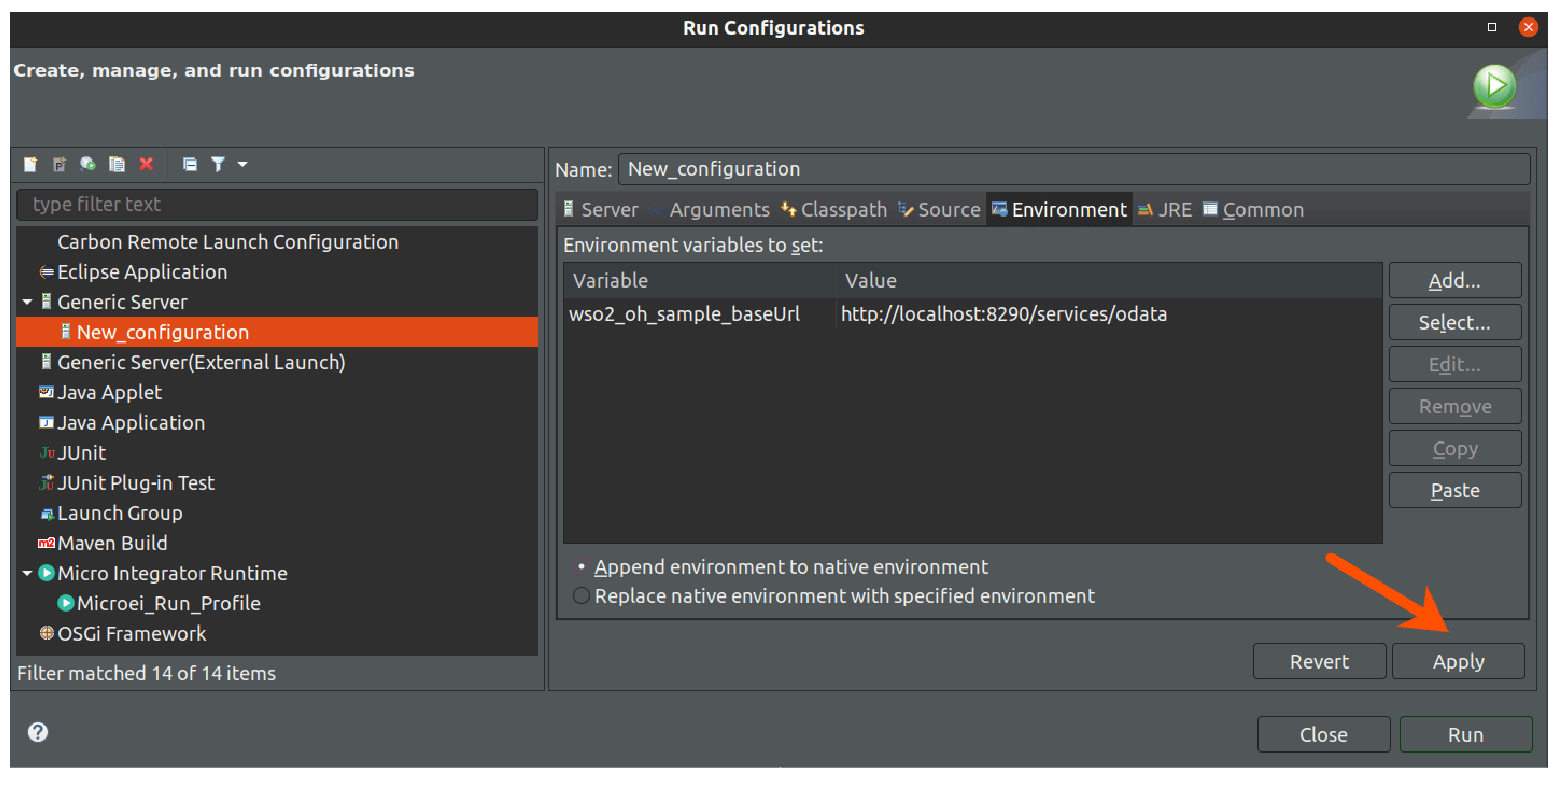
7.18. Add a new variable as given below and click OK.
Name = wso2_oh_sample_baseUrl
Value = https://localhost:8290/services/odata

7.19. Click Apply and close the window.
Running the Integration Project
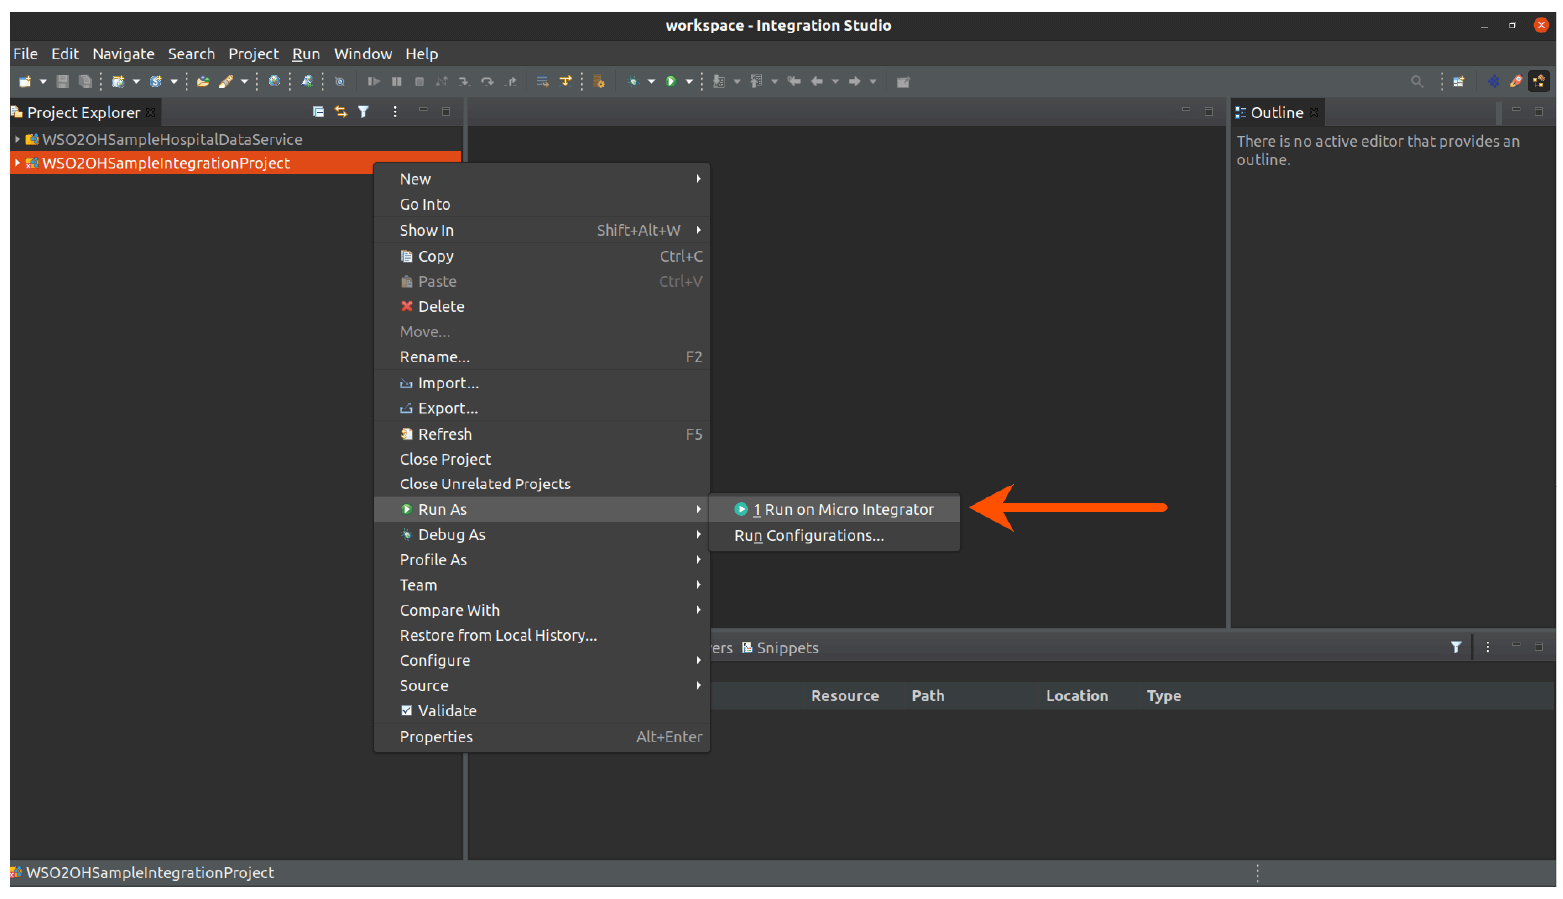
7.20. Right click on the WSO2OHSampleIntegrationProject and select Run As -> Run on Micro Integrator.
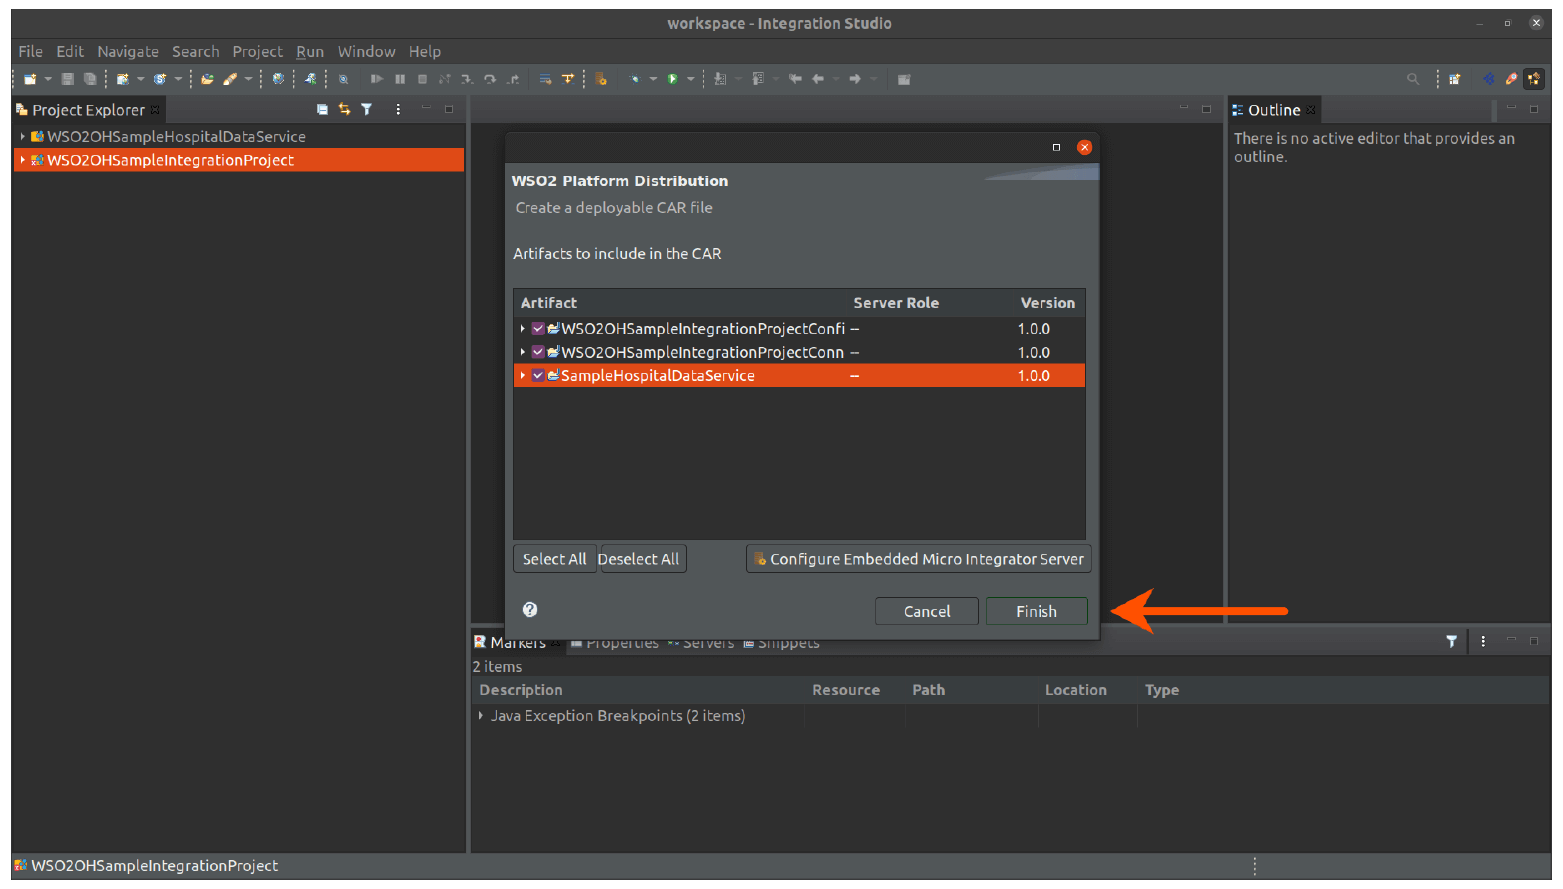
7.21. Select the three artifacts WSO2OHSampleIntegrationProjectConfigs, WSO2OHSampleIntegrationProjectConnectorExporter & SampleHospitalDataService.
Click Finish.
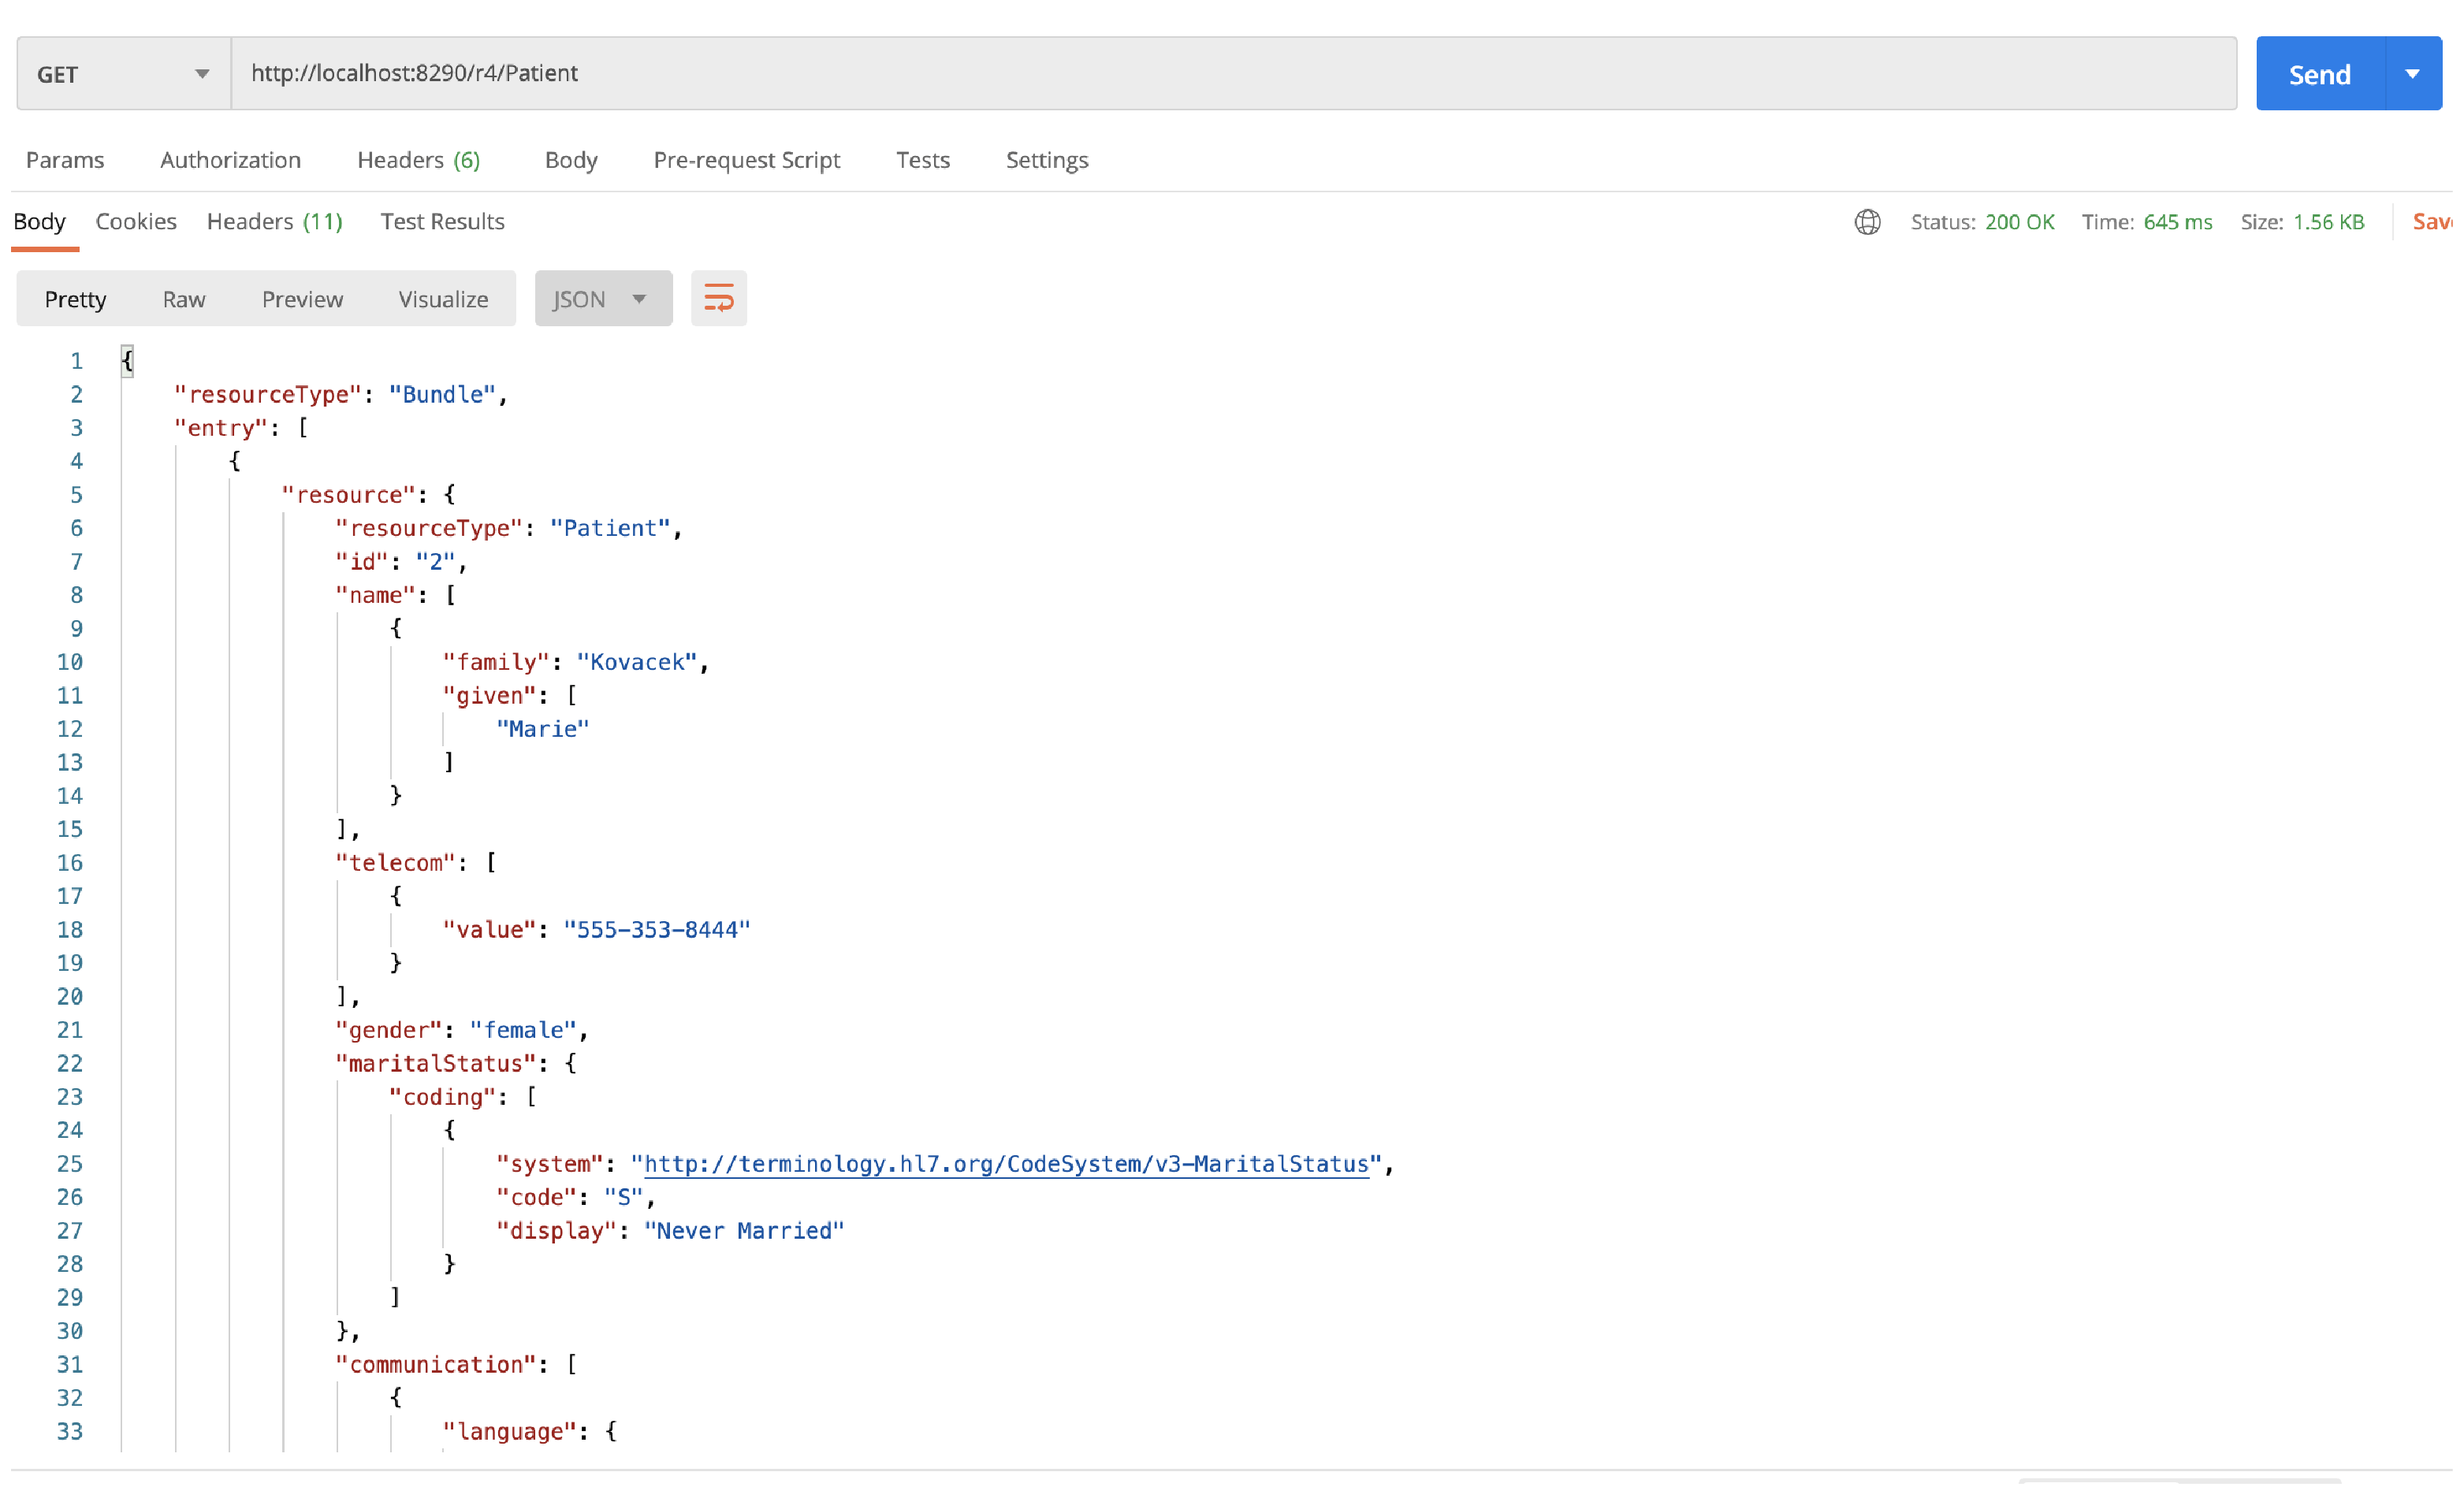
7.22. Invoke APIs using Postman as shown below.
GET url - https://localhost:8290/r4/Patient
- Overview
- Signing Up
- Signing In
- Open Healthcare Sandbox Environment
- Invoking APIs
- Invoking the Capability Statement and Well-Known Uniform Resource Identifiers
- PingIntelligence for APIs Dashboard
- Sample Integration Project