[Article] Advanced Handling of COPE Android Devices Using WSO2 Enterprise Mobility Manager

- Kasun Delgolla
- Senior Software Engineer - WSO2
Table of contents
- Applies to
- Introduction
- What is android system service application?
- How secure is the IntentService exposed by the system service application?
- Configuring system service application
- Vendor signing and building system service application
- What is a device owner on Android?
- Set device owner permissions and auto enable device administrator permissions to system service application
- Conclusion
- References
Applies to
| WSO2 Enterprise Mobility Manager | Version 2.0.1 and above |
Introduction
Android is a well-known open source mobile operating system that is used widely across various industries when manufacturing portable devices, i.e. mobile point of sales (POS) devices. Therefore it’s very important for those organizations to be able to control these devices in various situations. Given below are some common use cases:
- As the devices are corporately owned (i.e. POS systems), administrators need to keep track of the devices and have full control over them.
- As the device manufacturer, the need to upgrade device firmware frequently.
- The need to push some critical applications to their devices silently without user intervention.
- The need to enforce advanced restrictions (i.e. access to device settings, block installation of malicious apps, whitelist apps) over devices.
- The need to monitor and debug device issues remotely.
This sort of control cannot be achieved through the conventional device administrator permissions given by Android developer software development kit (which is used in the WSO2 Enterprise Mobility Manager (WSO2 EMM) agent application). Android system service application is carefully designed to handle all the above scenarios and enable full level of control over devices. This article discusses this application and how to configure it to acquire full control over Android devices using WSO2 EMM.
What is Android system service application?
Android system service application is introduced to WSO2 EMM to provide advanced control over Android devices. This includes operations that require system level permissions (root permissions in the linux context). Given below are some examples:
- Upgrading device firmware
- Rebooting device
- Silently installing/uninstalling applications
- Restricting user settings
- Reading device debug logs
The system service application is designed to work as a system application within the Android operating system. The WSO2 EMM agent application can securely and seamlessly communicate with this service application by invoking the provided IntentService.

Figure 1: System service <-> Agent application communication protocol
Figure 1 above explains how the WSO2 EMM agent application and system service application communicates within the device. Given below are the communication steps during the above process:
- The agent application receives a command from the WSO2 EMM server. If it’s a system level operation, the agent application invokes the system service application via the exposed IntentService.
- Then the system service application performs the operation after validating it.
- Once the execution is complete, it sends a broadcast to the agent application.
- The agent application listens to these broadcast signals by using a BroadcastReciever.
- The WSO2 EMM Agent replies back to the server with the operation execution status.
How secure is the IntentService exposed by the system service application?
Usually the Android intent services are accessible throughout the application ecosystem of the device. But in our case, we don’t want that to happen. Only the WSO2 EMM agent application should be able to communicate with the system service application. You can ensure that in all services exposed both by the agent application and the systems service application by enabling signature level protection to all the exposed services.
This means that only apps that are digitally signed with the same signing certificate used to sign the system service can access the service exposed by the system service application. In simple terms, application signing certificates should match in order to establish communication between the services. This ensures security in the communication channel so that none of the third party apps can maliciously access the system service application.
Given below is how it is achieved this at code level:
- Defining the custom manifest permission.
<permission android:name="org.wso2.emm.system.service.permission.ACCESS” android:protectionLevel="signature"></permission>
- Using the defined permission in the service definition.
<service android:name="org.wso2.emm.system.service.EMMSystemService" android:enabled="true" android:permission="org.wso2.emm.system.service.permission.ACCESS" android:exported="true"> <intent-filter> <action android:name="org.wso2.emm.system.service.START_SERVICE" /> </intent-filter> </service> - Using the above permission in the agent manifest enables access to the system services’ IntentService (both apps should be signed with the same certificate).
<uses-permission android:name="org.wso2.emm.system.service.permission.ACCESS"/>
In case you have another application that requires the Android system service capabilities, you can access it using the above mentioned procedure. See the IntentService exposed by the system service application to understand how you should invoke it. Also read this example on how to achieve it.
Configuring the system service application
To install the Android system service application alongside the WSO2 EMM agent application, you need to build it and sign it with the firmware signing key (platform key). This process is also known as “vendor signing” in embedded Android.
Since the system service application uses Android system APIs that are hidden to developers, this app cannot be built directly with Android Studio. Android developer SDK does not include aforementioned APIs and they are only accessible to system applications at operating system level.
If we need to access those, we need to use android.jar which is built using the original Android Open Source Project (AOSP) (we should build operating system (OS) version 23 - Marshmallow - since the system application uses it as the compile SDK) and replace it with the local android.jar file which is in our developer SDK (it’s usually located at <SDK_LOCATION>/platforms/android-<COMPILE_SDK_VERSION> path). To make the android.jar building process mentioned above easier, there is a GIT repository that has android.jar (unlocked hidden APIs) files for all SDK versions. You can directly use the jar file from this repository.
Once you replace the jar file, you can directly open the system application source via the Android Studio and build it as a usual Android application.
Vendor signing and building the system service application
To enable the WSO2 EMM system service as a system application in the device, we need to sign it with the platform key. Before you do that, make sure the AndroidManifest.xml file has the property android:sharedUserId="android.uid.system" within its
<manifest xmlns:android="https://schemas.android.com/apk/res/android" package="org.wso2.emm.system.service" android:sharedUserId="android.uid.system">
To do this, first you need the platform key (firmware signing key) in the .keystore format (See 'Signing your applications' for more details on keystores and signing process). Follow the steps given below to generate the signed Android Package Kit (APK).
- Open Android Studio, load the application and check the above mentioned configurations.
- Click on Build > Rebuild Project and wait till the process completes.
- Click on Build > Generate Signed APK. You will see the following dialog:
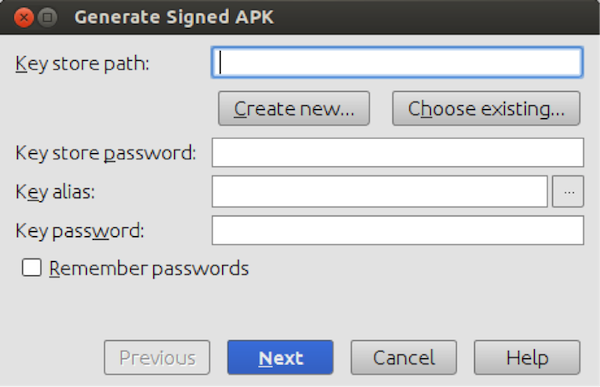
Figure 2
- Browse your keystore file using the Choose existing wizard and enter passwords.
- You can select the alias by clicking on the ... button (it will be picked automatically).
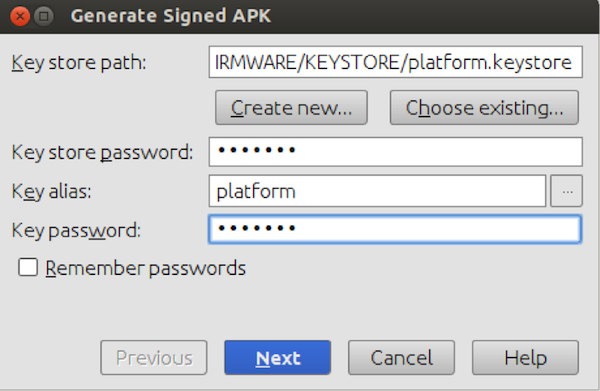
Figure 3
- After you fill all the details, click on the Next button.
- Select the Build Type as release and click Finish.
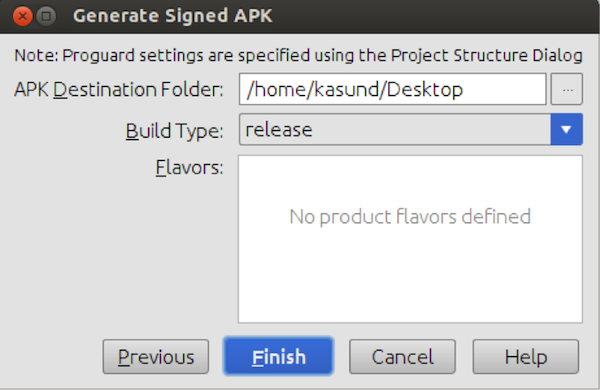
Figure 4
When the above process is complete, the APK file will be generated and stored in the destination folder you specified in the above dialog. You can now install the generated APK file to your device by connecting your device using the Android Debug Bridge (ADB) and issuing the ADB command, “adb install
What is a device owner on Android?
A device owner is an application that runs as a device administrator on Android devices above Android Lollipop (5.0+). It can use methods in the DevicePolicyManager to control configurations, security and other applications on the device. A device can have only one device owner. Therefore none of the other applications can use the methods in that class to control the device.
WSO2 EMM uses the above concept to enable user settings restrictions via the system service application.
Set device owner permissions and auto-enable device administrator permissions to system service application
There’s a list of functionalities in the system service application that requires device owner permissions. Therefore the system application must be explicitly set as the device owner of the device in order to enable all its functionalities. There are two approaches to achieve this on an Android device.
- Use the device policy manager (DPM) command via ADB.
- Programmatically set system service as the device owner from another system application running on the device.
When it comes to an enterprise with hundreds and thousands of devices we have to get rid of the first method above without any argument because it’s impractical to perform this manual process on each device one at a time.
When we have a custom made device (or when we have access to firmware signing key), there should always be other system applications that we use. We can also use the launcher application or any other system application to get the second option done. As an example, given below is a practical set of steps for enrolling a device to WSO2 EMM including the system application in a COPE (OEM) scenario.
- The WSO2 EMM agent application and the system service application are pre-installed on the device by default with the firmware.
- The device boots up for the first time.
- Application X (this can be any system application as explained above) launches automatically when the device is connected to the Internet for the first time.
- Application X sets the EMM agent as a device administrator.
- Application X sets the EMM system service as the device owner.
- Application X initiates the EMM enrollment by using the EMM auto-enrollment service.
- Now the device is enrolled to WSO2 EMM without any user interaction and ready to be managed.
Given below is how to perform steps 4 and 5 programmatically:
- Set the agent as a device administrator by using DevicePolicyManager API in Android by passing the agent package name and device admin receiver class name.
- Set the system service as a device administrator by using DevicePolicyManager API in Android by passing system service package name and device admin receiver class name (optional).
- Check whether the system service is already a device owner. If not, execute DevicePolicyManager (DPM) shell command programmatically using the Runtime.exec() API in Android.
Completed code for above steps are as follows:
public class DeviceBootReceiver extends BroadcastReceiver {
   private static final String TAG = "DeviceBootReceiver";

   @Override
   public void onReceive(final Context context, Intent intent) {
       Log.i(TAG, "disableAdminPopup" + " for Applications");
       DevicePolicyManager manager = (DevicePolicyManager) context.getSystemService(Context.DEVICE_POLICY_SERVICE);

       ComponentName componentAgent = new ComponentName("org.wso2.emm.agent", "org.wso2.emm.agent.services.AgentDeviceAdminReceiver");
       if(!manager.isAdminActive(componentAgent))
           manager.setActiveAdmin(componentAgent, true);

       ComponentName componentService = new ComponentName("org.wso2.emm.system.service", "org.wso2.emm.system.service.ServiceDeviceAdminReceiver");
       if(!manager.isAdminActive(componentService))
           manager.setActiveAdmin(componentService, true);

       if (!manager.isDeviceOwnerApp("org.wso2.emm.system.service")){
           Log.i(TAG, "isDeviceOwnerApp" + " setting owner");
           try {
               Runtime.getRuntime().exec("dpm set-device-owner org.wso2.emm.system.service/.ServiceDeviceAdminReceiver");
           } catch  (IOException e) {
               Log.e(TAG, "Shell command execution failed." + e);
           }
       }
       else {
           Log.i(TAG, "isDeviceOwnerApp" + " already owner");
       }
   }
}
This way we can seamlessly integrate the WSO2 EMM system service application and the agent application in a COPE (OEM) environment. This will enable many more system level features such as:
- Device firmware upgrade
- Rebooting
- Device hard lock
- Unlocking a hard locked device
- Silent app installation/uninstallation
- Application blacklisting and whitelisting
- Around 32 user settings restrictions
Conclusion
WSO2 EMM Android system service application enables enterprises to take better control over corporate owned devices. Specially for OEM scenarios, the system service and agent applications can be used as a background service with zero user interactions.
References
- [1] https://docs.wso2.com/display/EMM210/Integrating+the+Android+System+Service+Application
- [2] https://www.ricston.com/blog/explaining-behavior-android-application-system-apps-nonsystem-apps/
- [3] https://developer.android.com/reference/android/app/IntentService.html
- [4] https://developer.android.com/reference/android/content/BroadcastReceiver.html
- [5] https://developer.android.com/guide/topics/manifest/permission-element.html
- [6] https://developer.android.com/studio/publish/app-signing.html
- [7] https://developer.android.com/training/run-background-service/create-service.html
- [8] https://docs.wso2.com/display/EMM210/Invoking+the+Firmware+Upgrade+API
- [9] https://github.com/wso2/product-emm/blob/master/modules/mobile-agents/android/system-service/app/src/main/java/org/wso2/emm/system/service/EMMSystemService.java
- [10] https://source.android.com/
- [11] https://github.com/anggrayudi/android-hidden-api
- [12] https://github.com/wso2/product-emm/tree/master/modules/mobile-agents/android/system-service
- [13] https://docs.wso2.com/display/EMM210/Adding+a+User+Restriction+Policy+on+Android+Devices
About Author
- Kasun Delgolla
- Senior Software Engineer
- WSO2