Develop an API Proxy from Scratch
An API proxy acts as an intermediary between an existing API and WSO2 Developer Platform, intercepting all requests made to the API. It also functions as a managed API, allowing you to apply essential API management features such as security policies and rate limiting.
In this guide, you will:
- Create an API proxy component to expose an existing API.
- Deploy the API proxy.
- Test the API proxy to verify its functionality.
- Manage the API.
- Consume the API.
Prerequisites
-
If you're signing in to the WSO2 Developer Platform Console for the first time, create an organization:
- Go to the WSO2 Developer Platform Console and sign in using your preferred method.
- Enter a unique organization name. For example,
Stark Industries. - Read and accept the privacy policy and terms of use.
- Click Create.
This creates the organization and opens the Project Home page of the default project created for you.
Step 1: Create an API proxy
To create an API proxy, you can either upload an OpenAPI specification or provide an OpenAPI specification URL. In this guide, you will specify a URL to an OpenAPI definition of a sample API.
- Go to the WSO2 Developer Platform Console and sign in. This opens the project home page.
- If you already have one or more components in your project, click + Create. Otherwise, proceed to the next step.
- Click the API Proxy card. This opens the Create an API Proxy pane.
- Select Creare from Scratch option.
-
Specify the following values as Proxy Metadata:
Field Value Context department-serviceVersion v1.0Target https://samples.choreoapps.dev/company/hr -
Enter following details for the Component Details:
Info
The Component Name field must be unique and cannot be changed after creation.
Field Value Component Display Name Department ServiceComponent Name department-serviceDescription Sample proxy for department service -
Click Create. This creates the API proxy component and takes you to the Deploy page.
Step 2: Define resources for the API proxy
To add a new resource that retrieves a department by the department ID, follow these steps:
- In the left navigation menu, click Develop and then click Resources.
- Select GET as the HTTP Verb and enter
/department/{departmentId}as the URI Pattern. - Click + to add the resource.
-
Expand the added resource and specify the following values:
Field Value Operation ID findDepartmentDescription Find a department by department ID -
Remove the five default resources that start with
/*by clicking the delete icon corresponding to each resource. - Click Save.
Step 3: Deploy the API proxy
- In the left navigation menu, click Deploy.
- In the Build Area card, click Configure & Deploy. This opens the Configure & Deploy pane.
- Select External as the API access mode and click Deploy. The Development card indicates the Deployment Status as Active when the API proxy is successfully deployed.
Now you are ready to test the API proxy.
Step 4: Test the API proxy
WSO2 Developer Platform allows you to test your API proxy using either the integrated OpenAPI Console or cURL. In this guide, you will use the OpenAPI Console.
Tip
WSO2 Developer Platform enables OAuth 2.0 to secure APIs by default. Therefore, you need an access token to invoke an API.
- WSO2 Developer Platform automatically generates a key to test the API via the OpenAPI Console. To view the key, click the show key icon in the Security Header field.
- To disable security for the entire API or a specific resource:
- In the left navigation menu, click Deploy.
- Go to the Build Area card and click Configure & Deploy.
- In the Configure & Deploy pane:
- To disable security for the entire API, clear the OAuth2 checkbox.
- To disable security for a specific resource, turn off the Security toggle in the relevant resource.
- Click Deploy.
- In the left navigation menu, click Test and then click OpenAPI Console.
- Select Development from the environment drop-down list.
- Expand the
GET /department/{departmentId}resource and click Try it Out. -
Enter
1as the departmentId and click Execute. You will see a response similar to the following: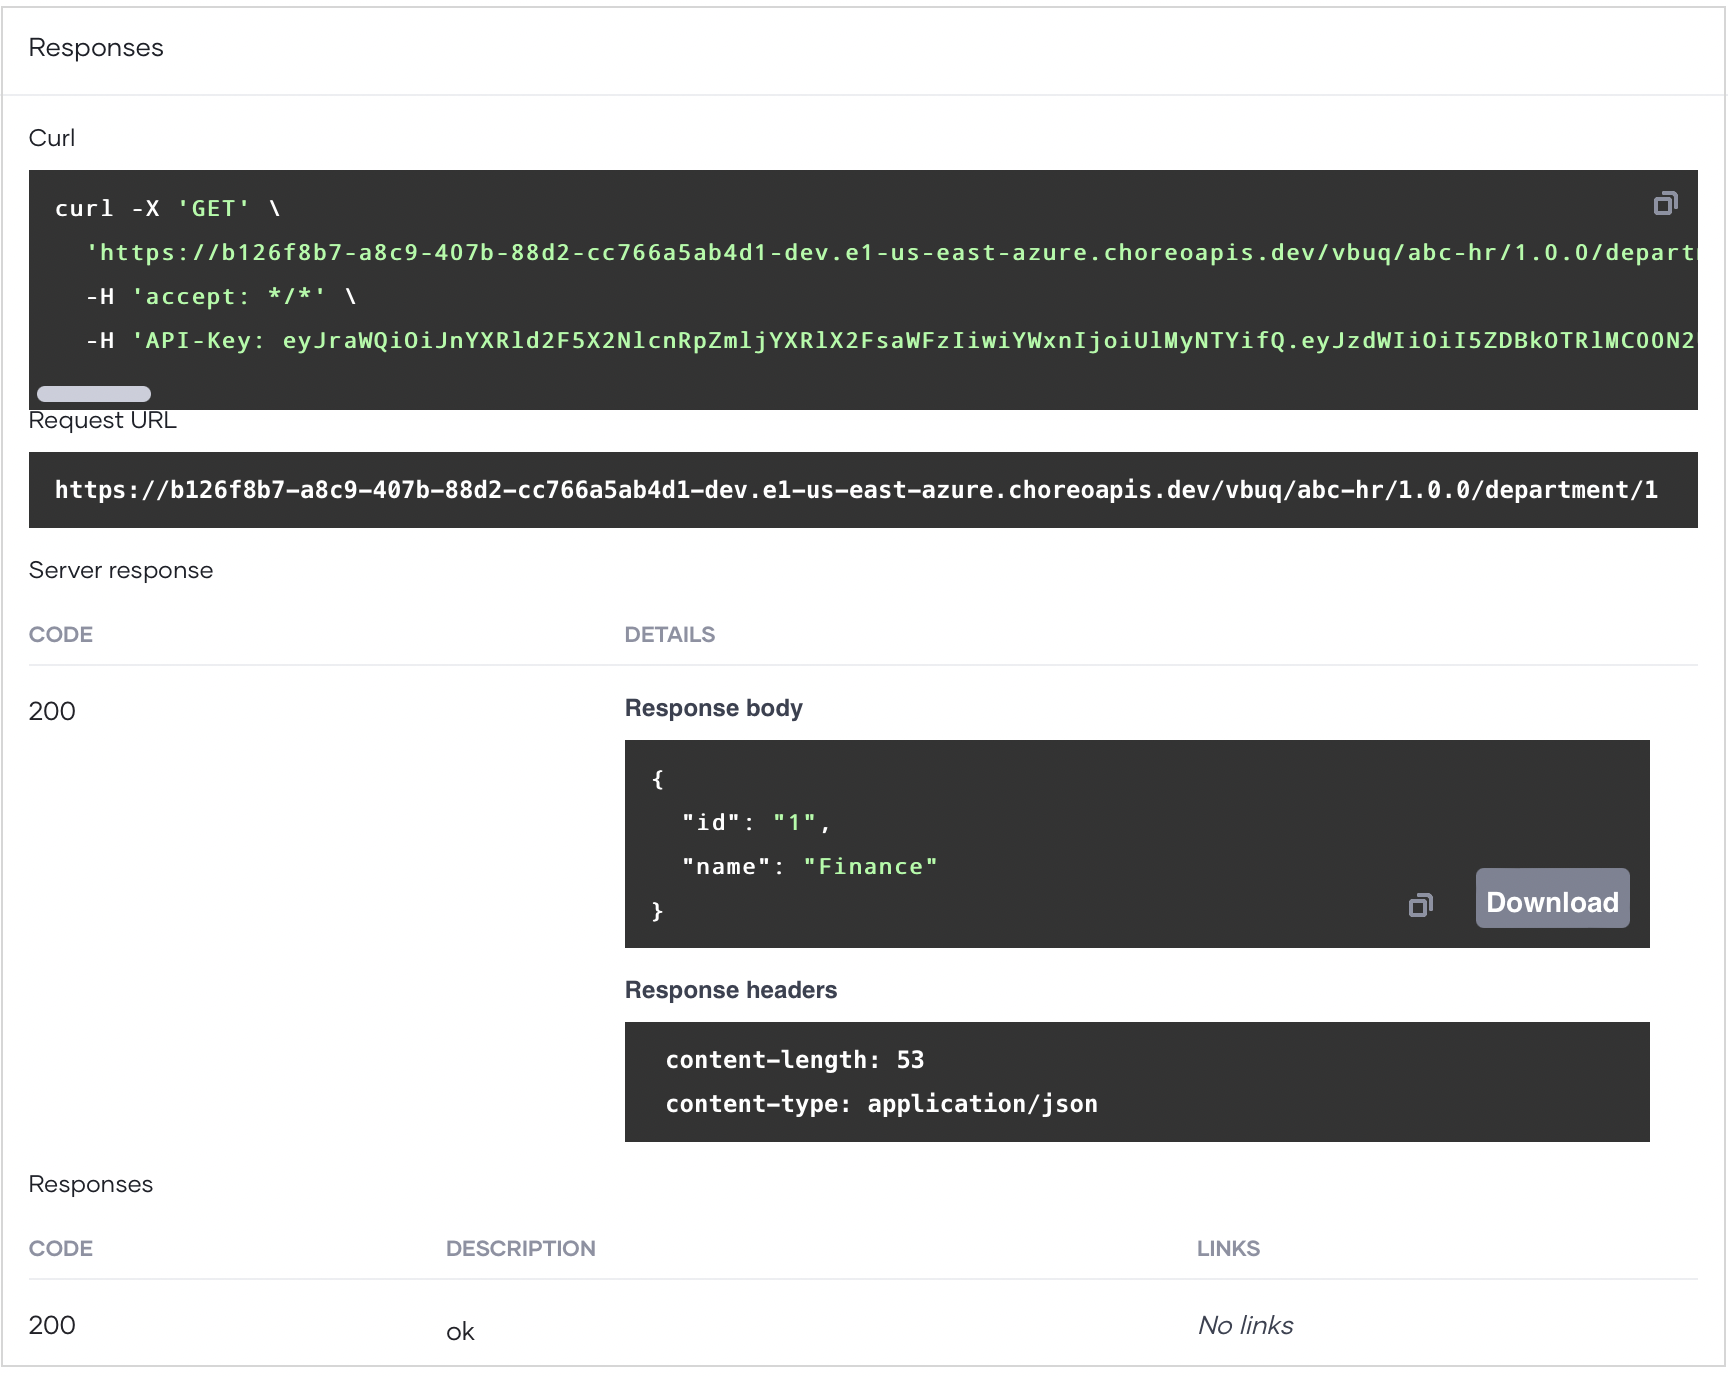
This indicates that your API proxy is working as expected.
Step 5: Manage the API proxy
Now that you have a tested API proxy, you can publish it and make it available for application developers to consume. In this guide, you will apply rate limiting to the API and publish it.
Step 5.1: Apply rate limiting to the API proxy
- In the left navigation menu, click Deploy.
- Go to the required environment card and click the settings icon corresponding to CORS, Rate Limiting and Resiliency.
- In the CORS, Rate Limiting and Resiliency pane, click Rate Limiting to expand the section.
- Select API Level as the Rate Limiting Level.
- Specify appropriate values for the Request Limit and Time Unit fields. You can proceed with the default values.
- Click Apply. This applies the rate limiting level to the API proxy and redeploys it.
Step 5.2: Publish the API proxy
Publishing makes your API available in the WSO2 Developer Platform Developer Portal (Devportal), enabling application developers to access and use it. In WSO2 Developer Platform, the Production environment is exposed to the Devportal by default. After completing Step 5.1, the API is only available to the internal developers within your organization for testing purposes. To make the API accessible for external application developers, go to the Deploy page and Promote the API to the Production environment by following the same steps outlined in Step 5.1.
If you need to change the default environments exposed to the Devportal, refer to the Configure Exposed Environments to Developer Portal documentation.
Once the API is successfully promoted, it will become available in the Production environment. You can then proceed with the publishing steps below to make it publicly accessible.
Note
Organizations created before April 24th, 2025, will have the Development environment exposed by default. Hence, organizations created before this date does not require to promote API to the Production environment.
- In the left navigation menu, click Lifecycle under Manage. This takes you to the Lifecycle page.
- Click Publish.
- In the Publish API dialog, click Confirm to proceed with publishing the API. If you want to change the display name, make the necessary changes and then click Confirm. This changes the API lifecycle state to Published.
Step 6: Invoke the API From DevPortal
To generate credentials for the published API and invoke it via the WSO2 Developer Platform Developer Portal, follow these steps:
-
In the Lifecycle page, click Go to Devportal. This takes you to the
Department Servicein the WSO2 Developer Platform Developer Portal. -
Invoke the API:
- In the Developer Portal left navigation menu, click Try Out.
- In the Endpoint list, select Development as the environment to try out the API.
- Click Get Test Key to generate an access token.
- Expand the
GET /department/{departmentId}resource and click Try it out. -
Enter
1as the departmentId and click Execute. You will see a response similar to the following: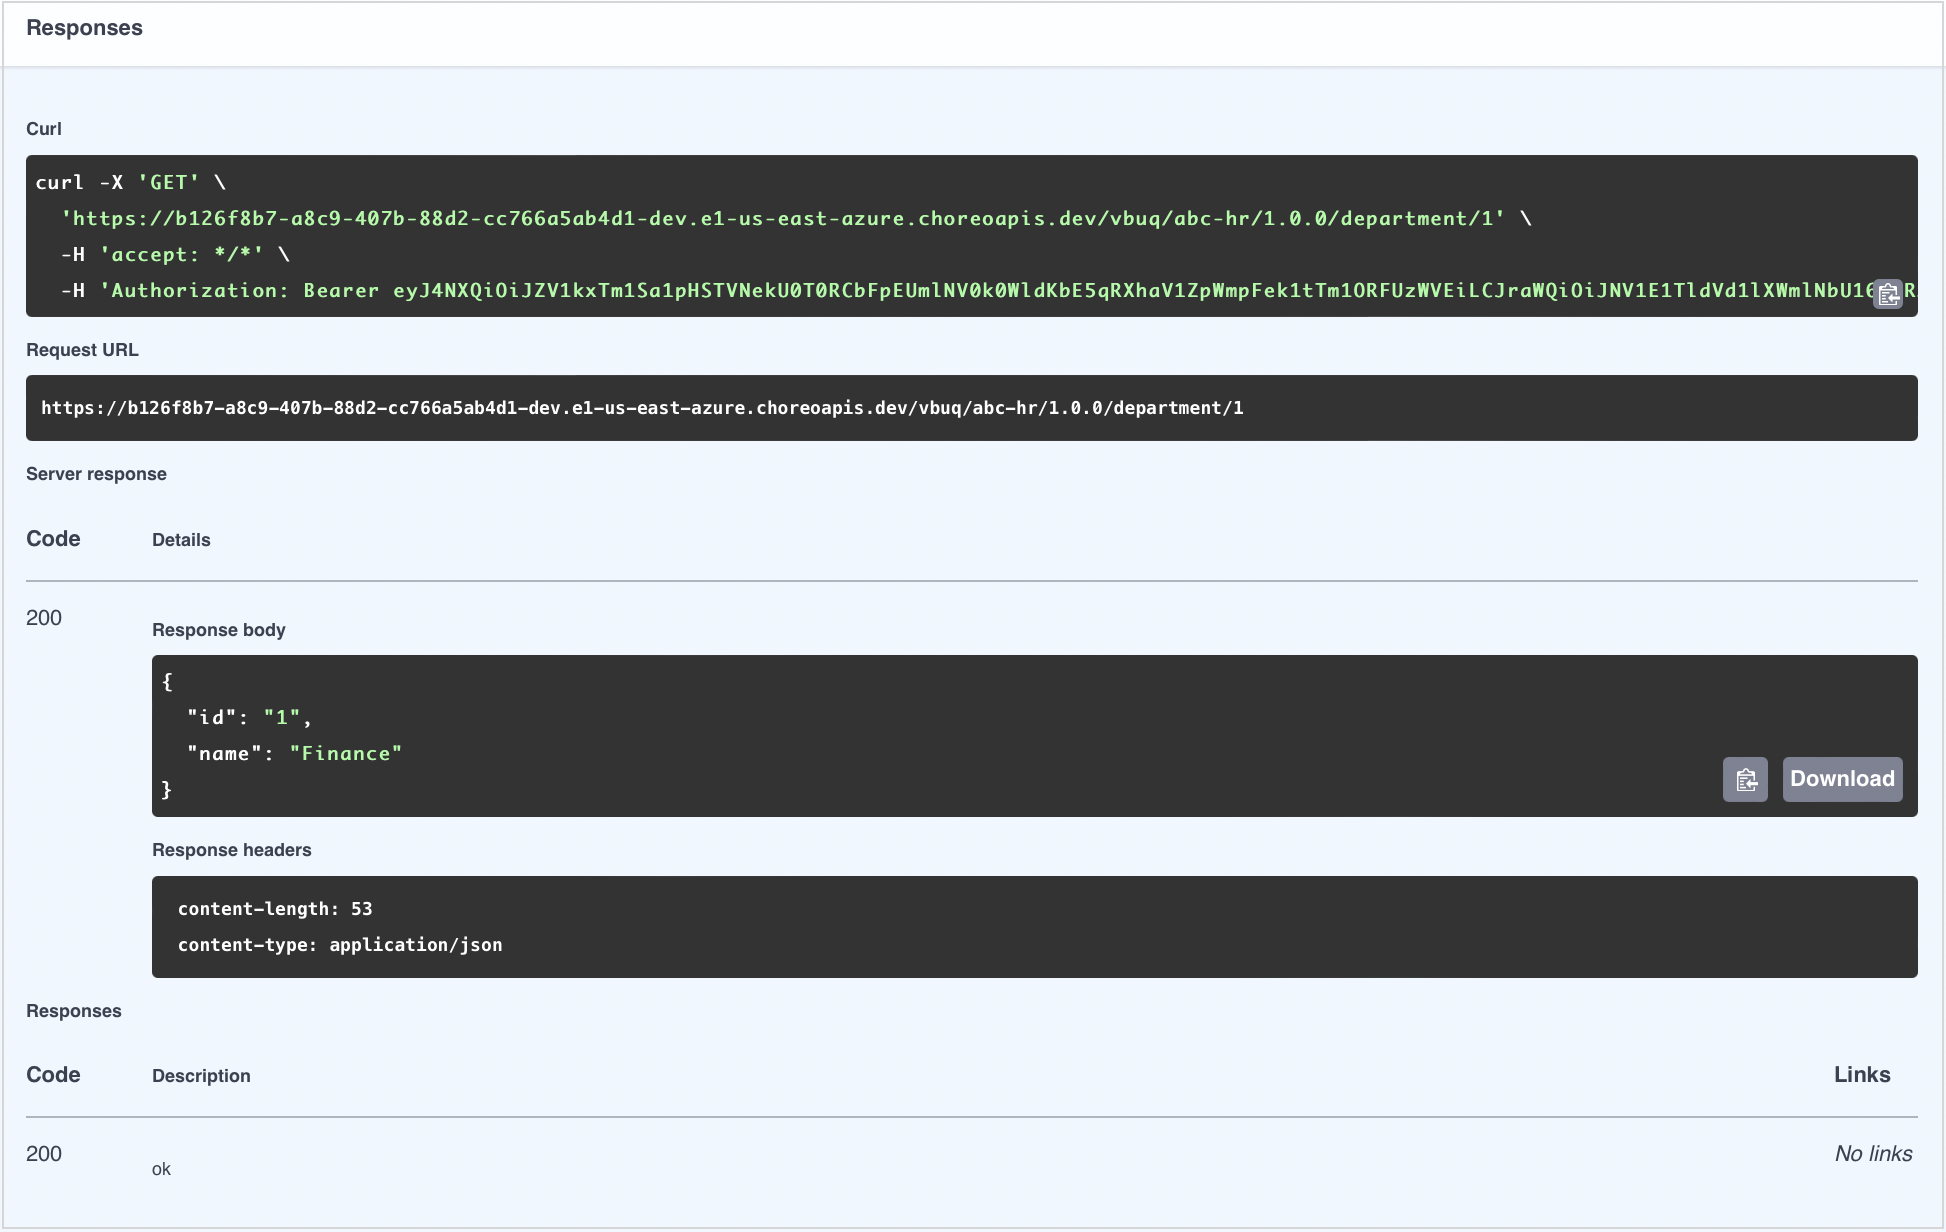
Now, you have gained hands-on experience creating, deploying, testing, and publishing an API proxy using WSO2 Developer Platform.