Consume an OAuth2 Secured Service
WSO2 Developer Platform is a platform that allows you to create, deploy, and consume services seamlessly. The WSO2 Developer Platform Developer Portal simplifies the process of discovering and using APIs for developers.
This guide is designed for application developers (internal or external to your organization) who want to consume APIs published in the Developer Portal to build their applications. You will learn how to:
- Discover APIs
- Create an application and generate credentials
- Subscribe to an API
- Consume a published REST API via a web application
Prerequisites
If you don’t already have a published service to consume, follow the Develop a Service documentation to publish and deploy a sample REST API.
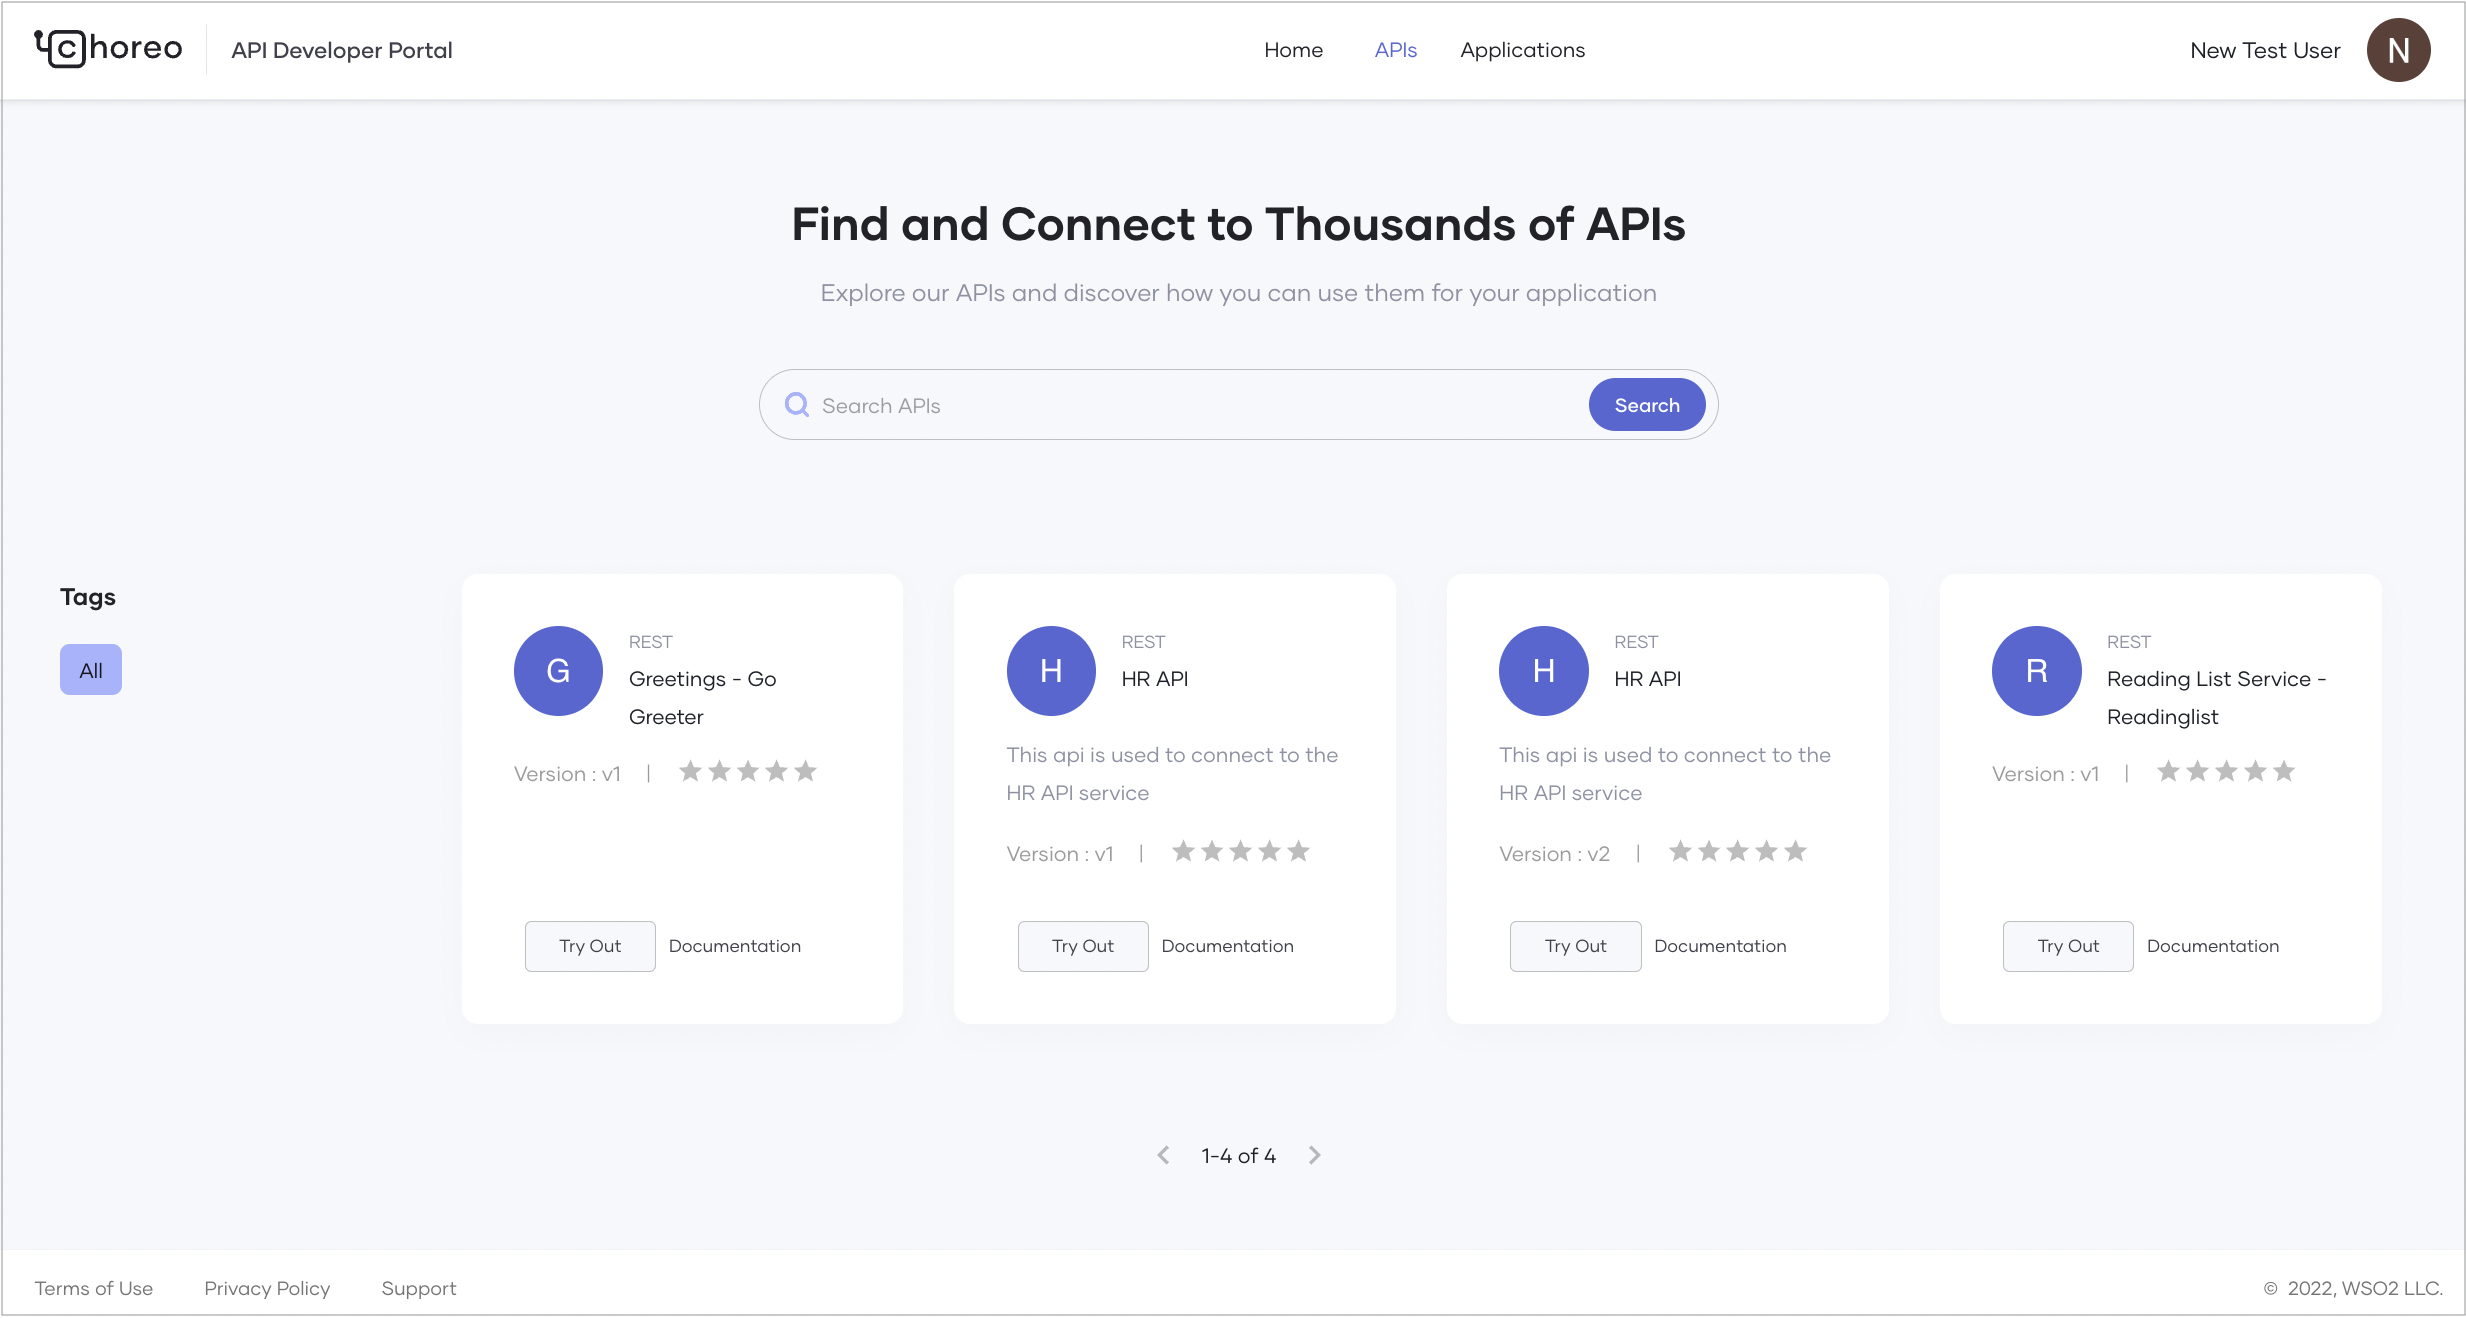
Discover APIs
In the WSO2 Developer Platform Developer Portal, developers can search for APIs by name. APIs and services created and published through the WSO2 Developer Platform Console are visible in the Developer Portal based on their visibility settings:
- Public: The API is visible to everyone in the Developer Portal.
- Private: The API is visible only to users who sign in to the Developer Portal.
- Restricted: The API is visible only to users with specific roles. This allows for fine-grained access control.
To learn more about API visibility, see Control API Visibility.
The Developer Portal lists APIs by their major version.
The API overview page displays subscribed versions of the API along with subscription details such as the application name and creation date.
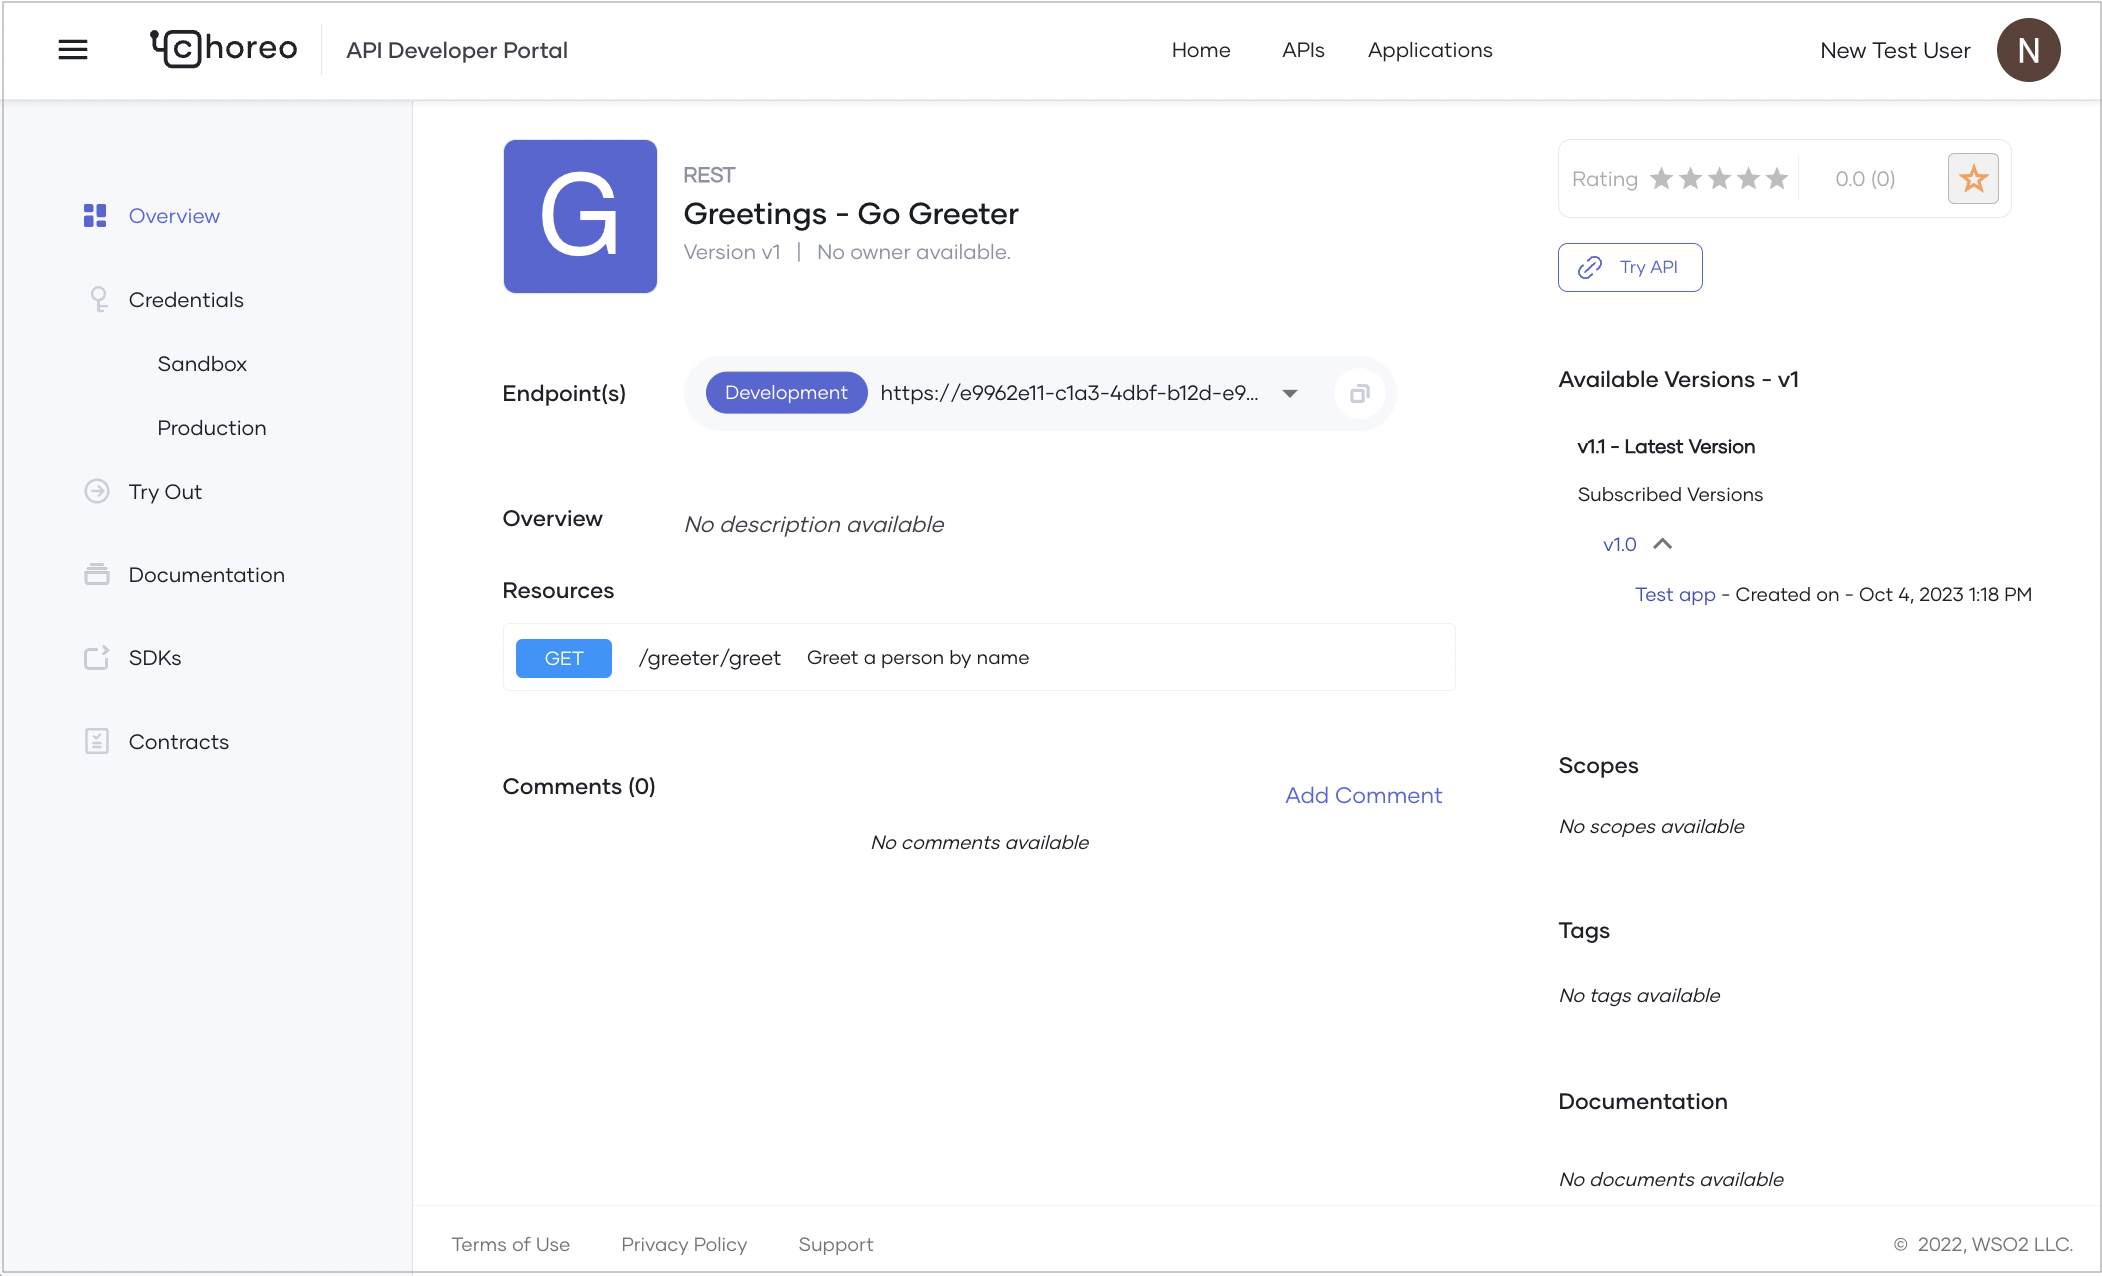
Tip
To use an API, it’s recommended to use the latest version. Copy the Endpoint(s) value from the API overview page and use it in your client application. This ensures your application always invokes the latest API version.
Create an application
An application in WSO2 Developer Platform is a logical representation of a physical application, such as a mobile app, web app, or device. To consume an API in WSO2 Developer Platform, you need to create an application that maps to your physical application and subscribe to the required API under a usage policy plan. This plan provides a usage quota. A single application can have multiple API subscriptions. Using the consumer key and consumer secret, you can generate an access token to invoke all APIs subscribed to the same application.
This guide walks you through the steps to create an application in WSO2 Developer Platform.
Step 1: Create an application
To create an application in the WSO2 Developer Platform Developer Portal, follow these steps:
-
Go to the WSO2 Developer Platform Developer Portal and sign in.
-
In the Developer Portal header, click Applications and then click +Create.
-
Enter application details. Provide a name and description for your application.
-
Click Create.
This creates the application and opens the Application Overview page. Here, you can view details such as the token type, workflow status, and the application owner.
Step 2: Generate keys
WSO2 Developer Platform uses OAuth 2.0 bearer token-based authentication for API access. An API access token is a string passed as an HTTP header in API requests to authenticate access.
Once you create an application, you can generate credentials for it. WSO2 Developer Platform provides a consumer key and consumer secret when you generate credentials for the first time. The consumer key acts as the unique identifier for the application and is used for authentication.
Generate environment-specific keys and tokens
You can generate keys and tokens to invoke production and non-production endpoints separately.
Note
Access to production endpoints depends on your role. If you have the necessary permissions, you can generate keys and tokens for production endpoints.
-
In the WSO2 Developer Platform Developer Portal header, click Applications.
-
On the My Applications page, click on the application for which you want to generate keys and tokens.
-
In the left navigation menu, click the desired environment under Credentials. This opens the Application Keys pane for that environment.
-
Expand Advanced configurations and review the following options:
- Grant types: Select the grant types to use when generating the access token.
- Public client: Enable Allow authentication without the client secret if your application is a public client (e.g., a browser or mobile app).
- PKCE for enhanced security: Set to Mandatory if you want the application to send a code challenge in the authorization request and a code verifier in the token request. Asgardeo supports SHA-256 and plain.
- Application access token expiry time: Set the access token expiry time in seconds.
- Refresh token expiry time: Set the refresh token expiry time in seconds.
- ID token expiry time: Set the ID token expiry time in seconds.
-
Click Generate Credentials. The Application Keys pane will display the consumer key and consumer secret.
You can use the consumer key and consumer secret to generate an API access token by invoking the token endpoint. You can also revoke the access token by invoking the revoke endpoint.
To generate a test token for testing purposes, click Generate Token and copy the displayed token. Alternatively, click cURL to copy the generated cURL command and obtain a test token using a cURL client.
Warning
Do not use the test token in your production environment.
Subscribe to an API
To use a published API in your application, you must subscribe to it. When you subscribe to an API, your subscription covers all minor versions within the API's major version.
The subscription process ensures secure authentication of API requests using application keys. While you can generate credentials for an API without subscribing to an application, this approach limits advanced configuration options such as access token expiry time, revoke token expiry time, ID token expiry time, and enabling access to the API without a secret. Generating keys directly in the API is suitable for testing or short-term use but is not recommended for long-term production usage.
To subscribe to an API via an application, follow these steps:
-
Go to the WSO2 Developer Platform Developer Portal and sign in.
-
To navigate to applications, in the Developer Portal header, click Applications.
-
On the My Applications page, click on the application you want to use to subscribe to an API.
-
In the left navigation menu, click Subscriptions.
-
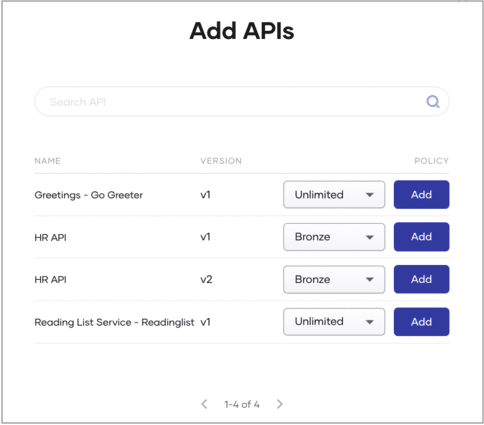
In the Subscription Management pane, click + Add APIs.
-
Click Add to subscribe to an API. You can subscribe to one or more APIs based on your requirements.
Tip
When a new minor version of an API is published, the major version-based invocation URL automatically routes to the latest minor version within the subscribed API's major version. This ensures that existing client applications continue to function without disruption while benefiting from improvements or additions in the newer minor version.
Once you subscribe to an API, you can invoke it using the application keys.
Consume the API via your web application
To securely invoke the API/service, you need to use your Identity Provider (IdP). Follow these steps:
- Create a web application in WSO2 Developer Platform.
- Create an OAuth application in the IdP.
- Configure the web application to authenticate API/service invocations using the IdP.
- Deploy the web application.
For this guide, you’ll use: - WSO2 Asgardeo as the IdP. - WSO2 Developer Platform-samples/reading-list-app/reading-list-front-end as the web application. This is a React SPA that uses Axios to invoke the service. It is configured to work with the WSO2 Developer Platform-samples/reading-list-app/reading-list-service. You can modify this web application to work with your service or deploy the sample service in WSO2 Developer Platform.
Step 1: Create a web application component
Info
You can use your own web application instead of the sample. For this guide, you’ll use the WSO2 Developer Platform-samples/reading-list-app/reading-list-front-end.
To host the front-end application in WSO2 Developer Platform, create a web application component:
- In the WSO2 Developer Platform Console, select the project for the reading list application from the project list in the header.
- Click Create under the Component Listing section.
- On the Web Application card, click Create.
-
Enter the following details:
Field Value Name Reading List Web AppDescription Frontend application for the reading list service -
Click Next.
- Click Authorize with GitHub to connect WSO2 Developer Platform to your GitHub account.
-
In the Connect Repository pane, enter the following:
Field Value GitHub Account Your account GitHub Repository WSO2 Developer Platform-samplesBranch mainBuild preset React (since it’s a React app built with Vite) Build Context Path reading-list-app/reading-list-front-endBuild Command npm install && npm run buildBuild Output distNode Version 18 -
Click Create. This initializes the service with the GitHub repository and takes you to the Overview page.
Step 2: Create an OAuth application in the IdP
To invoke the API/service, you need an access token. Create an OAuth application in the IdP (for example, Asgardeo) with the following settings:
- Allowed grant types: Code
- Public client: Enable this option.
- Authorized redirect URLs: Add the web app URL.
- Allowed origins: Add the same URLs as authorized redirect URLs.
- Access Token: Set to JWT.
WSO2 Developer Platform uses Asgardeo as the default IdP. When you create an application in the WSO2 Developer Platform Developer Portal, it automatically creates a corresponding application in Asgardeo. Follow these steps to configure the Asgardeo OAuth application:
- Sign in to Asgardeo using the same credentials as WSO2 Developer Platform.
- Ensure you’re in the same organization used in the WSO2 Developer Platform Developer Portal.
- In the Asgardeo Console, click Applications in the left navigation. You’ll see the readingListApp created by WSO2 Developer Platform.
- Click the edit icon to edit the application.
- Go to the Protocol tab and make the following changes:
- Under Allowed grant types, select Code.
- Select the Public client checkbox.
- In Authorized redirect URLs, enter the web app URL and click + to add it.
- In Allowed origins, add the same URLs.
- Under Access Token, select JWT as the token type.
- Click Update.
Step 3: Configure the web application to connect to the IdP and invoke the service
Update the web app configurations to invoke the Reading List Service REST API. These configurations are environment-specific. For this guide, we’ll configure the development environment.
Note
The web app reads environment-specific configurations from the window object at runtime via the config.js file. You’ll mount this file for the development environment. Repeat this process for other environments as needed.
To configure the front-end application:
- On the WSO2 Developer Platform Console header, select the project and the created web application component.
- In the left navigation menu, click Deploy.
- On the Deploy page, under the Set Up card and click Configure & Deploy.
-
Copy the following JSON configuration, paste it into the text area in the File Mount pane, and replace the placeholders with the values from the previous steps:
window.config = {
    redirectUrl: "<web-app-url>",
    asgardeoClientId: "<asgardeo-client-id>",
    asgardeoBaseUrl: "https://api.asgardeo.io/t/<your-org-name>",
    choreoApiUrl: "<reading-list-service-url>"
};
Field Description redirectUrl The web app URL you copied earlier. asgardeoClientId The Client ID from the Asgardeo application. asgardeoBaseUrl The IdP API URL with your organization name (e.g., https://api.asgardeo.io/t/<ORG_NAME>).choreoApiUrl The Reading List Service URL from the endpoint table in the overview page. Tip
You can refer to the mounted configuration file as
./config.jswithin your web application. -
Click Deploy.
- Once deployed, copy the Web App URL from the development environment card.
- Navigate to the web app URL to verify it’s successfully hosted.
That’s it! You can now use a user from your IdP to sign in and invoke the service through your web application.