Configure Pre-Update Profile Action with Choreo
5 mins
Using Choreo
In this section, we will walk through how to implement and deploy the Pre-Update Profile Action using Choreo based on the scenario discussed earlier.
This implementation is done using Node.js and follows the logic of validating user department updates and notifying the security team when sensitive user attributes are changed.
Set Up Your Node.js Project
Create a new project folder on your local machine. Open your terminal or command prompt and create a new directory where your project files will be stored. You can do this by running:
This command creates a new folder named profile-update-validator. Then, move inside that folder by running:
Now, any new files or commands you use will be applied inside this project folder. Once you're inside the folder, run:
This will create a file named package.json automatically. The package.json file is very important, it keeps track of
your project details (like name, version, and dependencies) and will help others (or platforms like Choreo) understand
how to run your project.
The -y flag automatically fills in default values for you, so you don’t need to answer any setup questions manually.
Install required dependencies. We will use express for building the service, nodemailer for sending emails, and dotenv to read environment variables.
Still inside your project folder, install the necessary libraries by running:
express: A fast, lightweight framework that makes building web servers in Node.js very simple and structured.
nodemailer: A library that makes it easy to send emails from your application.
dotenv: A zero-dependency module that loads environment variables from a .env file into process.env, helping you
manage configuration settings securely and cleanly.
This command will download the libraries and save them inside a folder called node_modules and also update your
package.json file under dependencies, showing that your project uses these libraries.
Create a file named index.js and add the following basic structure: In your project folder, create a new file called
index.js. (You can right-click and choose “New File” if using a code editor like VS Code, or create it via terminal
using the command touch index.js.)
const express = require('express');
const nodemailer = require("nodemailer");
require("dotenv").config();

const app = express();
const PORT = 3000;

// Middleware to parse JSON request bodies
app.use(express.json());
After saving this file, you will have a basic server ready that you can expand by adding routes (like
/validate-user-profile-update) in the next steps.
Implement the Profile Update Validation Logic
Add a helper function that looks through the incoming user data (claims) and picks out specific information like department, email, or phone number based on the provided field name.
// Helper to extract claim values
const getClaimValue = (claims, uri) => {
    const claim = claims.find(c => c.uri === uri);
    return claim ? claim.value : null;
};
Create a list of departments that are considered valid for your organization. Also, set up an email service (using Nodemailer) to send notifications when sensitive user profile updates happen. We will use a service like Mailtrap for development testing.
// Mock: valid department list (simulating a directory check)
const validDepartments = ["Engineering", "HR", "Sales", "Finance"];

// Email transporter config
const transporter = nodemailer.createTransport({
    host: "sandbox.smtp.mailtrap.io", // The hostname should be smtp.gmail.com if Gmail is used.
    port: 2525, // The port should be 465 smtp.gmail.com if Gmail is used.
    auth: {
        user: process.env.EMAIL_USER,
        pass: process.env.EMAIL_PASS
    }
});
Implement the /validate-user-profile-update API endpoint by creating a POST API that listens for user profile update
requests from WSO2 Identity Platform.
Inside this API:
- Check if the request is for a profile update.
- Extract the user’s department, email, and phone details from the request.
- Validate if the department is within the allowed list.
- If sensitive fields are being updated, send an email notification to the security team.
- Send a success or failure response back depending on the validation and email sending outcome.
app.post("/validate-user-profile-update", async (req, res) => {
    const payload = req.body;

    if (payload.actionType !== "PRE_UPDATE_PROFILE") {
        return res.status(200).json({
            actionStatus: "FAILED",
            failureReason: "invalid_input",
            failureDescription: "Invalid actionType provided."
        });
    }

    const claims = payload?.event?.request?.claims || [];
    const userId = payload?.event?.user?.id || "Unknown User";

    const department = getClaimValue(claims, "http://wso2.org/claims/department");
    const email = getClaimValue(claims, "http://wso2.org/claims/emailaddress");
    const phone = getClaimValue(claims, "http://wso2.org/claims/mobile");

    // Department validation
    if (department && !validDepartments.includes(department)) {
        return res.status(200).json({
            actionStatus: "FAILED",
            failureReason: "invalid_department_input",
            failureDescription: "Provided user department value is invalid."
        });
    }

    // Send security alert email if sensitive attributes are being updated
    const changes = [];
    if (department) changes.push(`Department: ${department}`);
    if (email) changes.push(`Email: ${email}`);
    if (phone) changes.push(`Phone: ${phone}`);

    if (changes.length > 0) {
        try {
            await transporter.sendMail({
                from: '"Security Alert" <[email protected]>',
                to: "[email protected]", // Replace with actual security email
                subject: "Sensitive Attribute Update Request",
                text: `User ${userId} is attempting to update:\n\n${changes.join("\n")}`
            });
        } catch (error) {
            console.error("Failed to send security email:", error);
            return res.status(200).json({
                actionStatus: "FAILED",
                failureReason: "email_error",
                failureDescription: "Failed to notify security team about sensitive data update."
            });
        }
    }

    // All validations passed
    return res.status(200).json({actionStatus: "SUCCESS"});
});
The final source code should look similar to the following.
const express = require('express');
const nodemailer = require("nodemailer");
require("dotenv").config();

const app = express();
const PORT = 3000;

// Middleware to parse JSON request bodies
app.use(express.json());

// Root endpoint
app.get('/', (req, res) => {
    return res.status(200).json({"status": "ok", "message": "Service is running."});
});

// Mock: valid department list (simulating a directory check)
const validDepartments = ["Engineering", "HR", "Sales", "Finance"];

// Email transporter config
const transporter = nodemailer.createTransport({
    host: "sandbox.smtp.mailtrap.io",
    port: 2525,
    auth: {
        user: process.env.EMAIL_USER,
        pass: process.env.EMAIL_PASS
    }
});

// Helper to extract claim values
const getClaimValue = (claims, uri) => {
    const claim = claims.find(c => c.uri === uri);
    return claim ? claim.value : null;
};

app.post("/validate-user-profile-update", async (req, res) => {
    const payload = req.body;

    if (payload.actionType !== "PRE_UPDATE_PROFILE") {
        return res.status(200).json({
            actionStatus: "FAILED",
            failureReason: "invalid_input",
            failureDescription: "Invalid actionType provided."
        });
    }

    const claims = payload?.event?.request?.claims || [];
    const userId = payload?.event?.user?.id || "Unknown User";

    const department = getClaimValue(claims, "http://wso2.org/claims/department");
    const email = getClaimValue(claims, "http://wso2.org/claims/emailaddress");
    const phone = getClaimValue(claims, "http://wso2.org/claims/mobile");

    // Department validation
    if (department && !validDepartments.includes(department)) {
        return res.status(200).json({
            actionStatus: "FAILED",
            failureReason: "invalid_department_input",
            failureDescription: "Provided user department value is invalid."
        });
    }

    // Send security alert email if sensitive attributes are being updated
    const changes = [];
    if (department) changes.push(`Department: ${department}`);
    if (email) changes.push(`Email: ${email}`);
    if (phone) changes.push(`Phone: ${phone}`);

    if (changes.length > 0) {
        try {
            await transporter.sendMail({
                from: '"Security Alert" <[email protected]>',
                to: "[email protected]", // Replace with actual security email
                subject: "Sensitive Attribute Update Request",
                text: `User ${userId} is attempting to update:\n\n${changes.join("\n")}`
            });
        } catch (error) {
            console.error("Failed to send security email:", error);
            return res.status(200).json({
                actionStatus: "FAILED",
                failureReason: "email_error",
                failureDescription: "Failed to notify security team about sensitive data update."
            });
        }
    }

    // All validations passed
    return res.status(200).json({actionStatus: "SUCCESS"});
});

// Start the server
app.listen(PORT, () => {
    console.log(`Server is running at http://localhost:${PORT}`);
});
Prepare for Choreo Deployment
Create a .env file to store sensitive information by adding a new file named .env in your project folder. The file
is primarily used for local testing, but these are included separately in the Choreo deployment.
In this file, save your email service login details (like username and password) securely, instead of putting them directly in your code.
Run an Express Node Project Locally
Navigate to the root of your project and install all required dependencies using npm:
Once dependencies are installed, you can start the Express server using:
Or, if a custom script is defined (e.g., dev), run:
This will start the server, and your API will be accessible on:
If you're using tools like nodemon for auto-reloading during development, make sure it's installed and used in the dev script.
Push Your Code to GitHub
First, initialize a Git repository in your project folder:
Then, add all your project files to the Git repository. Make sure not to commit files containing sensitive information
or unnecessary files, you can use the .gitignore file to exclude them.
Commit your changes with a message:
Finally, link your local Git repository to a remote repository (e.g., on GitHub) and push your code:
This makes your code available in the cloud and allows easy collaboration or version control.
Deploy on Choreo
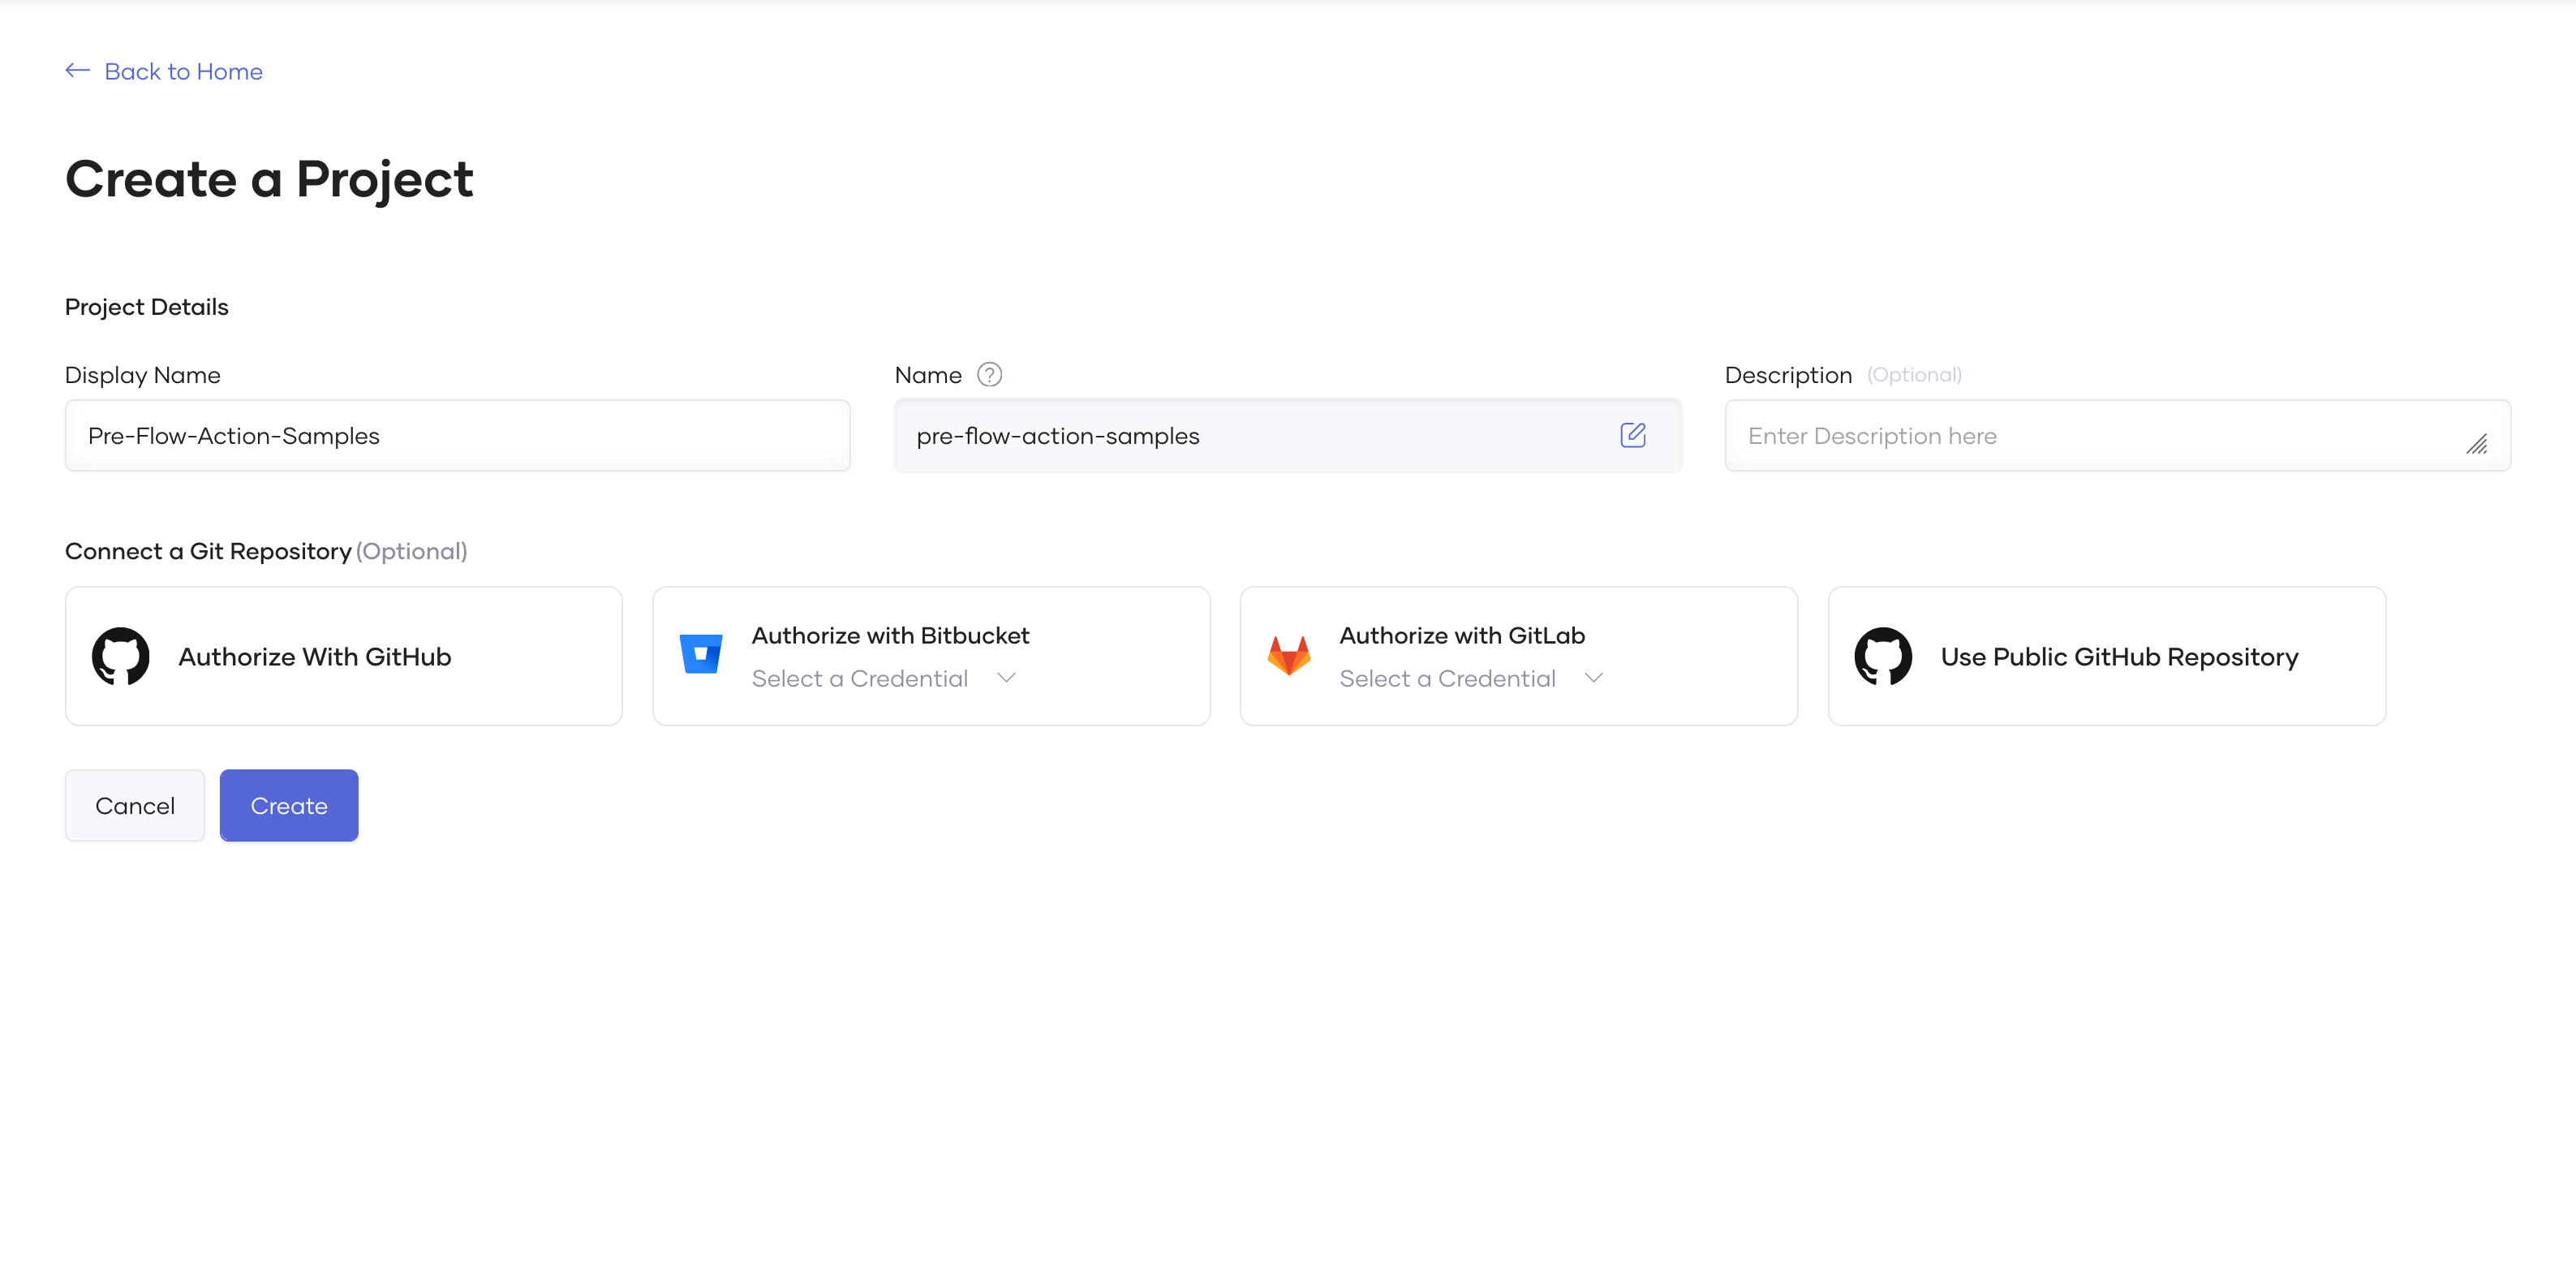
Log in to your Choreo Console and create a new project by signing in to your Choreo account and creating a new project from the dashboard.
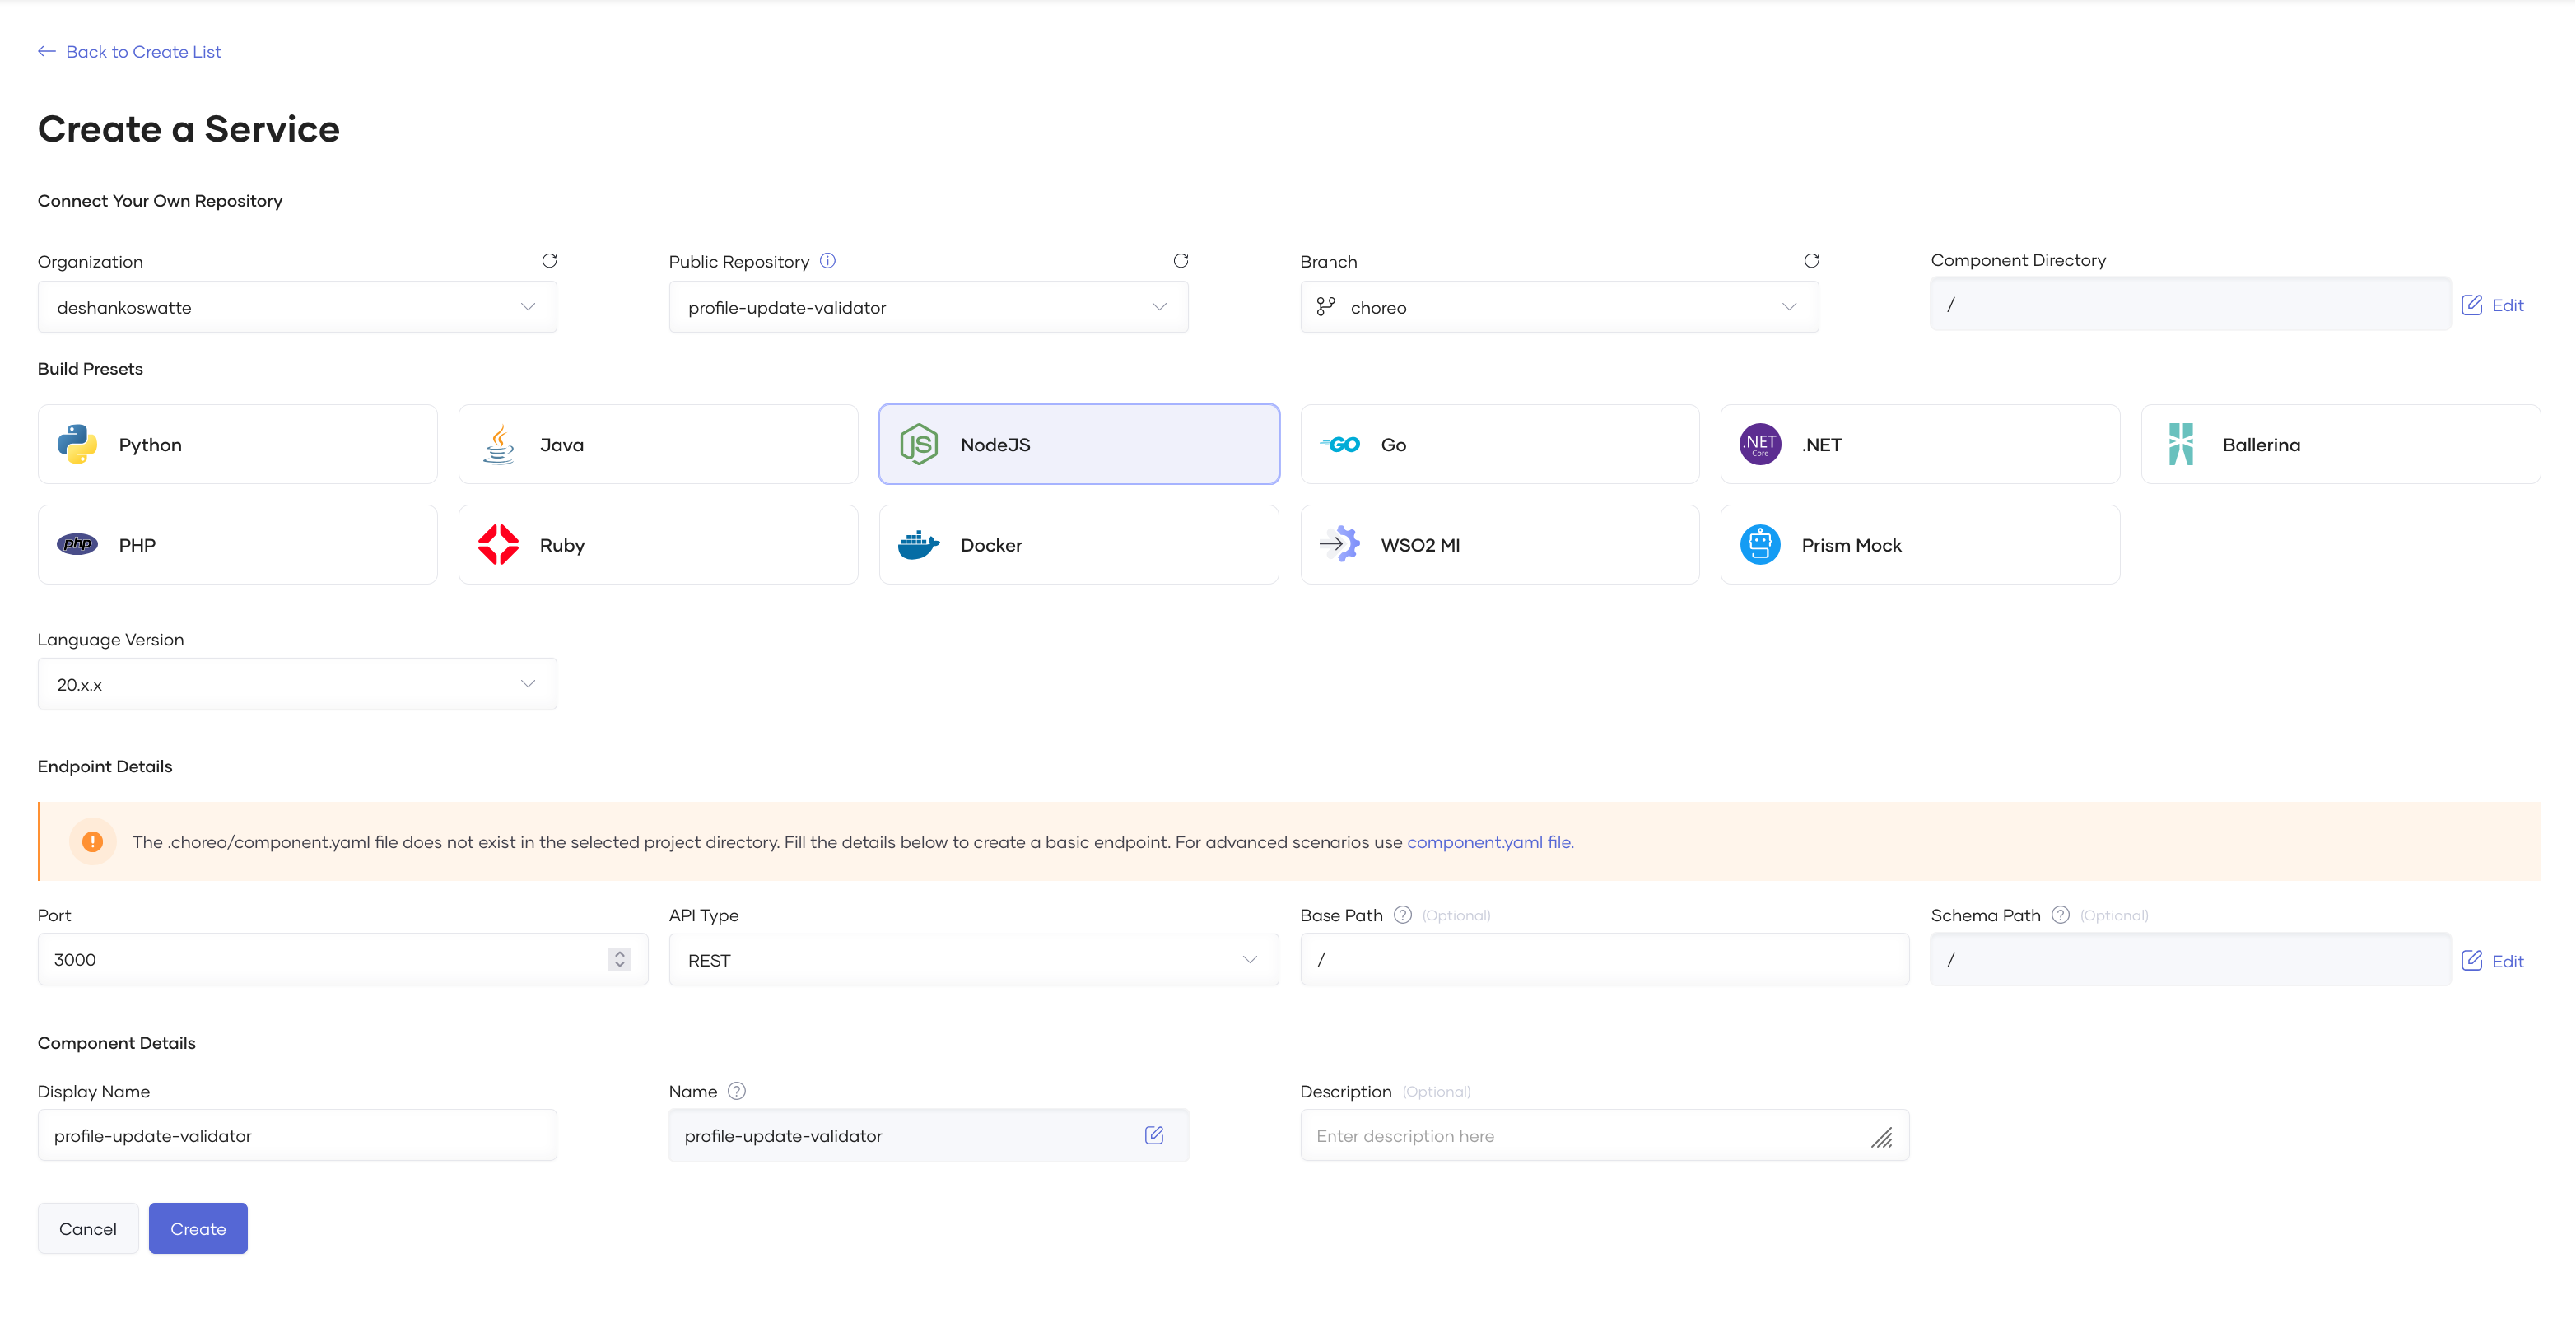
Within the created project, go to the "Components" section and create a new component. Select 'API Service' as the component type.
Link your GitHub account and select the profile-update-validator repository that contains your code. Choreo will use this to build the project.
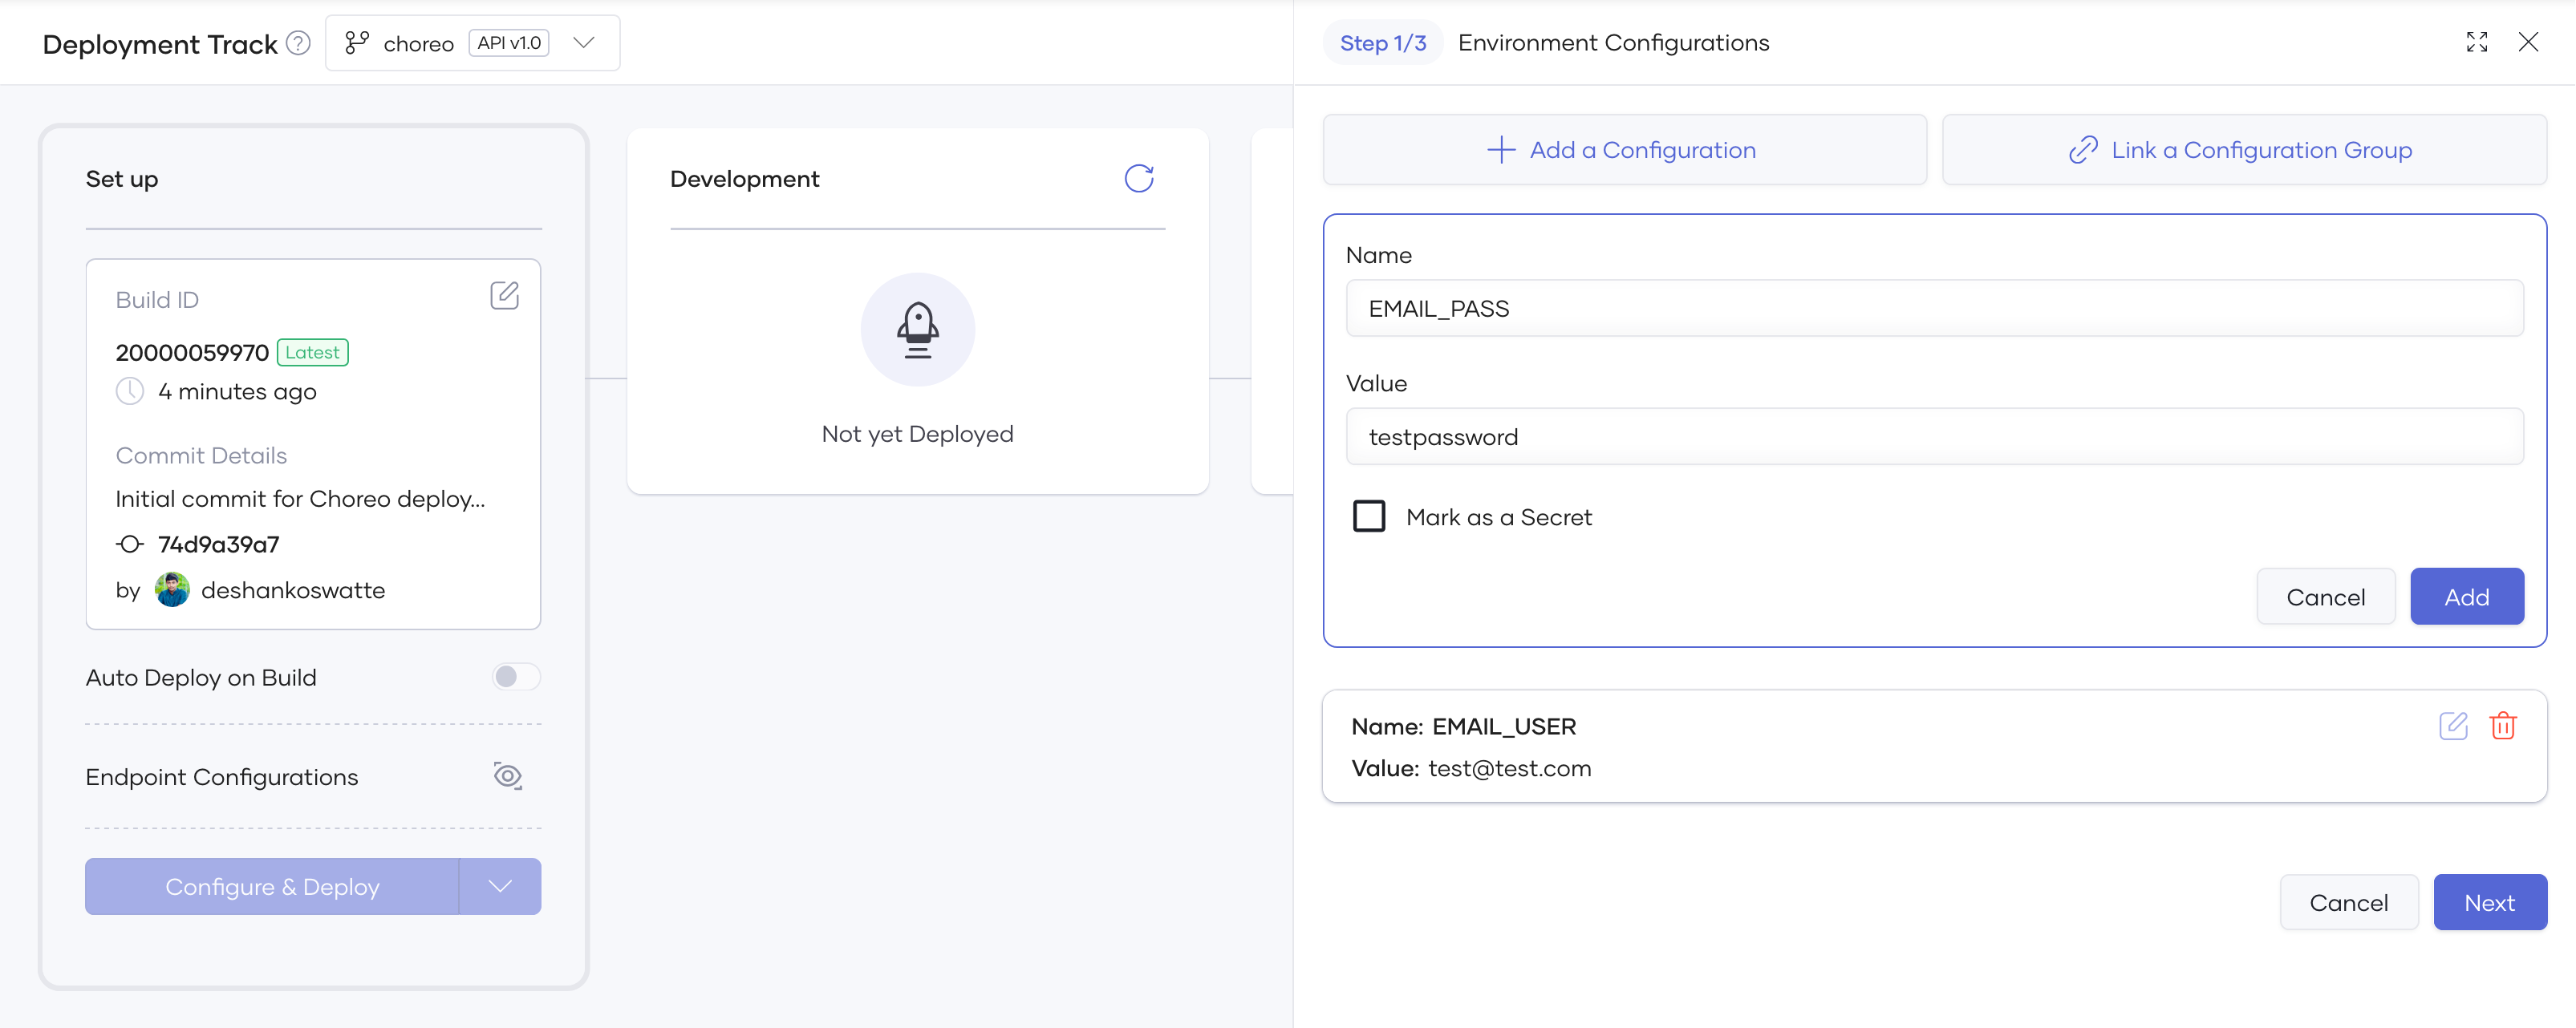
After the build is complete, navigate to the "Deploy" tab, click 'Configure and Deploy', and provide values for any required environment variables (like email credentials) so that they will be available during execution.
For security, make sure to enable the API Key protection mechanism. This will ensure that only authorized users can access your API.
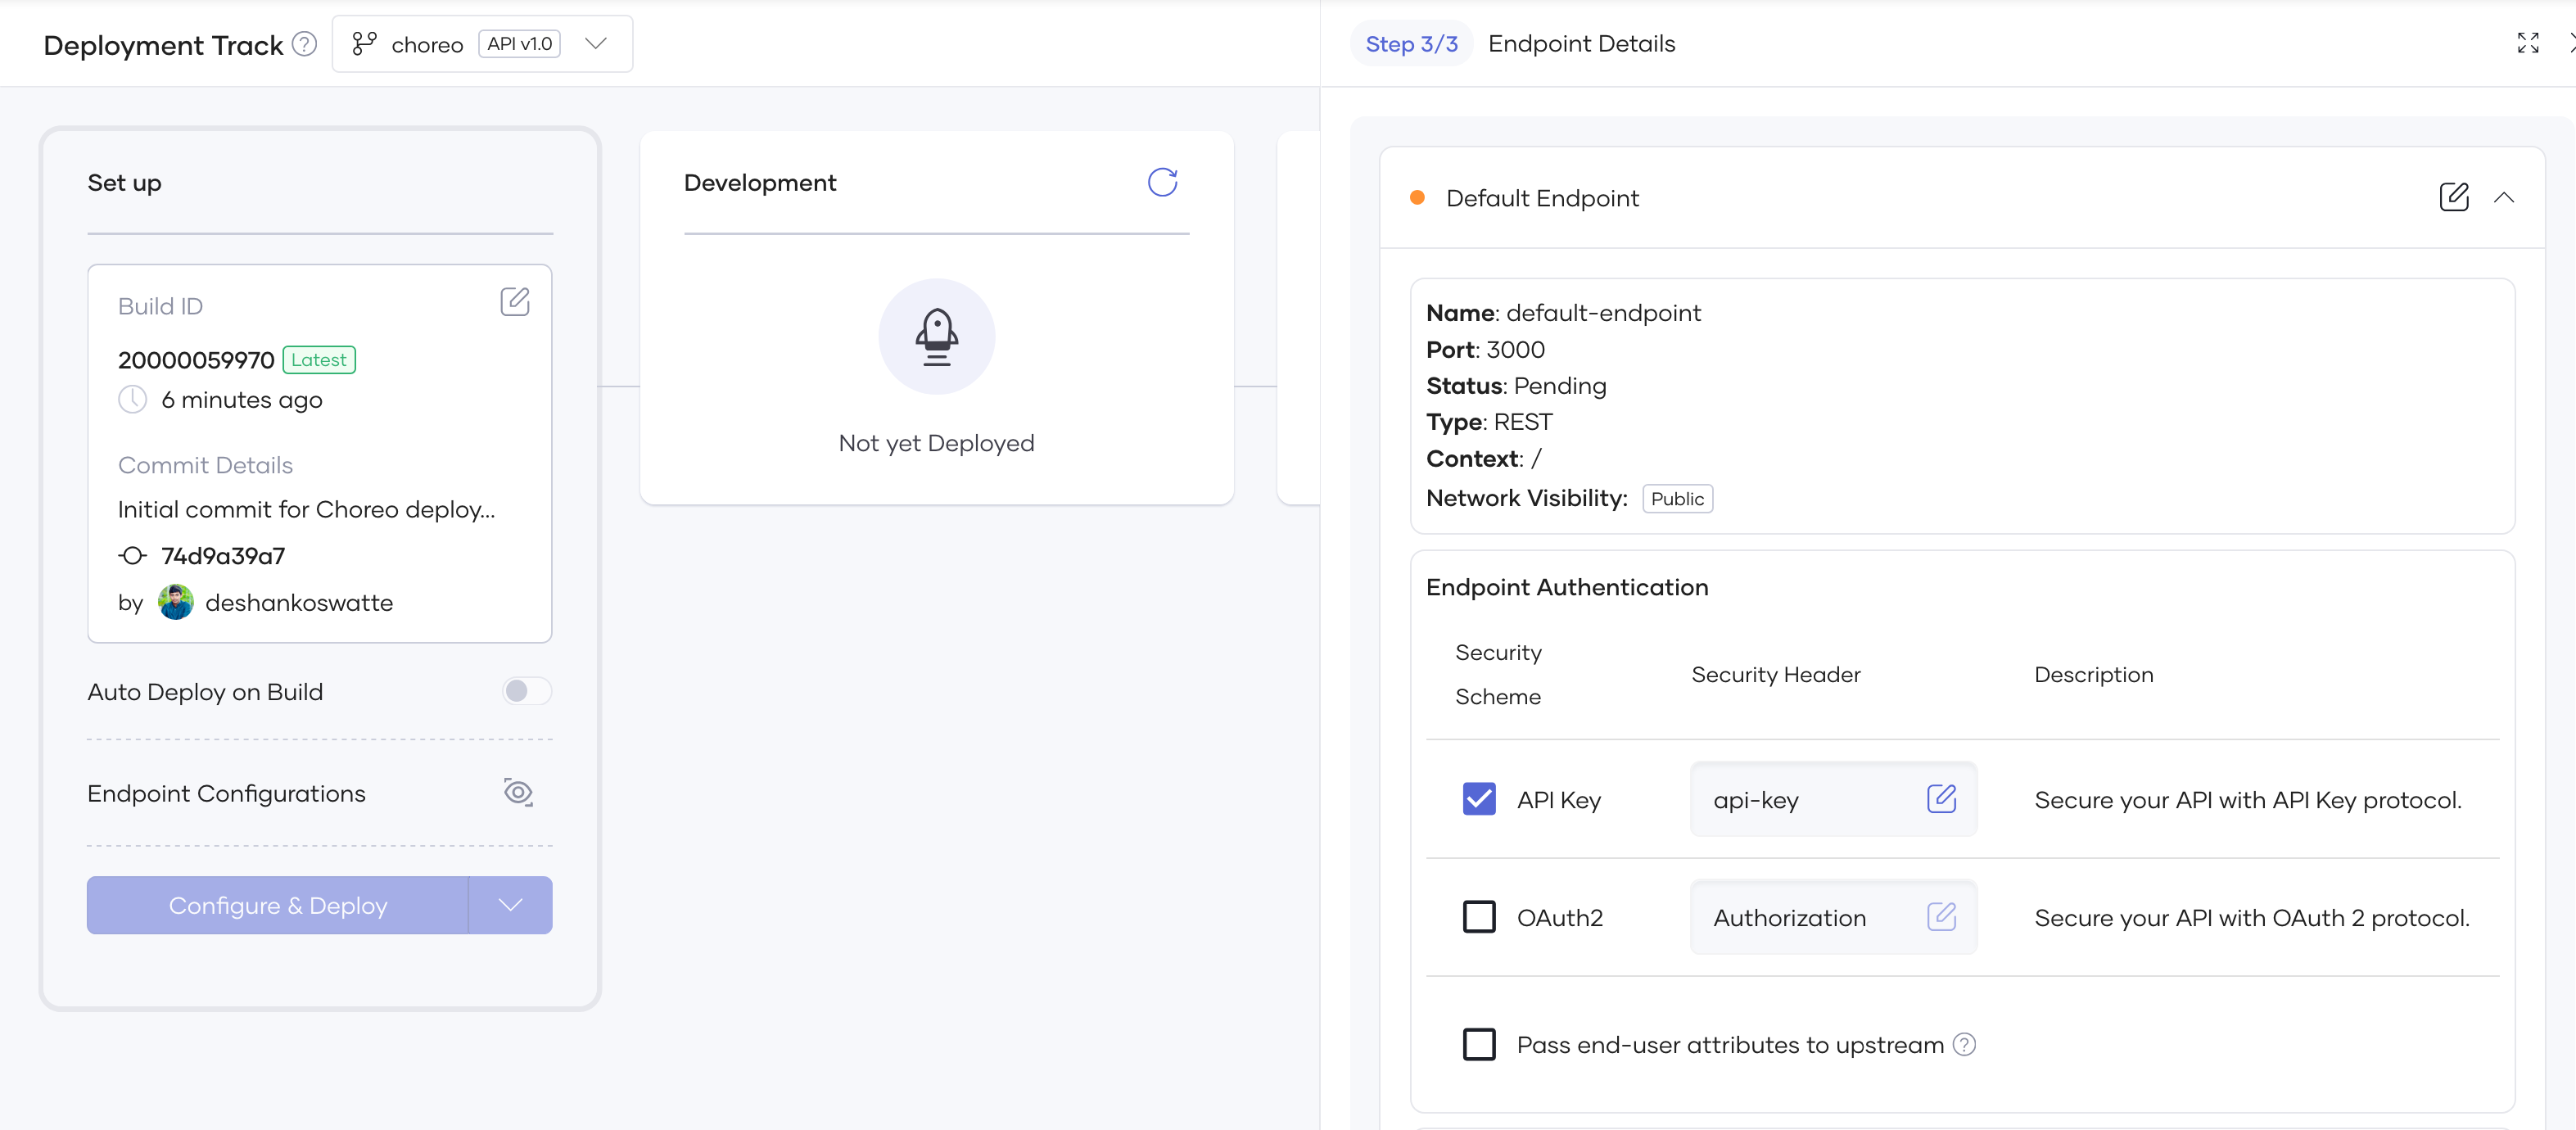
After the deployment is complete, Choreo will provide a 'Public URL' for your API under Endpoints > Endpoint Details. Be sure to copy this URL for future reference.
Additionally, Go to Manage > Lifecycle and click 'Publish' to move your API from the "Created" state to the "Published" state.

Once the API is published, navigate to the Dev portal (via the "Go to Devportal" link in the top right corner). In the Dev portal, go to Credentials > Sandbox and generate a new API key. This key is required for accessing the API securely.
The API key will be generated along with an application in WSO2 Identity Platform. Copy and save the key securely for later use in your API calls.
Test Deployed Service
To test the deployed service, you will need the public URL and the API key. A sample request for a successful scenario is shown below.
curl --location '<public_url>/validate-user-profile-update' \
--header 'Content-Type: application/json' \
--header 'api-key: <api_key>' \
--data-raw '{
    "actionType": "PRE_UPDATE_PROFILE",
    "event": {
        "request": {
            "claims": [
                {
                    "uri": "http://wso2.org/claims/department",
                    "value": "HR"
                },
                {
                    "uri": "http://wso2.org/claims/mobile",
                    "value": "+94771223448"
                },
                {
                    "uri": "http://wso2.org/claims/emailaddress",
                    "value": "[email protected]"
                }
            ]
        },
        "tenant": {
            "id": "2210",
            "name": "testwso2"
        },
        "user": {
            "id": "57b22cbf-4688-476c-a607-c0c9d089d25d",
            "claims": [
                {
                    "uri": "http://wso2.org/claims/username",
                    "value": "[email protected]"
                },
                {
                    "uri": "http://wso2.org/claims/identity/userSource",
                    "value": "DEFAULT"
                },
                {
                    "uri": "http://wso2.org/claims/identity/idpType",
                    "value": "Local"
                }
            ]
        },
        "userStore": {
            "id": "REVGQVVMVA==",
            "name": "DEFAULT"
        },
        "initiatorType": "ADMIN",
        "action": "UPDATE"
    }
}'
Configure WSO2 Identity Platform for Pre-Update Profile Action Workflow
First, sign in to your WSO2 Identity Platform account using your admin credentials, click on "Actions" and then select the action type Pre Update Profile.
Add an action name, the endpoint extracted from the deployment, and the appropriate authentication mechanism. For
Choreo, append the endpoint name defined in the source code to the generated Choreo URL, and set the authentication
mechanism to use an API key with the header name api-key and the value generated through the Dev Portal.

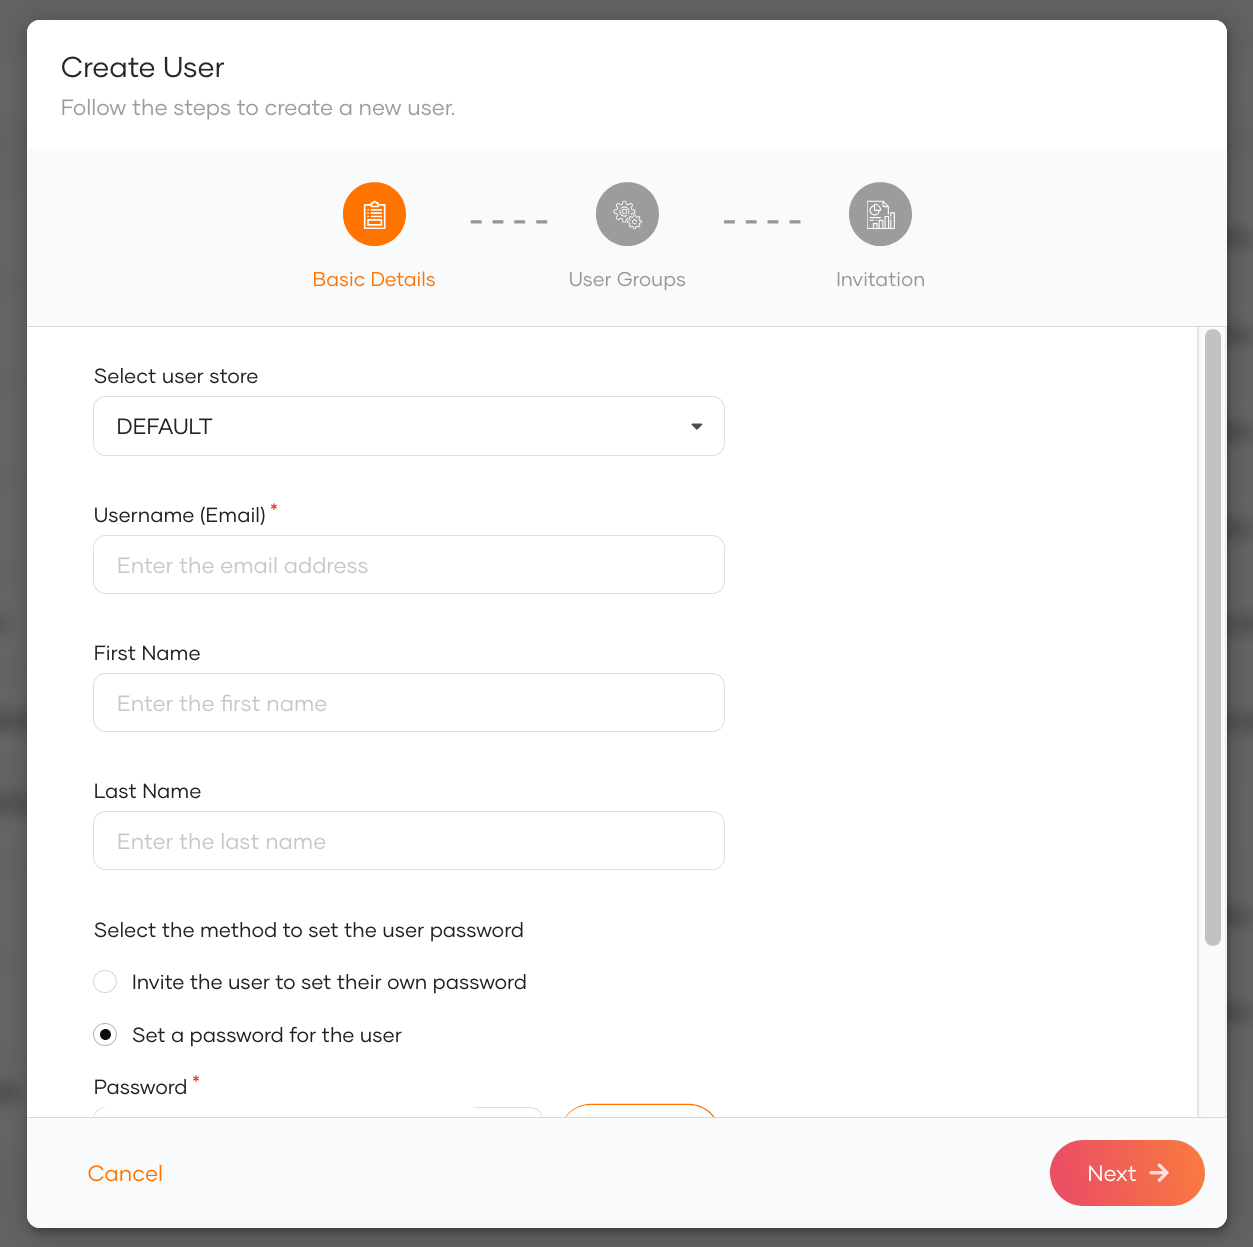
Once the action is configured, ensure that the action is marked as active. Additionally, navigate to the User Management > Users section and add a user with a predefined password for testing purposes.
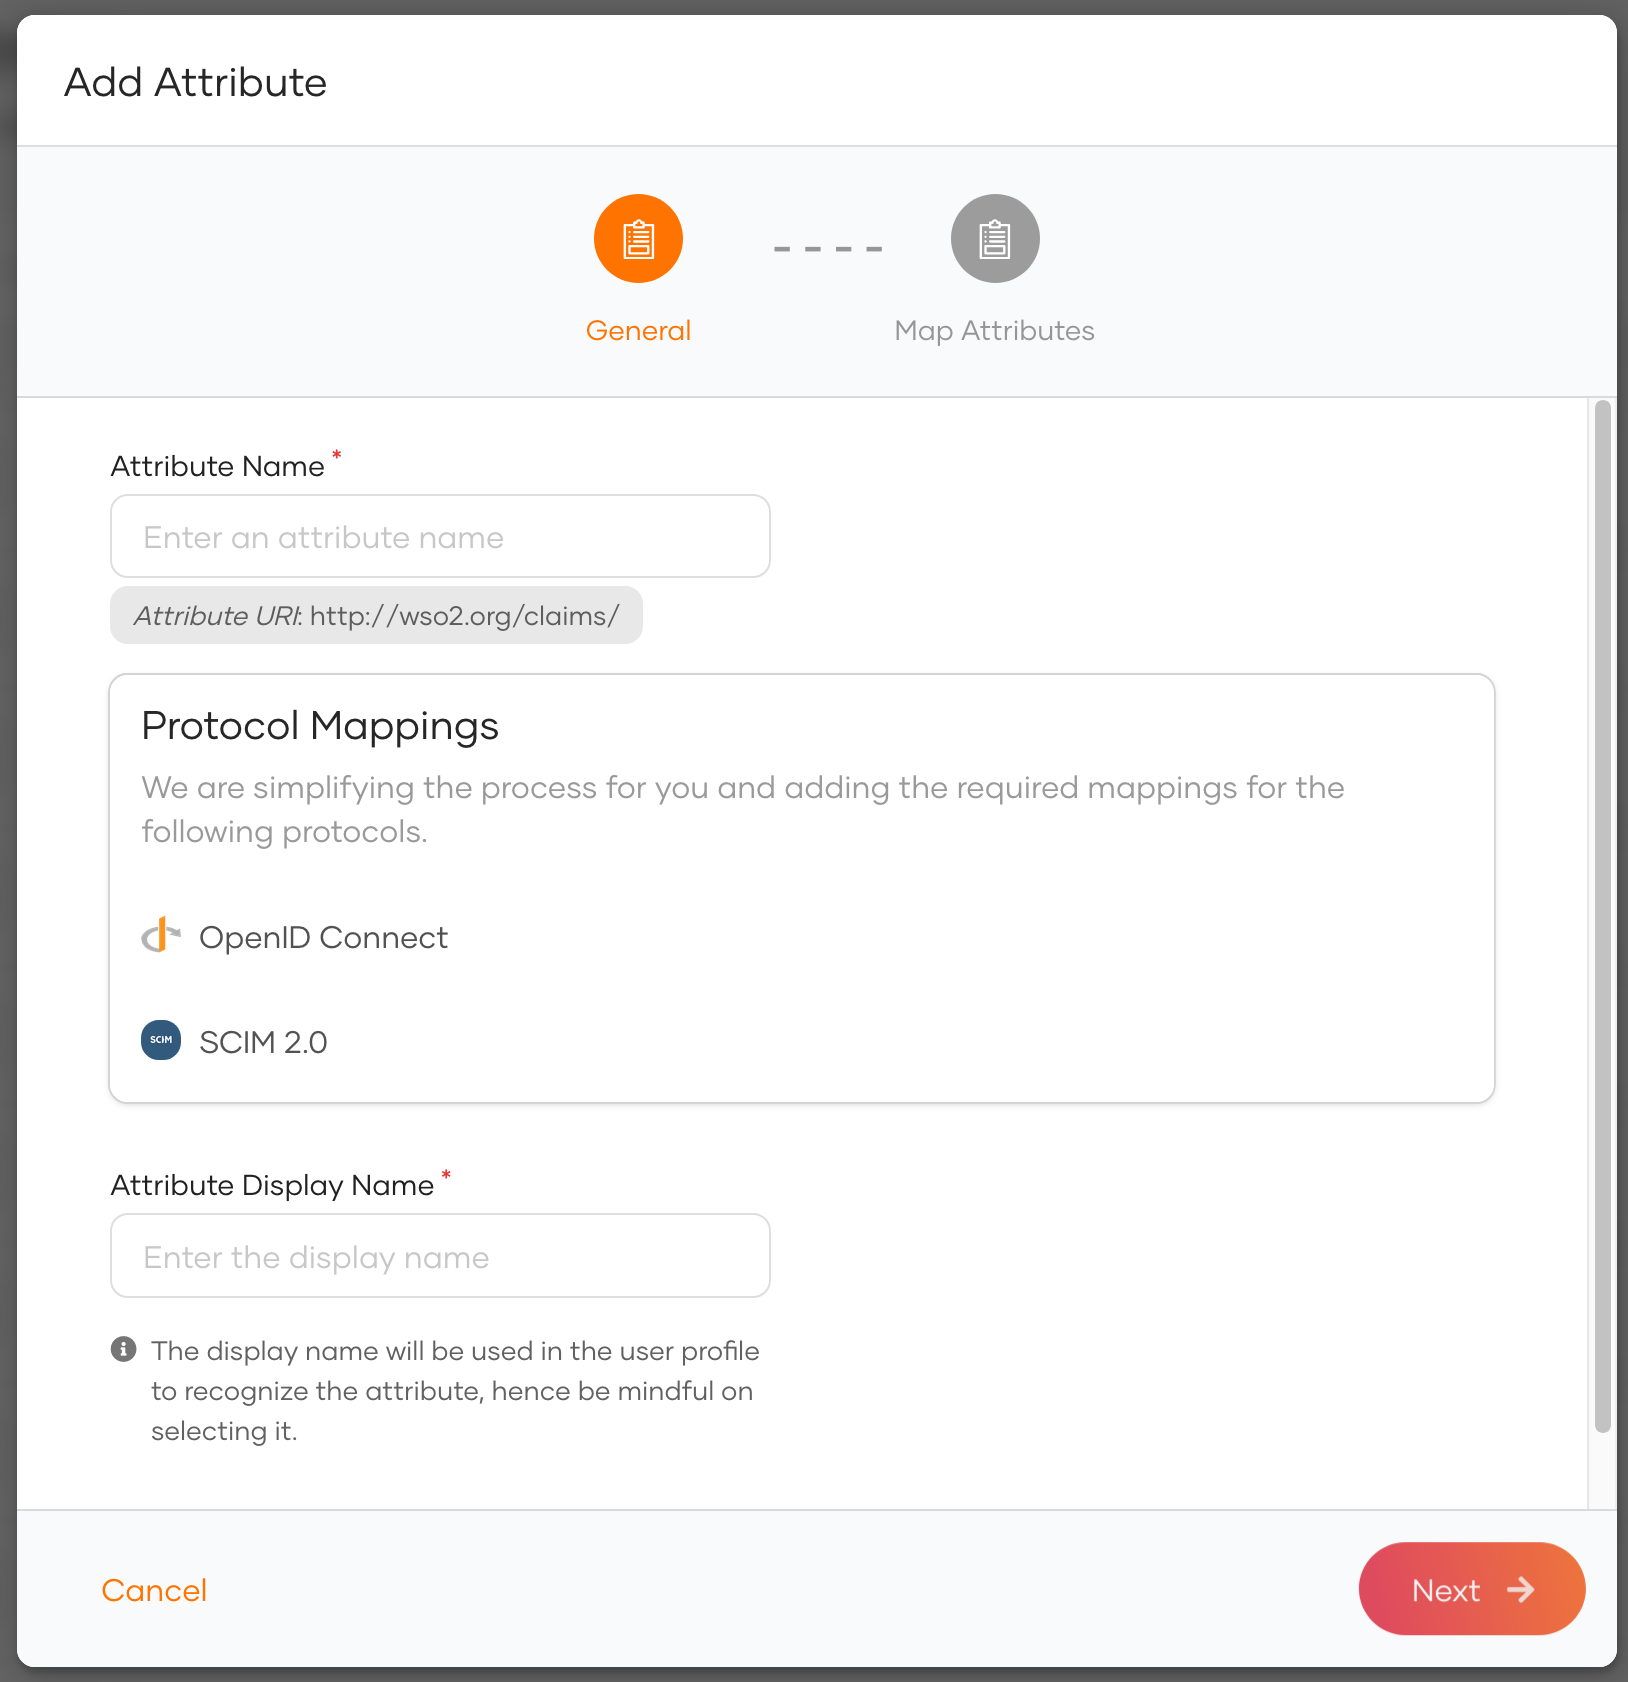
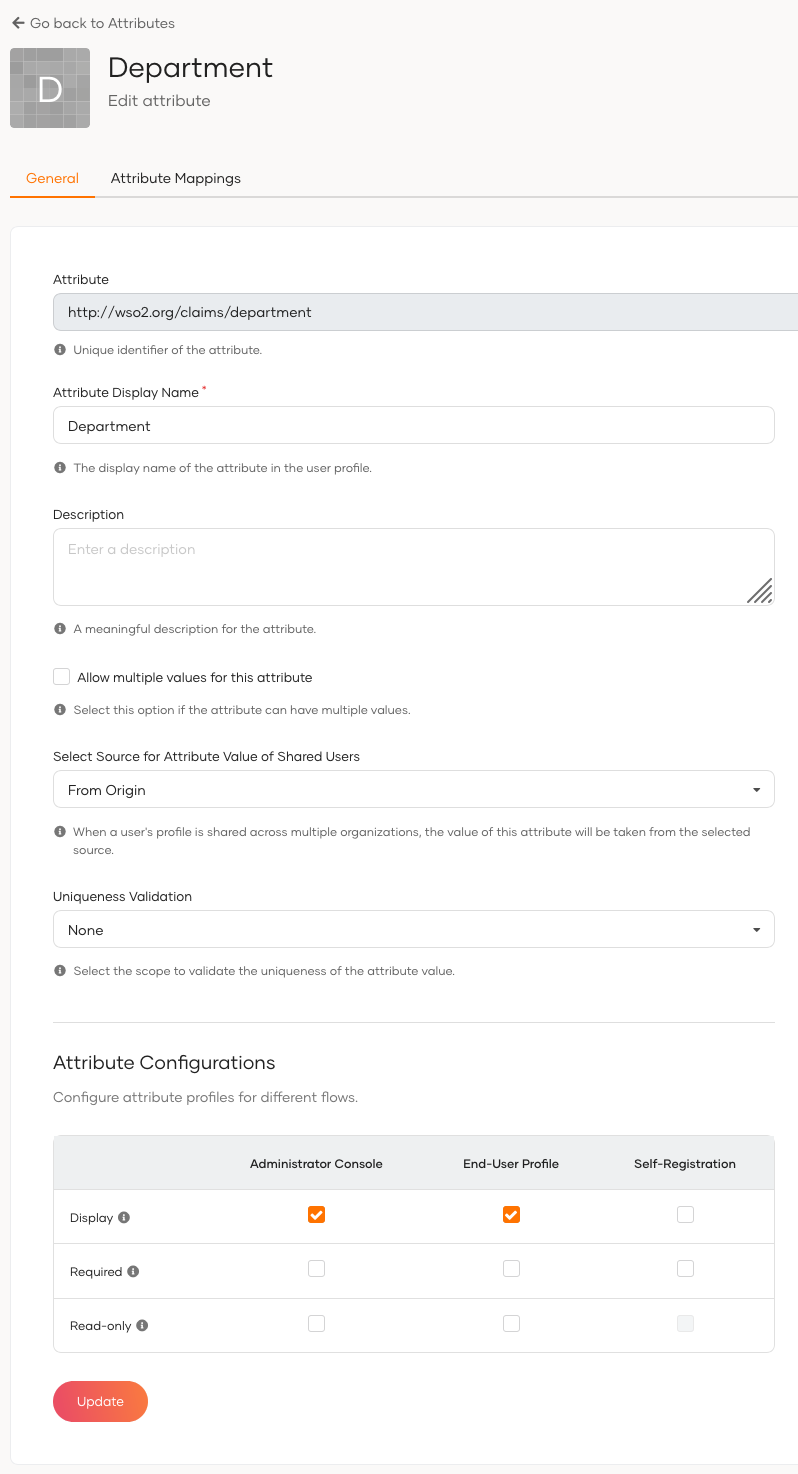
Since "department" is a custom attribute, you will also need to add an attribute for it. You can navigate to User Attributes & Stores > Attributes > Manage Attributes > Attributes > New Attribute, and then add an attribute named department.
Once it is added, mark it to be displayed in both the Administrator Console and End User Profile.
Validate Pre-Update Profile Action Workflow
To test the scenario, update the user's profile with sensitive claim values such as department, email, and phone number. You can perform this update either through the Console (administrator update) or the My Account application ( self-update) to verify that the department validation is working and that an email is sent via the SMTP server. Additionally, test with invalid department values to ensure the implementation handles errors as expected.
Console (administrator update)
Log in to the Console application using the administrator account, navigate to User Management > Users, select a specific user, and update the profile with sensitive attributes such as department, email address, and phone number.
My Account (self-update)
Log in to the My Account application using a specific user, navigate to Personal Info > Change Password, and update the profile with sensitive attributes such as department, email address, and phone number.