Add Apple login
You can add Apple login to your applications using WSO2 Identity Platform and enable users to log in with their Apple IDs.
Follow this guide for instructions.
Register WSO2 Identity Platform on Apple
Before you begin
You need a paid subscription to get access to an Apple developer account.
To register WSO2 Identity Platform on Apple, you need to create the following components on Apple's Developer Portal:
Step 1: Register an App ID
To register an App ID:
-
On the Apple Developer portal, go to Program resources > Certificates, Identifiers & Profiles > Identifiers.

-
Click
+to register an App ID. - Select App IDs and click Continue.
- Select App as the type and click Continue.
-
Enter the values for the following parameters.
Parameter Definition Description A description for the services ID. Bundle ID A unique identifier for the application. It is usually a string of characters in reverse domain name notation.
Example:com.domainname.appname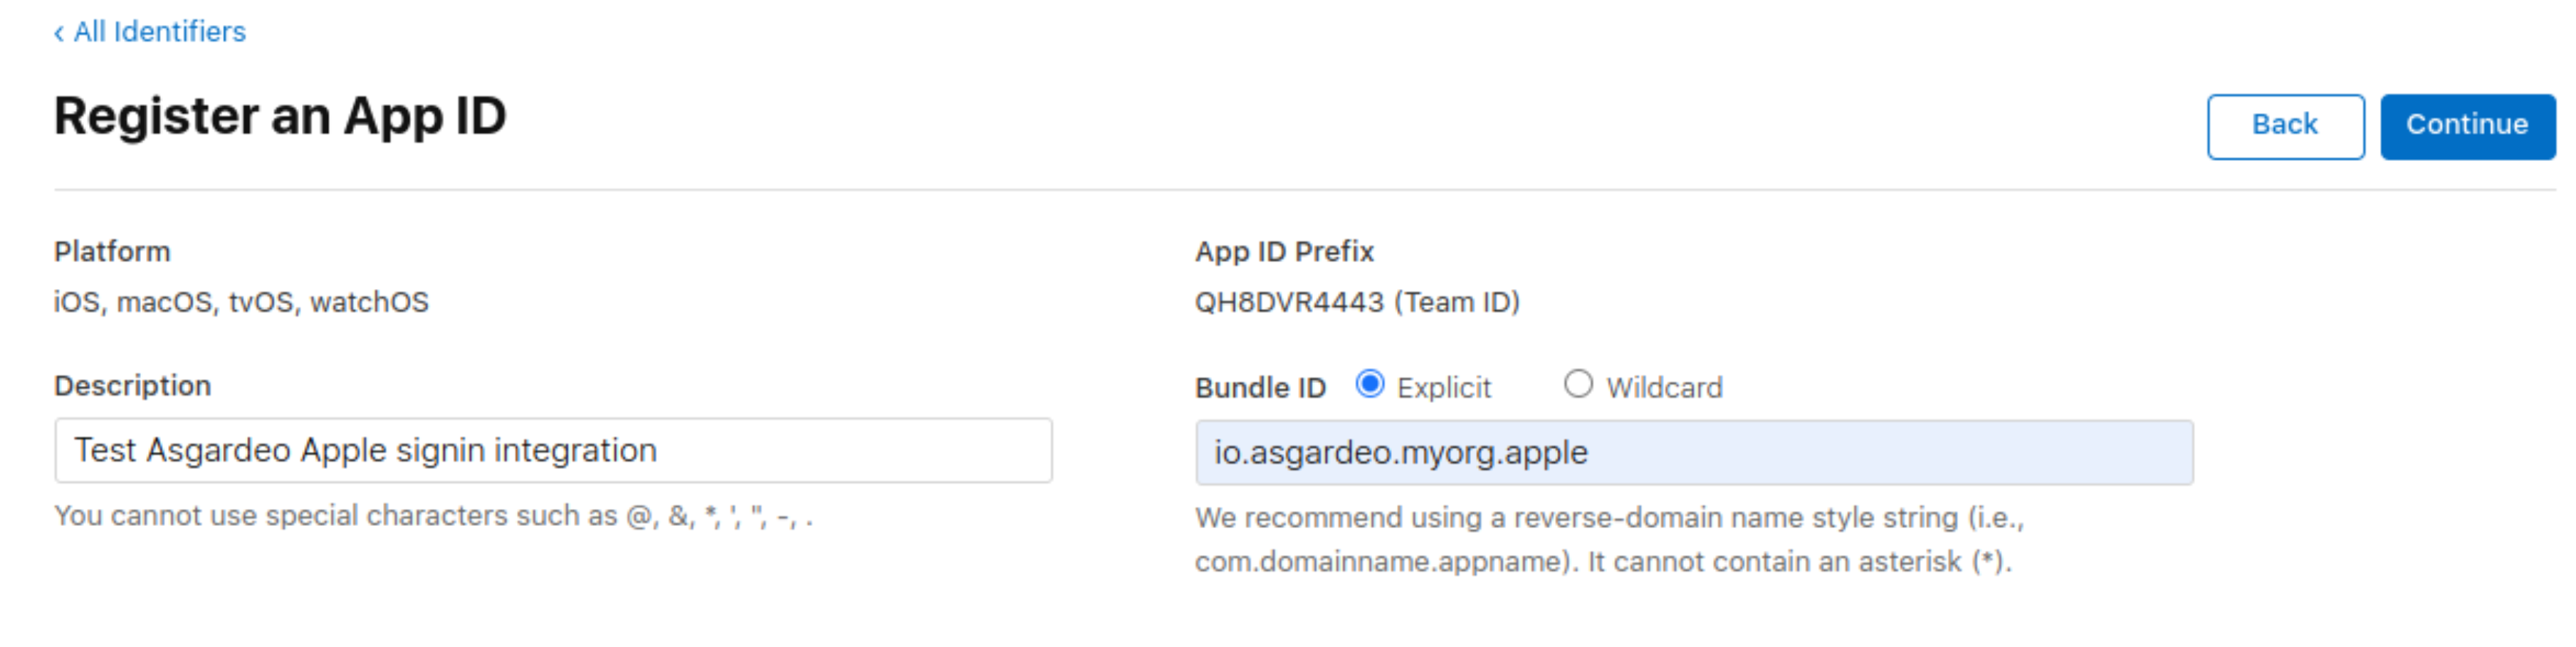
-
Under the Capabilities tab, select Sign in with Apple.
- Click Continue and then click Register.
Step 2: Register a Services ID
To register a services ID:
-
On the Apple Developer portal, go to Program resources > Certificates, Identifiers & Profiles > Identifiers.
-
Click
+and select Services IDs and click Continue. -
Enter values for the following parameters:
Parameter Definition Description A description for the services ID. Identifier A unique identifier for the application. It is usually a string of characters in reverse domain name notation. This value is considered the client ID of the application.
Example:com.domainname.appname -
Click Continue and then click Register.
- Go back to the Identifiers section and click on the Services ID you created.
- Enable Sign in with Apple and click Configure.
- Under Web Authentication Configuration, select the App ID you created as the Primary App ID.
-
Enter the following values under Register Website URLs.
Parameter Value Domain api.asgardeo.ioReturn URL https://api.asgardeo.io/t/{organization_name}/commonauth -
Click Continue and then click Save.
Step 3: Register a new key
To register a new key:
-
On Apple Developer portal, go to Program resources > Certificates, Identifiers & Profiles > Keys.

-
Click
+to register a new key. - Enter a name for the key, enable Sign in with Apple, and click Configure.
- Under Configure Keys, select the App ID you created previously and click Save. Then click Continue.
-
Click Register.
Note
You will now see that your app's Private key is ready to be downloaded. Download and save it securely, as you cannot download it again. Also, take note of the Key ID that is displayed on this page.
-
Click Done.
Note down the Team ID displayed in the top right corner under your name.
You can follow the Apple documentation for detailed instructions.
Tip
A client secret is required to integrate the Apple application with WSO2 Identity Platform. Usually, the external IdP generates a client secret, but in this scenario, Apple expects WSO2 Identity Platform to generate the client secret.
Register the Apple IdP
Now, let's register the Apple IdP in WSO2 Identity Platform.
- On the WSO2 Identity Platform Console, go to Connections.
- Click New Connections and select Apple.
-
Enter the following details of the Apple identity provider and click Finish:
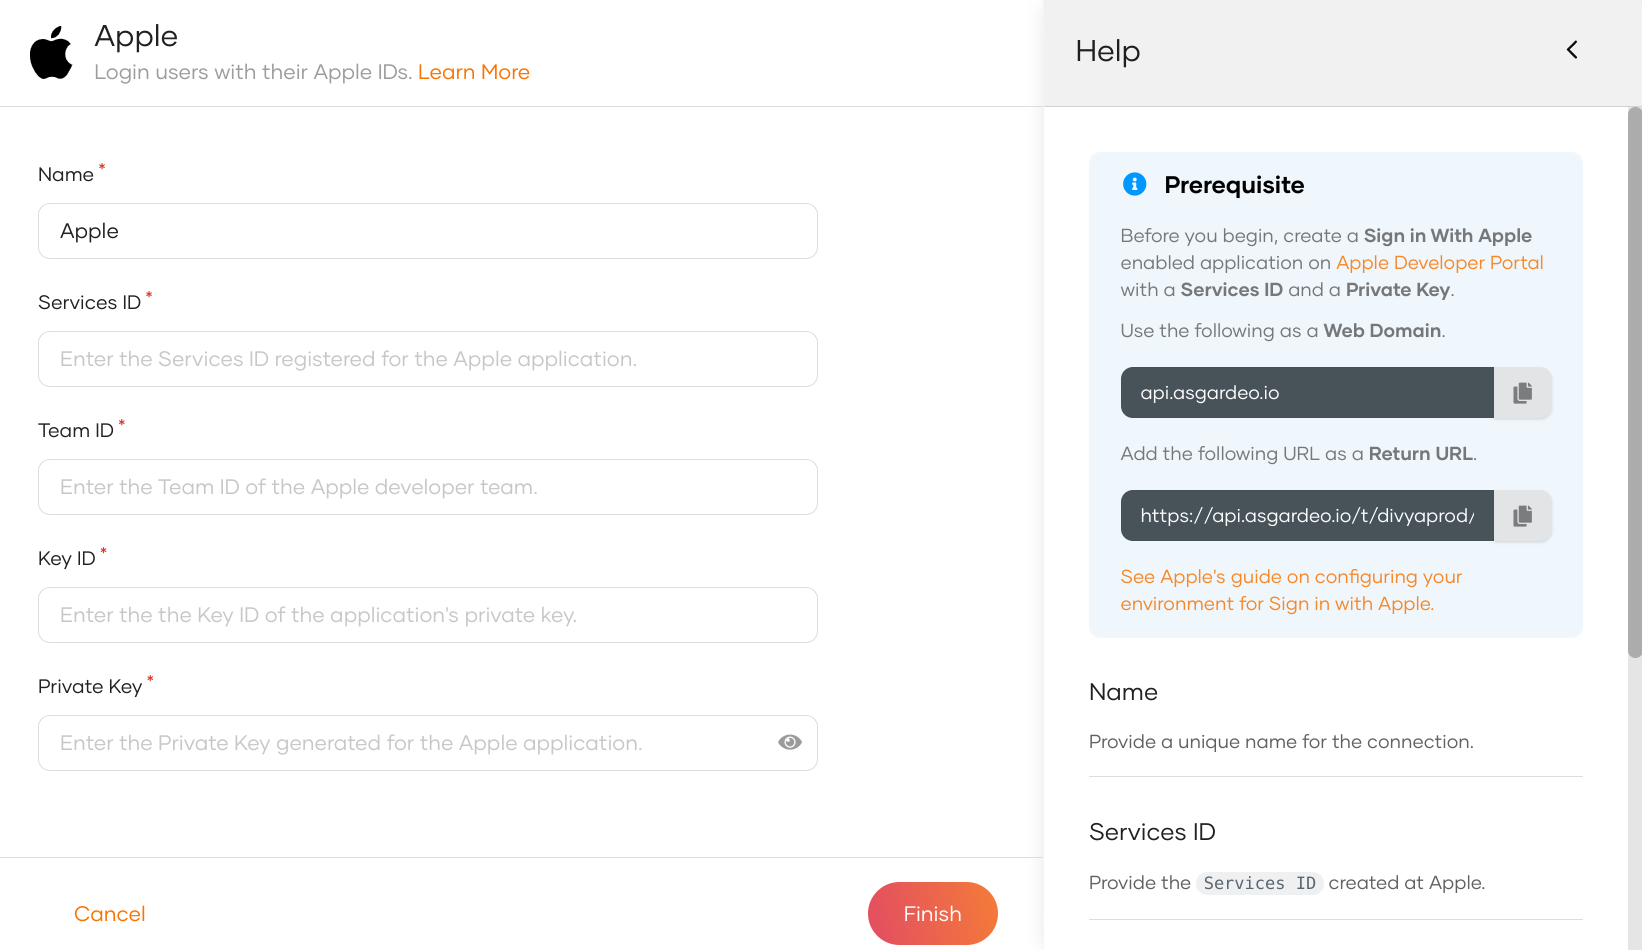
Parameter Description Name A unique name for this Apple identity provider. Services ID The services ID obtained from Apple.. Team ID Apple developer team ID obtained from Apple. Key ID Key identifier of the private key generated for the app. Private Key Private key generated for the app.
After creating the Apple identity provider, go to the Settings tab and see the list of scopes to which Apple has granted permissions.
- email: Allows to view the user's email address.
- name: Allows to view the user's name fields.
Note
WSO2 Identity Platform needs these scopes to get user information. WSO2 Identity Platform checks the attribute configurations of the application and sends the relevant attributes received from Apple to the app. You can read the Apple documentation to learn more.
Update the client secret validity period
WSO2 Identity Platform generates a client secret for the IdP. This client secret has the default maximum validity period of six months.
If you wish to reduce the validity period:
- On the WSO2 Identity Platform Console, go to Connections.
- Click Setup on your Apple IdP.
- On the Settings tab update the value of the Client Secret Validity Period.
Enable Apple login
Before you begin
You need to register an application with WSO2 Identity Platform. You can register your own application or use one of the sample applications provided.
- On the WSO2 Identity Platform Console, go to Applications.
-
Select your application, go to the Login Flow tab and add Apple login from your preferred editor:
To add Apple login using the Classic Editor: 1. If you haven't already defined a sign-in flow, click Start with Default configuration to get started.
-
Click Add Authentication on the step, select your Apple identity provider, and click Add.
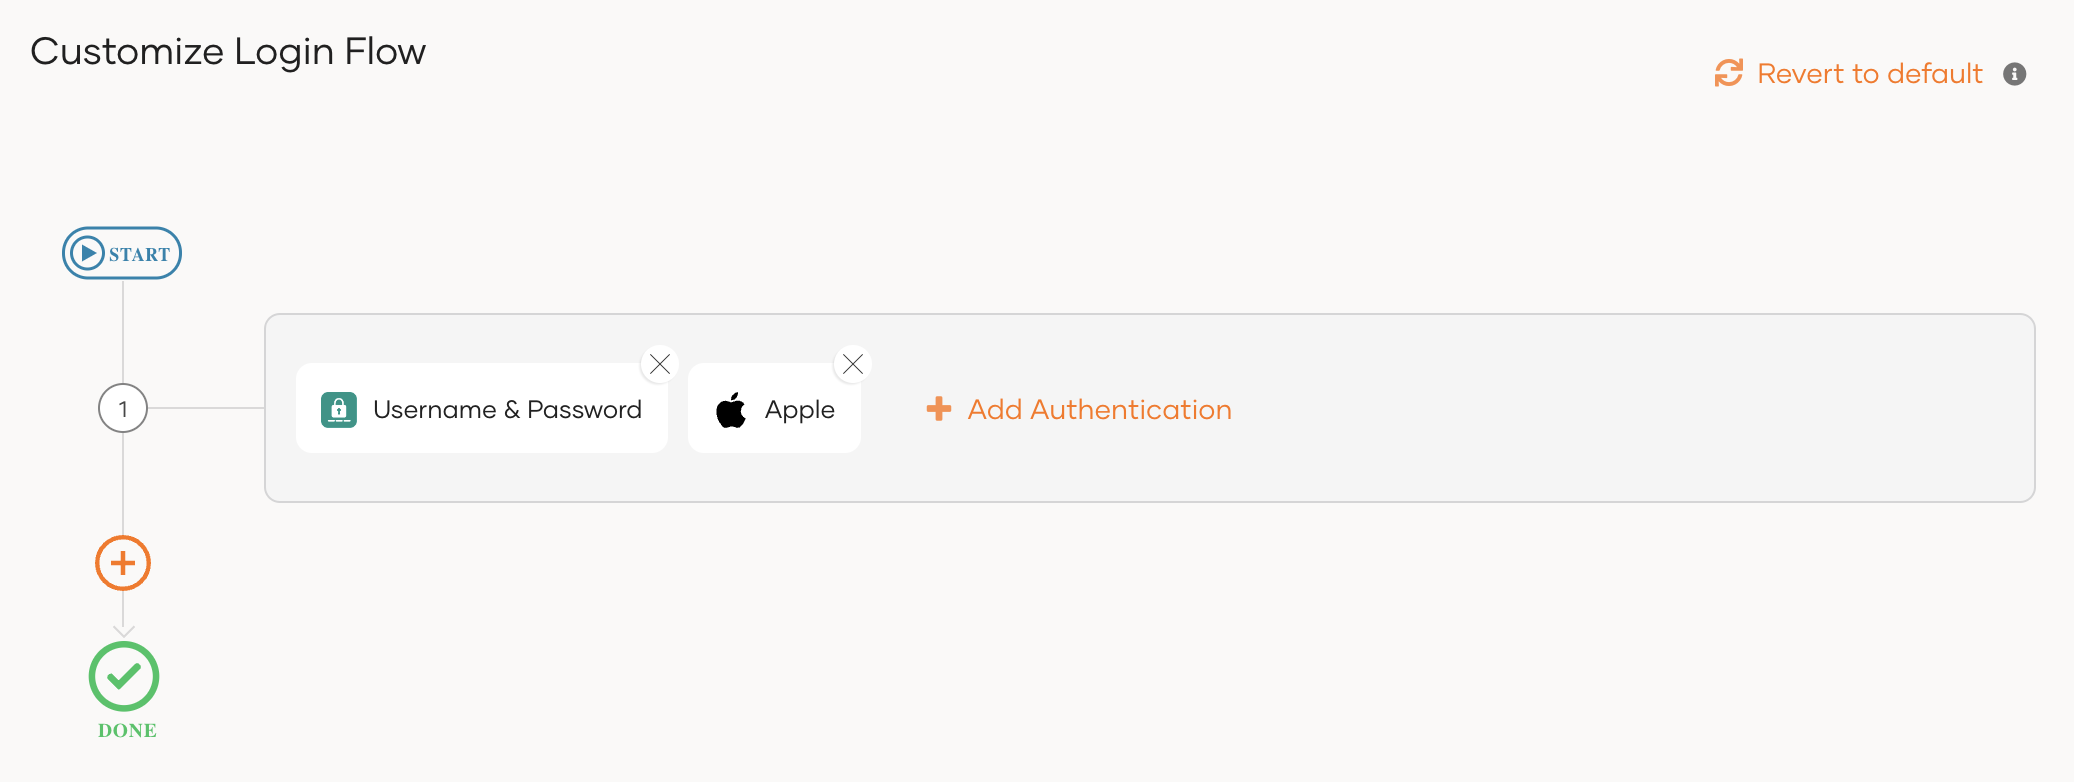
To add Apple login using the Visual Editor:
-
Switch to the Visual Editor tab, by default the
Username & Passwordlogin flow will be added onto the Visual Editor's workspace. -
Click on
+ Add Sign In Optionto add a new authenticator to the same step and select your Apple connection.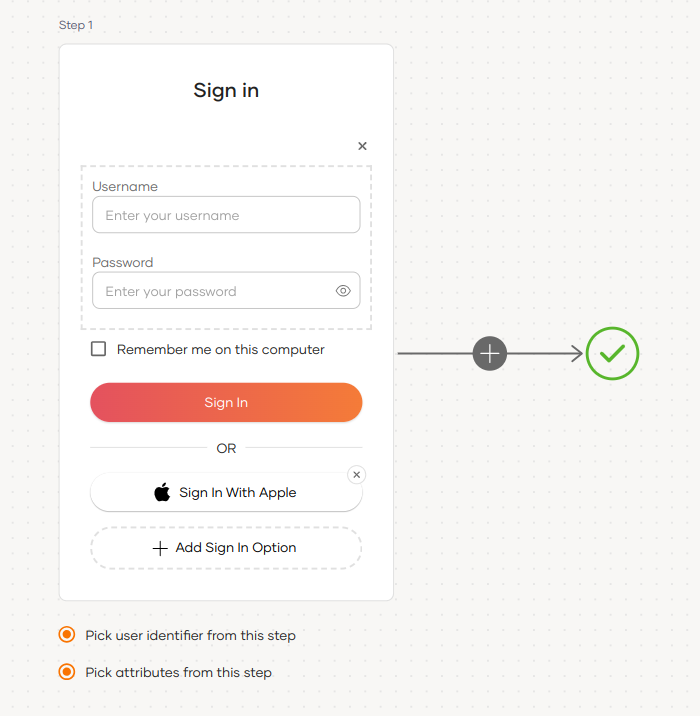
Recommendations
It is recommended to add your social and enterprise connections to the first authentication step as they are used for identifying the user.
-
-
Click Update to save your changes.
Try it out
Follow the steps given below.
-
Access the application URL.
-
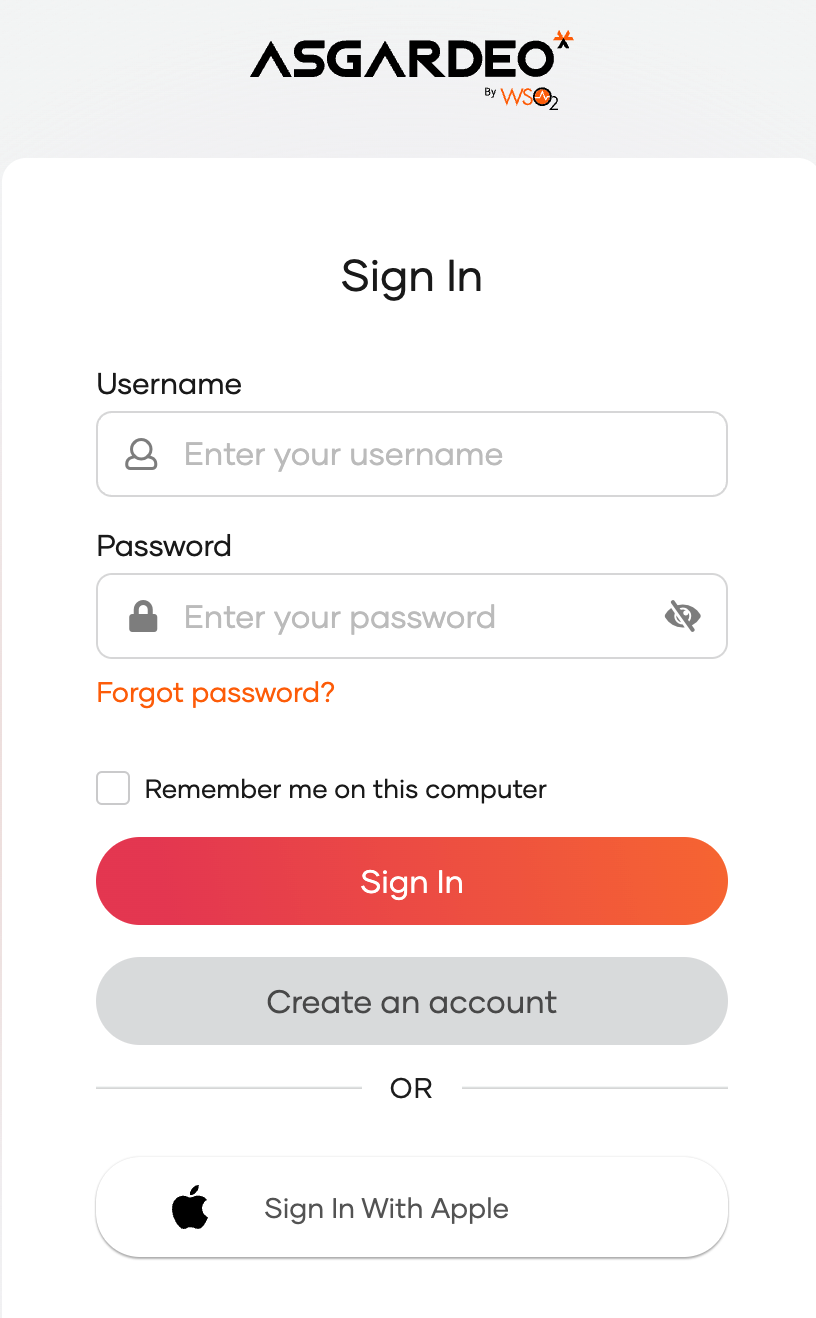
Click Login to open the WSO2 Identity Platform login page.
-
On the WSO2 Identity Platform login page, click Sign in with Apple.
-
Log in to Apple with an existing Apple ID.
Note
When a user successfully logs in with Apple for the first time,
- Apple will prompt you to create an account for the Apple IDP application.
- A user account is created in the WSO2 Identity Platform Console with the Apple username. Apple will manage this new user account.
Configure connection
To learn more about other configurations available for the connection, refer to the add federated login documentation.