Secure MCP servers with WSO2 Identity Platform and integrate them with n8n agentic flows
The Model Context Protocol (MCP) provides a standard way for AI agents and applications to discover and invoke tools. However, an MCP connection alone does not provide production-grade security. Without authentication and authorization, a client can access tools and resources without sufficient control.
At the same time, no-code and low-code platforms such as n8n are rapidly increasing the number of MCP clients being built. This creates an important question: Are these clients integrating with MCP servers using proper security standards?
The good news is that secure MCP ecosystems can be built using WSO2 Identity Platform. By leveraging WSO2 Identity Platform for authentication and authorization, you can protect MCP servers and ensure that only trusted clients and users are allowed to access specific tools.
By the end of this tutorial, you will be able to run n8n locally, configure its MCP client secured by WSO2 Identity Platform, set up a demo MCP server, and securely interact with it using OAuth 2.0 with PKCE from the n8n chat interface.
Getting started
First, clone this repository and go to the mcp-auth/integrations/mcp-auth-n8n-example directory to access the required project files and sample workflow.
Step 1: Set up n8n
Follow n8n documentation to install and run n8n locally using either Docker or Node.js.
Import the MCP client workflow
- Open the n8n UI. (Usually at
http://localhost:5678). - Select Create Workflow.
- Select Import from File.
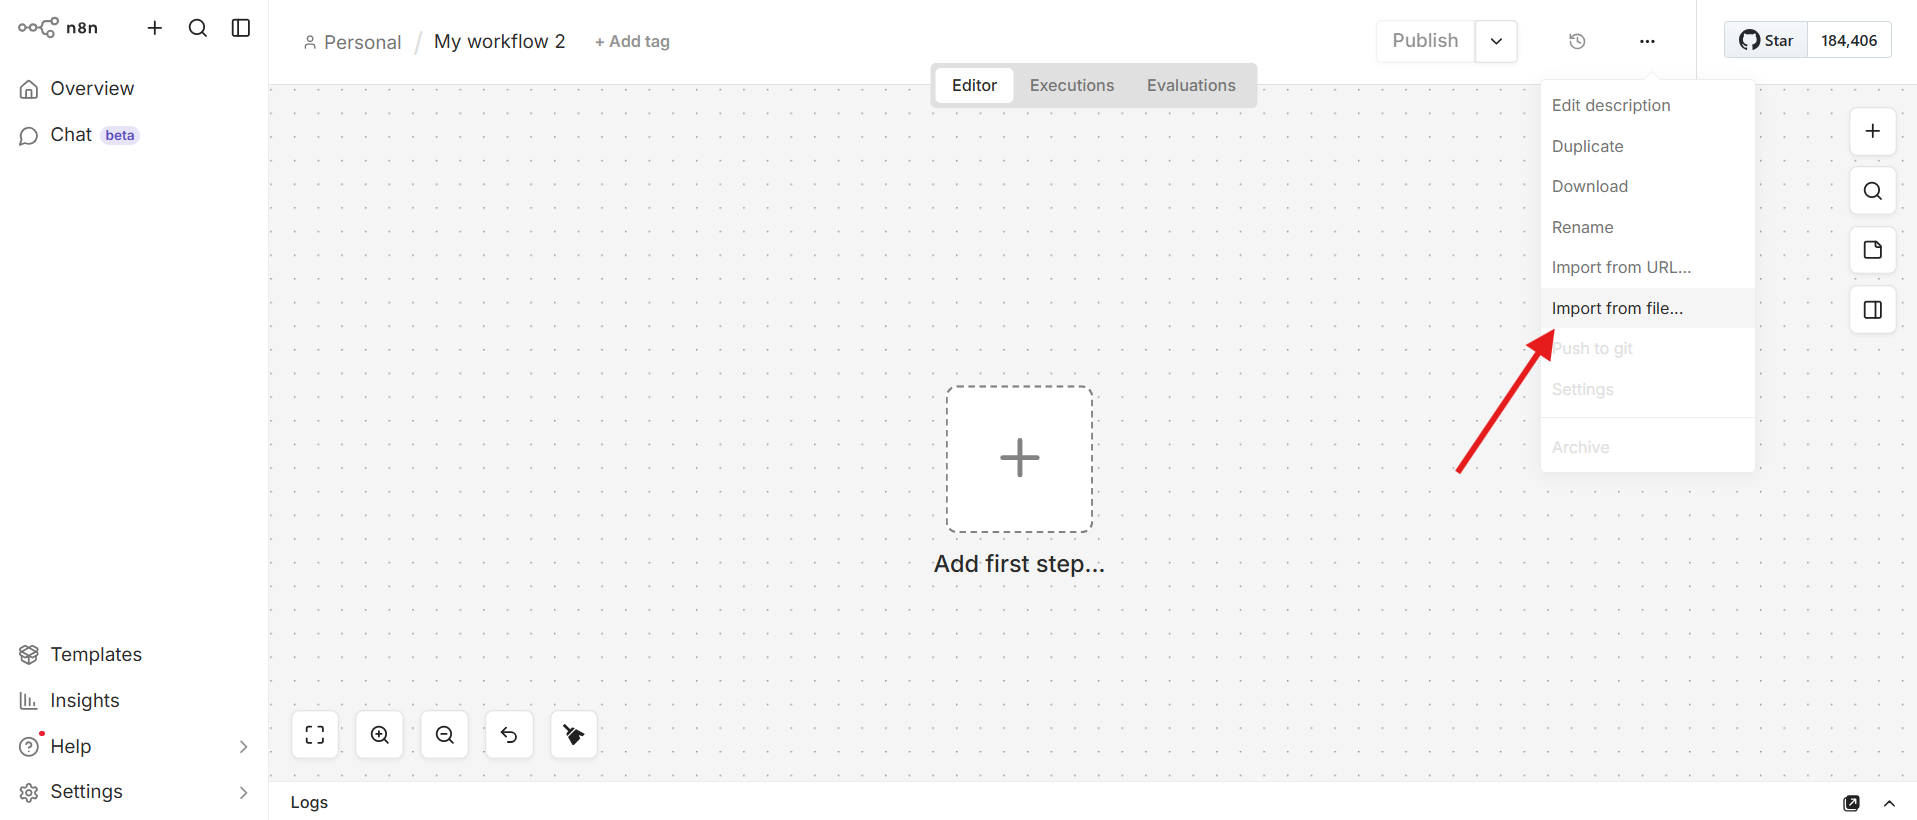
Select the mcp-client-n8n-example.json file from the cloned repository.
Step 2: Set up WSO2 Identity Platform
Register an application in WSO2 Identity Platform to represent the n8n MCP client.
Create an MCP client application
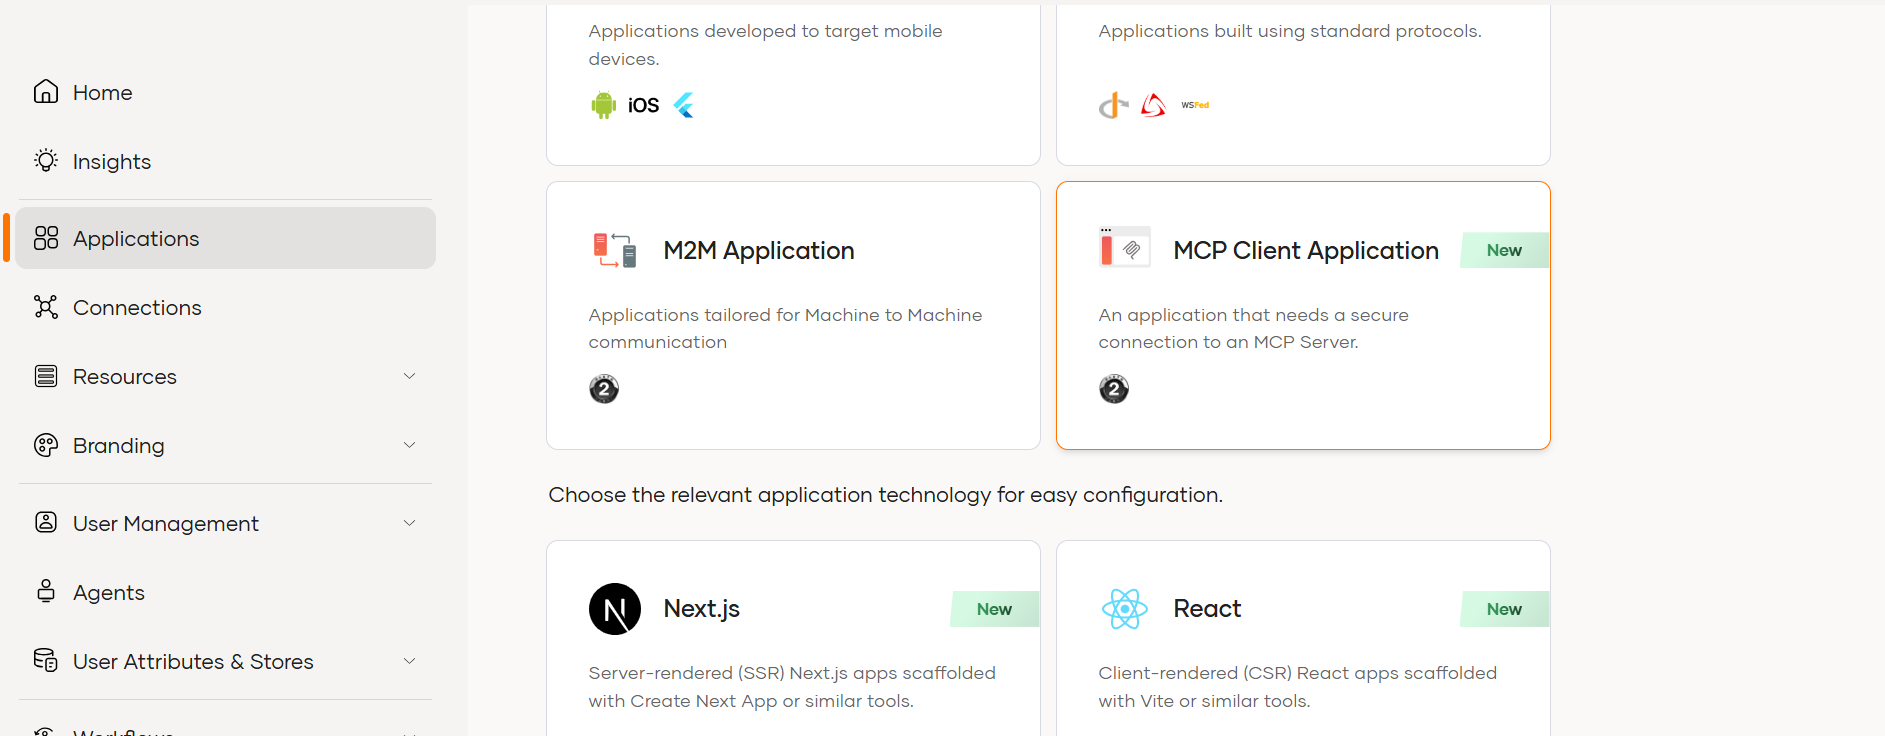
- On WSO2 Identity Platform console, Go to Applications.
- Click on New Application.
- Select MCP Client Application.
Configure the application with the following values:
- Application Name:
n8n-example - Redirect URL:
http://localhost:5678/rest/oauth2-credential/callback - Disable Public Client option, as n8n currently only supports confidential clients and expects the client secret during configuration.
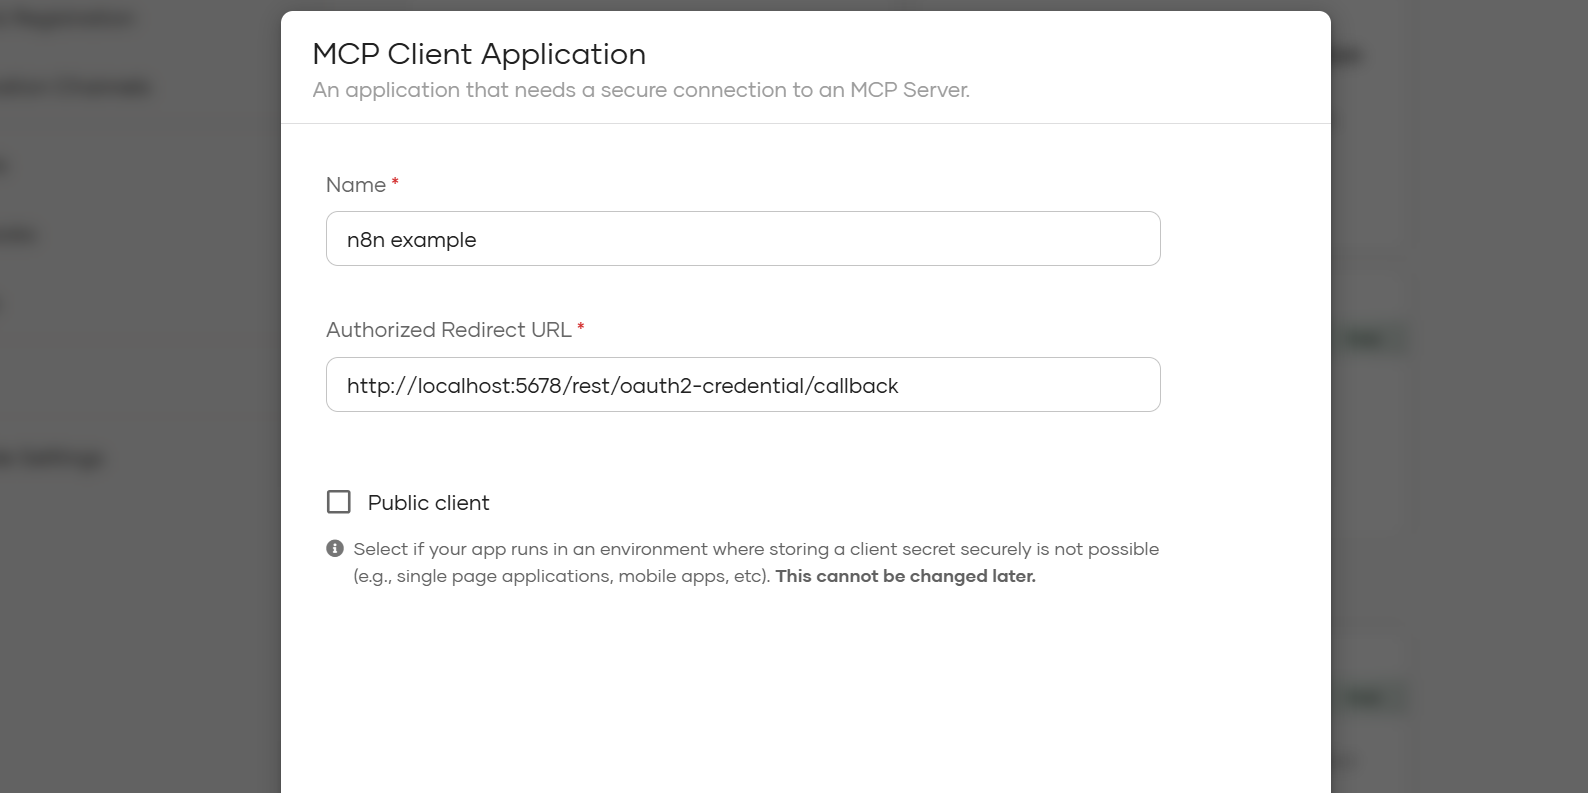
Save the application.
Step 3: Configure the MCP server
- Go to the
mcp-serverdirectory in the cloned repository. - Create or update the
.envfile with the required values. - Follow the setup instructions in
mcp-server/README.mdto run the server.
Step 4: Configure the MCP client in n8n
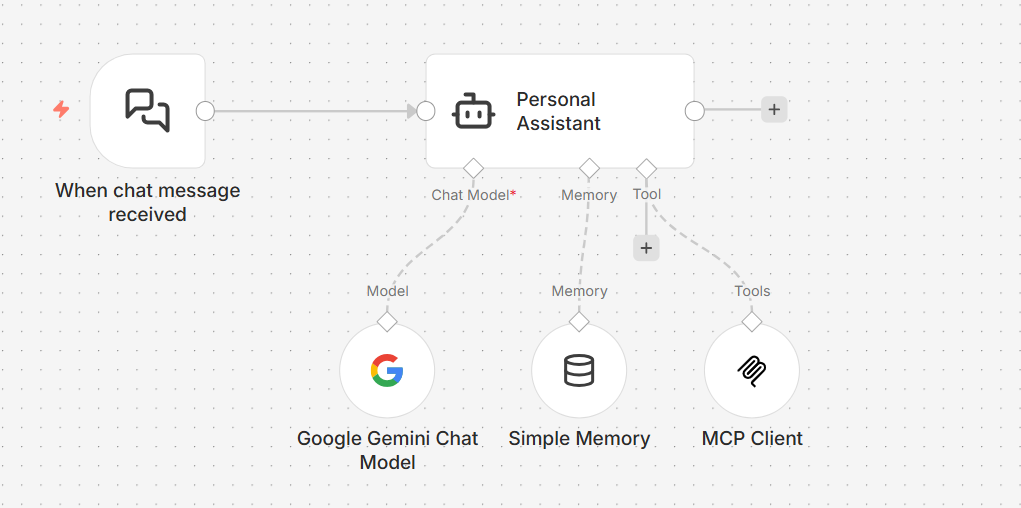
After the MCP server starts, open the imported n8n MCP workflow.
Configure the MCP Client node
Double-click the MCP Client node.
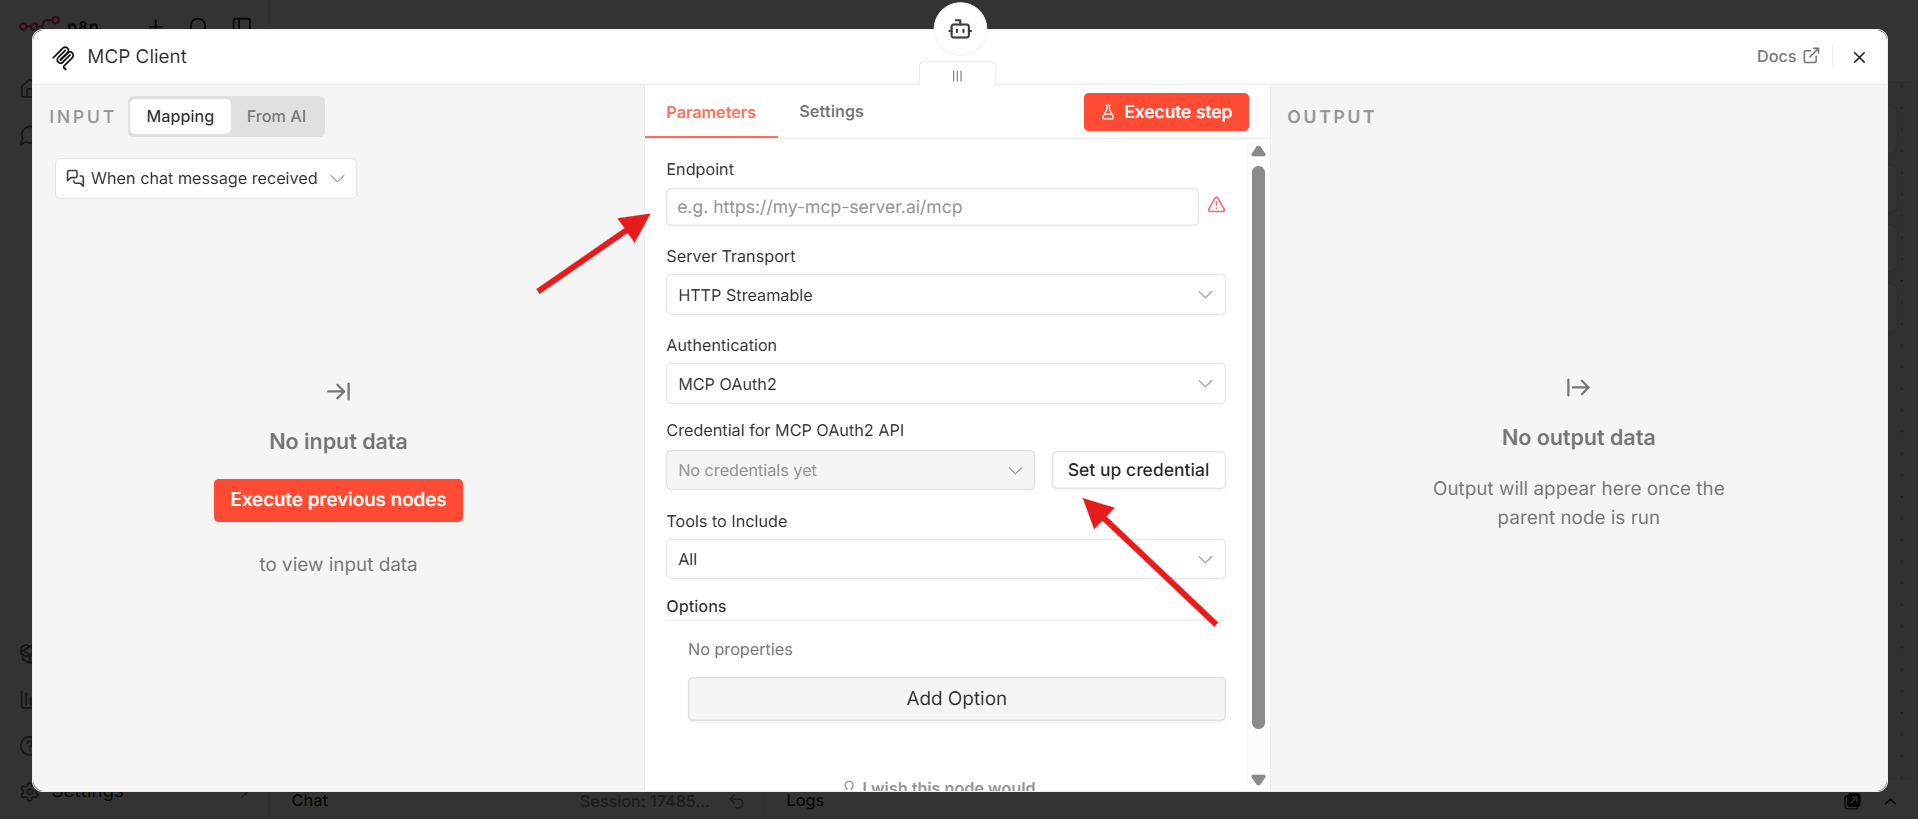
- Set the MCP server endpoint:
- If you use Docker:
http://host.docker.internal:3000/mcp - If you do not use Docker:
http://localhost:3000/mcp
- If you use Docker:
- Select Set Up Credentials.
- Configure OAuth 2.0 settings:
- Disable Use Dynamic Client Registration.
- Set Grant Type to
PKCE. - Provide the Authorization URL, Access Token URL, Client ID, and Client Secret.
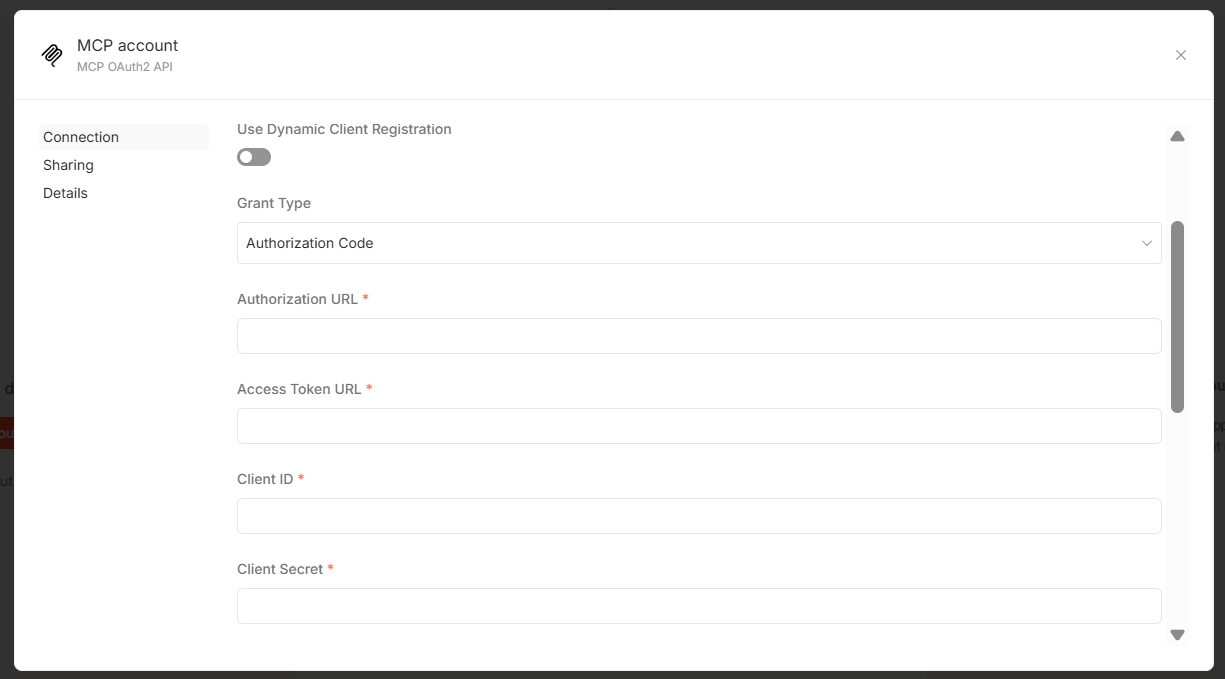
You can find these values in the Protocol and Info tabs of your WSO2 Identity Platform application.
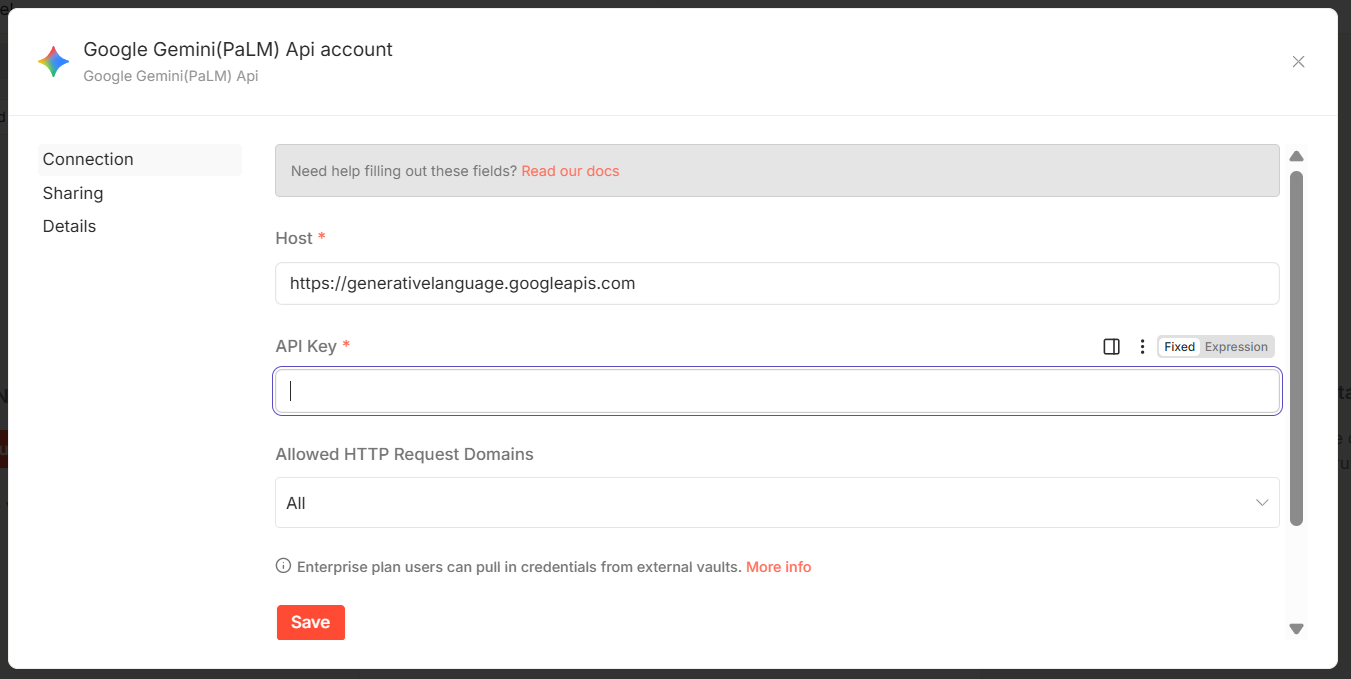
Configure the Google Gemini chat model node
- Open the Google Gemini chat model node.
- Generate an API key from Google AI Studio API keys.
- Add the API key to the node configuration.
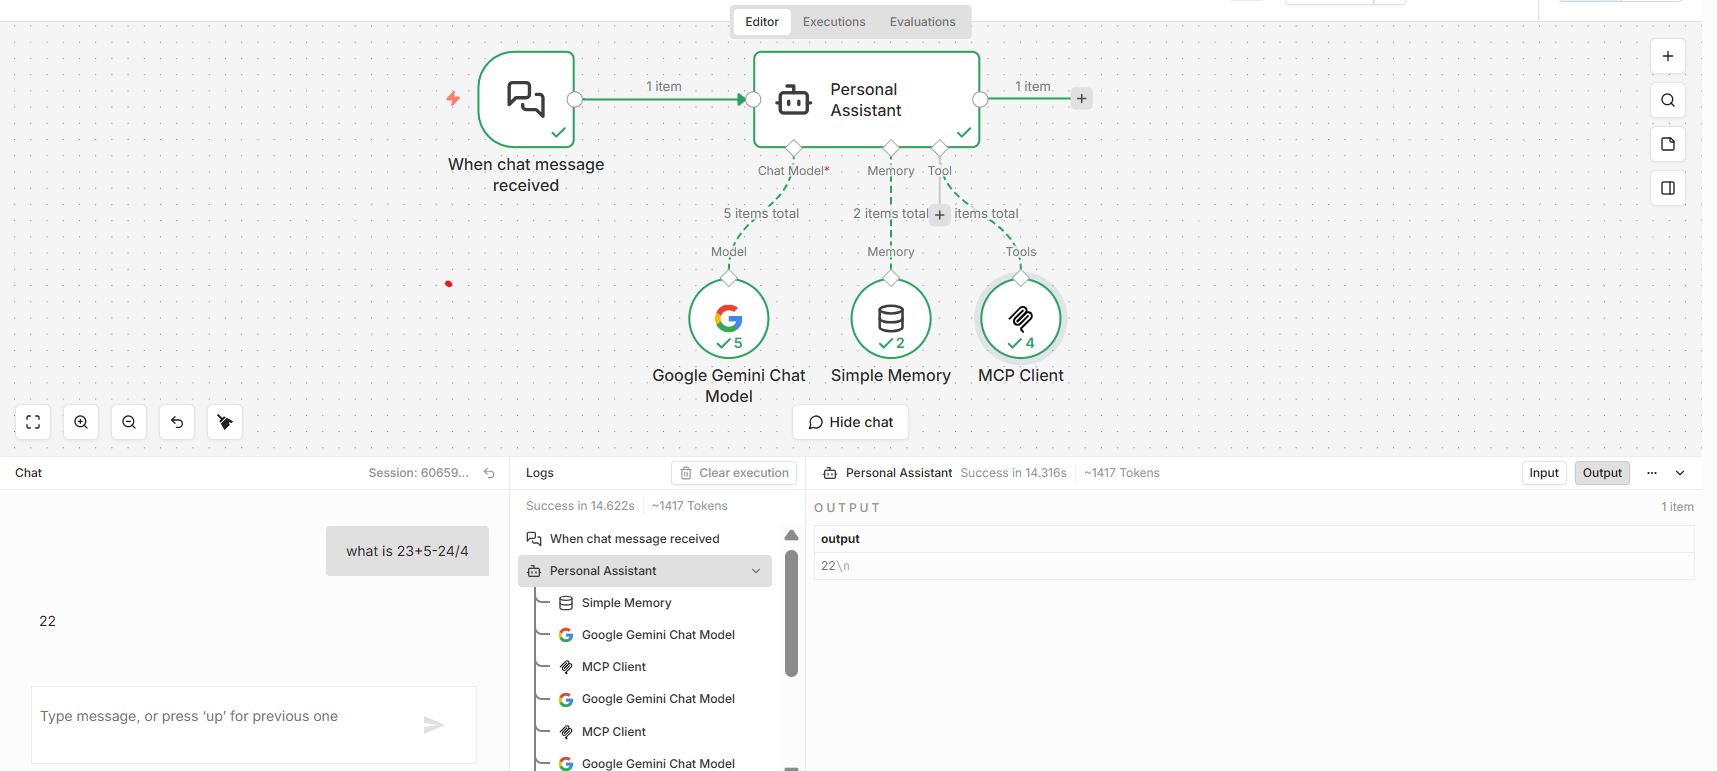
Step 5: Try the workflow
- Select Open Chat at the bottom of the n8n workflow editor.
- Send a sample prompt from the chat interface.
- Verify that the MCP client authenticates and invokes tools from the secured MCP server.
Troubleshooting
If the OAuth callback fails, confirm that the redirect URL shown in n8n is http://localhost:5678/rest/oauth2-credential/callback.
If token requests fail, verify the Authorization URL, Access Token URL, Client ID, and Client Secret from the WSO2 Identity Platform application.