Securing Routes within the app
5 min
In a .NET Blazor Web Application, handling and securing routes is an important aspect of managing user access, ensuring the right content is displayed to the right users, and protecting sensitive resources.
Blazor uses the RouteView component and a built-in routing system to manage navigation within the application. Routes are defined using the @page directive at the top of a Razor component (.razor file). You can also navigate to different routes programmatically using the NavigationManager service, which we will also cover in this guide when securing the routes.
Let’s first navigate to the NavMenu.razor file under the /Components/Layout directory and replace the content with following code to remove the existing components.
@using Microsoft.AspNetCore.Components.Authorization

<div class="top-row ps-3 navbar navbar-dark">
    <div class="container-fluid">
        <a class="navbar-brand" href="">wso2-dotnet</a>
    </div>
</div>

<input type="checkbox" title="Navigation menu" class="navbar-toggler" />

<div class="nav-scrollable" onclick="document.querySelector('.navbar-toggler').click()">
    <nav class="nav flex-column">
        <div class="nav-item px-3">
            <NavLink class="nav-link" href="" Match="NavLinkMatch.All">
                <span class="bi bi-house-door-fill-nav-menu" aria-hidden="true"></span> Home
            </NavLink>
        </div>
    </nav>
</div>
In order to redirect unauthorized users to the login page, we will create a Razor component named RedirectToLogin.razor under the /Components directory using the following commands.
Then replace the existing template with the following code. We will use the NavigateTo method from the built-in NavigationManager to perform the redirection.
@inject NavigationManager Navigation

@code {
    protected override void OnInitialized()
    {
        Navigation.NavigateTo($"authentication/login?returnUrl={Uri.EscapeDataString(Navigation.Uri)}", forceLoad: true);
    }
}
Now, open the Routes.razor file and add the AuthorizeRouteView component as shown below, which is used to protect entire pages or routes. It only renders the associated route if the user is authorized. Otherwise, it can redirect the user to a login page using the RedirectToLogin component we created.
@using Microsoft.AspNetCore.Components.Authorization

<Router AppAssembly="typeof(Program).Assembly">
    <Found Context="routeData">
        <AuthorizeRouteView RouteData="routeData" DefaultLayout="typeof(Layout.MainLayout)">
            <NotAuthorized>
                <RedirectToLogin />
            </NotAuthorized>
        </AuthorizeRouteView>
        <FocusOnNavigate RouteData="routeData" Selector="h1" />
    </Found>
</Router>
Then navigate to the Program.cs file and add the following code line so that a RouteGroupBuilder will be created for the /authentication endpoint.
using asgardeo_dotnet.Components;
using Microsoft.IdentityModel.Tokens;
using Microsoft.AspNetCore.Authentication.Cookies;
using Microsoft.IdentityModel.JsonWebTokens;
using Microsoft.IdentityModel.Protocols.OpenIdConnect;
using Microsoft.AspNetCore.Components.Authorization;
using asgardeo_dotnet;

var builder = WebApplication.CreateBuilder(args);

HttpClient httpClient;
if (Environment.GetEnvironmentVariable("HTTPCLIENT_VALIDATE_EXTERNAL_CERTIFICATES") == "false")
{
    var handler = new HttpClientHandler
    {
        ServerCertificateCustomValidationCallback = HttpClientHandler.DangerousAcceptAnyServerCertificateValidator
    };
    httpClient = new HttpClient(handler);
}
else
{
    httpClient = new HttpClient();
}

builder.Services.AddSingleton(httpClient);

JsonWebKeySet FetchJwks(string url)
{
    var result = httpClient.GetAsync(url).Result;
    if (!result.IsSuccessStatusCode || result.Content is null)
    {
        throw new Exception(
            $"Getting token issuers (WSO2) JWKS from {url} failed. Status code {result.StatusCode}");
    }

    var jwks = result.Content.ReadAsStringAsync().Result;
    return new JsonWebKeySet(jwks);
}

const string ASGARDEO_OIDC_SCHEME = "AsgardeoOidc";

builder.Services.AddAuthentication(ASGARDEO_OIDC_SCHEME)
.AddOpenIdConnect(ASGARDEO_OIDC_SCHEME, oidcOptions =>
{
    oidcOptions.SignInScheme = CookieAuthenticationDefaults.AuthenticationScheme;

    oidcOptions.Configuration = new ()
    {
        Issuer = Environment.GetEnvironmentVariable("TOKEN_ENDPOINT"),
        AuthorizationEndpoint = Environment.GetEnvironmentVariable("AUTHORIZATION_ENDPOINT"),
        TokenEndpoint = Environment.GetEnvironmentVariable("TOKEN_ENDPOINT"),
        JwksUri = Environment.GetEnvironmentVariable("JWKS_URI"),
        JsonWebKeySet = FetchJwks(Environment.GetEnvironmentVariable("JWKS_URI")!),
        EndSessionEndpoint = Environment.GetEnvironmentVariable("LOGOUT_URI"),
    };
    foreach (var key in oidcOptions.Configuration.JsonWebKeySet.GetSigningKeys())
    {
        oidcOptions.Configuration.SigningKeys.Add(key);
    }

    oidcOptions.Authority = Environment.GetEnvironmentVariable("AUTHORITY");

    oidcOptions.ClientId = Environment.GetEnvironmentVariable("CLIENT_ID");
    oidcOptions.ClientSecret = Environment.GetEnvironmentVariable("CLIENT_SECRET");

    oidcOptions.ResponseType = OpenIdConnectResponseType.Code;

    oidcOptions.MapInboundClaims = false;
    oidcOptions.TokenValidationParameters.NameClaimType = JwtRegisteredClaimNames.Name;
    oidcOptions.TokenValidationParameters.RoleClaimType = "roles";
    oidcOptions.MetadataAddress = Environment.GetEnvironmentVariable("METADATA_ADDRESS");
    oidcOptions.SaveTokens = true;
    oidcOptions.Scope.Add("internal_login");
})
.AddCookie(CookieAuthenticationDefaults.AuthenticationScheme);

builder.Services.AddAuthorization();
builder.Services.AddCascadingAuthenticationState();
builder.Services.AddScoped<AuthenticationStateProvider, PersistingAuthenticationStateProvider>();
builder.Services.AddHttpContextAccessor();

// Add services to the container.
builder.Services.AddRazorComponents()
    .AddInteractiveServerComponents();

var app = builder.Build();

// Configure the HTTP request pipeline.
if (!app.Environment.IsDevelopment())
{
    app.UseExceptionHandler("/Error", createScopeForErrors: true);
    // The default HSTS value is 30 days. You may want to change this for production scenarios, see https://aka.ms/aspnetcore-hsts.
    app.UseHsts();
}

app.UseHttpsRedirection();

app.UseAntiforgery();

app.MapStaticAssets();
app.MapRazorComponents<App>()
    .AddInteractiveServerRenderMode();

app.MapGroup("/authentication").MapLoginAndLogout();

app.Run();
By following these steps, you can easily secure your Blazor application routes and manage user access based on their authentication state.
You can also start the application at this point and observe the homepage of the application with the changes we made.
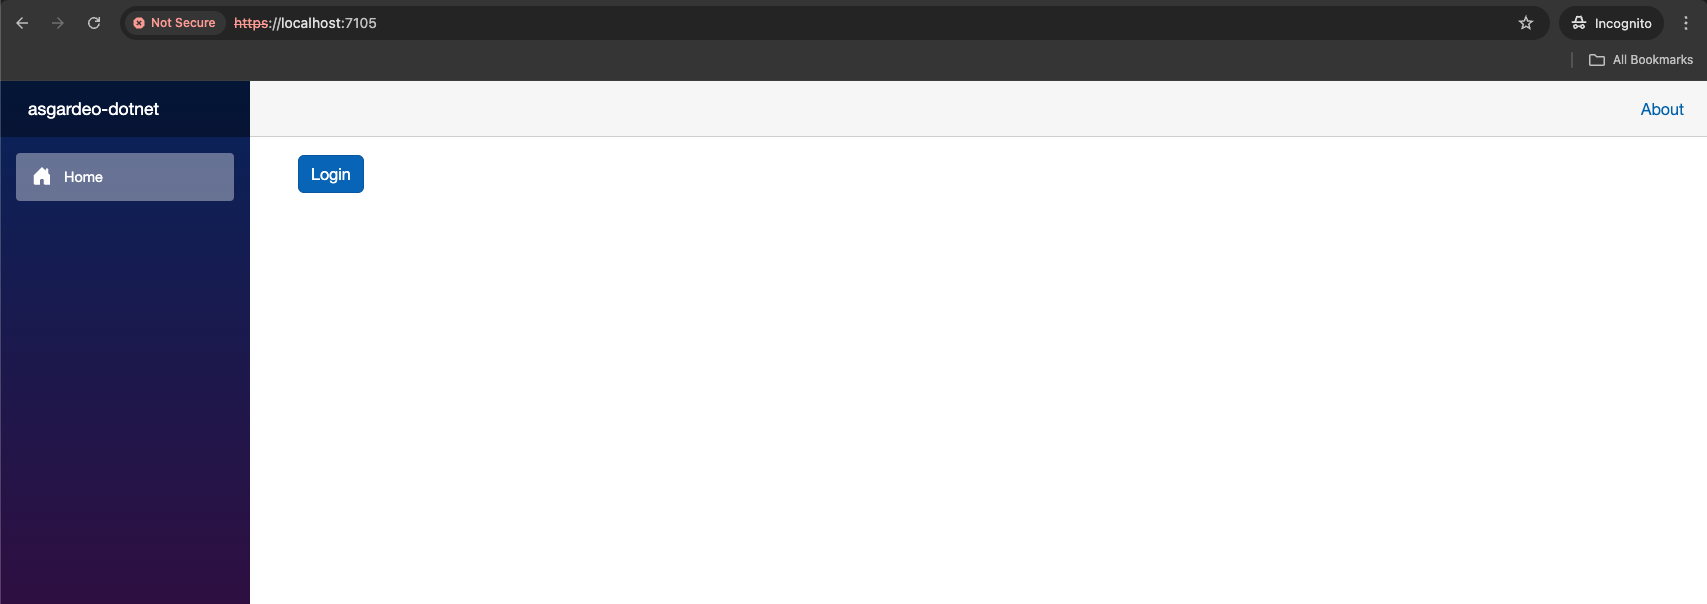
Clicking on the login button will initiate an OIDC request. WSO2 Identity Platform will receive this authorization request and respond by redirecting the user to a login page to enter their credentials.
Tip
The OpenID Connect specification offers several functions, known as grant types, to obtain an access token in exchange for user credentials. This example uses the authorization code grant type. In this process, the app first requests a unique code from the authentication server, which can later be used to obtain an access token. For more details on the authorization code grant type, please refer to the WSO2 Identity Platform documentation.
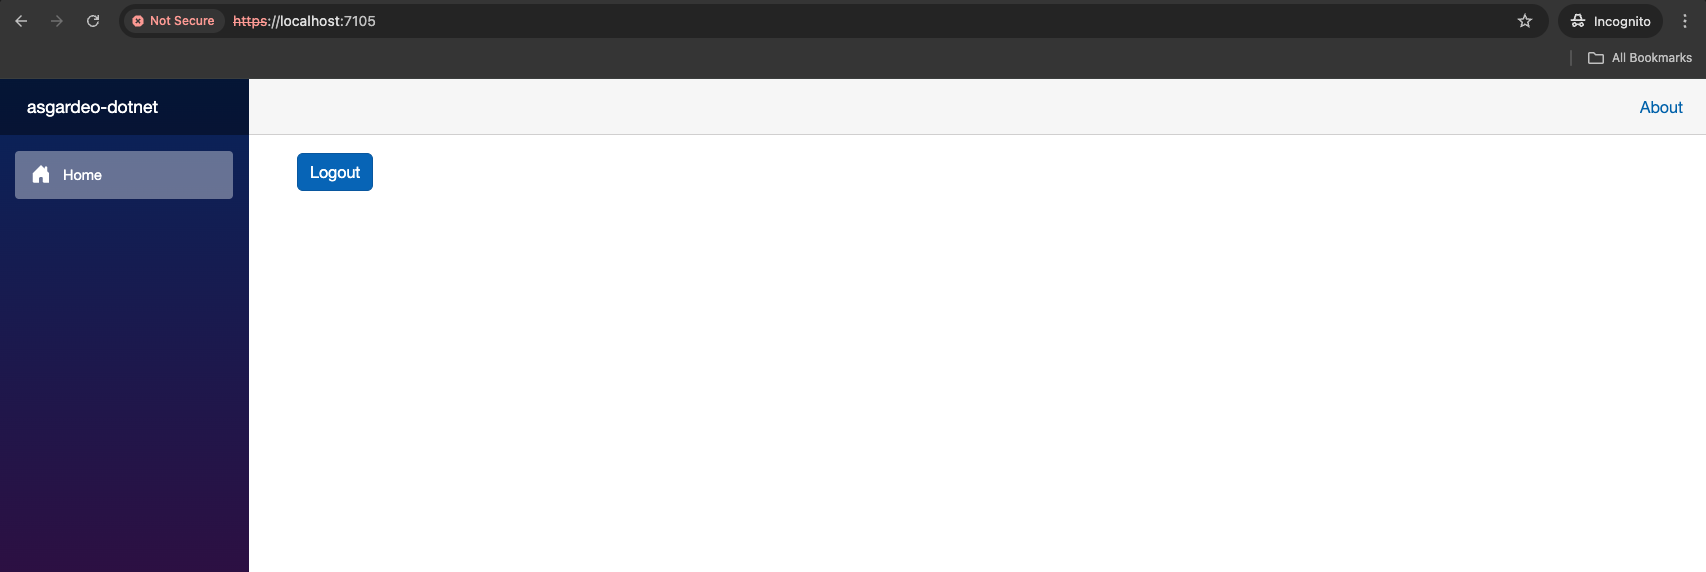
At this stage, you should have already created a test user in WSO2 Identity Platform, as outlined in the prerequisites section. Now can enter the username and password of the test user to the login screen.
If the login is successful, you should be able to see the application home page with the logout button as shown below.
Now that we secured the routes within the application, in the next step we will implement the functionality to display the logged in user's details once they are authenticated.