Register and manage agents
In today’s rapidly evolving AI-driven environments, effective management of AI agents is essential to ensure security, compliance, and operational efficiency. AI agents act autonomously to perform various tasks, and thus require well-defined lifecycle management from creation to retirement. WSO2 Identity Platform provides a comprehensive framework to help you create, configure, monitor, and securely manage the entire lifecycle of your AI agents.
This guide walks you through key processes involved in managing AI agents, including identity creation, credential issuance, role assignment, deployment, monitoring, and eventual deactivation or deletion. Following these best practices ensures your AI agents operate reliably within your organizational security policies and governance standards.
Understanding agent types
WSO2 Identity Platform supports two categories of AI agents based on whether they require user authentication.
Agents with user login
These are AI agents that allow users to log in to the agent. When users log in, these agents can act on behalf of authenticated users and access user-specific resources. Users must provide explicit consent before the agent can perform actions on their behalf. WSO2 Identity Platform automatically creates an OAuth/OIDC application for these agents to enable secure user authentication and authorization flows.
Agents with user login come in two variants:
-
Interactive agents: These agents require constant user interaction throughout their operation. Examples include:
- Chatbots that respond to user queries in real-time
- AI assistants that help users complete tasks
- Conversational interfaces
Interactive agents use the OAuth
authorization_codegrant flow with PKCE (Proof Key for Code Exchange) to authenticate users and get access tokens. -
Background agents: These agents perform tasks on behalf of users but operate asynchronously without requiring constant user interaction. Examples include:
- Scheduled report generators
- Notification services
- Batch processing systems that work with user data
Background agents use CIBA (Client Initiated Backchannel Authentication) flow. This flow lets the agent start authentication through an out-of-band channel (such as email or SMS). The user provides consent asynchronously.
AI agent lifecycle Management
-
Create Agent Identity
Begin by defining your AI agent’s identity. This includes setting a clear and descriptive name, a detailed description that outlines its purpose, and specifying the operational context such as the environment or systems it will interact with. A well-defined identity helps in tracking and managing agents effectively throughout their lifecycle.
-
Generate Credentials
Issue secure authentication credentials necessary for the AI agent to authenticate with your systems. These may include client ID and secret pairs, private key certificates, or other cryptographic credentials. Secure generation and handling of these credentials are critical to prevent unauthorized access.
-
Assign Roles and Permissions
Configure granular access controls by assigning appropriate roles and permissions to the agent. This step involves applying the principle of least privilege to ensure the agent only has the minimum access necessary to perform its functions, reducing potential security risks.
-
Integrate and Deploy
Integrate the authentication mechanism into the AI agent’s implementation code or runtime environment. Deploy the agent with the issued credentials, ensuring that it can securely authenticate and operate within the designated infrastructure.
-
Set Up Security Policies and Logging
Configure required security policies on resource servers that the agent accesses. This includes enforcing validation policies, access control rules, and enabling detailed audit and access logs. These logs provide traceability for agent actions and support compliance audits.
-
Monitor Agent Activities
Continuously monitor the agent’s activities through audit logs and monitoring dashboards. Set up alerts for any suspicious or anomalous behavior, enabling rapid detection and mitigation of potential security incidents or operational failures.
-
Retire and Decommission
When an AI agent is no longer needed, it’s important to properly retire and decommission it to prevent unauthorized access and ensure compliance.
Registering an AI agent
Registering an AI agent is the first step to bring an autonomous system into your WSO2 Identity Platform organization for controlled access and governance.
- On the WSO2 Identity Platform Console, go to Agents.
- Click + New Agent.
-
Enter the following details:
- Name: A descriptive name for your AI agent for human-readable display purposes
- Description (optional): Purpose and functionality of the agent
-
If you want to allow users to log in to this agent, enable the Allow users to log in to this agent checkbox. This will configure OAuth/OIDC authentication for the agent.
- If you enabled the user login option, select the agent type:
- Interactive Agent: Select this if the agent requires constant user interaction (e.g., chatbots, AI assistants). You will need to provide:
- Callback URL: The OAuth redirect URI where the agent will receive authorization codes
- Background Agent: Select this if the agent operates autonomously without constant user interaction. You will need to configure:
- Authentication Request Expiry Time: Duration in seconds for which the CIBA authentication request remains valid
- Notification Channels: Select how users will be notified for authentication (Email, SMS, or both)
- Interactive Agent: Select this if the agent requires constant user interaction (e.g., chatbots, AI assistants). You will need to provide:
- Click Create to complete the registration.
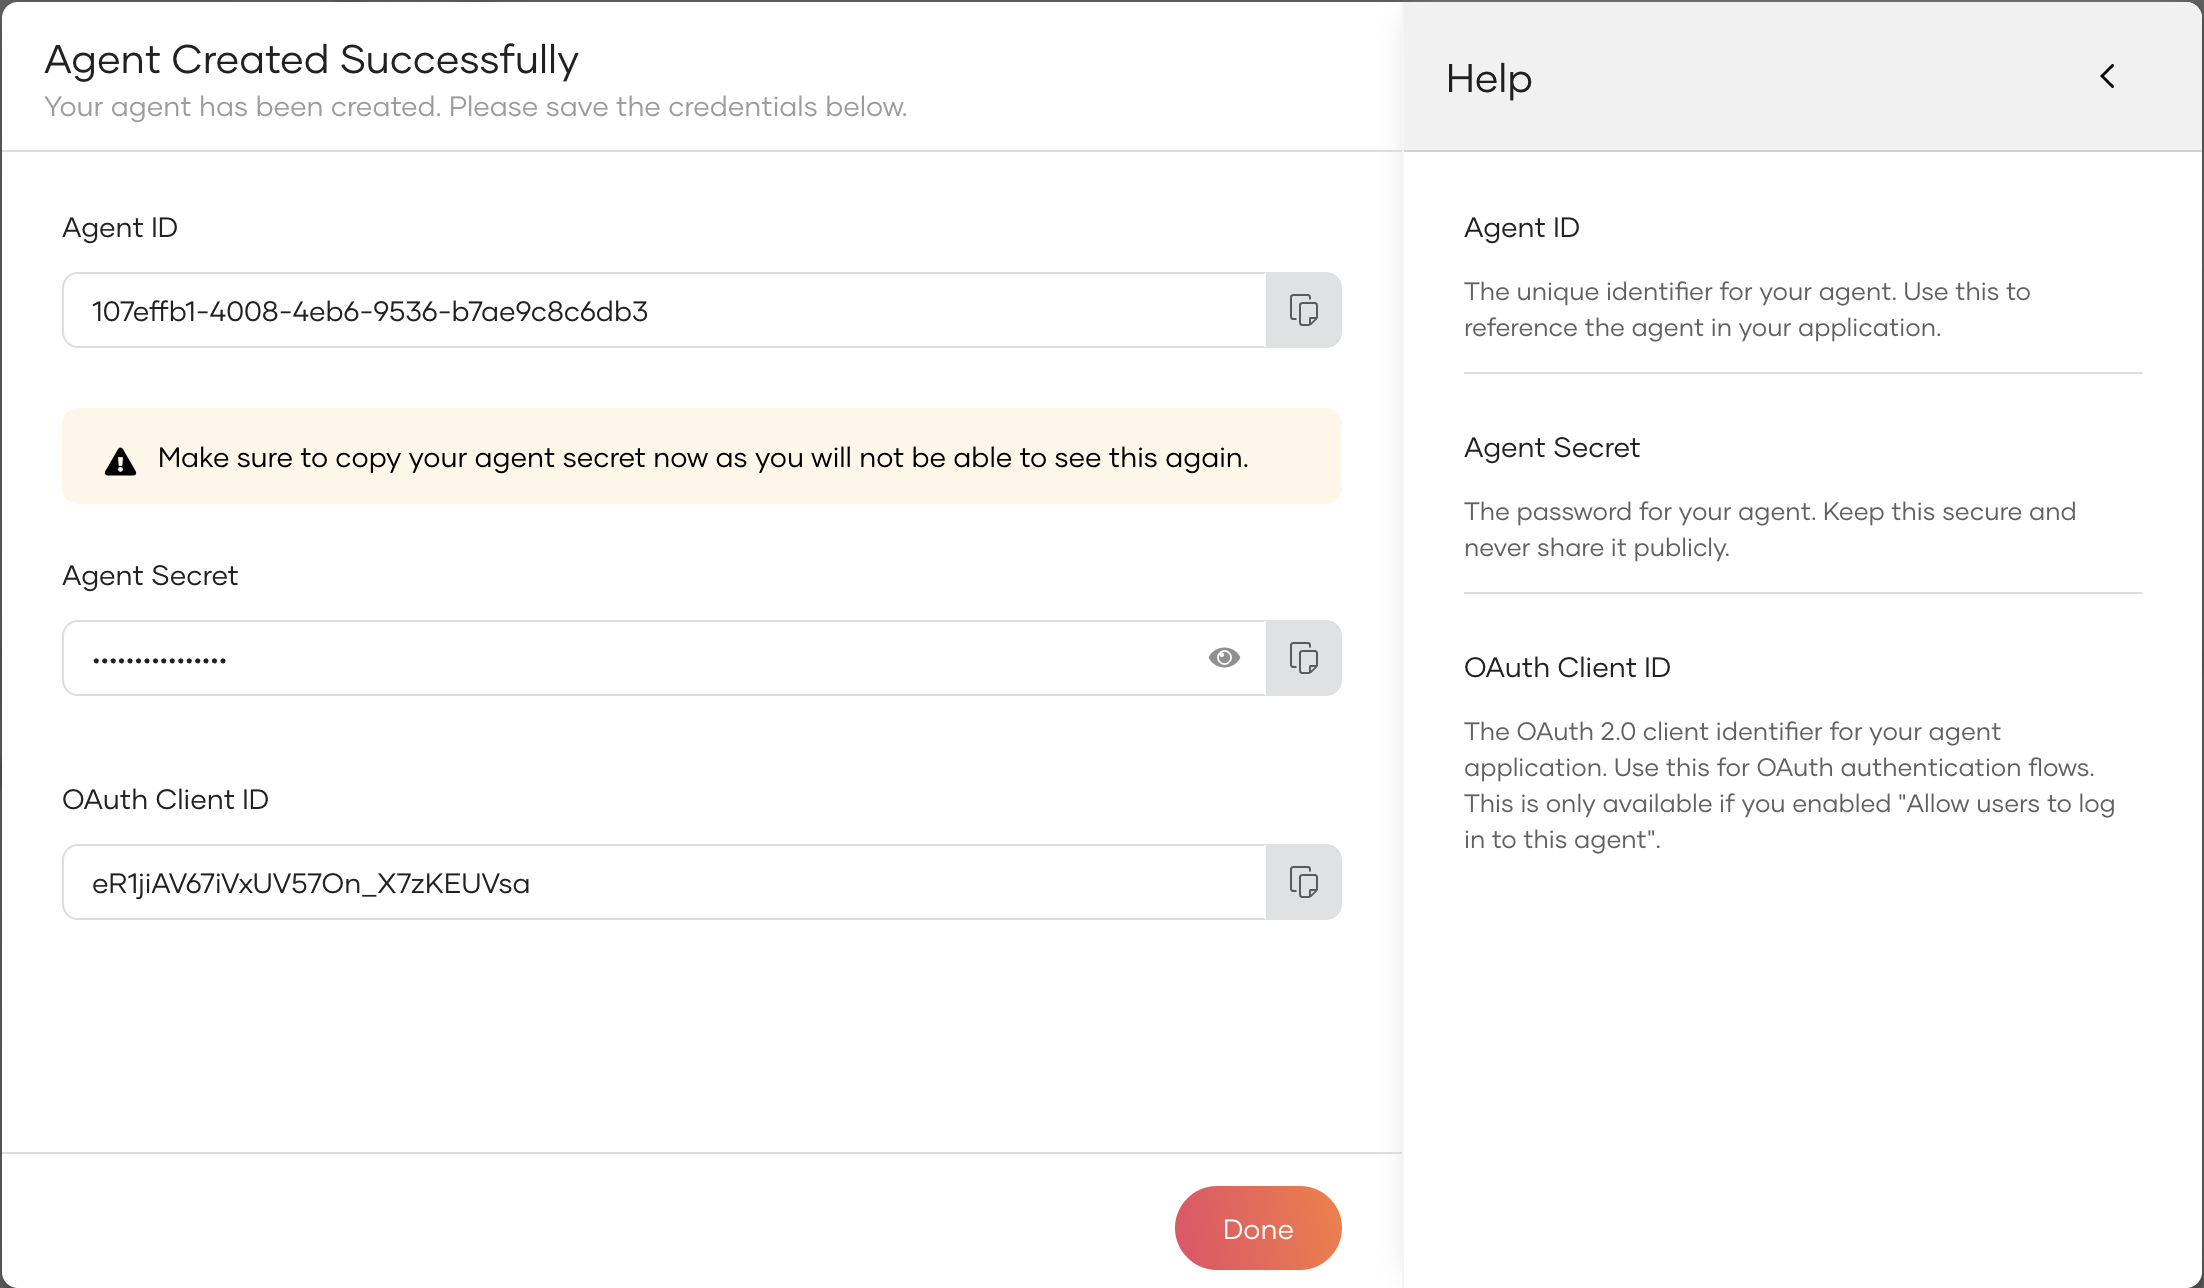
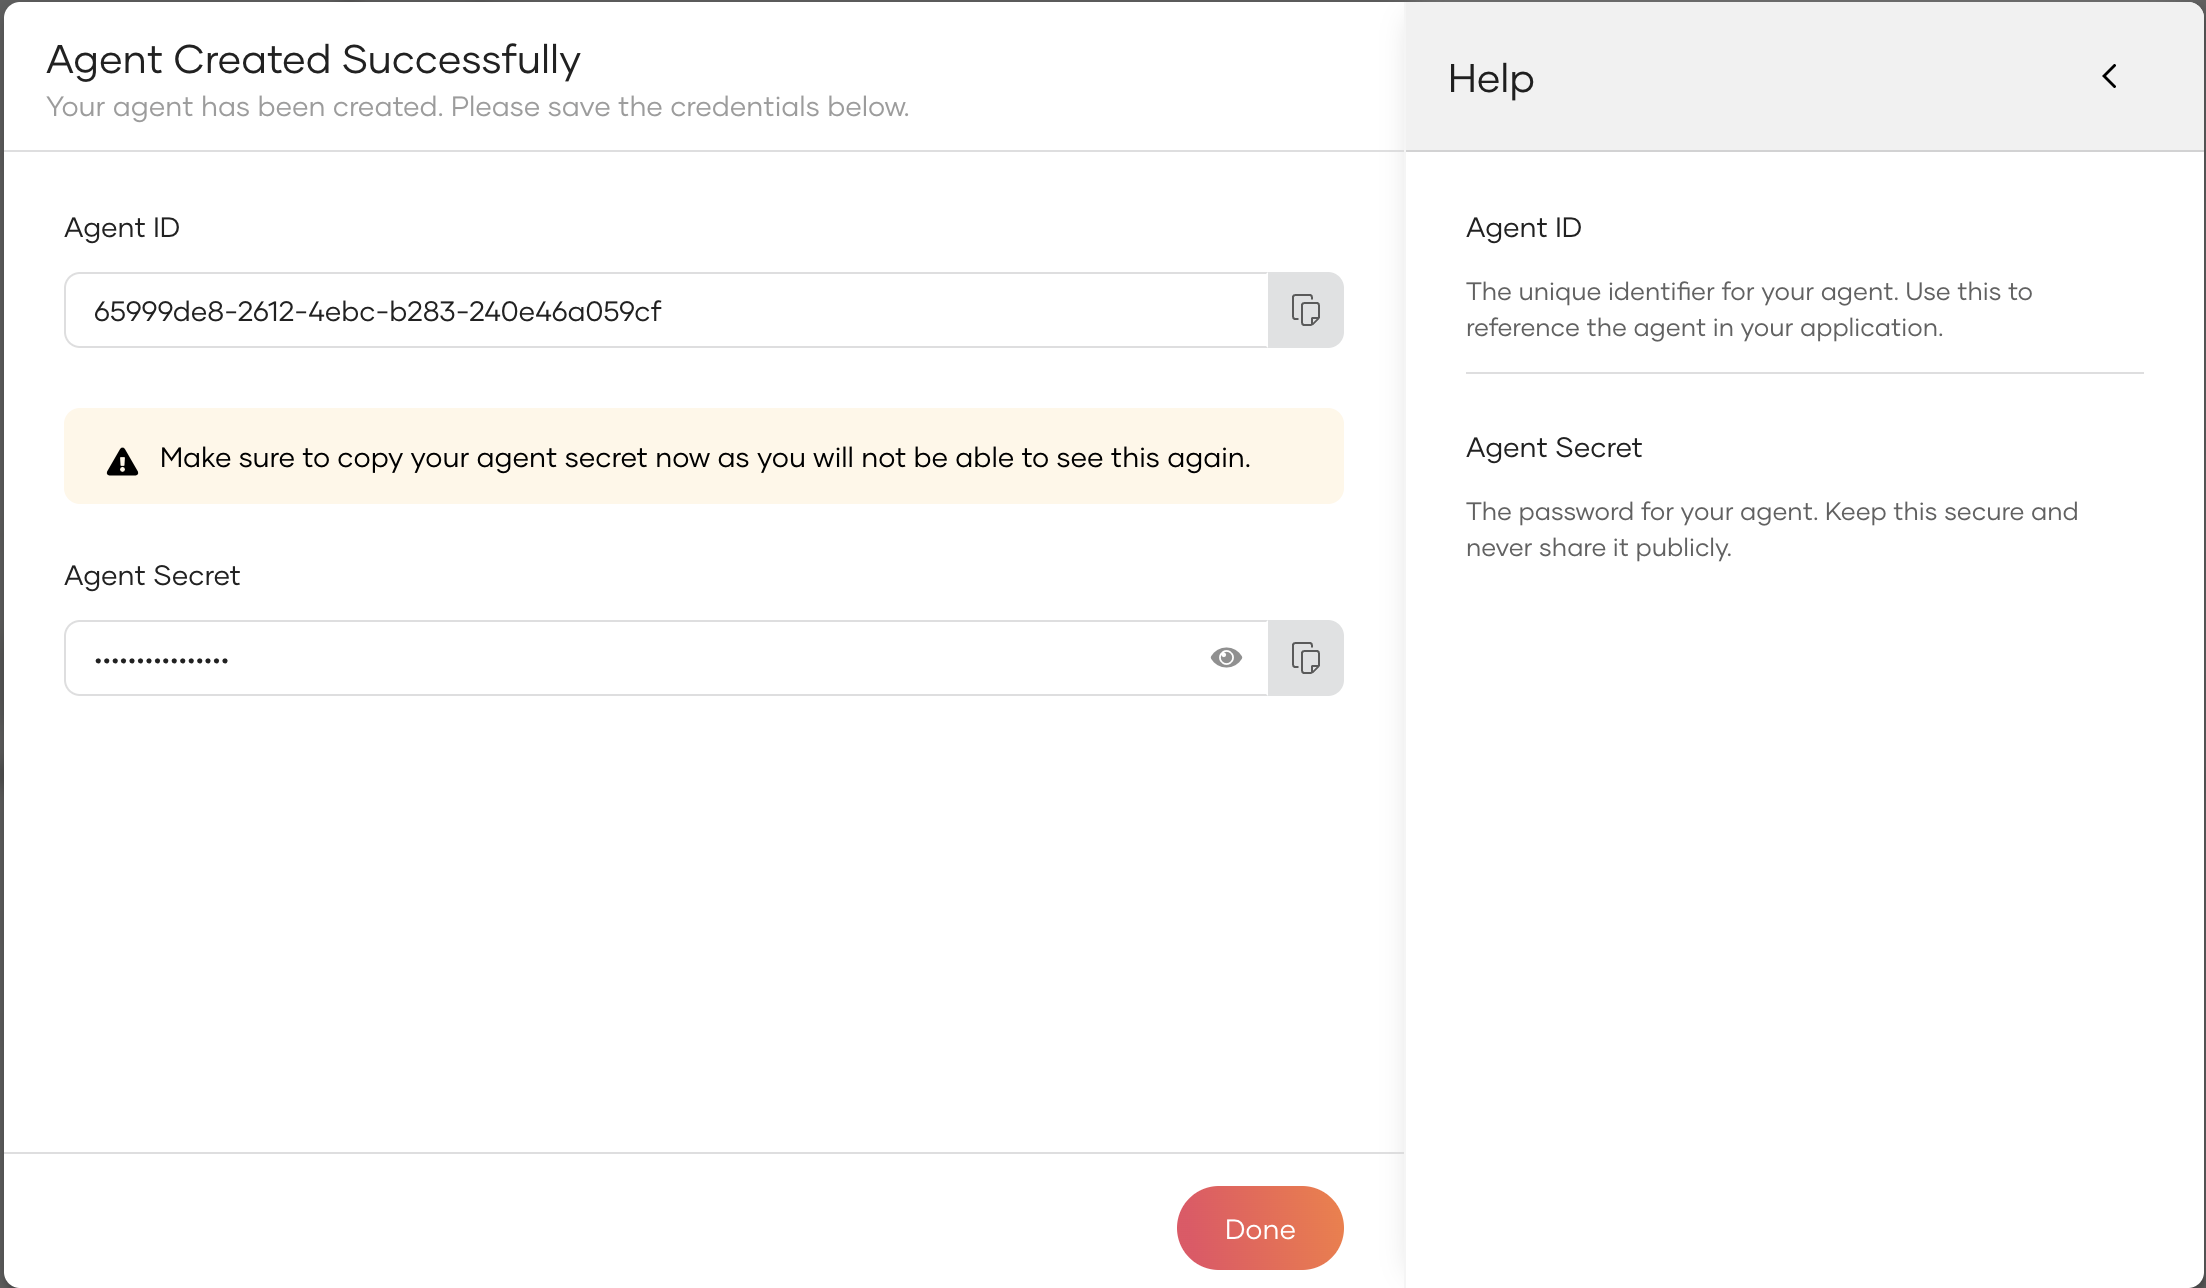
After successful registration, the agent receives a unique Agent ID that acts as its permanent identifier within the system. A secret credential is also issued at this point and is displayed only once. Be sure to store it securely for deployment.
For agents with user login enabled, an OAuth application is automatically created with the appropriate grant types configured:
- Interactive agents: Configured with
authorization_codeandrefresh_tokengrant types - Background agents: Configured with
urn:openid:params:grant-type:ciba(Client Initiated Backchannel Authentication) grant type
The success screen will display the Agent ID, Agent Secret (masked), and for agents with user login, the OAuth Client ID which can be used for OAuth/OIDC flows.
If needed, you can generate new credentials later. For detailed information on managing credentials, refer to the Agent Credentials section.
Updating agent information
Keeping your AI agent’s information current ensures smooth operation and compliance.
- On the WSO2 Identity Platform Console, go to Agents.
- Select the AI agent to be updated from the list.
- In the General tab, modify the agent’s attributes such as name, description, etc. as needed.
- Click Update to save your changes.
Regular updates are recommended whenever there is a change in the agent’s role, purpose, or operational environment.
Deactivating an agent
Deactivation is a vital security control used to temporarily suspend an AI agent’s access and functionality without deleting its data. This can be useful during maintenance windows, incident investigations, or when an agent is no longer needed temporarily.
- On the WSO2 Identity Platform Console, go to Agents.
- Click on the AI agent you want to deactivate from the agent list.
- In the General tab, scroll down to the Danger Zone section.
- Turn on the toggle in Block Agent.
-
Confirm the action.
Warning
Deactivating an AI agent will immediately revoke all its active access tokens, rendering any existing sessions invalid. Furthermore, it prevents the agent from initiating any new authentication attempts, effectively halting its operations until it's reactivated.
Managing OAuth applications for agents with user login
When you create an agent with user login enabled, WSO2 Identity Platform automatically creates an OAuth/OIDC application to handle user authentication flows. This application is configured with appropriate grant types based on the agent type you selected.
To view and manage the OAuth application:
- On the WSO2 Identity Platform Console, go to Applications.
- Find the application that corresponds to your agent (typically named with your agent's ID).
-
You can configure additional settings such as:
- Access token expiry times
- Refresh token expiry times
- Allowed scopes
- Additional callback URLs (for interactive agents)
- CIBA notification settings (for background agents)
Note
Changes to the OAuth application settings will affect how the agent authenticates users. Ensure you understand the implications before modifying these settings.
Deleting an agent
Deleting an AI agent permanently removes the agent and all associated data, including credentials and configurations. For agents with user login enabled, the automatically created OAuth application will also be removed. This action is irreversible and should only be performed when you are certain that the agent is no longer needed.
- On the WSO2 Identity Platform Console, go to Agents.
- Select your AI agent from the list.
- Scroll down to the Danger Zone section.
- Click Delete agent.
-
Confirm the deletion when prompted.
Warning
For agents with user login enabled, deleting the agent will also delete the associated OAuth application. Any users or services relying on this application for authentication will lose access immediately.
Best practices
It's always recommended to follow these best practices to maintain security, reliability, and compliance when managing AI agents in your organization.
-
Apply the Principle of Least Privilege. Assign only the minimum permissions necessary for the agent to perform its tasks, limiting potential exposure.
-
Regularly Rotate Agent Credentials. Periodically update credentials to reduce the risk of compromise and maintain a robust security posture.
-
Monitor Agent Activities. Use audit logs and monitoring tools to continuously track agent actions. Regularly review the logs to identify any suspicious or unauthorized behavior and ensure the agent operates within expected parameters.
-
Securely Store Agent Secrets. Treat agent credentials as sensitive information, storing them in secure vaults or secrets managers, never in plain text.
-
Review Agent Access Periodically. Conduct regular audits of agent roles and permissions to ensure they remain appropriate as organizational needs evolve.
Once you establish the agent identity, agent credentials are key to the agent's authentication and authorization. For more details on managing agent credentials, see the Agent Credentials guide.