Add login with an OpenID Connect identity provider
You can add standard OpenID Connect (OIDC) login to your applications using an external OIDC Identity Provider (IdP) and enable users to log in with their external identities.
Follow this guide to register an OIDC IdP in WSO2 Identity Platform and add it to the login flow of your application.
Register WSO2 Identity Platform in the IdP
You need to register an OpenID Connect application with the external identity provider. Follow the identity provider's documentation to know how to register an OIDC application.
You can use the following URL as the callbackURL of the application.
Once you register an application, you will receive the following:- client_id (also known as
app_idorapplication_id) - client_secret (also known as
app_secret)
Check the documentation of the OIDC identity provider and get the following endpoints:
- Authorization Endpoint URL
- Token Endpoint URL
- User Info endpoint (optional)
- Logout endpoint (optional)
Register the OIDC IdP
Now, let's register the OIDC IdP in WSO2 Identity Platform.
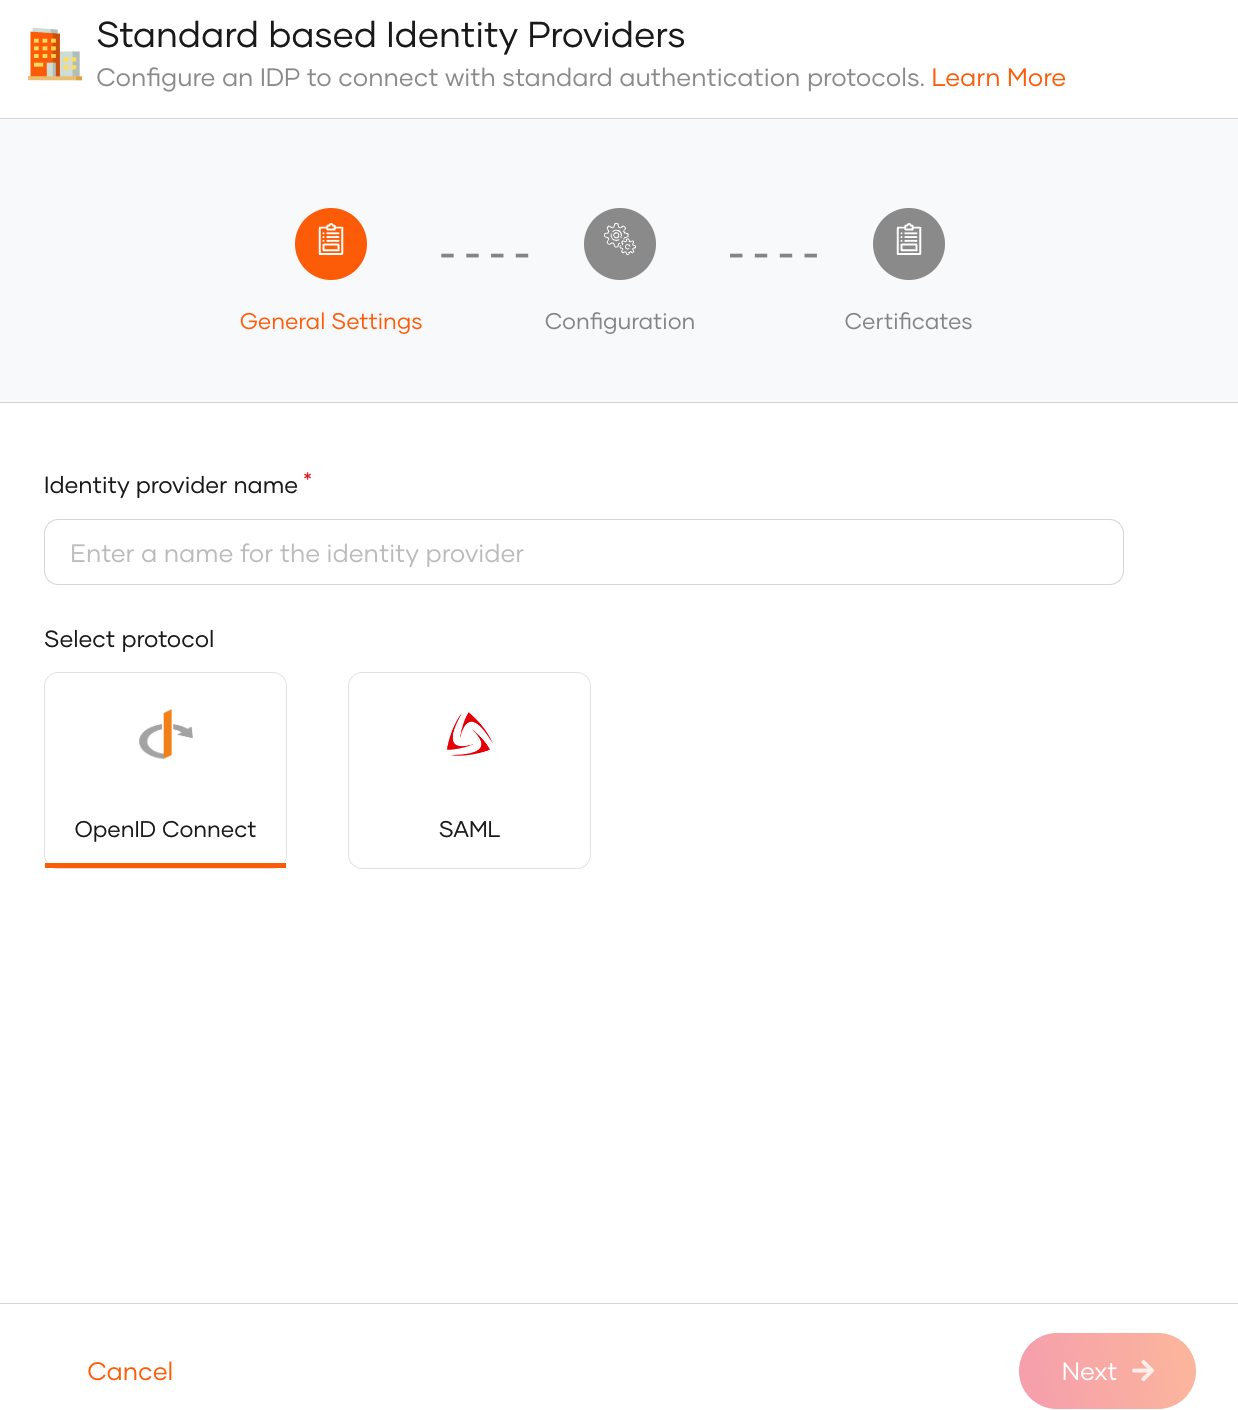
- On the WSO2 Identity Platform Console, click Connections.
- Click Create Connection and select Standard-Based IdP.
-
Provide a unique identity provider name, select OpenID Connect, and click Next.
-
Enter the following details of the external OIDC identity provider and click Next:
Parameter Description Client ID The client ID obtained from the external identity provider. Client secret The client secret obtained from the external identity provider. Authorization endpoint URL The authorization endpoint of the external identity provider. Token endpoint URL The token endpoint of the external identity provider. -
(Optional) Provide the mode of certificate configuration.
Note
You can either configure a JWKS endpoint or upload a certificate of the external party. This helps to validate the signature of the assertions sent by the external identity provider.
- JWKS endpoint: The JWKS endpoint of the external identity provider.
-
Use PEM certificate: Upload or paste the public certificate of the external identity provider. The certificate should be in PEM format.
If you have a certificate in other formats such as
.crt,.ceror.der, expand here to see how you can convert them to PEM format using OpenSSLConvert CRT to PEM
Convert CER to PEM:Convert DER to PEM:
-
Click Finish to complete the registration.
Note
Once the OIDC identity provider is created, you can configure additional OIDC settings from the Settings tab.
WSO2 Identity Platform requests for the openid scope from the external identity provider. If you need more attributes from the external identity provider, you can configure scopes from the Settings tab.
Enable the OIDC IdP for login
Before you begin
You need to register an application with WSO2 Identity Platform. You can register your own application or use one of the sample applications provided.
-
On the WSO2 Identity Platform Console, go to Applications.
-
Select your application, go to the Login Flow tab and add OIDC identity provider from your preferred editor:
To add OIDC identity provider login using the Classic Editor:
-
If you haven't already defined a sign-in flow, click Start with Default configuration to get started.
-
Click Add Authentication on the step, select your OIDC identity provider, and click Add.

To add OIDC identity provider login using the Visual Editor:
-
Switch to the Visual Editor tab, by default the
Username & Passwordlogin flow will be added onto the Visual Editor's workspace. -
Click on
+ Add Sign In Optionto add a new authenticator to the same step and select your OIDC identity provider connection.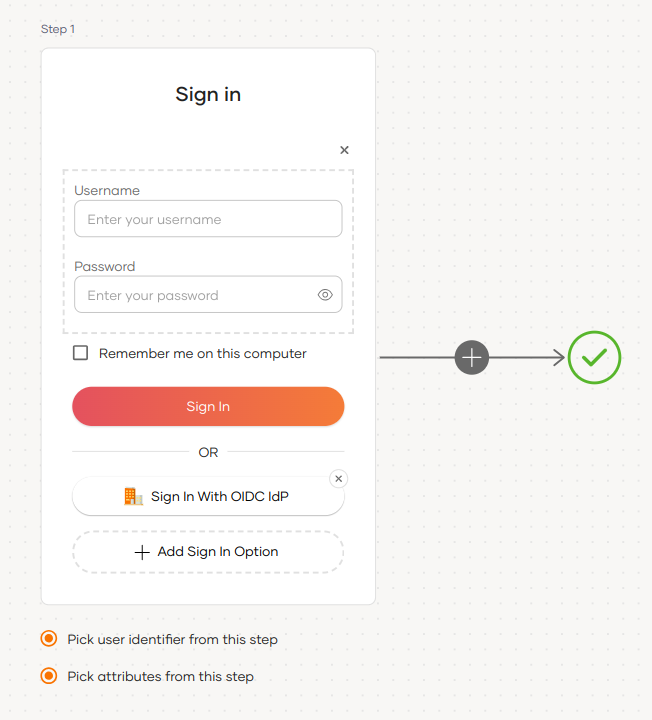
Recommendations
It is recommended to add your social and enterprise connections to the first authentication step as they are used for identifying the user.
-
-
Click Update to save your changes.
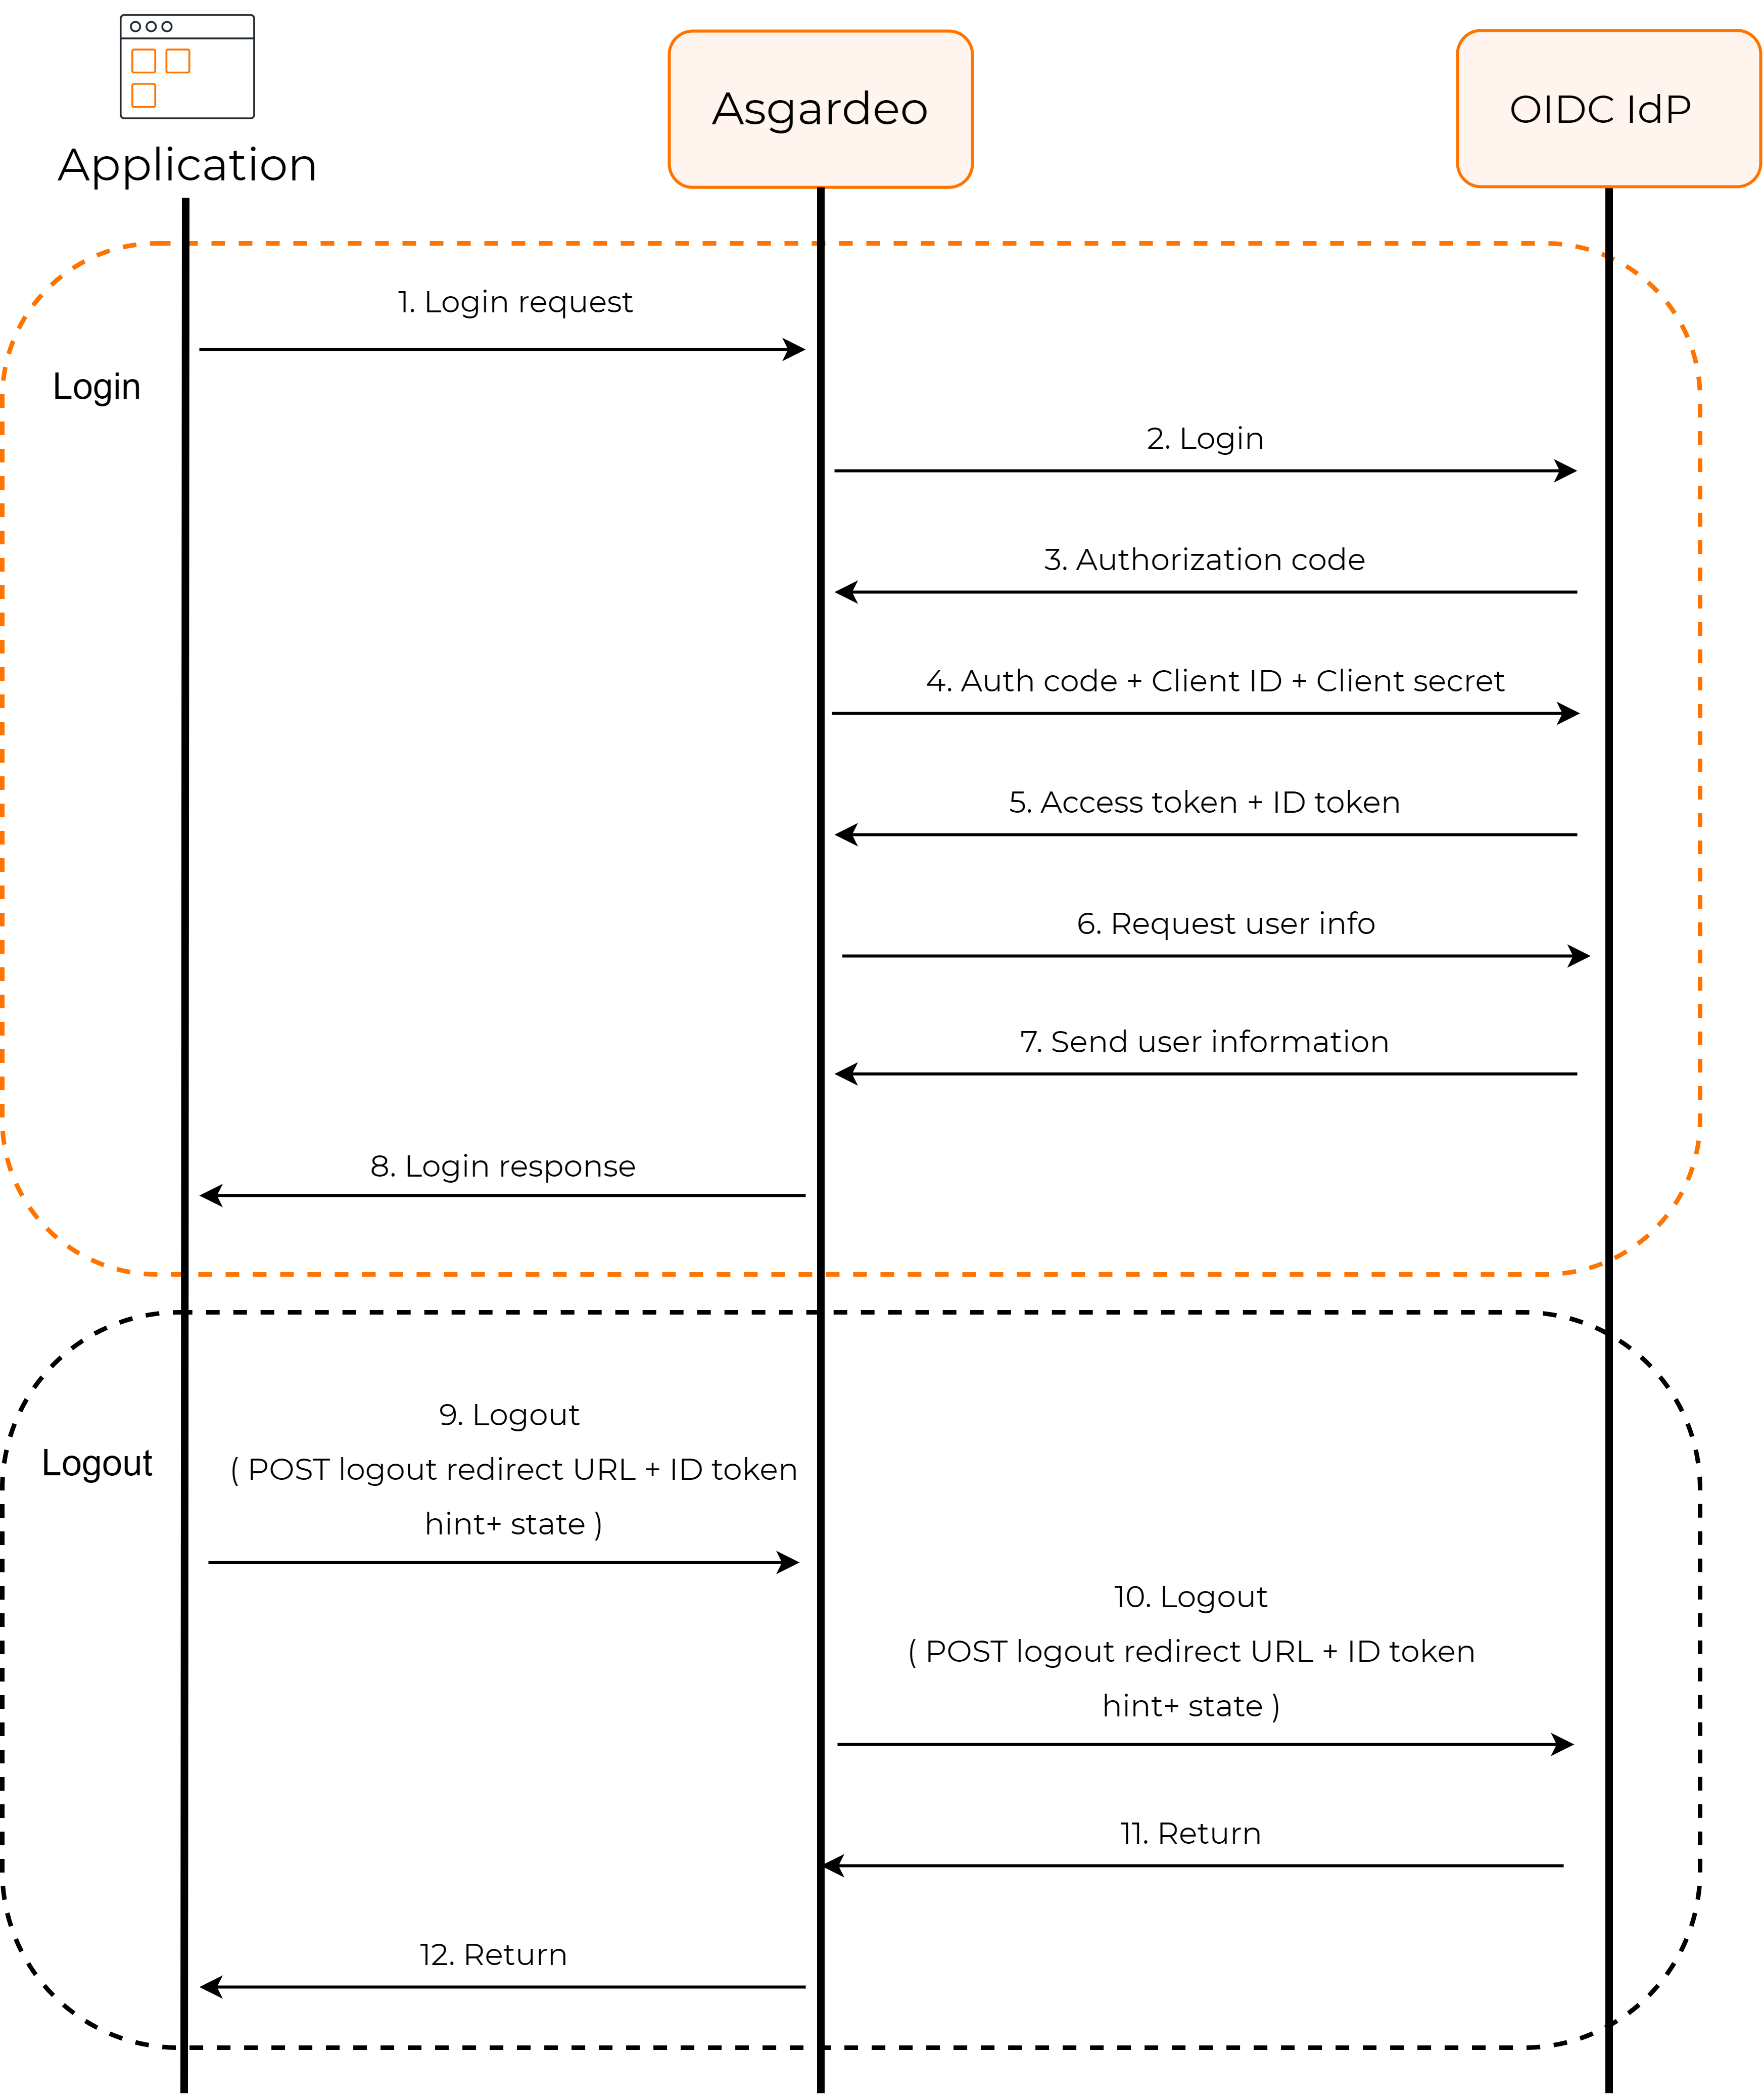
How it works
To provide this login capability, WSO2 Identity Platform uses the standard OpenID Connect with authorization code flow underneath. For an application, this flow works as follows:
Configure connection
-
To learn more about other configurations available for the connection, refer to the add federated login documentation.
-
To learn more about OIDC settings available for the IdP, refer to the OIDC settings documentation.