Add login and logout to your app
2 min
Next, let's add login and logout features to your Angular app. Angular uses services to access authentication data, and we can inject the OAuthService into your components to manage user authentication. The OAuthService provides methods for logging in and out, checking the user's authentication status, and retrieving access tokens. The key methods you will use are initLoginFlow() for signing in and revokeTokenAndLogout() for signing out. You can use these methods directly within your Angular components to trigger login and logout actions.
Replace the existing content of the app.component.ts file with following content.
Tip
For better organization, you can create separate components for different purposes, such as login and home pages. However, for simplicity, we are using the default component in this example.
import { Component } from '@angular/core';
import { RouterOutlet } from '@angular/router';
import { OAuthService } from 'angular-oauth2-oidc';
import { CommonModule } from '@angular/common';

@Component({
  selector: 'app-root',
  standalone: true,
  imports: [RouterOutlet, CommonModule],
  templateUrl: './app.component.html',
  styleUrl: './app.component.css'
})

export class AppComponent {
  title = 'wso2-angular';
  isAuthorized = this.oAuthService.hasValidAccessToken();

  constructor(private oAuthService: OAuthService) {

  }

  login() {
    this.oAuthService.initLoginFlow();
  }

  logout() {
    this.oAuthService.revokeTokenAndLogout();
  }
}
Once you've defined these methods in app.component.ts, update the corresponding HTML template in app.component.html by modifying the lines below:
<button *ngIf="!isAuthorized" (click)="login()">Login</button>

<button *ngIf="isAuthorized" (click)="logout()">Logout</button>
Let’s look into the underlying details of what’s happening here.
The AppComponent leverages the OAuthService, which was initialized earlier in the ApplicationConfig using authConfig, to access various methods and attributes provided by the SDK, such as initLoginFlow(), revokeTokenAndLogout(), and user-specific attributes. The AppComponent defines its own methods, like login() and logout(), which make use of these SDK methods.
In app.component.html, these methods are tied to button click events. The template also dynamically renders content based on the user's authentication status. It checks for the presence of the username attribute in the session to determine if the user is authenticated. If username is available, indicating that the user is logged in, the "Logout" button is displayed and triggers the logout() method. Otherwise, the "Login" button is shown, which initiates the login process via login().
Save the changes and re-run the application.
Visit your app's homepage at http://localhost:4200.
Initiate Sign In
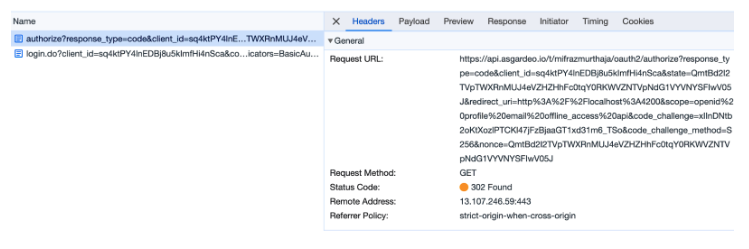
Clicking on the login button will initiate an OIDC request. You can observe this authorization request in the browser's DevTools. To do so, right-click on the application, click "Inspect," switch to the "Network" tab, and in the filter input, type "authorize." Then, click on the Login button to see the details of the request.
Tip
The OpenID Connect specification offers several functions, known as grant types, to obtain an access token in exchange for user credentials. This example uses the authorization code grant type. In this process, the app first requests a unique code from the authentication server, which can later be used to obtain an access token.
WSO2 Identity Platform will receive this authorization request and respond by redirecting the user to a login page to enter their credentials.
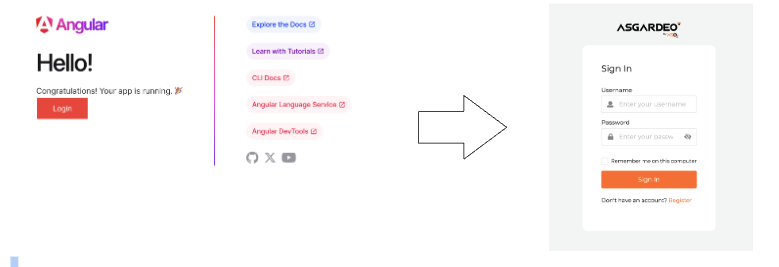
At this stage, you need to create a test user in WSO2 Identity Platform to try out the application. Once you create a test user, you can enter the username and password of the test user to the login screen.
Tip
PKCE (Proof Key for Code Exchange) is an addition to the OAuth2 specification to make the authorization code more immune to replay attacks. It is enabled by default for public clients such as our single page Angular app.
If you want to disable PKCE for some reason, you can do so via following the steps below. However, disabling PKCE for public clients such as our single page Angular app is highly discouraged.
- Log in to the WSO2 Identity Platform console and select the application you created.
- Switch to the Protocol tab.
- Uncheck the Mandatory checkbox under PKCE section.
In this section, we have added login and logout features to our Angular app. In the next step, we will look into how to access the user attributes of the logged in user.