Self-service for owners and administrators
If you are an owner or an administrator in an WSO2 Identity Platform organization, go to the My Account portal to manage your information from anywhere.
You can perform the following activities on this portal: - Update profile information - Change password - View linked social accounts - View and revoke active sessions
Access My Account portal
You can access the My Account portal using the following URL:
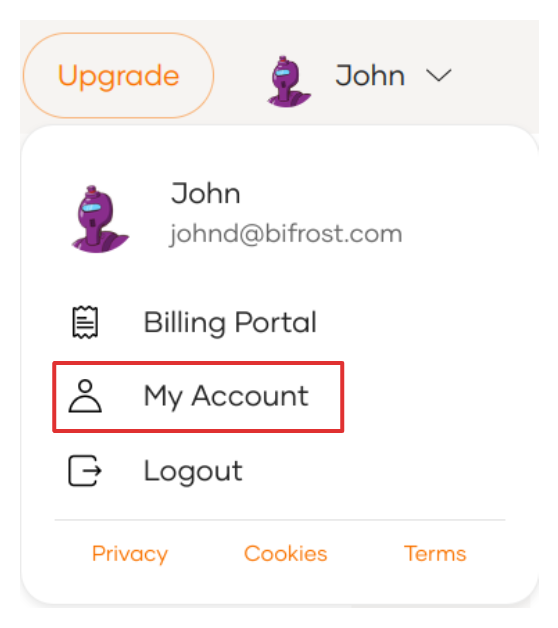
You can also switch to My Account from the WSO2 Identity Platform. Click your profile icon as shown below and select My Account.
You are now automatically signed in to the portal.
Update profile information
The user details displayed in your profile corresponds to the default attributes that are enabled for the organization.
To update your profile information via My Account:
- Sign in to the My Account portal.
- Click Personal Info to see the profile information.
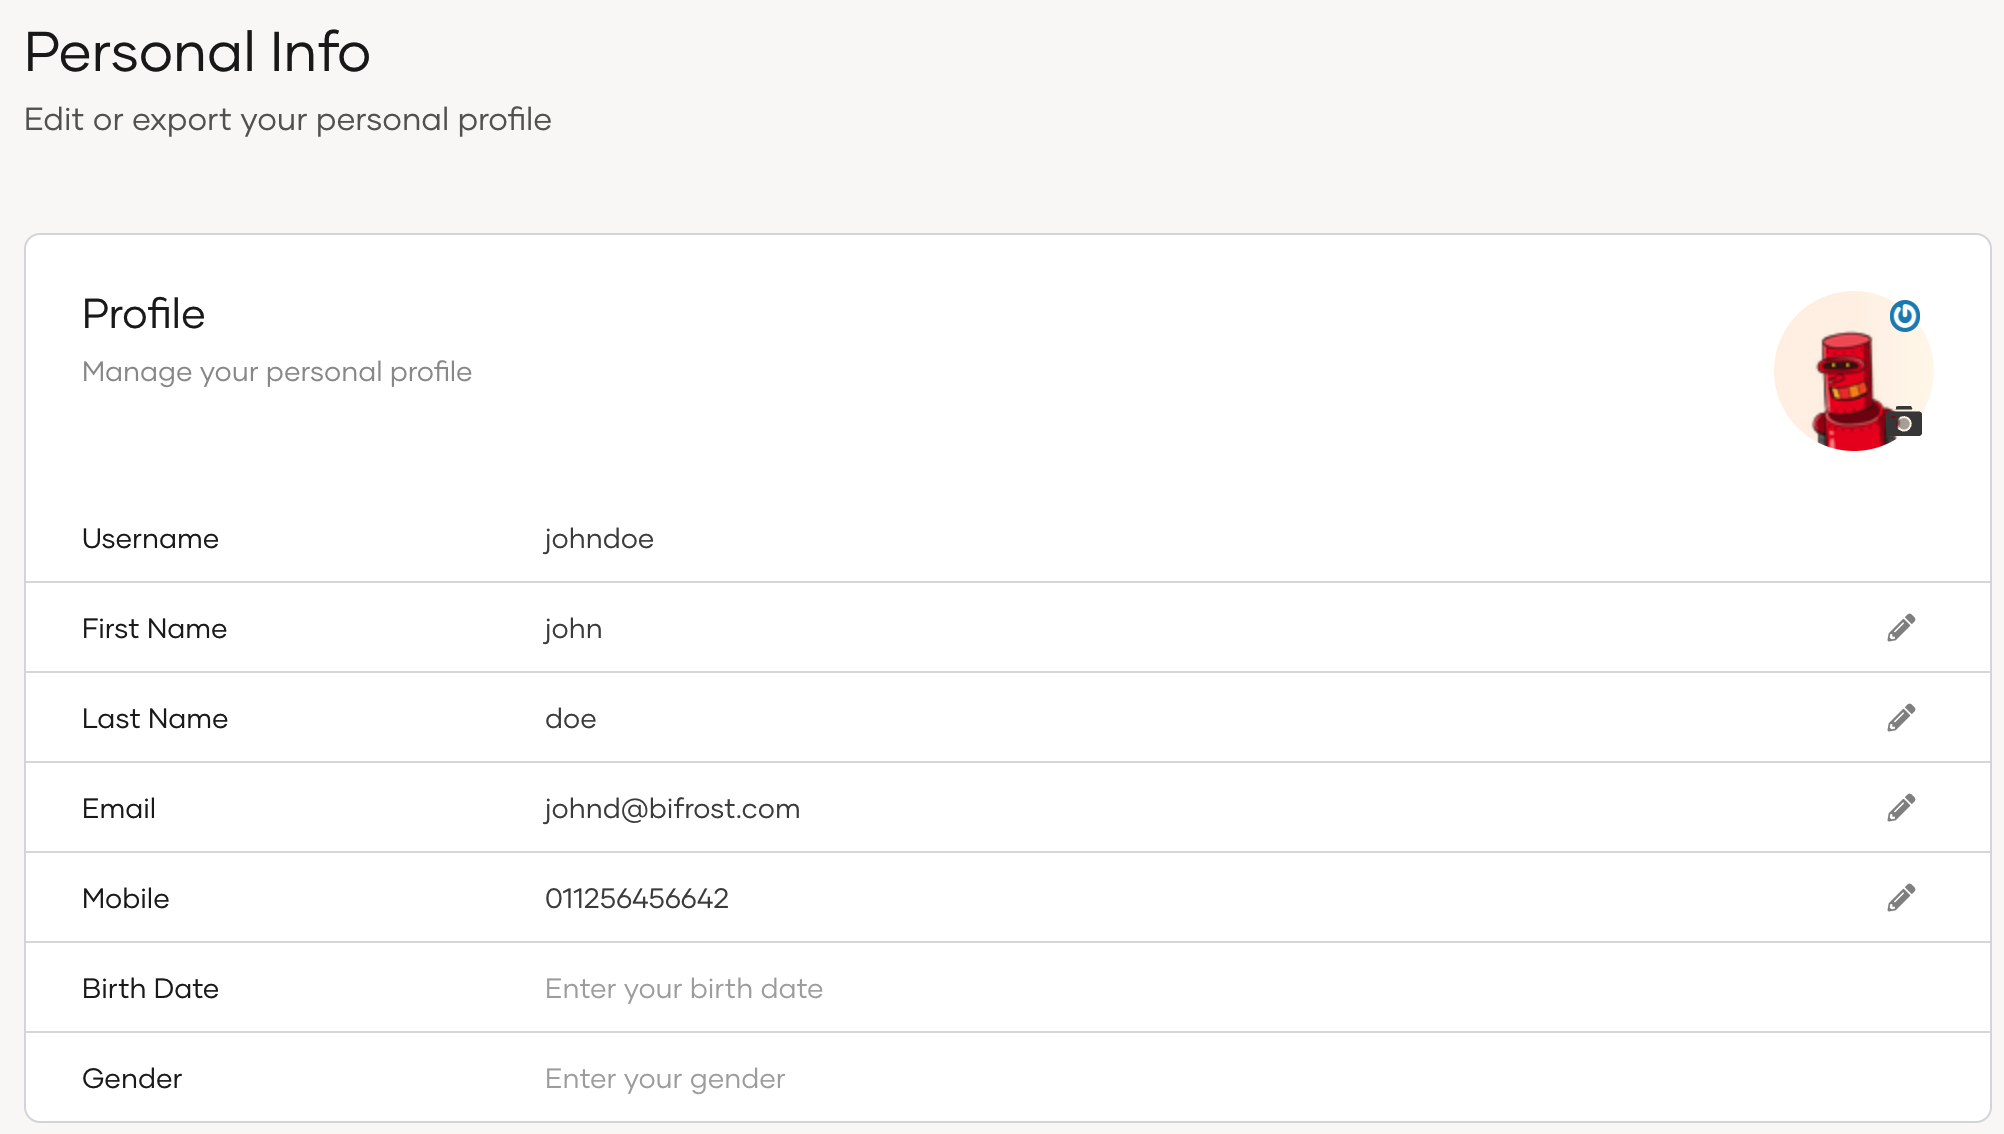
- If required, update the editable information.
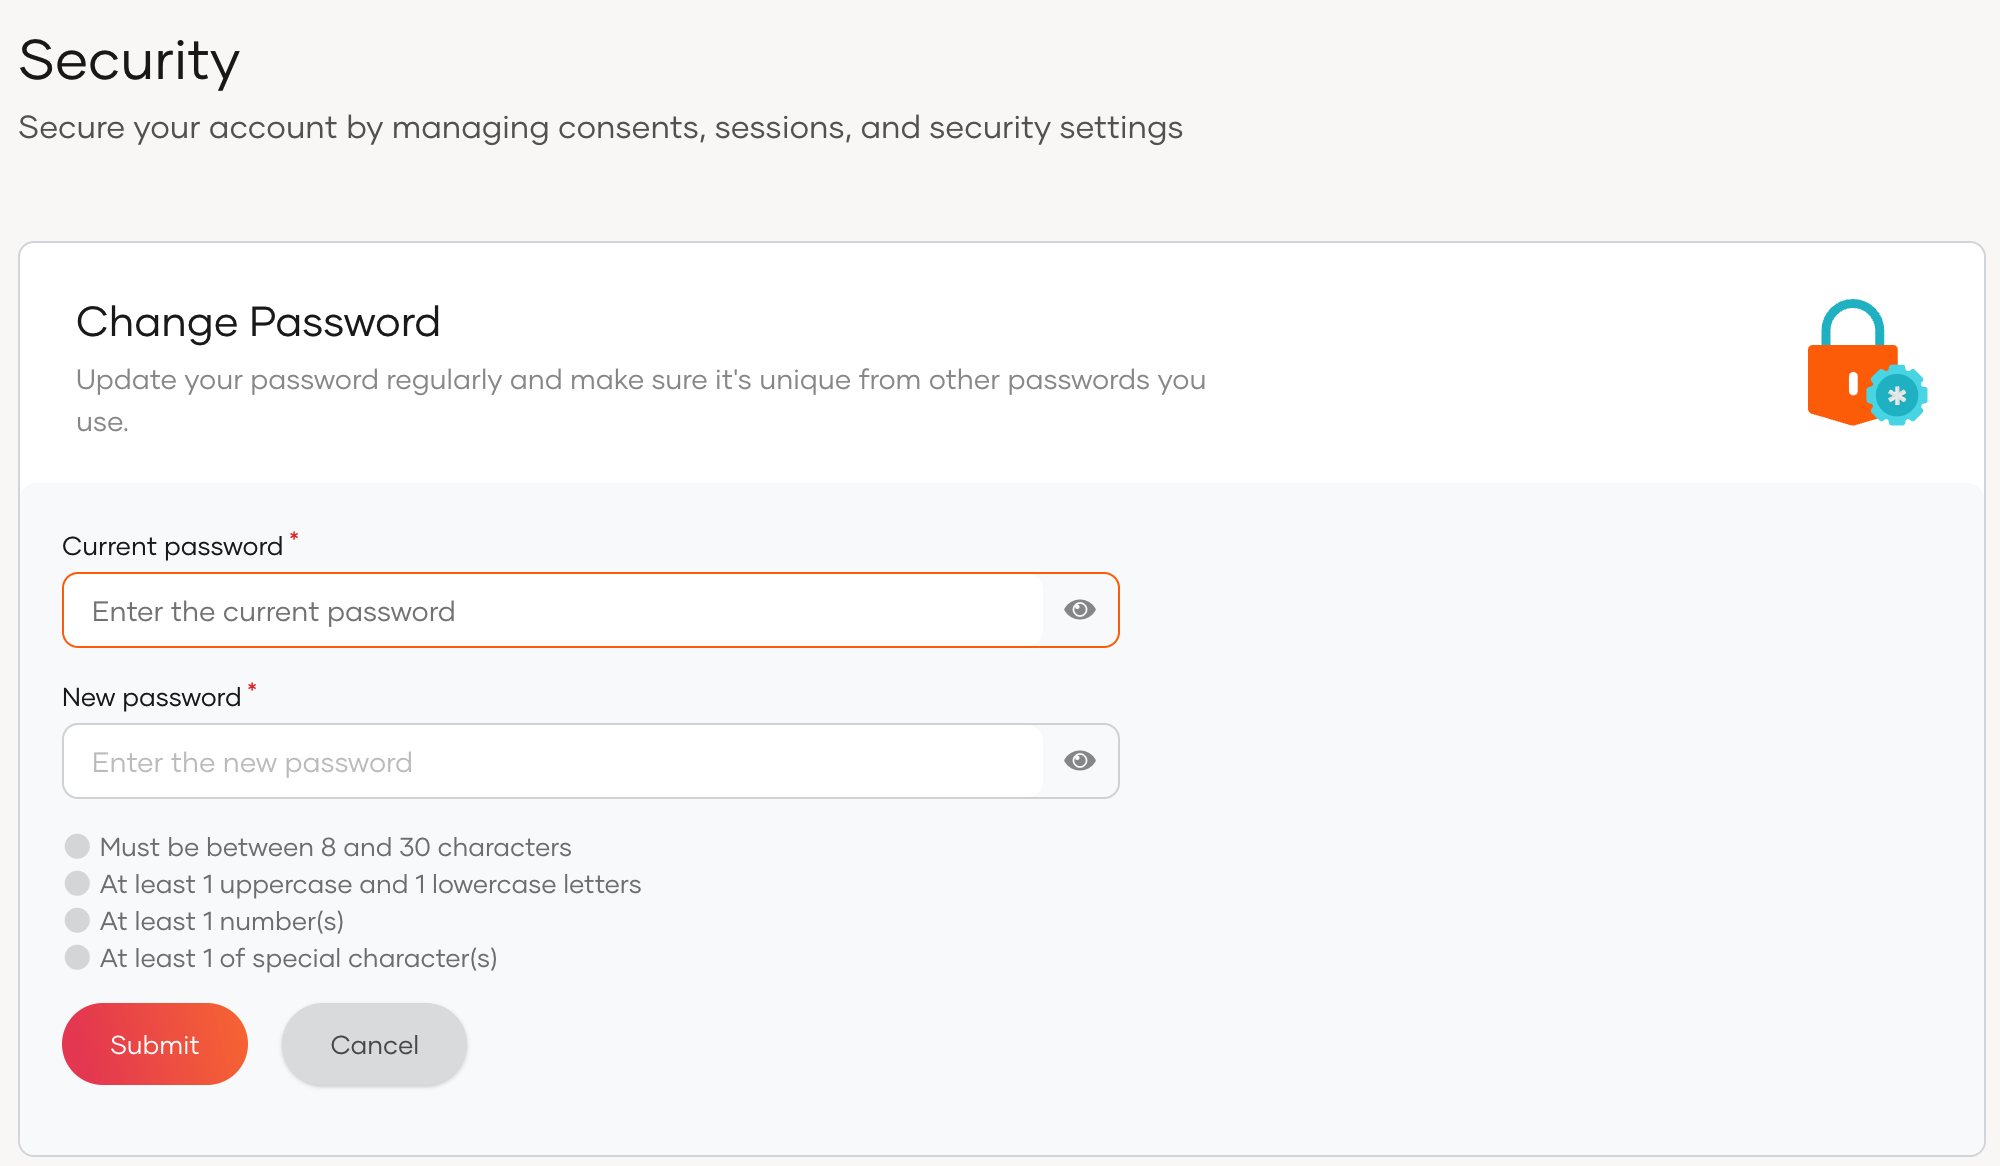
Change password
Users can use the My Account portal to change the password by following the steps below.
-
Sign in to the My Account portal.
-
Click Security and go to Change Password.
-
Click Change your password.
-
Enter the Current password and the New password.
-
Click Submit.
Note
- Alternatively, users can reset a forgotten password from the login page of an application.
- Users onboarded from a read-only remote user store do not have the capability of changing their password through the My Account portal.
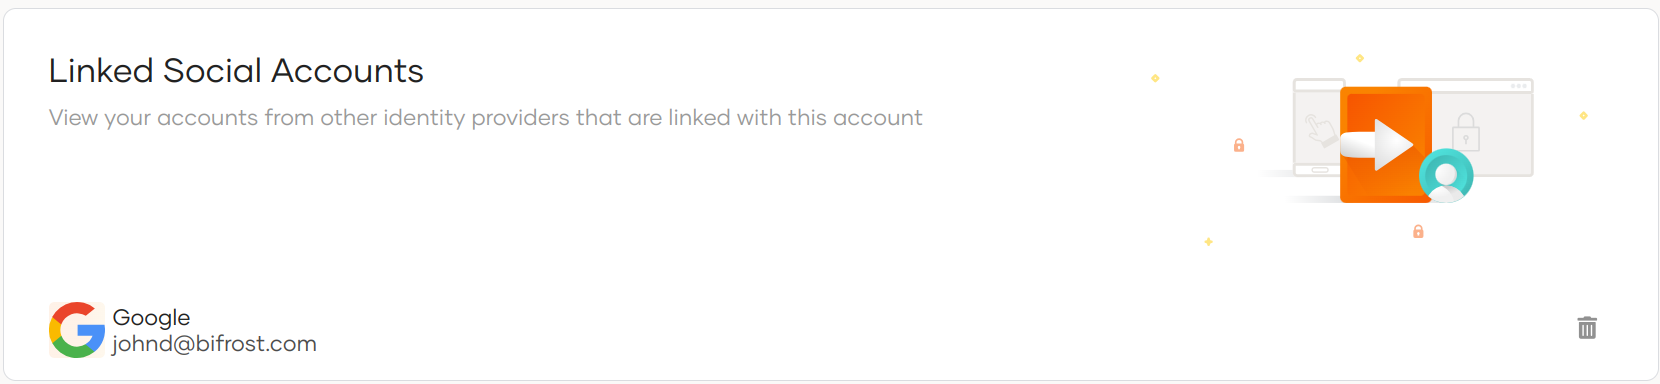
Manage linked social accounts
Users can use the My Account portal to change the password by following the steps below.
Given below are the steps to follow.
-
Sign in to the My Account portal.
-
Click Personal Info > External Logins.
-
To remove any of the linked accounts, click Remove.
Export profile information
Users can export profile information via the My Account portal as a JSON file by following the steps below.
-
Sign in to the My Account portal.
-
Click Personal Info and go to Export Profile.
-
Click Download the profile to export the user profile information.

Sample JSON file
This is a sample of the exported
jsonfile with an admin user's profile information.{ "user_profile": { "accountState": "UNLOCKED", "emailVerified": "true", "country": "SriLanka", "givenname": "firstname", "created": "2021-04-07T15:07:58.001440Z", "modified": "2023-04-25T04:31:05.838894Z", "emailaddress": "[email protected]", "userid": "36d2dd61-6e58-4b54-bfbe-f8621236c88b", "username": "[email protected]", "lastname": "Jerry" }, "linked_accounts": [ { "connection": "Google", "connectionId": "xxxx", "linkedAccountId": "xxxx", "isExternalConnection": true } ] }
Manage login sessions
Users can manage their own sessions via My Account by following the steps below:
-
Sign in to the My Account portal.
-
Go to Security and go to Active Sessions. This section lists all the active login sessions of the user.
-
Click Show more on an individual session to get more details on it.
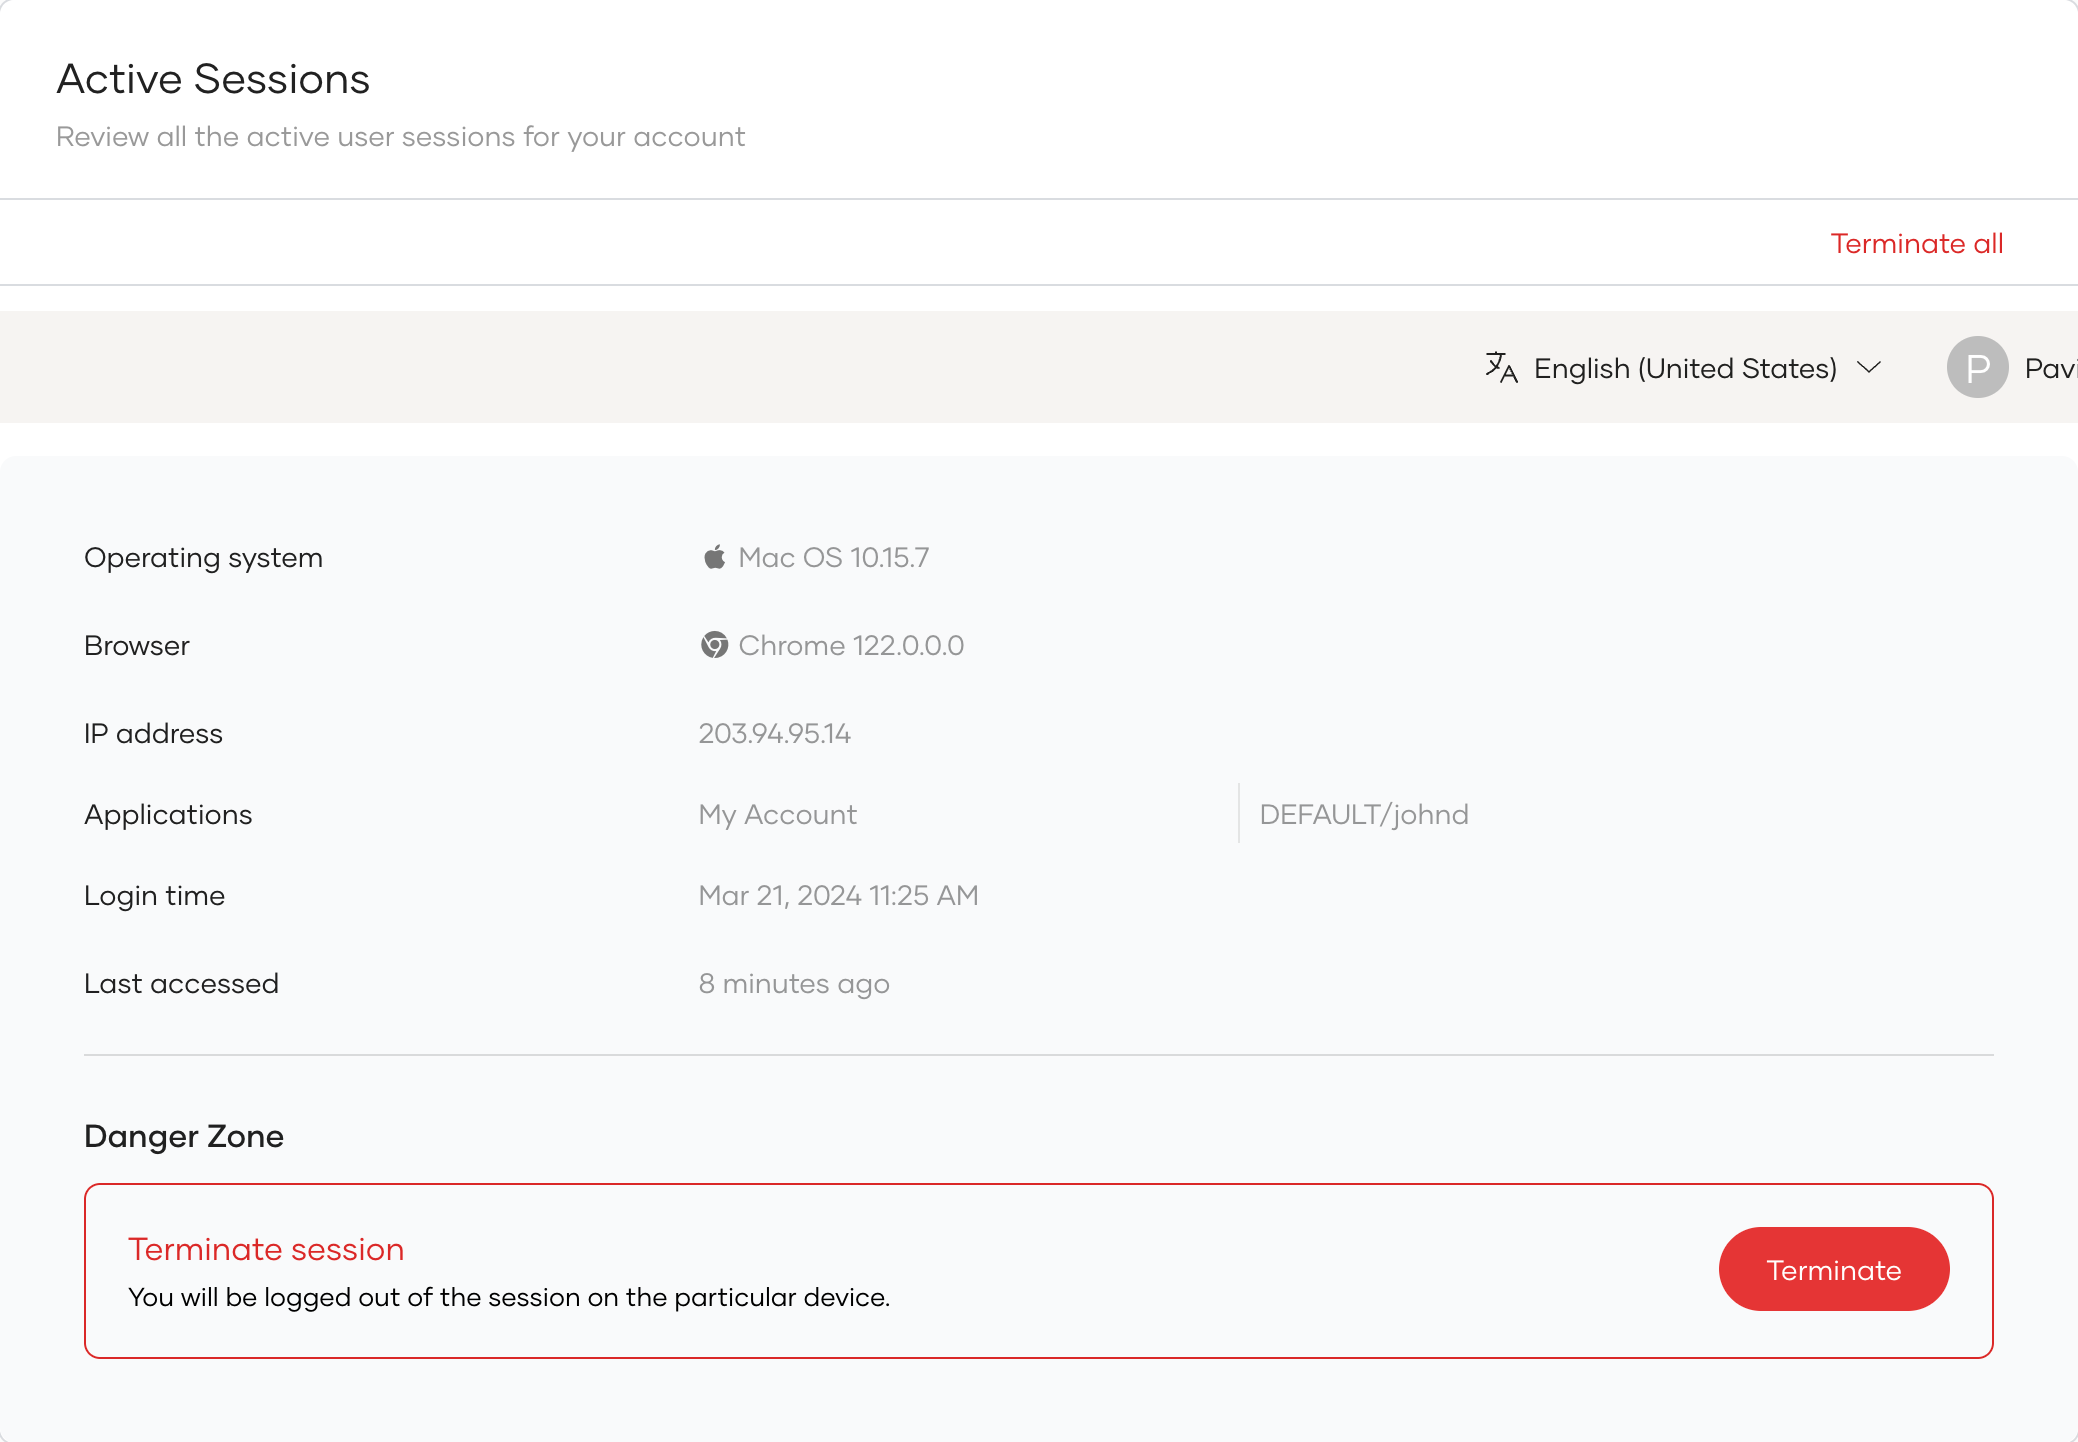
-
To terminate sessions, users can do one of the following:
-
Click Terminate on a selected session to terminate only that session.
-
Click Terminate all on the upper-right corner to terminate all active sessions.
-
Enroll TOTP for WSO2 Identity Platform users
If you, as an administrator or an organization owner, want to register an authenticator app for generating OTP values, you can configure it via the My Account portal.
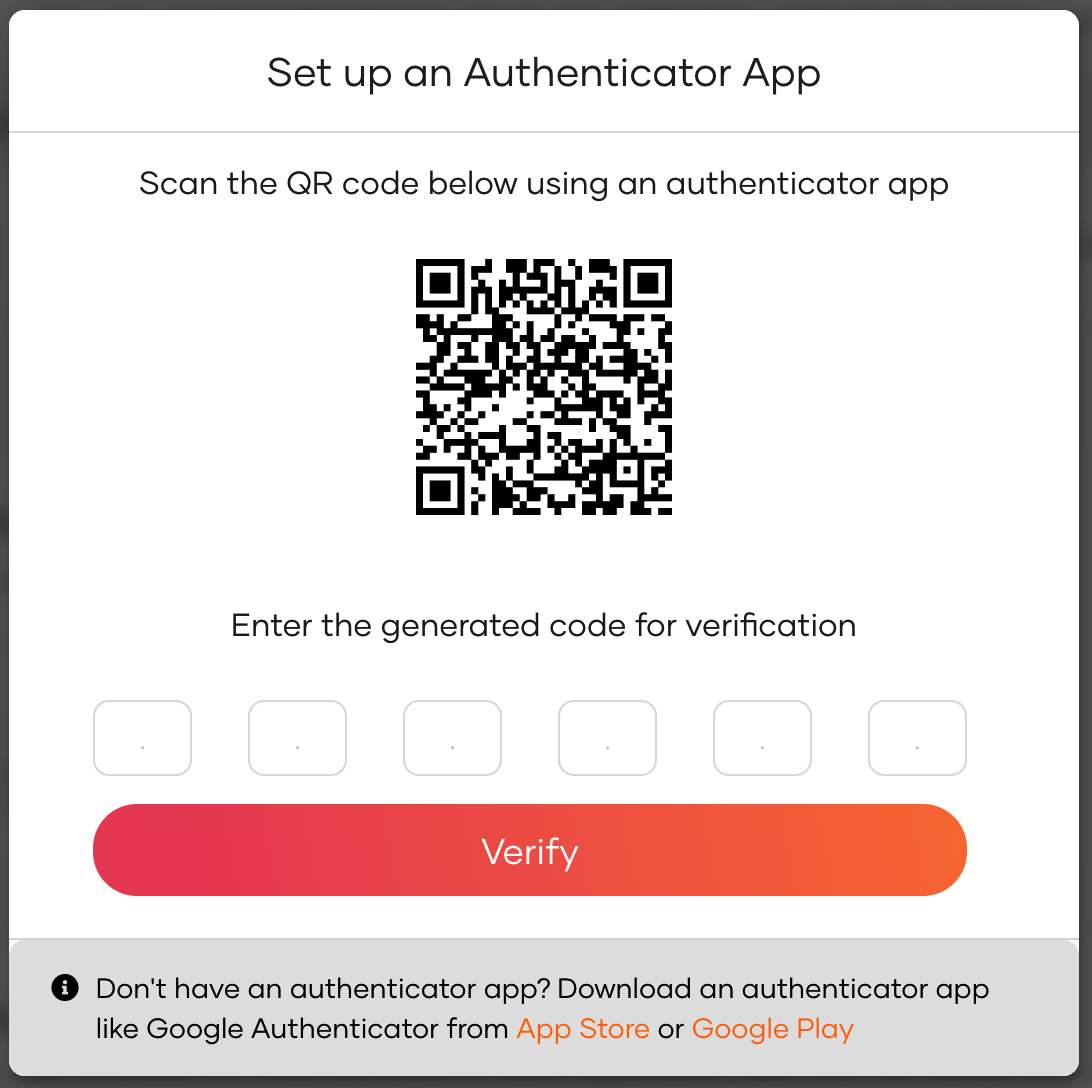
Initial setup
Follow the steps given below to set up an authenticator app using My Account.
-
In your My Account portal, go to Security > Additional Authentication.
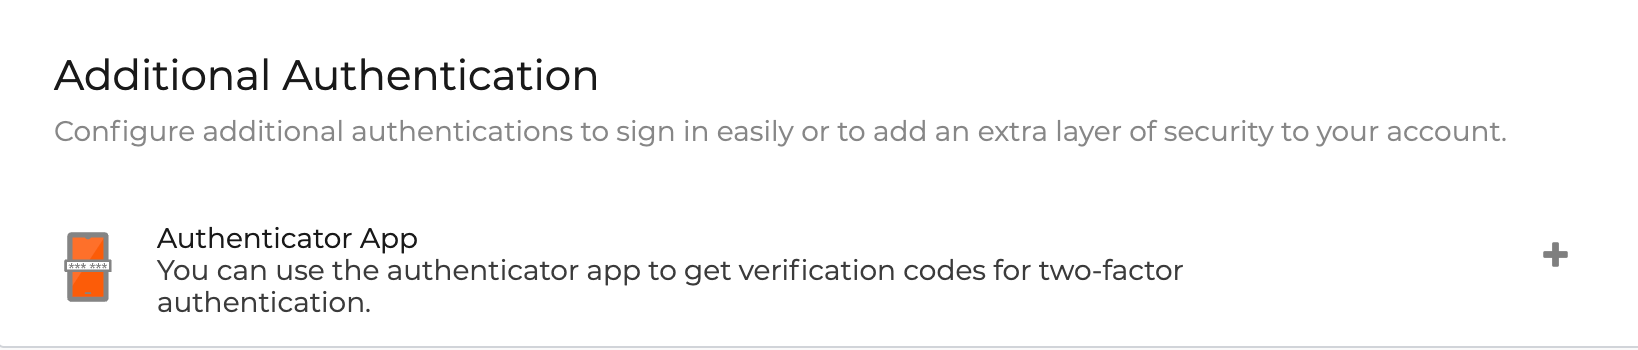
-
Click the + icon and scan the prompted QR code using an authenticator application.
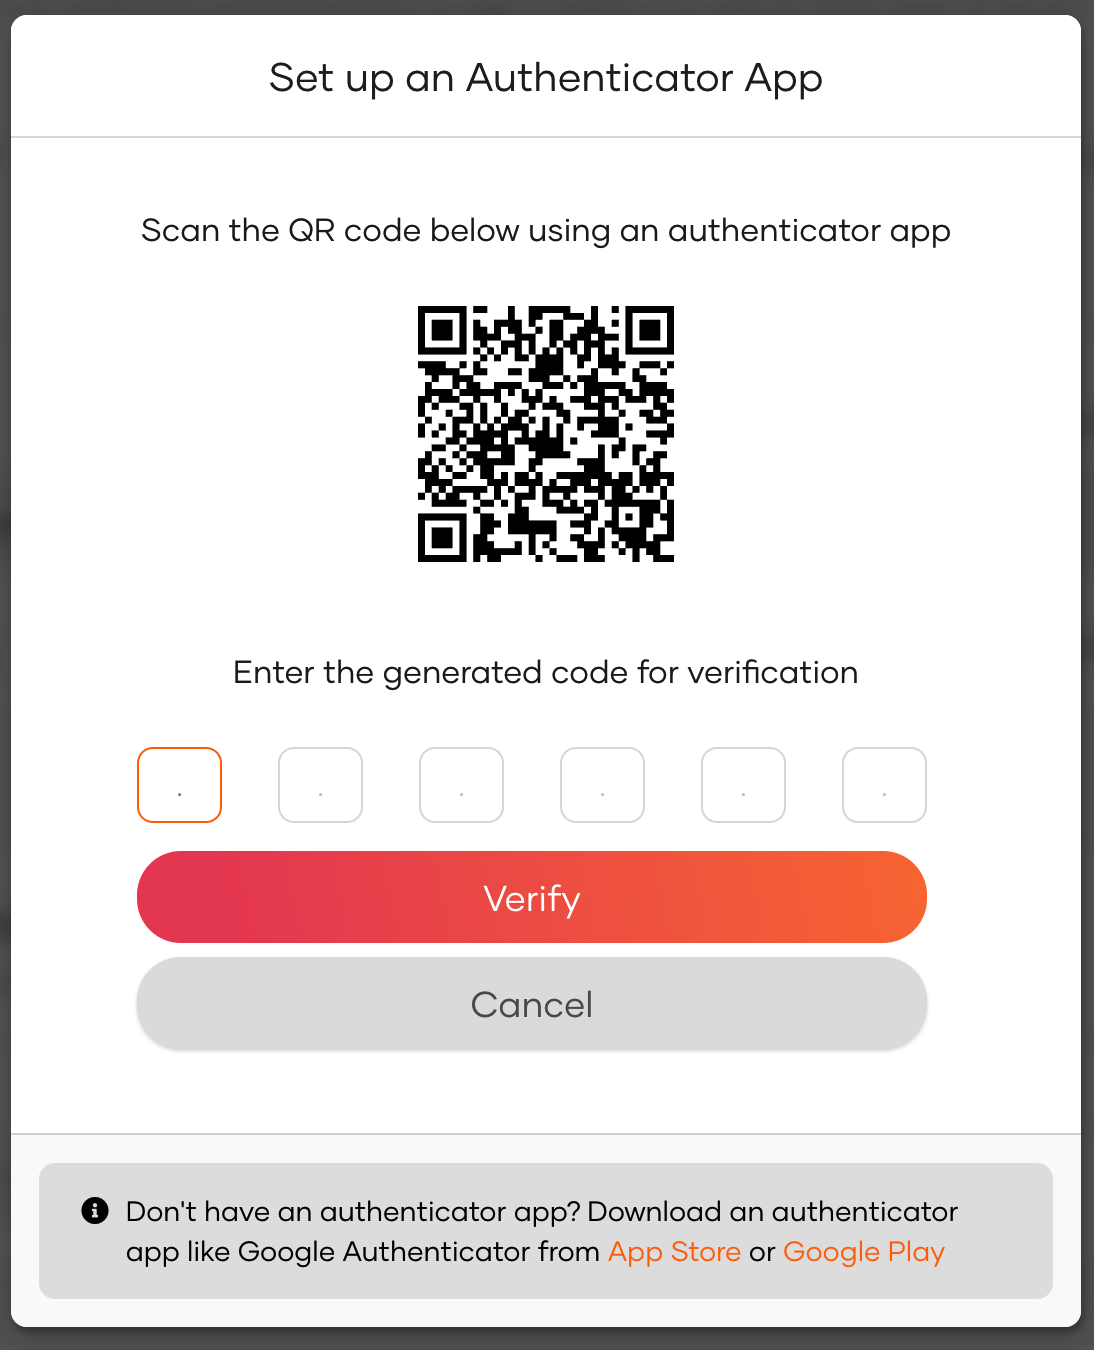
-
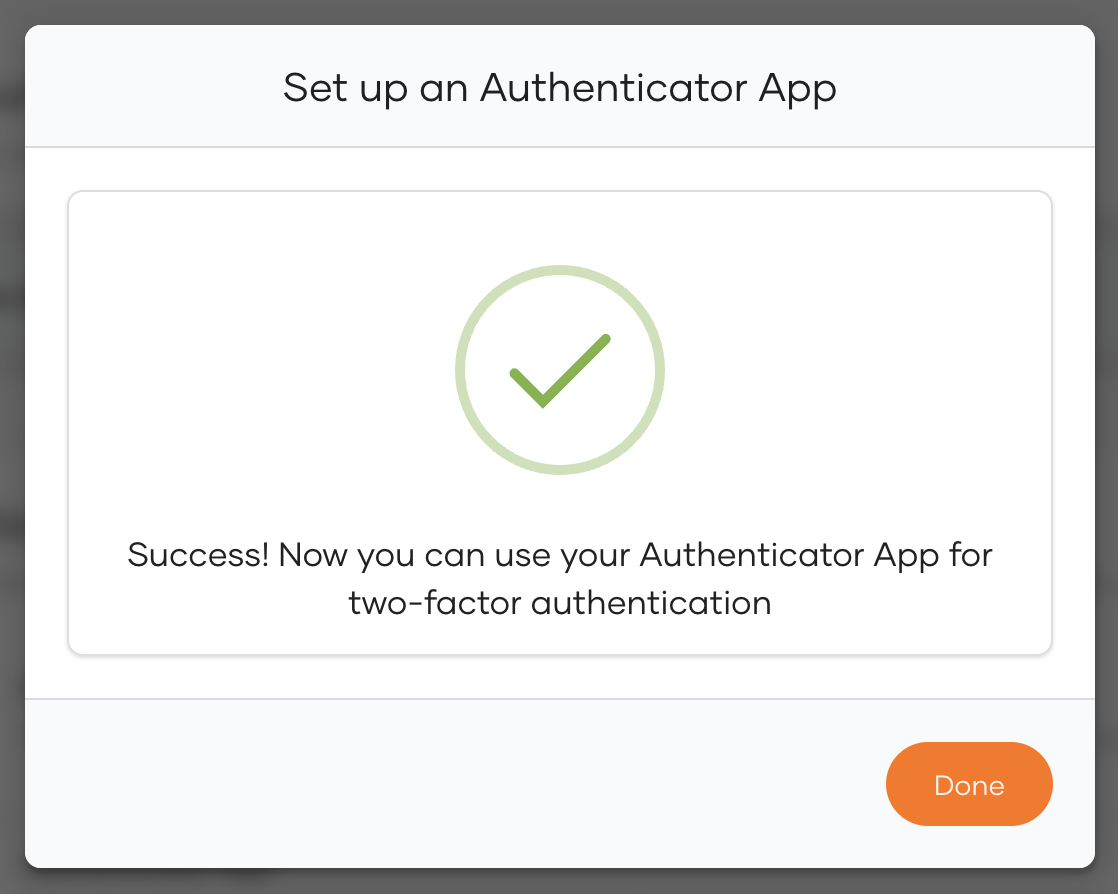
Enter the TOTP code obtained after scanning the QR code and click Verify.
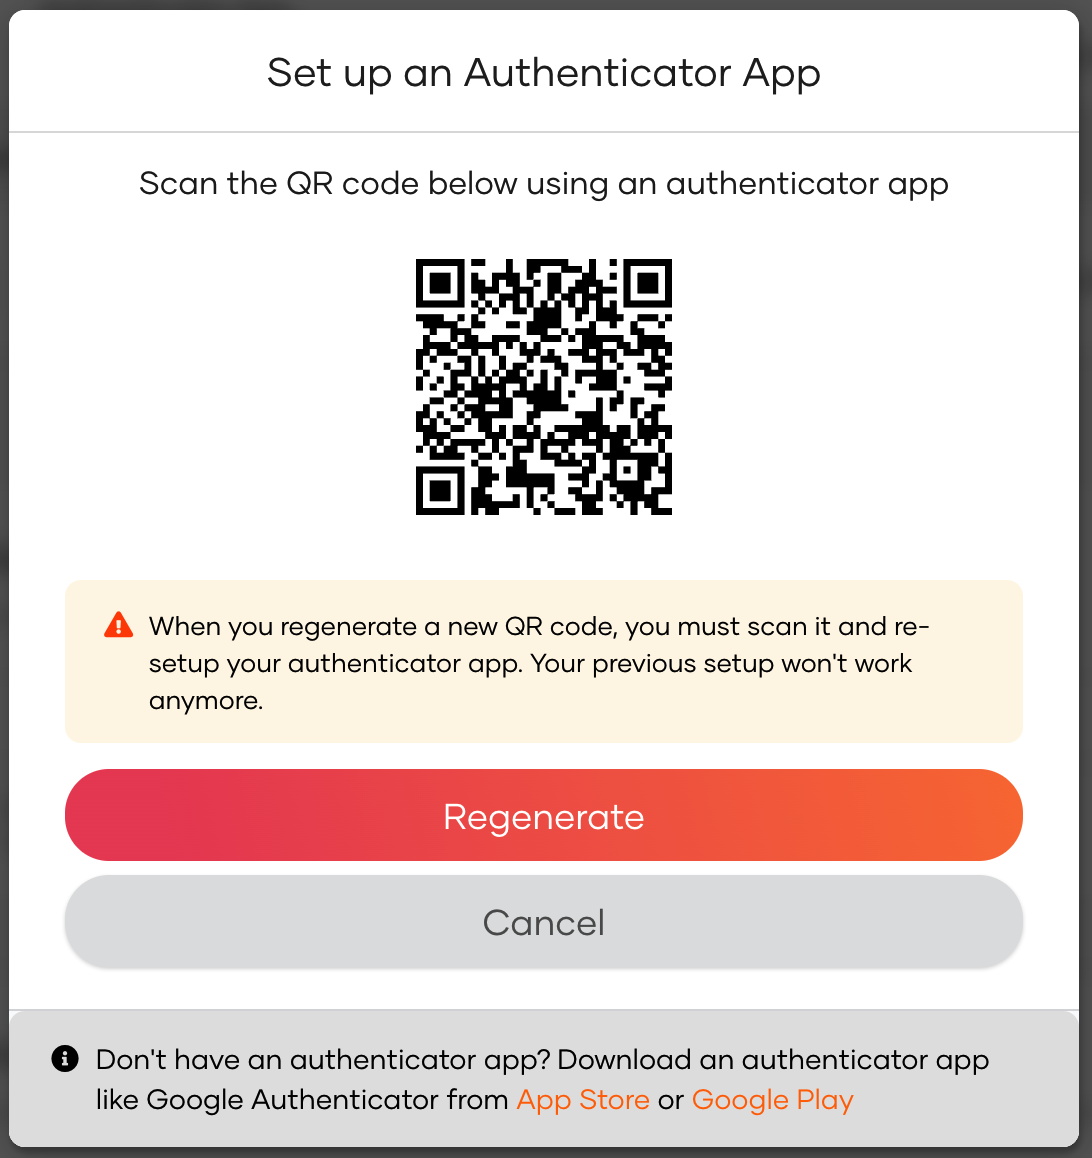
Regenerate the QR code
If you deleted the scanned QR from the authenticator app, follow the steps below to reconfigure it.
-
In your My Account portal, go to Security > Additional Authentication.
-
Click the eye icon (view) next to the authenticator app.
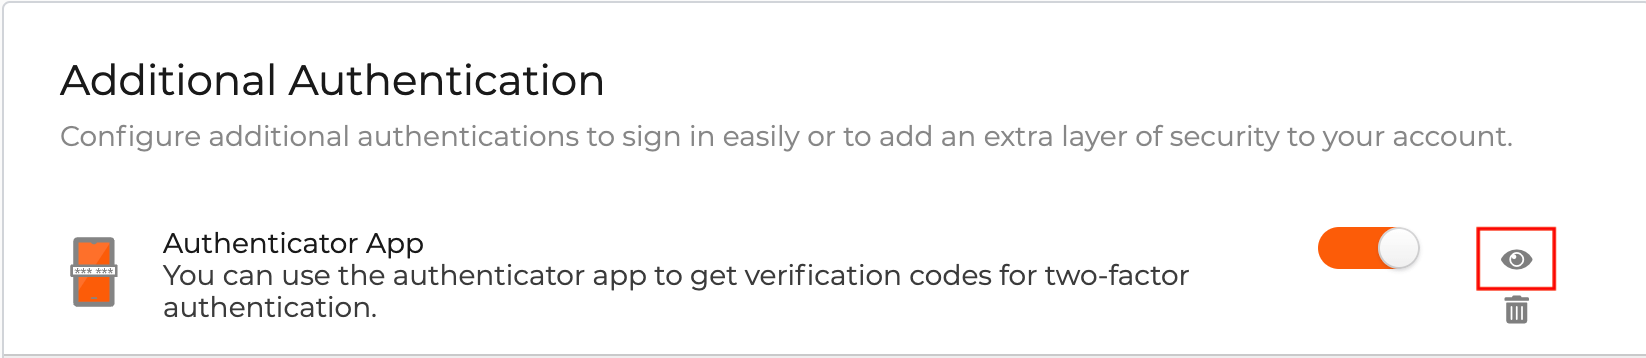
-
Click Regenerate to generate a new QR code.
-
Enter the TOTP code obtained after scanning the QR code and click Verify.
Configure backup codes
When you have enabled at least one additional authentication method in the Additional Authentication section, authentication using backup codes will be available as a recovery option for MFA. Users can use these backup codes to log in when they cannot obtain the required MFA codes.
Enable backup codes
Before you begin
You need to configure at least one additional authenticator from the My Account portal. See more information on configuring the authenticator app.
To enable backup codes:
- On the My Account portal, go to Security > Additional Authentication > Recovery Options.
-
Click
+to add backup codes. You will see a popup window with ten backup codes. Each backup code can be used only once.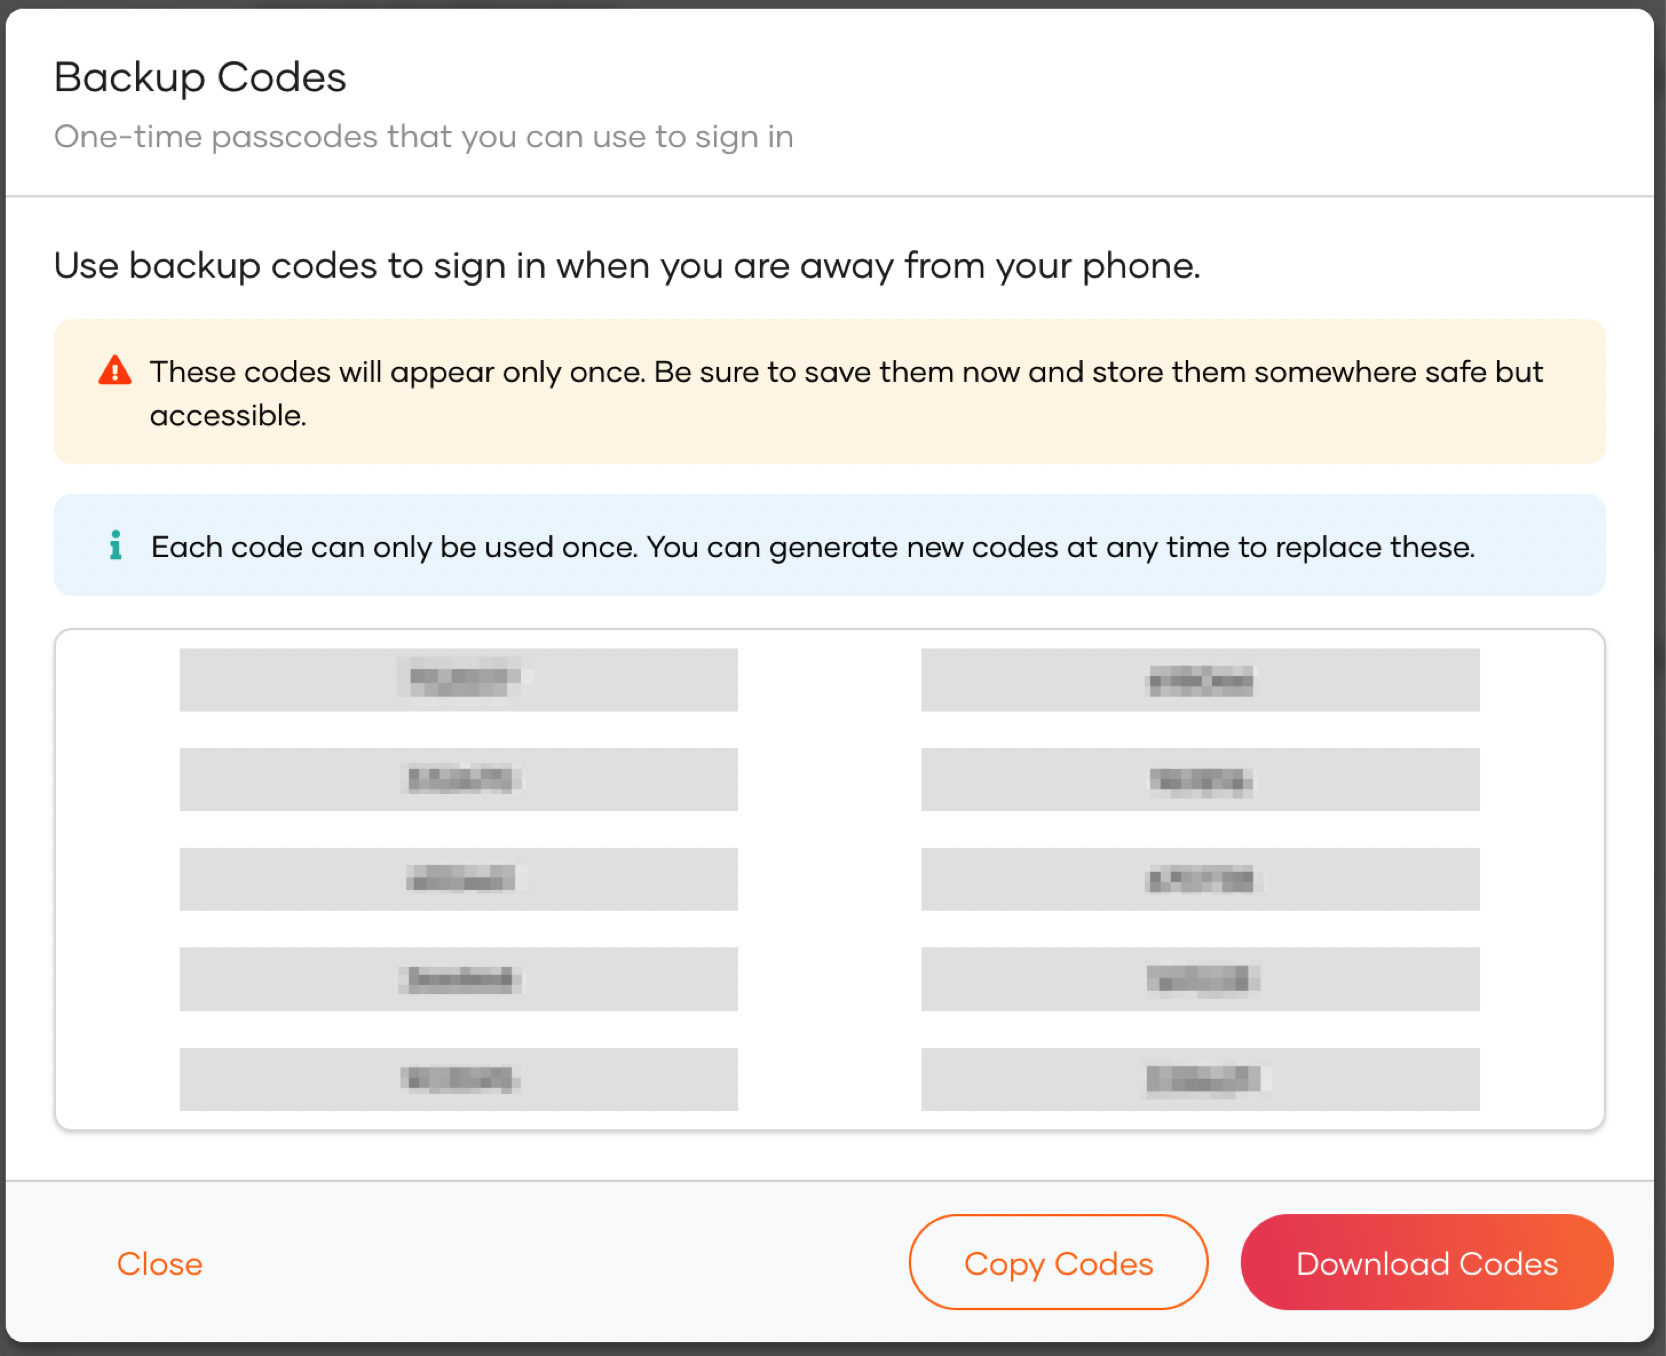
-
Click Download Codes or Copy Codes and save the copied or downloaded backup codes securely, as the codes will only be shown once.
- After saving the backup codes, click Close.
Note
The backup code configurations will not be applied to your active sessions by default, therefore it is recommended to terminate your active sessions.
Regenerate backup codes
In case you have lost these backup codes or have used them all, follow the steps below to generate a new set of backup codes.
- On the My Account portal, go to Security > Additional Authentication > Recovery Options.
-
Click on the refresh icon to regenerate the backup codes.

-
On the confirmation window, click Regenerate to confirm your action. You will see a popup window with ten backup codes. Each backup code can be used only once.
-
Click Download Codes or Copy Codes and save the copied or downloaded backup codes securely, as the codes will only be shown once.
- After saving the backup codes, click Close.
Note
The backup code configurations will not be applied to your active sessions by default, therefore it is recommended to terminate your active sessions.
Remove backup codes
To remove the backup codes:
- On the My Account portal, go to Security > Additional Authentication > Recovery Options.
-
Click on the trash icon to remove the existing backup codes.

-
On the confirmation window, click Remove to confirm your action.
Note
The backup code configurations will not be applied to your active sessions by default, therefore it is recommended to terminate your active sessions.