Add user sign up
10 min
First let's configure WSO2 Identity Platform Console to allow Self Registration of Users.
- Sign into WSO2 Identity Platform console and navigate to Login & Registration > User Onboarding > Self Registration
- Toggled the 'Enabled' button to enable Self Registration.
- Also navigate to Flows > Self Registration and click 'Enable'
Now since Self Registration has been enabled in WSO2 Identity Platform let's move on to configuring this in the Next application. Once the user signs up we will be providing the permissions to manage teams via the 'TEAM_ADMIN' role we created using the adaptive scripts feature in WSO2 Identity Platform.
WSO2 Identity Platform SDK provides SignUp, SignUpButtoncomponents to handle user self sign up.
Replace the existing content of the app/page.tsx file with following content to add the Sign Up button.
'use client'
import {SignedOut, SignUpButton} from '@asgardeo/nextjs';
export default function Home() {
return (
<div className="flex flex-col min-h-screen">
{/* Header */}
<header className="bg-white border-b border-gray-200 sticky top-0 z-50">
<div className="max-w-7xl mx-auto px-4 sm:px-6 lg:px-8">
<div className="flex justify-between items-center h-16">
{/* Left - Branding or Nav (can add logo here) */}
<div className="flex items-center space-x-4">
<span className="text-sm text-gray-600">Team Space</span>
</div>
{/* Right - User Actions */}
<div className="flex items-center space-x-3">
<SignedOut>
<SignUpButton />
</SignedOut>
</div>
</div>
</div>
</header>
{/* Main Content */}
<main className="flex-grow flex flex-col items-center justify-center text-center px-4 py-12 gap-6 bg-gray-50">
<SignedOut>
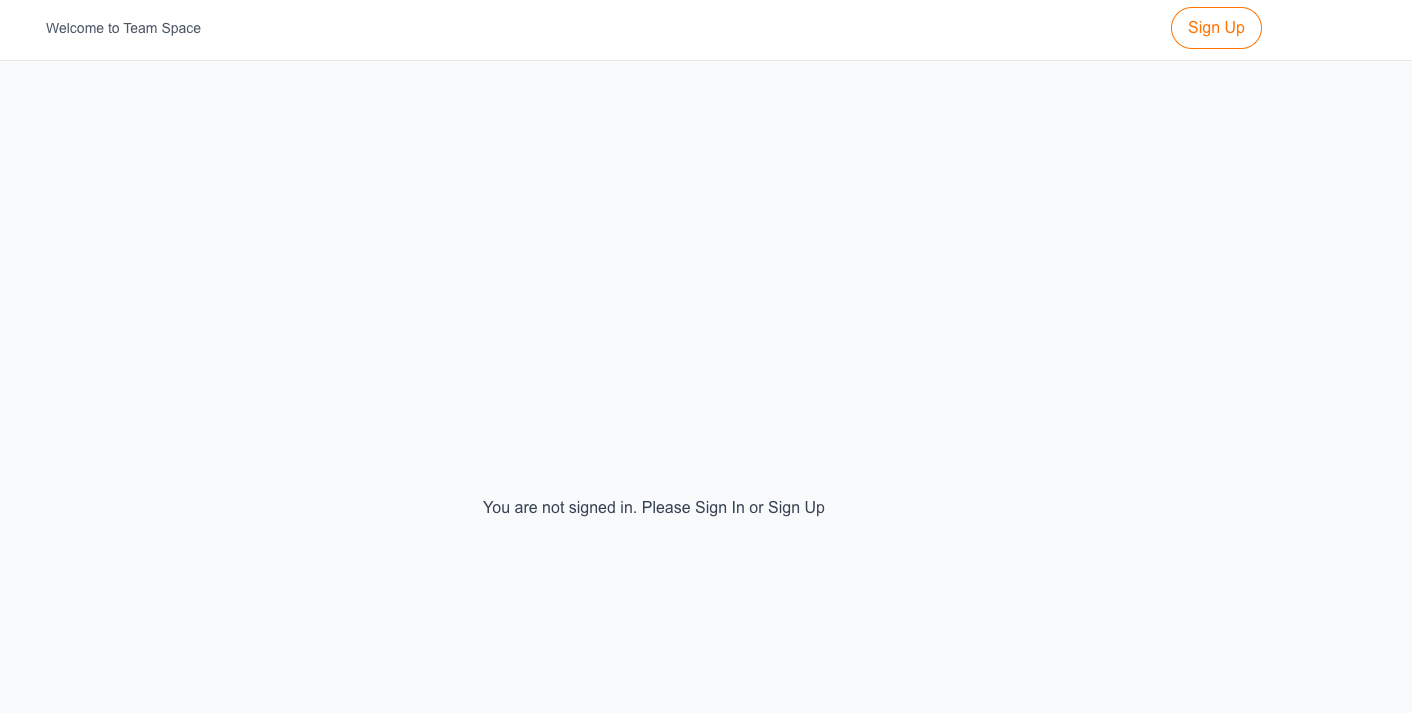
<p className="text-gray-700">You are not signed in. Please Sign In or Sign Up</p>
</SignedOut>
</main>
</div>
);
}
This code snippet adds a Sign Up button in the application.
Now since we need to display a Sign Up Page, the following can be done to integrate the WSO2 Identity Platform Next SDK with WSO2 Identity Platform and perform the Sign Up.
First, create an app route for the sign-up page. Create a new file called app/sign-up/page.tsx and add the following code:
'use client';

import Link from 'next/link';
import {SignUp} from '@asgardeo/nextjs';

export default function SignUpPage() {
  return (
    <div className="min-h-screen flex items-center justify-center bg-gradient-to-br from-blue-50 via-background to-purple-50 p-4">
      <div className="w-full max-w-md">
        <SignUp />
        <div className="mt-8 text-center">
          <Link href="/" className="text-sm text-muted-foreground hover:text-foreground">
            ← Back to home
          </Link>
        </div>
      </div>
    </div>
  );
}
Then, update the .env file with the route for the sign-in page. Add the following line to your .env file:
Save the changes and re-run the application in development mode if it is not running already.
Once the application is started, you will see the homepage of the application with the changes we made.
Initiate Sign Up
Clicking on the Sign Up button will display the Sign Up page from the WSO2 Identity Platform SDK as follows.
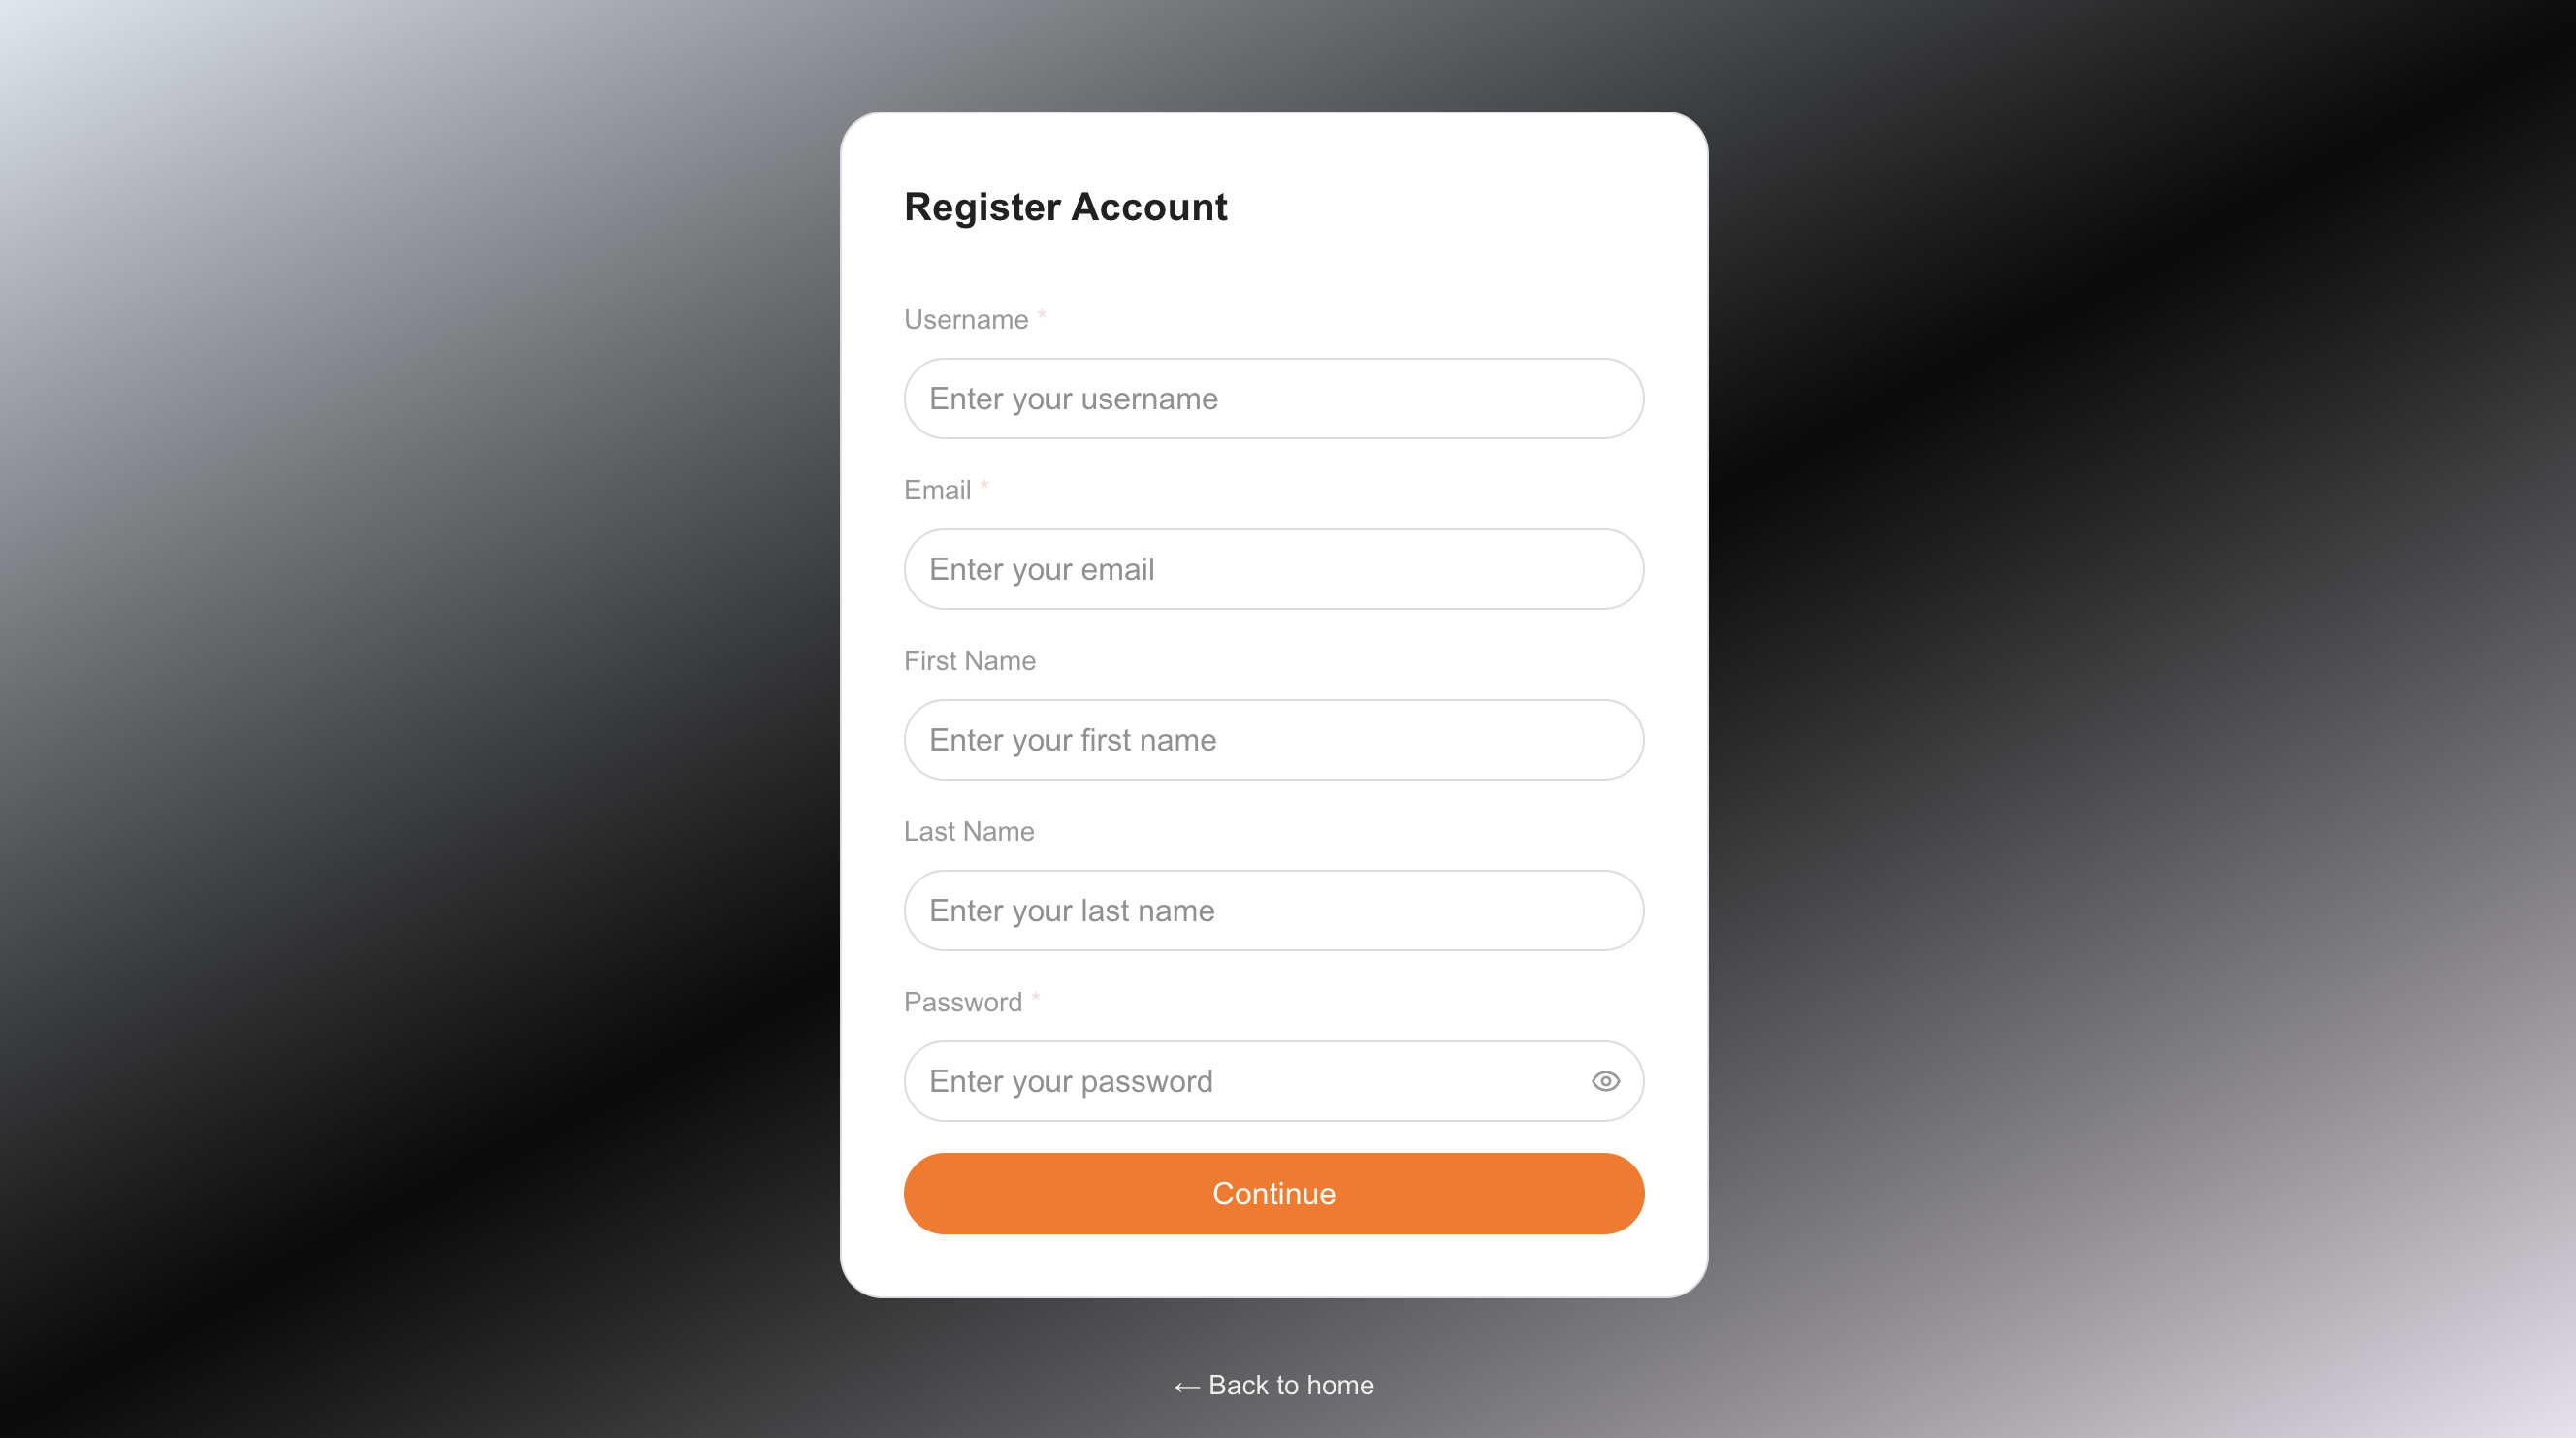
Once you fill this information and click 'Continue' the user will be created in WSO2 Identity Platform.