Add Google login
You can add Google login to your applications using WSO2 Identity Platform and enable users to log in with their Google accounts.
Follow this guide for instructions.
Register WSO2 Identity Platform on Google
You need to register WSO2 Identity Platform as an OAuth2.0 application on Google.
Note
For detailed instructions, you can follow the Google documentation.
-
Go to the Google Developer console, create a new project, or select an existing project.
-
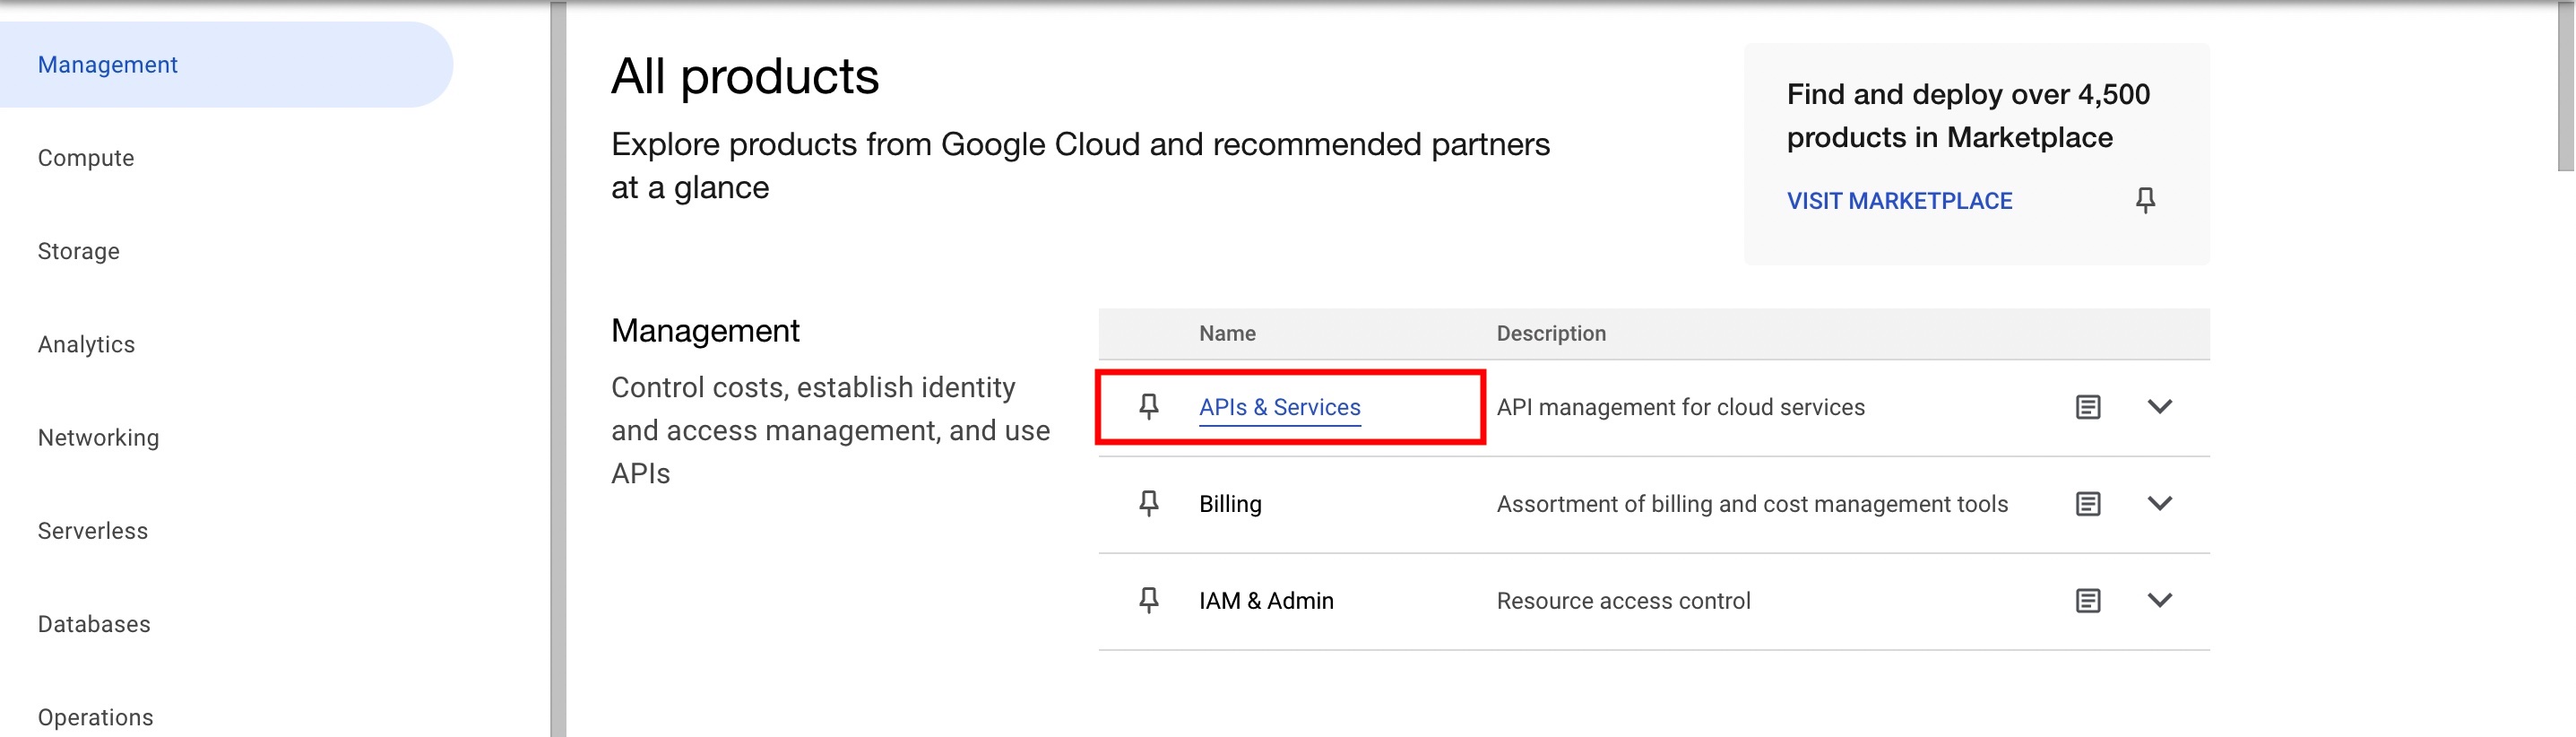
If the APIs & services page isn't already open, do the following:
- Open the navigation menu and click View all products.

- Under Management, click APIs & Services.
-
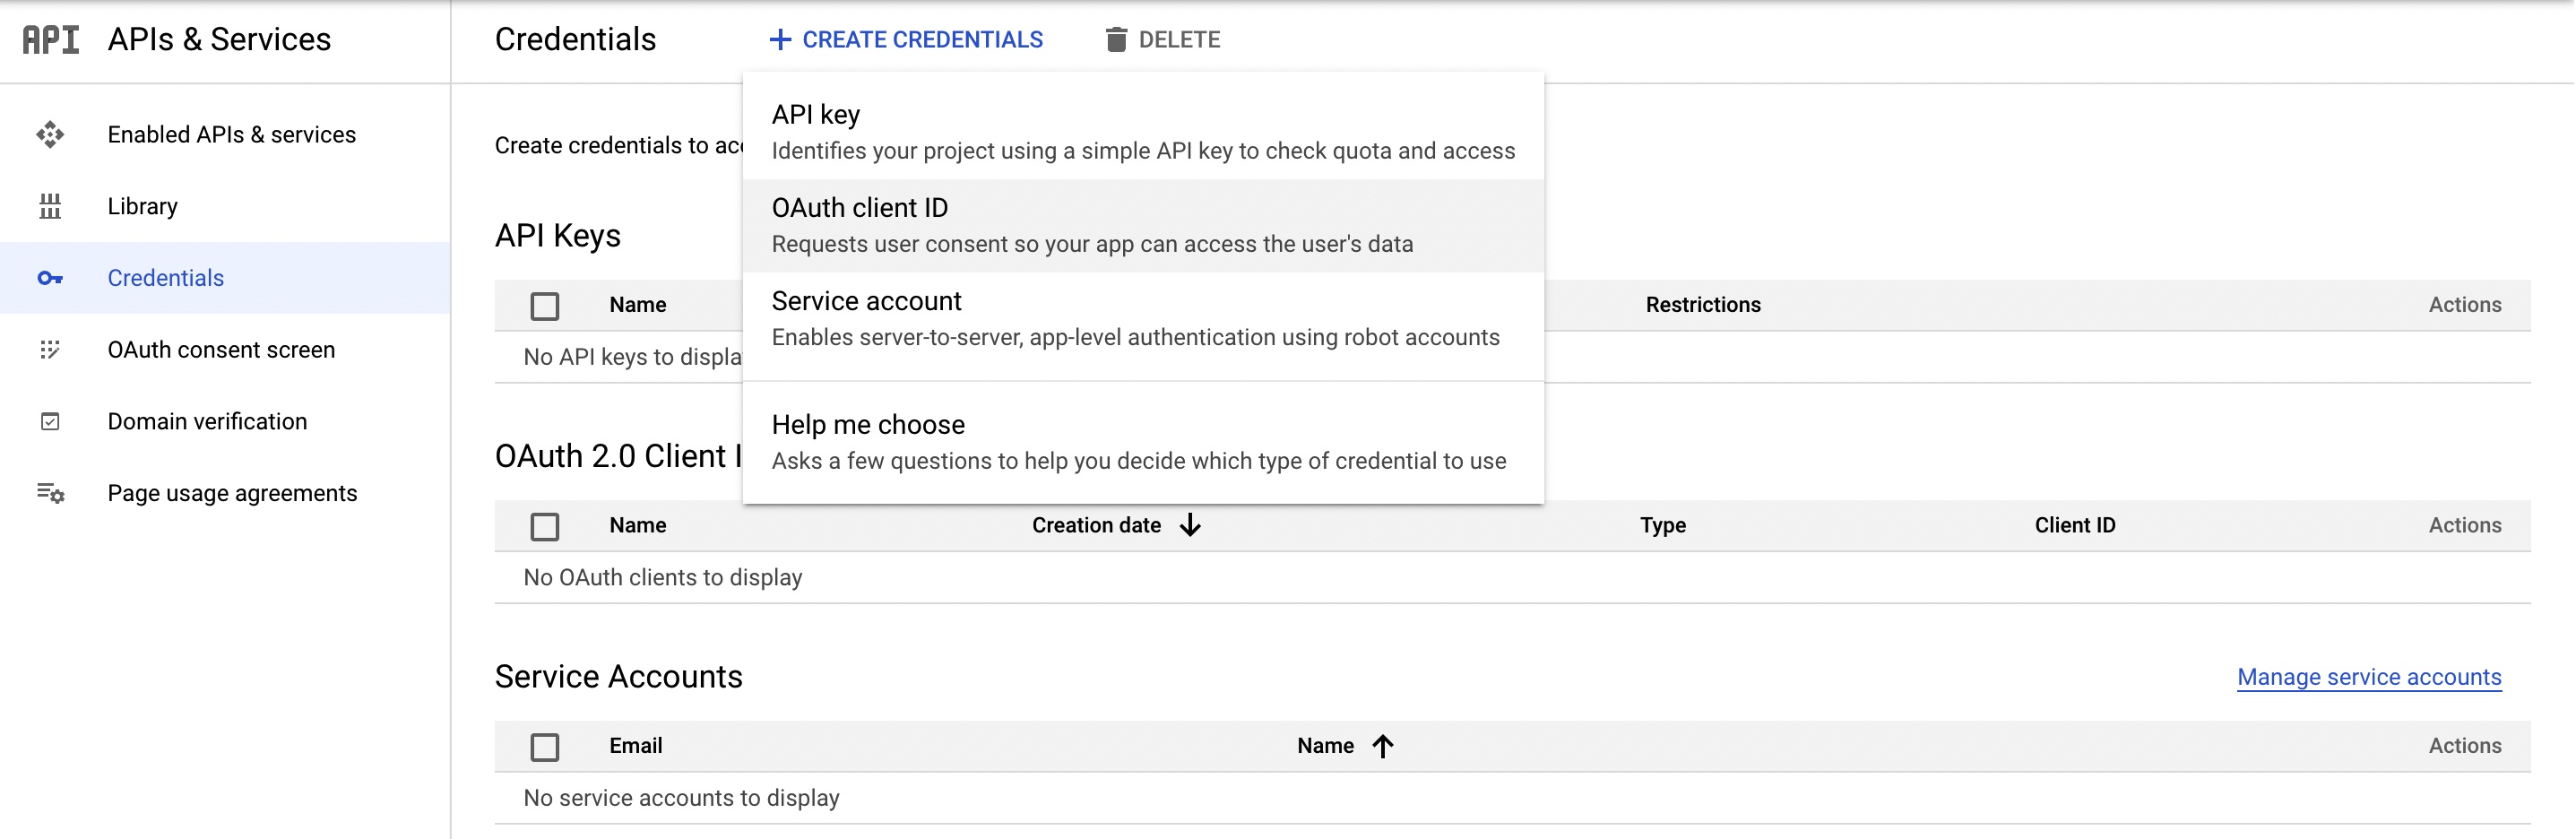
Go to the Credentials page, click Create Credentials, and select Oauth client ID.
-
Configure your consent screen by clicking Configure Consent Screen and return to Create OAuth client ID screen once you are done.
Note
For more information, see User Consent
-
Select the Web application as the application type.
-
Provide a name for your app and the following URL as the Authorized Redirect URI of the application:
-
Take note of the client ID and client secret generated for the application.
Register the Google IdP
Now, let's register the Google IdP in WSO2 Identity Platform.
- On the WSO2 Identity Platform Console, go to Connections.
- Click New Connections and select Google.
-
Enter the following details of the Google identity provider and click Finish:
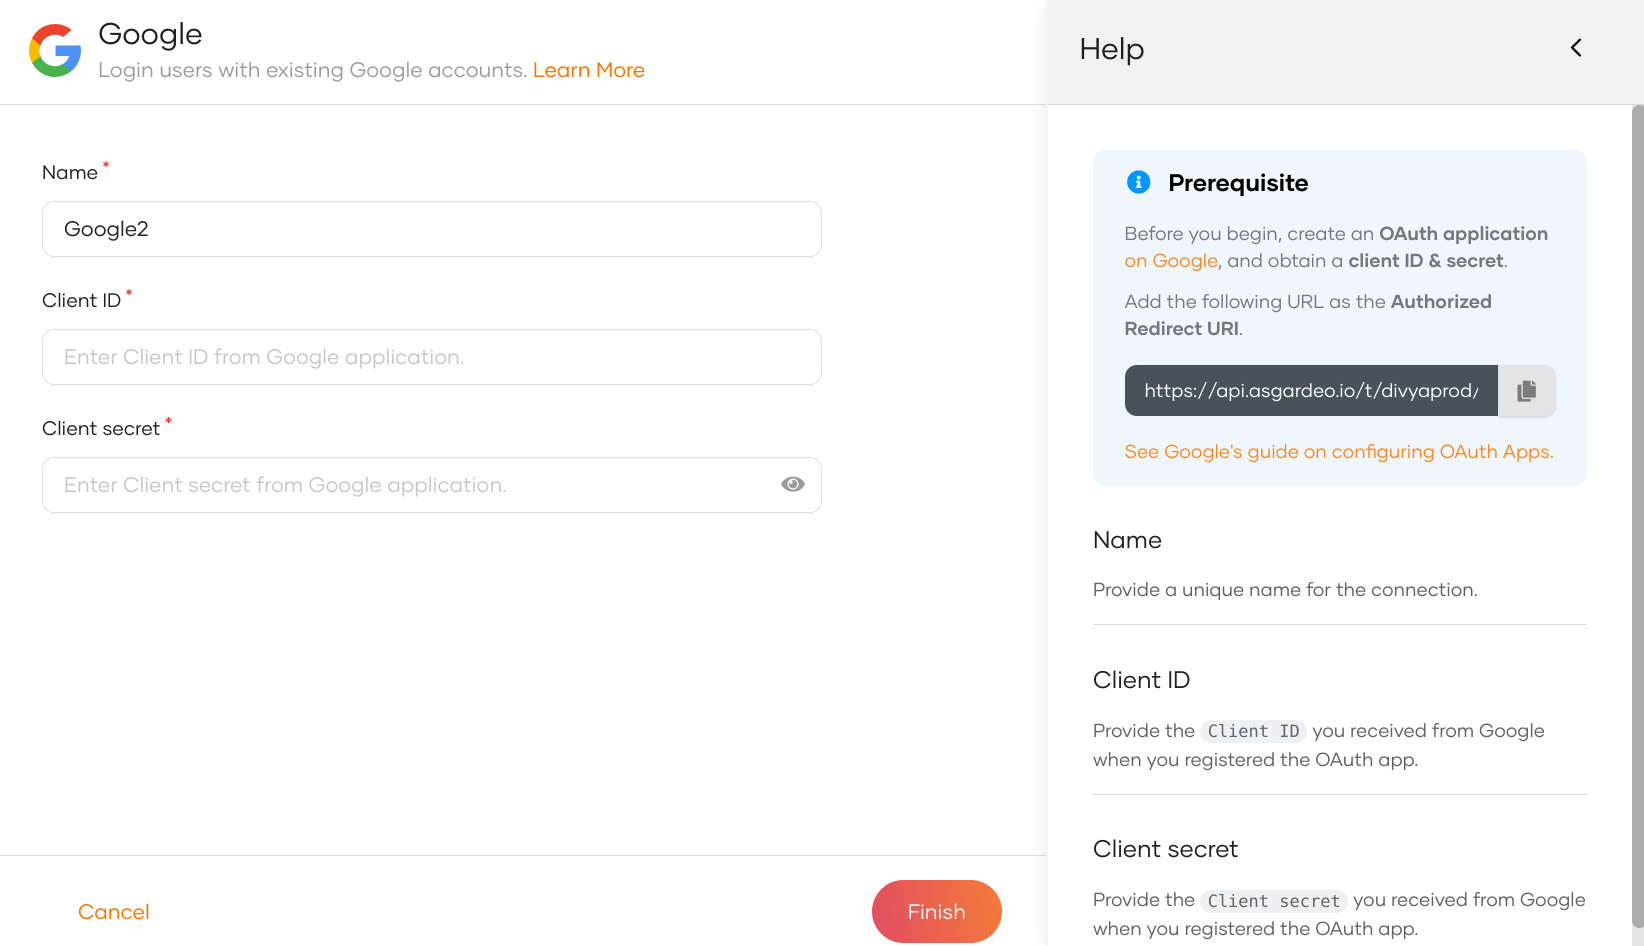
Parameter Description Name A unique name for this Google identity provider. Client ID The client ID obtained from Google. Client secret The client secret obtained from Google. -
Go to the Settings tab and see the list of scopes to which Google has granted permissions.
- email: Allows to view the user's email address.
- openid: Allows authentication using OpenID Connect and to obtain the ID token.
- profile: Allows to view the user's basic profile data.
Note
WSO2 Identity Platform needs these scopes to get user information. WSO2 Identity Platform checks the attribute configurations of the application and sends the relevant attributes received from Google to the app. You can read the Google documentation to learn more.
Enable Google login
Before you begin
You need to register an application with WSO2 Identity Platform. You can register your own application or use one of the sample applications provided.
- On the WSO2 Identity Platform Console, go to Applications.
-
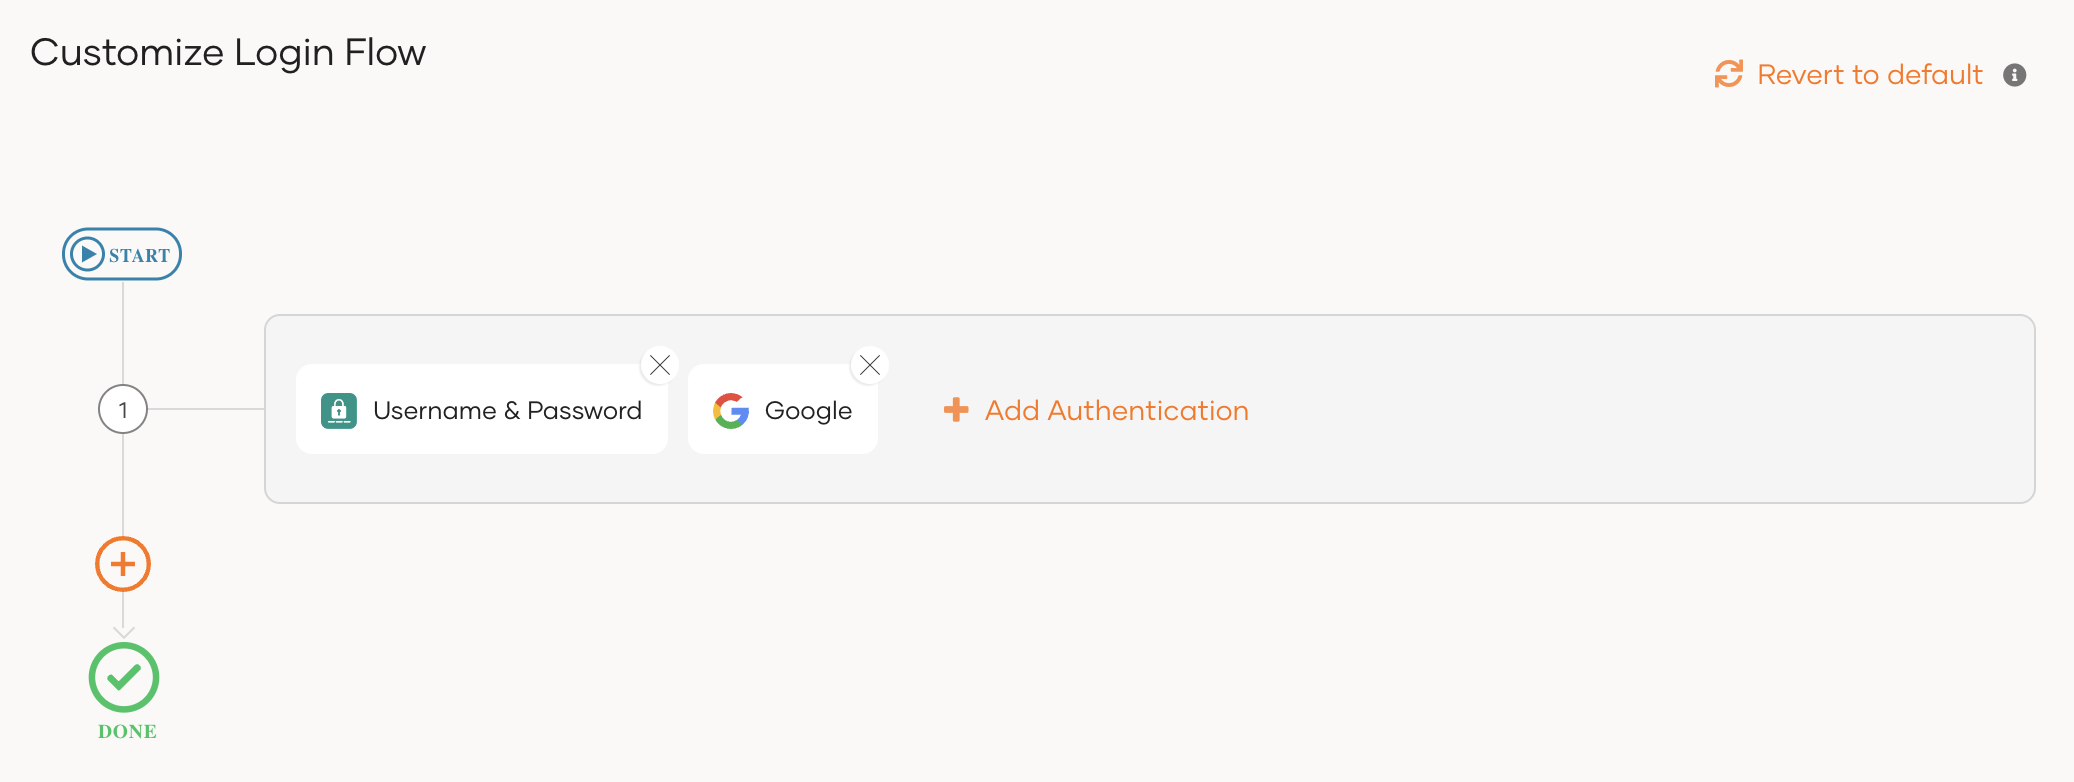
Select your application, go to the Login Flow tab and add Google login from your preferred editor:
To add Google login using the Classic Editor:
-
If you haven't already defined a sign-in flow, click Start with Default configuration to get started.
-
Click Add Authentication on the step, select your Google identity provider, and click Add.
To add Google login using the Visual Editor:
-
Switch to the Visual Editor tab, by default the
Username & Passwordlogin flow will be added onto the Visual Editor's workspace. -
Click on
+ Add Sign In Optionto add a new authenticator to the same step and select your Google connection.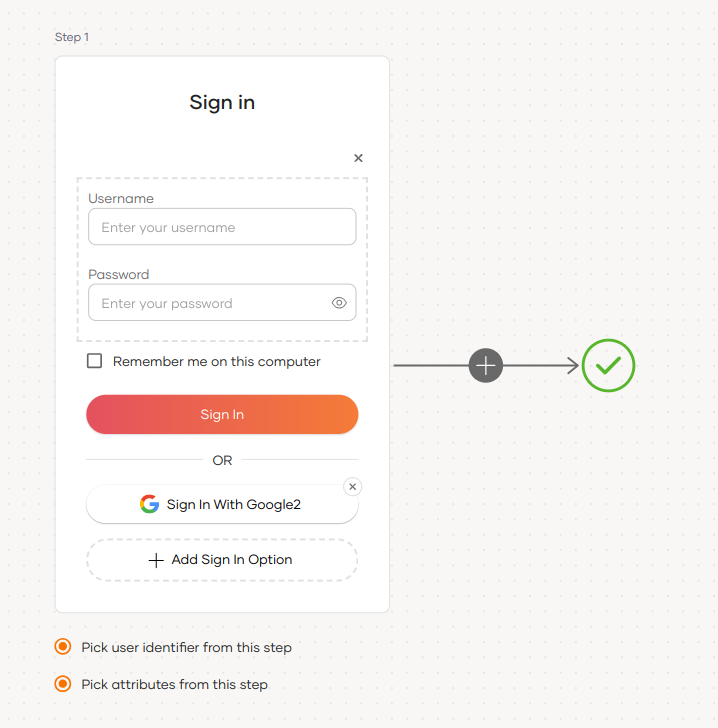
Recommendations
It is recommended to add your social and enterprise connections to the first authentication step as they are used for identifying the user.
-
-
Click Update to save your changes.
Try it out
Follow the steps given below.
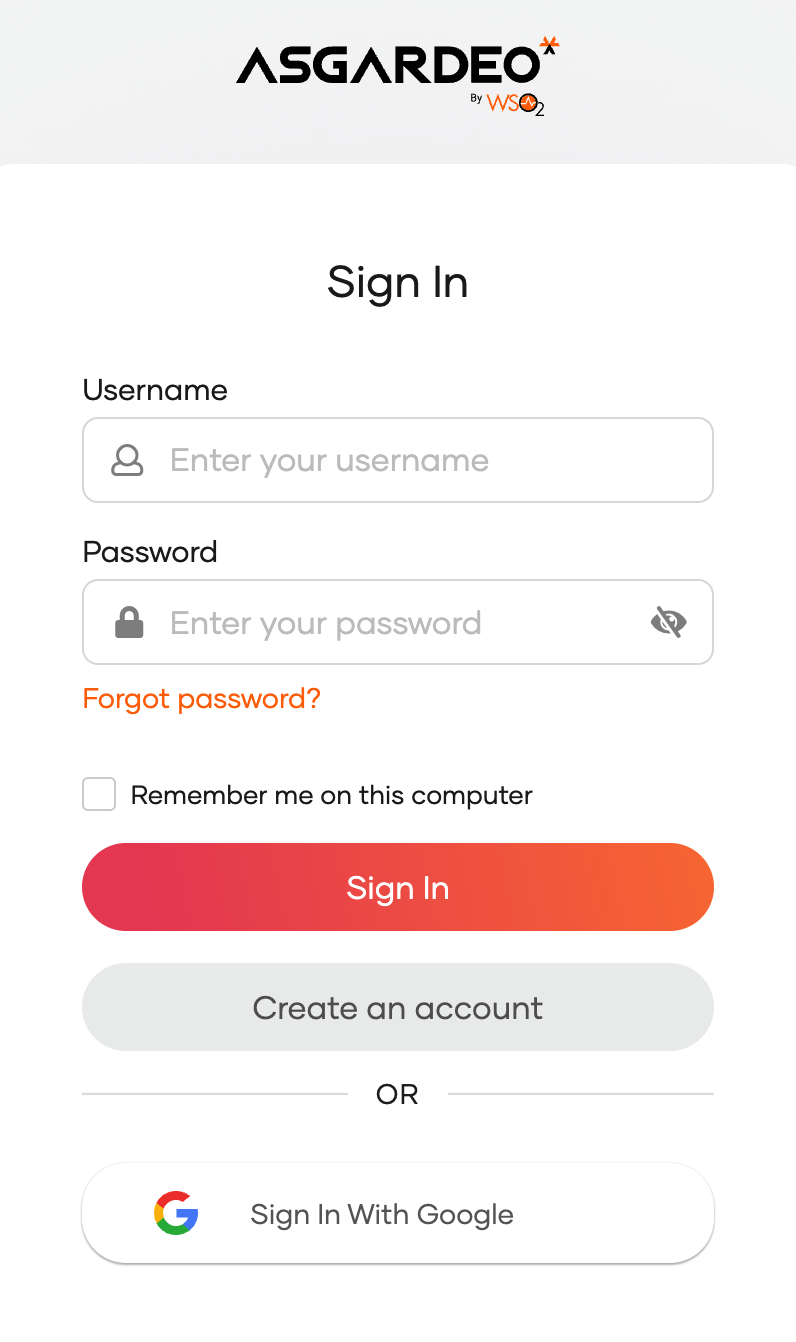
- Access the application URL.
- Click Login to open the WSO2 Identity Platform login page.
-
On the WSO2 Identity Platform login page, Sign in with Google.
-
Log in to Google with an existing user account.
Note
When a user successfully logs in with Google for the first time, a user account is created in the WSO2 Identity Platform Console with the Google username. This new user account will be managed by Google.
Configure connection
To learn more about other configurations available for the connection, refer to the add federated login documentation.