Add login and logout to your app
10 min
In this guide, we will go through how the login and logout functionality will be implemented, where we will not be utilizing any third-party SDKs.
Several classes are required to handle tasks such as:
- Building the route for both login and logout.
- Maintaining the authenticated user information.
- Persisting the authentication state.
Login and Logout Route Builder
The Login and Logout route builder adds the /login and /logout routes to the specified endpoint builder.
- /login: Configured as a GET endpoint that triggers an authentication challenge using the OIDC scheme.
- /logout: Configured as a POST endpoint that signs the user out of both the cookie and OIDC schemes.
Let's create a file named LoginLogoutEndpointRouteBuilderExtensions.cs in the root directory using the command given below.
Now let's add the following code.
using Microsoft.AspNetCore.Authentication;
using Microsoft.AspNetCore.Authentication.Cookies;
using Microsoft.AspNetCore.Mvc;

namespace Microsoft.AspNetCore.Routing;

internal static class LoginLogoutEndpointRouteBuilderExtensions
{
internal static IEndpointConventionBuilder MapLoginAndLogout(this IEndpointRouteBuilder endpoints)
{
var group = endpoints.MapGroup("");

        group.MapGet("/login", (string? returnUrl) => TypedResults.Challenge(GetAuthProperties(returnUrl)))
            .AllowAnonymous();

        group.MapPost("/logout", ([FromForm] string? returnUrl) => TypedResults.SignOut(GetAuthProperties(returnUrl),
            [CookieAuthenticationDefaults.AuthenticationScheme, "AsgardeoOidc"]));

        return group;
    }

    private static AuthenticationProperties GetAuthProperties(string? returnUrl)
    {
        const string pathBase = "/";

        if (string.IsNullOrEmpty(returnUrl))
        {
            returnUrl = pathBase;
        }
        else if (!Uri.IsWellFormedUriString(returnUrl, UriKind.Relative))
        {
            returnUrl = new Uri(returnUrl, UriKind.Absolute).PathAndQuery;
        }
        else if (returnUrl[0] != '/')
        {
            returnUrl = $"{pathBase}{returnUrl}";
        }

        return new AuthenticationProperties { RedirectUri = returnUrl };
    }
}
This code defines an extension method MapLoginAndLogout for IEndpointRouteBuilder in an ASP.NET Core application, allowing you to configure login and logout endpoints. The MapLoginAndLogout method creates a route group that maps two endpoints: a GET endpoint at /login and a POST endpoint at /logout, as mentioned above.
The GetAuthProperties method is used to build the authentication properties, specifically the redirect URL, which ensures that a valid URL is passed and, if necessary, it adjusts the format of returnUrl.
UserInfo Class
The UserInfo class represents information about an authenticated user and provides methods to map between a ClaimsPrincipal and this strongly typed representation. It serves as a way to expose more structured and manageable user information in an ASP.NET Core application. While this will not be used for the login and logout functionality in this guide, it will be useful as an extension point for other parts of your application where user information needs to be retrieved.
The class encapsulates key user attributes such as:
- UserId
- Name
- UserName
These attributes are derived from claims associated with the authenticated user's ClaimsPrincipal. You need to ensure that additional attributes such as UserName are configured as Requested in the Attributes tab of the application created in WSO2 Identity Platform.
Create a file named UserInfo.cs in the root directory using the following command.
Then add the following code.
using System.Security.Claims;

namespace asgardeo_dotnet;

public sealed class UserInfo
{
    public required string UserId { get; init; }
    public required string FirstName { get; init; }
    public required string LastName { get; init; }
    public required string UserName { get; init; }

    public const string UserIdClaimType = "sub";
    public const string FirstNameClaimType = "given_name";
    public const string LastNameClaimType = "family_name";
    public const string UserNameClaimType = "username";

    public static UserInfo FromClaimsPrincipal(ClaimsPrincipal principal) =>
        new()
        {
            UserId = GetRequiredClaim(principal, UserIdClaimType),
            FirstName = GetRequiredClaim(principal, FirstNameClaimType),
            LastName = GetRequiredClaim(principal, LastNameClaimType),
            UserName = GetRequiredClaim(principal, UserNameClaimType),
        };

    public ClaimsPrincipal ToClaimsPrincipal() =>
        new(new ClaimsIdentity(
            [new(UserIdClaimType, UserId), new(FirstNameClaimType, FirstName), new(LastNameClaimType, LastName), new(UserNameClaimType, UserName)],
            authenticationType: nameof(UserInfo),
            nameType: UserNameClaimType,
            roleType: null));

    private static string GetRequiredClaim(ClaimsPrincipal principal, string claimType) =>
        principal.FindFirst(claimType)?.Value ?? throw new InvalidOperationException($"Could not find required '{claimType}' claim.");
}
Authentication State Management
Let's create a file named PersistingAuthenticationStateProvider.cs in the root directory using the below command.
We will be extending the AuthenticationStateProvider class to manage the authentication state for the Blazor Web Application. This will ensure that:
- The authentication state is persisted across interactions.
- The authentication state is rehydrated correctly.
This approach is particularly useful in scenarios where the application depends on server-side data persistence for authentication state. You can utilize the following code which performs the above tasks. Additionally, as you can notice in the highlighted code below we have used UserInfo in the `PersistingAuthenticationStateProvider' class.
using Microsoft.AspNetCore.Components;
using Microsoft.AspNetCore.Components.Authorization;
using Microsoft.AspNetCore.Components.Web;

namespace asgardeo_dotnet;

internal sealed class PersistingAuthenticationStateProvider : AuthenticationStateProvider, IHostEnvironmentAuthenticationStateProvider, IDisposable
{
    private readonly PersistentComponentState persistentComponentState;
    private readonly PersistingComponentStateSubscription subscription;
    private Task<AuthenticationState>? authenticationStateTask;

    public PersistingAuthenticationStateProvider(PersistentComponentState state)
    {
        persistentComponentState = state;
        subscription = state.RegisterOnPersisting(OnPersistingAsync, RenderMode.InteractiveWebAssembly);
    }

    public override Task<AuthenticationState> GetAuthenticationStateAsync() => authenticationStateTask ??
            throw new InvalidOperationException($"Do not call {nameof(GetAuthenticationStateAsync)} outside of the DI scope for a Razor component.");

    public void SetAuthenticationState(Task<AuthenticationState> task)
    {
        authenticationStateTask = task;
    }

    private async Task OnPersistingAsync()
    {
        var authenticationState = await GetAuthenticationStateAsync();
        var principal = authenticationState.User;

        if (principal.Identity?.IsAuthenticated == true)
        {
            persistentComponentState.PersistAsJson(nameof(UserInfo), UserInfo.FromClaimsPrincipal(principal));
        }
    }

    public void Dispose()
    {
        subscription.Dispose();
    }
}
Home Page Setup
The classes implemented up to now lay the foundation for the home page where we will be adding the login and logout buttons.
Navigate to the Home.razor file under the /Components/Pages directory and replace the existing content with the following given code.
@page "/"
@implements IDisposable
@inject NavigationManager Navigation
@using Microsoft.AspNetCore.Components.Authorization

<PageTitle>Home</PageTitle>

@code {
private string? currentUrl;

    protected override void OnInitialized()
    {
        currentUrl = Navigation.Uri;
        Navigation.LocationChanged += OnLocationChanged;
    }

    private void OnLocationChanged(object? sender, LocationChangedEventArgs e)
    {
        currentUrl = Navigation.Uri;
        StateHasChanged();
    }

    public void Dispose() => Navigation.LocationChanged -= OnLocationChanged;
}
The above code implements the IDisposable interface to manage lifecycle events related to navigation changes within the Blazor application.
The current URL (currentUrl) is tracked by subscribing to the LocationChanged event from NavigationManager. When the URL changes, it updates currentUrl and triggers a re-render using StateHasChanged(), while the Dispose method unsubscribes from LocationChanged.
Next, let's add the login and logout buttons to the Home.razor page as follows.
@page "/"
@implements IDisposable
@inject NavigationManager Navigation
@using Microsoft.AspNetCore.Components.Authorization

<PageTitle>Home</PageTitle>

<div class="nav-item px-3">
    <AuthorizeView>
        <Authorized>
            <form action="authentication/logout" method="post">
                <AntiforgeryToken />
                <input type="hidden" name="ReturnUrl" value="@currentUrl" />
                <button type="submit" class="btn btn-primary">
                    <span class="bi bi-arrow-bar-left-nav-menu" aria-hidden="true"></span> Logout
                </button>
            </form>
        </Authorized>
        <NotAuthorized>
            <button type="submit" class="btn btn-primary" onclick="window.location.href='/authentication/login';">
                <span class="bi bi-person-badge-nav-menu" aria-hidden="true"></span> Login
            </button>
        </NotAuthorized>
    </AuthorizeView>
</div>

@code {
    private string? currentUrl;

    protected override void OnInitialized()
    {
        currentUrl = Navigation.Uri;
        Navigation.LocationChanged += OnLocationChanged;
    }

    private void OnLocationChanged(object? sender, LocationChangedEventArgs e)
    {
        currentUrl = Navigation.Uri;
        StateHasChanged();
    }

    public void Dispose() => Navigation.LocationChanged -= OnLocationChanged;
}
The above code conditionally renders a Logout or Login button based on whether the user is authorized (i.e., logged in) or not authorized (i.e., logged out).
- The logout button contains a form that submits a POST request to the
/authentication/logoutendpoint. - The login button redirects the user to the
/authentication/loginpage when clicked.
This code block uses the AuthorizeView component, which is part of Blazor's built-in authorization features.
Configure Authentication in Program.cs
We can now configure the Program.cs file to enable the authentication functionality. We will be using OpenID Connect functionality to the AuthenticationBuilder using the AddOpenIdConnect method, in the previous step we have installed required packages.
Then add the following code, which will create a new instance of an HttpClient, which we will be using to retrieve the JsonWebKeySet from WSO2 Identity Platform, and FetchJwks method which will perform the invocation of the endpoint passed as a parameter in order to parse the JsonWebKeySet class in the Microsoft.IdentityModel.Tokens namespace.
using asgardeo_dotnet.Components;
using Microsoft.IdentityModel.Tokens;

var builder = WebApplication.CreateBuilder(args);

HttpClient httpClient;
if (Environment.GetEnvironmentVariable("HTTPCLIENT_VALIDATE_EXTERNAL_CERTIFICATES") == "false")
{
    var handler = new HttpClientHandler
    {
        ServerCertificateCustomValidationCallback = HttpClientHandler.DangerousAcceptAnyServerCertificateValidator
    };
    httpClient = new HttpClient(handler);
}
else
{
    httpClient = new HttpClient();
}

builder.Services.AddSingleton(httpClient);

JsonWebKeySet FetchJwks(string url)
{
    var result = httpClient.GetAsync(url).Result;
    if (!result.IsSuccessStatusCode || result.Content is null)
    {
        throw new Exception(
            $"Getting token issuers (WSO2) JWKS from {url} failed. Status code {result.StatusCode}");
    }

    var jwks = result.Content.ReadAsStringAsync().Result;
    return new JsonWebKeySet(jwks);
}

// Add services to the container.
builder.Services.AddRazorComponents()
    .AddInteractiveServerComponents();

var app = builder.Build();

// Configure the HTTP request pipeline.
if (!app.Environment.IsDevelopment())
{
    app.UseExceptionHandler("/Error", createScopeForErrors: true);
    // The default HSTS value is 30 days. You may want to change this for production scenarios, see https://aka.ms/aspnetcore-hsts.
    app.UseHsts();
}

app.UseHttpsRedirection();


app.UseAntiforgery();

app.MapStaticAssets();
app.MapRazorComponents<App>()
    .AddInteractiveServerRenderMode();

app.Run();
We can now register the services required for the authentication services in the Program.cs file as given below.
using asgardeo_dotnet.Components;
using Microsoft.IdentityModel.Tokens;
using Microsoft.AspNetCore.Authentication.Cookies;
using Microsoft.IdentityModel.JsonWebTokens;
using Microsoft.IdentityModel.Protocols.OpenIdConnect;

var builder = WebApplication.CreateBuilder(args);

HttpClient httpClient;
if (Environment.GetEnvironmentVariable("HTTPCLIENT_VALIDATE_EXTERNAL_CERTIFICATES") == "false")
{
    var handler = new HttpClientHandler
    {
        ServerCertificateCustomValidationCallback = HttpClientHandler.DangerousAcceptAnyServerCertificateValidator
    };
    httpClient = new HttpClient(handler);
}
else
{
    httpClient = new HttpClient();
}

builder.Services.AddSingleton(httpClient);

JsonWebKeySet FetchJwks(string url)
{
    var result = httpClient.GetAsync(url).Result;
    if (!result.IsSuccessStatusCode || result.Content is null)
    {
        throw new Exception(
            $"Getting token issuers (WSO2) JWKS from {url} failed. Status code {result.StatusCode}");
    }

    var jwks = result.Content.ReadAsStringAsync().Result;
    return new JsonWebKeySet(jwks);
}

const string ASGARDEO_OIDC_SCHEME = "AsgardeoOidc";

builder.Services.AddAuthentication(ASGARDEO_OIDC_SCHEME)
.AddOpenIdConnect(ASGARDEO_OIDC_SCHEME, oidcOptions =>
{
    oidcOptions.SignInScheme = CookieAuthenticationDefaults.AuthenticationScheme;

    oidcOptions.Configuration = new ()
    {
        Issuer = Environment.GetEnvironmentVariable("TOKEN_ENDPOINT"),
        AuthorizationEndpoint = Environment.GetEnvironmentVariable("AUTHORIZATION_ENDPOINT"),
        TokenEndpoint = Environment.GetEnvironmentVariable("TOKEN_ENDPOINT"),
        JwksUri = Environment.GetEnvironmentVariable("JWKS_URI"),
        JsonWebKeySet = FetchJwks(Environment.GetEnvironmentVariable("JWKS_URI")!),
        EndSessionEndpoint = Environment.GetEnvironmentVariable("LOGOUT_URI"),
    };
    foreach (var key in oidcOptions.Configuration.JsonWebKeySet.GetSigningKeys())
    {
        oidcOptions.Configuration.SigningKeys.Add(key);
    }

    oidcOptions.Authority = Environment.GetEnvironmentVariable("AUTHORITY");

    oidcOptions.ClientId = Environment.GetEnvironmentVariable("CLIENT_ID");
    oidcOptions.ClientSecret = Environment.GetEnvironmentVariable("CLIENT_SECRET");

    oidcOptions.ResponseType = OpenIdConnectResponseType.Code;

    oidcOptions.MapInboundClaims = false;
    oidcOptions.TokenValidationParameters.NameClaimType = JwtRegisteredClaimNames.Name;
    oidcOptions.TokenValidationParameters.RoleClaimType = "roles";
    oidcOptions.MetadataAddress = Environment.GetEnvironmentVariable("METADATA_ADDRESS");
    oidcOptions.SaveTokens = true;
})
.AddCookie(CookieAuthenticationDefaults.AuthenticationScheme);

// Add services to the container.
builder.Services.AddRazorComponents()
    .AddInteractiveServerComponents();

var app = builder.Build();

// Configure the HTTP request pipeline.
if (!app.Environment.IsDevelopment())
{
    app.UseExceptionHandler("/Error", createScopeForErrors: true);
    // The default HSTS value is 30 days. You may want to change this for production scenarios, see https://aka.ms/aspnetcore-hsts.
    app.UseHsts();
}

app.UseHttpsRedirection();


app.UseAntiforgery();

app.MapStaticAssets();
app.MapRazorComponents<App>()
    .AddInteractiveServerRenderMode();

app.Run();
The environment variables that were added in a prior step are utilized to create a new configuration for the relevant endpoints and also configure the client ID and secret of the application created in WSO2 Identity Platform.
For the purpose of this guide, the SaveTokens property is set to true, so the application will store the access token, refresh token, and ID token in the authentication properties and simplify the token persistence.
The following WebApplicationBuilder services need to be configured in order to enable authorization and also add the custom AuthenticationStateProvider class previously created as a scoped service. Note that the application namespace usage need to be added as well.
using asgardeo_dotnet.Components;
using Microsoft.IdentityModel.Tokens;
using Microsoft.AspNetCore.Authentication.Cookies;
using Microsoft.IdentityModel.JsonWebTokens;
using Microsoft.IdentityModel.Protocols.OpenIdConnect;
using Microsoft.AspNetCore.Components.Authorization;
using asgardeo_dotnet;

var builder = WebApplication.CreateBuilder(args);

HttpClient httpClient;
if (Environment.GetEnvironmentVariable("HTTPCLIENT_VALIDATE_EXTERNAL_CERTIFICATES") == "false")
{
    var handler = new HttpClientHandler
    {
        ServerCertificateCustomValidationCallback = HttpClientHandler.DangerousAcceptAnyServerCertificateValidator
    };
    httpClient = new HttpClient(handler);
}
else
{
    httpClient = new HttpClient();
}

builder.Services.AddSingleton(httpClient);

JsonWebKeySet FetchJwks(string url)
{
    var result = httpClient.GetAsync(url).Result;
    if (!result.IsSuccessStatusCode || result.Content is null)
    {
        throw new Exception(
            $"Getting token issuers (WSO2) JWKS from {url} failed. Status code {result.StatusCode}");
    }

    var jwks = result.Content.ReadAsStringAsync().Result;
    return new JsonWebKeySet(jwks);
}

const string ASGARDEO_OIDC_SCHEME = "AsgardeoOidc";

builder.Services.AddAuthentication(ASGARDEO_OIDC_SCHEME)
.AddOpenIdConnect(ASGARDEO_OIDC_SCHEME, oidcOptions =>
{
    oidcOptions.SignInScheme = CookieAuthenticationDefaults.AuthenticationScheme;

    oidcOptions.Configuration = new ()
    {
        Issuer = Environment.GetEnvironmentVariable("TOKEN_ENDPOINT"),
        AuthorizationEndpoint = Environment.GetEnvironmentVariable("AUTHORIZATION_ENDPOINT"),
        TokenEndpoint = Environment.GetEnvironmentVariable("TOKEN_ENDPOINT"),
        JwksUri = Environment.GetEnvironmentVariable("JWKS_URI"),
        JsonWebKeySet = FetchJwks(Environment.GetEnvironmentVariable("JWKS_URI")!),
        EndSessionEndpoint = Environment.GetEnvironmentVariable("LOGOUT_URI"),
    };
    foreach (var key in oidcOptions.Configuration.JsonWebKeySet.GetSigningKeys())
    {
        oidcOptions.Configuration.SigningKeys.Add(key);
    }

    oidcOptions.Authority = Environment.GetEnvironmentVariable("AUTHORITY");

    oidcOptions.ClientId = Environment.GetEnvironmentVariable("CLIENT_ID");
    oidcOptions.ClientSecret = Environment.GetEnvironmentVariable("CLIENT_SECRET");

    oidcOptions.ResponseType = OpenIdConnectResponseType.Code;

    oidcOptions.MapInboundClaims = false;
    oidcOptions.TokenValidationParameters.NameClaimType = JwtRegisteredClaimNames.Name;
    oidcOptions.TokenValidationParameters.RoleClaimType = "roles";
    oidcOptions.MetadataAddress = Environment.GetEnvironmentVariable("METADATA_ADDRESS");
    oidcOptions.SaveTokens = true;
    oidcOptions.Scope.Add("internal_login");
})
.AddCookie(CookieAuthenticationDefaults.AuthenticationScheme);

builder.Services.AddAuthorization();
builder.Services.AddCascadingAuthenticationState();
builder.Services.AddScoped<AuthenticationStateProvider, PersistingAuthenticationStateProvider>();
builder.Services.AddHttpContextAccessor();

// Add services to the container.
builder.Services.AddRazorComponents()
    .AddInteractiveServerComponents();

var app = builder.Build();

// Configure the HTTP request pipeline.
if (!app.Environment.IsDevelopment())
{
    app.UseExceptionHandler("/Error", createScopeForErrors: true);
    // The default HSTS value is 30 days. You may want to change this for production scenarios, see https://aka.ms/aspnetcore-hsts.
    app.UseHsts();
}

app.UseHttpsRedirection();


app.UseAntiforgery();

app.MapStaticAssets();
app.MapRazorComponents<App>()
    .AddInteractiveServerRenderMode();

app.Run();
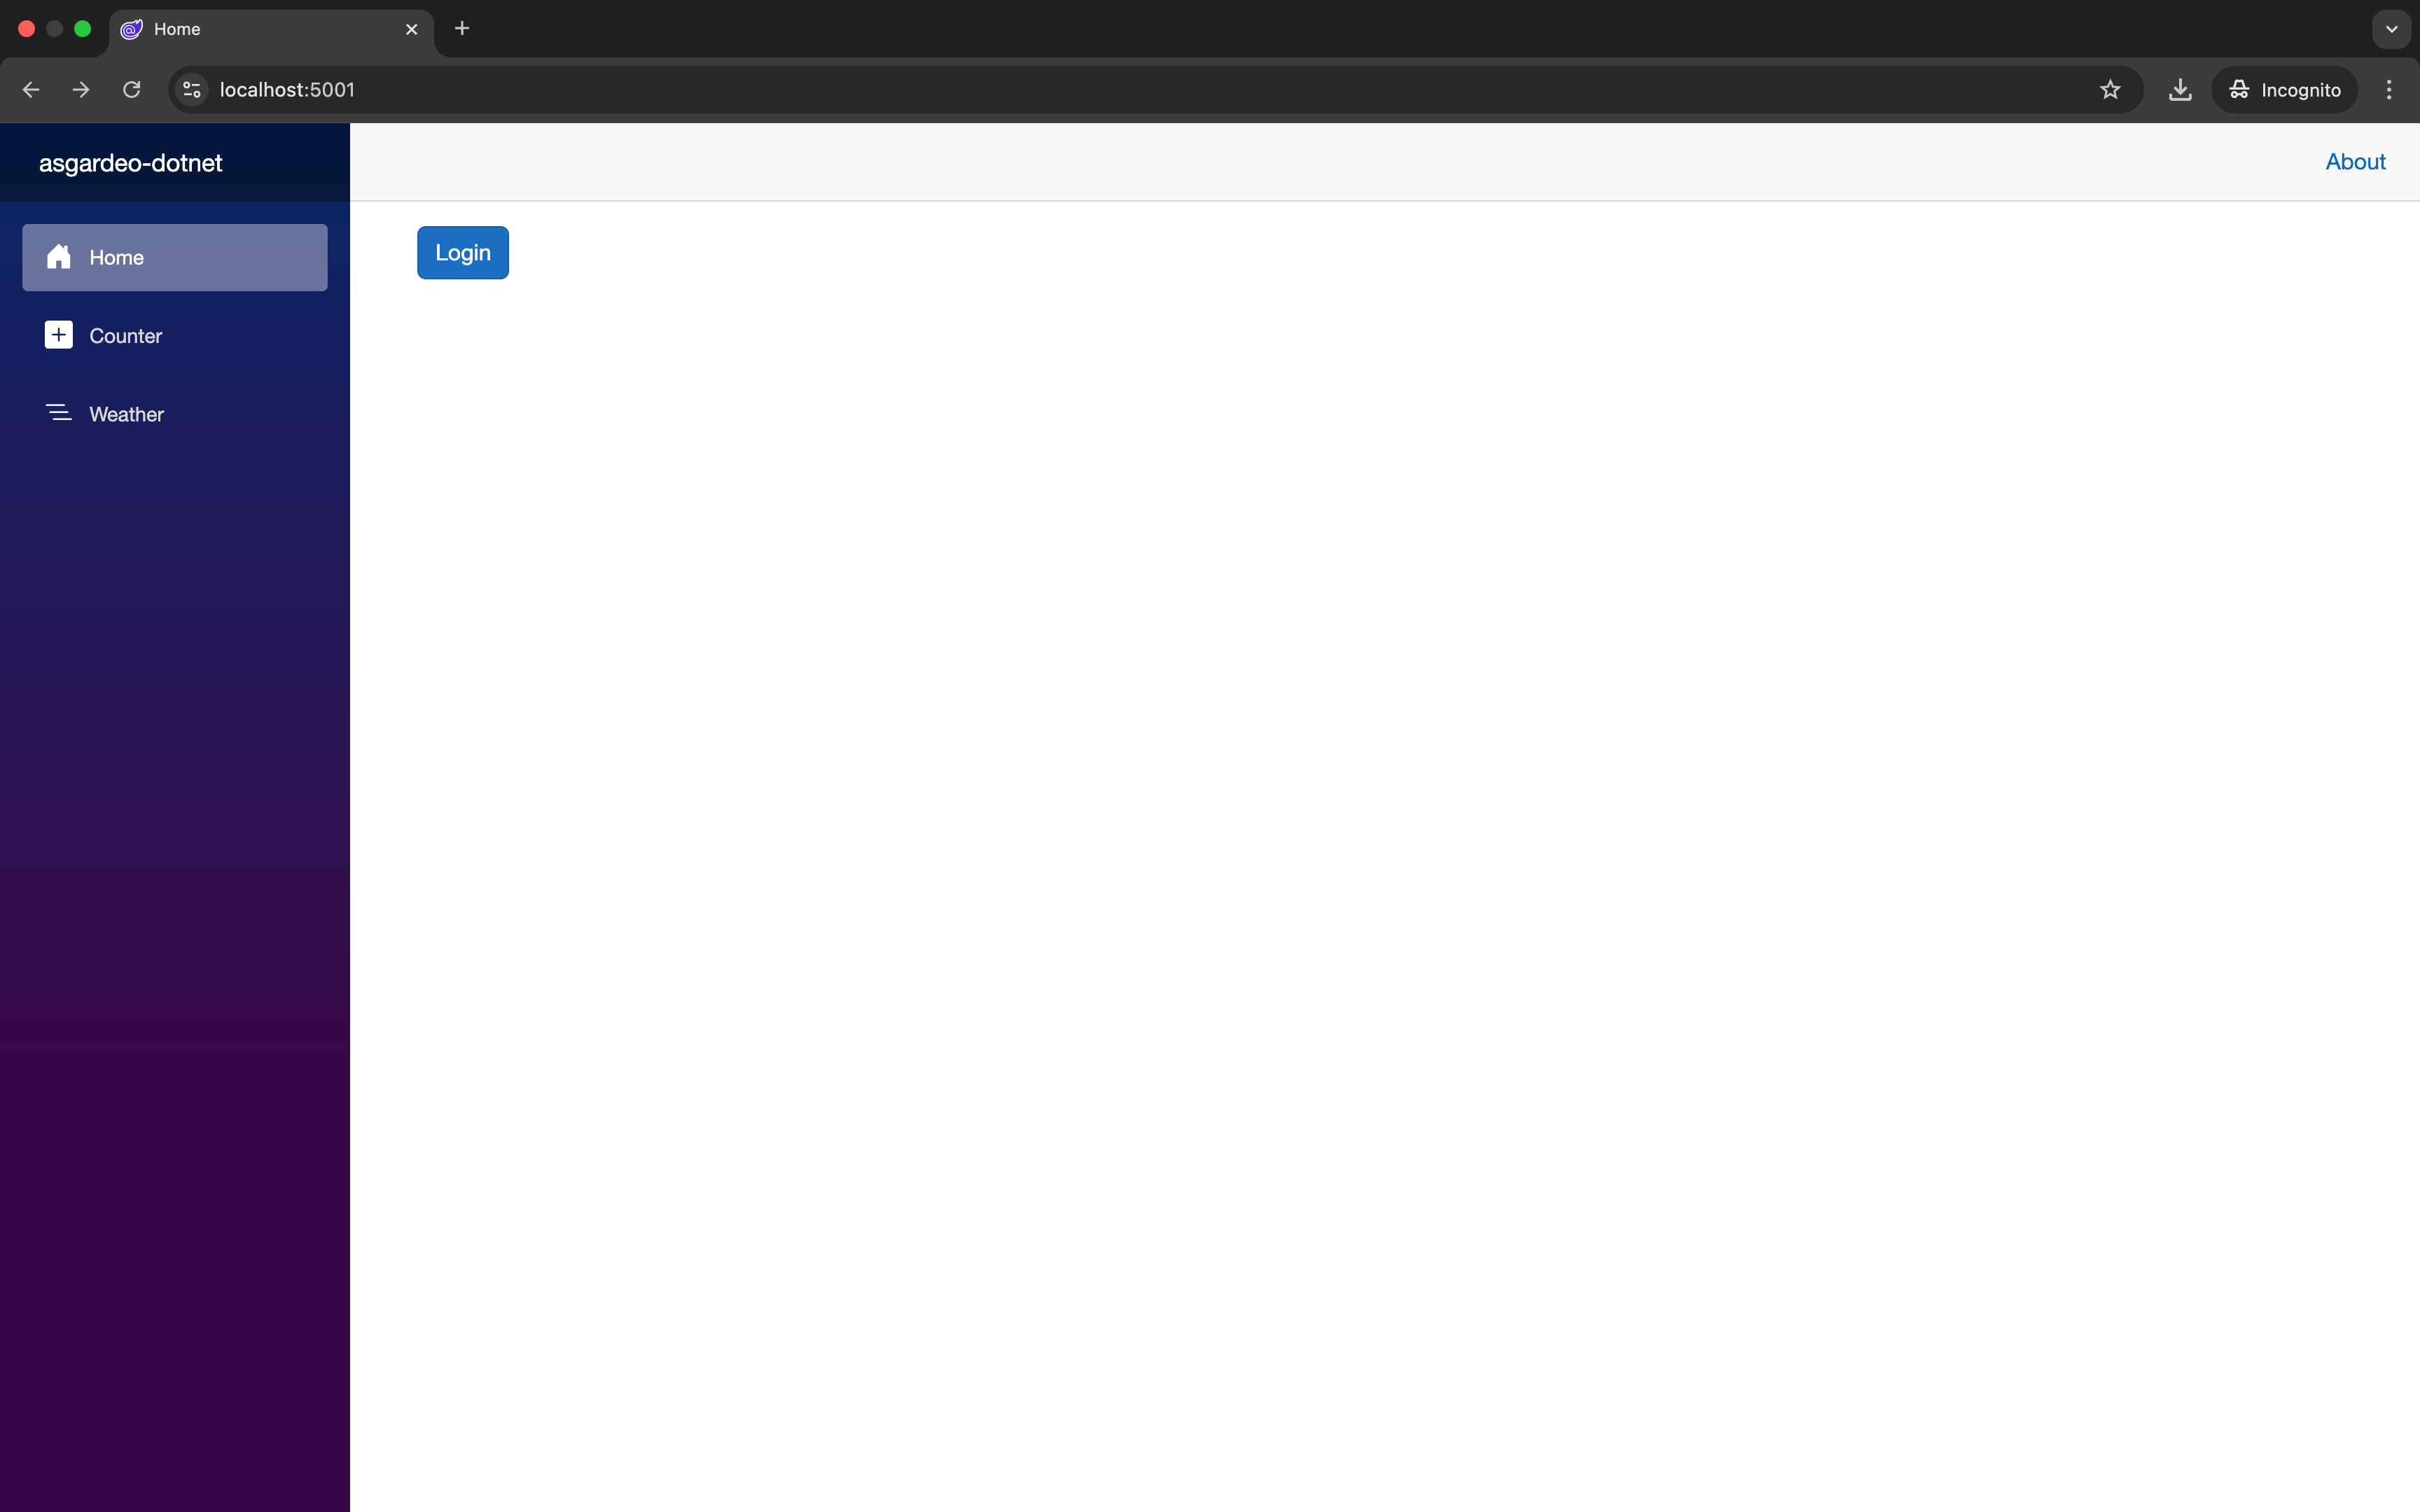
When you run the application using the dotnet run command you will now be able to see the Login button on the home page of the application. Clicking on it, however, the request will fail as we have not yet set up the routes for the login and logout functionality.
In the next steps we will set up and secure the routes in the application including for the login and logout functionality.