Connect a remote user store
WSO2 Identity Platform allows you to connect a remote user store and onboard users and groups from it. The user store connection can either be with read-only or read/write permissions. Administrators can then start managing access to business applications in WSO2 Identity Platform for these users and groups. This guide explains how you can set up a remote user store for your WSO2 Identity Platform organization.
User store connections
WSO2 Identity Platform supports the following user store connections.
Optimized user store connection (recommended)
WSO2 Identity Platform has introduced optimized user store connections, designed for high scalability and performance. At the moment, it supports read-only user stores and can be used to authenticate users and retrieve attributes. This connection is continuously evolving and will support a wide range of use cases in the future.
If this connection's capabilities meet your organization's requirements, we highly recommend that you use the optimized connection instead of the classic connection.
Classic user store connection
The optimized user store connection is the recommended choice, though its capabilities are limited at the moment. If your organization's requirements exceed the capabilities offered by the optimized connection, you can use the classic user store connection. The classic connection supports both read/write and read-only user stores, and offers full management capabilities. While the classic connection offers more capabilities, it may not be as performant as the optimized connection.
Switch connections from classic to optimized
If you have already connected a classic user store and would like to explore the new connection,
- Delete the existing remote user store.
- Register a remote user store again.
- Set up the remote user store with the new user store agent.
Switch classic connections from read-only to read/write
If you have connected a classic user store before 7th February 2023, you will only have read-only access for the user store. If you need read/write access for your user store in WSO2 Identity Platform,
- Delete the existing remote user store.
- Register a classic user store again with Read/Write access type. Make sure to select the classic user store path.
- Set up the remote user store with the latest user store agent.
Register and configure a user store in WSO2 Identity Platform
The following guides explain how you can register and set up a remote user store for your WSO2 Identity Platform organization.
Prerequisites
Ensure your system has the following before you proceed.
-
An on-premise user store. Currently, WSO2 Identity Platform supports:
- Lightweight Directory Access Protocol (LDAP)
- Active Directory (AD)
-
If using a classic user store, to run the user store agent:
- Install JAVA 8 or JAVA 11.
- Configure
JAVA_HOME.
System requirements
-
Recommended hardware requirements
CPU cores 2Storage 500 MBof free space on disk.Operating system The connector can run on Windows or Linux. RAM 1 GB -
Connectivity methods
Classic Optimized Protocol Web socket gRPC Port 443 443
Register a remote user store
To configure a remote user store for your organization:
-
On the WSO2 Identity Platform Console, go to User Attributes & Stores > User Stores.
-
Click Connect userstore to open the following:
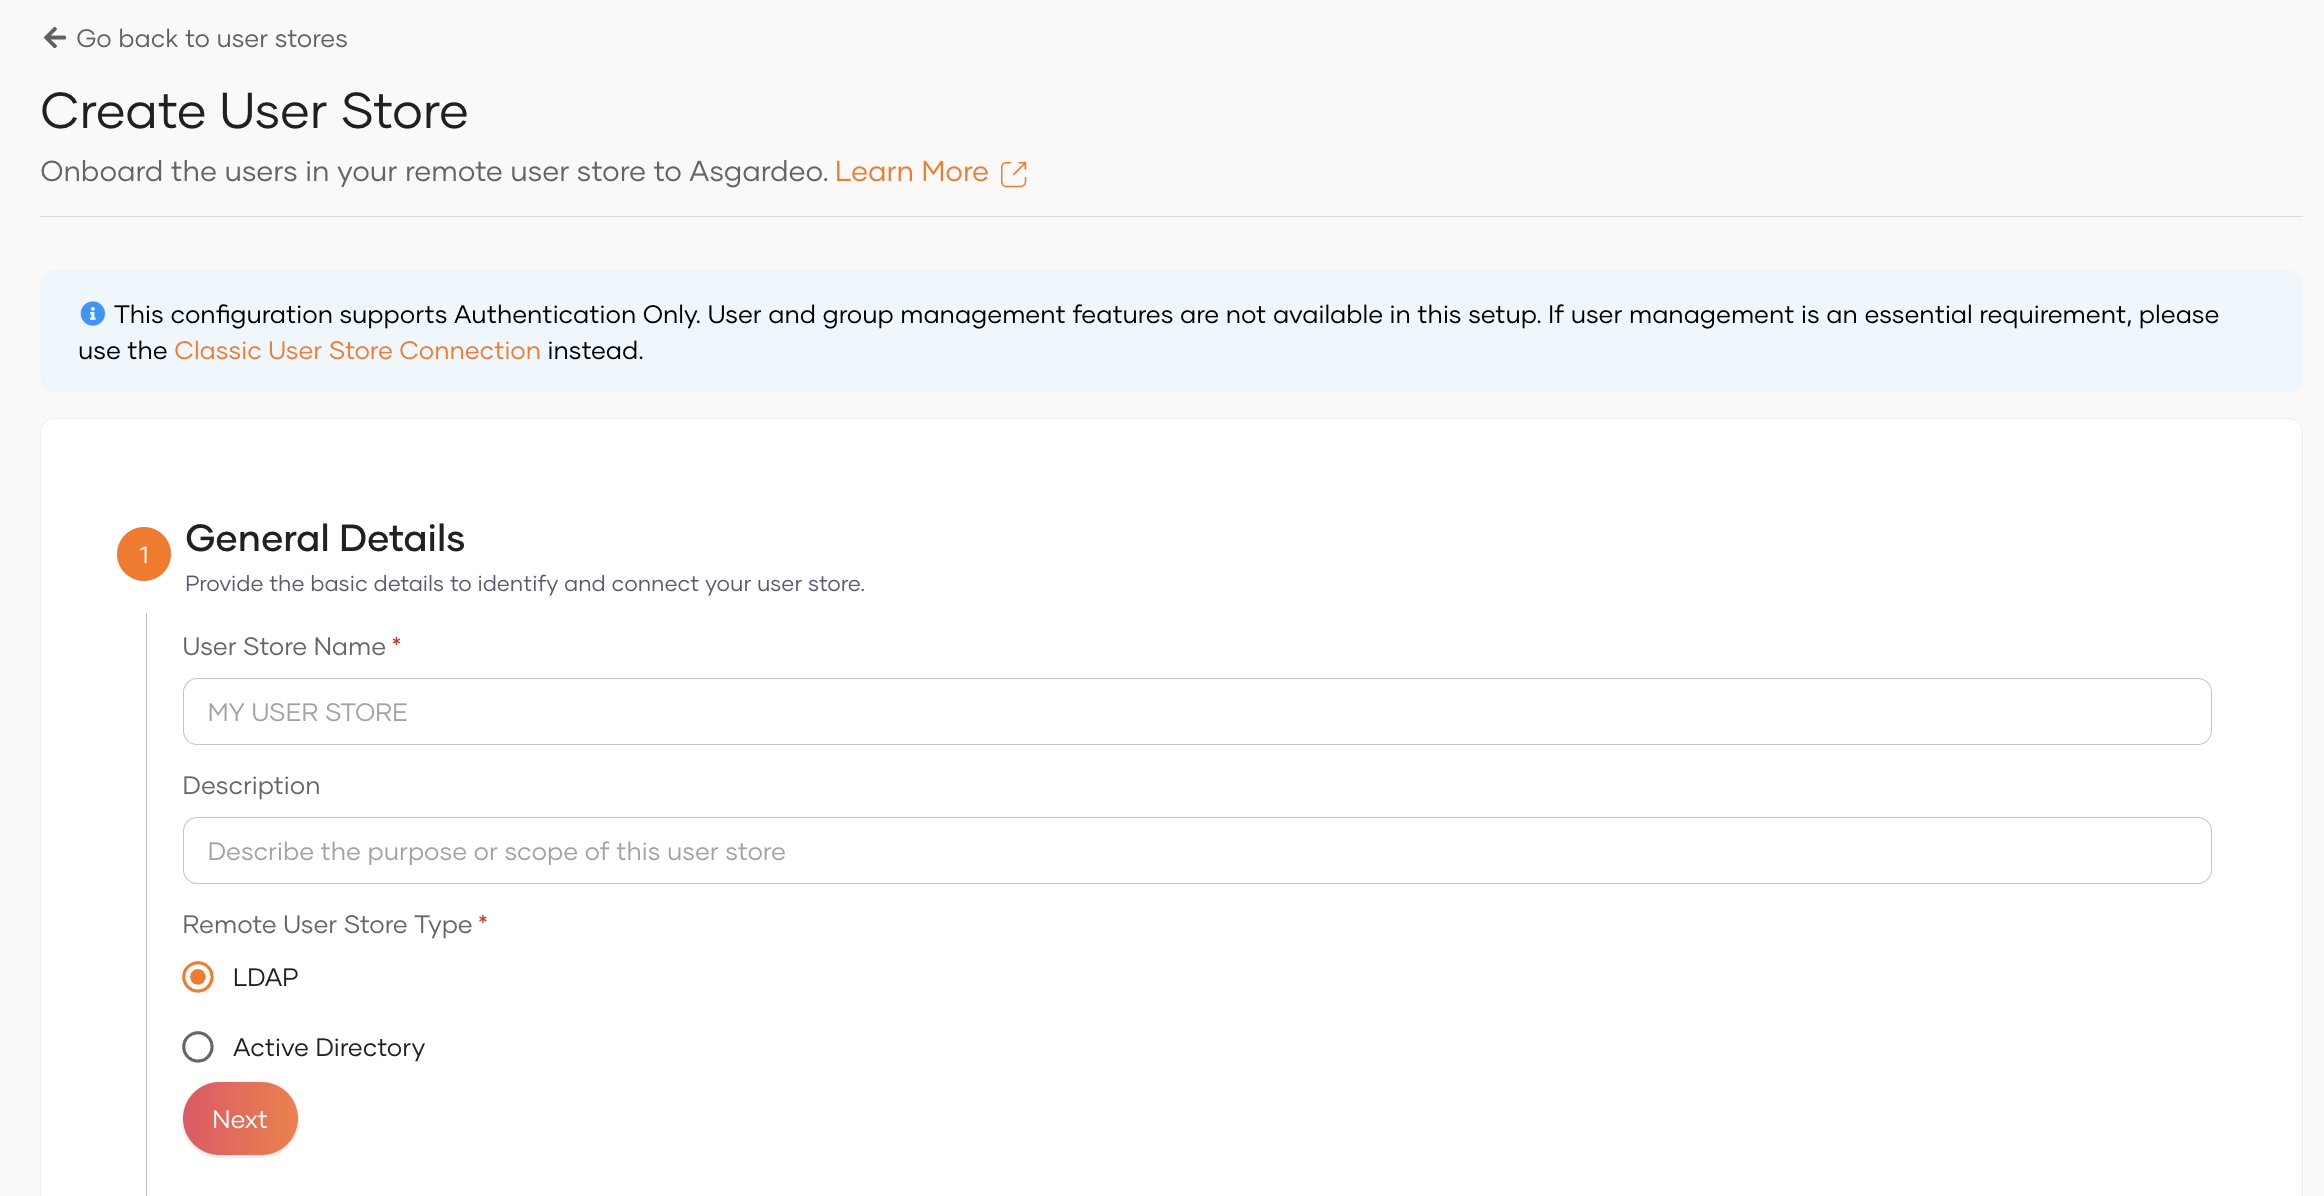
-
If the optimized connection supports your use case, this is the recommended choice. If not, click Classic User Store Connection instead.
-
Enter the following details about the user store.
User store name A unique name to identify your user store. Description A description for the user store. Remote user store type Select your user store type. Access type
(Only for classic user stores)Select the access type of the user store. It can be any one of the following:
- Read-only
- Read/Write
Note: The access type of the user store cannot be modified after creation. -
Click Next and under Configurations, provide the properties of your user store.
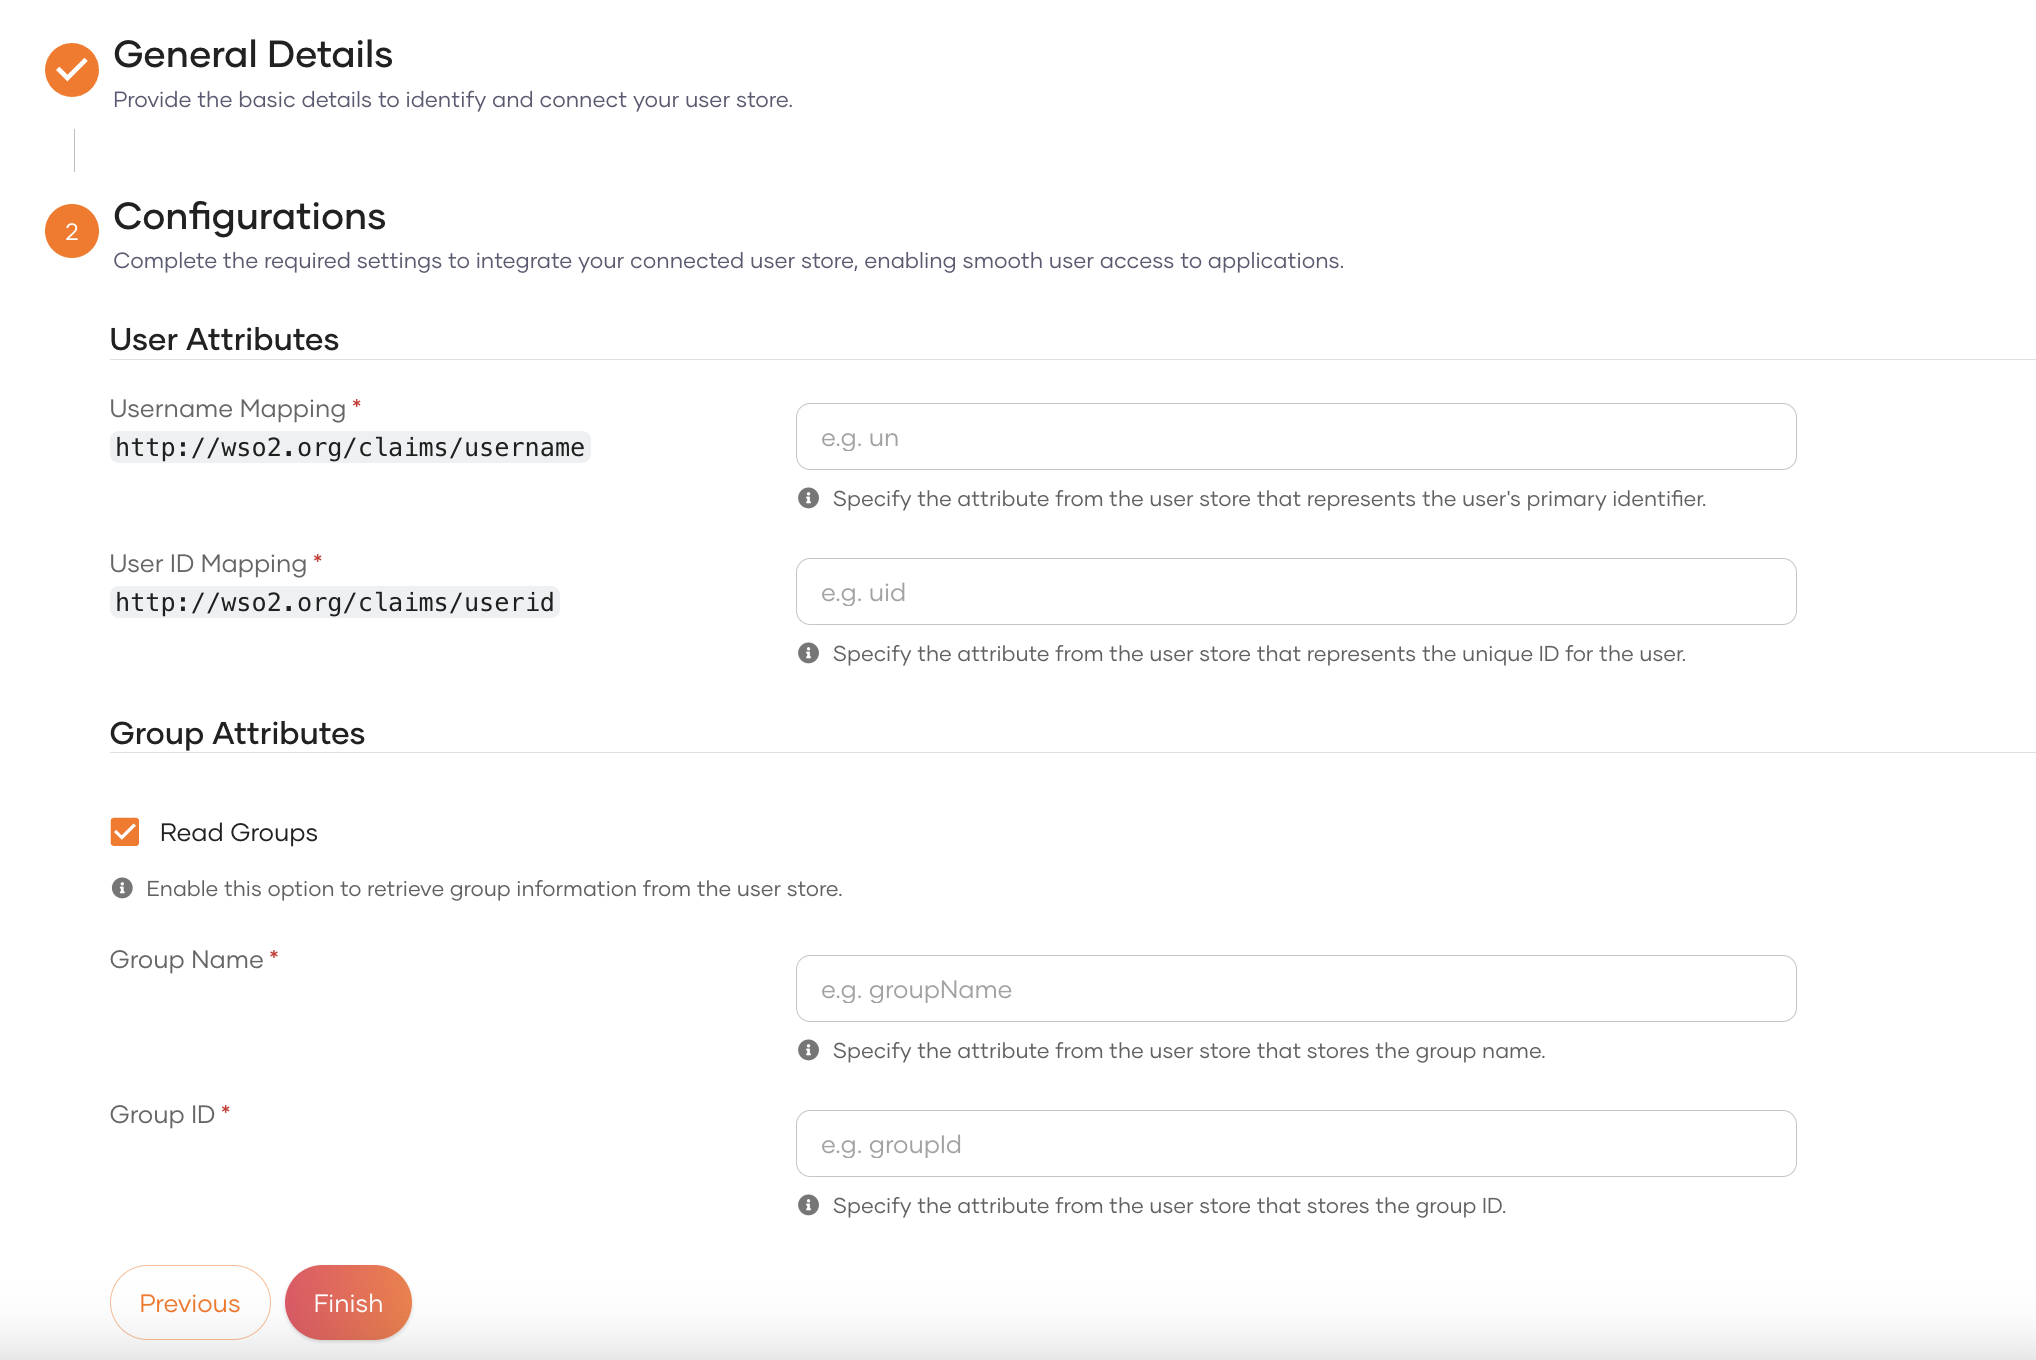
User attributes Username This attribute is used as the user identifier. Provide an attribute that identifies users in your on-premise user store.
For the best experience, use a username that satisfies validation rules in the Username validation section.User Id This attribute is used to uniquely identify a user entry. Provide an attribute that uniquely identifies a user entry in your user store. Group attributes Read groups
(Not required for classic user stores)Enable to retrieve groups from the user store. Group name
(Not required for classic user stores)This attribute is used as the group identifier. Provide an attribute that identifies groups in your on-premise user store. Group Id
(Not required for classic user stores)This attribute is used to uniquely identify a group. Provide an attribute that uniquely identifies a group in your user store. Warning
-
Map the Username and User Id attributes correctly for successful user authentication. If you have enabled Read groups, make sure to correctly map the Group name and Group Id attributes.
-
Additionally, to allow multiple email addresses and mobile numbers attributes for users, follow instructions in Assign multiple email addresses and mobile numbers to a user.
-
-
Click Finish to complete the registration.
Note
You can register only one remote user store per organization without an enterprise tier account. If you want to connect a different user store, delete the existing user store and register a new one.
If you're on the enterprise tier and need to connect more than one user store, please contact our support team through the WSO2 cloud support portal or email us at [email protected]. We'll guide you through the process.
Set up the remote user store
After registering the user store, you'll be redirected to the Setup Guide of the user store agent. To assemble and configure the user store agent bundle, follow the steps below for the appropriate agent.
-
Download the user store agent according to your operating system.
(Optional) Verify the integrity of the downloaded file
Copy the displayed hash value and run the following command in the same directory where you downloaded the zip file.
-
Configure the properties and connection details of the on-premise user store by following these steps:
-
Unzip the downloaded user store agent.
-
Go to the root directory of the user store agent and open the
deployment.tomlfile. -
Update the configurations according to your requirements and user store settings. A sample configuration is given below for the reference.
[system]
idle_connections = 10
connection_retry_count = 5
connection_retry_interval = 5

[user_store]
type = "ldap"
connection_url = "ldap://localhost:1389"
connection_name = "cn=admin,dc=example,dc=org"
connection_password = "adminpassword"
connection_timeout = 5000
connection_retry_count = -1

[user_store.properties]
user_search_base = "ou=Users,dc=example,dc=org"
user_entry_object_class = "inetOrgperson"
user_id_attribute = "uid"
user_name_attribute = "cn"
user_search_filter = "(&(objectClass=inetOrgperson)(?=?))"
user_list_filter = "(objectClass=inetOrgperson)"
read_groups = "true"
group_search_base = "ou=Groups,dc=example,dc=org"
group_entry_object_class = "groupOfNames"
group_search_filter = "(&(objectClass=groupOfNames)(?=?))"
group_list_filter = "(objectClass=groupOfNames)"
group_id_attribute = "uid"
group_name_attribute = "cn"
membership_attribute = "member"
Note
Refer remote agent properties for the complete list of agent configurations.
-
-
Return to the WSO2 Identity Platform Console and click Generate Token to create an installation token. The installation token is essential to run the user store agent. The token can be configured in one of the following ways.
-
Configure the token in the configuration file
Add the following configurations to the
deployment.tomlfile to configure the installation token.The installation token can be encrypted using the provided cipher tool. See how to configure secrets in the agent configuration file.
-
Configure the token as an environment variable
For containerized or cloud-native environments like Kubernetes, the installation token can be stored as an environment variable, typically configured through Kubernetes secrets. You can define the installation token with the following environment variable.
Warning
- Copy the installation token and save it in a safe location. You won't be able to see it again!
- Your token is your responsibility. Choose the right method that fits your deployment and securely store the token.
- This token has no expiry time, but in case you lose or forget it, you can regenerate the token.
-
-
To start the user store agent, navigate to its root directory and run one of the following commands based on your operating system:
-
Download the user store agent.
-
Configure the properties and connection details of the on-premise user store by following these steps:
-
Unzip the downloaded user store agent.
-
Go to the root directory of the user store agent and open the
deployment.tomlfile. -
Update the configurations according to your user store settings. A sample configuration is given below for the reference.
[user_store]
type = "ldap"
base_dn = "dc=wso2,dc=org"
connection_url = "ldap://localhost:10391"
connection_name = "cn=admin,dc=example,dc=org"
connection_password = "adminpassword"
user_id_search_filter = "(&(objectClass=inetOrgperson)(uid=?))"
user_name_list_filter = "(objectClass=inetOrgperson)"
user_id_attribute = "uid"
user_name_attribute = "cn"
user_name_search_filter = "(&(objectClass=inetOrgperson)(cn=?))"
password_hash_method = "PLAIN_TEXT"
group_search_base = "ou=Groups,dc=example,dc=org"
group_name_attribute = "cn"
group_name_search_filter = "(&(objectClass=groupOfNames)(cn=?))"
group_name_list_filter = "(objectClass=groupOfNames)"
group_id_attribute = "gid"
membership_attribute = "member"
Note
Refer remote agent properties for the complete list of agent configurations.
-
-
Return to the WSO2 Identity Platform Console and, click Generate Token to create an installation token. The installation token is essential to run the user store agent.
Warning
- Copy the installation token and save it in a safe location. You won't be able to see it again!
- This token has no expiry time, but in case you lose or forget it, you can regenerate an installation token.
-
To start the user store agent, navigate to its root directory and run one of the following commands based on your operating system:
Enter the installation token generated in the previous step when prompted.