Display logged-in user details
4 min
At this point, we’ve successfully implemented login and logout capabilities using the WSO2 Identity Platform SDK. The next step is to explore how to access and display logged-in user details within the app.
The Next SDK has components can be used to display user information. You can use the User, UserProfile, or UserDropdown components to access and display user profile information in a declarative way.
User: TheUsercomponent provides a render prop pattern to access user profile information:UserProfile: TheUserProfilecomponent provides a declarative way to display and update user profile information.UserDropdown: TheUserDropdowncomponent provides a dropdown menu with built-in user information and sign-out functionality.
First let's use the User Component to display the username as below.
'use client'

import { SignedIn, SignedOut, SignInButton, SignOutButton, User } from '@asgardeo/nextjs';

export default function Home() {
  return (
    <>
    <div className="flex flex-col items-center justify-center min-h-screen text-center gap-6">
      <header className="flex flex-col items-center gap-2">
        <SignedIn>
          <SignOutButton />
        </SignedIn>
        <SignedOut>
          <SignInButton />
        </SignedOut>
      </header>
      <main className="flex flex-col items-center gap-4">
        <SignedIn>
          <User>
            {(user) => (
              <div>
                <p>Welcome back, {user.userName || user.username || user.sub}</p>
              </div>
            )}
          </User>
        </SignedIn>
      </main>
      </div>
    </>
  );
}
Now let's use the UserProfile component to display and update user profile information.
'use client'

import { SignedIn, SignedOut, SignInButton, SignOutButton, User, UserProfile } from '@asgardeo/nextjs';

export default function Home() {
  return (
    <>
    <div className="flex flex-col items-center justify-center min-h-screen text-center gap-6">
      <header className="flex flex-col items-center gap-2">
        <SignedIn>
          <SignOutButton />
        </SignedIn>
        <SignedOut>
          <SignInButton />
        </SignedOut>
      </header>
      <main className="flex flex-col items-center gap-4">
        <SignedIn>
          <User>
            {(user) => (
              <div>
                <p>Welcome back, {user.userName || user.username || user.sub}</p>
              </div>
            )}
          </User>
          <UserProfile />
        </SignedIn>
      </main>
      </div>
    </>
  );
}
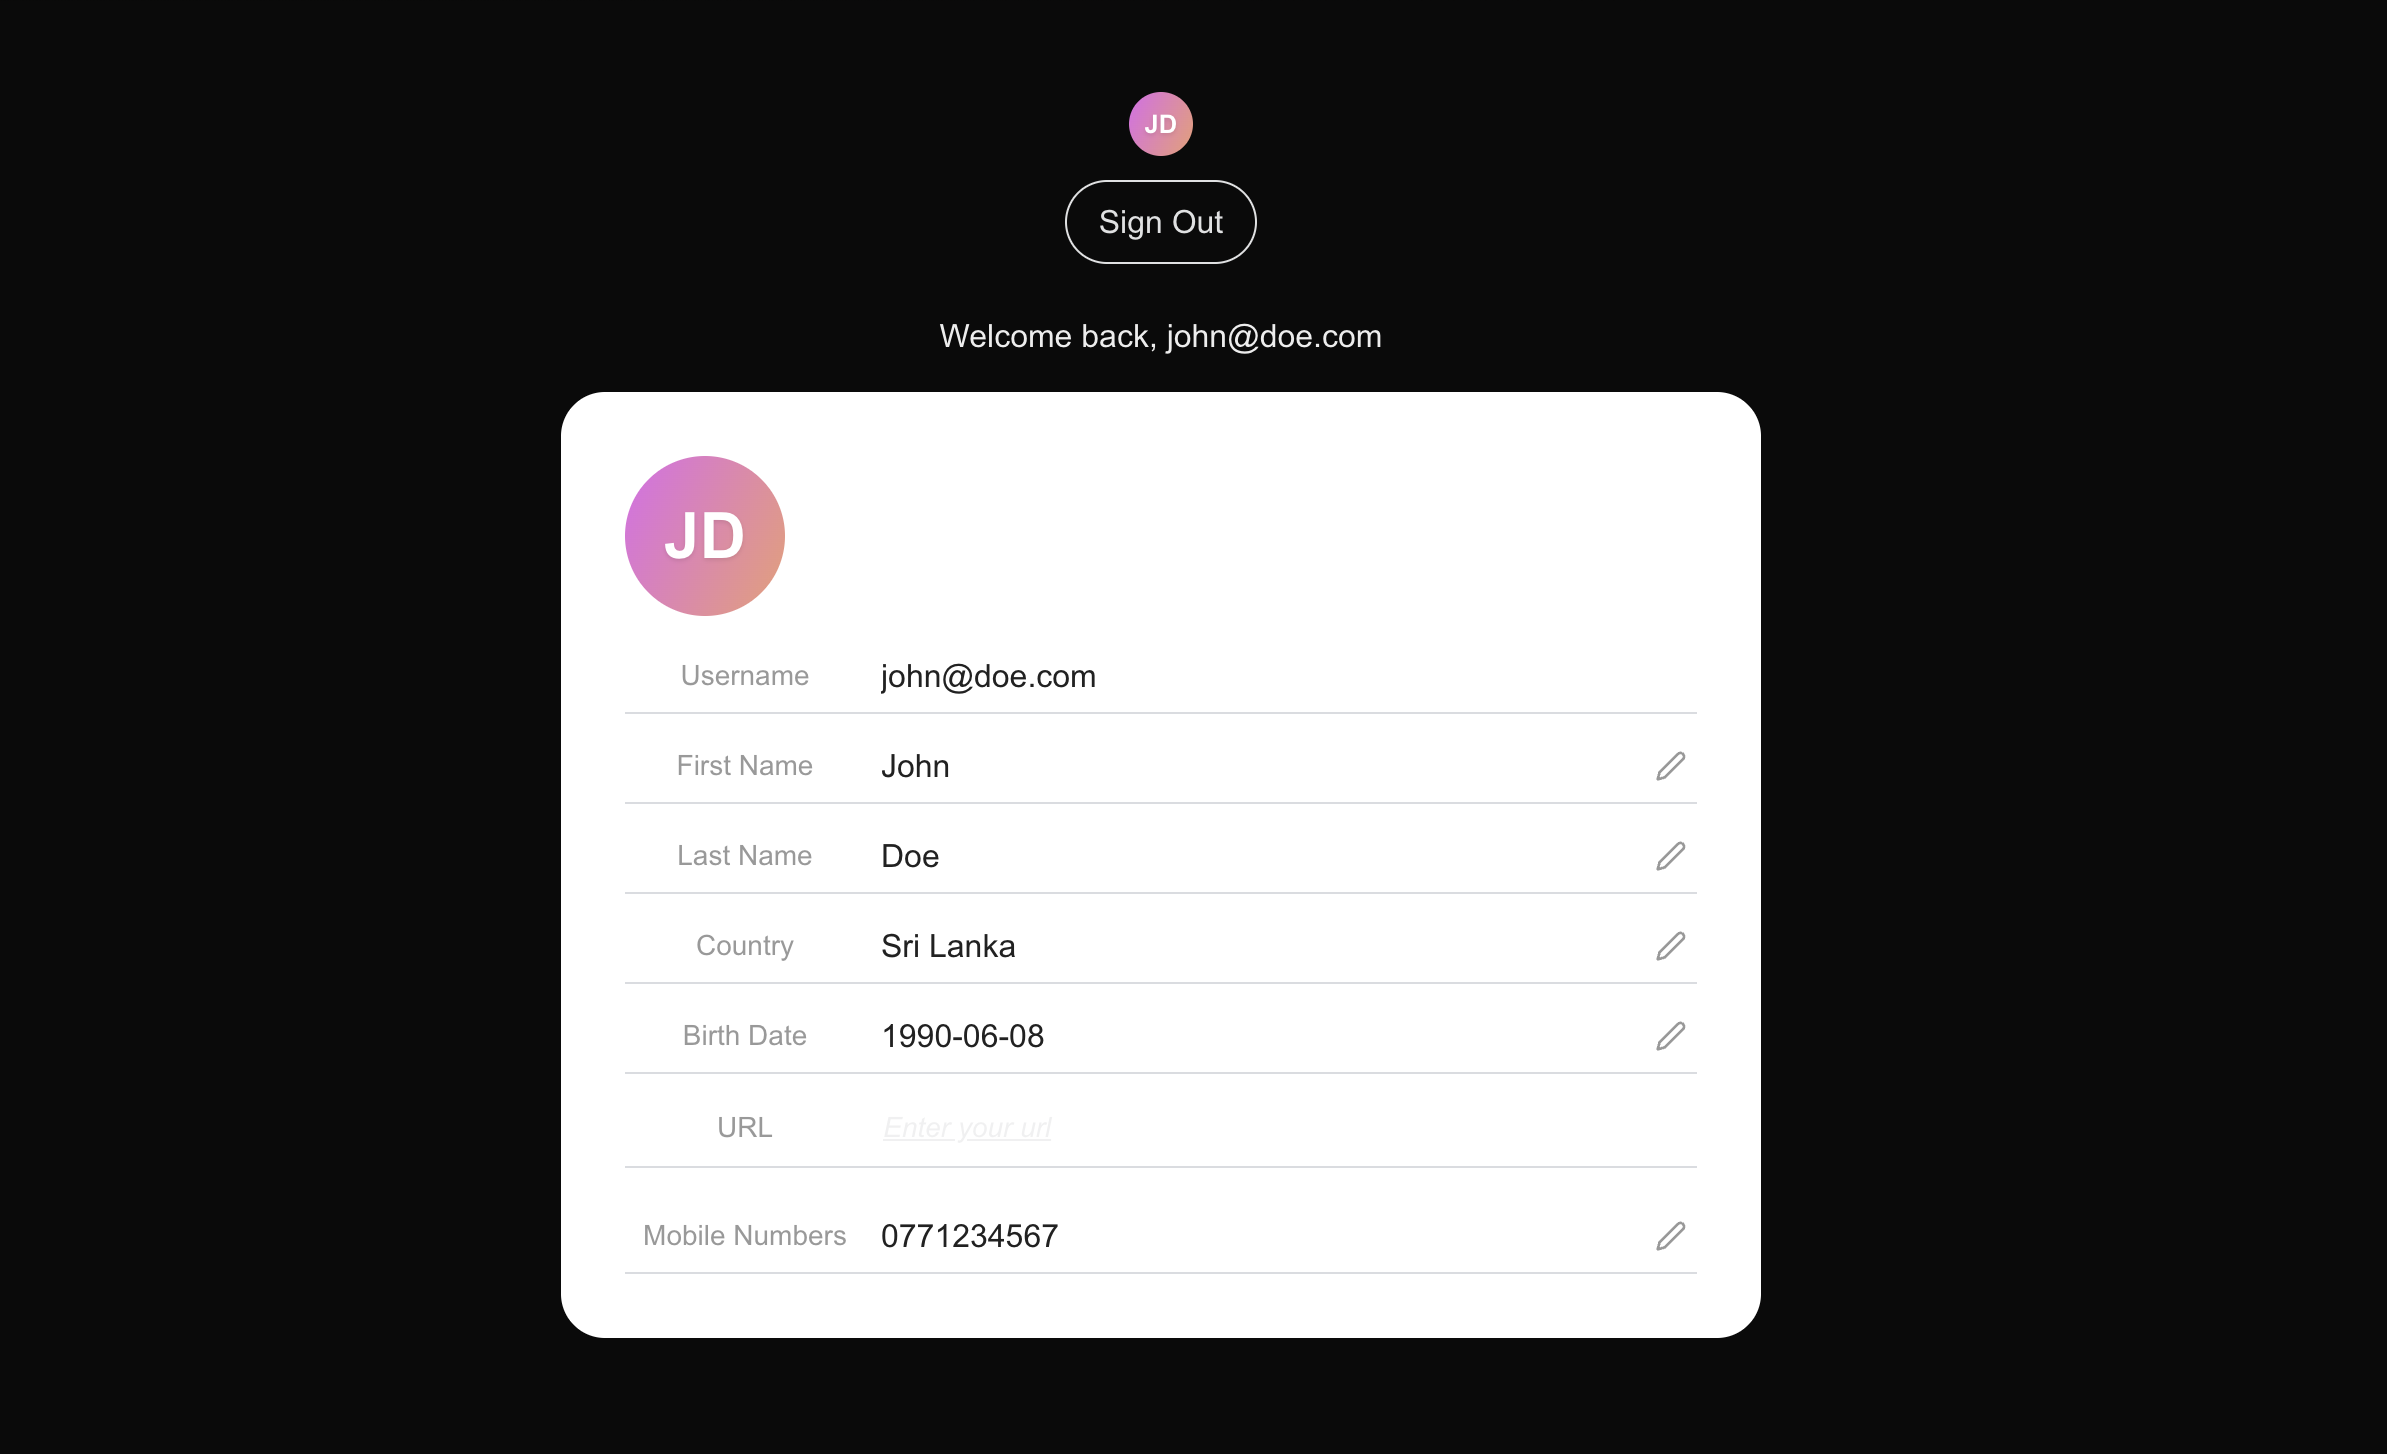
Finally we can use the UserDropdown component to provide a dropdown menu with built-in user information and sign-out functionality.
'use client'

import { SignedIn, SignedOut, SignInButton, SignOutButton, User, UserDropdown, UserProfile } from '@asgardeo/nextjs';

export default function Home() {
  return (
    <>
    <div className="flex flex-col items-center justify-center min-h-screen text-center gap-6">
      <header className="flex flex-col items-center gap-2">
        <SignedIn>
          <UserDropdown />
          <SignOutButton />
        </SignedIn>
        <SignedOut>
          <SignInButton />
        </SignedOut>
      </header>
      <main className="flex flex-col items-center gap-4">
        <SignedIn>
          <User>
            {(user) => (
              <div>
                <p>Welcome back, {user.userName || user.username || user.sub}</p>
              </div>
            )}
          </User>
          <UserProfile />
        </SignedIn>
      </main>
      </div>
    </>
  );
}
If your Next application is already running in the development mode, the home page will be reloaded and you will see the updated user interface.
In this step, we further improved our React app to display the user attributes. As the next step, we will try to secure routes within the app.