LoginFlow AI
Welcome to the Quickstart Guide for LoginFlow AI! In this guide, you’ll learn how to use Asgardeo LoginFlow AI to generate login flows for your applications, including passwordless login, Multi-Factor Authentication (MFA), social logins, and adaptive authentication logic that’s automatically generated.
[//] STEPS_START
Configure Connections in Asgardeo
MFA, passwordless and social providers are configured in Asgardeo as connections. To start, set up the following connections in the Asgardeo console.
-
To configure username and password login, no additional steps are required. Asgardeo is pre-configured to use username and password as the default login option for your application.
-
Asgardeo pre-configured with Magic Link and Email OTP as connections, so you can follow this guide without needing to modify the default settings.
-
Configure GitHub as a social login provider by creating a connection in Asgardeo console.
-
Register a GitHub OAuth App or a GitHub App by following the Register Asgardeo on GitHub step in this guide. Once the GitHub app is registered you need to copy
Client IDandClient secretfor the next step. -
Register GitHub connection in Asgardeo console by following the Register the GitHub IdP step in this guide.
-
Create and configure a sample app
You can either use the Asgardeo Try-It hosted app without setting up a local app or create & run a sample app locally using the Asgardeo React template.
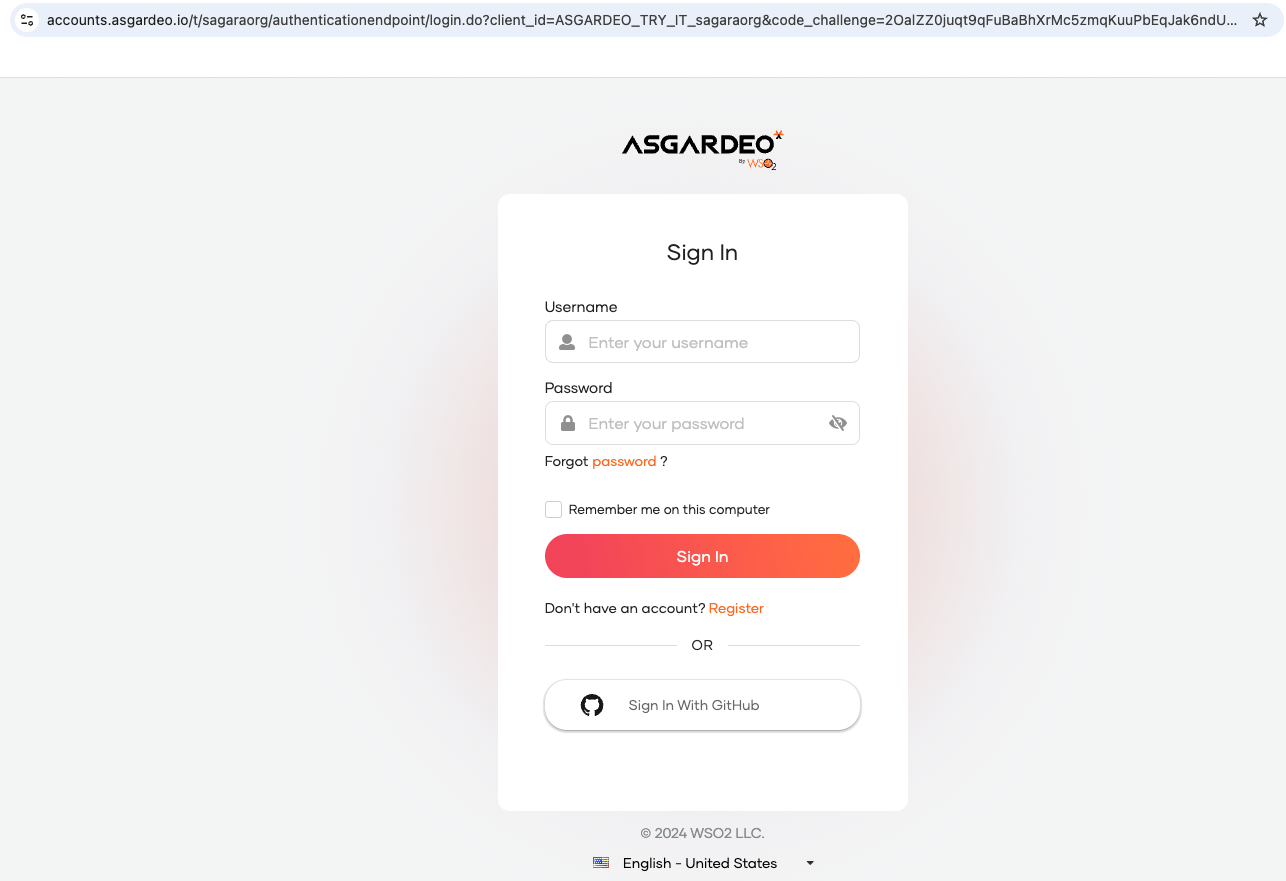
- On the Asgardeo Console, go to Home and click Try login with the Try It app.
- A dialog box appears prompting you to create a user account. Create a user account or if you already have one, click Continue to proceed.
Note
Asgardeo provides a hosted sample app called Try-It , which allows you to explore features like passwordless login, Multi-Factor Authentication (MFA), social logins, adaptive authentication, and user provisioning without the need to create or run a local app. Once you enable the Asgardeo Try-It app, it will automatically register and configure an application in the Asgardeo console, making it ready for you to use.
-
Sign into Asgardeo console and navigate to Applications > New Application.
-
Select Single Page Application and complete the wizard popup by providing a suitable name and an authorized redirect URL.
Example
name: asgardeo-react
Authorized redirect URL: http://localhost:5173
-
Note down the following values from the Protocol tab of the registered application. You will need them to configure Asgardeo React SDK.
client-idfrom the Protocol tab.- The name of your Asgardeo organization
-
Use the Asgardeo React template to bootstrap your application by running the following command.
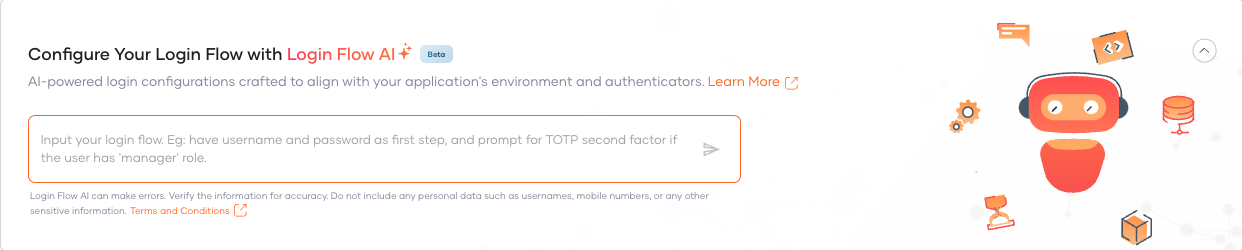
Open the Login Flow AI prompt
-
On the Asgardeo Console, go to Applications, and select the Try It application (or select Asgardeo-react app in case if you have created and running an app locally in the previous step).
-
Go to the Login Flow tab of the application and click the Try Login Flow AI button to open the Login Flow AI prompt.
Try out Login Flow AI - Password or MagicLink
Enter the following given natural language instruction and click the run button.
The following login flow with username & password and Magic Link should be generated in the Login Flow designer.
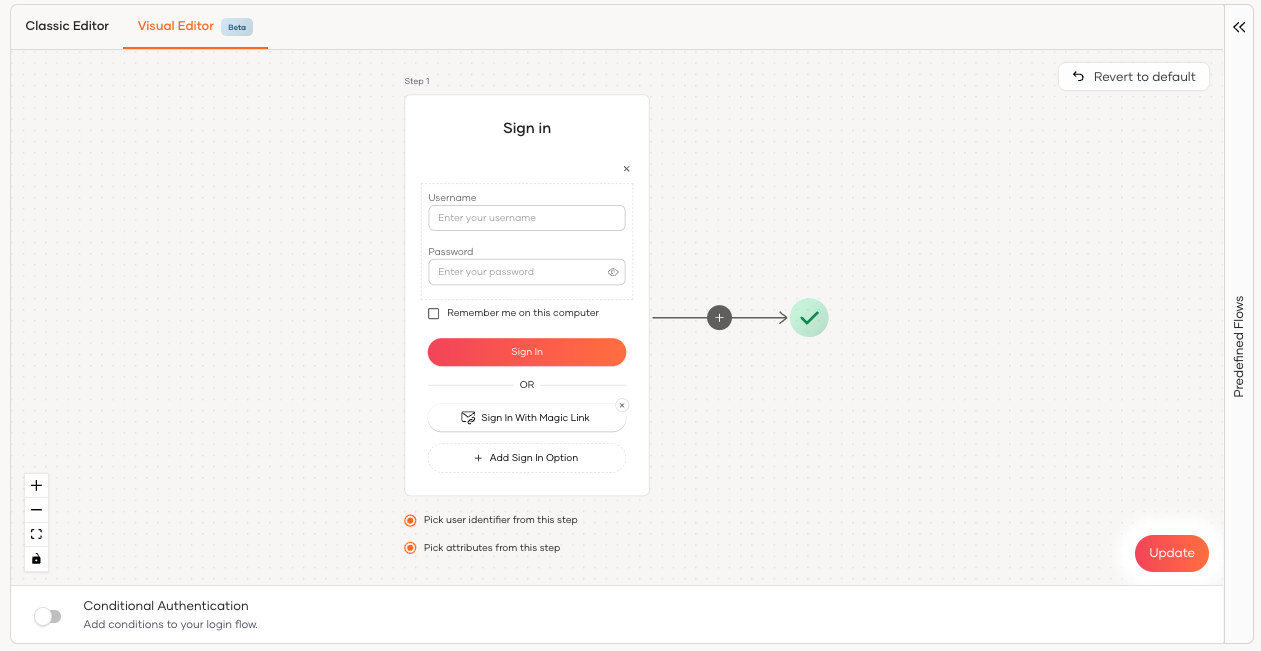
Click the Update button to save the above login flow configuration.
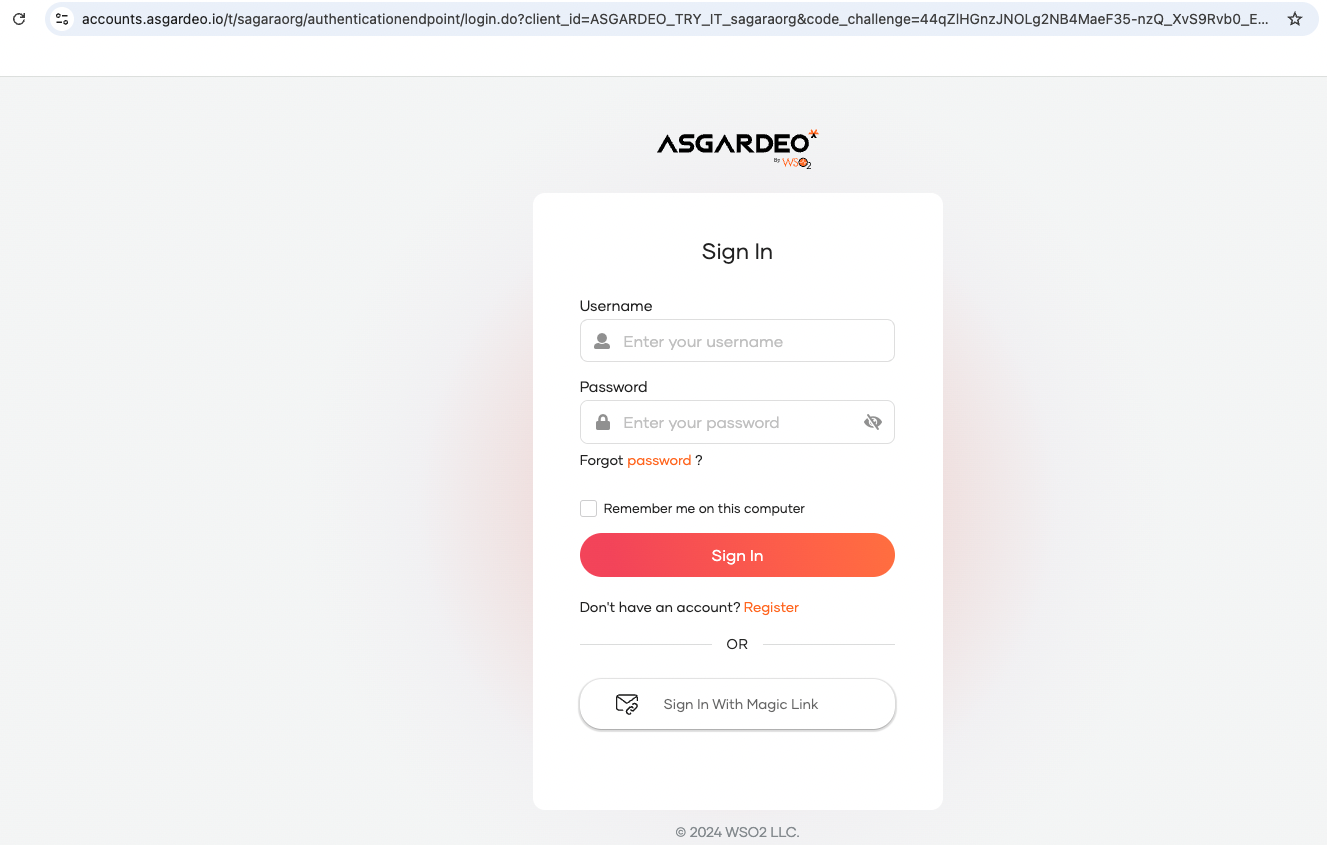
Next, click Try Login button in the top right corner of your screen. This will open the Try-It application in a new tab.
Now you can try logging to the Try It application using either username & password or Magic Link.
Tip
You need to create a test user in Asgardeo by following this guide to tryout login and logout features. Also, make sure you have entered a valid email address in the user profile of the test user to the receive Magic Link login code.
Try out Login Flow AI - Password or GitHub
Enter the following given natural language instruction and click the run button.
The following login flow with username & password and GitHub should be generated in the Login Flow designer.
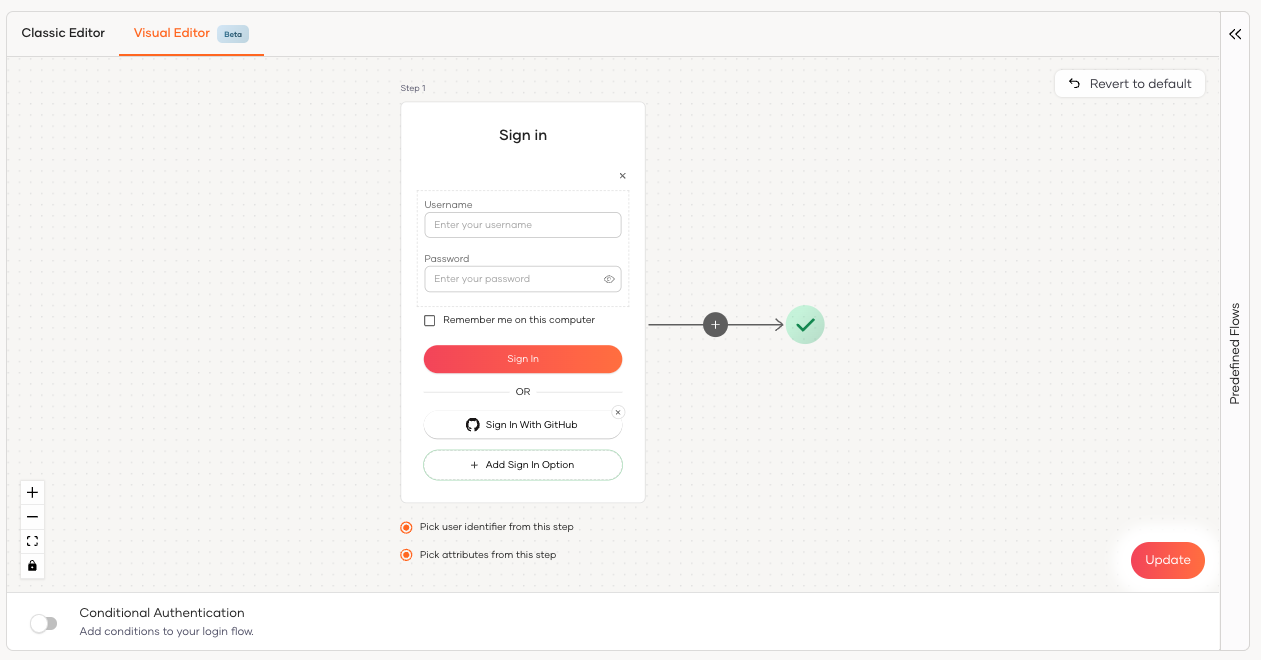
Click the Update button to save the above login flow configuration.
Next, click the Try Login button in the top right corner of your screen. This will open the Try-It application in a new tab.
Now you can try logging to the Try It application using either username & password or GitHub.
Important
When testing with a GitHub user, ensure that the public email setting in the public GitHub profile is configured to return an email address. For guidance, refer to this GitHub guide
Tip
You need to create a test user in Asgardeo by following this guide to tryout login and logout features. Also, make sure you have a valid GitHub account to login using GitHub.
Try out Login Flow AI - Password or GitHub with Email OTP
Enter the following given natural language instruction and click the run button.
The following login flow with username & password and GitHub should be generated in the Login Flow designer.
Click the Update button to save the above login flow configuration.
Next, click the Try Login button in the top right corner of your screen. This will open the Try-It application in a new tab.
First the Try It application prompt you to login using either username & password or GitHub.
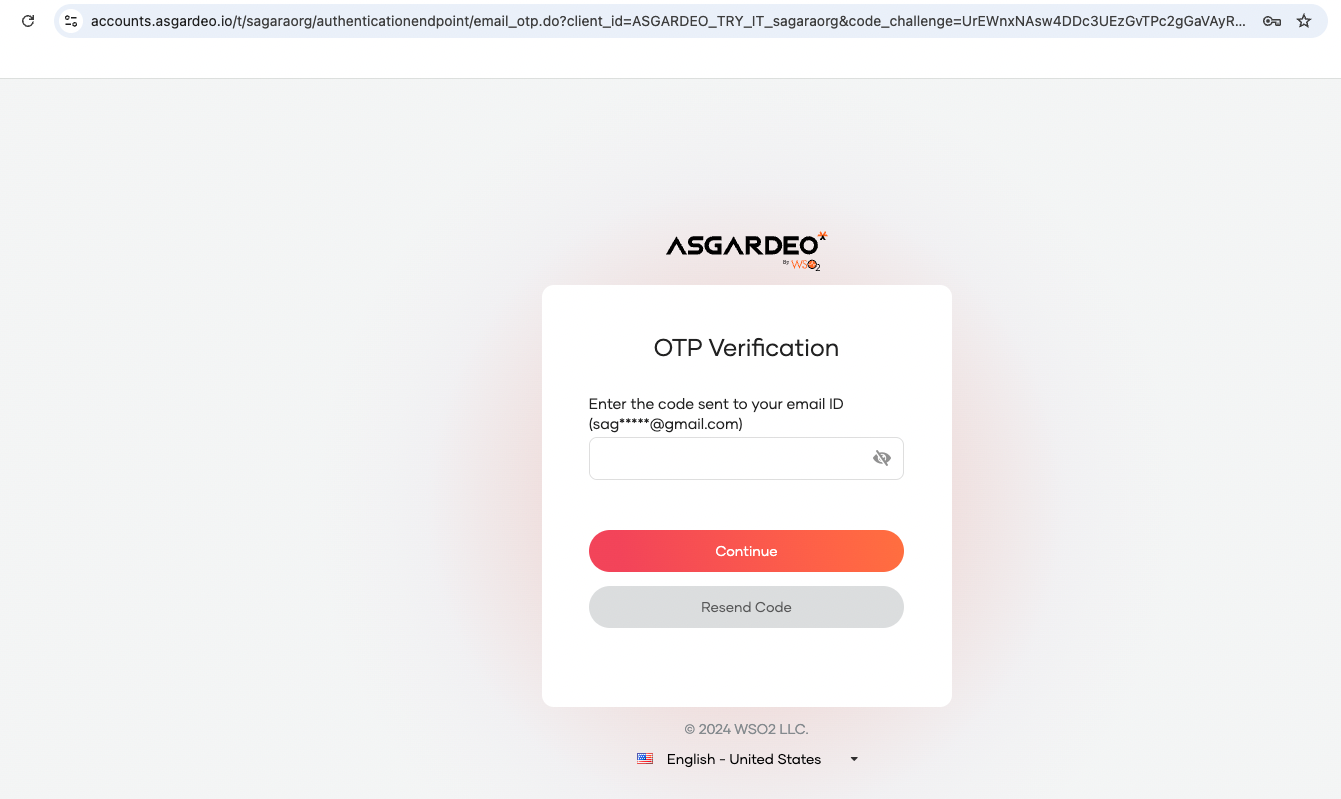
If it succeeds, the application will ask you to enter the Email OTP that was sent to the email address of the current user.
Tip
You need to create a test user in Asgardeo by following this guide to tryout login and logout features. Also, make sure you have entered a valid email address in the user profile of the test user to receive the Email OTP code.
[//] STEPS_END